Kit Basher
-
Posts
2,428 -
Joined
-
Last visited
Content Type
Profiles
Forums
Events
Gallery
Everything posted by Kit Basher
-
Thanks, John! Thanks, Chris! Thanks, David!
-
Thanks, Larry!
-
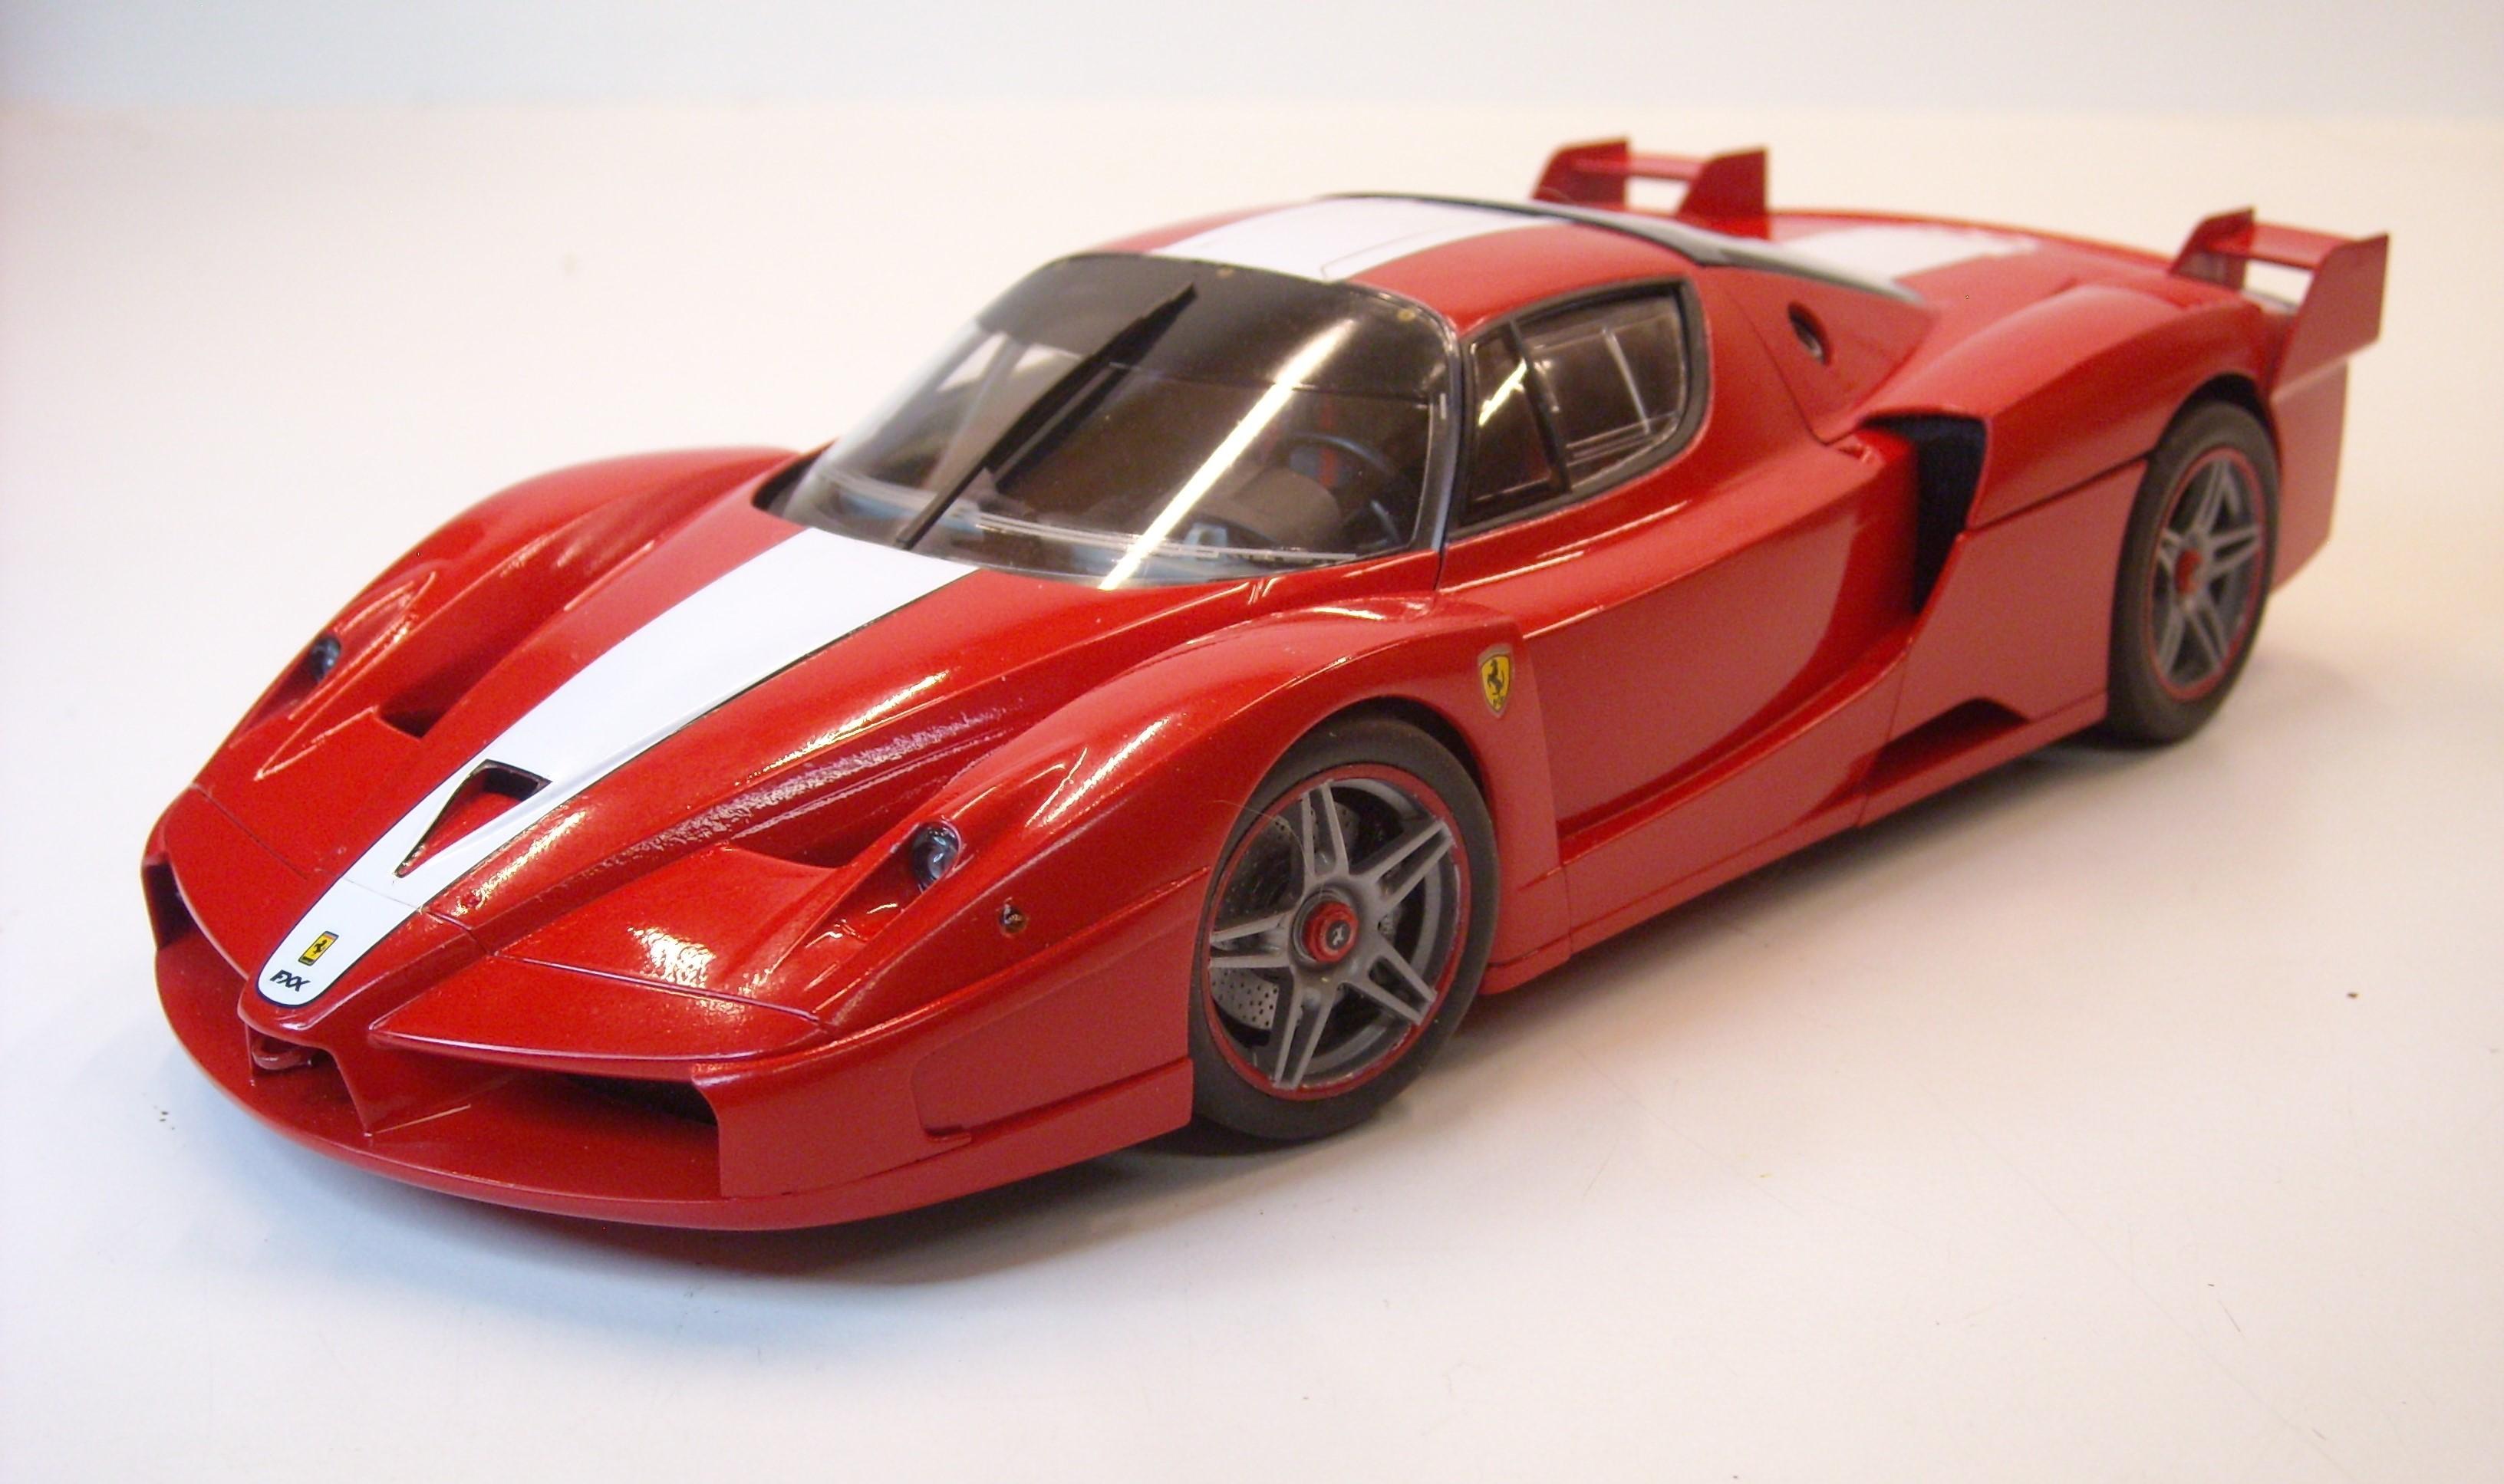
Tamiya kit. The paint is Tamiya bottle lacquer "Italian Red". It's great paint to use, this is straight from the airbrush, no clear, no polish. When I started this kit, I thought it might be over my skill level, but I got 'r done.

- 16 replies
-
- 11
-

-
Cutting plastic mesh
Kit Basher replied to Kit Basher's topic in Model Building Questions and Answers
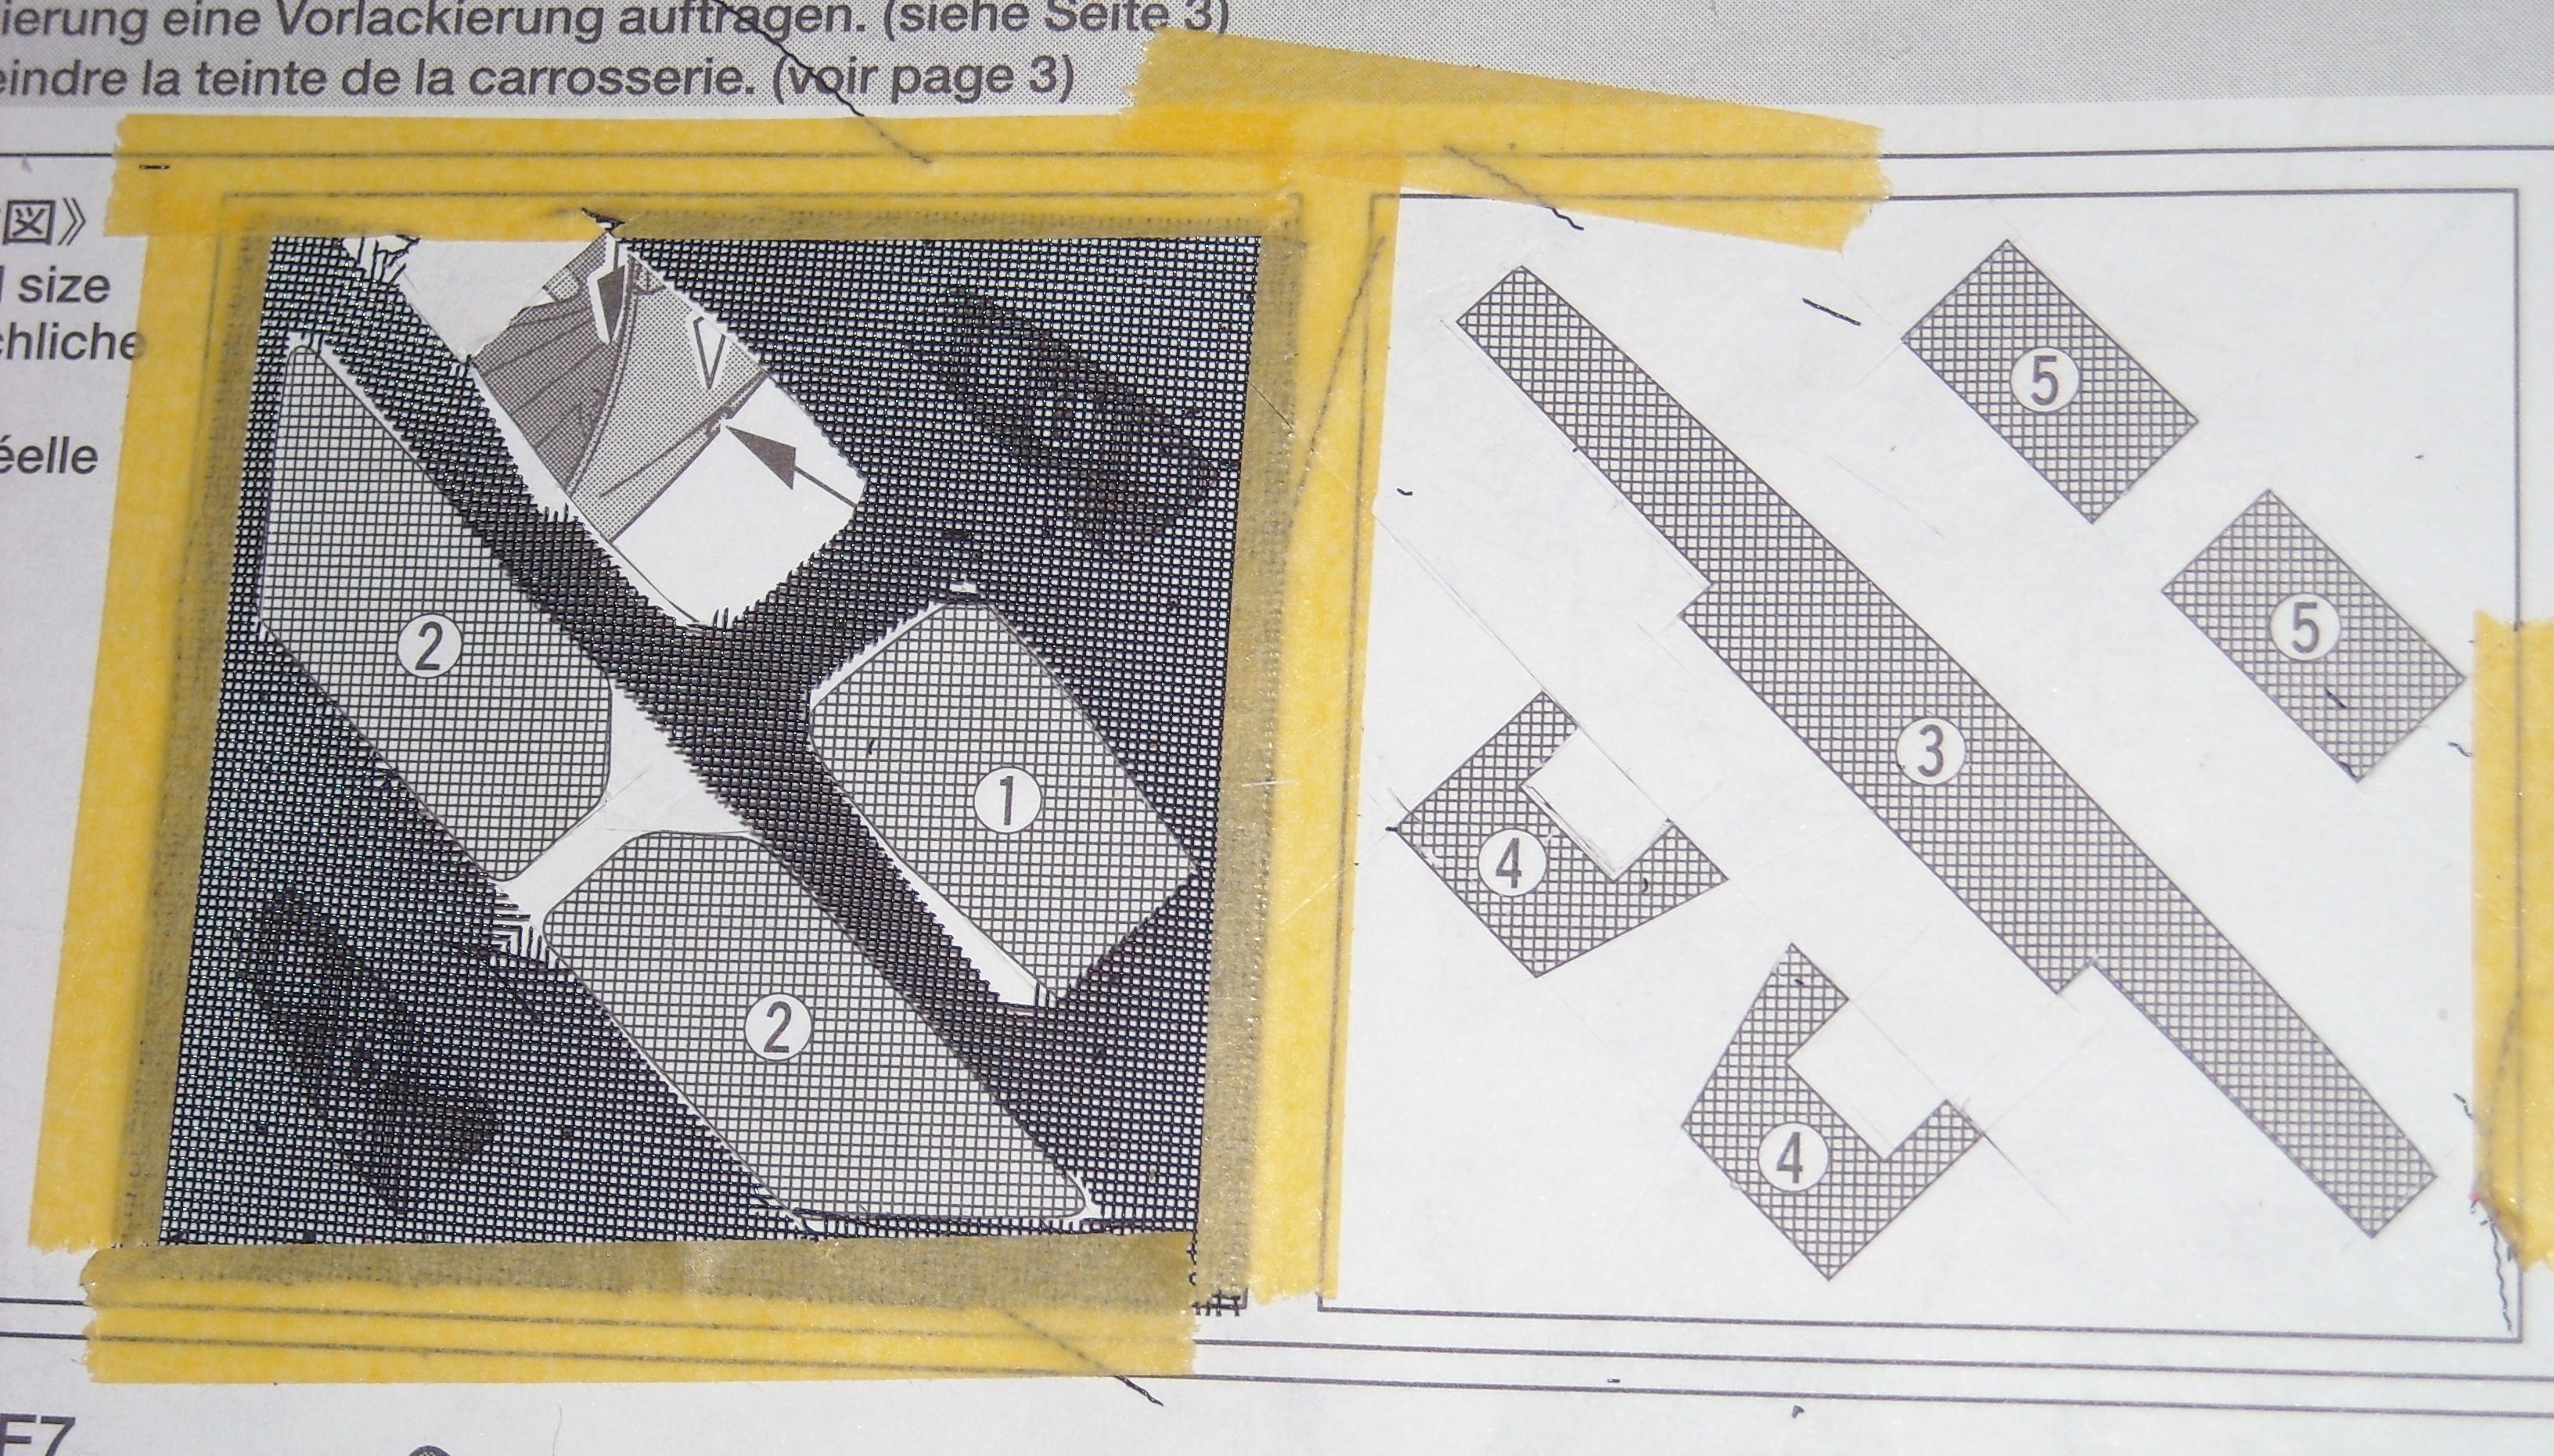
This method worked really well. I stuck Tamiya tape to the instructions, traced the outline of the pattern onto the tape, put the tape on the mesh, and cut it out with scissors. Easy and great results. Thanks, Greg! And thanks to all for your suggestions! -
Cutting plastic mesh
Kit Basher replied to Kit Basher's topic in Model Building Questions and Answers
Thanks David. The mesh cuts easily with scissors, and I think if I can somehow attach the pattern to the mesh, scissors would work. I'm going to try that with masking tape later tonight. -
Cutting plastic mesh
Kit Basher replied to Kit Basher's topic in Model Building Questions and Answers
Thanks, Ulf! I just checked and I can buy that stuff online. Sorry I used the idiom, but you interpreted it correctly. "Pick your brain" means seeking information. -
Cutting plastic mesh
Kit Basher replied to Kit Basher's topic in Model Building Questions and Answers
Found some time, so here's the photo of what I'm doing. As you can see, I have to cut diagonally across the mesh. You can also see my attempts haven't been terribly accurate. Thanks for all the input so far!
-
Cutting plastic mesh
Kit Basher replied to Kit Basher's topic in Model Building Questions and Answers
Thanks, that is interesting. Sounds like it would work well. This is also a Tamiya kit, BTW. I'm going to try the masking tape trick later this evening, but I may pick your brain about the glue you used. Thanks. The hot knife is another good idea. I will post a photo of the mesh and instructions later tonight. -
Cutting plastic mesh
Kit Basher replied to Kit Basher's topic in Model Building Questions and Answers
Thanks, I will give that a try. Thanks, I've been doing that for final trimming, but initial cutting to the pattern is the hard part. Thanks, I like the chopping idea. I've been pulling the blade across the mesh, which makes it move. Some of the cuts are curves, I don't know how I'll "chop" those. Thanks, I haven't tried that, but I suspect it would take more than pins to hold this stuff in place. -
Cutting plastic mesh
Kit Basher replied to Kit Basher's topic in Model Building Questions and Answers
Unfortunately, no. It has to match the pattern really well, and then be placed down in a hollow. Thanks for the reply. -
I'm working on a kit that involves cutting plastic mesh to match a pattern printed in the instructions. So far, I've been taping the mesh over the pattern and cutting it with a razor blade. This works, but the mesh still wants to flex and move around, so this method is not optimal. Just wondering if there is a better way. Any suggestions?
-
Milsbo glass door cabinet-extra shelves??
Kit Basher replied to Safire6's topic in General Automotive Talk (Trucks and Cars)
If you can find a custom glass shop near you, they should be able to make whatever you need. 1/4 inch plate glass with ground edges would be fine, although tempered would be better (more money). Be prepared, glass is expensive! Your photos don't show what kind of shelf supports your cabinet uses, but if they are the pins that fit in holes in the cabinet sides, those are available at home center/ hardware stores, and certainly online. There are two sizes, 1/4 inch and 5 mm. I bet IKEA uses 5 mm, but definitely check first. Hope that helps. -
Thanks, Scott!
-
I'm in the process of building that Bonneville. So far it's a really great kit. Hope you enjoy yours!
- 38,759 replies
-
- 2
-
-
- johan
- glue bombs
- (and 1 more)
-
Thanks, Larry! Thanks, Bob! Thanks, Bob!
-
It's a rough life...
-
Thanks, Carl!
-
Revell 2017 Ford GT Le Mans
Kit Basher replied to Deathgoblin's topic in Other Racing: Road Racing, Salt Flat Racers
Great job! I've also done this kit, so I know what you mean about the masking, but you nailed it. Nice work on the engine and interior too. -
Wow, that is amazing! Incredibly realistic!
-
Thanks, Chris!
-
Thanks, Keith! Thanks, Ricky! Thanks, David! Thanks, James! Thanks, EMRE! The interior is Testors "Flat Tan". I may have added some brown to it to darken it. Thanks, David! Thanks, Craig! Thanks, Tim! Thanks, Bill!
-
Thanks, David!
-
Thanks, Jeff!
-
Thanks, Andy! Thanks, David!
-
Thanks, Michelle!