Kit Basher
-
Posts
2,431 -
Joined
-
Last visited
Content Type
Profiles
Forums
Events
Gallery
Everything posted by Kit Basher
-
Revell 2017 Ford GT LeMans
Kit Basher replied to Kit Basher's topic in Other Racing: Road Racing, Salt Flat Racers
Thanks, Larry! -
Revell 2017 Ford GT LeMans
Kit Basher replied to Kit Basher's topic in Other Racing: Road Racing, Salt Flat Racers
Thanks, Mike! Thanks, John! Thanks, Garry! -
Revell 2017 Ford GT LeMans
Kit Basher replied to Kit Basher's topic in Other Racing: Road Racing, Salt Flat Racers
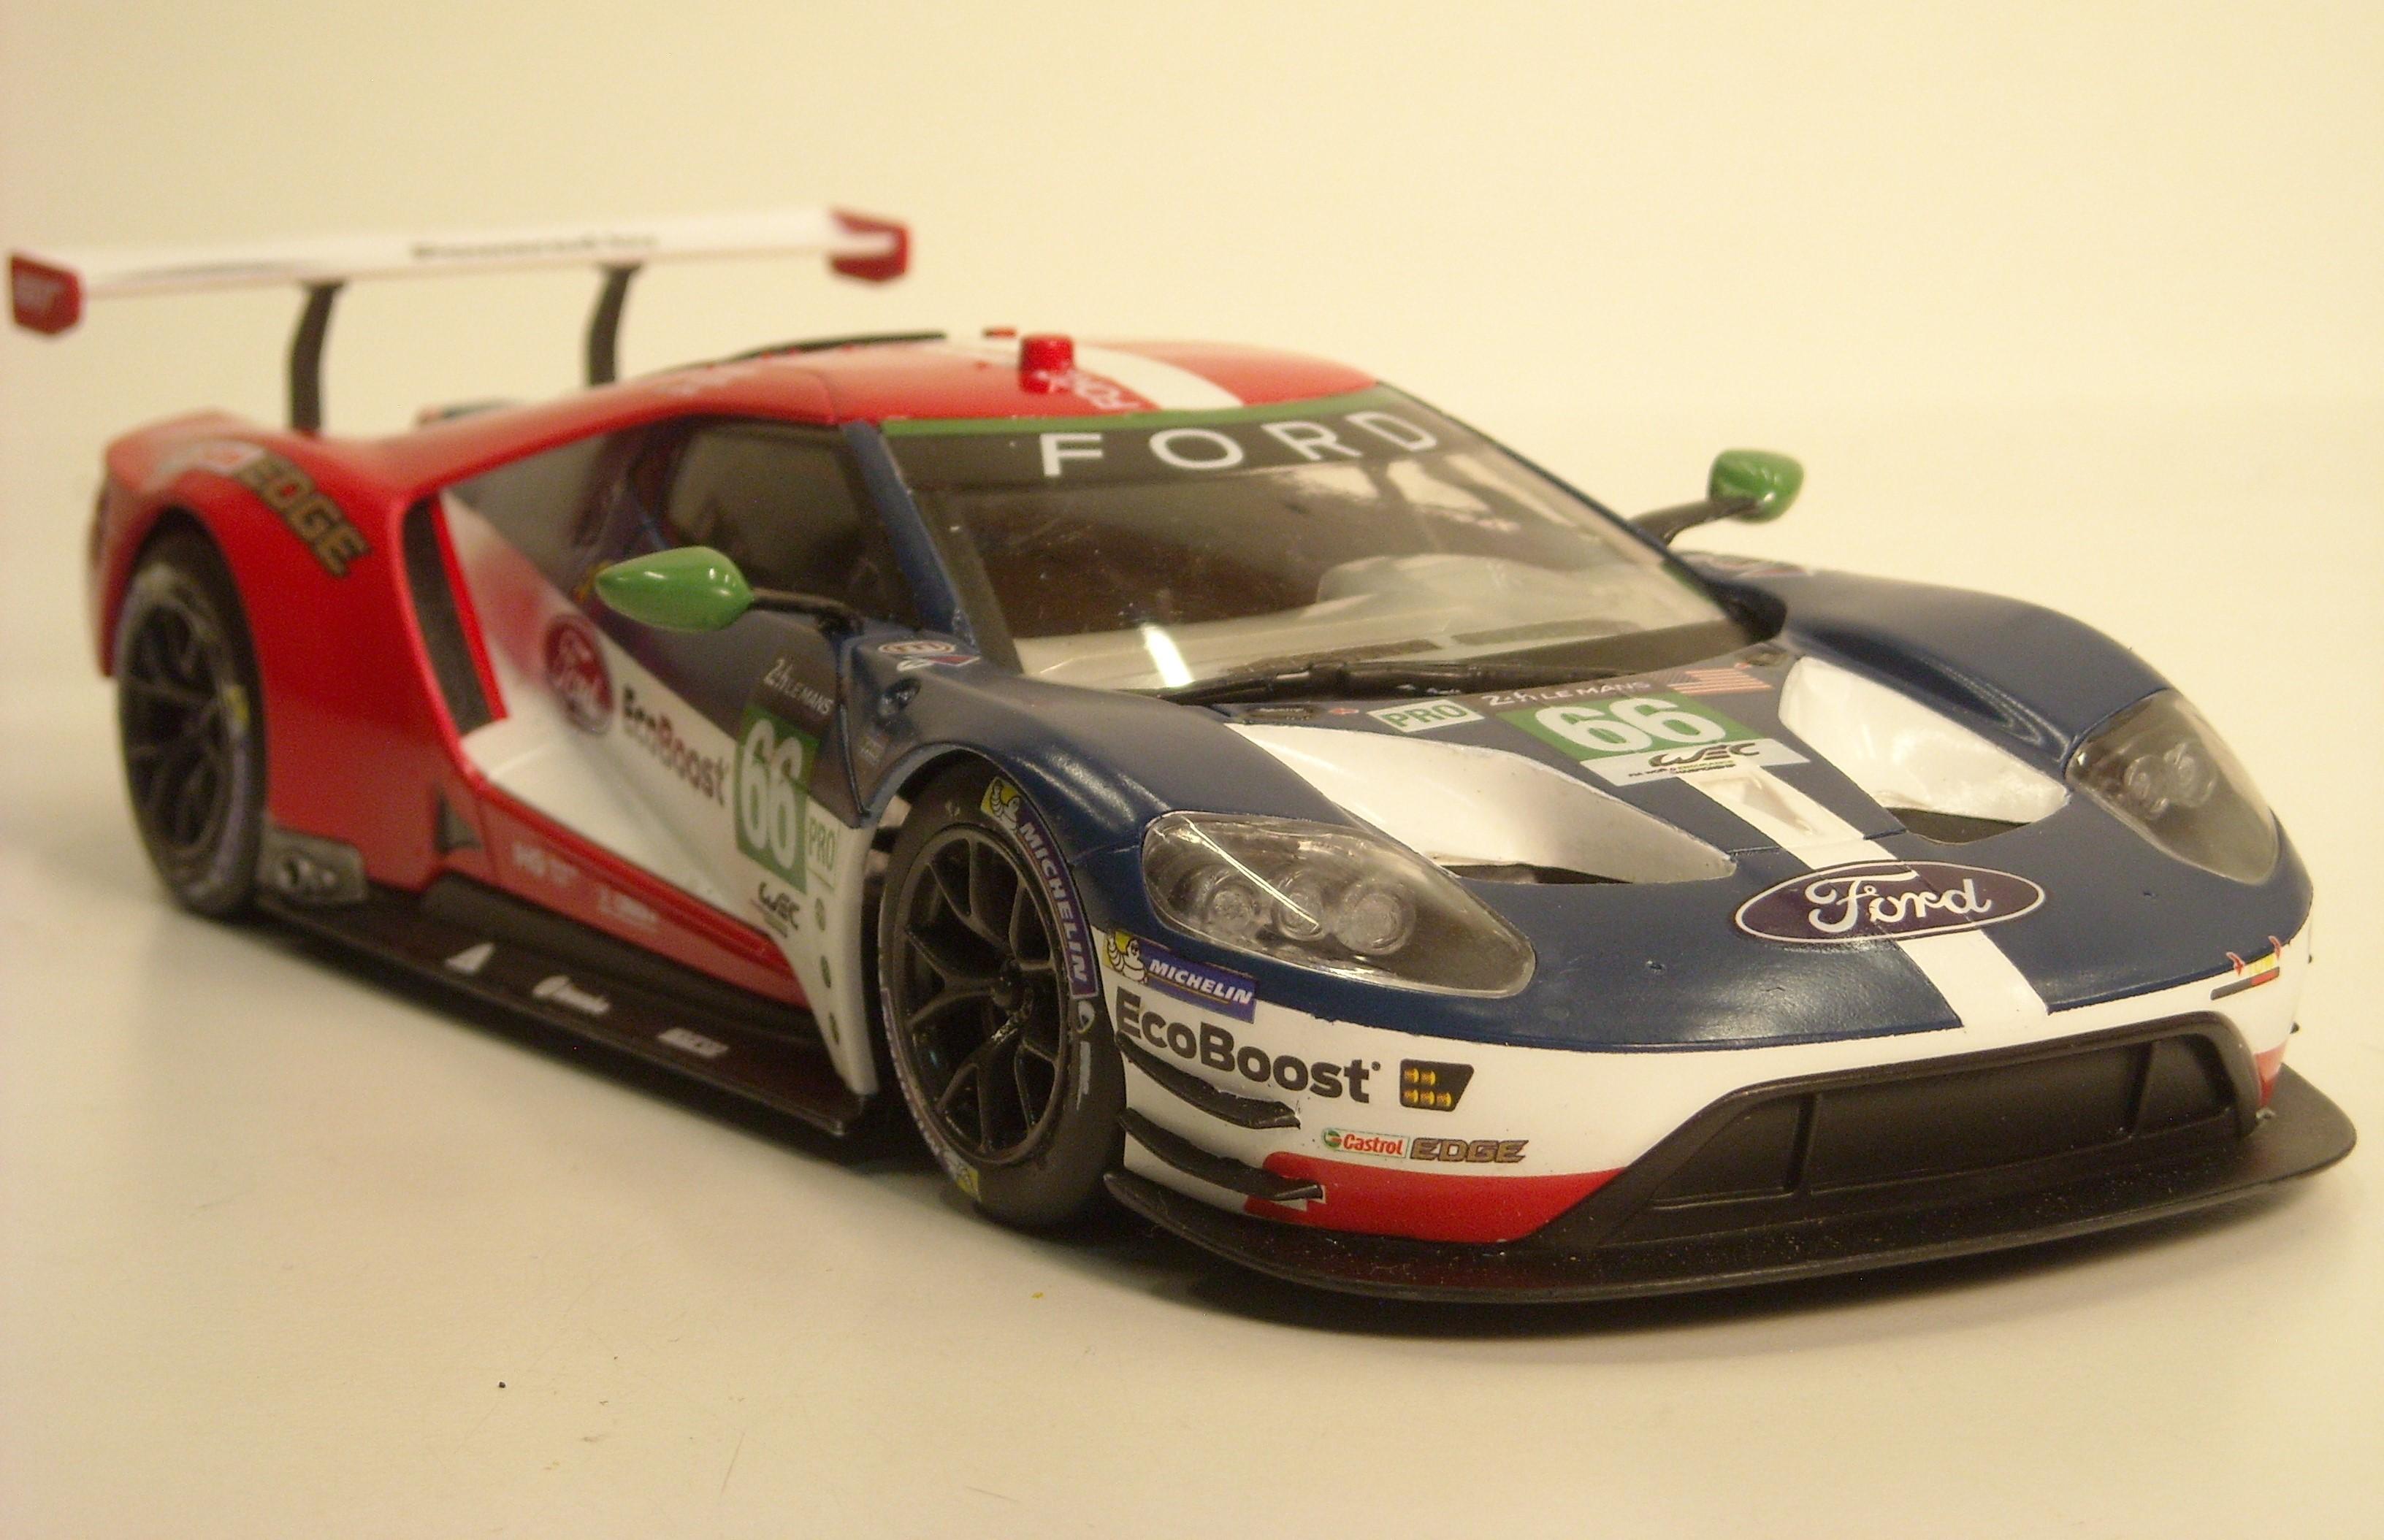
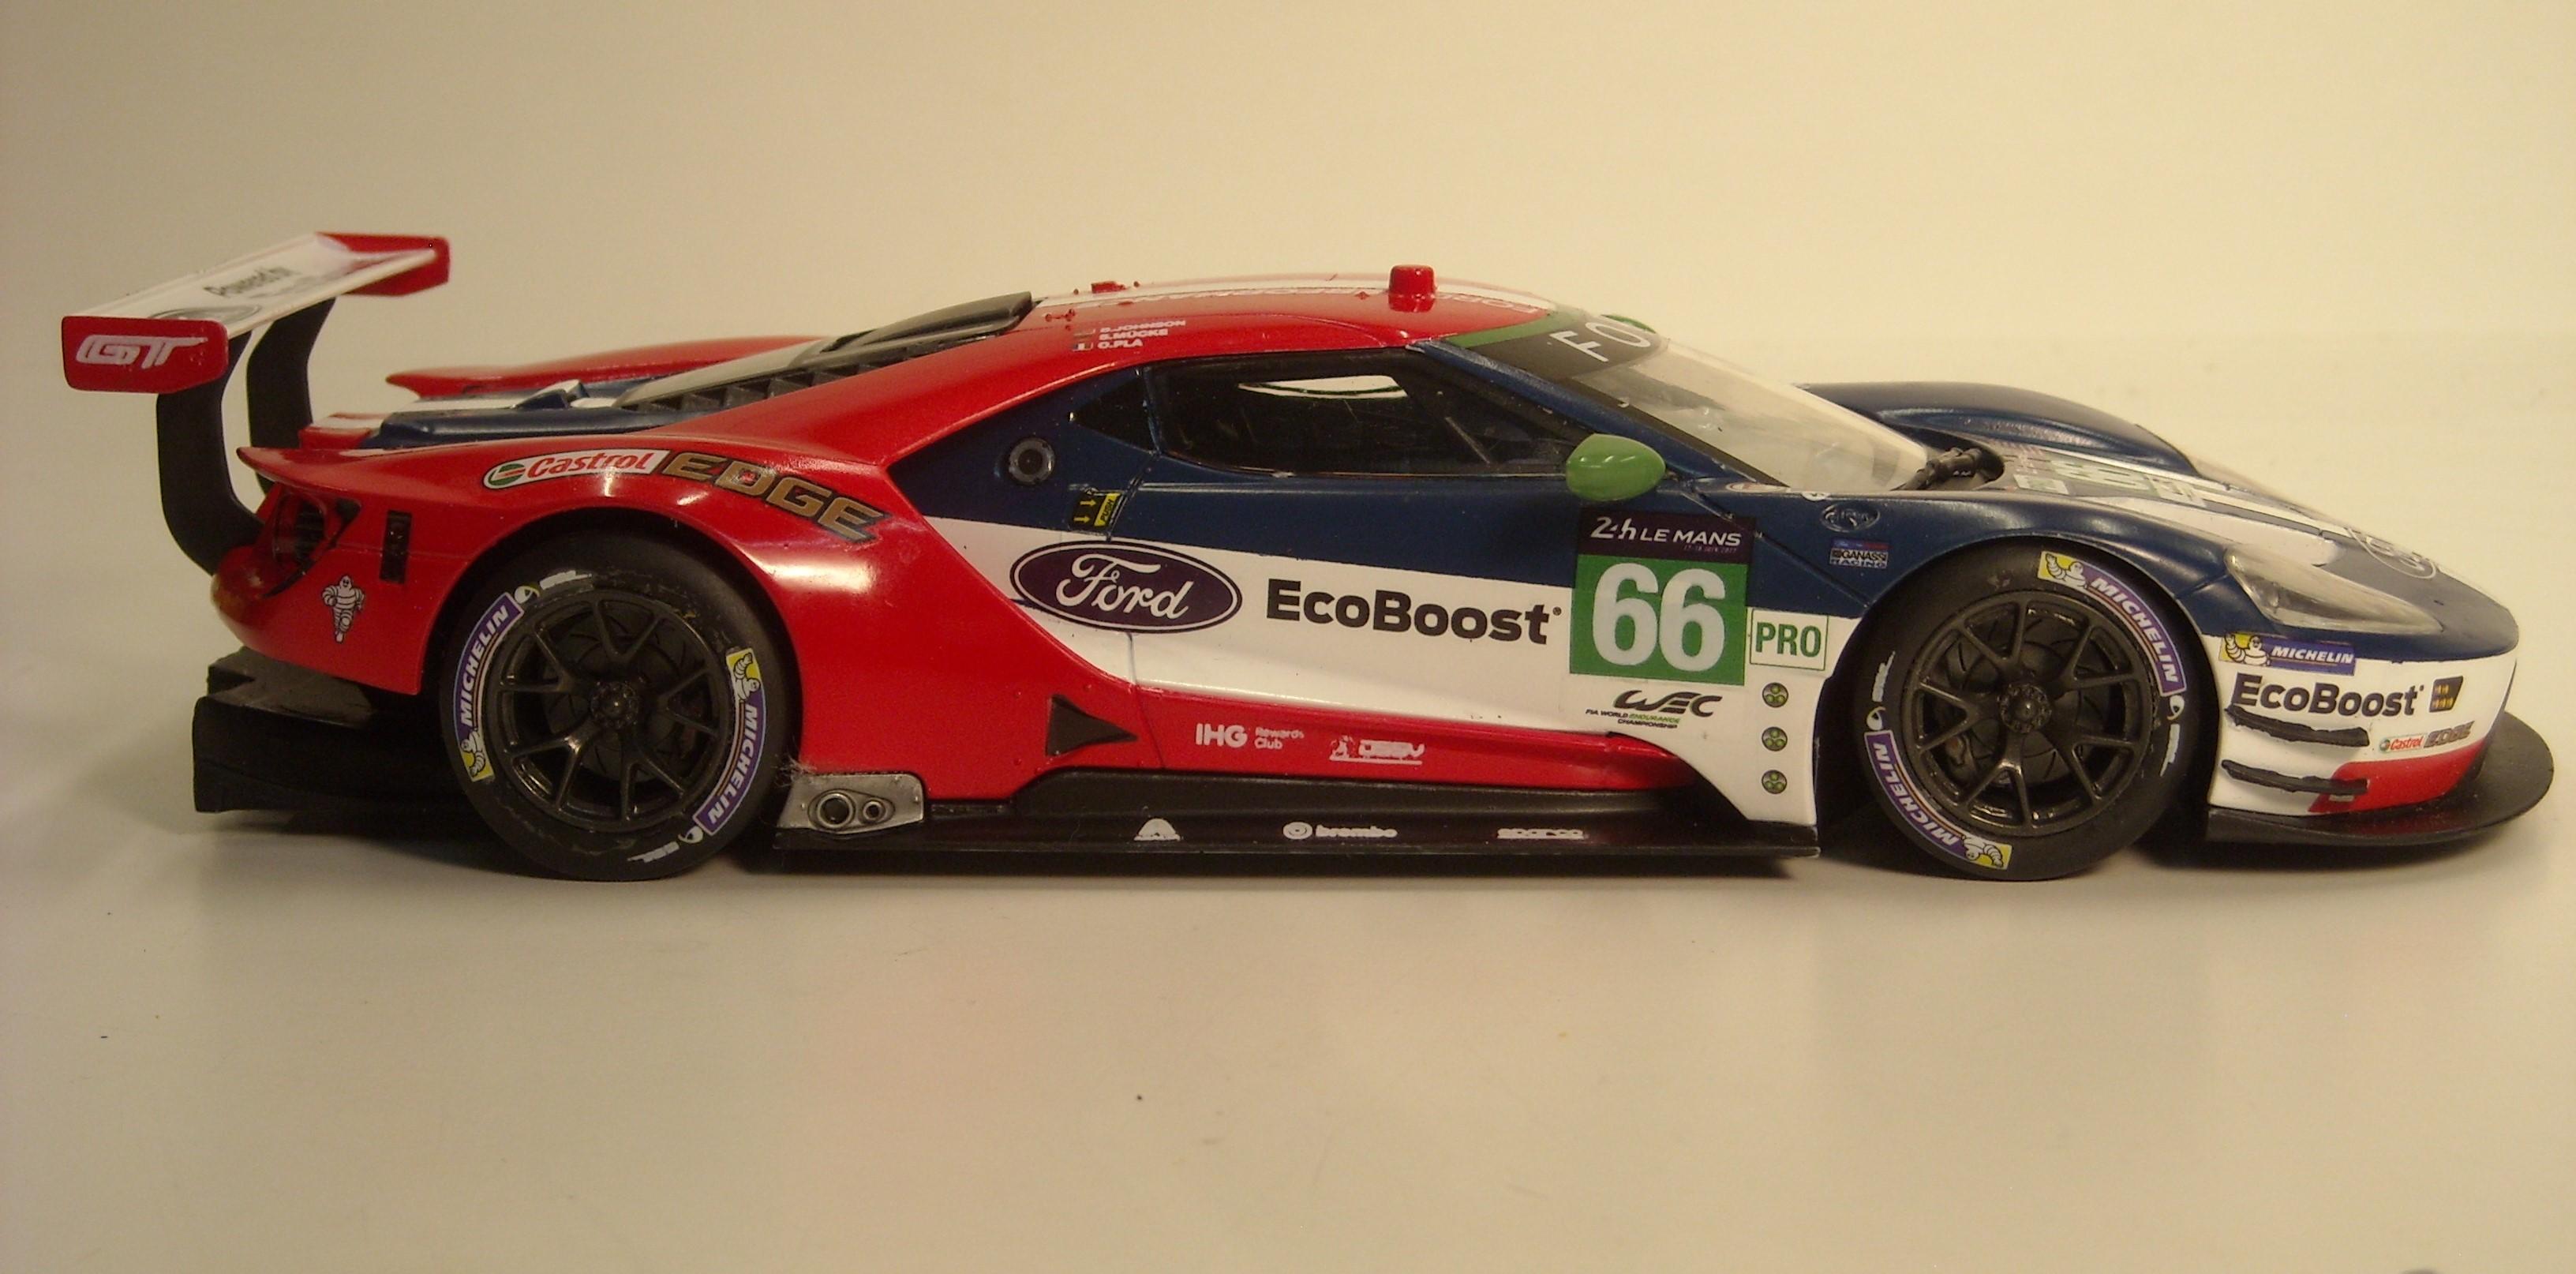
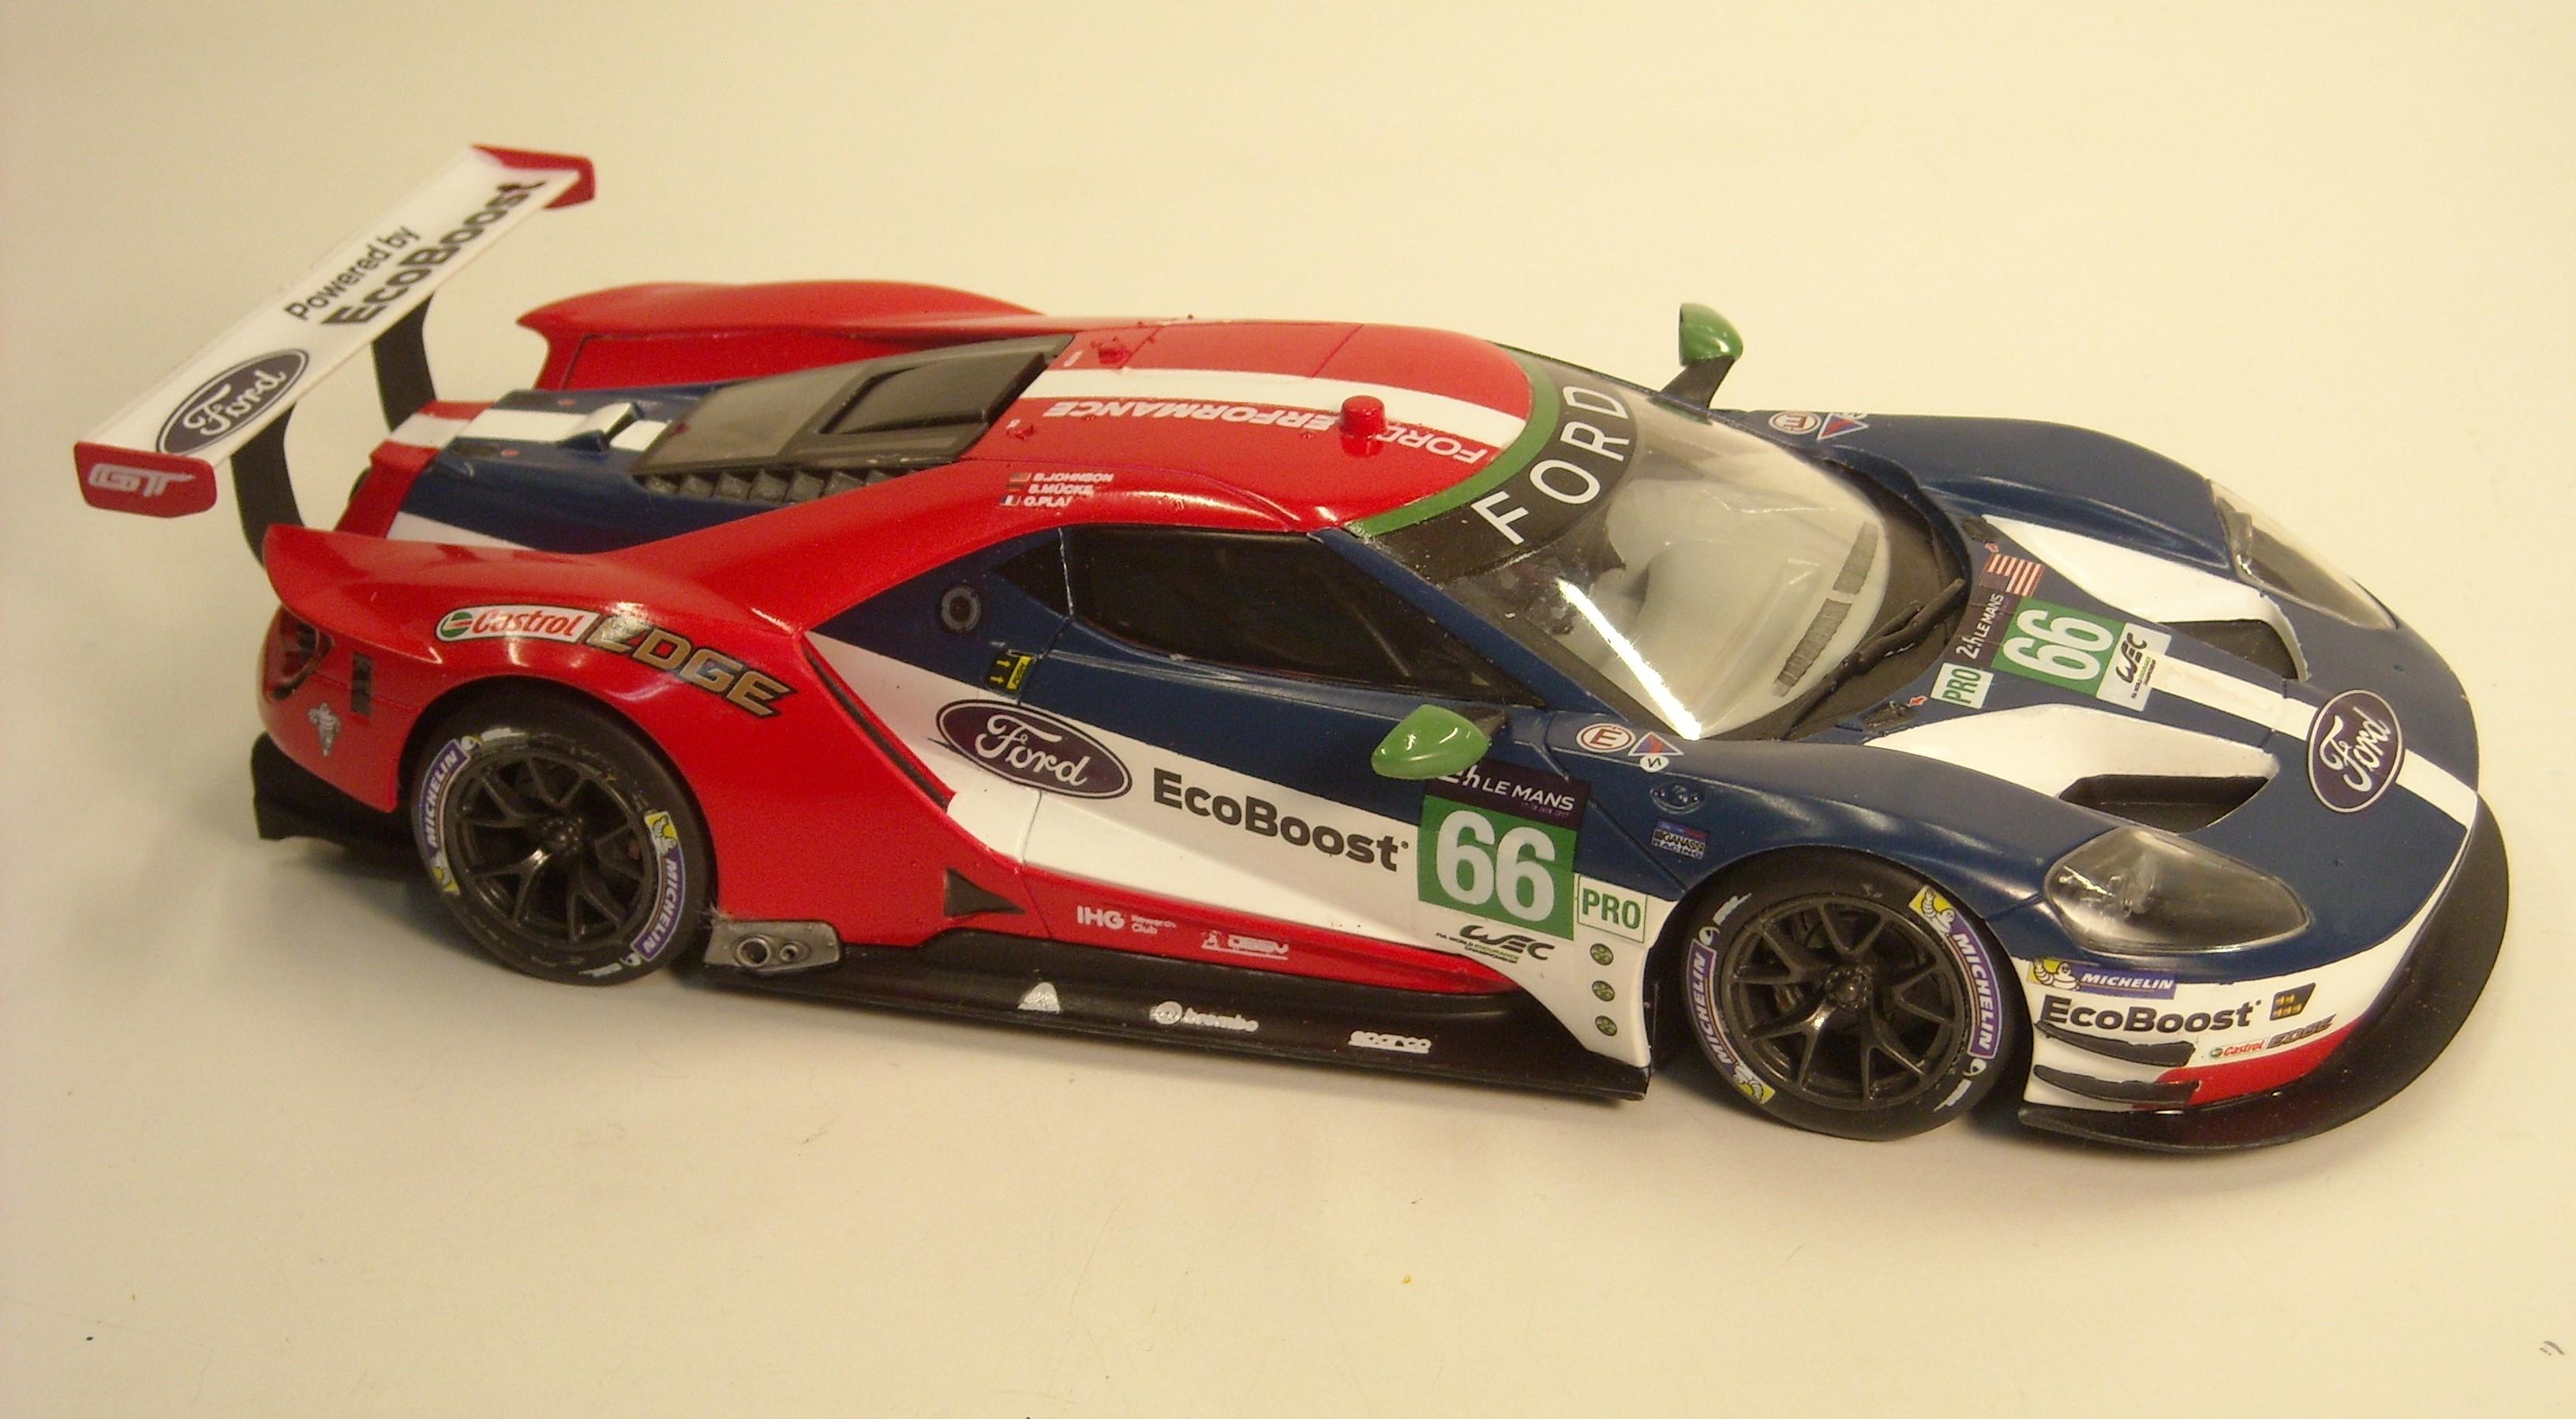
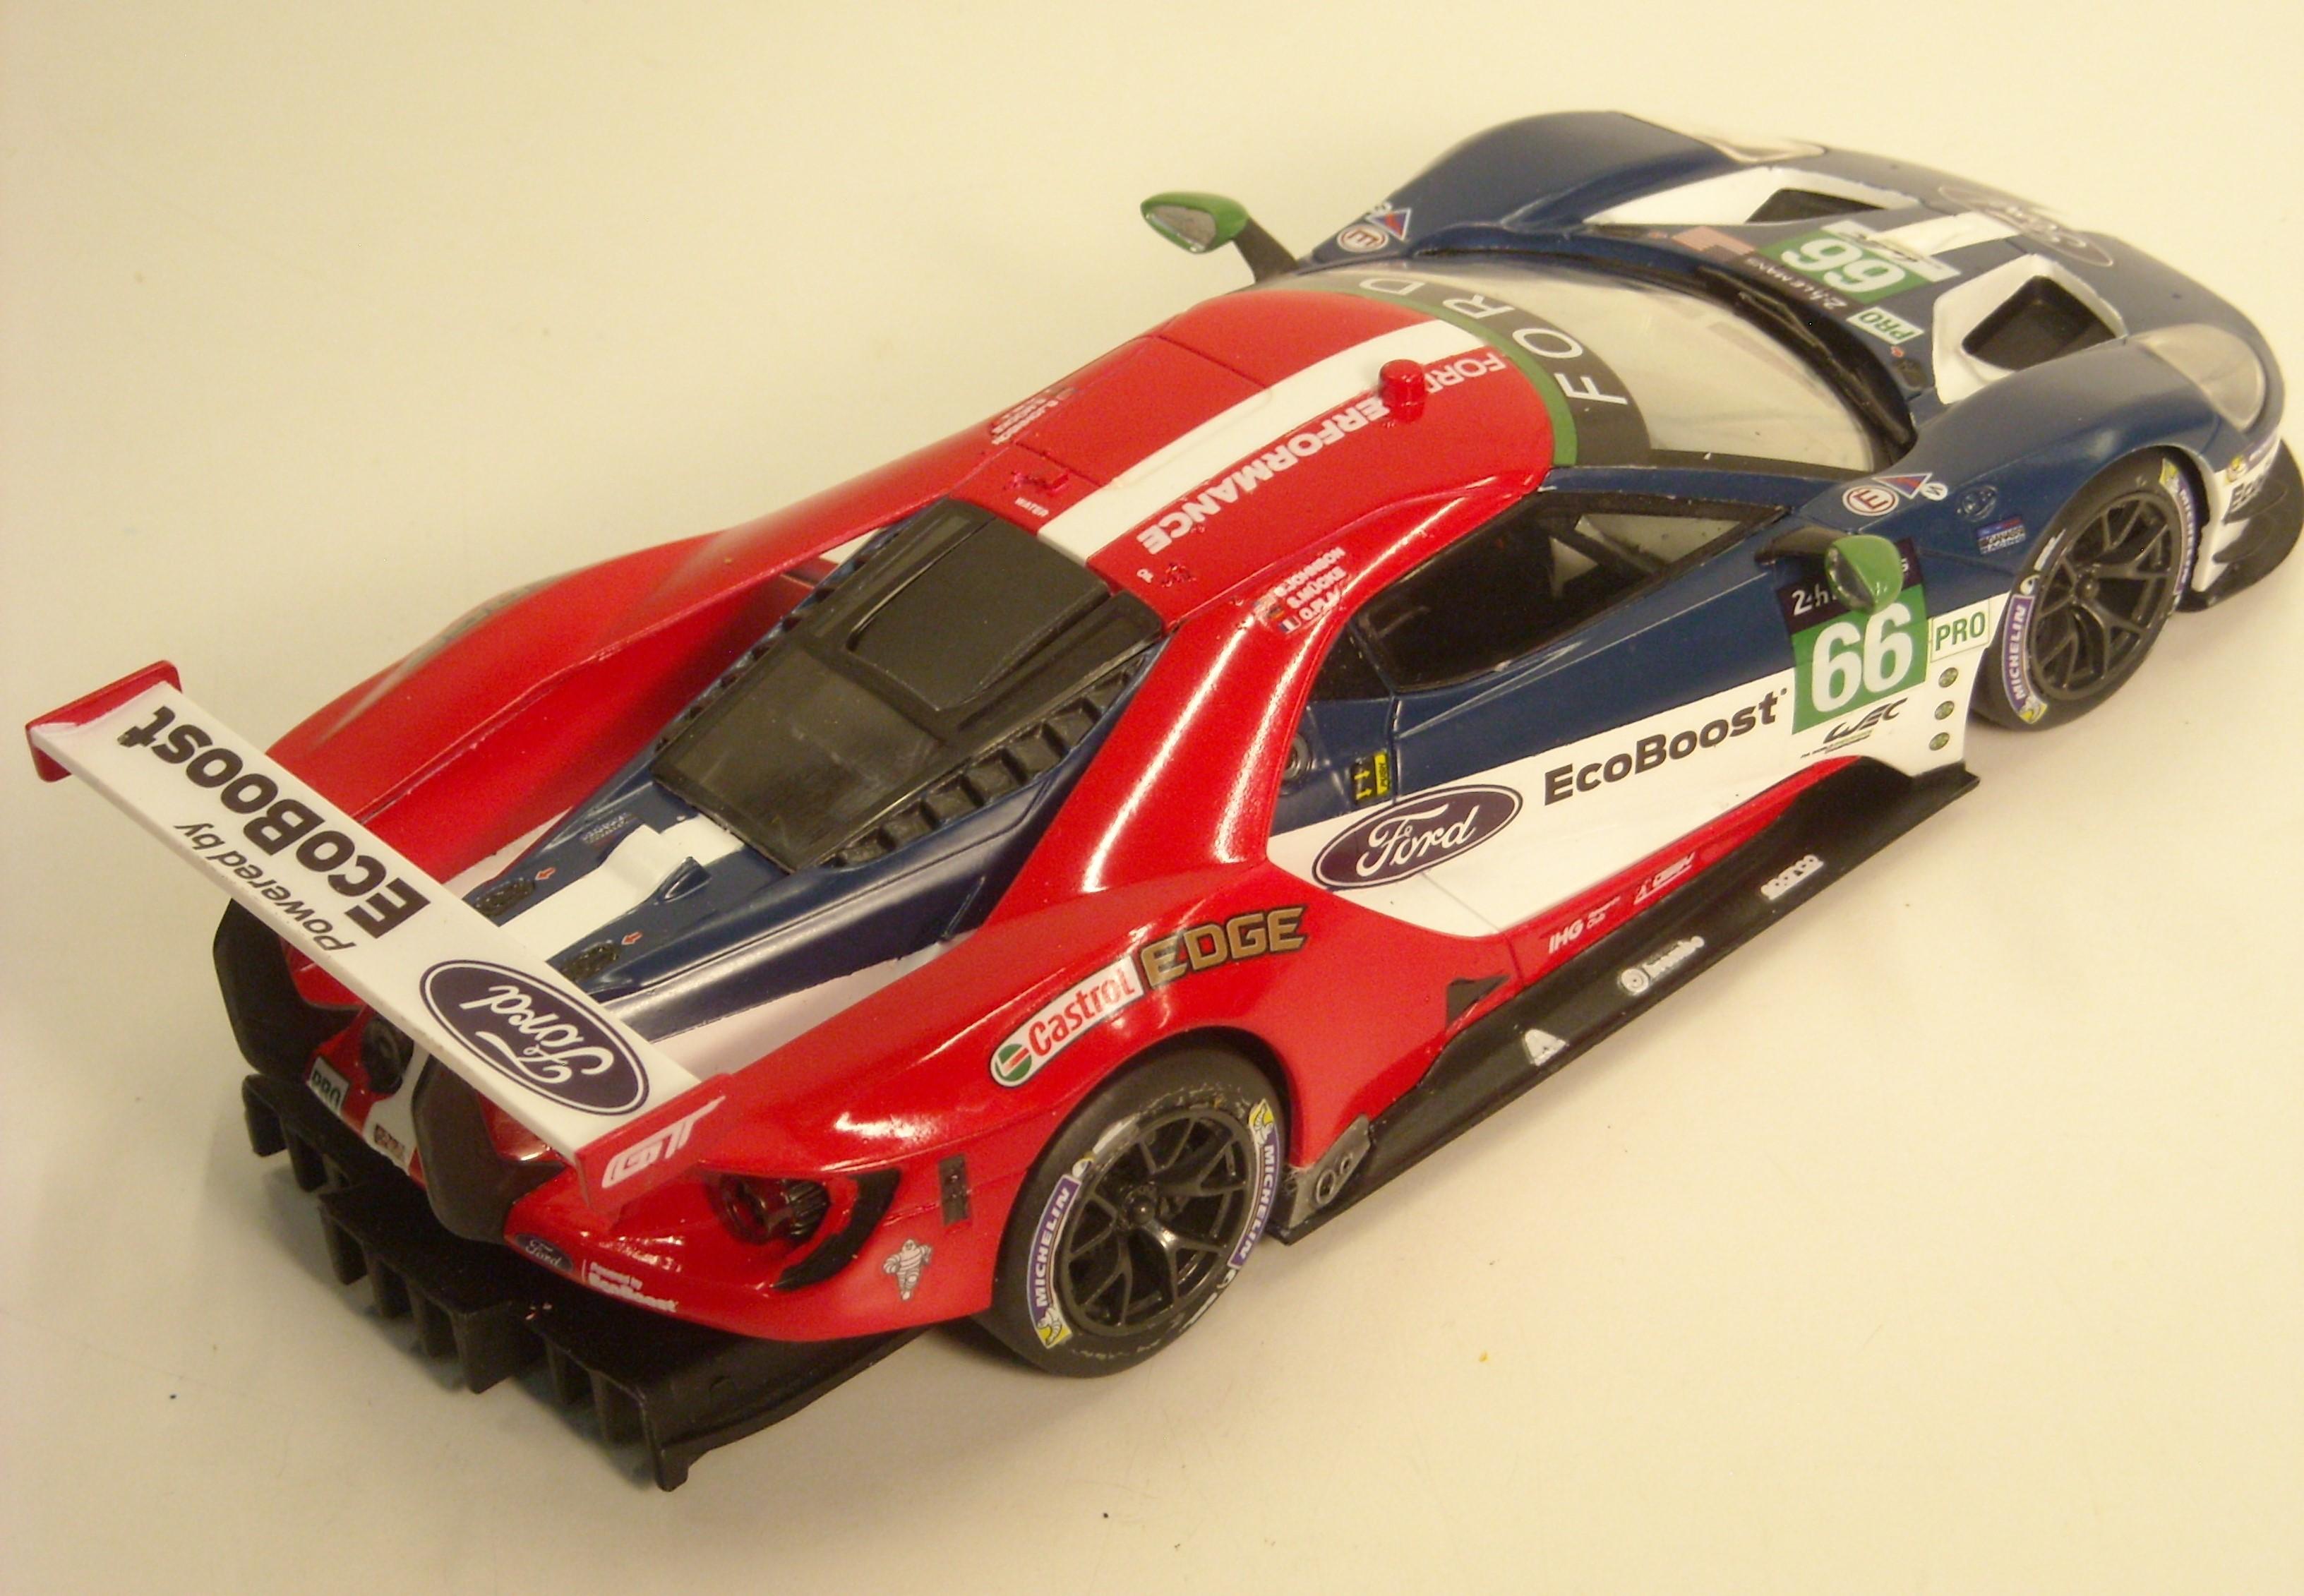
Thanks, Bruce! Not really. It goes together really well. Obviously, the tricky part is the masking. It helps that Revell made a two part body. I masked the white stripe and the front air ducts, I didn't want to just depend on the decals. Then the decals cleaned up my masking. Give it a go, I really enjoyed it. -
Revell 2017 Ford GT LeMans
Kit Basher replied to Kit Basher's topic in Other Racing: Road Racing, Salt Flat Racers
Thanks, Jim! -
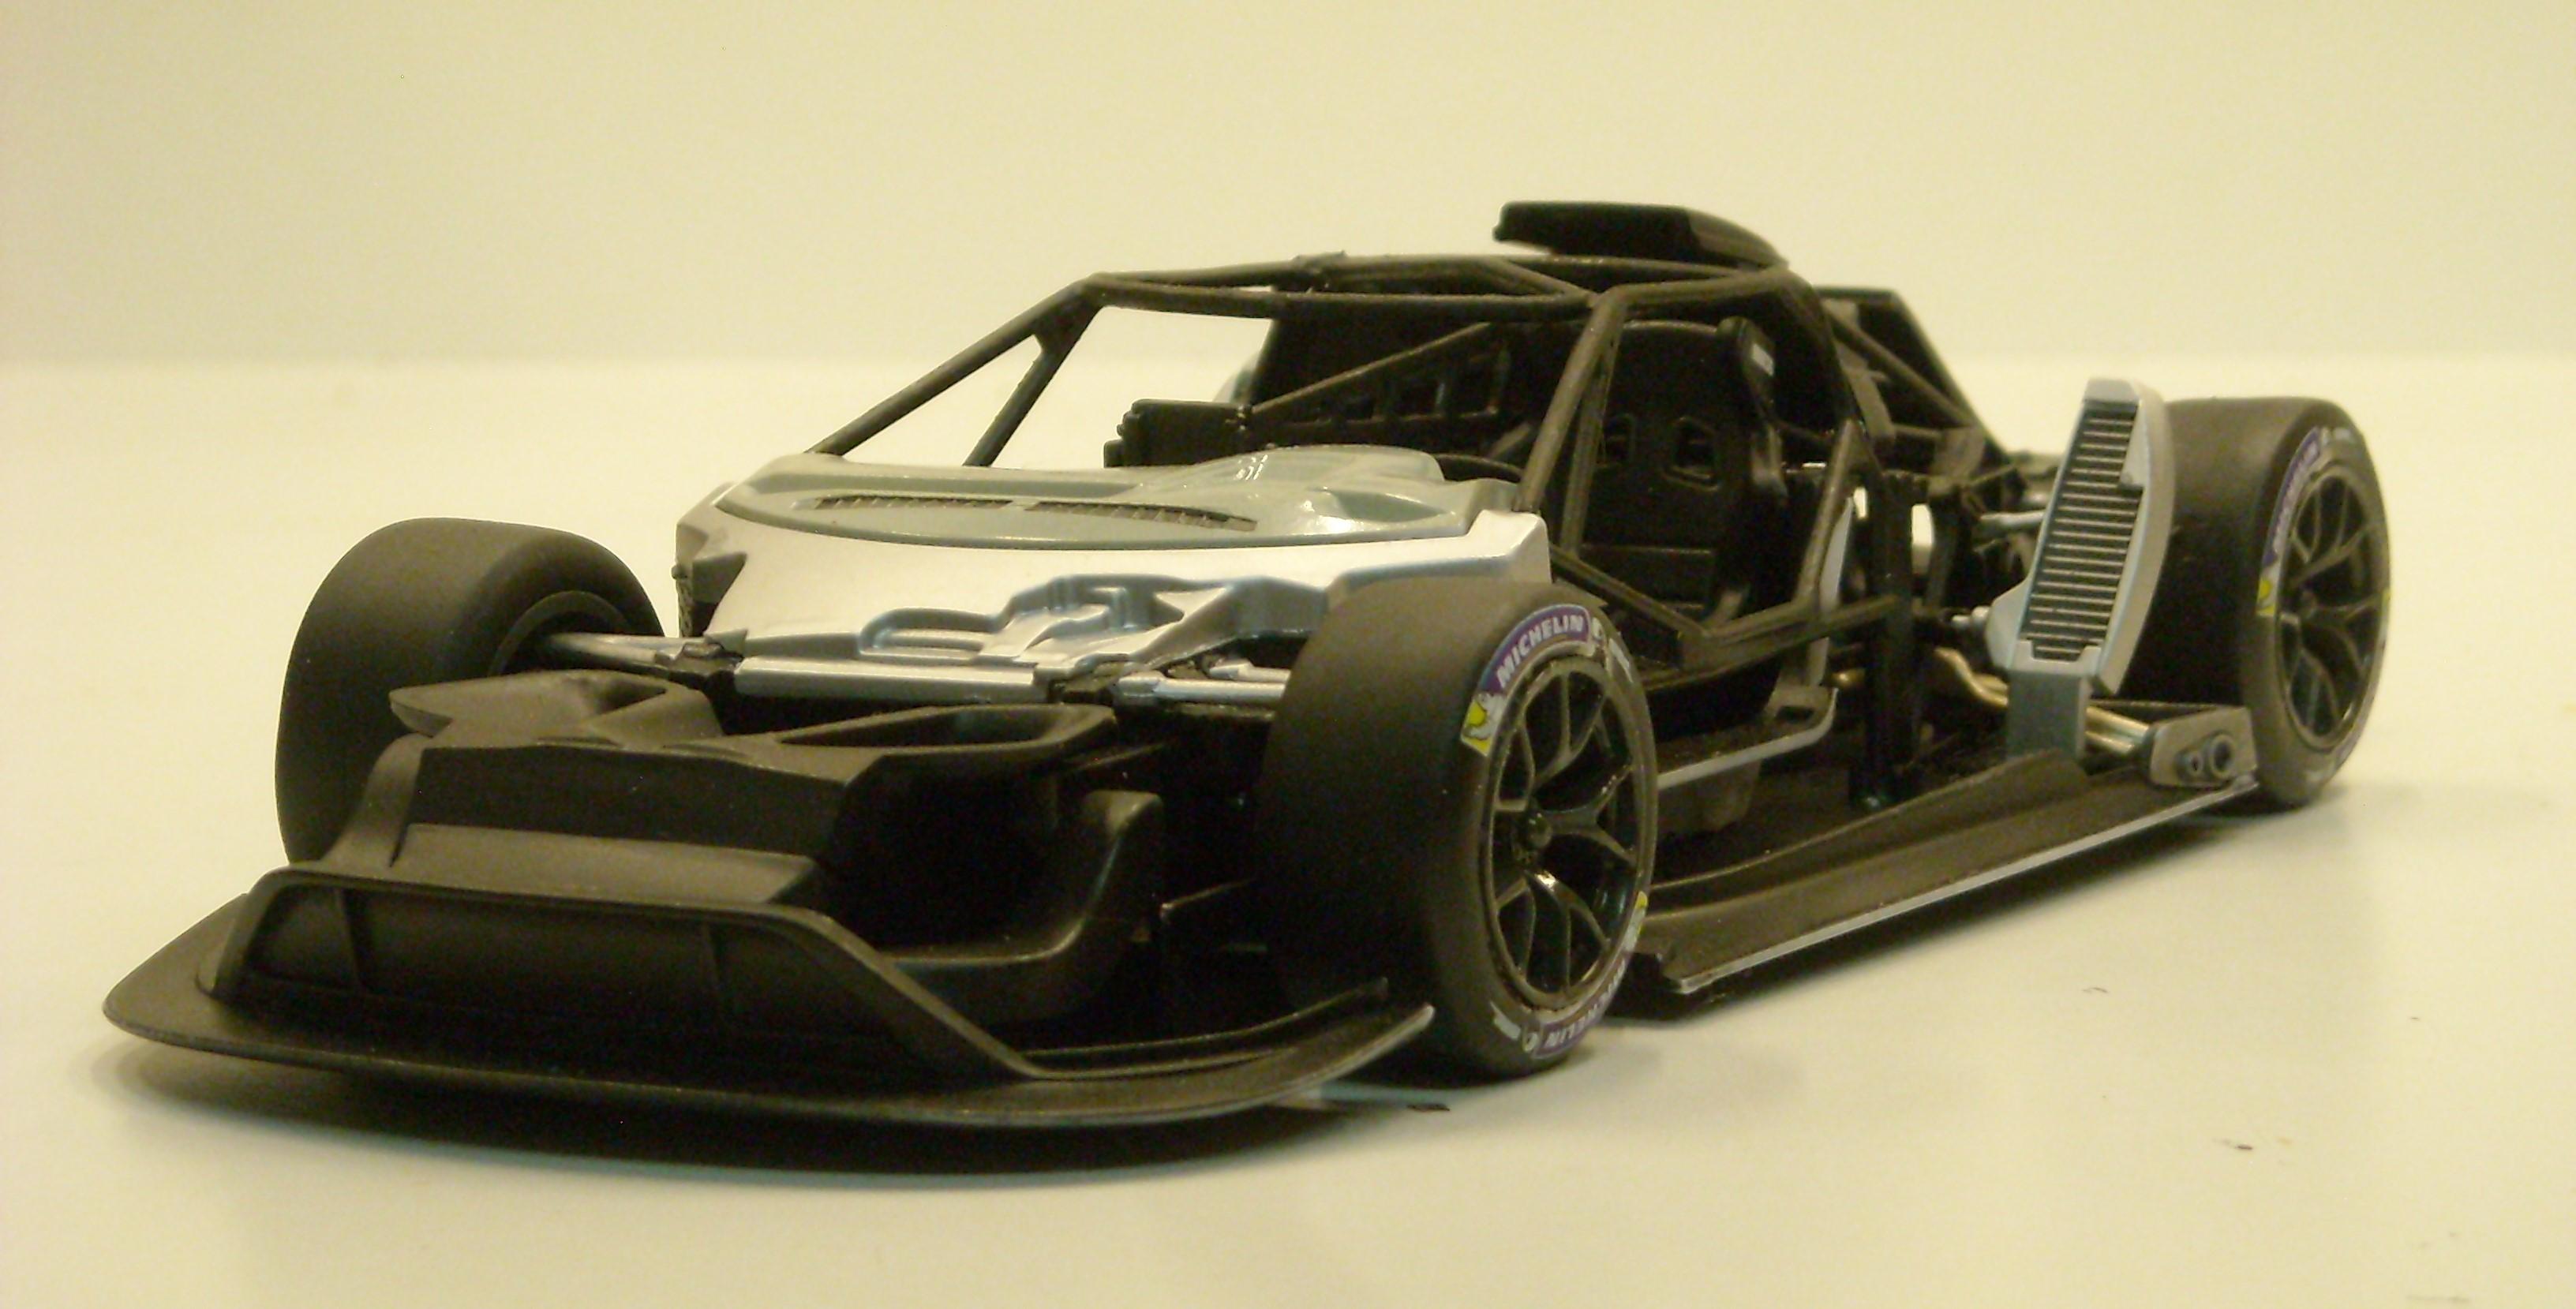
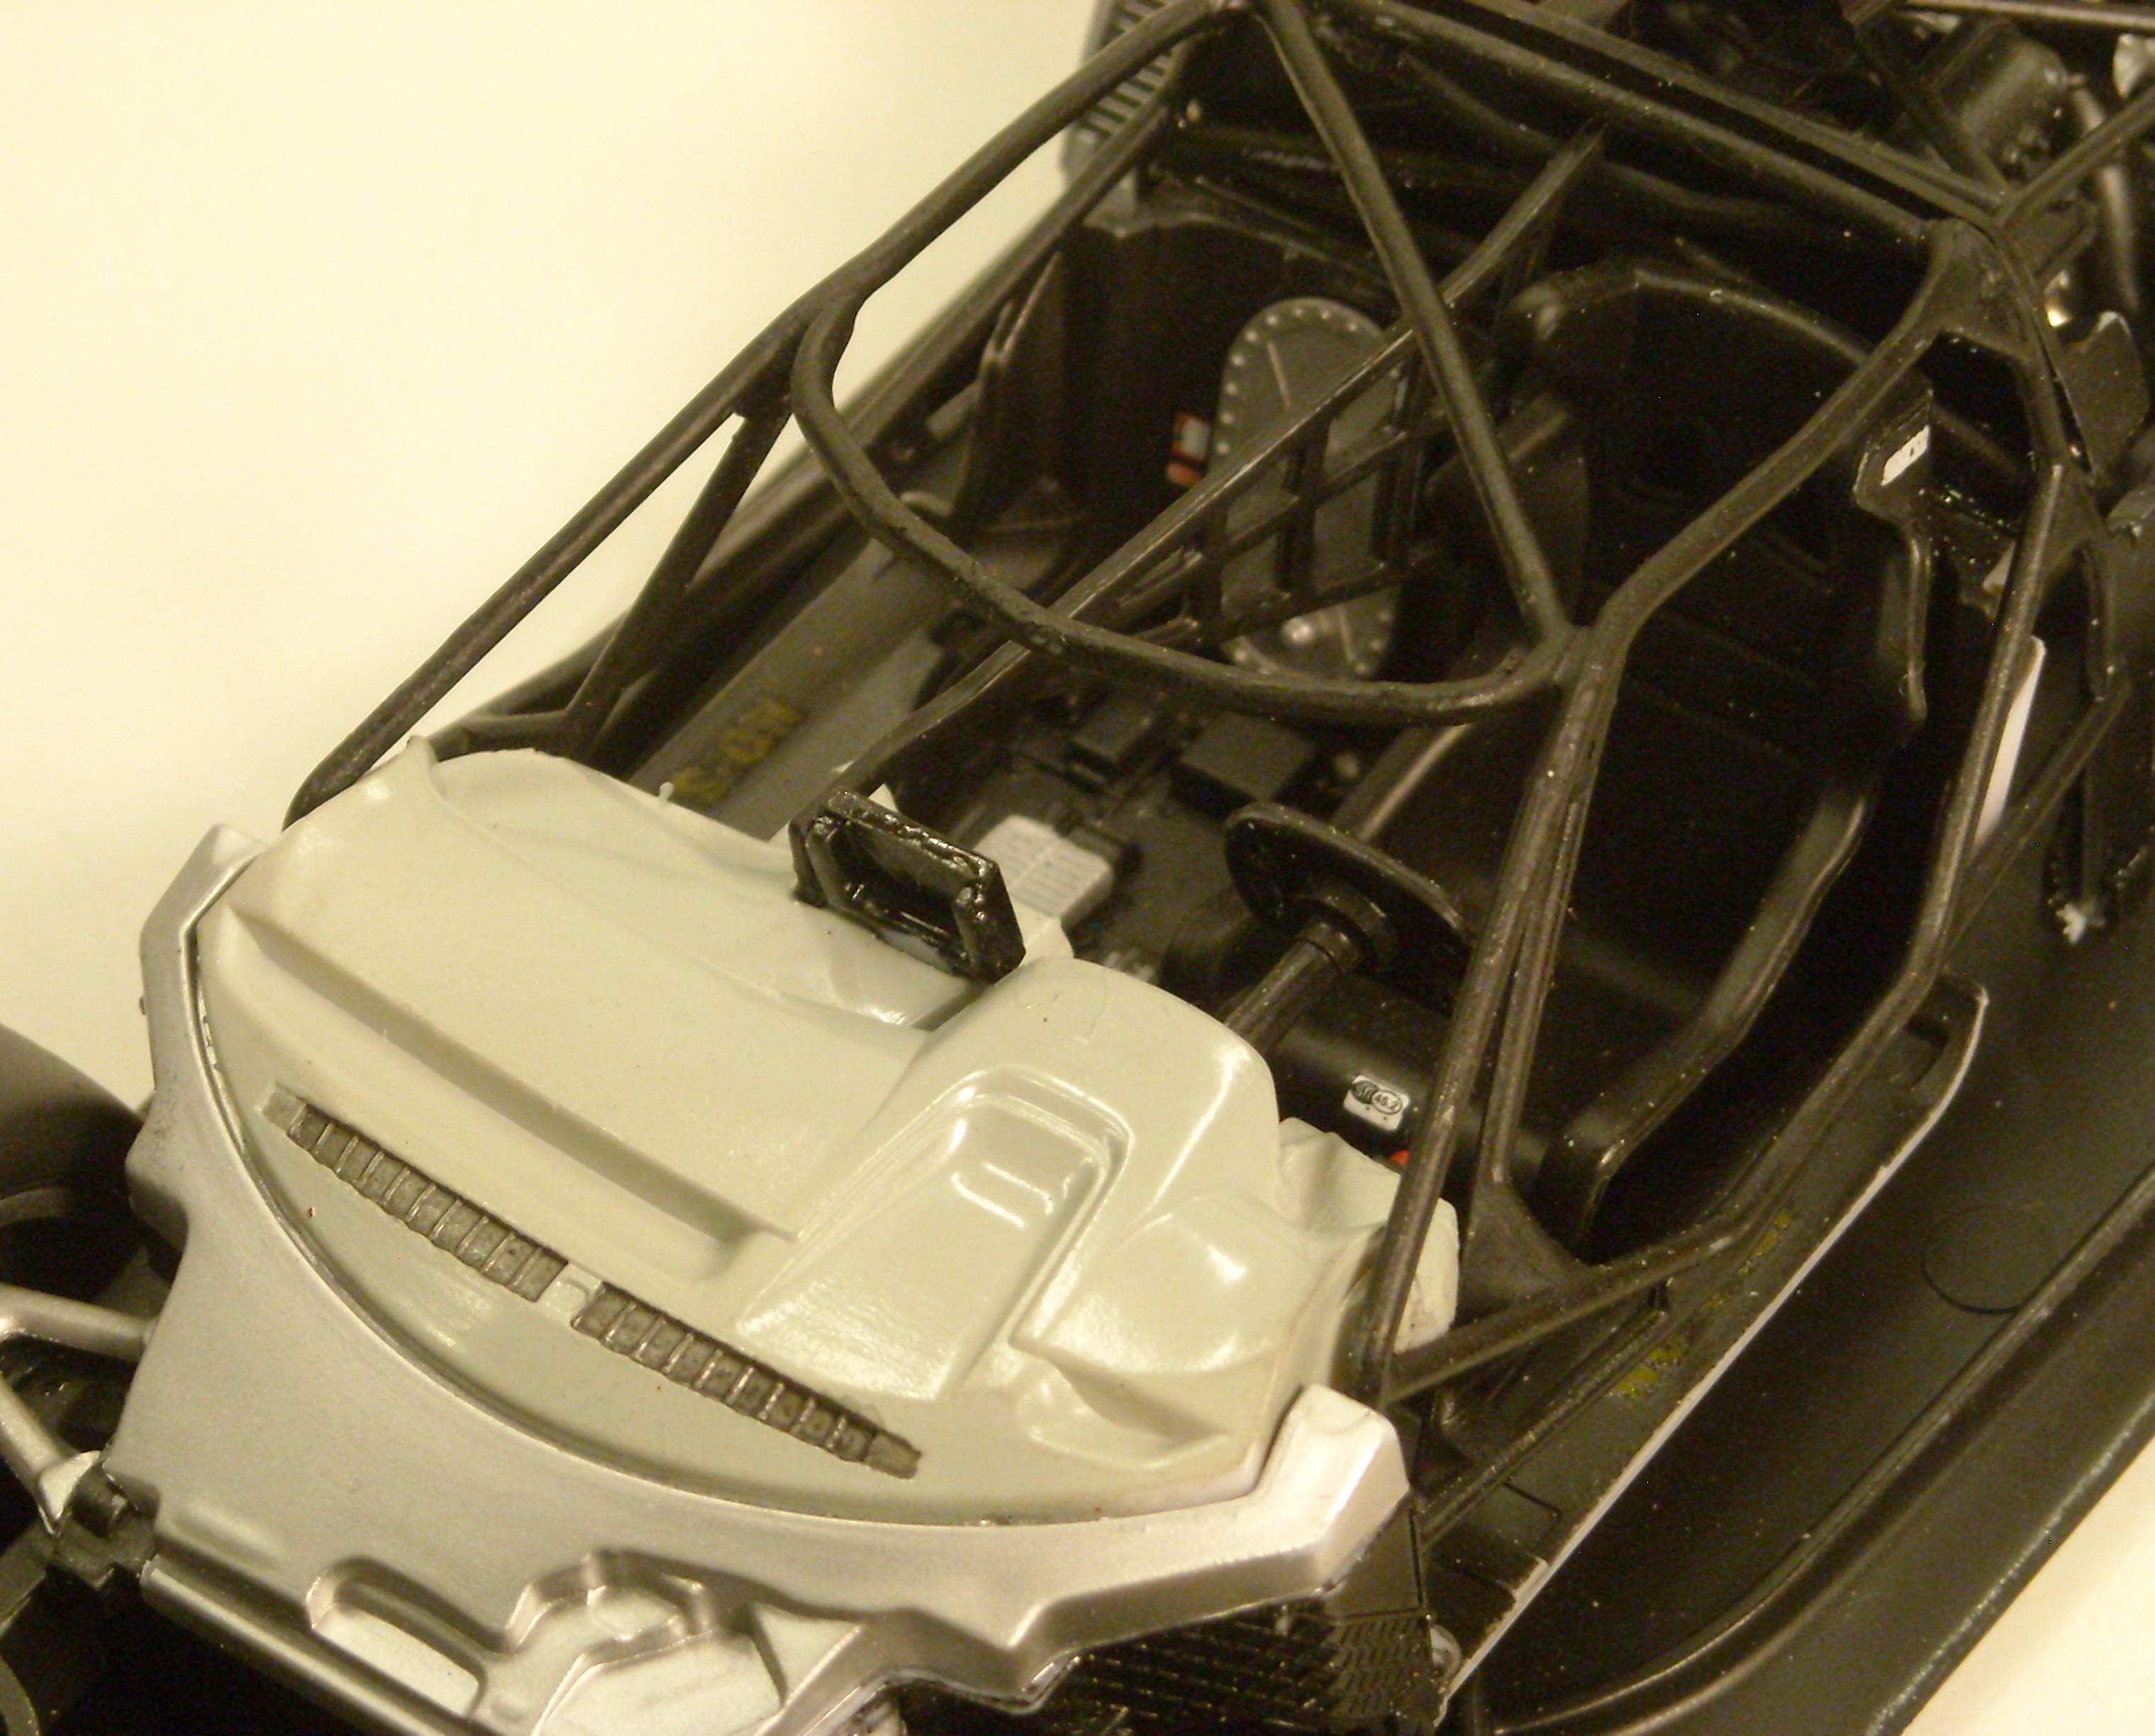
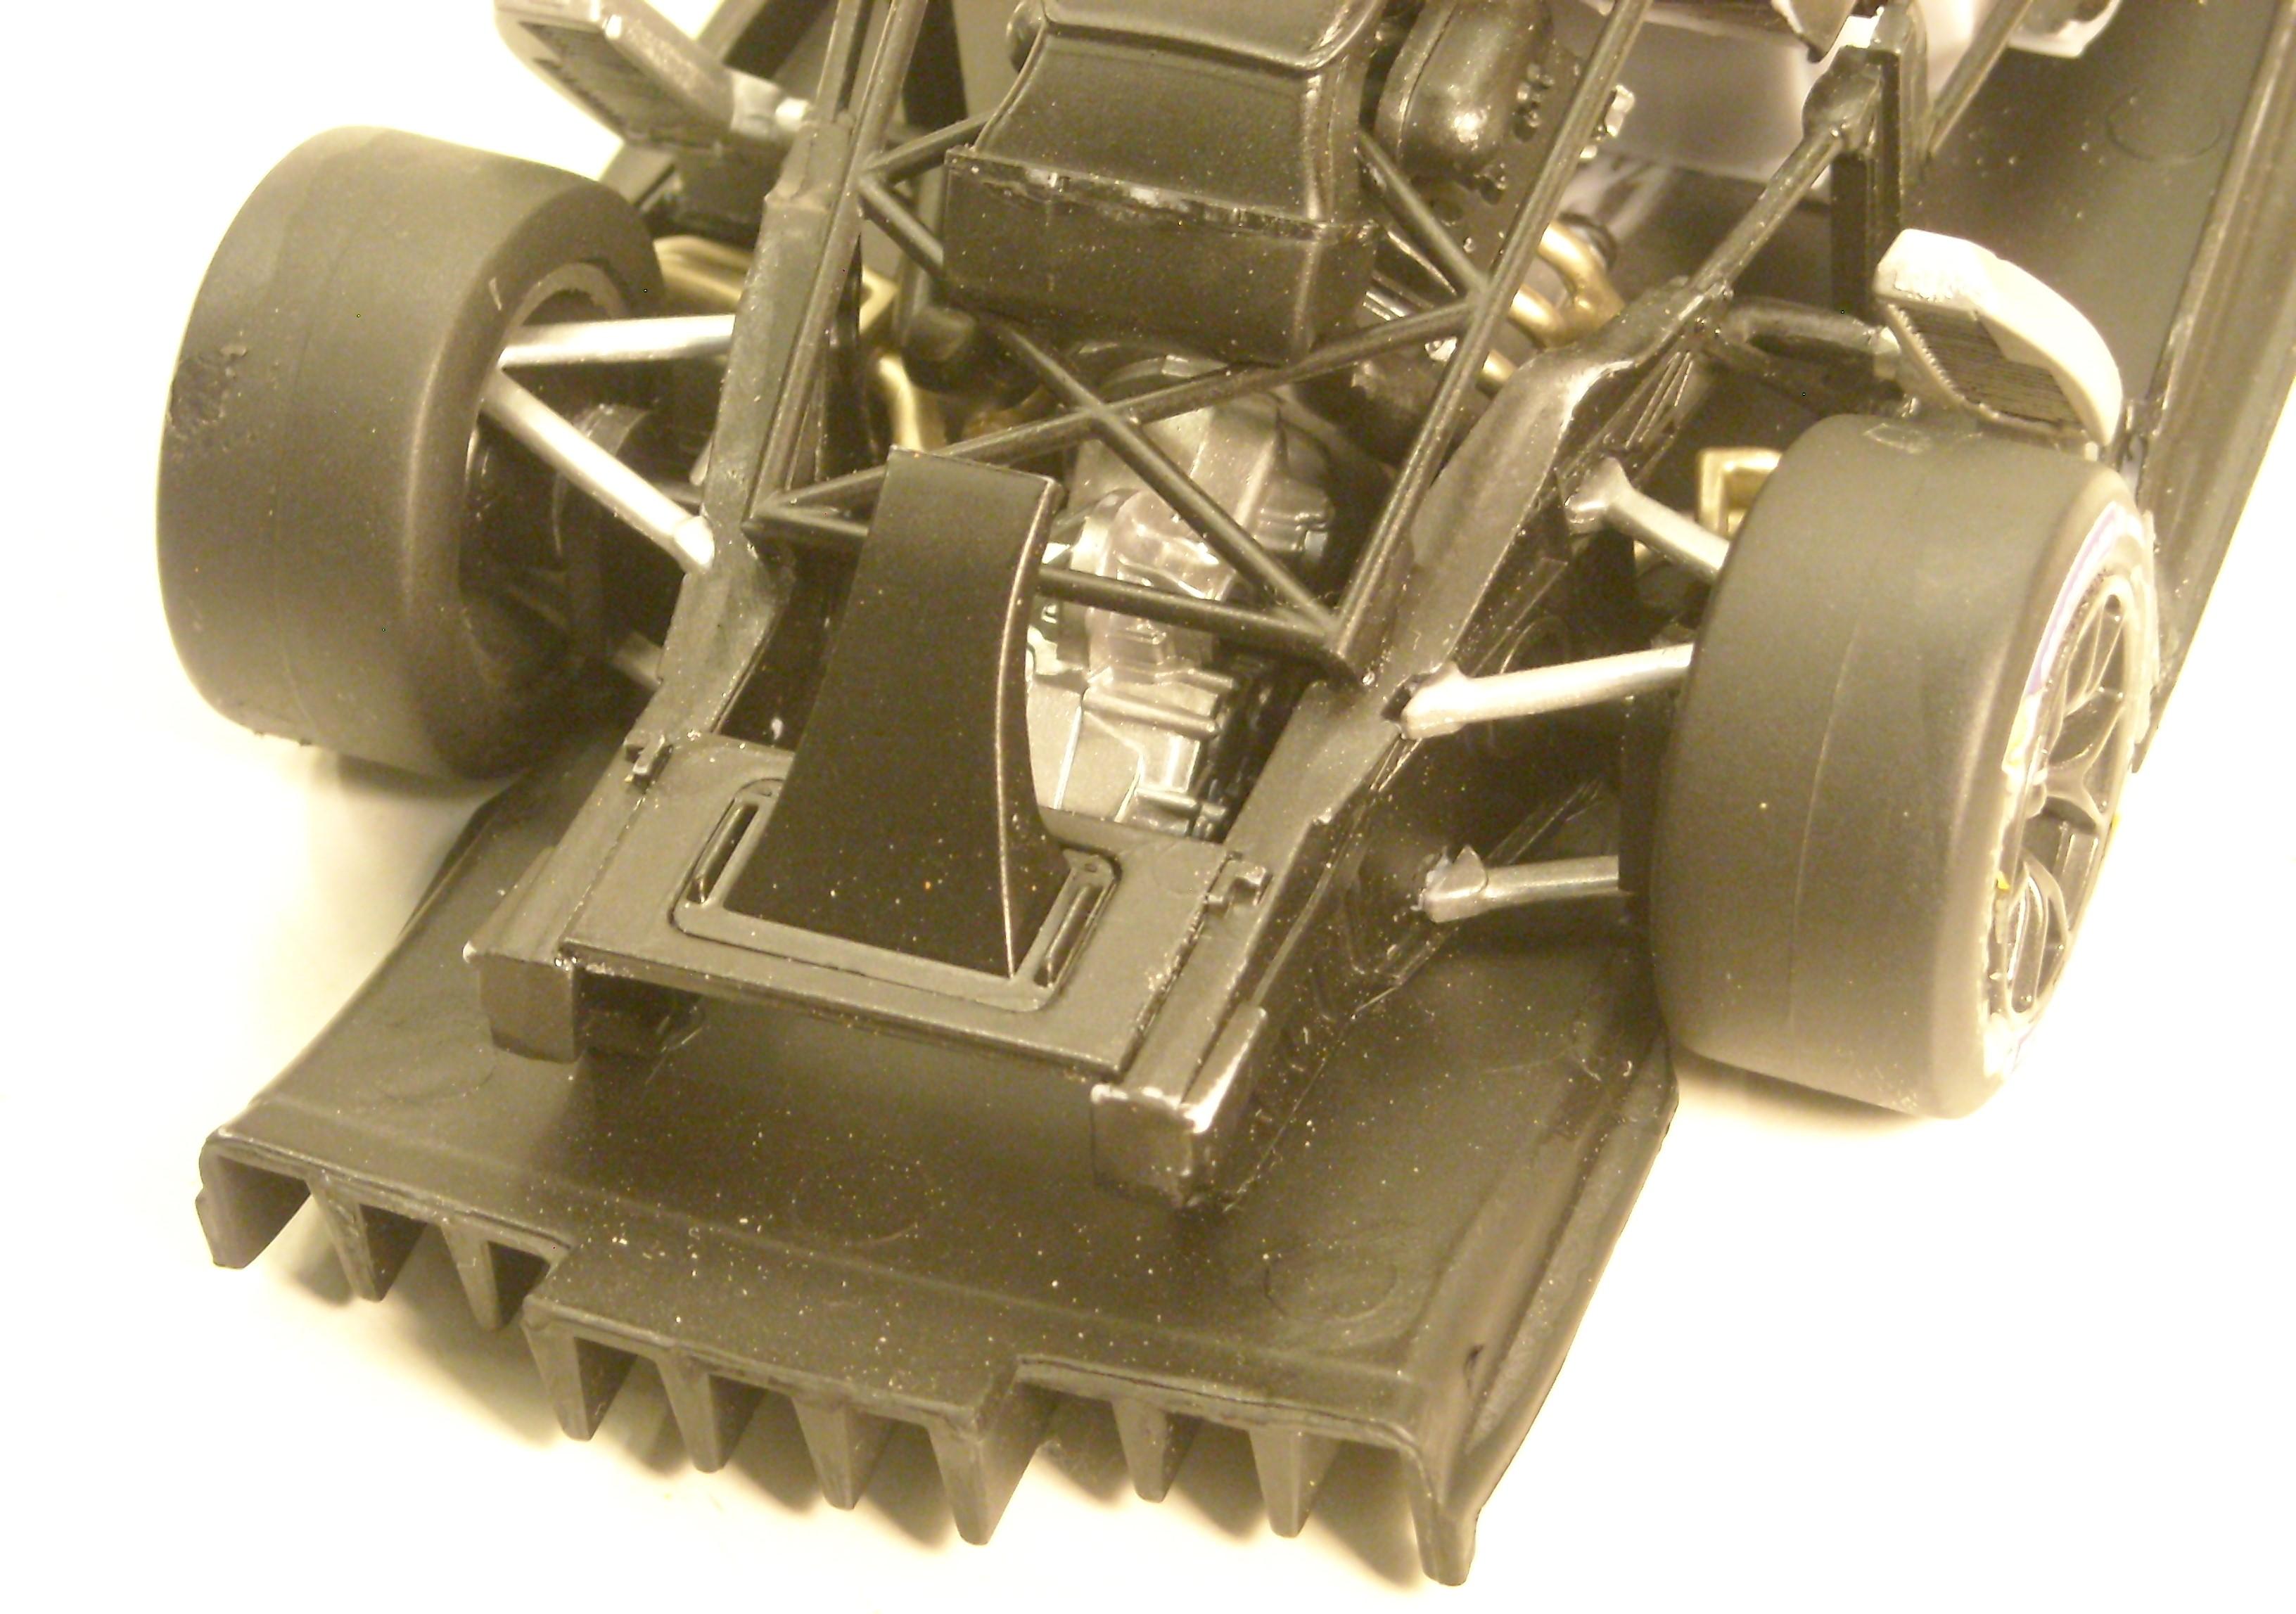
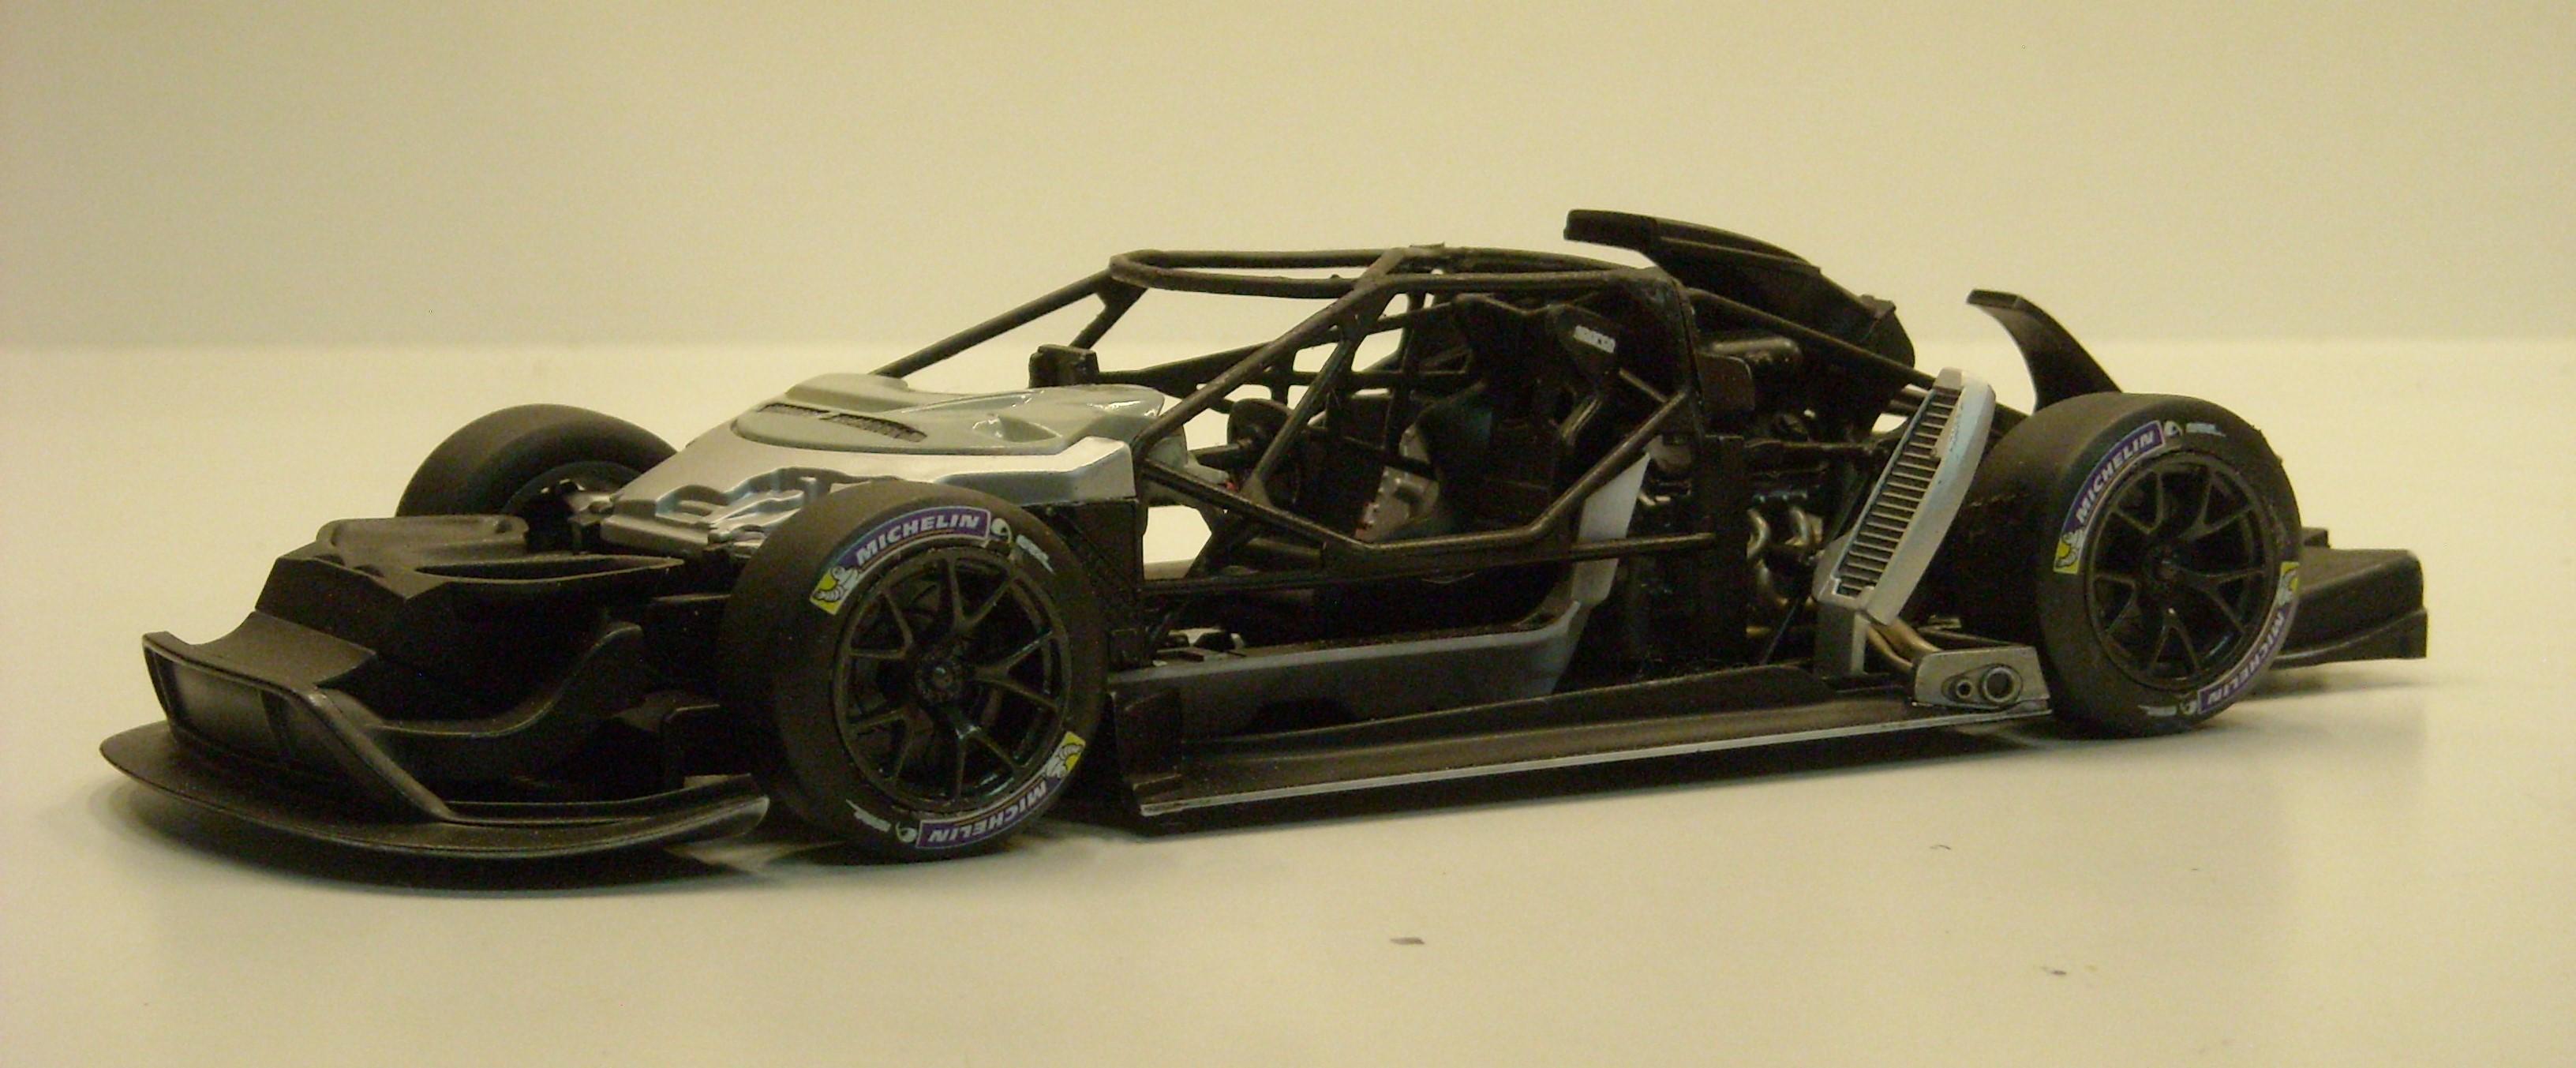
Finally finished this up. Challenging but fun to build. The paint is Tamiya "Pure White", MM "Blue Angel Blue", and Testors "Dark Red".

-
2017 Ford GT GTE
Kit Basher replied to Chris Smith's topic in Other Racing: Road Racing, Salt Flat Racers
That looks amazing! Excellent work. I am almost finished the Revell 1/24 version. Now I am embarrassed to post it. -
Finished the running gear for the Ford GT. Now all that's left is the easy part, painting the body. (Yeah right! Painting red, white, and blue on all those crazy shapes will be a piece of cake!)
-
Your most difficult kits
Kit Basher replied to T-Ray's topic in General Automotive Talk (Trucks and Cars)
Testors/ Heller Ferrari 512S. Still half finished in the box. A lot of the assemblies have no positive way of knowing if they are in the right place. So I had to do a lot of tweaking and adjusting. That may not be a problem for a better modeller than me, but the deal breaker was the back hatch. It doesn't even come close to fitting the rest of the body. I'm seriously considering removing the very nice Ferrari engine, gluing the hatch shut, and calling it a curbside. -
Thin Tape That Will Stay Put.
Kit Basher replied to StevenGuthmiller's topic in Model Building Questions and Answers
Another source for vinyl similar to the Oracal is sign makers. They use a fairly heavy vinyl to cut out signs. Whatever is not part of the sign gets thrown away. Those scraps should be plenty big enough for your purpose. The adhesive should not be a problem, as this stuff is intended to last many years outside. I don't know how well paint would stick to it. -
What Did You Get Today? (Not Model Related)
Kit Basher replied to LOBBS's topic in The Off-Topic Lounge
I've had one of those for several years, and it's held up well so far. (Hope I don't jinx it!) It's relatively stupid, which I consider an advantage. I don't bother to tell it what time it is. -
Happy Birthday, Carl!
-
Boss 351 Hood Painting
Kit Basher replied to Perspect Scale Modelworks's topic in Model Building Questions and Answers
The Revell 69 Boss 302 has the decals with a wide section (maybe 3/16"), then a space, then the pinstripe. Kinda hard to explain, if you take a close look at the photo, maybe you will see what I mean. The wider section covers the transition from body color to the black, so masking doesn't have to be so precise, and it is easier to get the decal straight (although I didn't!). If you are going to cut the decal, maybe you can do something similar. I used Testors square bottle Semi Gloss black, not a perfect match, but OK. OOPS! i just re-read the previous posts and see that this is what you're trying to avoid. DOH! Sorry.
-
How to put BMF trim on a vinyl top?
Kit Basher replied to Kit Basher's topic in Model Building Questions and Answers
That is obvious from the quality of your models. Many thanks, gentlemen, for the advice. I will take your suggestions and do the best I can. -
How to put BMF trim on a vinyl top?
Kit Basher replied to Kit Basher's topic in Model Building Questions and Answers
Thanks, Steve, I was hoping you'd chime in. Did you paint the body first, or the roof? -
How to put BMF trim on a vinyl top?
Kit Basher replied to Kit Basher's topic in Model Building Questions and Answers
I thought about that and it may be the best option. It would require a steady hand and a fair amount of time, but I think it might work. Is that how you do your vinyl tops? -
Specifically, I'm working on a Porsche 914. Once the top has been textured, how do you get smooth BMF on the trim. Or do you trim first, then texture the top? The trim on this kit is pretty faint to start with, and it goes around most of the "roll bar", and on part of the Targa top. Any help greatly appreciated!
-
Yeah, I am concerned about silvering. The tires are more of a flat color, not shiny like old AMT tires. The closest thing I have to Tamiya acrylic clear is Future, I may try some on the inside of a tire and see if it sticks. I can always get Tamiya clear if that would work better. I'm wondering if anyone has used something besides Dullcote. I have a bottle of Tamiya flat clear. Would that make any difference?
-
Thanks, guys. It sounds like my best bet is to put the tires on the wheels before doing the decals. The tires are kinda hollow and very flexible, very similar to the tires and decals on Jim's Corvette. I will have to mask the wheels, as I want to keep them a bit shiny. Any additional advice would still be welcome.
-
I'm building the Revell "2017 Ford GT Le Mans". It's time to put the decals on the tires. I haven't done this before, so I have a couple of questions. Any special prep needed to make the decals stick to the tires? I'm guessing I will need to do something to take the shine off the decals. I have Testors Dullcote, but is there a better product or technique for doing this? Can I put the tires on the wheels after decals and clear, without destroying the decals? Any advice would be most welcome. Thanks
-
Subtle, I like it! Johnny Cash would be honored.
-
Looking for hobby shop on ebay
Kit Basher replied to slusher's topic in Model Building Questions and Answers
Would that be Model Car Mountain, Carl? -
The smoke has reached all the way to here in Virginia. I can't smell it, but the sun and moon come up pink, and everything is hazy gray.
-
I totally agree. I wouldn't even consider using solvent cement to glue a chrome door handle to a painted body. Epoxy for sure.
-
I do most of my building using liquid cement straight the way you described. Where I'm finding the thinned tube glue useful is for small parts or painted/chrome parts. I can scrape the glue surface, place the thinned glue, and assemble the parts. When I try to do that with straight liquid cement, I inevitably get cement where I don't want it, damaging the paint or chrome. I'm not suggesting that thinned tube glue is the only glue you will ever need. I use several different glues, depending on the application. For me, this is another tool in the toolbox that helps me with certain jobs.
-
No problem. I just got all excited about a Polara.