

BigBad
-
Posts
1,585 -
Joined
-
Last visited
Content Type
Profiles
Forums
Events
Gallery
Everything posted by BigBad
-
 Hessel, one of the guys here built a pretty nice lowboy trailer by using some drawings and pitures from a trailer manufacturer's internet site: www.rogerstrailers.com.
 -
Ihobby chicago
BigBad replied to Trucker_tim's topic in WIP: Model Trucks: Big Rigs and Heavy Equipment
WHAT DO YOU KNOW??? PLEASE do tell! -
Yep, I have one of those and it works nicely, is not very expensive, well below 100$. Cleans pretty easily too. You do not really need dual action when you begin. If you already have a nice compressor, use that one and GET the regulator, they are not expensive, around 30$. Get the equipment that is designed for this airbrush though. Some bottles with paint outlets will fit your airbrush but are not angled the same as the original and won't allow for good alignment with the paint surface. If you plan on only shooting parts and panels with color, the single action airbrush will be way better than rattle cans because of the flow control, i.e. YOU control the amount of paint that goes on and the thickness of the coat. So the paint doesn't run if you are a little careful, that's the beauty of an airbrush compared to cans. The dual action airbrush will allow you to change the flow the width of your paint coverage. So unless you want to make gradual shading on your model, this is not really necessary. More control around body moldings, door surrounds, little details won't drown under a heavy coat of paint. It's actually pretty easy to use once you get the hang of it. It's the cleaning up and preparation that can get messy when you're not used to it. Get some extra little bottles that fit on the airbrush along with caps that close after use, to store your paint leftovers, you will thank yourself. Whwn you are done with the coat you just shot, don't forget to clean your airbrush by shooting some appropriate paint solvent for the type of paint you are using (just like you shoot paint) so you don't drip paint on your next job. Sounds like a lot of work, but it's not that bad. Practice makes perfect. There are some sites that are specialized on showing how this works. So you're not stuck with no reference. Have fun!
-
1974 Kenworth W900
BigBad replied to Jim B's topic in WIP: Model Trucks: Big Rigs and Heavy Equipment
Looking good up to now, nice interior, nice detail overall. One question I have, does Kenworth have all white engines like Peterbilt? You painted your 3408 white so it got me wondering. Have you done stuff since the 9th? Are you sticking with that white and blue paint job? I saw the actual truck in the pictures on something similar to Youtube, it's awesome, what a nice oldie! Just don't remember which site it's on though. You should hear that thing running, it got the hair on my arms to stand on end! So you got me going on this one, I bought the same kit, odered a Detroit 12V71, cab guard and tool boxes from AITM, got some Dark Green and Gold Seminole decals from Model truck parts and I got all my stuff to start. Cab is going to be white with a dark green frame and tan beige interior. I'm going to try and use the front axle and wheels from the International 4300 to have poseable front wheels and the rear axles and wheels as well. We'll see where it goes from there. I'm stoked! Let us know what you're doing to your Kenny, Jimmy. Funny, I'll have a Kenny running a Jimmy! Screamin' Jimmy that is... Or a Buzzin' dozen, Or a Destroy Diesel... Beautiful thing to hear. -
Kenny-whopper Wrecker build
BigBad replied to a topic in WIP: Model Trucks: Big Rigs and Heavy Equipment
The big KW looks good in black... Nice paint job by the way! -
mo'luminium parts
BigBad replied to mse op's topic in WIP: Model Trucks: Big Rigs and Heavy Equipment
2 hole budds.... I need. Badly. I'll give him a nudge. -
IH F2674 and lowboy trailer
BigBad replied to Aaron Corey's topic in WIP: Model Trucks: Big Rigs and Heavy Equipment
Hey I had a very similar truck to this one like 30 years ago! I took the dump body off, shortened the frame for a Tractor trailer look and put on some (I think were) 1:16 scale formula 1 tires for the front super single tires. Looked great. I like yours with the front grill and the Chevy Titan rims... Looks... Purposeful, a little like what "Modeltruckbuilder" does. I love that trailer! Thanks for the pointers and the reference from Rogers, that is great material to work with! -
mo'luminium parts
BigBad replied to mse op's topic in WIP: Model Trucks: Big Rigs and Heavy Equipment
Quicker than Eric at P & P... -
at the show...
BigBad replied to scale trucker's topic in WIP: Model Trucks: Big Rigs and Heavy Equipment
Woohoo! What a treat! Nice job! -
Ihobby chicago
BigBad replied to Trucker_tim's topic in WIP: Model Trucks: Big Rigs and Heavy Equipment
Daniel, I saw a couple of your trucks on an other forum and I was amazed at your St-Dominique Mack concrete truck, I you haven't shown it here before, I sincerely think you should. Since you know about the St-Dominique concrete trucks, would you by any chance live near St-Hyacynthe?? -
Well Highway, I was doing it with imageshack before this site got overhauled and it worked. Then I saw i could upload some pictures directly, great! So I won't have to go through the middleman... But Nooooo, I got a limit of 1.95 MB. I'll try this out another day. Thanks for looking anyway!
-
BJ & The Bear
BigBad replied to mackinac359's topic in WIP: Model Trucks: Big Rigs and Heavy Equipment
You are one lucky individual! I used to watch this show when I was 12-13 years old! Very nice restoration they did to this old KW. Thanks for posting this Tim. -
Just tried, it doesn't work with reply, or even with a new topic. This is silly!
-
Sorry for the T800, I can't seem to upload more than 3 pictures here... So I guess I won't be posting anything else today!
-
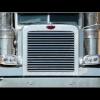
These are shots I took of some Tow trucks in a hot rod/big rig show near Montreal. Some guys building Lonestar tow truck might find some ideas for their build.
-
bare metal foil question
BigBad replied to catd11rpusher's topic in WIP: Model Trucks: Big Rigs and Heavy Equipment
On the contrary Mike! This stuff looks good even if you chop it up into sections. Easy! First, you need a SHARP hobby knife. If you plan to cover a complex shape, such as a windshield surround, divide this area into simple shapes, top molding, corner, molding side, bottom, etc... so cut a shape at the approximate lenght and width (wider than the molding usually) of the section you need to cover, remove from the paper backing with either your hobby knife or a the edge of a sheet of paper. Align the foil with the truck's molding and position it on the molding. Then tap on the foil with your finger, then drag your finger lightly on the foil to get it to stick on the surface. Burnish the foil on the surface with a cotton swab to get the surface details to show trough. Then take your knife and cut the foil around the molding and remove the excess... You have to try it once first to get the feel of the thing. Even if you "break" the foil or crack it, you just add another foil and overlap over the other that's already stuck on the surface and then cut the excess. You'll see it's even easier than painting! -
American Industrial Truck Models, AITM. All kinds of resin parts you'd like to add to a truck kit or convert into another truck model. Such as truck cabs, hoods, engines, transmissions, fuel tanks, hydraulic oil tanks, wheels, tires, axles... You name it. This place specializes in Mack truck parts but to many others too. Great service too!
-
By the way guys, how do you deal with KFS, kit form services? They don't have Paypal, can't send a check, they have no secured site... How do you guys deal with the credit card thing? Do you really send the credit info on two or three e-mails? I'm not confortable dealing without a secure money exchange system. I really want to get some of their stuff! Is there a better way to do this?
-
I just got the parts, so nothing really built yet. I'll get a picture of the separate parts ASAP. The DD 12V71 is on their parts list. It looks pretty good! the block, heads and valve covers are all molded as one though. But it looks nicely detailed. They are twin turbo and I think you can leave them off if so desired.
-
Italeri Pete 377 - 378 instructions?
BigBad replied to 69A-CAR's topic in WIP: Model Trucks: Big Rigs and Heavy Equipment
Kurt this is one heck of a nice truck you have built there. I think I saw it somewhre else but never actually saw the work on the Detroit 60. Man that is awesome work! -
I just received some resin parts from AITM which I ordered Wednesday of last week! I got two Detroit Diesel 12V71 twin turbos, a headache rack, 2 frame mounted 24 scale inch wide tool boxes with mesh grill, 2 36 inch toolboxes for a flatbed trailer, 4 rear 2 hole budd wheels and two gigantic floatation tires with bud 10 hole wheel inserts. (These tires are B-I-G) they really are intended for heavy duty offroad trucks. ALL the parts are great maybe except some work that has to be done to the tires, but nothing that can't easily be fixed though. Dave at AITM will work hard to get your order out fast! I recommend! So a lucky GMC Astro and a Revell Kenworth will get a Detroit V12! Waiting for those decals to come in... How about a 1974 W900, White cab with the VIT sleeper cab, with dark green and gold Seminole paint job, silver headache rack and a dark green frame and roof, Owner/operator style.That is in the plans to start soon. Next up, Revell Pete 359 with a Detroit 8V92 from KFS.
-
Building Italeri truck cabs...
BigBad replied to BigBad's topic in WIP: Model Trucks: Big Rigs and Heavy Equipment
Well, I think that settles it. Thanks for the tips Tim, It's going to be a big help. I was a bit baffled because I am used to the old AMT's, Ertl's and Revell "cast as one" cabs with at least SOME material around the glass to stick. Italeri unsettles me a little with their flush fitting glass. I'll go Tim's way and most other's by putting the cab together first. I'll glue the glass very carefully with some Elmer's glue all then seal them with clear drying epoxy glue. -
James, for smaller orders, you might want to try Udisco in Montreal. They are a big distributor with a large warehouse. Living near Montreal, I have been there quite a number of times and they have most current Moebius, Round 2/AMT/Ertl and Italeri kits. Give them a try at www.udisco.com. Their prices are not bad either.
-
"truck comin' out!"
BigBad replied to ntc8733's topic in WIP: Model Trucks: Big Rigs and Heavy Equipment
Yeah baby! A nice GMC General! That is one rare sight as a model as well as in 1:1! Good job! -
So here's the thing, I got really excited about building trucks again that I bought almost every kit available today except a couple. In that lot I have 6 Italeri trucks waiting for a nice build. The question is, how do you guys go about building the cabs? Do you go the way the instructions tell you to or you just put the outer panels all together without any interior or window glass attached? I have seen a lot of detailed builds from Tim Ahlborn who gets the outer panels together first, then paints and attaches the interior panels and glass afterwards. This guy has a lot of experience, therefore knows what to do. Knowing my own abilities, I am a little concerned for the glass installation building this way though. When the panels are flat, it's easy enough gluing the windows in, but once the cab is built, I'm not to sure of the outcome yet, I fear some glue smearing. A little insight on this would be appreciated. By the way, I hate the joints on the roof of these cabs, you know, just aft of the windshield frame... Reminds me of the AMT Freightliners. On the other hand, I have to say Italeri makes nice models and the rest of the trucks go together well.