
James W
-
Posts
572 -
Joined
-
Last visited
Content Type
Profiles
Forums
Events
Gallery
Everything posted by James W
-
Very nice execution of a great kit. The paint job is first rate. You gotta love that Railroad paint. Nice mix of parts, you really got a flat head under the hood? I don't doubt it, it must be tight though. New rolling stock means it's driven. Good job.
-
how to "rust" aluminum
James W replied to dryvr12's topic in General Automotive Talk (Trucks and Cars)
Just so I understand, you want a combination of rusty and shiny. The idea about the salt water has some merrit, but I don't think you need to do that. Dry brush some rusty looking paint over the antenna and go from there. If you want the whole thing rusty, I would etch them with an acid(start with vinagar) so that you can paint them with red oxide primer. Find some references you can study as you work. -
CB, glad you like the jerry cans. Scott, never fear, the reason I did not put the fuel tank up front was I had no room for a radiator and fuel tank. But with the fuel tank(s) moved to the back... you will just have to wait and see if you like my solution. I was thinking the front was a little long, Jairus said he thought it was too and he seems to know something about design. I originally had the wheel base at 5 to 5.25 inches. It is over 5.6 now. The four links at the front are a little long and can't be moved back because they would interfere with the engine. The frame itself could also be shortened too. The quarter eliptic springs I want to use can act as half of the linkage. I have pictures of a rod that show how it can be done, so this weekend I will be constructing the new front suspension. A slick and cool way to do it and very clean. See you next time.
-
That was Fast! Hope you had time to eat dinner.
-
That motor takes alot of work just to make it presentable. It will be fun to see you make it right.
-
Kit bashing vs. Scratch building
James W replied to Jairus's topic in General Automotive Talk (Trucks and Cars)
Since slot car racing is an activity centered around racing slot cars on a track, any modification of these cars is above and beyond the basic hobby. I doubt there is an understanding of the difference by the slot car guys, they just want to show off their gee-wiz models. If I posted on that forum I am sure that I would step in it as soon as I touched the keyboard. I'm not a slot car guy. Yes, they should probably redefine the heading. No I'm not going to tell them that. Since you have one foot itn either camp, I nominate you, Jairus, to spread the gospel. Let me know how the stoning goes BTW. -
How do YOU assemble your project?
James W replied to beefheart22's topic in General Automotive Talk (Trucks and Cars)
Like most who have responded here, I glue sub-assemblies then paint them. I have found that I usually end up putting paint on just a little too soon. That is why I have half-assembled models that have frames with 3 coats of paint on them. If you don't account for every detail you will add later you handle the parts more then you should and there goes the paint job! -
I'm trying to decide which end of the frame is more cool. The upswept front frame is beautiful in it's execution. I'll be watching this.
-
The engine certainly fits the car.
-
The idea of putting the fuel tank up front has been nixed. I decided on twin jerry cans. But I had none that fit the space and only one of the correct type so... Starting with the prototype I cut some plastic to size. Once I had a rough shape glued together with liquid cement I created a second and glued it with CA glue. After some careful carving, the two bucks were split where they had been glued with CA and were then planed down to the correct thickness. To form the reinforcing cross I carved a panel to be glued to the front side. Now I have a left and right jerry can. The right one has been shaped with a radius gage. notice how it looks a little smaller. A little more detail, handles and a fill cap, just basic shapes added to the tops I created wrap around brackets with .015 strips glued around the cans. Some 'angle-iron' glued to the cap will get a little more file work before it is finished. A few hours at the bench yeilded some nice, one-of-a-kind details that fit perfectly on my project. I really enjoy this type of building, but it is the reason I don't finish many projects. Lots of hours and very 'little' to show. Oh well, I enjoy it!
-
Good to see the old model skills again. You build woodies like most guys wire an engine. Since this thing is going to go around a track it needs a hula girl on the dash or some dingle balls to sway side to side. What do you say? A dog with a bobbing head. A waving hand on a spring.
-
A few more pics, some work done today. Jairus, that is bare metal foil but I hate to disappoint, it is left over from another abandoned project. It may not survive this build. Maybe I can reincorperate it into the section job at the beltline. Hmm... Here a the front 4 bars, built from the Revell 32, They were broke when I got 'em so I beefed them up a little. I like the size and gerth of this rear transaxle. It is the size of the cab. The rear tires are a bit out of scale but I think they work here. The whole rod is big. Here it is with my 'Stray Dog' which is small but about average for this type of car. I said I was going to use torsion bar springs up front but that is not panning out. So on to Quarter Elliptic springs which use only half of a conventional leaf spring. Here is one on the Stray Dog, hard to see, but I will show better views as I build the new set. It's as long as a whole pickup even though it is a cab only rod. This view shows the grill I worked on today. I ground out the back side then reinforced it with K&N brass screen. I hope to carve a fuel tank for the front to mimic the waterfall portion of the 41 grill. I think this is one of the prettiest grills going and would hate to only use a portion of it. That green truck looks familiar, where have I seen it before..
-
I built one of these also, I'd love to get another. All I have left is the engine, but it is a glue bomb. Those wheels would look right on Revell's 510 to build a stock version.
-
"I can hear music, sweet sweet music..."
-
Are you talking about 'glass' T-tops? If they are just body color tops you should be able to cut them out and glue in sheet plastic to form a bulkhead. If you are talking clear tops, my first thought is to carve them from thicker plexiglass to get the right curve and polish them out afterward, not a task I would look forward to. Maybe someone has a better idea?
-
The 1/8 tube should bend to about a 45 degree angle without heat. For more than that try boiling water poured over the localized area to be bent. To 'bend' the .188x.188 you will have to cut it and reglue the joints. There is enough plastic there to pin the joints after they are glued. To do this drill a hole through the joint from one piece to the other and glue in a plastic or metal rod with superglue. Heating plastic causes it to relax and revert to its previous form, usually a puddle. Heating it beyond a temperature that you can still touch it is a problem, but if you warm it with boiling or near boiling water you should be able to manipulate it to some degree. If this dose not get you where you need to be, let us know.
-
Update 3-22-09 After sitting home for two months, I decided to post this project and my work called me back. I'm not complaining, this my just take a little longer. Here is the engine w/blower sitting in the car. I don't have engine mounts made but it is pinned to the frame. When doing this type of work I find it critical to be able to disassemble and reassemble at will and always have everything mount in the same possitions. The engine mounts to the frame and the rear engine mounting plate locates the cab. Here is the back of the cab w/ the transaxle bracket. A tight fit locates the cab side to side. Here you see the Johan Caddy wheels I referred to last post. The gap between the brake drums and center section is there because it is not in the frame.This is a swing axle design with only one flex joint. These arms tie the outer hub to the frame and pivot on the same plain with the axle without allowing the axle to move forward or back. A transverse spring provides for movement up/down and helps locate the axle. Subassemblies still plug together so that I can break them down and paint later. Hope to get back to the model desk soon, but that will depend on work. I'm gone.
-
Looking great so far!!! I just took apart our old printer and it had a nifty cogged belt to run the ink jets side to side. Didn't see if you are looking for one and maybe it would not be the right size, but I thought i would throw it out there anyway.
-
I'm still thinking...
-
Nice ride!! I can almost feel the AC.
-
Cool idea for my next project
James W replied to Nick Winter's topic in General Automotive Talk (Trucks and Cars)
I love Pontiacs! Those wagons look sharp. I remember an option where you could order a standard Lemans with the GTO nose. Must be what these are. Also look for GT-37 -
That is a great old car. It's good to see someone doing it in 3D.
-
Looking good so far. How about twin centrifugal superchargers to strain the crank shaft some more?
-
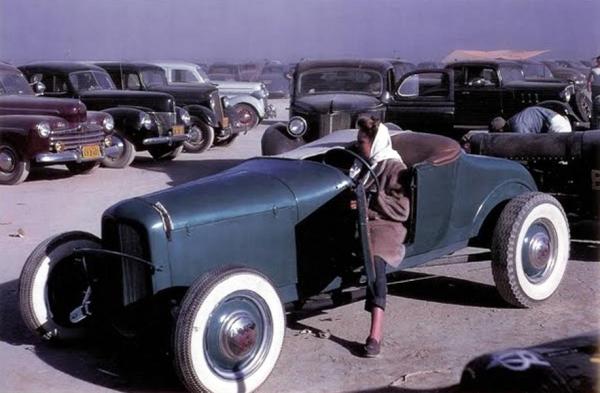
I like the modern tire on the rat rod, because we all know they are going to evolve over time right. That's what hot rodding is. Nice chop too.
-
Those look like Fujimi wheels that could be purchased on their own in hte 90's. not possitive however. Nice stash of plastic, are most of them started like mine?