
James W
-
Posts
572 -
Joined
-
Last visited
Content Type
Profiles
Forums
Events
Gallery
Everything posted by James W
-
How Out-of-box is OOBS?
James W replied to gowjobs's topic in General Automotive Talk (Trucks and Cars)
I know at some contests, OOBS means constructing the model the way the instructions indicate. I don't think, however that if the end result is the same that you could be caught for using the wrong 'methode' to build a kit. How much filler is used to achieve the result the box indicates depends on how accurite the kit is. Just don't add parts from other kits or build stuff that is not in the kit. BMF is OK, Flocking is over the line. Don't ask me to explain, it is making my head hurt just thinking of a reason. If you are building for a specific contest, build with those rules within arms reach, otherwise OOBS is just a catch phrase. These are just humble opinions. Hope to see pictures in progress. -
When I first saw this tractor I thought of this.
-
That's a great little combo!! Nice work
-
Welcome! I'm sure you will like it here. With all those years building under your belt I'm sure you will have alot to add to our insane little party.
-
That is Cooool!!! I was going to combine that body with the AccMin GS vette chassis but I gave up! Looks like you had it nailed from the start.
-
I am fairly sure that engine came from the 66 Buick Riv from AMT. I always liked the Nailhead for nostalgia. Buicks were good performers and light weight. I may be offering the air cleaner as a vacuum formed part in the near future so stay tuned.
-
The legos are not a bad idea as long as you have them. Is the base plex or glass? I think plexiglass would flex too much.
-
Two tone silver is classic!! Touch of lime is something Foose would do. Keep Going Man!
-
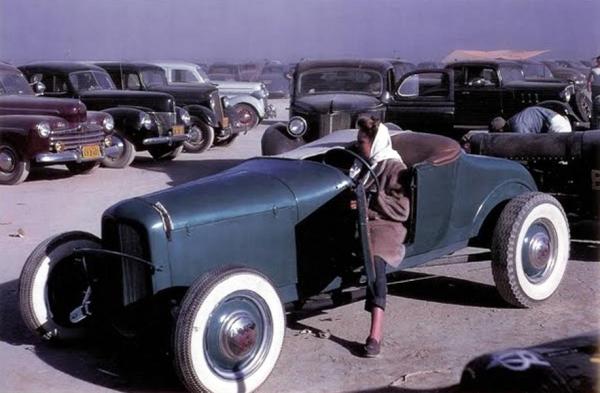
Someone recently posted a built version of the 'VaVaVette' here on the forum. Those old mags are cool and have gotten a new life since the web has everyone exchanging images. Thanks for posting them.
-
With all due respect James, Oregon is hardly overcrowded and the proposed restrictions on our liberty will do ZERO to effect the condition of the earth.
-
Nice job! I think that guy on the right just scratched your door. He looks suspicious.
-
This is just a suggestion, I have not done this for a while. I would grind some table salt very fine and then add rubbing alcohol as a suspension and apply it by spraying it off a tooth brush. If it dose not work or you don't like the pattern it will wipe off. Look at reference photos for patterns on vehicles simular to yours. Hope this works for you.
-
Shoot, now I just want to throw the one I did against the wall... Very nice, love the patern of rust on the roof, very real.
-
AMT/Model King 1972 Chevy Blazer
James W replied to Jordan White's topic in General Automotive Talk (Trucks and Cars)
I built mine in the 70's, second kit I ever did. Had no problems with it, love the seprate frame. The rear door hinges were hokie and I just left it off, even today I don't know how I would fix that problem.. Consider maybe a different engine, modern kits are more accurate. Other than that a good model. -
Beware the type of 2 part epoxy you use. The 5 minute epoxy found in hobby shops that is primarily a glue dose not harden enough to become a usable part. Something like JB Weld might do the trick however. Note that if you have any undercuts in the finished part, the mold will have to flex to get the parts out.
-
I built this one too when it first came out. It's an interesting body. I would not mind finding another one. I'll keep cheching back.
-
Lets not forget about flood control which was the primary reason most of these dams were built to begin with. Hydro power was a side benefit. Without these dams the rivers flood the valleys when it rains and go near dry in the summer. Thats great in a wilderness, but now KFalls is farmland and homes for families with kids and pets(threw that in to get the simpathy thing going) What do you supose this great brain trust of Oregon and California is going to do about flooding and providing irrigation water?
-
My first completion of 2009
James W replied to ismaelg's topic in General Automotive Talk (Trucks and Cars)
It's got wheels... close enough. If that is what you are building, good for you. You have to mix it up a little or it gets old. Nice work on the markings, and the back drops are cool. -
Ditto I was going to comment on the color and the cheater slicks, then I read the other posts. Very nice build!!
-
Bernard, I'm kind of a one-trick-pony in detailing engines. I'v got a few tricks I just use over and over so I'll try to highlight some here. The fuel line between the carbs is some soft .020 wire bent into a 'U' of appropriate size. The fuel block is Evergreen that I drilled as a "T' fitting and slipped over the 'U' The fuel feed line then connects up and I paint it silver. On this one I got tricky and glued a gauge on top of the fuel block. It was detail painted using a pin to highlight the engraved details. The fuel filter is some clear sprue chopped off to about .060 to .080. I then drill down the center of the sprue and flow in some yellow transparent paint. Slip it over the fuel line, glue it and paint the ends silver. (OOPS, I missed that step on this one.) Throttle return spring visible ahead of the carb under the front of the air cleaner is some fine wire used in electronics for wire wrapping circuits. Availiable at Radio Shack it is about .008" diameter. I take about 3 inches and wrap the middle section 8 or 10 times around a small diameter drill bit. leave a tail at both ends, one attaches to the carb linkage, the other to the intake manifold. These springs are not that hard to make and the depth of detail they create is worth the effort. Carb linkage is usually a straight pin, the head is filed flat and one side of the pin head filed down to form a 'C' shape. Drill the carb and insert. The radiator hoses have bare metal foil hose clamps. I cut a peice very narrow but long enough to work with, wrap it around the hose ends and secure with CA glue. The radiator cap is filed flat on top, then I drill a pilot hole with a .020 drill followed by a 1/16 or so drill bit to create a dish in the cap. Hope this helps, let me know if you still have questions. George, I may take you up on the offer... for the air cleaners. The model is already spoken for. Send me a PM. Thanks again for the comments.
-
Nicely done!! looks great. I miss the old Mopar fleets that used to flourish back in the 70's
-
Bernard, I really can't remember where the radius rods came from, but I think what caught your eye were the rod ends fastened by these tiny nuts and bolts found in the R/C hardware section of the hobby shop. Thanks guys for all the kind comments. Over-all I am pleased with how this thing turned out. Might even try some more shiny stuff. Now on to the next build...
-
Originally built as a rat, When I chose the wheels, they were just too nice for a rust bomb. The bed was inspired by a magazine photo of a truck with a 57 Ford bed about 5 years ago. Cab was chopped and channeled severly, painted Krylon Ivory and finished in Tamiya clear with pearl added. 60 Ford trunk was narrowed and cut down, roll pan added and filler panel is painted red to simulate full width taillight. 66 Buick engine was detailed, air cleaner was vacuum formed over parts box unit so I can use it over and over. This one took a while to finish. I have trouble building clean and the paint has lots of flaws so it was hard to keep going. Thanks for looking, your comments are welcome.
-
Elections have consequences..
-
Quiet air supply 4 airbrush
James W replied to plumnuts's topic in General Automotive Talk (Trucks and Cars)
I've done the same thing. Big compressor in the garage fills the tank and I'm ready to go. I even carry the whole thing outside to spray nasty stuff like Floquil I have had trouble runing out faster than I thought I should, two hours no way. I run about 20 psi however. I'm sure that makes a difference.