
James W
-
Posts
572 -
Joined
-
Last visited
Content Type
Profiles
Forums
Events
Gallery
Everything posted by James W
-
Fins! The Rise and Fall of The American Tailfin
James W replied to MrObsessive's topic in Contests and Shows
Go for it Bill, you could do it justice. Thanks for the info, I'm a fan of those old showcars, but only know bits and pieces. -
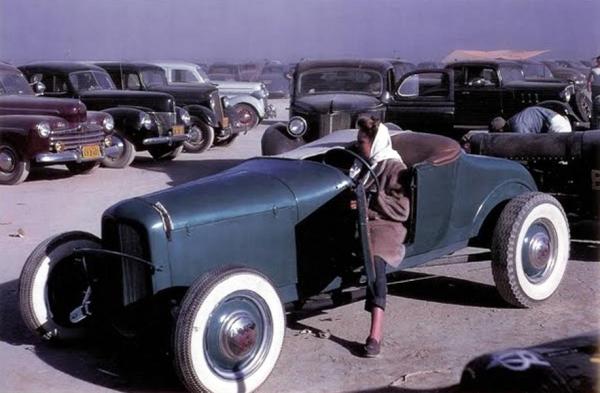
Some early mock-ups of my rat rod. The bent 8 is designed to run on flex fuel.
-
Fins! The Rise and Fall of The American Tailfin
James W replied to MrObsessive's topic in Contests and Shows
Nice shots Bill. Thanks for posting them. Any info on the cream and black show car? It looks kind of like a Desoto at the rear. -
Don't kid yourself. They still have 'em
-
Congrats Chris, Way to go!!
-
Jairus I loved the door latches on your Mustang Convert. from a few decades ago. (well a couple anyway) They pose as ordinary pull door handles but are sooo trick!!!!
-
Columbia two speed rear axle
James W replied to Paul Payne's topic in General Automotive Talk (Trucks and Cars)
Stock version of the AMT 41 Woody has the 2-speed axle I used in my 'Stray Dog' The hot rod version has a quickchange rear. The Revell 40 has the 2-speed, but it dose not have the bolt detail around the banjo that the AMT has. -
Milt, I had forgotten about the hobby knife handles, I have one on my work table! A number one xacto handle that has it's head split into 4 sections (some only split into two) makes a great drill holder. The large handle is easy to hold and use. I have an .020" chucked up all the time 'cause it makes a great starter hole for every other drill bit. dryvr12, I see elsewhere on the forum that you are in your formative years. Keep your solutions simple. I know that buying tools is not as fun as buying the next kit, but the tools will last a lifetime. Jairus solution of heated plastic rod (Evergreen brand) may be the easiest to work with, but don't be afraid to try the solder.
-
My Rat will be powered by a slant 6. If you hadn't noticed, it leans to the RIGHT.
-
Wow, I don't ever remember seeing a Roadrunner with full wheel covers. I'm afraid the selection of model wheel choices falls well shy of such an unusual option. Magnum 500's, Dog Dish, and Rallye but no full wheel covers. Anybody out there casting these in resin?
-
Sorry I took a while to get back. I use .0225 to .025 drills with some .020" wire that I've had around for some time. The solder you are using for exhaust, assuming 24-25 scale, is about .125 diameter so anything up to about half that diameter, .0625", would work on the ends. For exhaust hangers you will want something smaller like .020" Just get some piano wire and matching small drill bits at the local hobby shop. Think of the pins the model companys use to align parts in a kit. You are making custom parts so make custom pins. It's up to you ultimately. How much modeling have you done? Do you have a pin vise(small diameter drill)? They are very handy for adding detail like engine wire, plumbing and brakes. Anyway let me know if I'm going over your head or if this is stuff you already know.
-
Try drilling and mounting small diameter wire, both at the ends and along the run of the pipe like where an exhaust clamp would be. You can then use AC glue to hold the solder in place. I find that glue alone is not strong enough to hold, especially when you make adjustments. By pinning it into place you can unmount and remount the pipes until you have it looking the way you want. As for the tips, add a piece of aluminum tube to the end of the solder. You might try making the whole tail section, aft of the mufflers, from aluminum tube if the bends are not to sharp. Hope this helps.
-
A nice, clean build. Good Job
-
Cool idea. I'd like to see how it went together.
-
Jairus, you should add 'Clean the litter box' to your list. It dose wonders around here. I also wax the end of the table next to the waste can, that way I don't have to handle stuff twice.(O.H.I.O.)
-
What are your favorite car songs?
James W replied to Darrell Gwinn's topic in General Automotive Talk (Trucks and Cars)
Stay Cats; Hot Rod Gang, Built for Speed, Rev It Up and Go, Look at That Cadillac, 18 Miles from Memphis. Brian Setzer; Switchblade 327. George Thorogood; Ride on Josephine. David Lindley; Mercury Blues... this version is particularly tasty, it can be found on 'Hot Rods & Custom Classics' from Rhino Records. Of course if you find this collection, your troubles are over. -
This topic is pretty wide open, but if you have weathering experience, it should be easy to translate. The place I would suggest you start is pictures of abandoned cars. Also military dioramas will have a wealth of ideas. Once you have some images you like, look at the base colors. I like to paint base colors using oil base paints. This makes a durable base to work on. You can layer the base colors and sand through the top to expose contrasting colors. You can also layer 3 or 4 similar colors, painting different areas, to simulate faded paint. Use rubber cement as a mask to leave irregular paint blotches from 'battle damage' For rusty areas I use red oxide as a base, mask with rubber cement, then cover with color. After exposing the red ox, I dry brush some shades of rust following references. Dark colored or black washes will give depth and highlight the parts that 'rub' in the fight. If they have been abandoned long, the most vulnerable spots will become solid rust from the elements. I add texture to my rust paints(I use 5 or 6 shades from orange to brown) by mixing a little baking soda in the paint. Use pastel chalks to soften and add subtle color shifts for more depth. These are just some ideas to start. I never stop experimenting and rarely go long without craving a good rusty subject to work on. Again, find references. They are your best freind. Have Fun
-
Maybe if Uncle Sam hadn't taken the money in the first place so Uncle Sam could decide who needed it the most, we could give our excess to a whole different group of 'less fortunate' people. Mine is going straight into paying property taxes for the year. My way of 'sticking it to the man.' tax refund>pay tax>tax refund>pay tax You have to admit there is a certain symmetry to it.
-
Pacific NW Model car Fest Pics
James W replied to RodneyBad's topic in General Automotive Talk (Trucks and Cars)
Thanks for posting Rod. It was a good show. It was good to see you again and all the guys in the club. I can't get to the meetings because of my work schedule, but I will pass this on. -
Warped Already Built Up Chassis
James W replied to Paul Payne's topic in General Automotive Talk (Trucks and Cars)
The super glue is very likely to come apart, especially when you start moving the plastic frame around. It dose not melt the plastic but only attaches to it. You might want to disassemble as much as possible before hand or take your chances leaving it all together which ever seems to work better for you. I had a freind that used super glue just because it would come undone when his clients returned his work to be repainted. -
Suggestions On Creating Door Panels
James W replied to Bruce Poage's topic in General Automotive Talk (Trucks and Cars)
The AMT Pontiac Catalina custom version has diamond tuck interior panels that you could cut down and use. Many other newer kits have seperate interior side panels that you might look at also. -
Ping Pong Ball Build Off
James W replied to Dr. Cranky's topic in General Automotive Talk (Trucks and Cars)
Man, I know that yellow plastic is going to bleed through the paint! -
Removal/replacing Molded Engine Bay Details.....
James W replied to Scot M's topic in Tips, Tricks, and Tutorials
This would be a good candidate for aluminum sheet. Pro street cars usually have one bend in the panel near the top, then go at about a 45 degree angle down to the frame rail. Good reference photos always help get the idea, but for what you are doing, just make it cover the tires and your good to go. -
Welcome Scot, I agree the mag is top quality. Enjoy the forum too, lots to see and do!
-
Has Anyone Built The Tamiya '66 Volkswagen 1300 Beetle?
James W replied to MNRenegade's topic in Car Kit News & Reviews
It's been a few years since I built mine, so I dug out the instructions. Parts C-15 and C-8 are the swing arms ,they mount to the chassis pan to a square peg. Temporarily mount them on the peg and drill through the swing arm into the peg to insert a sewing pin with the head used as a keeper. This will be the pivot point just like the prototype. Now remove the swing arms and file the square peg into a round peg, this allows the arms to move after you glue the pin in place. You may be able to cut the axles away from the transaxle just inside the dust boots and insert a wire there on either side as your flex point. When I built mine these modifications did not allow the joints to flex enough to get the wheels all the way to touch the fenders. The car has a bit of rake so it did not lower the back a quarter inch as the front had been lowered. It dose exibit the cambered wheels and still looks 'drivable'. Hope this helps. I really enjoyed building this kit and plan to do a Ghia version someday.