truckabilly
-
Posts
789 -
Joined
-
Last visited
Content Type
Profiles
Forums
Events
Gallery
Everything posted by truckabilly
-
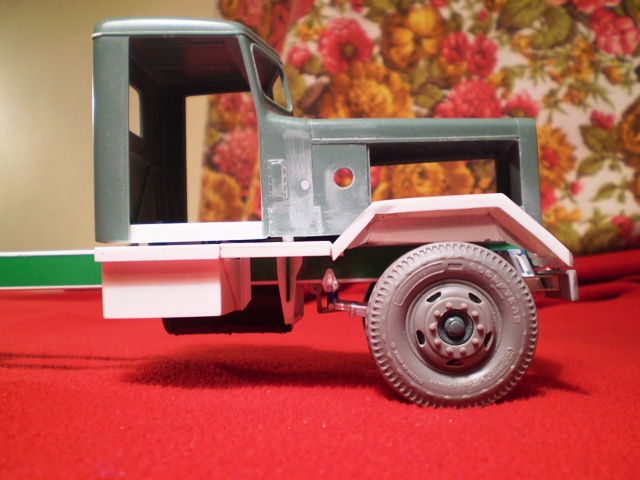
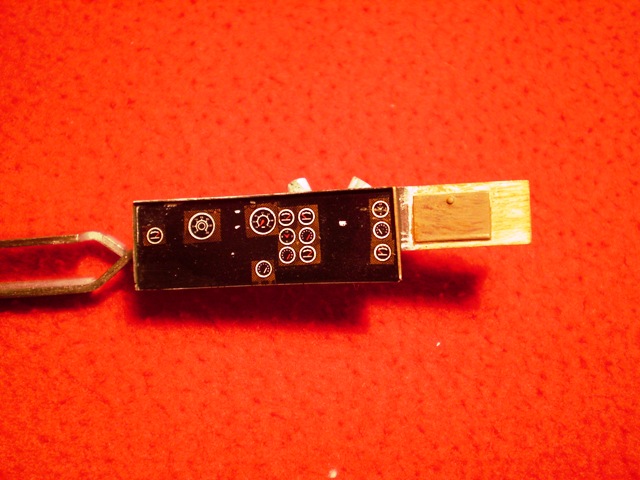
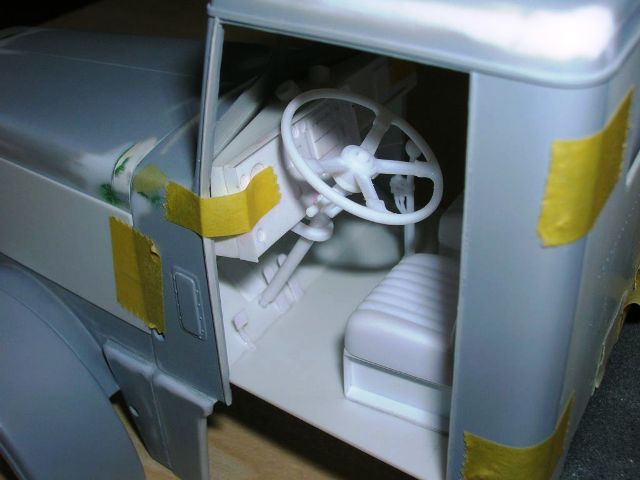
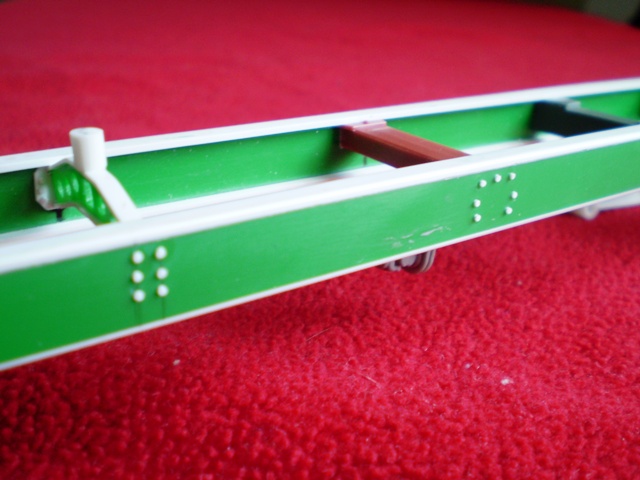
 The green material is what used to be a warning or safety sign. Here is a pic of some of those... The green one is the kind I use. Basically it´s a styrene sheet 1 milimetre thin. Easy to cut and grind and it works well with glues like Revell Contacta. Unfortunatelly, they are becoming quite rare over here where I live. They changed them into stickers or foils which are no good for model building. If you come across something like this be sure to sandpaper the actual sign first as it may materialize through the color later. I keep on working on the fenders. To be in a picture with dimensions and proportions I temporarily glued the fuel tank and battery box to the frame. The battery box is scratch built. The thing is still in progress and will be dismantled prior the paint job. I carry on with the dashboard too. The instruments are cut out of Kenworth T900 decal. Not quite right with red needles but they will be hardly visible anyway. The wood imitation is painted with enamel colors, using sponge. The photo is taken under a light bulb, thus the colors are not quite true. That´s all I´ve got for now. Thanks for your comments, criticism and advice.
-
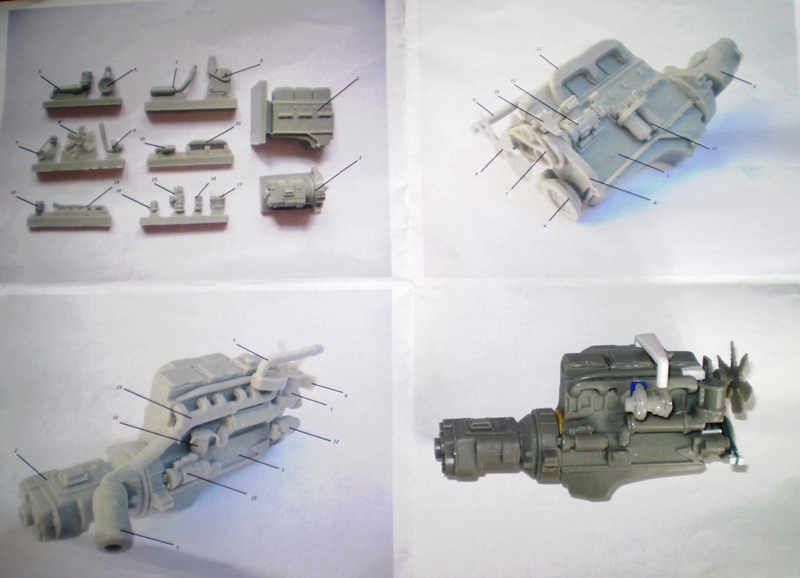
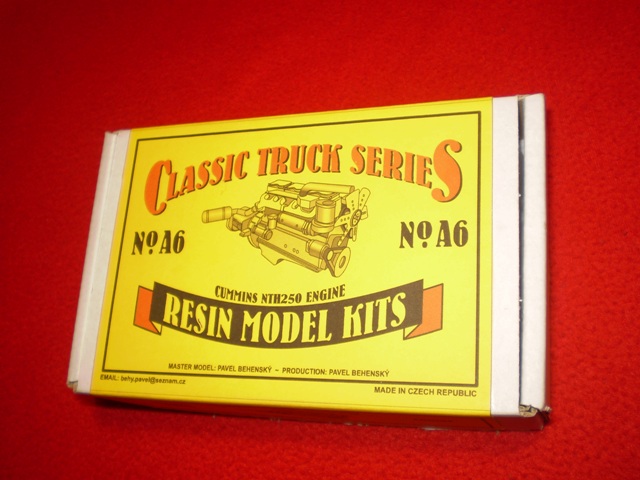
Thank you guys for your kind words. And thank you, Tim, for pictures and info. I am working on the battery box and step boards at the moment. But for now, let me jump to the engine. Originally AMT´s Cummins was taken out of White Freightliner finished model, paint stripped-off and dismantled. The parts were cleaned, some of them modified, a few details added. This served as a new master for a small batch of cast engines wrapped in this sweet box. Some modifications to original engine... For logging application I added a turbocharger left from RoG twin turbo Cummins. Probably not quire correct in shape and size but I did not have anything else. I made a cross over pipe and also changed the exhaust piping. I will probbaly add some more details to the engine as it is my obsession on each truck. All for now.
-
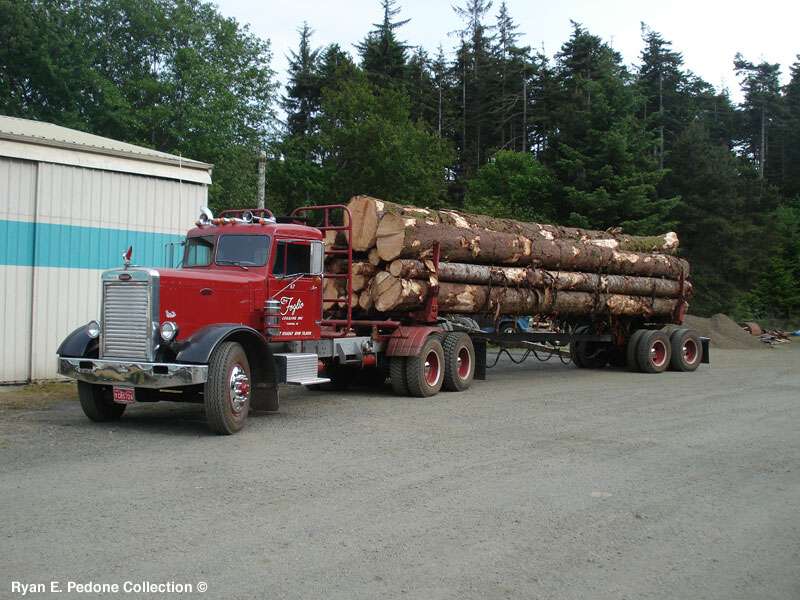
Probably something like it, Car Man. This picture is the only one I have. No idea how the truck looks on the sides. How long the fuel tank is? Is it just one tank or two? Does it have a tank behind the cab? Are there any chain hangers on the frame and where exactly? What drives and suspension is there on this particular truck? How the exhaust tubing under the hood looks like? It seems to me that the fender on passanger side is not full length, just the part above the step board skirt. And is there any step board skirt at all? I don´t think so, but I may be wrong. What about the driver´s side? Full length fender? Part length fender? There is a sort of catwalk above the roof. How does it look like, how is it attached to the cab? As you can see, I know virtually nothing about this truck. All I can come up with is a combination of several features that I see on pictures of another 351 trucks. And hope that it won´t be wrong too much. Thanks for your interest.
-
KW W900 Aerodyne Snap tite 1:25
truckabilly replied to Pavel A.'s topic in Model Trucks: Big Rigs and Heavy Equipment
I would call it Snap Kit in Disguise. I really wouldn´t tell it´s made out of snap kit. The model looks gorgeous. Jarda -
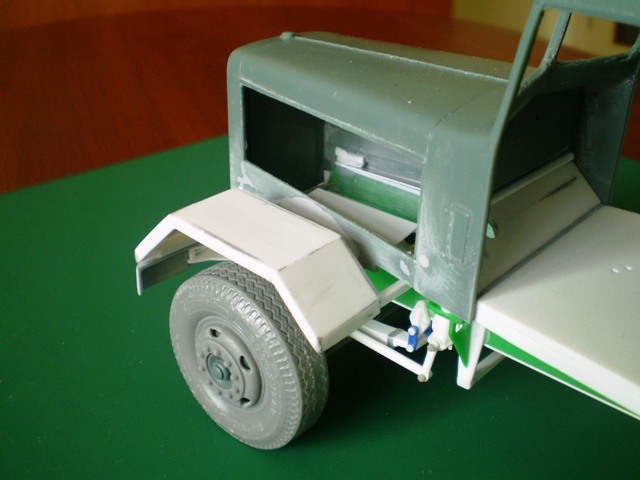
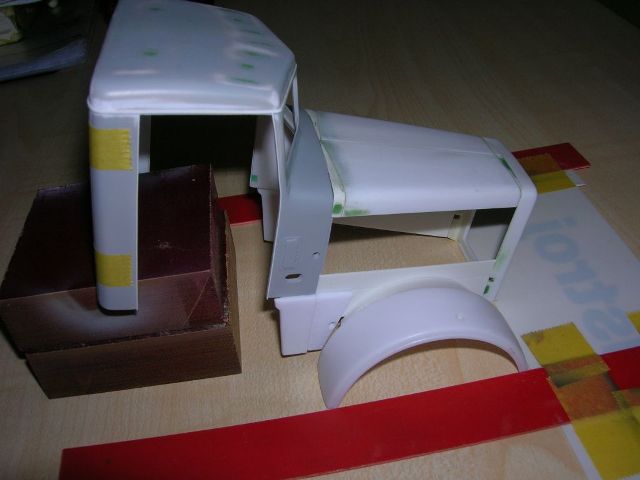
The whole batch is sold out, Scale Trucker, and the reissue is not in plans for any near future. The author is too busy with his current project which is KW S900 model. I worked on the pit fenders for a while. I thought it would be a piece of cake since it´s nothing but a simple geometry. But with no measures of the real thing it wasn´t so simple. It took me a few weeks to put all the dimensions together and get the shape and location right. Well, right... sort of, I mean. The round fenders are gone now for I needed to test fit the new pit fenders. It still takes some clean up after a primer is applied. The plate on the inside is a technological addition which will be cut off along the frame rail. Here are the fenders with the cab altogether. I will continue with the full fenders. That takes a different battery box instead of the one in the set. Gotta find some pic if it´s possible. I think it´s just a plain box under the fender, right?
-
I can´t belive I missed this somehow. My main focus is on American truck models and this was off my attention at first. Untill now. I didn´t realise it was a scratch build. That changed the way I look at the model. It´s really top class job and it sure deserves lots of respect. It takes a great craftsmanship to achieve a look like this with all the parts being home made. And if there´s no surviver in the real world, that makes it even more unique. You did fantastic job in three fields... the research, the model building and picture taking. I have nothing but very very deep respect for you. And I am sorry for overlooking your great build.
-
Pete 378 Car Hauler
truckabilly replied to kilrathy10's topic in Model Trucks: Big Rigs and Heavy Equipment
Very nice build, great work on it. My bow to your trailer. -
Auslowe Kenworth T904
truckabilly replied to griffin's topic in Model Trucks: Big Rigs and Heavy Equipment
This is really awesome. Great build in all aspects. very very nice. -
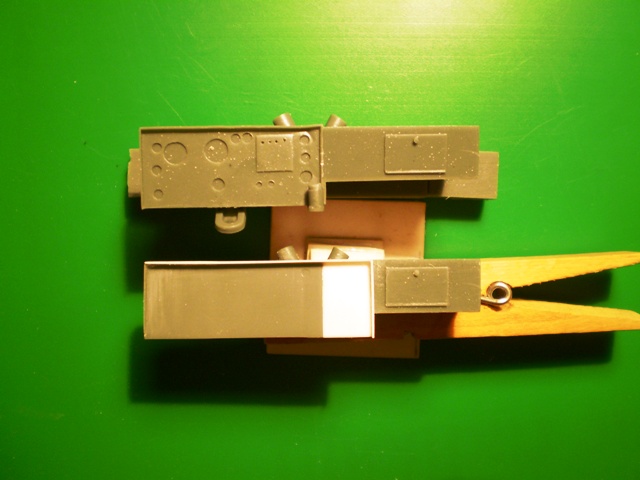
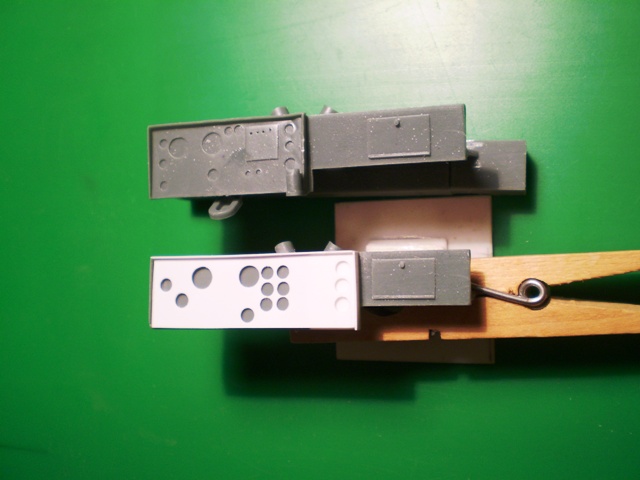
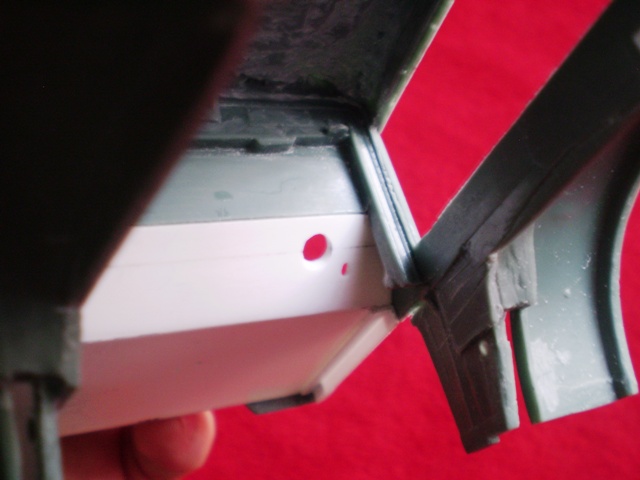
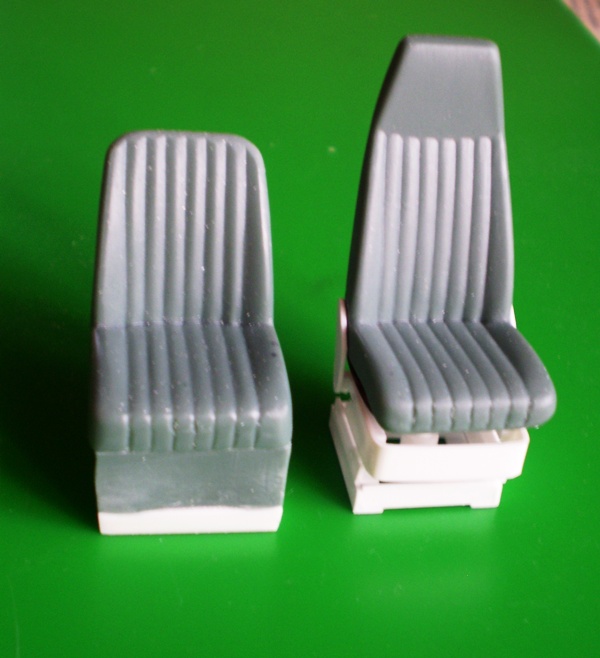
Thank you very much, Tim, for your information. It´s really helpful. I got rid of the ribs on the seats. I hope to make different upholstery for each seat and different level of wear. I also modified the dashboard. The one from the Revell-Monogram kit is too narrow. The instruments location is different on each pic I have. I just picked one and drillied out the holes according to the picture. Well, not that much accurate. I hope it will look okay when it´s painted.
-
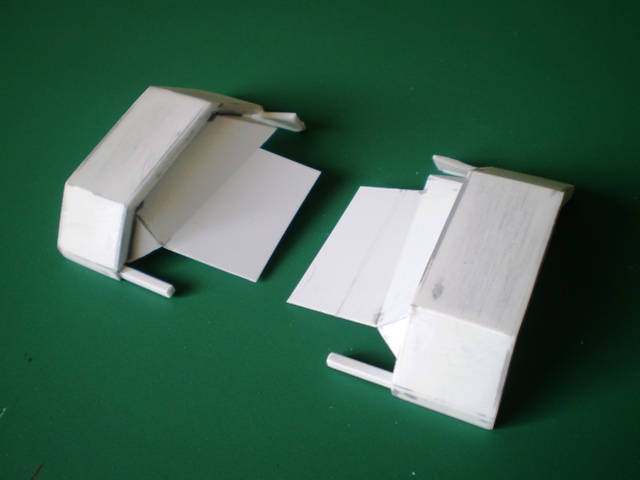
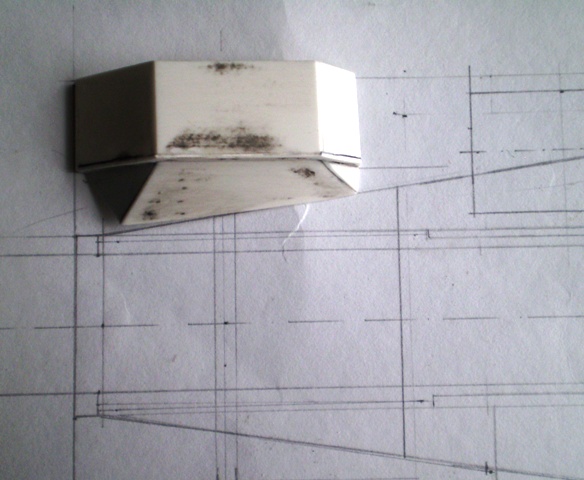
Thanks a lot Tim. That sure helps. I started working on the flat fenders. But I realised that I don´t have a picture showing the shape of the part between the hood side and actual fender. I made this technological specimen. It´s not very well done and it won´t come to the model. I just tried to get the shape and dimensions. Not sure if I did it right. Let me know, please, if you see any clear mistake. I just do by the pics I have.
-
New member here..
truckabilly replied to Dhar217's topic in General Automotive Talk (Trucks and Cars)
Welcome on board Darren. Bill Signs is nice truck to build. If you go out of box or 1:1 like you said, it is not correct replica in all aspects but still it is a nice model. You can do whatever modifications to it and make it a truck of your desire. The situation in truck modeling is a bit more complicated than you are probably used to in 1:35 scale military models. The choice of kits is not that wide and most of them represent trucks of the past. I am not much familiar with the offer of aftermarket parts in the U.S. but I have seen some nice goodies. Be prepared for a lot of cleaning work as some kits came into being decades ago. Take a look at tips section and if there is anything you would like to know, just ask. I am sure the guys here are willing to help. On the other hand, since you are truck driver, we may ask you, from time to time, how the things are done on real truck. Have nice building days. -
Peterbilt 379 with D.T.U.
truckabilly replied to truckabilly's topic in Model Trucks: Big Rigs and Heavy Equipment
How about this? http://s808.photobucket.com/user/jartul/library/Long%20Hauler%20379%20-%20119?sort=3&page=1# -
It looks like it´s gonna be a cool rig. Next time you take pictures, try to dust off the in progress model a little. I have the same problem with my pics. I keep forgetting to dust off the sub assemblies and the camera always makes the dust particles a lot bigger than they realy are. Keep on great work.
-
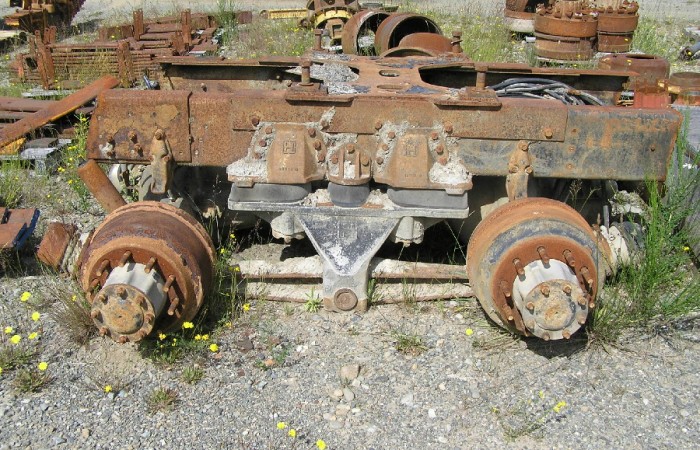
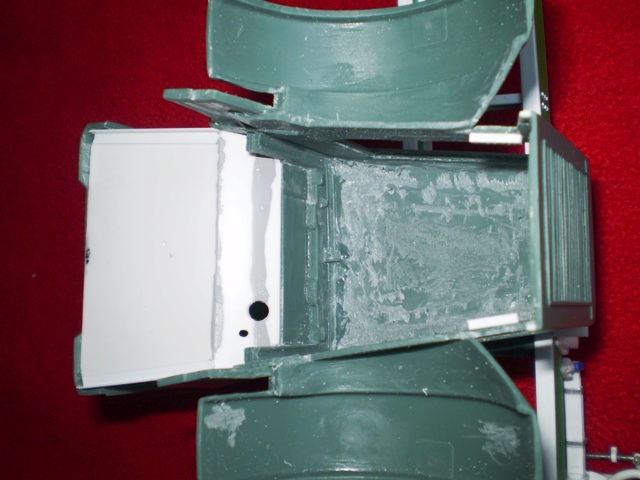
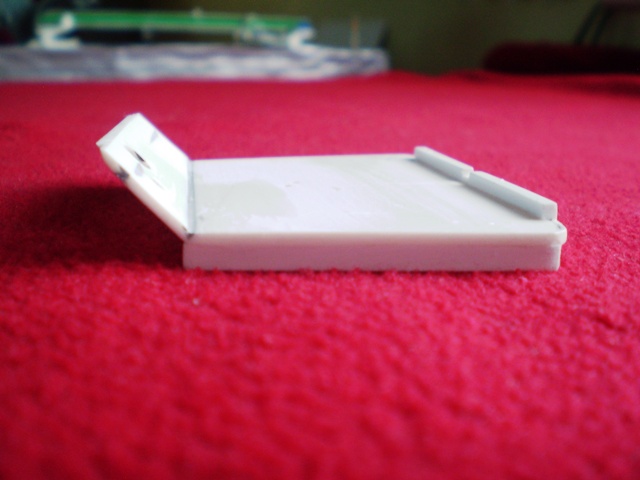
Thank you very much for your help, friends. The rear suspension is just point-glued to the frame and will be replaced with either better version of Hendrickson walking beam or a completely different system. The clutch pedal... I was thinking of this arrangement. I like it because it´s different from the 359 kit offer. But I am not sure if it isn´t a modern replacement because the truck in the pic might have undergo a restoration. I also don´t like the tall fancy seats that came with the resin set. I was considering a complete replacement but look what I came up with at the end. I replaced the floor because the resin piece was twisted and I was too lazy to fix it. Also the original floor had the front part angled only on the inside. The bottom side was straight all the way rear to front. So, this is my floor made of plastic sheet. Since I made this, I also had to cut off part of the fire wall so that the new floor would match. As you can see, the cab still has round fenders. I won´t cut them off until I have the flat fenders ready. I wanted to make new seats but to make things quicker I stole this idea from another of my model building buddies (with his kind permission). I shortened the back of the passenger seat and raised the base a bit because it seemed to sit too low on the floor. I kept the driver´s seat tall and even added air spring to it. Like Jesse said, a desirable upgrade for the driver. The idea of rubber block suspension is worth considering. I have found some pictures but I don´t know how much the look changed over the years. Could this be the thing?
-
Thank you Tim. Would you have some more info about the truck, like what kind of suspension the model L is supposed to have, if a twin-shift would be okay or what engine would be correct?
-
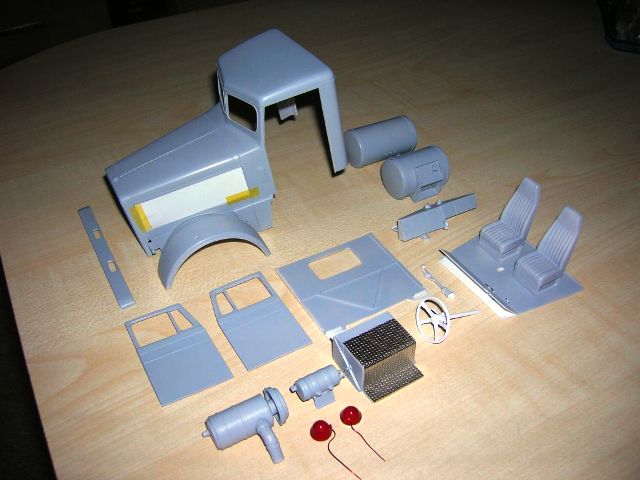
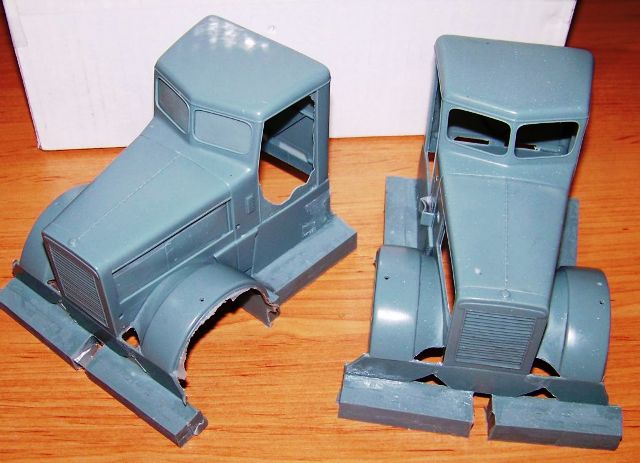
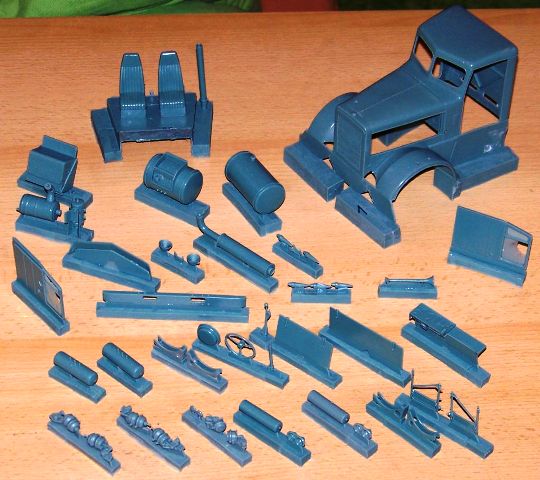
Thanks everyone. Here is how the cab I use came into being. Even though there are some cast 351 cabs available in the world, a friend of mine and local modeler decided to make his own master. He modified the Revell - Monogram Peterbilt 359 cab and turned it into the 281 / 351 cab. With the cab shell, the einterior parts came along and some of the frame parts as well. A 20 pcs batch (if I remember that correctly) of cast cabs and other goodies came into being the other day and this is how the fresh delivery looked like. The whole batch is sold out at the moment. Most of the transkits ended up in local modelers hands. Only one left for the author himself. Next time I will be back with my build.
-
Transmission for twin stick shifting
truckabilly replied to truckabilly's topic in General Automotive Talk (Trucks and Cars)
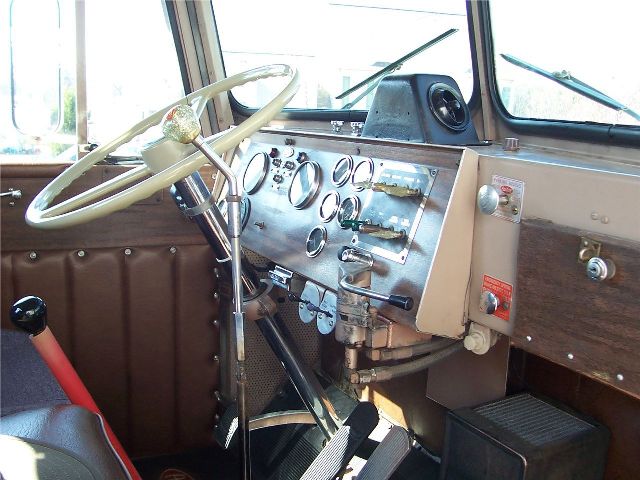
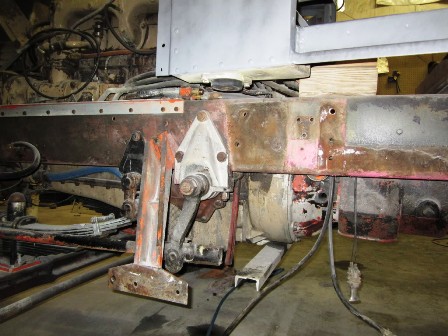
Thanks a lot, Richard, for your answer. Now I have another issue to solve. Peterbilt 351 could have the steering box located inside the frame or outside. My version has the inboard box but... I have never seen one. I have no idea what lines should be connected with it or if I need a ram also to provide the power steering. The set up in the picture is the one that inspired my model. Can somebody explain for me how these old systems worked, please?
-
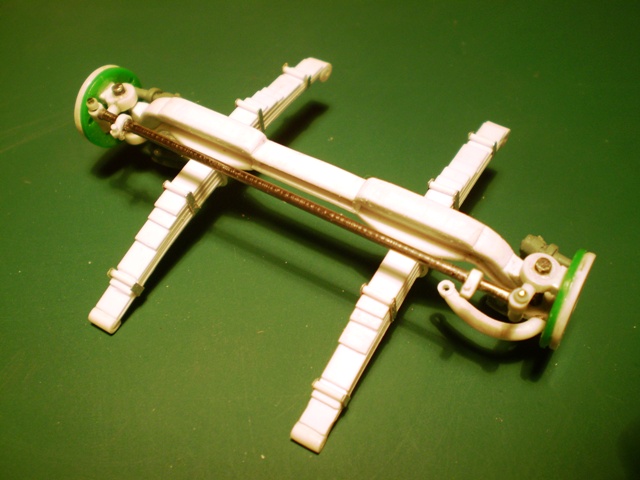
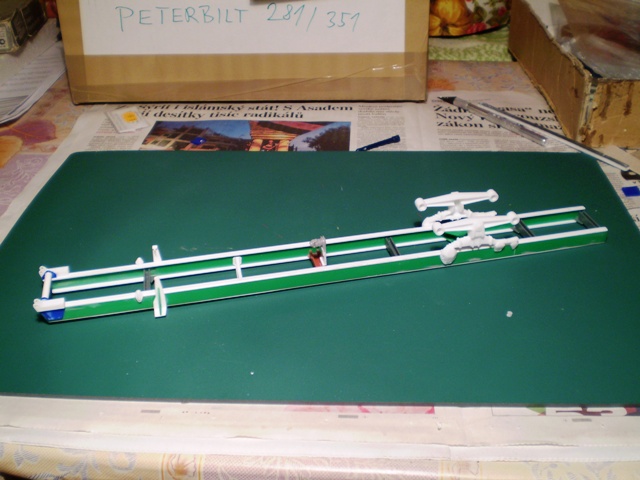
I never thought I would build something as old as this - a logging truck of 1950´s. But I watched the birth of brand-new cab for Peterbilt 281/351 and was so impressed that I couldn´t resist. I bought two transkits straight from the author. I started working on one and I would like to have this or that As I do not know much about logging trucks of that era I will appreciate every information, every advice, every help that I can get from you. If you see me going wrong direction, please, don´t hesitate to tell me so and get me back on the right track. This is the first big rig that I started out with frame and not the engine. It is also my first attempt to work with resin material at such an extent. But first, the good old styrene. I said I started with frame but that´s not quite correct. Actually, I started with the front axle. I didn´t have any spare one and so I copied the RoG Peterbilt 359 axle using styrene sheets and channels. Believe it or not but the axle alone, without springs, consists of some 30 parts. The brake chambers are part of the cast set. The rest is scratch built. So is the frame. The rails are doubled for better toughness. The cross members is a mixture of resin cast, the original RoG parts and scratch built ones. The rear suspension is attached just temporarily. I will rebuild it if I don´t get better one somehow. I hope this kind of suspension is okay for logging truck. What do you think? I added some bolts cut from Plastruct hexagonal rod. The job is not finished yet but I think I will put them only on the outside. Next time I will show you the birth of the cab using the author´s photos. And the modification that I have done to it. Till then I would like to know if a non turbo engine is okay for logging truck of 1950´s and if I can use two gear boxes for a twin- stick shifting. I would really appreciate this information.
-
Peterbilt 379 with D.T.U.
truckabilly replied to truckabilly's topic in Model Trucks: Big Rigs and Heavy Equipment
Thank you all very much for your kind words. I enjoyed every minute spent at my work bench with this build. There´s a lot of things on the model that I could have done better but that might easily change in never ending story. And new ideas for another builds are knocking on my door already. I just placed the model in my show-case. And it still doesn´t have the front mud flaps..... oh, what a shame! Thank you for your interest and support. It helps a lot and gives me the will to bring it home. Thanks a lot. -
KW C500 OIL FIELD
truckabilly replied to Swamp Dog's topic in WIP: Model Trucks: Big Rigs and Heavy Equipment
Attractive and exotic truck to me. I hope I will learn a few tricks. An oil field truck is one of my dream models for the future. And this looks like the one I should closely watch. -
KW W900 Aerodyne Snap tite 1:25
truckabilly replied to Pavel A.'s topic in WIP: Model Trucks: Big Rigs and Heavy Equipment
Pavel, You are doing incredible job on this snap kit. It looks very nice and more expensive than it is. I think I might steal some ideas from you when I build mine. I will be watching the progress closely. Greetings to Slovakia -
If I want to build a model truck with two shifting levers in the cab, what transmission do I need? Are two separate gear boxes in the frame or are they joined together in one block? I´m talking about 1950´s Peterbilt. Can somebody tell me what transmission I should look for? A picture would help a lot. Thanks in advance. Jarda
-
A Kenworth W900 daycab tri axle
truckabilly replied to marcay's topic in WIP: Model Trucks: Big Rigs and Heavy Equipment
Nice work so far. I like 3 drives chassis. Just one note... The can above the front axle is power steering reservoir. No line should go from the can to the brake chamber. Maybe it is just the angle of the picture but it looks like a green line is running from the bottom of the can to the brake chamber. One line should go from the can to steering box, the other from the steering box to the pump located on the engine and the last line should go from the pump to the can. At least I belive it shoud work this way. Correct me if I´m wrong. Best Regards -
Long Hauler 379 - 119
truckabilly replied to truckabilly's topic in WIP: Model Trucks: Big Rigs and Heavy Equipment
You´re welcome. Thanks all of you for your comments. -
I don´t think I can find the words to express my admiration for this build. Awesome realism. Incredible work with modeling tools, painting and camera. Great combination of skills and talent.