truckabilly
-
Posts
789 -
Joined
-
Last visited
Content Type
Profiles
Forums
Events
Gallery
Everything posted by truckabilly
-

CLYDES II
truckabilly replied to truckabilly's topic in WIP: Model Trucks: Big Rigs and Heavy Equipment
Now I am really hesitating... should I carry on with this build or give it up? I finally sprayed the major parts of the truck using GSI colours "C" line. The shade appears much lighter on the pics than it actually is. The real truck looks pretty dark on some photographs and then quite light on some others. I tried to come up with something in the middle and I think I achieved that. But the colour reveals each and every fault, each and every scratch and imperfection. The stripe on top of the hood looks really bad. You know that I extended the hood twice. I think it´s okay on the skin, but I just could not align the stripe and every trial to make it look better ended up in worst and worst condition. Well, here I am, kinda helpless... Jarda -
How long does it take?
truckabilly replied to ARTEMIS1759's topic in WIP: Model Trucks: Big Rigs and Heavy Equipment
I asked the same question when I spoke to a much more experienced truck model builder then me. He said, it is like learning a foreign language. If you want to have result then it takes an hour a day at least. I think, it is very individual. Even though I spend long hours at the bench, my progress is very slow. First, I don´t make plans for my projects. I make decisions on the go. And I make a lot of mistakes too. Sometimes it´s one step forward and two steps back. Even if I want to build a stock box model, there is always a detail here and there that I modify or add something that the kit omitted. And with the quality of some of the old kits I have to clean each and every part. I hate all kinds of seams and grooves and pin marks showing through on a finished model. I try to take good care of all this and it takes a lot of time. If you want to be fast and make your model collection grow in a rapid pace, then you shoud not bother with superdetailng. But some guys are able to make well detailed models with a percfect painting job / weathering and still have breath-taking building tempo. Like I said, it is very individual. -
My first Kenworth W 900
truckabilly replied to greymack's topic in WIP: Model Trucks: Big Rigs and Heavy Equipment
Sweet little truck. The backdrop is nice too. -
CLYDES II
truckabilly replied to truckabilly's topic in WIP: Model Trucks: Big Rigs and Heavy Equipment
Hello, I am working on the air ride seats. I reshaped the Revell´s seats a bit and made a new springing mechanism. It is not the exact type that Clydes II has but it is quite common in Peterbilts, if I can judge. Anyway, it is the best I could come up with. These pics show the progress. More work is yet to be done. Jarda -
Kenworth T 600 rebuild
truckabilly replied to truckabilly's topic in WIP: Model Trucks: Big Rigs and Heavy Equipment
Wow, thank you for the info. I didn´t know that. I have seen only pictures with some of the newer engines installed in T600. One of the typical features I spotted on these pictures is the intercooler located in front of the radiator. But this old NTC is equipped with an aftercooler. I hope my engine and radiator set up is alright. No intercooler, no big tubes running to the sides of radiator. I would appreciate, Scott, if you could confirm this to me. I do not see any logic in using both the intercooler and the aftercooler on the same engine. But I am not a mechanic. Jarda -
Kenworth T 600 rebuild
truckabilly replied to truckabilly's topic in WIP: Model Trucks: Big Rigs and Heavy Equipment
Another interior item that I added is the 3pt. seat belts. I made them of a cigarette paper and the buckles are made of a plastic scrap. I also changed the steering wheel spokes. That´s all for now. Thanks for looking. -
Kenworth T 600 rebuild
truckabilly replied to truckabilly's topic in WIP: Model Trucks: Big Rigs and Heavy Equipment
I dug out the interior and added the headliner with the drop shades and FM and CB radios -
Kenworth T 600 rebuild
truckabilly replied to truckabilly's topic in WIP: Model Trucks: Big Rigs and Heavy Equipment
I added the amber lights to the bumper corners. I don´t know if they are the turn signal lights or the width clearance lights. One of the parts that are completely wrong in the kit is the firewall. I threw it in the trash and made the one of my own with the windshield washer reservoir and the "box" on the other side. I don´t know what it is. A cab heater? -
Kenworth T 600 rebuild
truckabilly replied to truckabilly's topic in WIP: Model Trucks: Big Rigs and Heavy Equipment
My old KW brochure said that the exhaust pipes run above the frame. I hope that it is the case of T 600 too because I have made that change. Here is the old under frame tube and the new above frame tube at the same pic. The line running from the tube is the pyrometer sensor wire. Here is the exhaust tube painted and mounted to the frame. -
Kenworth T 600 rebuild
truckabilly replied to truckabilly's topic in WIP: Model Trucks: Big Rigs and Heavy Equipment
The cab steps / tank coveres looked very strange to me. It wasn´t like anything I´ve seen on the T 600. I tried to make the steps of my own but I never did such a thing and didn´t know how. But I have built some paper models before. So I went in that fashion and here is how I made my steps. Here you can see the new steps in comparison with the old ones. -
Kenworth T 600 rebuild
truckabilly replied to truckabilly's topic in WIP: Model Trucks: Big Rigs and Heavy Equipment
Thank you all for your comments. Now I would like to show you some of the parts that I scratchbuilt or modified. Since I moved the air filter from its original location, I wondered what the real truck has in that place. And I found the air dryer. Here is mine. I had to modify the tube running from air filter to turbocharger. I also changed the air tanks. Those in the kit were much too short and thick for a KW. The kit mirrors lack some of the brackets. I used the the mirrors but made the brackets of my own. -
Kenworth T 600 rebuild
truckabilly replied to truckabilly's topic in WIP: Model Trucks: Big Rigs and Heavy Equipment
Some more pics: -
Kenworth T 600 rebuild
truckabilly replied to truckabilly's topic in WIP: Model Trucks: Big Rigs and Heavy Equipment
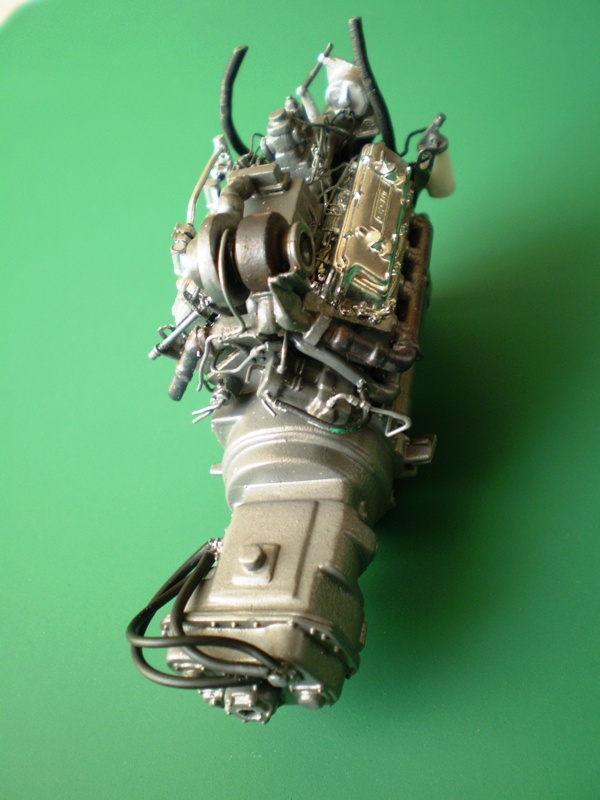
The stock box engine - twin turbo Cummins - is not a correct engine for T 600 but I left it in the truck. I didn´t have any other to replace it. I just repaired the whole turbo set up and added some details to the engine. Then I sprayed a new paint. One of the things that puzzeled me was the air filter location. The kit had the filter located on the RH frame rail just behind the bumper. But all the pictures of T 600 engine compartment showed the filter sitting on top of the engine. So, I scratchbuilt a new filter including the bracket and placed it on the engine. -
Kenworth T 600 rebuild
truckabilly posted a topic in WIP: Model Trucks: Big Rigs and Heavy Equipment
This model started its life as a pure stock box build in the late 1980´s or early 1990´s. It is my second truck model and the first model of American truck. My modelling know-how and skills were very poor then and my reference material next to none. No PC, no internet, no real truck around. Just a few pictures in the old KW brochure that I requested a long long time ago. As the time was passing by my knowledge of American trucks improved with a great help of internet. I looked at my old T 600 model and realised how many things were wrong. Originally I just wanted to improve the looks of some parts like the engine, the fuel tanks and the smoke stacks. But as I had the model in my hands so many times, things started to fall off. That´s when the idea of a more complex rebuild came across my mind. There was one important limitation that I set at the begining. The paint scheme on the cab and sleeper must be preserved. The whole paint job was done for me by the father of my friend and work fellow. Both are skilled and experienced modellers and I asked them for this favour. I was the one who chose the paint scheme. The inspiration came from the old KW brochure. But the whole painting is their job, not mine. Unfortunatelly, I never took a pic of the original build. It was partly dismantled already when I took some. This was the starting point. I changed some of the parts and their arrangement but the basic set up remained the same. Will show everything bit by bit. Jarda
-
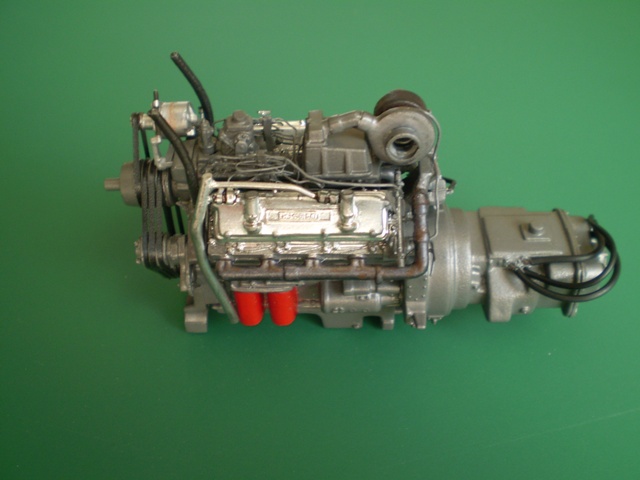
Very nice engine and tranny. The decals make it look cool. I spy two eyes (loops or whatever you call it) for hanging the engine in case of repair or replacement. The ones just behind the cylinder rows. I assume there should be one in front too. The closest thing to this is the tab behind the fan wheel. But there is no hole in it, so.... Just wondering, that´s all. Jarda
-
Stepp´s CAN DO
truckabilly replied to truckabilly's topic in WIP: Model Trucks: Big Rigs and Heavy Equipment
The bottom side of the truck: And the whole build: Jarda -
Stepp´s CAN DO
truckabilly replied to truckabilly's topic in WIP: Model Trucks: Big Rigs and Heavy Equipment
A few more details: -
Stepp´s CAN DO
truckabilly replied to truckabilly's topic in WIP: Model Trucks: Big Rigs and Heavy Equipment
Here is a few more pics of the wrecker. I took them in a room when the sky was grey. I am not satisfied with the pictures but do not have any other yet. Will have to wait for better weather to take some outdoor pics. -
CLYDES II
truckabilly replied to truckabilly's topic in WIP: Model Trucks: Big Rigs and Heavy Equipment
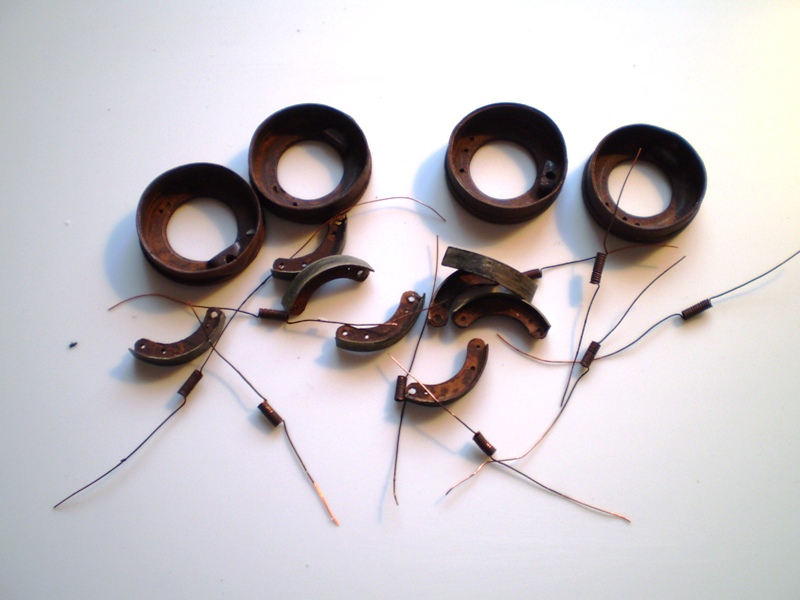
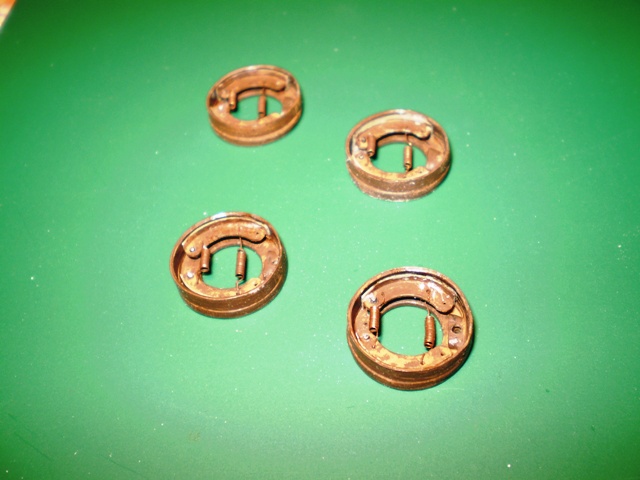
Again, I couldn´t resist and made me the brake details to rear axles. Not 100% accurate but still better than empty wheels. I used only a junk plastic sheets and a wire. The brake drums are made of a plastic stripe. I coudn´t find any tube. Jarda
-
I do not know if I break any commercial rules of the forum with this. If so, I appologize to administrators and please, get the thread off. I just wanted to let you all know that there are some photo etched parts for Eurepean and American truck models available from my fellow country men. They are new to bussiness but I think the quality is fairly good. Check their catalogue at http://www.liaznavzd...edtrans/ctm.php They also sell through Model Maker Shop http://www.modelmakershop.com/
-
Wow, that´s an eye-catcher! I like it very much. Jarda
-
Snap 359-in Progress
truckabilly replied to SpreadAxle's topic in WIP: Model Trucks: Big Rigs and Heavy Equipment
It is shaping up great. I like the color & stripes combination. And the engine is awesome. Jarda -
CLYDES II
truckabilly replied to truckabilly's topic in WIP: Model Trucks: Big Rigs and Heavy Equipment
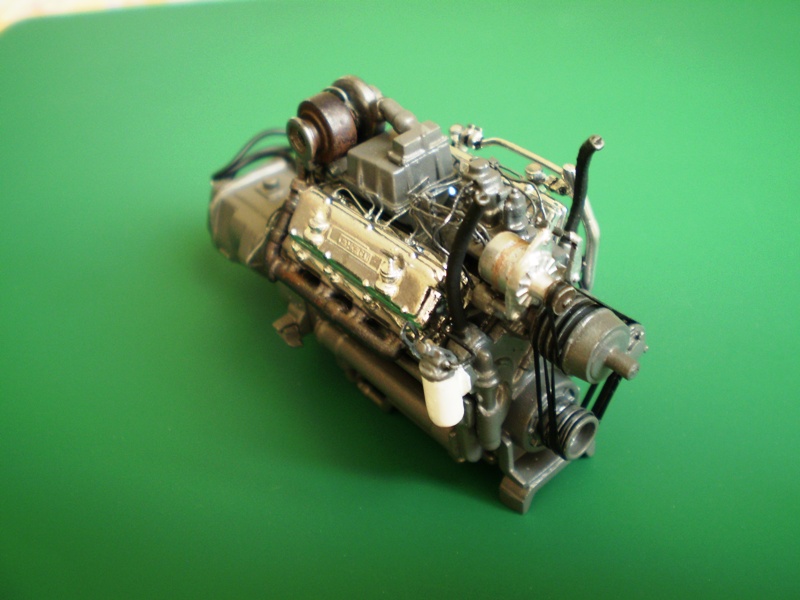
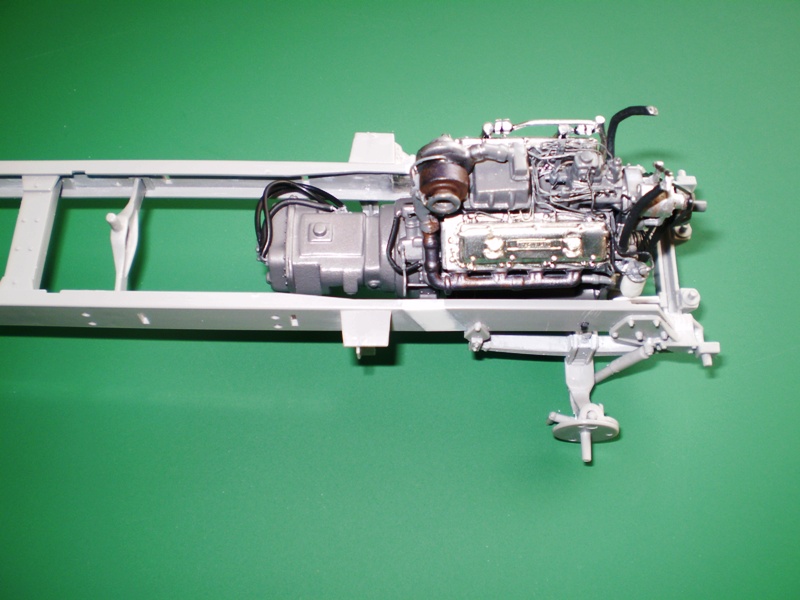
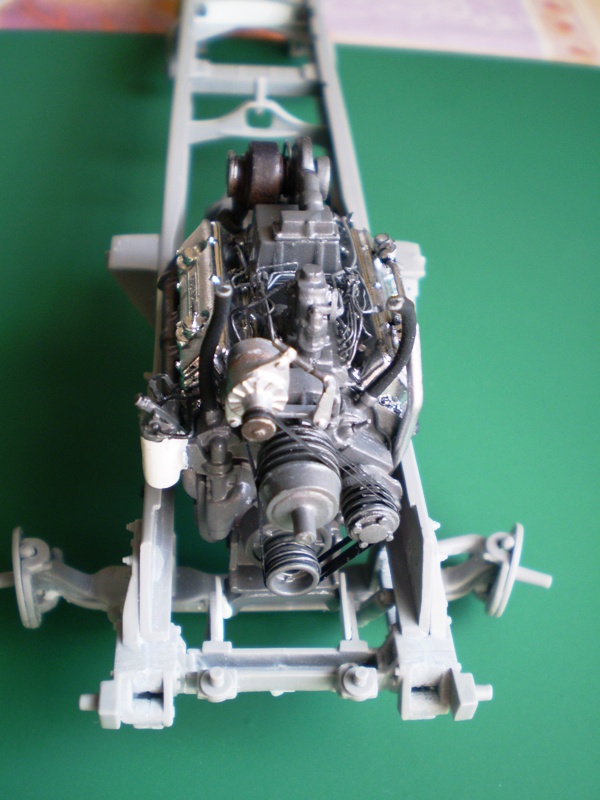
Hello there, I finished the engine. Still not positive that the engine in Bill Signs unit is of the same color as the truck. But it is painted already. I used GSI 28 lightened by a drop or two of white. I added the plumbing and reworked the belts and puleys. Not a 100 % accurate but it is my first try. Here is a few mock-up shots of the engine in the frame. Still some colour imperfections but they will be fixed. Till next round Jarda
-
DON'S tow..Pete
truckabilly replied to bsoder's topic in WIP: Model Trucks: Big Rigs and Heavy Equipment
Looks very nice in yellow. -
I like both pulley systems, they make nice details.