truckabilly
-
Posts
789 -
Joined
-
Last visited
Content Type
Profiles
Forums
Events
Gallery
Everything posted by truckabilly
-
 Another one of your beatiful trucks. I like them all and I am glad you are back. Jarda
 -
Pro Star and 53 ft Great Dane reefer
truckabilly replied to Dave Metzner's topic in Truck Kit News & Reviews
Cool thing. I am happy that someone takes care of the new stuff. Doesn´t matter if I do like the real truck or not... and I do, by the way. But the model world sure needs some fresh air. Lonestar and Prostar are welcome items. Let them roll, Dave. Let them roll. -
MAN Trucks in the USA?
truckabilly replied to RDean58's topic in WIP: Model Trucks: Big Rigs and Heavy Equipment
I also think that the over engineered design of European trucks is the reason why the North American market do not accept them. More complicated construction means higher costs and more room for all kinds of malfunction. The basic structure of North American trucks did not change that much over the decades. It is no problem to meet full service trucks produced in 1960´s or even older on American highways. A truck that is over 8 years in Europe is suspicious for the highway patrol. The way the North American trucks are ingineered is good for economy. It isn´t that costly, the parts are usually interchangable. The European trucks have too many changes during their production period. You may have two European trucks of the same make and model and their parts still wouldn´t fit. Just because of a different year of production or just a different place of production. That´s insane. The European truck makers learned a lot of tricks to keep the fuel consumption low. But what´s the use if the production costs are so high? Something works well in America, something else works well in Europe. I am not saying that American trucks are better in general. I just think that they are cleverly designed for their own territory. And in my eyes... they look better. Jarda -
Awesome builds again. Your weathering skills are top class. The trailer is cool. Jarda
-
CLYDES II
truckabilly replied to truckabilly's topic in WIP: Model Trucks: Big Rigs and Heavy Equipment
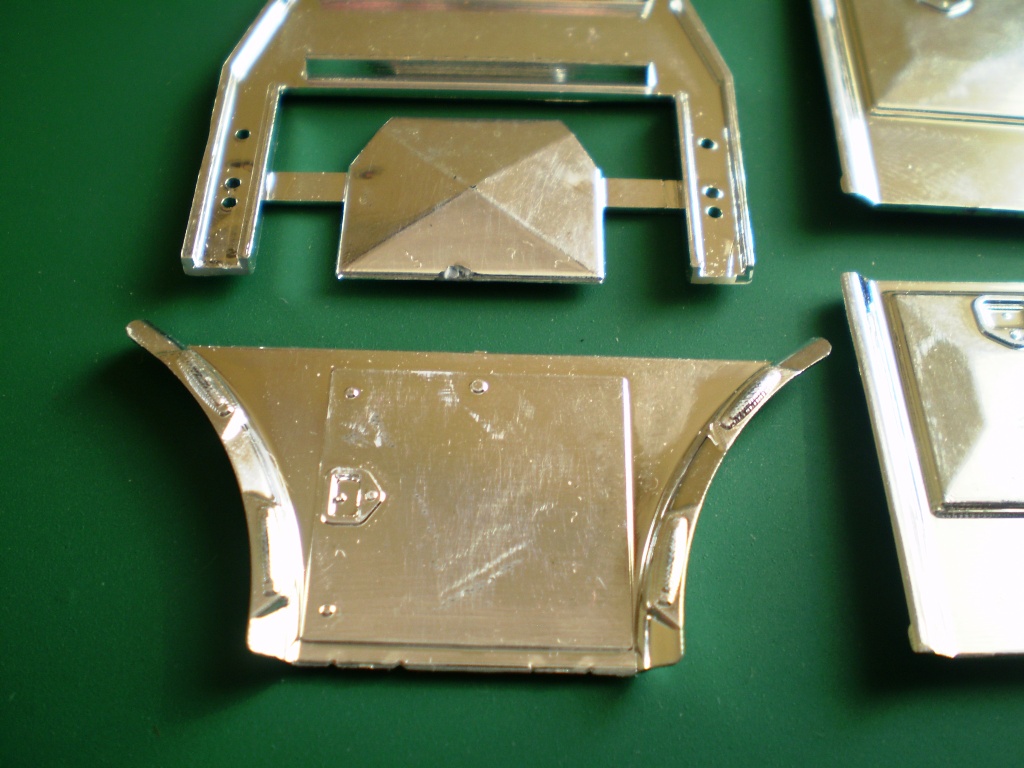
There is a thread on this forum about a bad quality of the reissued Bill Signs chrome parts. I thought mine were okay but then I found this. Even though the trees were wrapped in the bags the surface is damaged. The mirror brackets have excesive plastic around and it will leave a bad mark after I cut it off. Also, the mirrors have a different set up from the real unit 402 of the Bill Signs fleet. So, it´s just a little more work with a knife and glue and alclad paint. That´s what model building is about, isn´t it?
-
Aero Kit Pete
truckabilly replied to truckabilly's topic in WIP: Model Trucks: Big Rigs and Heavy Equipment
Thank you guys for your kind words. I sprayed a few layers of clear coat and this is how it looks now. Not very shiny but I didn´t even want it that way. But still I think I could have done better. The skin isn´t very smooth. Is it possible to polish clear coat?
-
Kenworth T 600 rebuild
truckabilly replied to truckabilly's topic in WIP: Model Trucks: Big Rigs and Heavy Equipment
Somehow I left this build sleep for a while. No wonder since the kit´s name is "Big Sleeper". Probably nothing to do with Raymond Chandler´s book so they should have named it "Big Bunk" or something. Anyway, I took the model outside the other day and took some pictures. Hope you like it. -
Aero Kit Pete
truckabilly replied to truckabilly's topic in WIP: Model Trucks: Big Rigs and Heavy Equipment
My way of making the seat belts is simple. The belt is cut off a cigarette paper, two layers glued by a white disperse glue for paper and painted black or whatever colour the belt might be. The buckles are cut off a junk plastic. Then there is a wire and a bit of a photoetched rim to complete the buckle I have never seen the seat belts of the US trucks in a great detail. The design may be more of an European car. The pictures show the things needed and the work flow. I used brush for painting for it was quick. But the airbrush would probably make a better result. I am glad if it you find this tutorial useful. -
and more to building
truckabilly replied to jacobus's topic in WIP: Model Trucks: Big Rigs and Heavy Equipment
Very impressive collection. Congrats. -
Aero Kit Pete
truckabilly replied to truckabilly's topic in WIP: Model Trucks: Big Rigs and Heavy Equipment
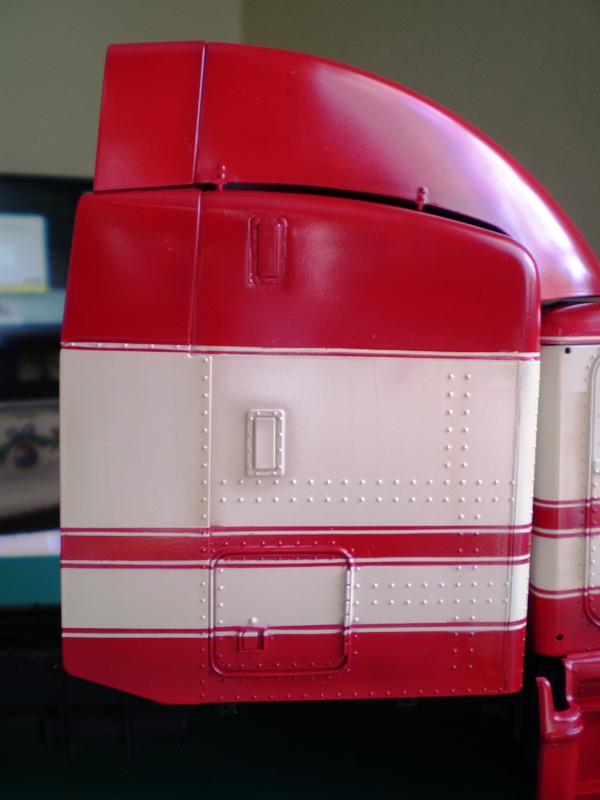
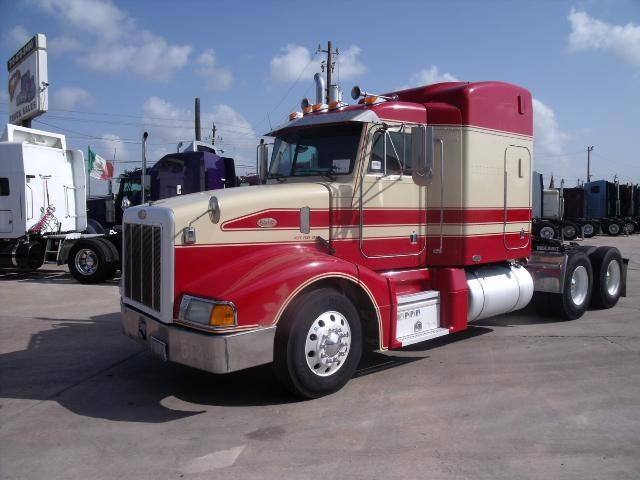
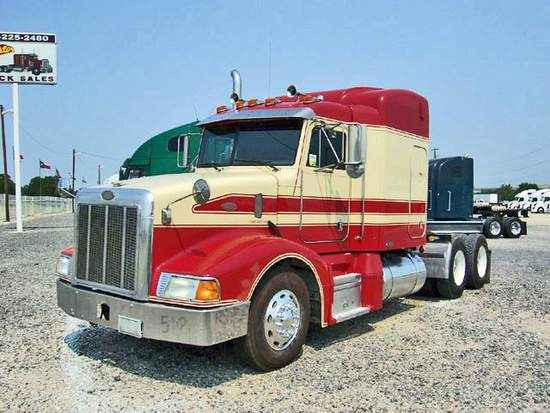
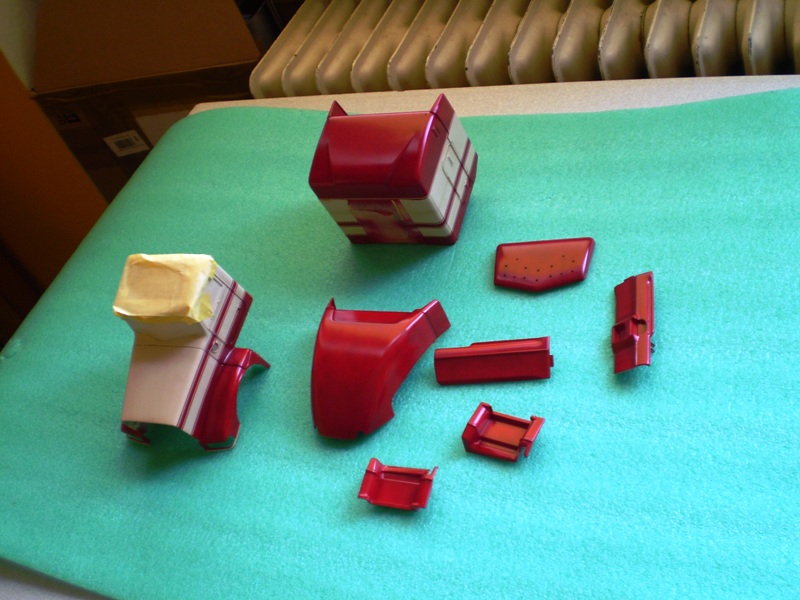
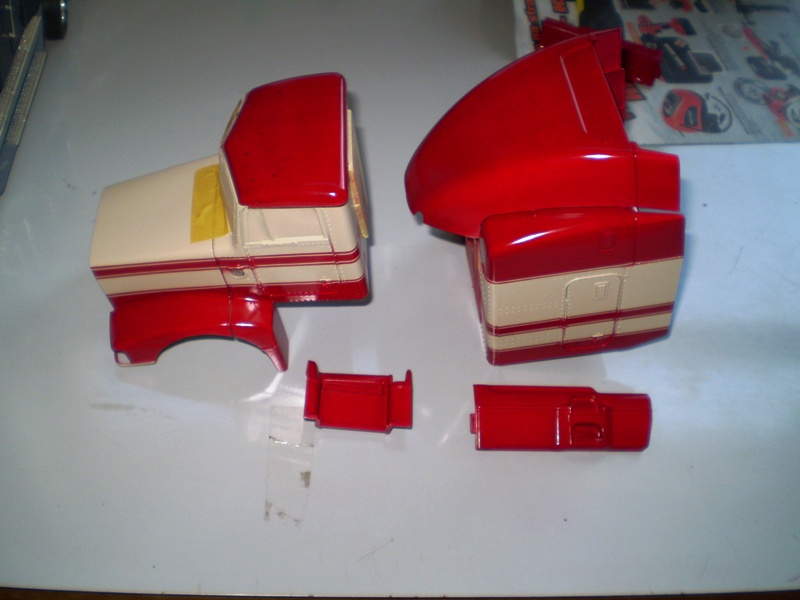
My inspiration came from these pics. The pattern is not exactly the same, the colors are not authentic. I used GSI semi gloss 45 for the cream and GSI gloss 100 for red.
-
Aero Kit Pete
truckabilly replied to truckabilly's topic in WIP: Model Trucks: Big Rigs and Heavy Equipment
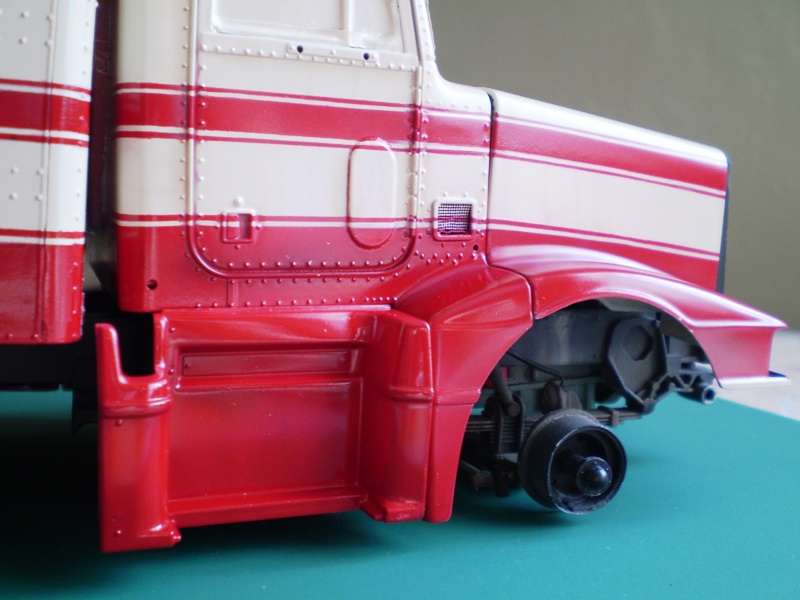
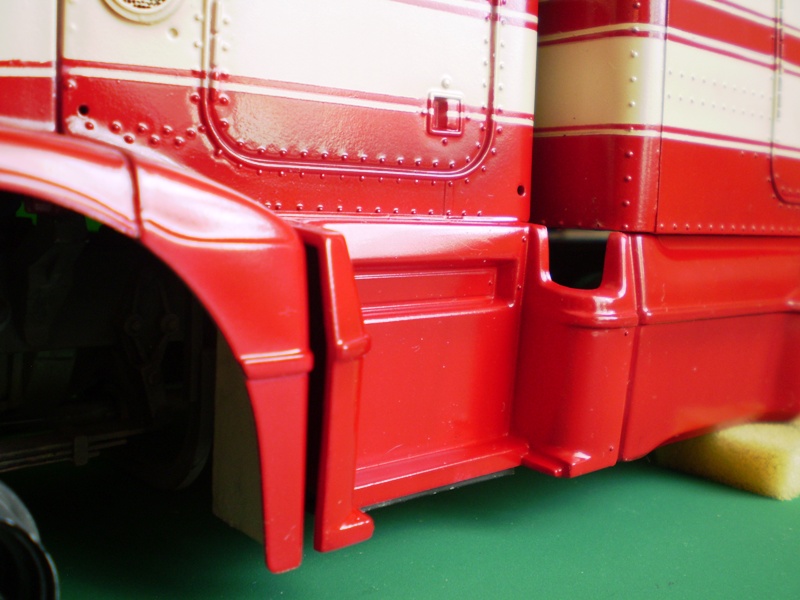
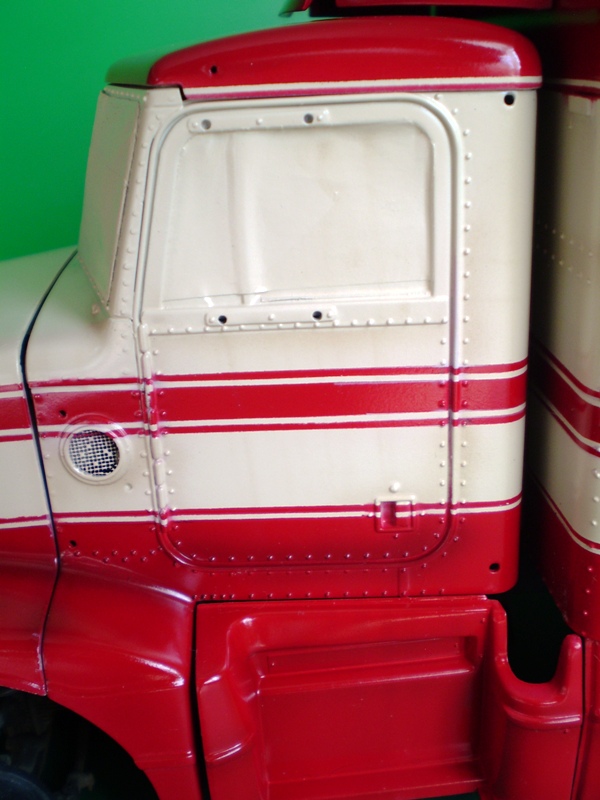
There is more work yet to be done on the on the paint scheme to call it finished. I have just a few pics for now. I took them right after the red stripes were sprayed. I took the cab and other parts to the local modelers meet last weekend. It was my first opportunity to use a real airbrush. The owner of the spray gun tought me how to use it and, in fact, it was him who painted the stripes for me. His paint job looks a lot better than mine. I will have more pictures after I spray the clear coat. This si how far I got with this project. From this moment on my posts will be in accordance with the progress.
-
My set of chrome trees is so - so. But it goes away with a touch of a finger. One of the front discs shows bare plastic in the middle. I won´t bother writing RoG for replacement. I always replace the chrome half-parts like the fuel tanks, the exhaust pipes and such with the alclad. The RoG were always cooperative when I needed any replacement. But this time I believe I can handle the problem by myself. But I found the tires far from being satisfactory. Not only they are slightly bigger than the rims but they almost fall apart too. I never encountered anything like this before but the tires seem to be made of layers and they separate willingly. I just finished putting them on the wheels and it was heluva job.
-
Aero Kit Pete
truckabilly replied to truckabilly's topic in WIP: Model Trucks: Big Rigs and Heavy Equipment
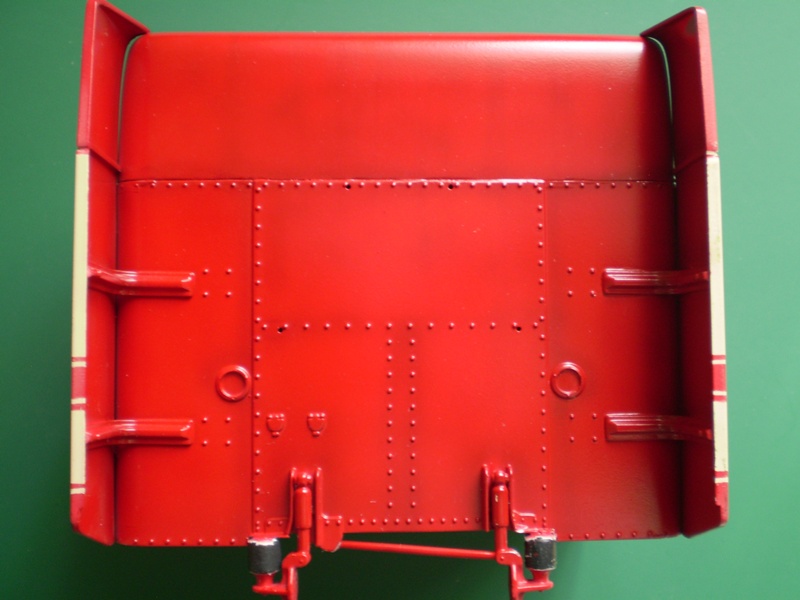
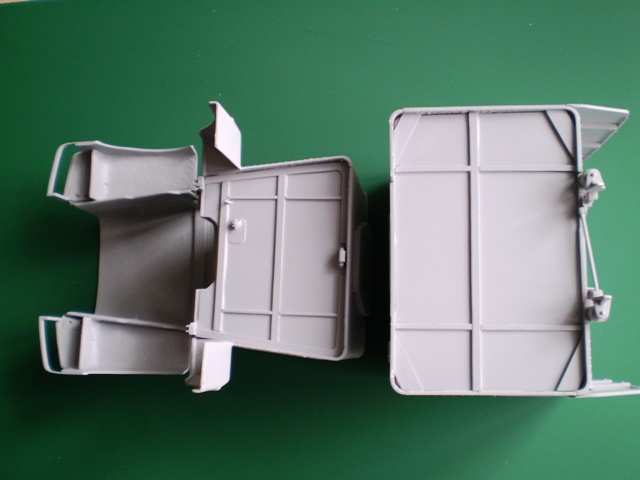
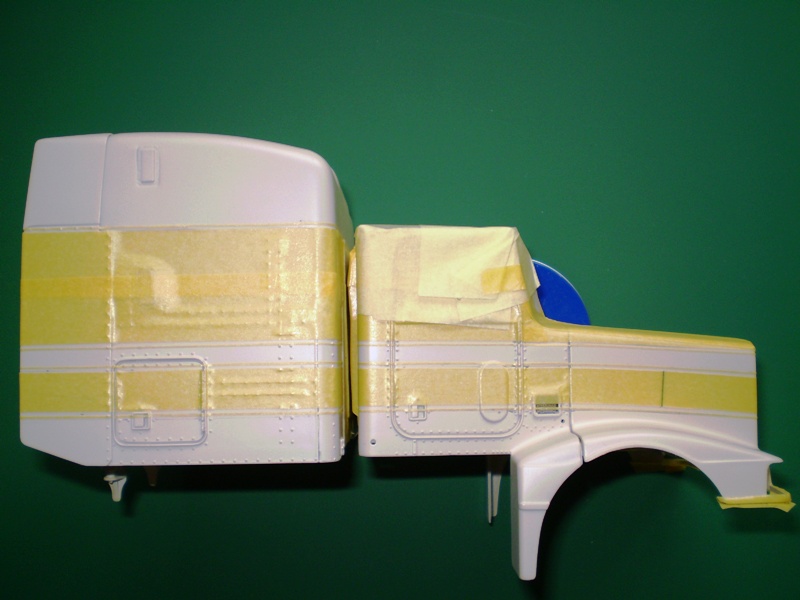
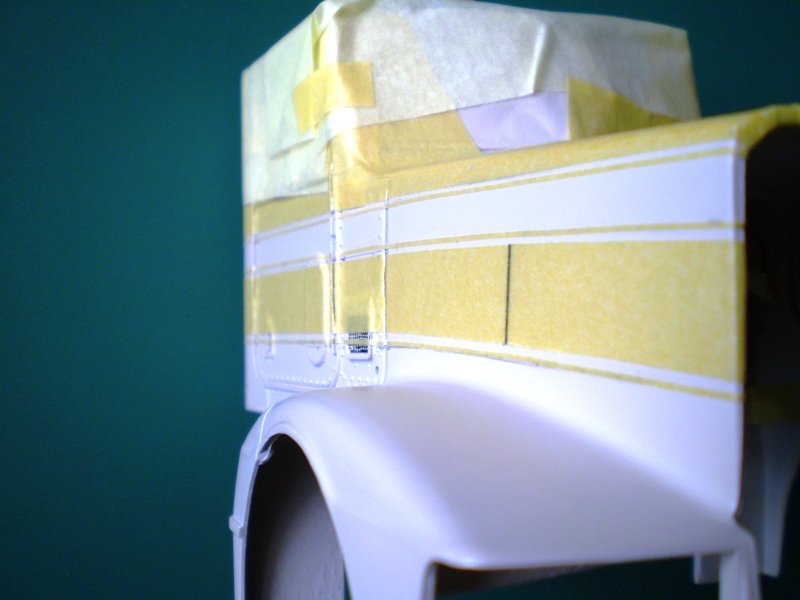
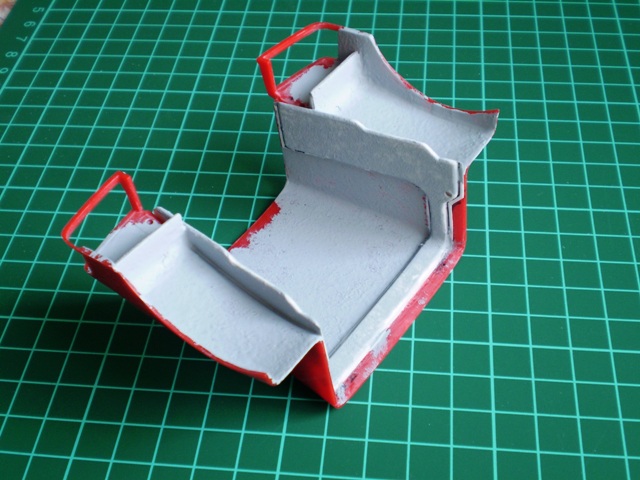
I said I do not know a lot about American trucks. Like the bottom side of the floor was just a pure guesswork. I do not know how the structure details look like and where they located. What lines and which way they go under the cab and sleeper. How the clutch pedal is connected with the clutch. Okay, I managed to get a few pics lately but I´d still like to find some more. Anyway, my floor´s bottom side is in the pic. Bandit1 likes my paint scheme. Here is the overall cream colour and masking for the red stripes. Will show them in the next round. Thanks for looking.
-
Aero Kit Pete
truckabilly replied to truckabilly's topic in WIP: Model Trucks: Big Rigs and Heavy Equipment
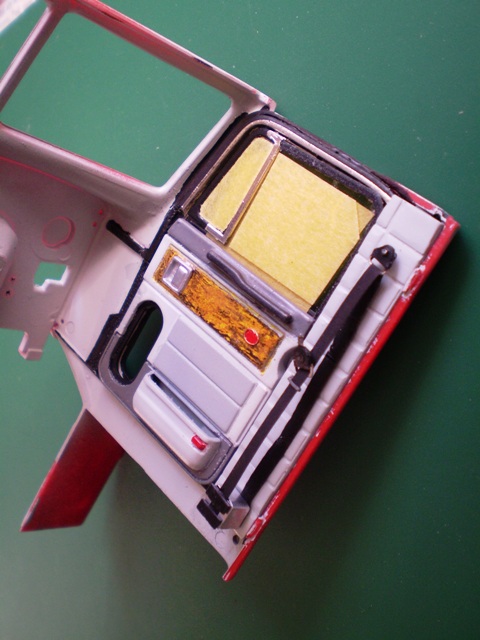
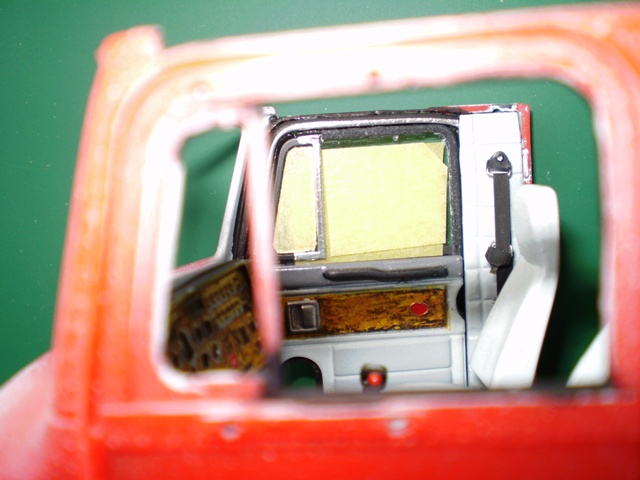
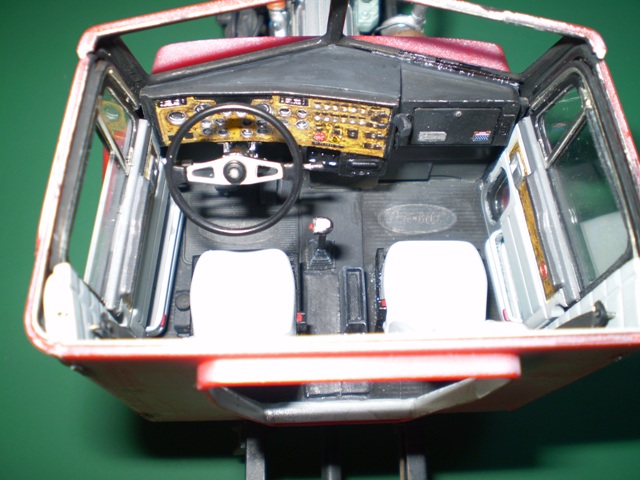
Thanks. All my knowledge about North American trucks comes from watching pics on the net. Truckpaper, Hank´s, Public Fotki, Flicker, Tim´s web sites, this here forum and some of the others... There is a whole lot of things that I do not know at all about North American trucks. But when I build a truck I try to get as much studying material as I can. Like the pictures of Peterbilt interiors showed me some different details than the kit offers. So, I made some minor modifications. The inner window rim is missing on the door. I made one. No seat belts in the kit? A stripe of cigarette paper (I ain´t no smoker, I swear) and plastic junk and there you go. Got a pair of 3 pt. seat belts. No equipment for communication? Oh, come on! Have you ever seen a semi in North America without a CB? Or radio? What do the guys of Revell or Italeri think? No carpets with the red oval logo on them? Find yourself a way to make them. I found me a poor man´s way. B&W copy of the decal logos on a regular paper cut out and glued onto self-made carpets. Painted, weathered... who can tell it isn´t embossed? That is my usual way of building a model.
-
Kenworth T600a
truckabilly replied to skulls's topic in WIP: Model Trucks: Big Rigs and Heavy Equipment
Wow, nice slide show. The sleeper interior is awesome. So is the rest of the model. Cool! -
Aero Kit Pete
truckabilly replied to truckabilly's topic in WIP: Model Trucks: Big Rigs and Heavy Equipment
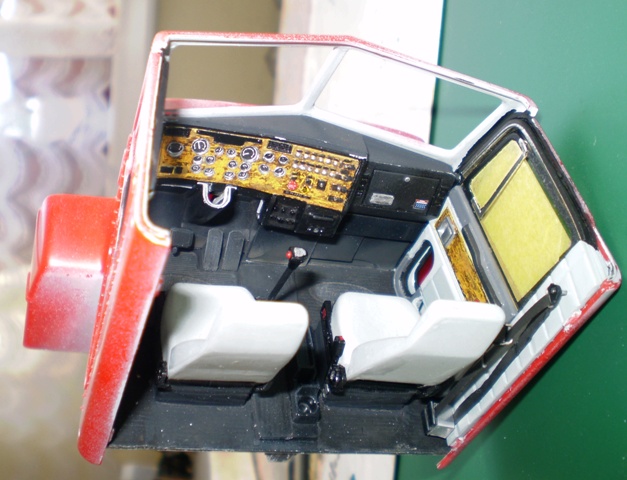
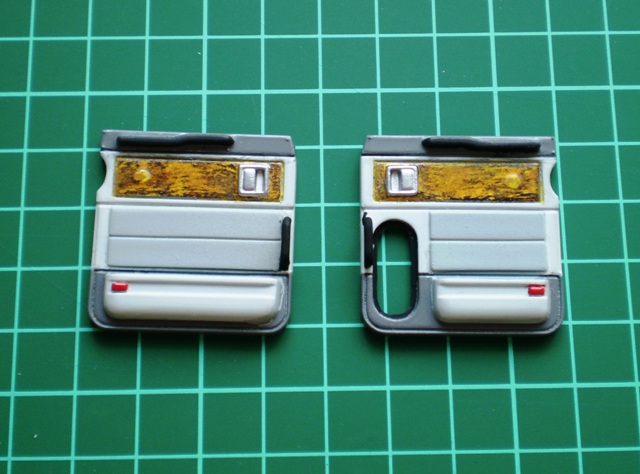
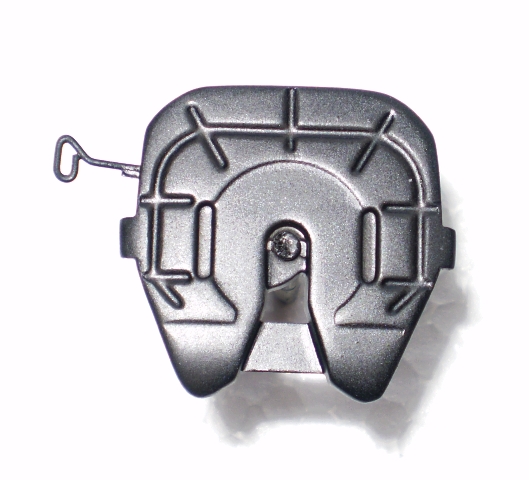
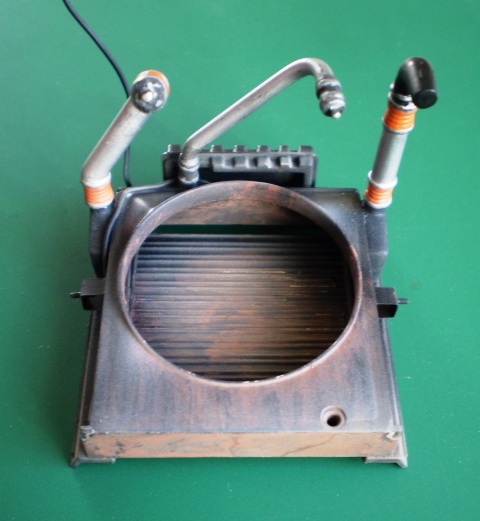
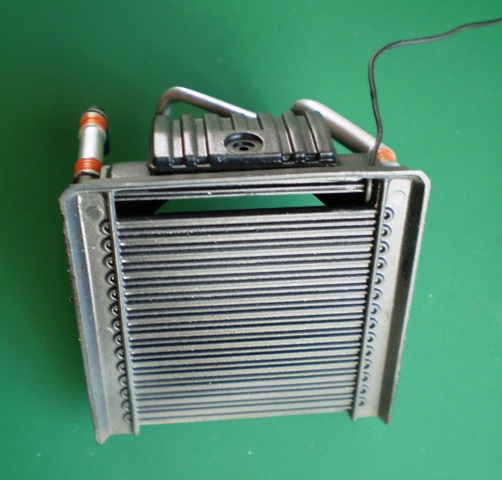
Here´s a few more pics of some parts that I modified. Even though the dashboard has a correct decal in the reissued kits, the embossed instruments remained wrong. I drilled out the holes in the correct places, cut the decal into pieces and attached the scales from behind. I painted the woodgrain with a help of a sponge on the insruments panel and the inside door panels too. I never liked the fifth wheel from Italeri, so I changed the shape and added the handle. I coiled a wire and replaced the molded one on the 5-th wheel support panel. The hood has inside details added. The radiator is weathered some details added.
-
Aero Kit Pete
truckabilly replied to truckabilly's topic in WIP: Model Trucks: Big Rigs and Heavy Equipment
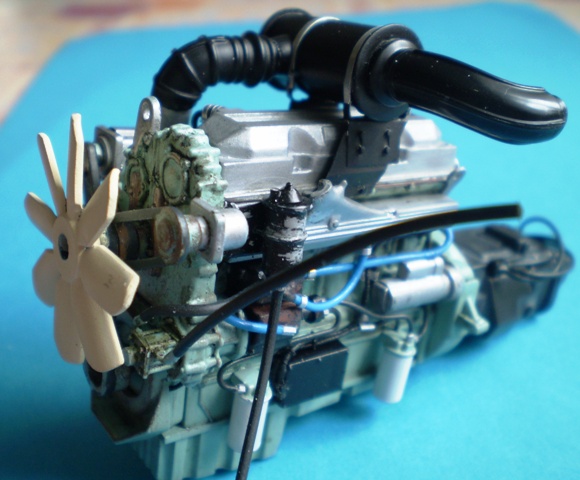
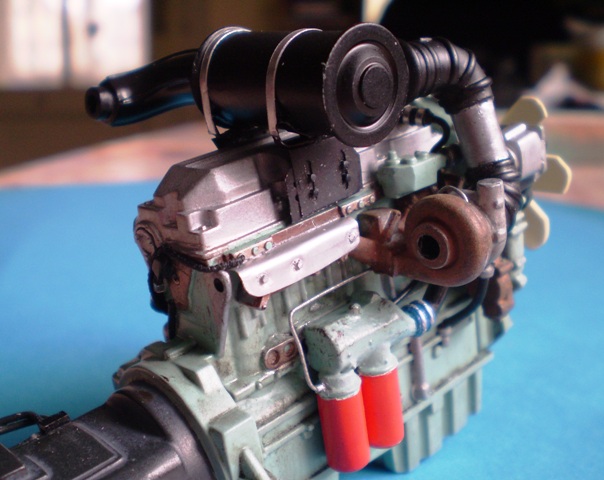
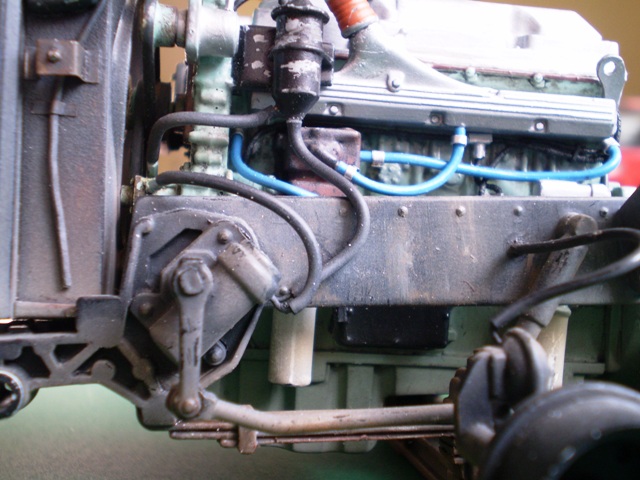
Thank you guys for your comments. I kept 60 series DD in mine. I built three 60 series engines at a time. Each a little bit different from the others. They are all painted with humbrol enamels and weathered with oils. I chose one of them and installed it in the 377 frame. I changed the air filter a bit and added the mounts that hold it on the top of the engine. The mounts are made of a beer can tin.
-
Aero Kit Pete
truckabilly replied to truckabilly's topic in WIP: Model Trucks: Big Rigs and Heavy Equipment
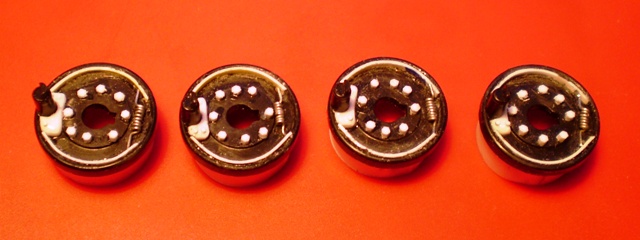
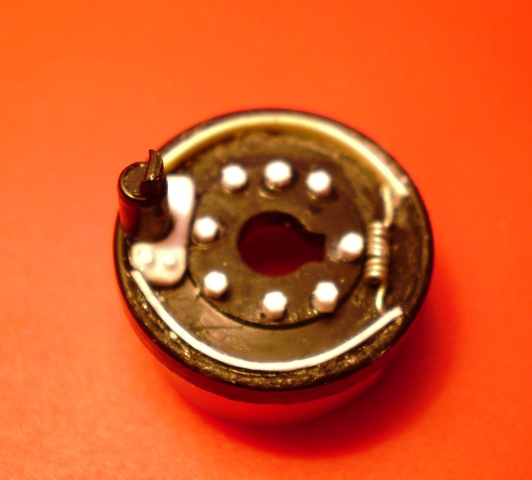
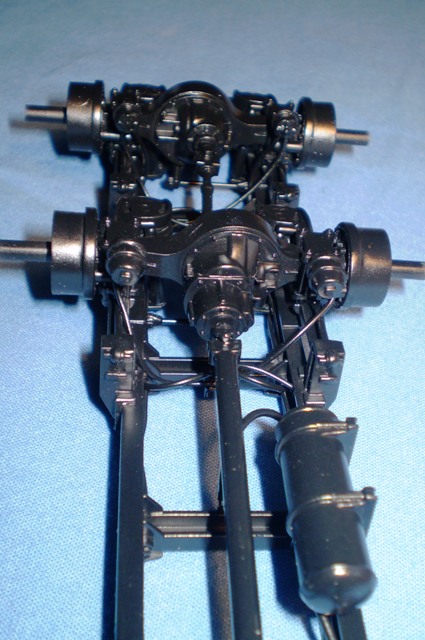
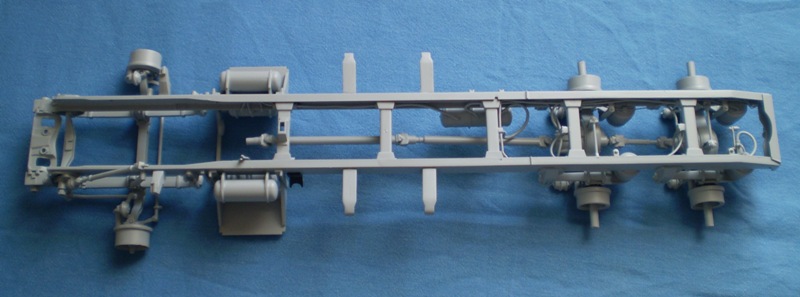
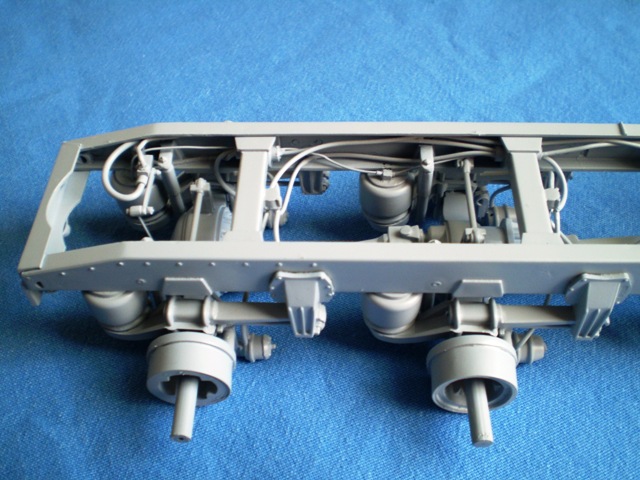
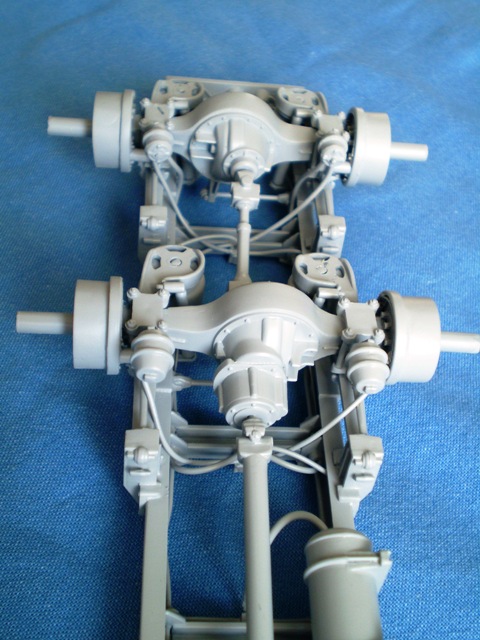
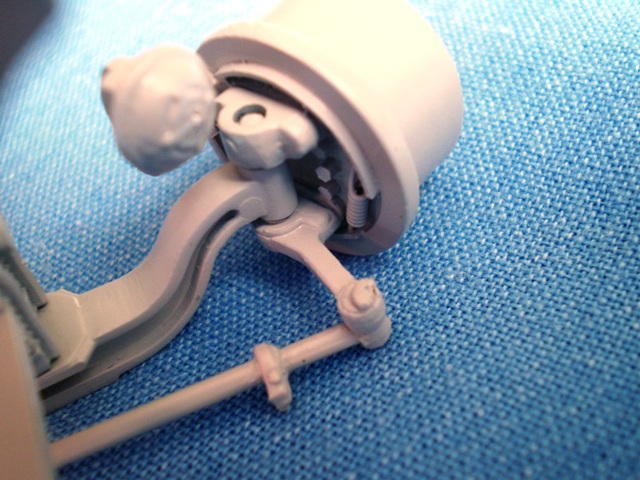
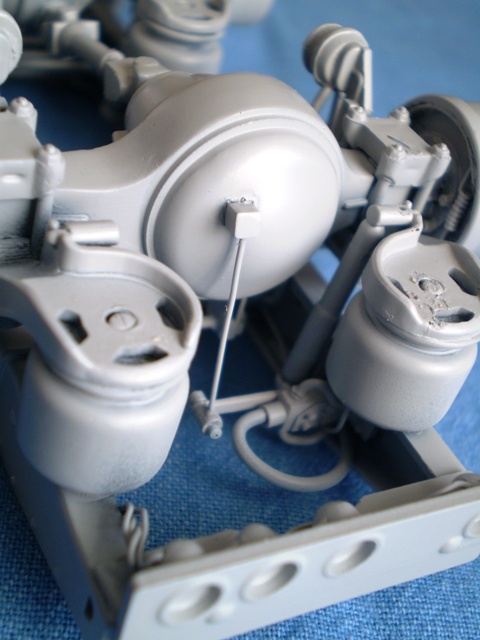
I made the brake details using the Evergreen hexagonal rod, a wire and a piece of plastic sheet. Another pics show the frame painted black.
-
I thought I posted this project here already but I cannot find it. I hope I am not starting another thread with a different name for the same thing. I began to build the 377 A/E Peterbilt in April 2011. It is still in progress. I just wanted to add another step but I probably never posted the project here. If someone remembers seeing these pics on this forum, please let me know. So, here is the beginning. I plumbed the frame and added the brake details. Another added item is the height control valve.
-
CLYDES II
truckabilly replied to truckabilly's topic in WIP: Model Trucks: Big Rigs and Heavy Equipment
Thank you Tim and Tony. The bended part is actually a solid styrene rod. I wouldn´t even try to bend a tube on a flame. The bends were not perfect, I had to smooth the shape with a file and sandpaper. And, to be honest, they are not perfectly identical. Can´t wait to paint the whole tubing. -
CLYDES II
truckabilly replied to truckabilly's topic in WIP: Model Trucks: Big Rigs and Heavy Equipment
I guess I will use the Italeri trailer tires as these are a bit closer to the real dimensions. The rims can be modified. Meanwhile I worked on the suction pipes and exhaust tubing as the ones from the kit don´t fit no more. Everything is yet to be painted but I took these pictures for better contrast. All the tubing is made of Tamyia 5mm plastic rod and Evergreen 4.8mm tube. I bended the elbows above a candle and added thin stripes to make the elbow details. Bending the rod above the flame didn´t go very smooth but finally I got what I wanted. I hope it looks okay when painted. -
Old School Star Car In Blue
truckabilly replied to mackinac359's topic in WIP: Model Trucks: Big Rigs and Heavy Equipment
That´s a very nice truck & trailer. I like the overall color combination. It is the first time that I have noticed how low this sleeper actually is. The second picture looks like a day cab truck with just some box behind. Maybe it´s just a play of angles but sure looks cool. Jarda -
CLYDES II
truckabilly replied to truckabilly's topic in WIP: Model Trucks: Big Rigs and Heavy Equipment
Hey guys, I need a little help with my tires. It might have been discussed here already but I can´t find the thread. I think that the front super singles of Bill Signs (and CAN DO for that matter) are much too big for the 1/25 scale. I know that they were originally used on a car in 1/16 scale or something like that. I wonder if the Italeri super singles are closer to reality than those of RoG. I don´t think the difference in diameter between the front super singles and rear dual drives should be that big. What do you guys think about it? Any ideas or help appreciated. -
Kenworth Alaskan Hauler
truckabilly replied to Old Albion's topic in WIP: Model Trucks: Big Rigs and Heavy Equipment
That´s a badass truck and awesome work on the build. Great details and excellent weathering. Nice to watch something like this. -
Baby Girl's first W.I.P.
truckabilly replied to Badluck 13's topic in WIP: Model Trucks: Big Rigs and Heavy Equipment
I am joining the fan club. Nice job on the trailer. It is nice to see kids doing something else than just playing PC games. I look forward to seeing the tractor. Jarda