truckabilly
-
Posts
789 -
Joined
-
Last visited
Content Type
Profiles
Forums
Events
Gallery
Everything posted by truckabilly
-

Aero Kit Pete
truckabilly replied to truckabilly's topic in WIP: Model Trucks: Big Rigs and Heavy Equipment
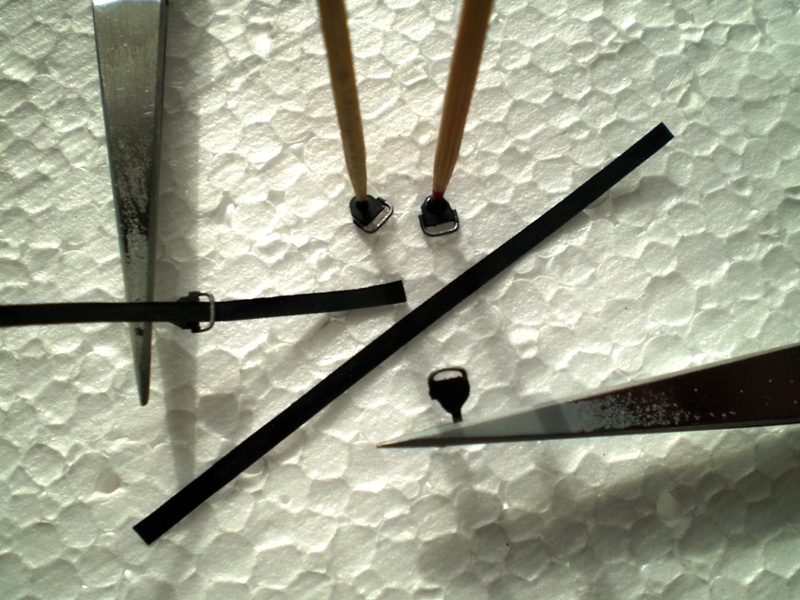
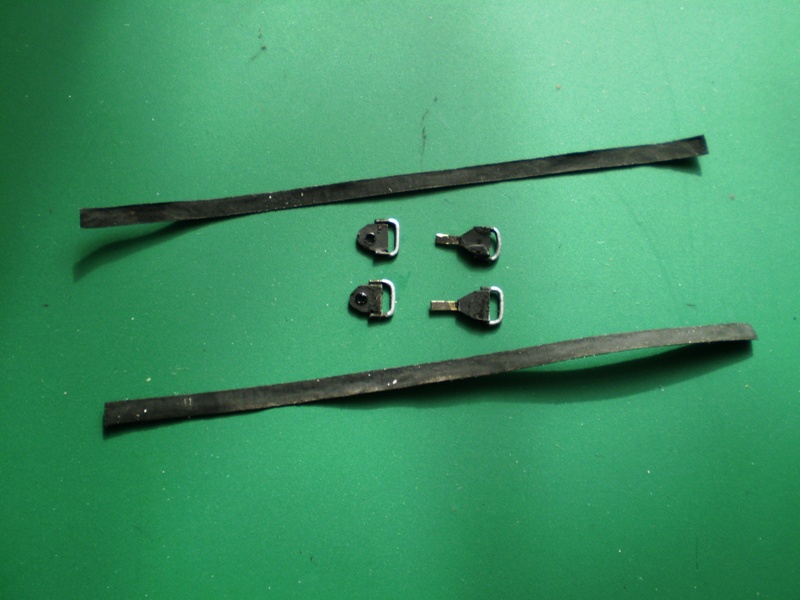
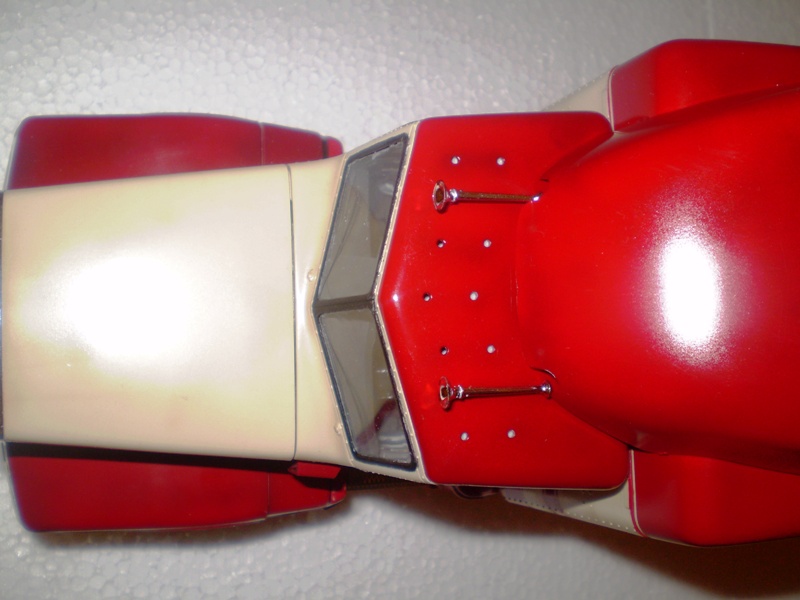
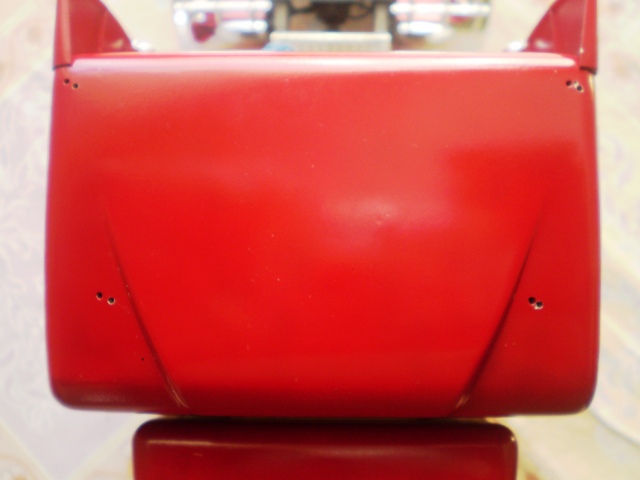
So far I didn´t have any serious problems with parts fitting. But now I had to deal with a geometry issue. It was probably my fault but the under cab fairings didn´t fit quite right. Everything was okay on the passenger side but the driver side... oh, Lord! Also, the upper edge of the fairings was supposed to be glued to the cab lower edge. But there´s a gap between these parts on the real truck. I wanted to keep this gap on my model too. So I´ve done these channels to keep the distance and make a solid joint. Still the gap was different on each side. I did some adjustments and accepted this compromise. But... another problem occured when I test fitted the roof horns and the aero shield... The pic is no good but the horns and the aero shield didn´t fit right. I had to drill new holes to the sleeper roof.
-
CLYDES II
truckabilly replied to truckabilly's topic in WIP: Model Trucks: Big Rigs and Heavy Equipment
Yeah, I believe. My reason was to get rid off the chromeless spot at the very centre of the wheel. Then, unintetionally I rubbed off the chrome on the other wheel too. So, good bye chrome and welcome alclad... The fact that one of Klaus Lassen´s picture shows the wheel with no cap on it, is just welcome feature. -
new to forum
truckabilly replied to signguy2108's topic in WIP: Model Trucks: Big Rigs and Heavy Equipment
Welcome Larry. Nice collection. Looking forward to seeing some more. -
Transcraft 45' split axle step deck
truckabilly replied to Ben's topic in WIP: Model Trucks: Big Rigs and Heavy Equipment
Very nice build. -
CLYDES II
truckabilly replied to truckabilly's topic in WIP: Model Trucks: Big Rigs and Heavy Equipment
Here´s more. I continued on the open centre of the front wheel - passenger side. The tips of the Evergreen tube and rod is what I used. I also assembled this module. The silver lines are of two different thicknesses. The thin ones are elastic threads taken out of some clothing. The thick ones are cut off a bijoux bought in a toy shop. The rest of the cables are the standard electric wires. -
Cummins finished!
truckabilly replied to Ben's topic in WIP: Model Trucks: Big Rigs and Heavy Equipment
Very nice work on the Cummins, Ben. I am looking forward to seeing the 1693. -
That's the brakes!
truckabilly replied to Ben's topic in WIP: Model Trucks: Big Rigs and Heavy Equipment
That´s awesome brake detail. I like it. -
Nice work with the drawings and the belly dump trailer. Useful web site, thanks for sharing.
-
Aero Kit Pete
truckabilly replied to truckabilly's topic in WIP: Model Trucks: Big Rigs and Heavy Equipment
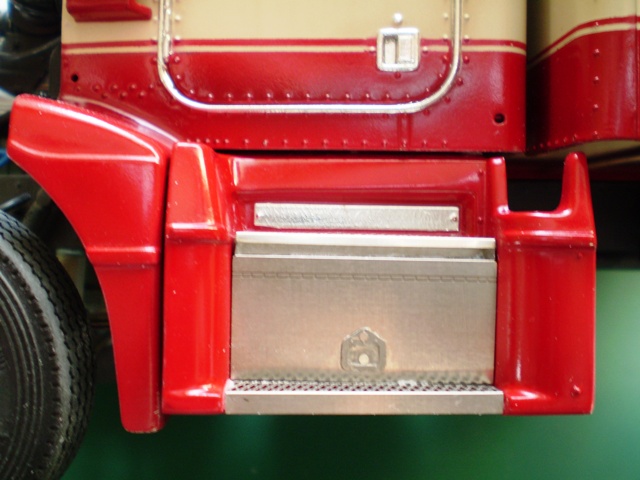
Some details are easy to find. Some others not. I didn´t want to have the bottom of the cab with no details so I put some lines in there. You can see they end nowhere... for the lack of details of this part. The cab and sleeper are glued to the frame. The hood can still be removed. The air filter just sits on the engine. I will glue it later.
-
CLYDES II
truckabilly replied to truckabilly's topic in WIP: Model Trucks: Big Rigs and Heavy Equipment
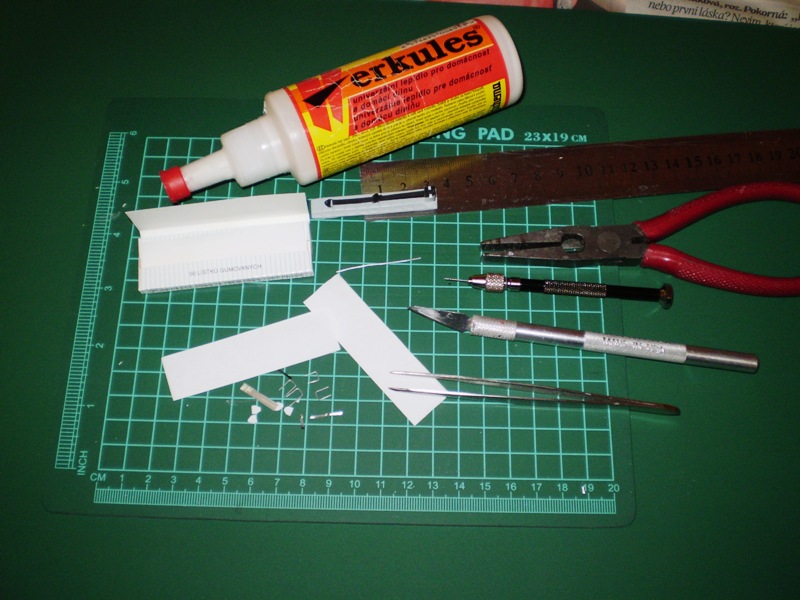
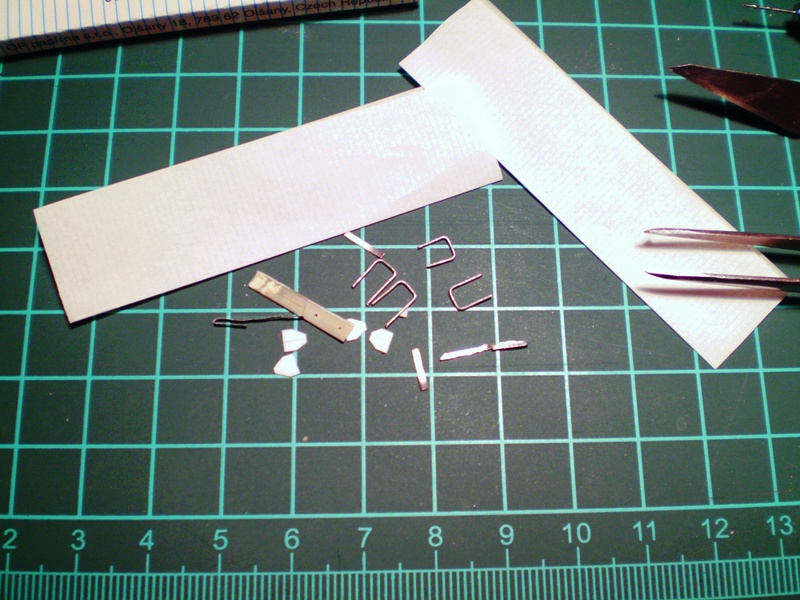
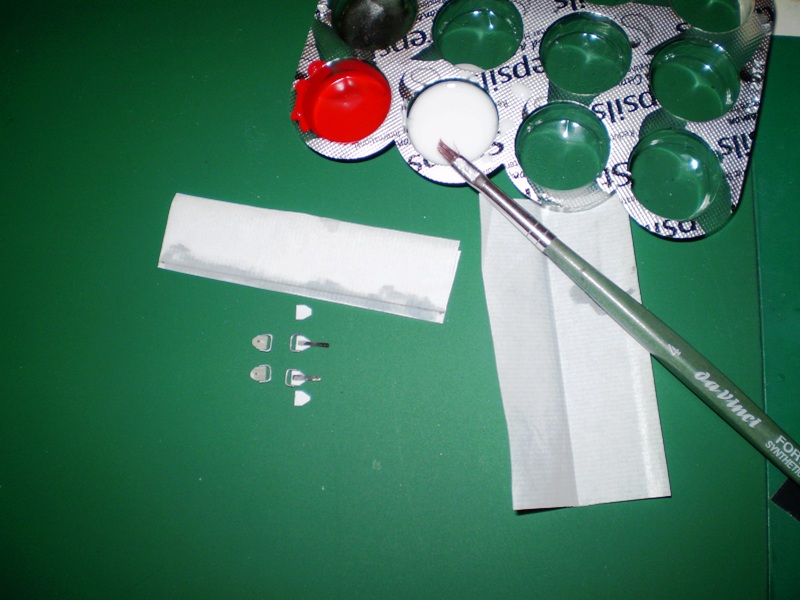
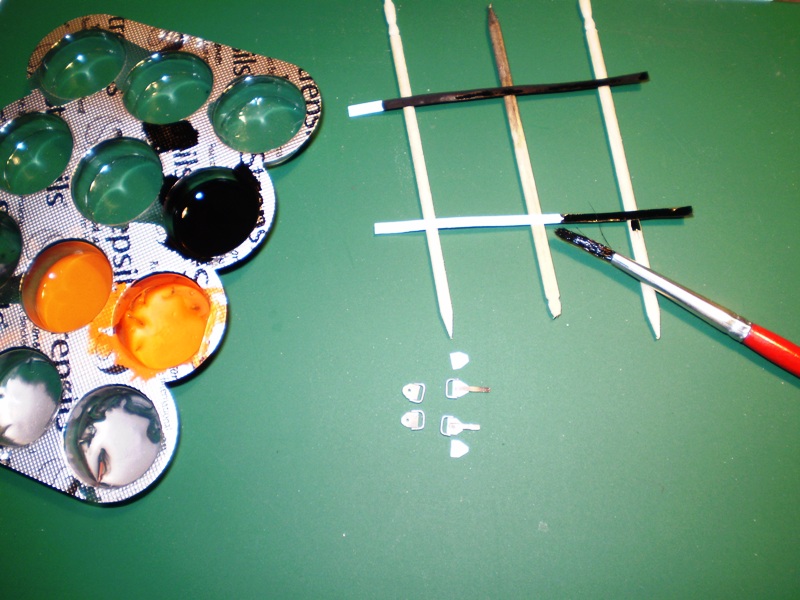
I used a photo etched mesh for the breathers. But the one I used was too short for the Revell part. I had to extend it with another piece of mesh. This is how I´ve done it. More pictures the next time. I ran out of batteries. -
CLYDES II
truckabilly replied to truckabilly's topic in WIP: Model Trucks: Big Rigs and Heavy Equipment
Clydes II is back again. The cab & hood is polished and decals applied. This is just a rough mock-up with no try for a correct alignment. The chrome parts are in various stages of progress. Some are ready to put on the model, some need a bit of touch up, some deserve a complete redo. But I´ve done that already and they do not look any better. Maybe this is where the border line for my abilities is set. You might have noticed that one of the front wheels centre is open. That´s how the real truck looks in the picture. Jarda -
48 ft drop deck trailer scratch built
truckabilly replied to Inky's topic in WIP: Model Trucks: Big Rigs and Heavy Equipment
Cool! -
Italeri Pete 378
truckabilly replied to JamesW's topic in WIP: Model Trucks: Big Rigs and Heavy Equipment
Looking good, James. I am building Italeri´s 377 Pete which is the same kit except for the different shape of the hood, SBFA and aero kit. These kits are very nice to build, like Tim said. Parts quality is far better than the RoG´s and no fit issue whatsoever. So far that is. Still got some things to complete. The 377´s front springs look okay to me even though there are only two leafs on the real truck. I wonder if the springs of 378 kit are correctly shaped. I never found a good picture of the front suspension. Can anybody shed some light in it? I am sorry for the question, I didn´t mean to hijack the thread. -
1978 Chevy Bison log truck
truckabilly replied to bitner's topic in WIP: Model Trucks: Big Rigs and Heavy Equipment
A very nice truck. How many of them you have altogether? Would be nice to see a group photo one day. -
Got one and plan to build it. Not sure when though. According to my sources a photoetched grill is going to come into being. Again, I don´t know when. But once a see-through mesh is installed, there is need to make the front of radiator too and some other stuff as well. You can see through the grill mesh on the real bus quite easily.
-
Kenworth W900 custome
truckabilly replied to Inky's topic in WIP: Model Trucks: Big Rigs and Heavy Equipment
I do not see any reason you should not win a contest. All it takes is to take part in one. This build is nicely done. I am looking forward to seeing the trailer. -
Aero Kit Pete
truckabilly replied to truckabilly's topic in WIP: Model Trucks: Big Rigs and Heavy Equipment
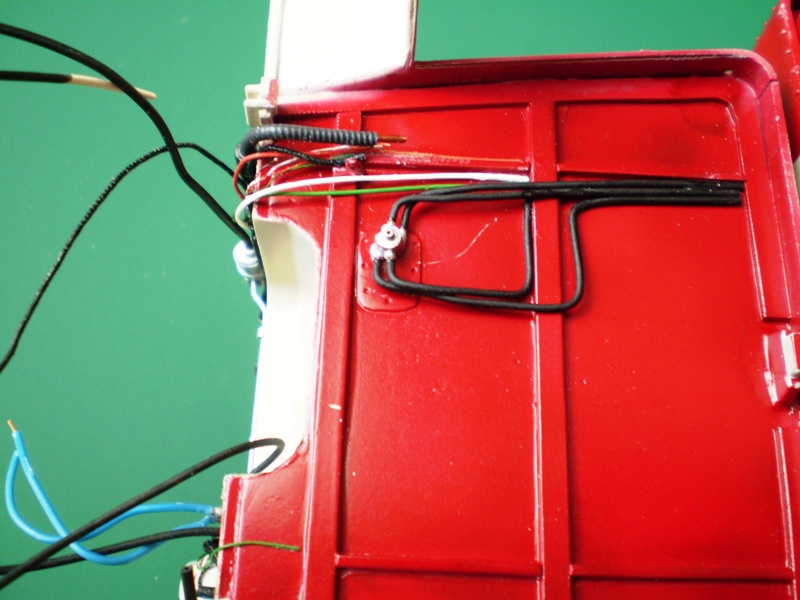
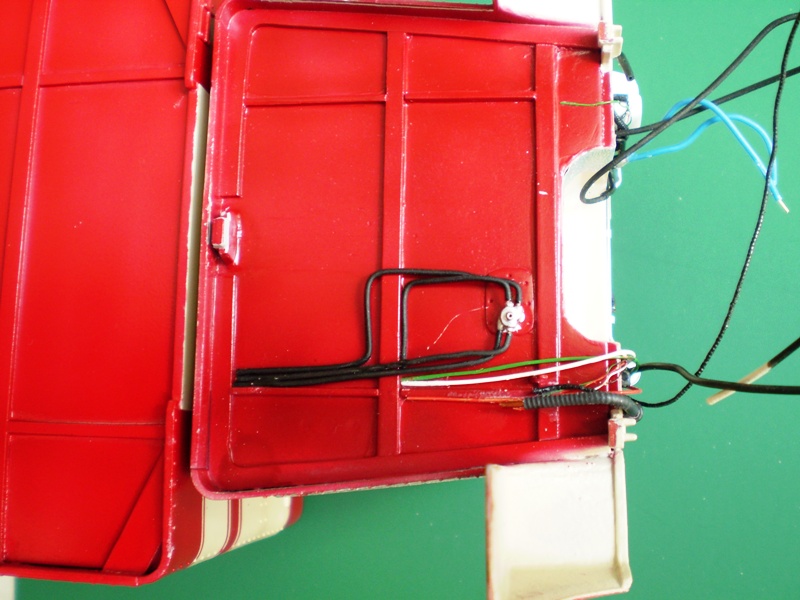
I working on the details for this build. Right now I think I can show some pics of the firewall. I added a few details and plumbing. The firewall is not perfectly accurate. Italeri mirrored some of the elements on the firewall and I have noticed that after it was painted. I will take care of that on my future builds. I will add a beeper under the windshield center post and maybe a few more tiny wires. Unfortunatelly, I do not have a complete knowledge of all the wiring and plumbing so the wires and hoses will end up in some hidden spot under the cab. -
Oshkosh trucks
truckabilly replied to greymack's topic in WIP: Model Trucks: Big Rigs and Heavy Equipment
Wow Dave, that´s something! Where did you get the green unit loaded on the truck? -
Oshkosh trucks
truckabilly replied to greymack's topic in WIP: Model Trucks: Big Rigs and Heavy Equipment
How about this? The level of this kit is far better than anything in 1-25 or 1-24 scale. http://www.greatmodels.com/~smartcart/cgi/display.cgi?item_num=HB85502 -
1975 Autocar DC Wrecker
truckabilly replied to maxwell48098's topic in WIP: Model Trucks: Big Rigs and Heavy Equipment
That is a nice combination of Autocar chassis and wrecker body. I like the color combo too. Just wondering if this kind of bumper was ever to be found on any Autocar... Anyway, nice build. The triple axle wrecker on Peterbilt 359 (should be 379) has many functional parts. But it takes a lot of work to make them really working. Out of production for now but with recent wave of reissues one never knows... -
Log Truck Chassis
truckabilly replied to TUFF TIN's topic in WIP: Model Trucks: Big Rigs and Heavy Equipment
Wow, that looks very nice. I like the details. -
How are the Italeri Kits?
truckabilly replied to Prostreet's topic in WIP: Model Trucks: Big Rigs and Heavy Equipment
Italeri´s Peterbilt 377 is one of the most accurate kits on the market. I am building one myself now and I didn´t find any fit issues yet. The only inaccuracy is the firewall. Some of the elements are flipped in left - right direction. The Baywatch WS on the other hand is very inaccurate kit, both the tractor and the trailer. The frame and engine is generic, the truck is RH steering version (you can make an Australian prime mover out of it, the kit includes all the Aussie parts), the trailer is too low with simplified suspension and has identical wheels with the tractor´s drives. Some vital parts are mising in my kit, like the king pin and its mount. I heard that the kit has a hood fit problem. I do not know the MAN kit but I built the dump trailer. The kit is accurate, great quality of details, everything fits okay. There are some boxes in the back of the trame which are simplified, I think. All the three axles are equipped with lifting air bags which is wrong. At least one of them has to be solid. You have to cut the air bags off even if you leave all the axles dropped. I hope that helps. -
That is a very nice wrecker. I like the colors too. Is the winch scratch built or the one from KFS? Jarda
-
The dashboard is awesome. As well as the rest of the truck. Very nice. Jarda
-
Baby Pete
truckabilly replied to mackinac359's topic in WIP: Model Trucks: Big Rigs and Heavy Equipment
Ha, I thought that the first picture was one of your backdrop photos. Your model pictures are so live like and models so realistic that it is really hard to tell them apart sometimes. Jarda