truckabilly
-
Posts
789 -
Joined
-
Last visited
Content Type
Profiles
Forums
Events
Gallery
Everything posted by truckabilly
-

1955 IH RDTC Highbinder
truckabilly replied to DRIPTROIT 71's topic in Model Trucks: Big Rigs and Heavy Equipment
I enjoyed looking at the progress of this one and seeing it all done is just as great. It´s a nice truck and you have done a great job. -
Rat Rod Pete 359
truckabilly replied to Darren B's topic in WIP: Model Trucks: Big Rigs and Heavy Equipment
Nice detailing work. -
1955 IH RDTC 405
truckabilly replied to DRIPTROIT 71's topic in WIP: Model Trucks: Big Rigs and Heavy Equipment
Wow, that´s awesome! I like what I see here. -
This looks very nice. I´m gonna peep here if I build a tanker myself some day.
-
1955 IH RDTC 405
truckabilly replied to DRIPTROIT 71's topic in WIP: Model Trucks: Big Rigs and Heavy Equipment
This cool rig is just getting cooler. Very nice job Brian. -
1955 IH RDTC 405
truckabilly replied to DRIPTROIT 71's topic in WIP: Model Trucks: Big Rigs and Heavy Equipment
This looks great. I like it a lot. -
So! Who wants to build this one????
truckabilly replied to DrKerry's topic in General Automotive Talk (Trucks and Cars)
HNUS!!! That´s "disgust" in my native language. -
Yeaaaah!!!!!!!
-
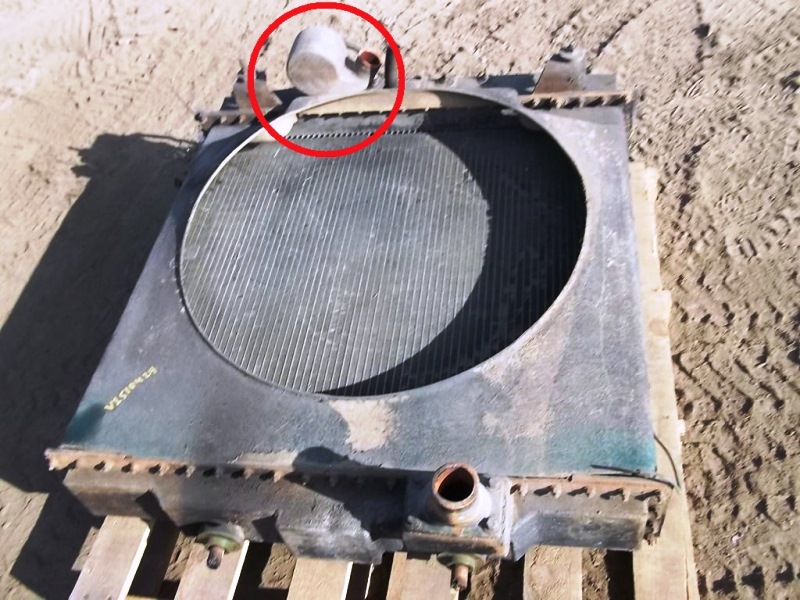
I wonder what is this thing in the circle. What purpose does it serve ? I´ve also seen those little cylindres in horizontal orientation. Some radiators have one, some have two and some have none. Can someone give me info on this? Thanks in advance.

-
AMT Kenworth W925
truckabilly replied to PierreR89's topic in WIP: Model Trucks: Big Rigs and Heavy Equipment
Go through this, you may find something useful. http://forums.aths.org/PrintTopic104703.aspx
-
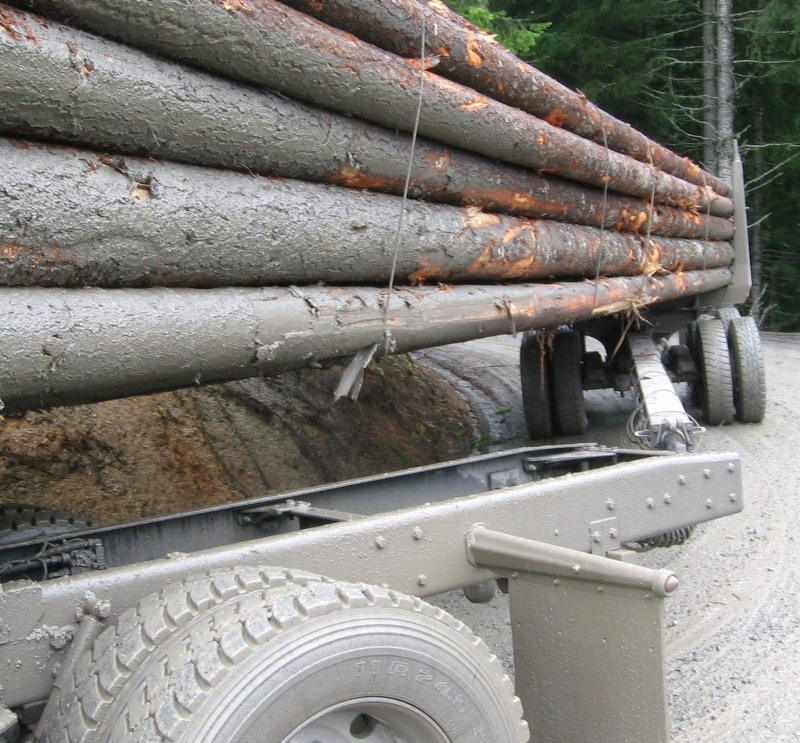
Peerless logging trailer question
truckabilly replied to DrKerry's topic in General Automotive Talk (Trucks and Cars)
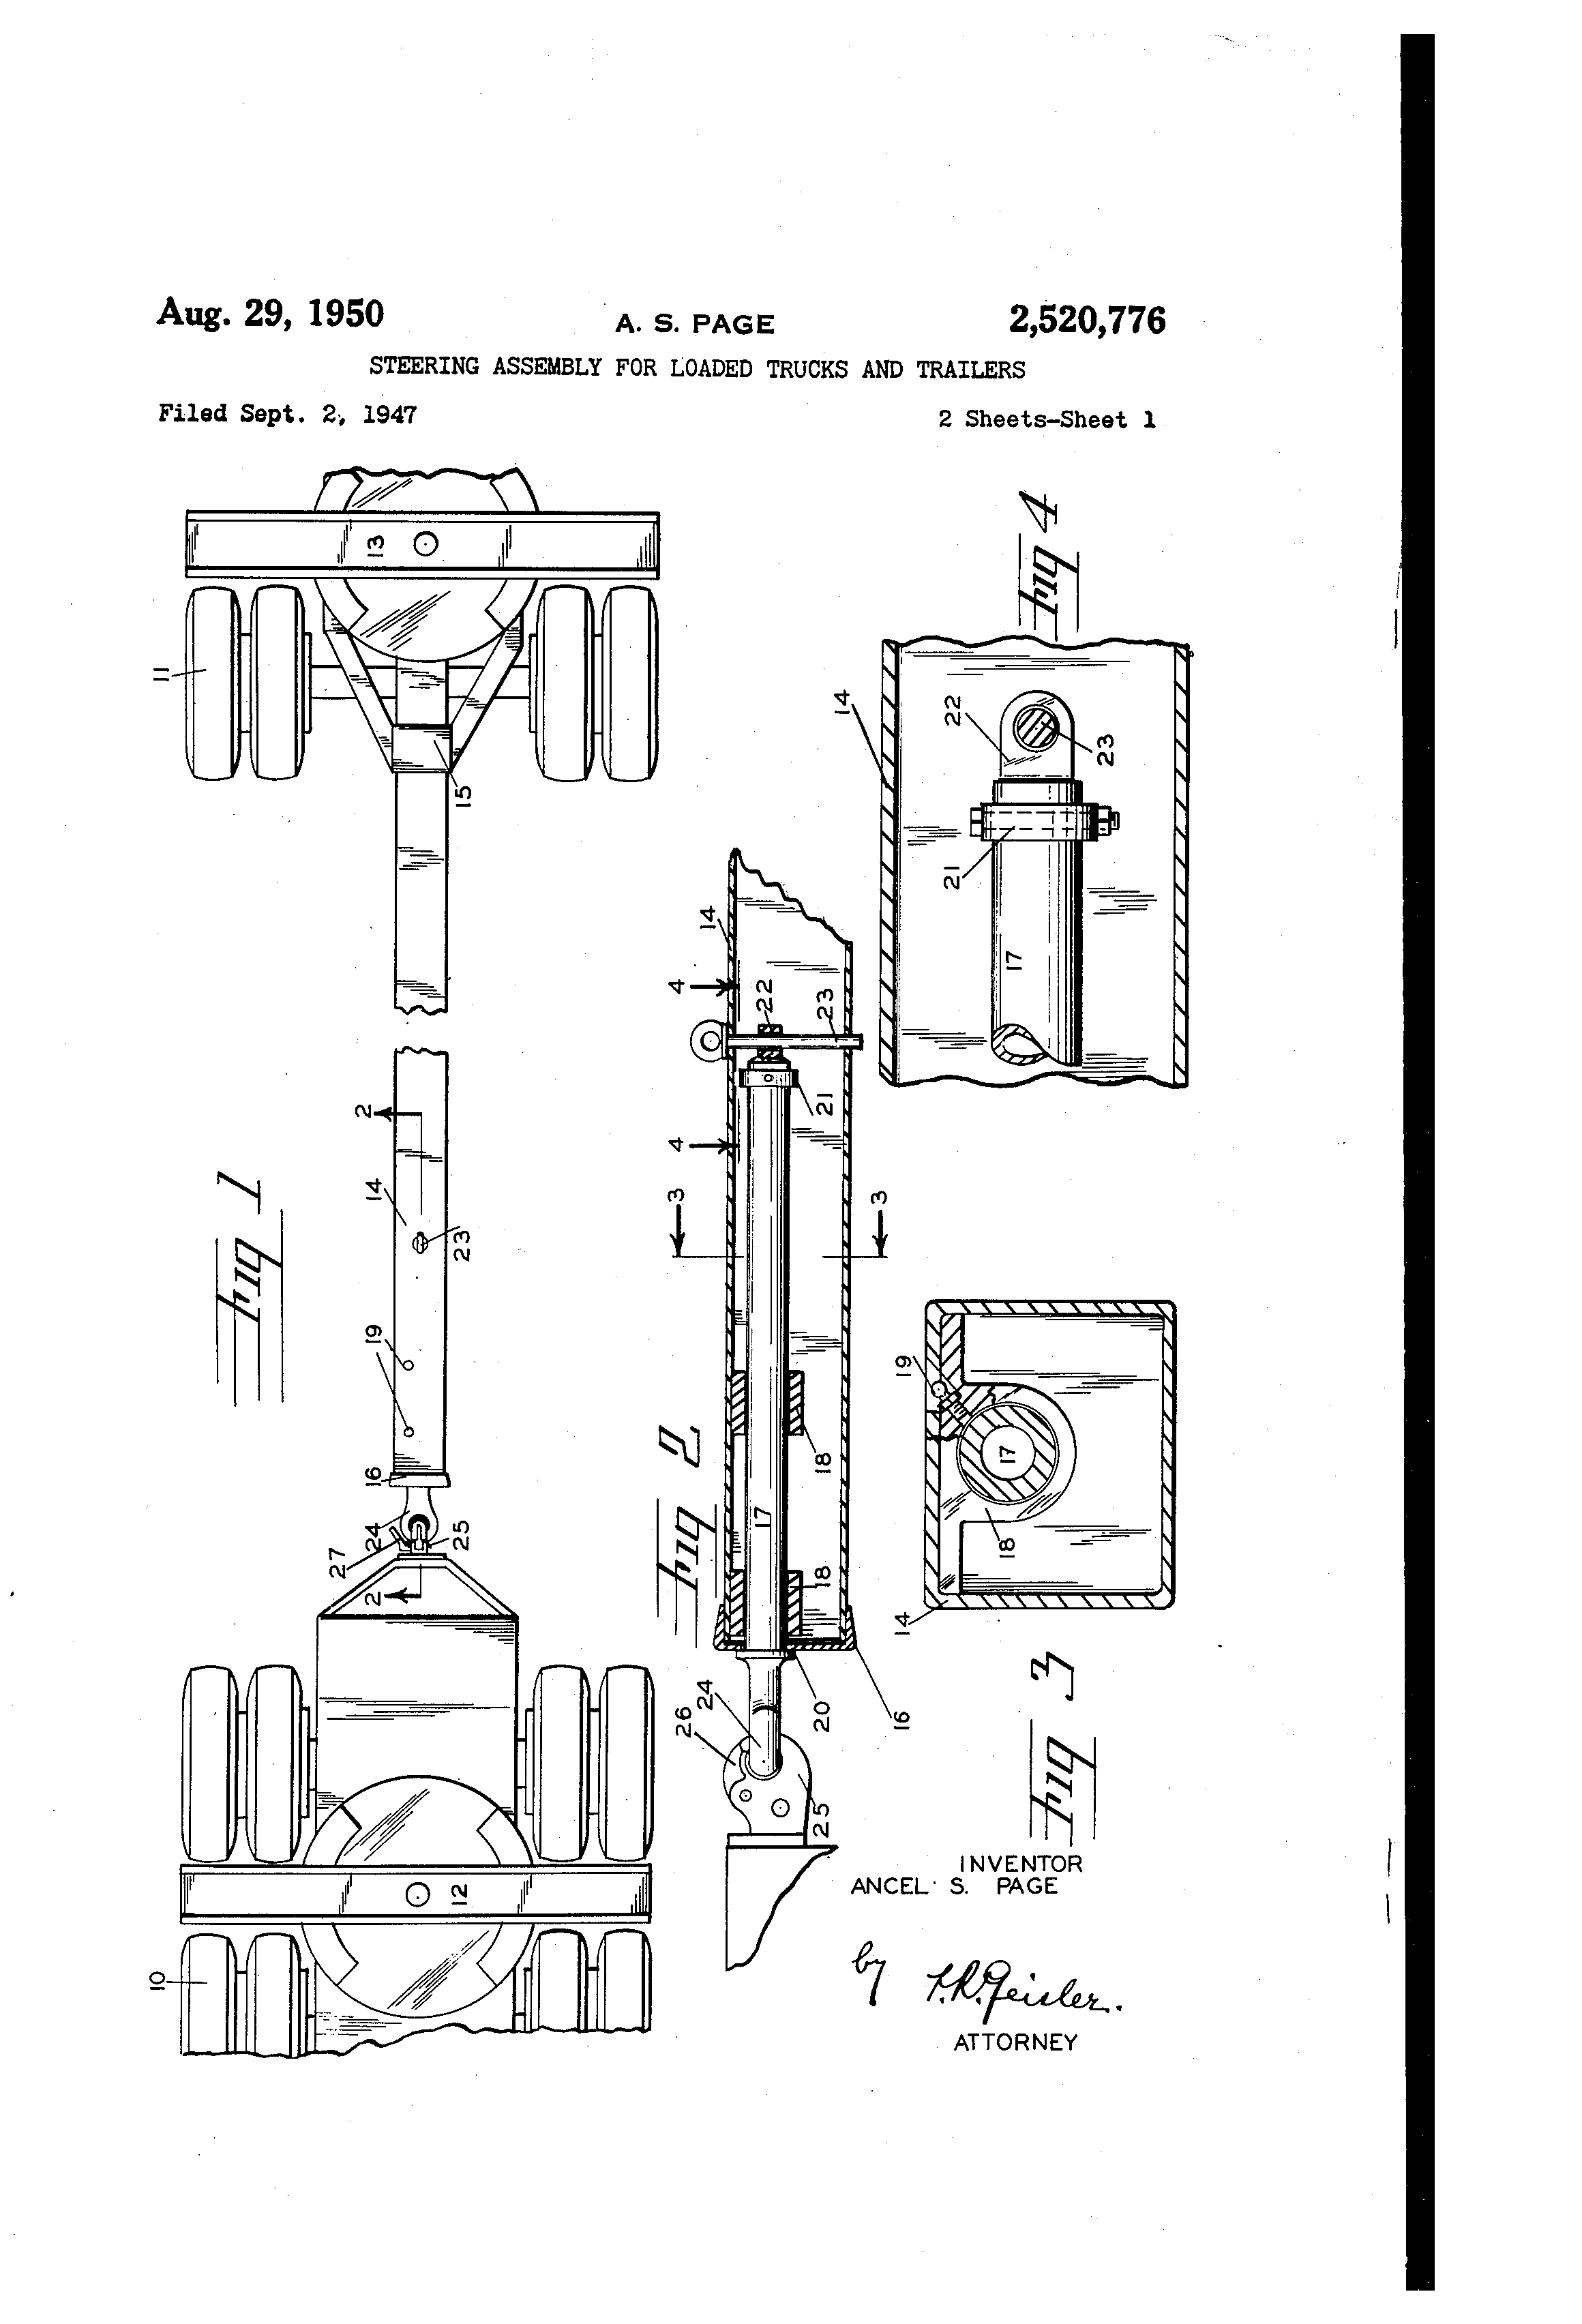
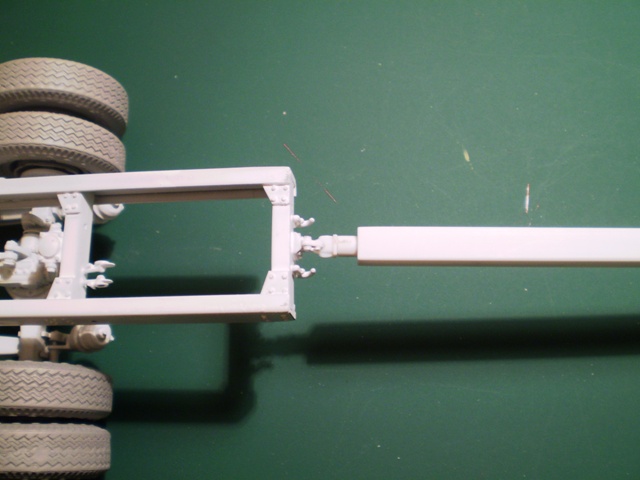
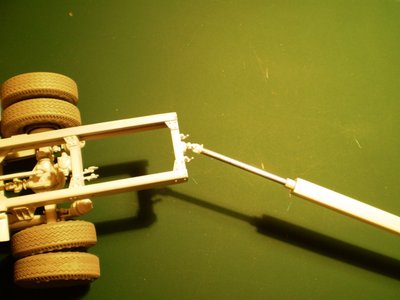
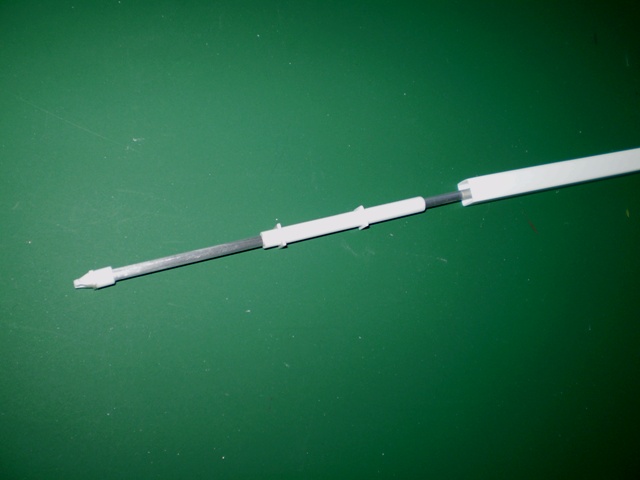
I don´t know the precise figure either. But these pics taken from US patent web might help. I have made my telescopic end much longer I guess. But it doesn´t matter because the rod extens only as needed in the corner. The aluminium K&S tube is inserted in Evergreen tube onto which I glued the two square inserts to match the inside of the square channel. I hope it helps, if not too late.
-
Peerless logging trailer question
truckabilly replied to DrKerry's topic in General Automotive Talk (Trucks and Cars)
Actually, it is telescopic in front. There must by a length compensation when the truck and trailer goes through a corner.
-
Nice work, Kerry.
-
Even though these days are pretty hot over here I managed to cool down and repaired the interior. I cut off the the floor including the firewall and spilled out the junk. One by one I cemented the loose parts back, changed the windshield glasses and added a fan. Then I glued the floor back and went on with another parts. Like the roof AC unit, PE windshield wipers, air filter and lubefiner. These pictures show a mock up with the cab parts sitting on the frame. The hood is still without the hinges. That´s why the alignment is not correct. There are some paint faults that I have yet to address. I hope everything goes on OK, with no further accidents.
-
Even though these days are pretty hot (temperature wise) I managed to cool down and repair the cab interior. I cut off the floor icluding the firewall and spilled out the junk. One by one I glued all the loose parts back, changed the windshield glasses, added a fan and glued the floor back again. I also added the roof AC, PE windshield wipers, air filter and lubefiner. I stripped the chrome off the grill rim and headlights. The headlights are terribly molded, I had to cut lamp rims off and glue them back in correct position. These are pictures of the mock up with the cab parts sitting on the frame. The hood is still without hinges. That´s why it doesn´t align to the cab very well. There are some paint problems that I have yet to address. I hope everything goes on with no further accidents.
-
I wonder what is the purpose of the big bumpers like this one on the Ford wrecker. A similar bumper is in Canadian or Alaskan hauler (Revell RoG Peterbilt 359) kits. Is it just for cool looks or is there something inside? Like counterweight or something? Thanks for the info.
-
White Road Commander II
truckabilly replied to 20dakota04's topic in Model Trucks: Big Rigs and Heavy Equipment
Oh, my ....... You must be kidding! That really made my chin drop down, for good I guess. I love everything on this build! Going back and viewing the pics again and again is a must. I wish I had half of your talent. This is as amazing as it can be. -
Thanks a lot for the pics, Daniel. They sure help. Meanwhile I continued with the chassis. I painted the wheels and mud flaps and glued them to the frame. Just as the fuel tanks, radiator, engine and top plates. The original belts are replaced by a rubber thread. And, disasters do happen sometimes. I wanted to take a picture of the cab parts sitting on the frame. But the cab slipped off the desk and hit the floor hard. All the windows left their rims, the windshield pillar broke off and so did the driver´s seat. The floor remained in its place as it is glued tight. Now I have a loose seat in the closed cab shell and for the life of me I can´t figure out what to do with it. Except for smashing it for good which I was very close to do, I tell ya. This build is full of bad luck. Well, I hope I can fix it after I cool down a bit. Why don´t I collect them postage stamps instead?
-
Tyrone Malone Super Boss
truckabilly replied to truckabilly's topic in General Automotive Talk (Trucks and Cars)
So, it is going to be like I said in the beginning of my SuperBoss thread. The build will feature parts and colors that never met on actual 1:1 truck. At least, I reposted the pictures here. But I can´t help those in someone else´s posts. I am trying to restore the photos in my old threads but it is time consuming and tiring. So, it is going take a while. -
Tyrone Malone Super Boss
truckabilly replied to truckabilly's topic in General Automotive Talk (Trucks and Cars)
Thanks a lot for explanation, Håkan. It looks like I have to say good bye to my plan to build the early version of the truck. I have made a present look the dashboard and added the front brakes. But the front wheels in the kit are the small ones, aren´t they? -
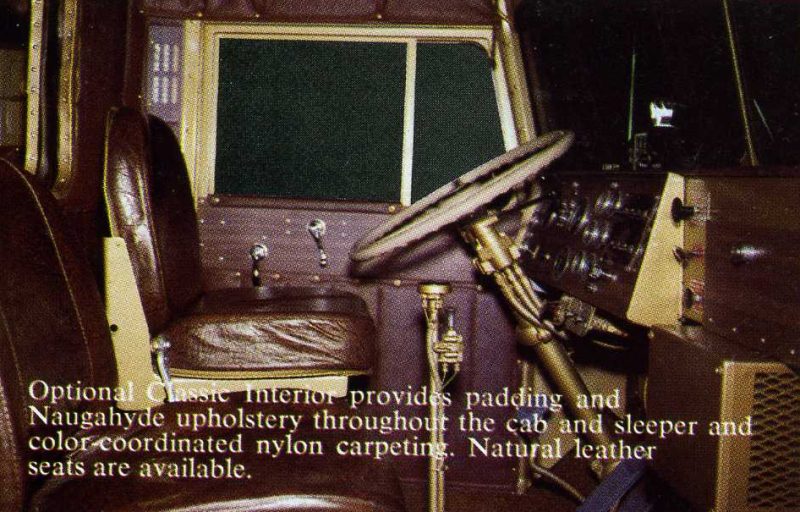
Thank you Ronnie and Brian. I have a dumb question. If you take a look at this photo, there are sort of mounts at the lower edge of the sleeper. I wonder what should be there underneath this structure. I mean the space between the truck frame and the sleeper.. The kit has a pair of rails to connect the sleeper with the frame. But how do the real mounting points look like on the 1:1 truck? Are there just brackets of some kind or rubber blocks or even air bags? The truck has an air suspension. Can somebody give me info on that?
-
Hi there. I think it´s time to get this project back to life. So far it looks like my original photobucket pics are back. This time straight from my PC. Thank you, administrator for enabling this feature. It´s a great help. So, let me carry on with the interior. The colors were inspired by one of Tim Ahlborn´s old photos. Not exactly a true match but sort of what´s here. This is just a trial. If it really works I will continue. Please, let me know if you see the pics. Two or three positive replies (or negative for that matter) will do. Thanks.
-
Round2 SuperBoss 1/25
truckabilly replied to truckabilly's topic in WIP: Model Trucks: Big Rigs and Heavy Equipment
Thanks Darren. The frame is painted with Gunze Sky Blue, No. 34. I really didn´t care about a true match shade. This looked okay to me, so I used it. I just pray that the rest of the truck´s paint job will turn out okay too. -
White Freightliner
truckabilly replied to yura1961's topic in Model Trucks: Big Rigs and Heavy Equipment
This looks great! Nice and clean. -
1973 White Road Commander Aerodyne
truckabilly replied to DRIPTROIT 71's topic in Model Trucks: Big Rigs and Heavy Equipment
I'd get it one piece at a timeAnd it wouldn't cost me a dimeYou'll know it's me when I come through your townI'm gonna ride around in styleI'm gonna drive everybody wild'Cause I'll have the only one there is around. Man, that´s a nice combination of parts. I like the different wheels on each axle. You´ve done an awesome job. The weathering makes it look realistic. A real mesh on the grill would make it look even better. Plano mesh would work I think. I like the color combo too. It's a '60, '61, '62, '63, '64, '65, '66, '67'68, '69, '70 automobile.


.jpg.30341ac172d41dbdacc301a914a11c0d.jpg)