
Jdurg
-
Posts
212 -
Joined
-
Last visited
Content Type
Profiles
Forums
Events
Gallery
Everything posted by Jdurg
-
Can't believe I missed this thread too! I JUST got one of these kits off E-Bay yesterday and it should get here on Wednesday next week. I'm really looking forward to it. I figure I'll do the Goodwood Green Metallic body with black interior. The only issue will be with the hood stripe. Trying to figure out if I should do a base coat of white paint over everything, then mask off the stripe area and paint the Green over the top. How exactly did you paint your hood? I'm a little bit uneasy about masking in case there is a leak under the mask, or when I remove the tape if it pulls off some of the green color. I guess I could use the kit decals and create a stencil out of them by tracing the black stripe by putting white paper over it and copying the outline with a pencil, then taking the tracing and putting over the top of the white decal paper I have and cutting multiple copies. The only tough part would be having both copies line up fully. I did this on the 1996 Grand Sport model I built and the white decal paper is actually pretty solid. Anyway, the build looks great and makes my anticipation all the more intense. Great job!
-

What do you do while waiting for a kit to arrive?
Jdurg replied to Jdurg's topic in General Automotive Talk (Trucks and Cars)
Well one thing I just did was realize that on the photo-etch sheet for this kit, there are plenty of emblems and whatnot that need some painting. So I was able to get the paint in there where needed. What's so great about this is that because it's a large scale kit (1/12), the photo-etch pieces themselves are pretty large and thick. So I was able to take some paint and let it flow into the valleys in the photo-etch sheet and cover the parts where needed. Once it dried, I took some VERY fine sandpaper and polished up the metal while also removing the paint from the areas where it doesn't need to be. As a result, I have been able to get the colors in the right spot and really make them stand out. Just did the black right now, and will soon have the white and red colors on the flag emblems painted. This is getting me even more psyched. What's cool about doing a car like the 1967 Corvette, which is widely popular, is that there is a TON of reference material out there. I found a website that has immense numbers of photos of each model year Corvette. With the '67 being so popular, I am able to get a ton of photos of the underside of the car as well as of the rolling chassis. This will be critical with regards to having the fuel line, the brake lines, and the right coloration of the suspension parts. Wednesday can't get here soon enough! -
What do you do while waiting for a kit to arrive?
Jdurg replied to Jdurg's topic in General Automotive Talk (Trucks and Cars)
LOL. Sounds like a good idea. But with my back having tightened up on me, can't be mixing the vodka with the pain medication and muscle relaxers. Need a functioning liver to build models. -
What do you do while waiting for a kit to arrive?
Jdurg replied to Jdurg's topic in General Automotive Talk (Trucks and Cars)
Hehe. Me too. I've been going through the tips and tricks sections, looking at other project announcement threads for Corvettes, and searching the web for good tutorial sites in order to get more ideas for how to better detail the kit. As you are coming back to the hobby, like I did earlier this year, I will first say "Welcome Back!" I got back into this as a way to keep my brain busy while looking for a new job, and because I love corvettes. Two sites I will recommend you check out are http://www.italianho...s/tutorials.htm for some GREAT tutorials for detailing techniques, and for paint take a look at http://www.automotivetouchup.com. The prices are a bit higher than I am comfortable with, but they have EXACT matches for paint colors for nearly every make and model of car out there. If you are looking to accurately replicate the colors of a real car, these paints are great. They are a lacquer paint, but I haven't had any compatibility issues with any of the kit plastics I've used the paints on. They dry super fast, and rock hard. The clear coat they sell is the best clear I've ever used. It goes on and appears to have a little orange peel to it, but as the paint dries it smooths out and becomes incredibly hard and glossy. So easy to buff up and get to a thick, rich shine. The quick drying is a huge plus too. Only a couple of hours after applying the paint, you can safely pick up the parts and touch the painted surface without fear of damaging it. I still let it sit a full 24 hours before buffing out or sanding, but the sniff test (where you take a whiff of the painted surface to see if you can smell any fumes coming off which would indicate that it's still drying) usually lets me know that it's perfectly fine after only 6 or 7 hours. -
Oh, you'll definitely have to take photos of the 1/8 scale 1985 Corvette as you build it! Always wanted to get me one of those things, but just do not have the room to assemble it and display it. (Plus, don't have enough spray paint to properly paint it. lol). I got me a 1/12 scale Monogram 1967 Corvette Coupe that will arrive at the house on Wednesday of next week. Can't wait to detail the engine compartment, wire it, plumb it, etc. I have a TON of different gauge wires I accumulated while building my speaker set many years ago, wiring ethernet connections throughout the house, taking apart dead motors, etc. etc. so I have a ton of colors of wire, a bunch of different gauges to use, and now a great kit to make full use of it. I think lately I've gotten more attracted to using solder for wiring wherever I can, and just painting the solder when needed, or painting it with liquid electrical tape which gives it the insulation look that I am looking for. I LOVE building bigger scale Corvettes as they are so much easier to detail and get nitpicky with. My plans are to paint it Goodwood Green Metallic with a black interior as I have plenty of black flocking and also picked up a can of "interior touch-up" paint from a local auto parts store in black. This will make things a bit interesting as the hood stripe for this color combination is white, and with a dark green color I may have some very detailed masking to do when painting the car. Or VERY precise white decal cutting to do.
-
The other day I went on E-Bay and found a 1/12 scale, Monogram 1967 Corvette Coupe still sealed in its box up for grabs. Yeah, the $75.00 that included shipping was a bit stiff, but the kit is no longer in production and it's a kit that I loved building when I was a kid. I have the MCG Photo-Etch set for the kit but just needed the actual kit to build. I'm now at the difficult part in waiting for the kit to arrive (scheduled to arrive on Wednesday next week) and just thinking of what I'm going to do. I think I'll spend the extra money (got some b-day cash a couple weeks ago and some poker winnings that I use to splurge on myself) and go get the high quality automotive touch-up paint from a site that I've purchased from before. I don't think I've ever painted a car green or yellow, and am leaning towards going with the Goodwood Green Metallic paint with a black interior. I just think that the Sunfire Yellow color with black interior would too "bumble-bee" like for me. With this being a large scale kit, I know I can really detail the engine bay, fully wire it and plumb it, and just make it stand out. I was thinking of opening the doors for it, but with a 1967 Coupe the doors are VERY tricky to cut out and I don't want to mess this up. So I'll just do a minor cut job and cut the headlights out and hook it up so they can rotate like on the real car. There are so many things I'm thinking of and hoping of doing here. I got a Connecticut State license plate template and have put my actual plate number on there and will use that for this car, and am already working on possible photo-etch parts I can make that aren't on the MCG sheet. I'll likely de-chrome the chromed parts, clean them up, then send them to Chrome Tech USA and have them all re-chromed for me. So what do you guys/gals all do when you are waiting for a kit to arrive and itching to get some paint and glue applied?
-
Beautiful job! I LOVE Corvettes of any year, and the 1967 is my dream car. Although only 20 were made, I still want a Torch Red, with black strip and interior, L89 Vette with side pipes. Chances are, I'll never get one, but that 1963-1967 era for the Vette is the best. I hope to one day be able to get my dad his dream Red 1963 Split Window Corvette. His description of that car got me into the Corvette world, and also led me into building scale model cars. Got a 1953 Vette that I'm building right now which I hope to post here once I get the clear coat on the body polished out. The biggest pain with white cars is the dust.
-
Well, let's just say I won't ever think about saying, or doing, anything wrong to you. Have to say, spending an evening at the firing range is a good way to release stress.
-
I have always been a fanatic about cooking. Something about throwing together random goods and forming a magnificent concoction. Likely why model car building has always been appealing to me. With the recent car accident that some individual threw upon me, I have more time to work in the kitchen as I don't have to worry about driving anywhere (Car is being repaired) or working (Was laid-off officially the day after my fender-bender), I've had more time to cook in the kitchen. I like making beef roulades which are simple to do. Just take some thin minute-steaks, pound them out to make them almost carpaccio thin, then take some slices of bacon, slices of onion, a pickle spear, a carrot spear, and roll it all up. Let it simmer in a low pan with some beef gravy and mushrooms/onions and you have a great meal. It goes best with some green beans and spatzel, as well as some potato dumplings to soak up the beef gravy. Stuff also reheats well too.
-
What Slows Down Your Builds?
Jdurg replied to slusher's topic in General Automotive Talk (Trucks and Cars)
For a long time, it was work. Just spending too much time working. After today, that's no longer a problem. (I had my last day at work and turned in all of my stuff. I'm on payroll until the end of September, but don't work another day at the company any more). Other issues have been fit problems that don't appear until you have paint on the parts. Need to remember that if it's a solid fit without paint, it will have problems once a few layers of paint go down. Right now, the issue is just overall body aches and auto repairs. Got nipped in the front end of my car yesterday and fault can't be placed anywhere. My car is getting repaired, and I'm just overall sore and frustrated that this has happened to me again. Yes, the great thing is that nobody was hurt and the repairs are minimal in cost, but still, it's freaking annoying! But I did get the Detail Master Photo-Etch set for the R/M 1953 Corvette Kit from E-Bay which arrived today, and early next week the 1953 Corvette model kit I bought will arrive. When building my 1996 Grand Sport (which sadly is finished, but final fit problems make it look pretty horrific), I had bought some of the white color for painting the stripe down the middle and that is the same color as used on the 1953 'Vette. So I have plenty of that for painting the body, red flocking for the interior, and all summer to work on this now that I'm not working. -
has anyone used testors "wet look" clear.....
Jdurg replied to foxbat426's topic in Model Building Questions and Answers
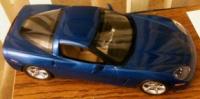
Here's a good photo showing the gloss. Just took this with my iPhone. I REALLY love this Admiral Blue Metallic color. In ambient light, it's a really deep dark blue color. In direct light, or even better in sunlight, it is fairly bright and metallic. I may want to pick up more to paint other cars. BTW, if I were to ever do this kit again, I would likely try and convert a larger scale C4 style Corvette and paint it properly. Arctic White basecoat, mask off where the center white stripe is, paint the AB Metallic, then use white decal film for the thin pinstriping like they do on the real thing. It would take an extensive amount of body work and perhaps some custom resin molded parts to convert the MPC 1988 Corvette into the 1996 Grand Sport, but maybe that will be something on my model building bucket list, or perhaps Revell will produce a 1996 C4 large scale Vette. lol. -
I think it's important to remember that there are many different mixes of primer that are designed for different tasks. "Most" primers are going to be pretty thick as they are designed to cover and seal porous materials such as woods and particle boards. This is so that the color coats will have a smoother surface to go over. Automotive primers are generally designed to go on thin so as to protect the metal/fiberglass/plastic surface they are covering. Since those surfaces generally tend to already be somewhat smooth, there isn't a need for there to be a lot of solids added into the primer. They can use a very fine particulate in there which will still seal any "pores". In addition, many automotive touch-up primers are also designed to be used as a sort of "guide coat" when sanding to better show any not smooth spots in the underlying body work. Therefore, they go on fairly thin which is great for us scale-modelers. So I would highly suggest sticking with primers that are designed for automotive touch-up work if you are looking for ones to use on your models.
-
has anyone used testors "wet look" clear.....
Jdurg replied to foxbat426's topic in Model Building Questions and Answers
Yeah, I love this stuff. It is a bit more "noxious" with regards to the fumes, so that is something you definitely need to keep in mind and do your spraying outside, or in a spray booth that is well ventilated. In addition to their clear, they also have a boatload of other paint products there. Paint pens, small touch-up bottles, the aerosol rattle cans, medium sized cans of paint (for spraying), and large cans for spraying. The primer is a good one that is quite fine and "bites" to the surface without damaging it. Their color paints go on and then seem to "dull" out. They are definitely not one-shot, no clear paints. The basically "flat" sheen of the color coats likely is what lets the clear "bite" onto the color and really attach firmly to it. One MAJOR thing to keep in mind when using their aerosol cans is that they are designed for use on full scale automobiles. Therefore, I noticed that the 12 ounce can of the Admiral Blue Metallic I bought was all used up when I put two coats on my kit. Likely because a good volume of paint comes out in a wide spray pattern. With the clear coat, which is the same size can, I was able to get a feel for the paint volume with the spray pattern and was able to apply two coats to all parts of the car and there's a small amount left in the can. (Not enough for another kit, but the build I used it on had to spray the body, the hood, the front fender piece, and the hardtop). So if there is any issue I have with the product is that it puts out a lot of paint volume with the spray. If there was a way to modify that nozzle and have it put out less volume, that'd be great. But now that I know the intricacies of the spraying, I'll be able to make better use of the product. Especially if I'm getting another color from them. Clear and primer, I'm definitely going to stock up on once my finances allow it. Colors will be limited to those which I cannot find a Dupli-Color Perfect Match can of. ($7.00 for a can is better than $20.00 for a can). Still, the qualities of the product are so great that I see myself going back to them for each kit I build. And yes, I know I sound like a freaking commercial with how often I mention them and talk about them, but I'm just a very satisfied customer and want other's to benefit. In fact, the customer service there is incredible. Before buying the product, I sent an e-mail asking if the product would be compatible with the polystyrene used in model cars, and got a response almost immediately. They said that their paints aren't designed with polystyrene plastic in mind, but they have had many reports from customers saying that it worked fine. Also, when using my first can of clear, there was an issue with the nozzle and paint just started spraying out of it like a fountain. It was a defect in the can and after I called them they apologized profusely and immediately shipped out another can free of charge. Customer service like that is another positive for the product. Finally, in the latest issue of SAE, in one of their articles they showed a can of their product that someone was using. -
has anyone used testors "wet look" clear.....
Jdurg replied to foxbat426's topic in Model Building Questions and Answers
Just curious, but is it a true lacquer? E.G. is it something that can be polished/buffed out using standard automotive products, or is it more of a "lacquer" but still needs to be treated like an enamel? I have used the Dupli-color clear coat that James posted a picture of, but the only issue I have with that is that it always seems to take a while for it to dry for me. Still, it's a very good clear coat and up until this latest '96 Grand Sport kit that I built, it has been the primary clear coat finish that I've used. However, when I was looking to get the Admiral Blue Metallic color for the Grand Sport, I found a site online with a boatload of color options that had the Admiral Blue (named "Cloissone Blue Metallic" there) which had a nice, large, 12 ounce spray can of clear coat for only $7.95. I figured why not give it a try? After using it on this build, I am floored. The paint color itself is beautiful, but the clear coat goes on in a way that prevents any type of runs or sags. While it initially appears that it will be bumpy and full of orange peel, as it dries it flattens out and conforms to the surface underneath it beautifully. Also, the clear coat does not negatively impact decal film (the white stripe and the red hash marks are decals from the kit. For the white stripe, I also put another Testors White Decal Paper over the center stripe since the kit's white is a bit too transparent). In addition, it dries very quickly. In a matter of a few hours, it is dry enough to handle. I let it sit for 24 hours, after which there is almost no odor coming off of it. After 48 hours, there is absolutely no odor on it so it has fully degassed. When touching it, it still feels a bit strange, but after using some very fine full scale automotive rubbing/polishing compound on it, it comes out silky smooth. The gloss is incredibly bright (sorry that my photography skills can't capture it), and it has depth to it just like real cars. It's also very, VERY tough. No issues with masking tape on it, or anything else. In fact, at one point I had accidentally dropped a toothpick with some superglue on the end of it onto the driver's side headlight! I was able to wait for the superglue to dry, then it just flaked right off of the clear coat with zero damage. Amazing. I live by this stuff now. -
A sad update here. The only place the decals worked was on the hardtop, which I won't be using, and the hood. On the main body and the front fender, they didn't work right. So I had to use masking tape and Arctic White Duplicolor touch-up paint on the body and front fender. It didn't turn out right. It just turned out "barely acceptable." I'm going to just have to deal with it. The bulk of the model is coming out just fine, so I'm going to have to deal with these glaring imperfections. It's just too darned difficult to mask off the paint lines properly when the pinstriping is so small. Oh well. It's not worth stripping and re-painting. (And considering how hard the paint I used for the Admiral Blue Metallic cures, stripping is not possible.). I'll just deal with this as a learning experience and make a 80% good enough model.
-
I just started using a brand called "Automotive Touch-Up". They are based out of the New Orleans area here in the states, and at their website (http://www.automotivetouchup.com), you can pick any year and make/model of car you can think of and they will show you the colors they have available for that year. If they don't have a color, they will make it for you. Now their color cans (12 oz. aerosol) cost $19.95 each, but their clear coat is the same size and costs $7.99. It's an acrylic lacquer that goes on nice and easy, and drys pretty quickly. When drying, it will flatten itself out and leave a beautiful, rich, clean clear coat. It does need time to cure afterwards, so after applying the clear i let it sit for about a week before doing any heavy handling, but you can pick up the parts and it won't leave marks after a few hours. I just give it the extra time to cure so that it will be rock hard. The stuff does not negatively interact with any plastic, decal, or other automotive brand paints I've used yet. I love this stuff. I'll grab a photo of the hood I just painted with this stuff once i get my photo area setup.
-
The replacement can of Clear Coat arrived today. Fantastic customer service from this place. Since it is raining heavily outside, I had to do a very quick test spray in a ventilated basement this evening. The test was a complete success! The Testors Decal Paper is fully compatible, and the deep clear coat on the hard top looks great! When the sun shines this weekend, I'll be able to give everything the clear coat it needs. I also got the transmission from TurboKitty yesterday, so my build will progress quickly. This paint is incredible. The blue is so rich and beautiful that I want to buy a gallon of it and paint my Honda Civic with it. Lol. I am incredibly happy right now.
-
Today, in the mail I got a proper 6-speed manual transmission for an LT4 Corvette engine, along with some other engine pieces and decals for my 1996 Grand Sport build. Thank you so much TurboKitty! The Monogram kit, for some reason, comes with an automatic transmission for this kit which is completely wrong as the Grand Sport was NEVER offered with an automatic transmission. But now I have the proper tranny for this kit and it's going to turn out wonderful.
-
Got the body and rest of the body-colored parts painted today. The major downside to these cans of paint I'm using is that they are designed for painting full scale automobiles so the spray pattern is quite large. This means that even though the can holds 12 ounces of paint, a large amount is used when you spray. Thankfully, the paint cures pretty solidly so that I can lightly sand and buff out the basecoat and only the two coats of paint that I've used were needed. I'll post pictures later once the paint has fully cured and I've had a chance to buff it out. I then get to go and start putting the decals on and the body work will be done. I just need to wait until June 13th when my replacement clear coat aerosol can arrives so that I can test out the Testors decal paper and make sure it won't have issues. I'm getting pretty psyched at how this will turn out.
-
"Holy Grail" Models?
Jdurg replied to Billy Kingsley's topic in General Automotive Talk (Trucks and Cars)
I would like to get a 1/8 Scale Monogram 1985 Corvette Coupe and convert it to a 1996 Grand Sport Coupe. The thing keeping me from doing that is the insane amount of space that completed kit would require, and my lack of available space and soon to be finances due to me losing my job at the end of next month. (Though thankfully I am still on payroll until the end of September when I will then get my severance package and I have already gotten informal offers from a few places. So while this is tough, I am pretty much safe until the end of this year). But I would love to build a huge Corvette, or a 1965 version. -
I'll have to follow this build closely. Although I only build Corvettes, I have no issues building famous movie cars. The Ghostbusters Car and the BttF DeLorean are two that I'll have to add to my builds at some point. Would also give me a reason to spend the $20 on a can of the white paint used on the 1953 Corvette since I'd also be able to use it here.
-
Today I got to put some coats of Admiral Blue Metallic on some parts of my current build, and I also got to test out the use of white Testors decal paper to reinforce the semi-transparent white color of the kit decals. I love this new paint I have.
-
Found my camera so I took some better photos. First is the hard top where you can see the amazing blue color, and how the kit decals needed help with white decal paper in order to be fully white. I'll just have to live with the pin striping being semi-transparent. Hopefully the Testors paper will survive this awesome paint I'm using. Here's a better front on view of the hood. I love this color. Side view of the hood. Primed body which looks more yellowish than gray like this photo makes it out to be. For some reason, the iPhone camera I've been using captures the color better.
-
Alright. As promised, here are some photos of the build thus far. This paint supplier I found is AWESOME! I was in the process of putting the clear coat on the hardtop to see if the decals would survive, when the nozzle malfunctioned and the can started spraying fountains of clear coat and noxious fumes all over my driveway. (Sprayed the stuff outside because it was beautiful, and the odors on these things are super potent). Happily, the decals did not react and while the clear finish I applied isn't perfect, this paint does a great job of leveling out as it dries. I called the company I got the paint from and told the customer service person what happened, and they immediately sent out a replacement can free of charge! Now the cans can only be shipped ground and the place is located in New Orleans, but by the tracker it will arrive on Wednesday. I'm taking some vacation time next week so this means I'll have a long weekend to spray. As said in my first novel, heh, the 12 ounce cans of primer and clear cost about $8.00, and the 12 ounce custom mixed colors are $20.00. From how I've seen it work, that is well worth it. The paint dries super fast, but takes some time to "cure". So it becomes non-tacky within minutes, but the paint levels out and binds to itself and the surface over the course of a few hours. After light sanding with 2000 grit sandpaper, I see that it does not run away from the edges like other auto paints I've gotten do. In the picture below you'll see the hood on the left after one coat of Admiral Blue Metallic. I have lightly sanded the finish and used some rubbing compound to level off some of the orange peel. I'll be applying two or three coats overall to the car to deepen the color. It looks INCREDIBLE in the sunlight. In the middle you'll see the hard top that is erroneously provided in the kit. I used this to test out the kit decals and the kit plastic with the paint. It's all a success. The kit decals are kind of thin with regards to the white, but if I apply another layer of the Testors white decal film to it, it looks perfect. Because of the thin pinstriping on the Grand Sport, I couldn't successfully do a proper white undercoat and mask off the areas where the stripe remains. So I'll decal the car using the kit decals after wiping away the orange "gunk" that the glue on it turned into. The clear coat seals the decals to the body and keeps them there, and it does a great job of blocking out the blue undercoat. The clear gives the Admiral Blue Metallic a rich, deep gleam to it. I LOVE this paint. Over on the right is the primer. The primer binds strongly to the plastic and has a fuzzy feel to it that is easily sanded smooth with some 1000 grit sandpaper. The way it fills in flaws and sands so that you can see low spots, it is a fantastic primer. Anyway, I'll be getting more done this weekend, and I can't wait to get this thing built up. I LOVE this paint and will be buying all of my body paints from this place in the future.
-
Well, I got me another can of clearcoat on the way. The first can I got, when i pressed down on the nozzle, paint started to bubble up and along the sides of the spray nozzle and forming a fountain out of the can. Thankfully, I did this outside so I only ended up clearcoating the goggles, gloves, ground, and garbage clothes i was wearing just in case something like this happened. I immediately called up the store i got the paint from (that automotivetouchup.com place I've been gleaming about) and they apologized for what they said was a faulty nozzle assembly and have immediately shipped out a replacement. The place was great and even though I was only using the paints for model car building (and they don't react at ALL with the plastic or the 16 year old decals from the kit i'm building), they still treated me like a valued customer and have made it right. I will be purchasing all of my model car building paints from them if I can. It's nice to see such great customer service. I did get one layer of clear on the hard top I've been using as a test subject, and the color and depth and shine is amazing. Will post a picture asap.