
Jdurg
-
Posts
212 -
Joined
-
Last visited
Content Type
Profiles
Forums
Events
Gallery
Everything posted by Jdurg
-
 For me, it's the experience of starting with a bunch of plastic molded into various parts that on their own, don't really amount to anything. Then, after following the instructions for assembly and painting everything, what was once a bland bunch of plastic pieces is now a detailed automobile with engine, interior, etc. It's the sense of accomplishment that I've followed directions, been patient, and dedicated myself into researching the 1:1 vehicle and creating a miniature version of it. I like building things and being able to follow instructions, recipes, plans, etc. and winding up with a great end product. I like to do woodworking (I built a poker table in my house from plywood and lumber and had NEVER done any woodworking before in my life. I've had people offer me $1,500 for the table, but I'll never sell it), I love to cook, and I love to build model Corvettes. Each time I do any of that, I will undoubtedly make some mistakes, but I can learn from it and do a better job next time. Building model cars also helps me be patient and learn to wait before proceeding. It forces me to not rush into things and that's a life skill that comes in handy everywhere.
 -
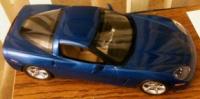
MPC 1988 Corvette Convertible. Completed 22-May-2012!
Jdurg replied to Jdurg's topic in WIP: Model Cars
The spark plug wiring is done. It did not come out exactly as I wanted it to because of the fact that the wire I used, with the insulation on it, was a bit stiffer than expected and also there was not enough room in the distributor. In retrospect, I should have started by gluing the 8 wires into the distributor and then routed them and cut them at the insertion point into the engine. As a result, the driver's side wires do jam into the top, but the passenger's side had to just be wrapped around the shaft of the distributor. Although the Plenum Inlet Cover hides the distributor, you can still see on the driver's side how it rides up, but on the passenger side it does not. Oh well. Lesson learned for next time. The little looms I made for the wires out of thin styrene do look good on the engine, so I'm happy with that. I'm currently working on building some seat belt latches for the interior. For my first attempt at wiring an engine, I think it came out okay. Top View Passenger Side View Driver's Side View. -
MPC 1988 Corvette Convertible. Completed 22-May-2012!
Jdurg replied to Jdurg's topic in WIP: Model Cars
Alright, a little bit more progress. I've been focusing on the engine work while I apply putty to the body and sand that all smooth. Using Squadron Green Putty which I am then "sealing" with an ultra thin layer of superglue. So here's a picture of the engine from the driver's side, the passenger's side, and the top. Also, I made up some decals that I plan to print out as I picked up some decal paper (white and clear) and after I get my ink-jet printer cleaned up and replace the long since dead ink cartridges, I'll be able to print them. For the Tuned Port Injection decal, I'm still not sure if I'm going to use this as a decal. I'm looking to see if there are any places online that will make some custom photo-etch parts. Or, I'll pick up the Micro-Mark Pro-Etch Photo Etch System once I get some funding. (Recently had a nasty legal issue crop up that I had to pay out of my butt for a lawyer to prove that I was not guilty of what I was accused of. It was worth it, however, as the courts agreed with me). So I may see about having a photo-etch TPI logo for the throttle body which would look more realistic. Anyway, here are the photos. Driver's Side. I'm a little irked with the exhaust manifolds since they didn't go on in a manner that allows the exhaust to fit easily. I'll have to modify the exhaust later on. Passenger's Side. Just like the Driver's Side, there are spark plug wire brackets that I made out of thin styrene because I couldn't wait to figure out how to make photo-etch ones. I think they turned out well and work great in order to route the wires properly. I have a .pdf file that shows the proper routing of the wires. Since the plenum cover will hide the top of the distributor, I don't need to worry about the way the top looks. After the semi-gloss clear coat on the brackets has dried, I will route the wires and take another photo. This will be my first ever spark plug wiring job, so while it won't be perfect, I hope it will look good. Also, once the plenum cover goes on, I'll be able to route a fuel line from the fuel filter to the TPI setup. Also, a red wire will be attached to the starter so I can route it to the batter once the engine is installed. Top view of the engine. Here's the decal I created for the oil filler cap. It'll be scaled down and applied to the oil cap on the passenger's side and should look good. I'm the most psyched about this decal. I found an image of the oil filter used on the L98 engine and it was large enough where I was able to put it in Photoshop, grab the logos from a Google Images search, clean them up, then create the design in Photoshop by placing the text and logos on the background I made. (The original image was rotated and unable to be used. It was also too blurry. I only used the image in the lower left corner from the original. The rest was created or copied from an image search). The bar code was a random bar code I found and used. Once this is scaled and printed on the decal paper, it will look GREAT on the oil filter. Finally, here's the TPI decal I'll use if I can't somehow make, or acquire, a properly scaled photo-etch piece. The final size will be 2mm tall, by 3.5mm wide. I also discovered that I have made a fairly major boo-boo. The belt on the gear/pulley assembly was WAAAAAAAAAAAY too thick so I cut the pulleys/gears off of the belt and sanded them smooth. My plan is to use the .015" thick styrene sheet to cut belts for the "sturdy" part. (The hard part will be cutting a notch in the gears/pulleys to insert the styrene belts). I am then going to cover the belts with some blue painters tape and paint it black. The texture is perfect. Where I screwed up is that I didn't measure the distances of the belts before cutting them off. So I'm going to need to either find someone who has this kit and can measure the belt lengths, or somehow get a replacement part and measure. This will be rough. Thankfully the engine gets put into the overall model towards the end of the build. -
MPC 1988 Corvette Convertible. Completed 22-May-2012!
Jdurg replied to Jdurg's topic in WIP: Model Cars
Thanks everyone. I put a layer of semi-gloss Acryl paint on my wheels last night. I consider them "done". The photo doesn't do them justice. In real life, they are very bright and metallic looking. The emblems turned out great, and the black wash I gave them turned out perfect. I am quite happy. I now need to focus on cutting some support for the gears/pulleys and making them look like real belts. The finished engine I plan on showing will be great. -
Very, VERY true. The bad thing is, the sharper the scalpel blade is (and we all try and use the sharpest possible), the more dangerous the cut is. This is because the sharp blades will readily cut right through the flesh and not "tear" the flesh at a cellular level like a duller blade will. The result of this is that the collagen fibers needed to help get the new flesh to grow has nothing to really bind to. So those sharp scalpel blade cuts can take a long time to heal and will be easily "disturbed" which can then open things up again. The sharp blade cuts also result in more of a burning sensation to the wound which can hurt like crazy. A paper cut is an example of a sharp cut in the skin with little tearing. Everybody knows how much those hurt. The best thing to do when you have cut yourself is to first make sure you disinfect the heck out of it. You do NOT want to get an infection, and I highly doubt that all of us store our blades in an autoclave when we're not using them. So go and get some soap and water, or some 90%+ isopropyl alcohol to clean the wound. Or you can use that ethyl alcohol hand cleaner to clean it up. Yes, this will burn and hurt for a while, but it also means that the bacteria which could cause an infection will be killed. Next is to asses the cut. If you cut deep enough to have an artery damaged, every time your heart beats there will be a spurt of blood that comes out. If this is the case, go to the ER. You cannot treat those cuts at home. If it's just oozing out blood on you, like my cut yesterday was doing, keep everything sterile and clean up the blood. If you have some cyanoacrylate glue, you can use that and apply a little bead of the CA Glue over the wound and the reaction with the moisture in your skin and with your blood will cause it to set up VERY quickly and seal the wound shut. As time goes on, the glue will slowly crumble away as flesh replaces the gap, and before you know it you'll be back to normal. CA Glue is also called "Liquid Stitches" in the medical industry as it can be used to seal larger wounds without the need for using stitches. Over the next few days, be certain to pay attention to the wound. Check and see if it's getting warm, or swelling up a bit, causing additional pain, or starting to emit a foul odor. Also pay attention to the area in and around the wound and not exactly right where the wound is. E.G. if you cut your thumb, check out the area around the knuckles and in the lymph nodes in your arm. If they start to swell up or feel "off", go see a doctor as those are signs of an infection. If you treat an infection quickly, you can avoid the really nasty consequences. E.G. amputation, sepsis (infection spreading across your entire body), loss of sensation in the area, and other nasty things. The best way to prevent a cut is to be careful. Don't force things, and think about the consequences of all the actions you are doing. No need to lose a finger because you didn't pay attention to what you were doing. Difficult to build a model kit if you don't have all five fingers on both hands.
-
MPC 1988 Corvette Convertible. Completed 22-May-2012!
Jdurg replied to Jdurg's topic in WIP: Model Cars
By use of logic, I have figured out how to get the small emblems on the wheels and on the driver's side valve covers painted. Thankfully, the pieces were molded in black plastic and I plan on covering the wheels and the engine components in a semi-gloss clear coat to add some depth to it, and to give it the proper sheen. I was cleaning a brush after putting a coat of aluminum paint on a wheel when I wondered what would happen if I went and took a toothpick, soaked it in some paint thinner, then used the toothpick to gently scrape away the paint from the Corvette Emblem on the valve cover and the wheel? Upon trying this out, the aluminum paint was removed from the high spots in the emblem but paint in the lower spots stuck around. No worries about fine detail painting with a brush as I was able to take a sharpened toothpick, dab it in some of the red and the white paint needed on the emblem, and just brush the paint on with the toothpick. After the Acryl paint dries and hardens, I can just take a plain old toothpick and rub it on the high spots to bring the black plastic color back out. I think it turned out great. So here's an image of the engine with the emblem taken care of as described above. The photo really doesn't do it justice. In person, it looks even better. Here's the corrected wheel. The coloring on this photo is off due to the angle at which I took the picture. (Should have kept the same angle as on the engine photo I posted here as both parts were sitting on a sheet of white styrene). Anyway, there's still some smoothing out that I need to do on this, but the sink holes are now completely gone which makes me quite happy. Some VERY fine sanding with some 2500 grit sandpaper is in order to smooth out the rough spots. (The picture makes it look like there's a ton of paint on this thing, but that's not true in person. The real thing looks perfectly fine with a few little specks here and there that the 2500 grit sandpaper will handle). Once the semi-gloss goes on this, it will look even better. I plan on doing the emblem trick on these wheels just like I did on the engine. -
MPC 1988 Corvette Convertible. Completed 22-May-2012!
Jdurg replied to Jdurg's topic in WIP: Model Cars
Thanks! The only reason I wouldn't use the Acryls on the body of the car is because I like to use the very readily available polishing compounds and automotive rubbing compounds that would likely eat right through the Acryl paint. I don't have a hobby shop all that close to me, so it's more difficult for me to get the model car polishing kits, etc. Still, after using these Acryl paints on many parts in my current build, I'm not going to permanently shut the door on that. The Acryl Gloss paints go on just like the flat enamel paints, and the finish they provide is incredible. The oil filter and starter, which are gloss blue and gloss black respectively, look and feel amazing. I will definitely be buying more of these paints as time goes on. Oh yeah, I may have a picture up later, but I was able to use the Squadron Green Putty to clear up the sink holes in the one wheel. Now, after re-coating it with the aluminum paint, I can't tell which one is the putty wheel unless I look really closely. So it looks like I've succeeded. -
Heh. Well, the superglue has kept the wound shut (and with sharp razor cuts, that's the most difficult thing since there is no "jagged edges" to the wound for the new flesh to grow off of) so that has kept the bleeding away. The lidocaine gel I have in my first aid kit has helped keep the pain away, and the lack of swelling or foul odor or redness at the site of the wound means no infection. So now I can laugh and since my right thumb is wrapped up in a bandage, I've been forced to learn better, and safer, ways to cut parts. So a positive from a negative.
-
As has been mentioned in this thread before, a lot of it is human nature. As human beings, we are all naturally competitive. Our brains are wired to enjoy things that make us happy. The dopamine reward path is why some people have issues with cigarettes, alcohol, and other things that aren't good for us. Whenever we do things that make us feel good or make us happy, it's the dopamine rush in our brains that causes this. It's what makes us want to do that thing over and over again. For all of us here, it's building model cars that creates that "rush". It's why we're into this hobby. For the contest builders, they want to win. They want to show off what they've done that makes them feel "better" than others. So if a builder has built a model that won a contest once, the desire to get that "good feeling" from winning a contest will just naturally cause them to bring it again. We all want that positive feedback. The "Workbench" and "Under Glass" forums here are proof of that. We want people to comment on what we've done and say "You've done a good job." We want positive reinforcement so we get that dopamine rush in our brains. Personally, I don't care about contests or whatnot. I put my posts in the Workbench or Under Glass section to get feedback to help me improve on my talents. Not so I can win a contest, but so I can satisfy myself. I am the most critical and difficult judge ever when I'm looking at my own models. I can always see the faults I've made even if nobody else can. A few years ago, I built a poker table out of high quality materials and white oak. I had never done woodworking before. My poker buddies and my father looked at the table and were amazed. While it looks and functions good, I can still see the small flaws and they drive me crazy. So by posting topics in the Workbench and Under Glass forums, I hope to get other critical eyes to review my builds and give me the constructive criticism I seek. I really couldn't care less about what a "judge" thinks of my build. The only judge that matters to me is the one located within my cranium. Sorry for the lengthy, scientific post. Once a science guy, always a science guy.
-
I've got to say, I'm pretty much "box-stock" aside from minor details like opening up doors/convertible-tops/trunks/etc. and only build Corvette models, but I still love seeing what others can come up with. This is looking amazing. Can't wait to see the final build of this. Again, while it's not something that I would do, I still love seeing others do this. Seeing this forces me to go and make sure that the simple things (removing mold lines, sink marks, gaps, etc.) are done properly on my cars. Awesome job!
-
Funny. All this talk about somehow cutting yourself, and I have been happy to say that has not happened............. until just now. I was cutting the pulleys and gears off of the overly thick molded setup on the '88 Vette model I'm building. Trying to smooth out the pulleys/gears, I was using my new, sharp x-acto blade. It seemed to be getting caught up, so the idiot in me decided to just push it a bit harder. The blade went right through the plastic and a good chunk of my right thumb. Realizing I had done this, I waited the requisite 2 seconds before the burning pain set in and the blood started to ooze out. I got some kleenex and soaked up the blood, and more came out. A pretty good amount of my own red life liquid was coming out. Thankfully, I didn't panic and just waited to make sure that no arteries were sliced. The blood that oozed out was not pouring/streaming out and not in tune with my heartbeat, so it's a simple cut. I had been using my spray setup to put the semi-gloss coat on items so I had some 90% isopropyl alcohol that I used for cleanup. I soaked up a q-tip in that and, although quite painful, I disinfected the cut. I then soaked up more of the blood and since I had some cyanoacrylate glue right near me, I applied some to the slice to keep it shut. Once the glue polymerized and hardened, the bleeding stopped. I then added more alcohol to the wound to ensure it was clean and wrapped it up in a bandage and put it in a band-aid. Doctors use cyanoacrylates to seal together small wounds that really don't call for sutures, but which need to be kept shut. So what I did was right in line with what a doctor would do. The disinfecting is the important part. As the wound heals, the CA glue will crumble away and come off, and everything will be back to normal. Right now, I'm just laughing a bit and realizing that the pain is still there from the cut. lol.
-
Serendipity is a wonderful thing. That's how I came into existence!
-
Give it some time, but I found that Easy-Off Oven Cleaner does a good job if you let it sit long enough. In the '88 Vette I'm building, I painted it a metallic black that for some reason never dried fully. So I had to soak it in the Easy-Off to get the paint off and it took me a good 6 hours worth of soaking before a toothbrush and some elbow grease could get it all off. even then, I still needed to use a q-tip with some paint thinner to get rid the of the last remaining bits. *Some words of caution. Easy-Off Oven Cleaner will do a number on your skin if it gets on it for even a small amount of time. WEAR GLOVES. If using a q-tip soaked in thinner, do this very lightly and don't let the thinner soak into the plastic and mush it up. I use a water soluble enamel thinner and after rubbing the last bits of paint off, I quickly ran the part under running water to make sure that the thinner didn't dissolve the plastic. End result ended up just fine.
-
How focused are your scale modeling interests?
Jdurg replied to Jantrix's topic in General Automotive Talk (Trucks and Cars)
For me, it's just Corvettes. Love the car, hope to own one some day, and have so much reference material that it makes it easier to fully detail everything. Really have zero interest in building race cars, drag racers, trucks, etc. Just like me my Vettes. -
11) When detail painting an item that is not seen very often, the detail painting will be perfect and look amazing. When detail painting an emblem or logo that is on the outside of the car or a visible part of the interior, you will always slip right at the very end in a manner that is impossible to clean up without massive stripping and repainting. 12) Your glue application will always be perfect and clean throughout the entire course of the build process. The SECOND you need to glue clear plastic any place, your accuracy will slip and the glass will fog up.
-
GM factory paint colors?
Jdurg replied to Rob Hawkins's topic in General Automotive Talk (Trucks and Cars)
It might not be the EXACT same color as Lemans Blue, but Medium Quasar CC Blue is a pretty close match. Rust-Oleum makes an Automotive Touch-Up paint that I used on my '05 Corvette. It's ATU 6027, and GM code 80, WA9544. Below are some pictures of my car. The lighting plays a big part in the coloration. -
To be honest, those "smudges" actually make it look more like real metal. Most metal sheets or objects I've seen have the discolorations in areas and your photos seem to replicate that. It's pretty amazing how metallic those look.
-
Earlier this week, while looking around online, I noticed on Amazon.com that there was a seller who had the 1/16th scale MPC 1988 Corvette for an incredibly reasonable price. Seeing this, I picked it up and was happy to have the package arrive a week earlier than expected. Therefore, I have been able to get started on it. The kit is in good shape with no warpage of parts, and nothing that stands out as a potential problem. I have already inspected everything and begun my plan of attack. The model has quite a few sink marks in there which I will need to fill in, and after painting the wheels (I'll get into this later) I noticed some more sink marks that I'm thinking about filling in before progressing any further. Just need to get used to using the Squadron Green Putty and once I'm more than a novice at that, I'll fill these in. The model already has opening doors which is a very nice, and surprising, touch since I have never bought a model kit before where the doors were designed to be opened. The convertible top is not an opening portion, but based on the design of the kit I think I can get that to open. Right now, my plan of attack is as follows: Open up convertible lid and perhaps come up with a folded up cloth "top" to store in there. If I get really ambitious, I might even try and get it to fold/open like the real thing. Wire the engine and engine compartment. On a model of this size, I discovered that USB cables contain perfectly sized wiring for use as spark plug wire. I cut apart an old USB cable and inside I found plenty of red, black, and green wire that works perfect for spark plug wiring. I've already drilled the holes in the cylinder heads for the acceptance of these parts and was happy to find a VERY detailed wiring/firing order diagram for the L98 engine online. The distributor has had the center of it drilled out to accept the wiring there. Since the top of the distributor is concealed by the Inlet Plenum Body, just drilling a center hole is good enough. For the rest of the engine compartment I've done my research and have dozens of photos of the 1988 Corvette Engine Bay. Correct the Alternator Bracket. The alternator bracket on this kit is incorrect in that it's completely solid and not "ladder-like" like the real thing is. I may need to go and fashion my own bracket out of sheet metal, or some very thin styrene if my attempt at cutting the proper holes in the existing bracket doesn't work. I do have some things that I'm not quite sure how to handle yet. One is the logos on the body of the car. I would like to get some photo-etched logos to use, but nobody makes a photoetch set for this model so I'd have to either find a place that will custom create a set for me, or pick up my own photo-etch producing device. This is the aspect that will make this a fairly lengthy build. I am certainly not going to just use the details molded onto the car. Makes sanding/painting way too difficult. Anyway, I'll post photos as I go along. Thus far, I have four photos to show: I de-chromed the wheels and a good deal of the chrome parts in this kit. Easy-Off Oven Cleaner took care of the chrome in minutes, and it also ate through the clear coating underneath it in a heartbeat. The 1988 Corvettes I've seen photos of have had aluminum wheels and not chrome. Only a select few have chrome wheels. On the bottom right, I honestly didn't see the sink marks until I put the first coat of aluminum paint on there. Since I can now see them quite easily, I think I'm going to sand the paint away from those areas and fill it in with putty before I put another coat of aluminum on there. Once the aluminum is all dry, I will spray a semi-gloss clear coat over everything to get the sheen I want. For the logos in the middle, I'm hoping to perhaps get a photo-etch set made of those emblems so that I can detail paint them easier and then epoxy them to the centers. I'll need to find someone who can create a set for me, or I'll need to get the equipment to create my own. (Creating my own may be a good option as I also need to get wire looms and whatnot for the wiring in the engine bay and the only ones available online are 1/24 or 1/25 scale). It's a little blurry and still has a small bit of the milky haze to it from the clearcoat, but the sheen is exactly what I wanted. The engine block and oil pan on the L98 engine is a black color which I obtained by painting the engine block and the oil pan a nice flat black which went on smoothly, covered well, and didn't obscure any details. By spraying a semi-gloss clearcoat on top it gets what I wanted for color without the difficulties associated with painting with semi-gloss or gloss colors. (For me, flats are always the easiest shades to paint as they leave almost no brush strokes). I was also able to make use of the "poor man's airbrush" that I picked up today. It's a propellant can with a cap that attaches to a bottle with a siphon feed on it. Depress the button on top and the paint in the bottle is vaporized and sprays on the object. I used it to coat the oil pan and it worked great. It's also my first use of the acryl paints and my god I love them! They cover well, they dry fairly quickly, and they level out and don't run away from high spots. I wouldn't use them to cover the body of the car or any highly handled areas, but they definitely are great for small details. Plus, the clean-up is simple. Soap and water. Here are more parts which got the Easy-Off chrome removal. The Intake Plenum Body, the Fuel Rail, and the Throttle Body. By de-chroming these parts, I was able to attach the Throttle Body to the Intake Plenum Body and paint them as a single unit. The flat part on the Throttle Body is another area where some custom photo-etch would be nice as the real 1:1 car has the Tuned Port Injection label plate on there. With this kit being an older kit, it's not surprising that a decal wasn't even included for this. The manifold has been painted aluminum even though the instructions say to paint it black. In the images I have seen of L98 engines online, the intake manifold is always an aluminum color. The pipework is many times a shade or so darker, and I think I may use my gunmetal paint to darken the pipes on there. Finally, in the upper right corner is the oil filter from the kit. I painted this using the gloss blue Testors Acryl paint that came with the spray gun kit. I mixed it with some of the semi-gloss clearcoat to lessen the gloss of it, and painted away. I am simply amazed at how smooth the paint went on, how quickly it covered everything, how it leveled itself out and removed all brush strokes, and how it didn't "run" from the high parts and raised areas of the plastic. The filter was molded in bright red, and I can't see any of that through the super smooth paint job on it. I'm looking around online to find some logos/images to put onto the filter. I figure I can invest in some ink for my inkjet printer and some decal paper and come up with something for this. And the final photo for today. This is the engine block with the aluminum and flat black paint completed. (The oil filter is also visible in this image). I still have some touch-up to do for some of the aluminum, and I need to pain the molded in hoses on the valve covers and the oil cap the proper shade of black. In addition, I have to go and detail paint the Corvette logo on the driver's side valve cover. The valve covers were de-chromed since, again, my source material shows these as being aluminum and not chrome. The cylinder heads were also painted aluminum to match all of the source photos I have and not black like the instructions stated. Same with the transmission. I've always seen them as aluminum/metal and not painted. The only areas which did match what the instructions stated were with regards to the block itself. All the images I've seen have that as a semi-gloss black color. So I painted the block flat black since it covers very easily, and doesn't leave a lot of nasty brush marks. The two halves of the engine fit together fairly well, but there was still a noticeable gap down the middle. (You can still see the seam/gap in the manifold area, but since that will be covered I didn't concern myself with it). I spent a good deal of time with superglue and baking soda to fill in the gap and smooth out the seam around the bell housing and the transmission. With the paint coats on there, I think I did a pretty good job. Though it can't be seen in the photo, I have drilled the holes for the spark plug wiring according to the wiring diagram I have. After the paint has a day or so to fully dry and cure, I'll use the spray setup I have to put a coat of semi-gloss clear over everything. The rest of the engine parts have not been painted or cleaned up yet, but that is my goal for tomorrow. I'm trying to figure out how to get the pulley/gear system corrected as the "belt" molded in there is WAAAAAAAAAAY too thick. But many of the gears are "hanging" from this setup so I'm not sure how I can cut the pulleys/gears off of it and still keep its shape. Right now, I'm thinking drilling a couple of small holes in the gears and putting some stiff wire in there, then covering the two wires with masking tape to act as a belt. Or, cut some incredibly thin, but sturdy, sheet styrene or metal and use that to stiffen it up. Regardless, I'll figure out something and make this look more realistic. More to come likely next weekend as I get more finished here.
-
YOUR LOCAL HOBBY SHOP ECONOMY
Jdurg replied to Dr. Cranky's topic in General Automotive Talk (Trucks and Cars)
Around me, in Southeast Connecticut, there is only one local hobby shop, and one Michael's Craft Store to go to. The LHS is nice, and I went there today to get my stuff, but the store is so cramped and there is just too much going on there. It's difficult to spend time looking through all the model kits because the aisles are so narrow that only one person can fit in there. If you need to get further down the aisle and somebody is already there, you just have to wait. In addition, the shop tries to cater to car model kits, airplane models, military models, science models, model railroading, RC Cars, sports cards/memorabilia, board games, crafts, etc. etc. It's a small square footage store that just seems to be trying to get too much in there at once. The prices are also a bit high. A typical plastic model car kits costs $25 on average. A 1/2 oz bottle of Model Master paint is $3.50 or so. They have PLENTY of styrene sheets and sticks/tubing, but, it's difficult to find things. A lot of this is simply because the store area they have is not large enough for everything they want to do. Still, they are the only local hobby shop so if I need something right now, I have no issues driving down there and supporting them. The place is run by a family that has been running the store since I was a little kid. It's good to see them still around, but I just wish it was easier to look through their inventory and find things. I miss the days when Wal-Mart/Target/Benny's/Toys 'R Us carried model cars. When I got back into this hobby a few months ago after a 15 year absence, the first place I went to look for model kits were the aforementioned stores where I used to buy them as a kid. Was sad seeing that they have cleared out their inventor of model kits and supplies and stated that they do not carry them and never will. So right now, online is where it's at for me. To deal with the shipping charges, I find a place that will charge a flat shipping rate and just buy in bulk when I'm able to. -
Stopped by the only Hobby Shop we have in my area, and picked up the following: Testors Acryl Semi-Gloss Clear Bottle. (Need a semi-gloss overcoat for the engine and interior of the car I'm building now). Testors Model Master Semi-Gloss Black Enamel. (My bottle is getting low). Testors Model Master Insignia Yellow Enamel. (For the shocks on the '88 Corvette I'm building). Squadron Green Putty. (So I don't have to use superglue and baking soda as putty. Have been used to using Bondo for the MDF/Woodworking stuff I've done before, but it's too much of a hassle for model car building and I've heard great stuff about Squadron Green). Cheap synthetic paint brushes. (Needed a few more, and for $2.00 these are good enough for the purposes I would need to use them for). Plastic Bulb Pipettes. (Needed some of these to get paint from bottles into the feed-bottle of my next item on here). Testors Model Car Spray Kit 9215. (I saw this right above where the paints were being sold and with the $10 coupon I had, this only ended up costing me about $9.00 total. So I figured, why not? It includes a can of propellant, five different Testors Acryl paints, a larger bottle of Acryl White Primer, a Feed bottle about the size of a standard Model Master Paint jar, a cap to the feed bottle to connect it to the spray cap, a feed tube to pull paint from the feed bottle, a spray cap that connects to the propellant bottle, a nozzle cleaner, and instructions. I don't have the funds for an airbrush quite yet, and also don't have the time to do the proper research, so I figured this would be good enough for now. I'm used to using rattle cans to paint models, and this "airbrush for dummies" should suit my needs for applying a semi-gloss overcoat to interiors/engine parts, as well as let me quickly paint things like chassis which generally take forever using a brush). I'm just happy that I didn't pick up various model kits that I saw and wanted. I need to finish the '63 Corvette 1/16th scale kit I already have (which I've been putting off due to poor fitting of the trim pieces. The kit is 99% done) and I also want to finish this '88 Corvette 1/16th scale kit with all the full detail that I plan on doing. (Spark plug wiring, engine bay wiring, etc. etc. Was happy to find the wiring diagram for the spark plugs, at least, online for the L98 engine).
-
Whenever I have done clearcoats, I have typically done so after putting on my three or, if there was a lot of orange peel, four color coats and sanded after each of them. For the final color coat, I generally do a very light "sanding" with rubbing compound to take down the high parts of it. My goal is to have it be smooth, but then have a little bit of a "fuzz" on it which lets me know that the clear coat will have something to grab onto. A VERY thorough washing with soap and water to make sure any greases/oils/waxes are off the surface, and letting it dry is then key. For the clear coat application, I generally only use one fairly "wet" coat of clear. Too much clear and the paint coat starts to look too "thick" and extra layers of clear don't really add anything but a greater chance of having the color turn yellow over the years. I say just go with one "wet" coat of clear to seal up the color layer. If your pain application technique is proper, there won't be a lot of orange peel in your clear coat. In addition, proper sanding/smoothing of the primer and color coats underneath will give a super smooth finish for the clear to go over. Then, I don't even break out the sandpaper for the clear coat. I just use rubbing compound and polishing compound since the clear finish shouldn't really require any sanding on it if the base coats are done well enough. While the pictures are of poor quality, head into the "Under Glass" forum and take a look at the photos I posted under the "2005 Corvette Completed" thread. I got that color and finish by using two coats of primer, and two coats of color with proper sanding/rubbing out after each coat, then applying one "wet" coat of clear. (This was all automotive touch-up paint lacquers). Another option for color application that may be good for a beginner is something I just discovered today. I was out at my local hobby shop because I had a $10 coupon thing I had gotten from a previous big purchase of items and also needed to get some brushes, a few colors of paint, and a semi-gloss overcoat for my interior/engine work on the '88 Vette 1/16th scale model I'm building. While looking at the paints, I noticed a "spray kit" from Testors. (9215). Taking a look, it's like an airbrush for the rattle-can folks. It's a can of propellant that connects to a bottle with a tube in it that is attached to the propellant can nozzle. Press down on the propellant spray button and a fine vapor of the paint in the attached bottle sprays out onto your target. It does not have the accuracy or control of an airbrush, and if the can is turned in any direction except directly upright you will spill paint everywhere, but to get started with using airbrushes and for painting things like chassis and interiors, it works great. I picked it up because the only semi-gloss rattle cans I could find were lacquers (which would not go over the enamel engine paints). So I was forced to either get an airbrush like thing, or find a bottle of brush paint which is almost never available in clear semi-gloss. (flat and gloss abound, but semi-gloss seems to be the forgotten one).
-
Thanks! Yeah, the color just looked really good to me when I was looking at all the options available at the auto shop. Amazing how a rattle can paint job can turn out nicely. Even though it's a metallic blue, I was able to wet-sand it without any issues. The tail-light tinting actually happened by accident. Heh. I was painting the inside of the body shell flat black and accidentally got some paint on the backside of the lights. Instead of trying to get the paint off, I just took more black paint and put it behind there. The lights are red plastic, and the black paint behind it darkens them nicely and really makes the back-up brake light on top stand out a bit more. Quite a serendipitous mistake.
-
Wow! That's impressive for a first glue kit attempt. My first glue kit attempt wasn't exactly show-worthy. Heh. I remember keeping it around my work area when I was younger as a reminder to be patient and take your time. The interior looks really good. I like how the paint on the dashboard is kind of textured. Makes it look like real vinyl/leather.
-
Funny, because that's the part of the build that I love the most. I simply love building the engine, detailing it, wiring it, etc. etc. Currently, in the '88 Vette kit I just got in the mail today, I'm in the nasty part of just gluing the engine block halves together and seeing a small gap and alignment issue. So I'm stuck sanding the lines down and filling in some sink-holes in some areas, etc. etc. I don't currently have any filler putty that I can use that won't crumble away, so I'm making due using superglue gel and baking soda. This works surprisingly well and I'm glad I read about that while stalking the forums here before signing up. It makes a mess when sanding, but I used this on the '05 kit I just finished building and I can't even see where it was used, so it's nice and strong. This weekend, I'll need to go and hit the hobby shop and pick up supplies. (And I MUST stay away from the kit area. )
-
I got a very nice surprise today. Earlier this week, I bought from Amazon.com an MPC 1988 1/16th scale Corvette Convertible. The shipping estimate for the kit said that it would get here on the 7th of March. So I was COMPLETELY surprised when during the middle of the day I got a knock on the door and it was the Mailman with a nice large box to give me. Opened it up and there was my still fully sealed MPC Kit. It was all in great shape and has made me so happy. I have wanted to build a larger scale modern Vette for a long time, but only knew of the 1/8th scale kit from Monogram (I think it was them, or Revell) and that's just a tad bit too large for me. 1/16th is a great size for me. Plus, it's the same scale as the 1963 coupe I'm almost done with. I like this MPC kit because it has opening doors which saves me the hassle of having to build that myself. For customizing, I think I'm going to open up the soft-top lid and put a rolled up cloth top in there, or if I can, figure out how to make it functional and unwrap it and turn it into a fully working soft-top. Hmm...... I just got an idea. I just wish there was a photo-etch detail set for a kit of this size as I want to sand off the molded in badges so that I don't have to worry about them when painting. I may have to look into getting my own photo-etch kit and try to create the emblems myself.