
Jdurg
-
Posts
212 -
Joined
-
Last visited
Content Type
Profiles
Forums
Events
Gallery
Everything posted by Jdurg
-
 Don't have any photos and this may not be modeling related, but in the mail I got the two electronic mouse traps I had been looking for. I've had a mouse infestation for a few weeks now, and these little buggers have been taking the bait from my traps and running off without setting them off. So I got these electronic traps that are supposed to electrocute the mice. Well, I went out for dinner and when I got back the two traps had both captured a mouse. I got the little buggers! FINALLY! I am so happy that I finally nabbed these two creatures. I know there's more, but I'm now up to 5 in my recent catch numbers. It has taken some time, but no longer am I being awoken by a mouse running through the walls, or running right out in front of me while watching TV. YES! Sorry I'm so happy, but these things have evaded me for some time and I FINALLY got them!
 -
Amazing work with the enamel paint guys. I just don't have the patience to wait for enamels to fully cure, and am also not very comfortable with the softness of enamel paints. Any time I've used them when building model cars, I always wind up with a fingerprint mark in them from handling the parts when I am applying detail work, or from assembling the body onto the chassis. I paint strictly with lacquer based products now as they dry super fast and I haven't had any issues at all with the lacquer eating the plastic as long as I put a good primer coat on. Later today I will be able to put rubbing compound and then polishing compound on my '67 Vette body and get ready to do final assembly. (Once I figure out what to do for windshield/rear window glass as the clear plastic in the kit is waaaaaaaaaaaaaaaaaaaaaaaaaaaaaaaaaay to thick and out of scale).
-
Oldsmobile Engine Green (for the Revell '50 Olds Coupe)
Jdurg replied to Art Anderson's topic in Tips, Tricks, and Tutorials
Might be a bit late, and the cost and quantity of the paint offered here may be a bit too much, but there is a website that sells quarts of Oldsmobile Engine Green paint at the following URL: http://www.hirschauto.com/prodinfo.asp?number=EE-QUART You could also try http://www.automotivetouchup.com/ and e-mail them and see if they could mix the proper paint color for you. This place generally deals in body paint, but after talking with them over the phone and via e-mail they stated that they can provide pretty much any type of paint (Engine, Interior, Body) for any year of car. Just tell them what you need. I love this place and feel like a sales rep every time I recommend them to people, but the product is well worth the cost. -
Thanks Charlie. Unfortunately, a drive of that distance would be a bit too much for me. I live in New London County, so that would be well over a 1.5 hour drive up to Worcester. That means I'd have to be up at 5:00 A.M. every day to shower, get ready, and get into work by 7:30 A.M. every day. Then, with the long drive home, I would be physically dead by the end of the work day. With the need to meet doctor's appointments and have any kind of social life whatsoever, that would not work out. I have looked into positions that are widely available up in the Cambridge area of MA as well, but they have all offered low salaries and a requirement to be in the office every day. I'm at a financial situation where I would not be able to afford relocating up there at this time. I only bought my house five years ago and there is a lot of work that needs to be done on the house before I could sell it. It's just not able to happen now. Happily, I have got in contact with a recruiter for the clinical research industry who has found a company based out of Chicago who is VERY supportive of remote workers (as they don't have to pay for office maintenance for such employees, nor other costs associated with having employees in the office) and is shopping my resume out to them and other companies looking for people able to work from home. Having been unemployed since the end of July (and "officially" unemployed since the end of September as that is when I was taken off of payroll), I've discovered that not going into the office every day has saved me a TON of money. I'm no longer spending money on gas for the car, coffee at work, breakfast and lunch at work, and stopping for happy hour with colleagues after work. Seeing his, I realized that I could take a pretty significant paycut if I were able to work from home and still live the same style of life that I have right now. Even better, many of these companies that support remote workers will pay for land-line telephone services as well as internet bills. The one company I'm seriously considering right now would be willing to pay for the full cable tv/internet bill since I can only get internet if I have a cable TV account. I also fully paid off my car last month, and paid off my credit card in full which resulted in a significant savings each month. I received my severance check from my former company a few weeks back and have that in savings and just transfer over to my checking account the amount of money that I would get from my paychecks each pay-period if I was still working. My hope is to get back to work in the next month so that I can have the severance check available for home repairs and pleasure spending.
-
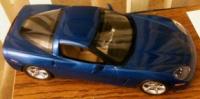
Beautiful 1:1 car there. Are you going to paint the scale model version the same blue? Need to build me a large scale blue car as I loved the Admiral Blue Metallic paint I put on my '96 Grand Sport Corvette in 1/24 scale. I can only imagine that a larger scale car would look even better in a deep metallic blue color.
-
Kurt Wilson`s: 23 T` Bucket new project 10/9/12
Jdurg replied to John Teresi's topic in WIP: Model Cars
Very nice! Always feels good scratch-building something that comes out good, doesn't it? -
Just wanted to post a photo of the main body after I had applied Bare Metal Foil to the trim, and put on the final clear coat for the body. I'm AMAZED by how it has turned out. Tomorrow, once the clear coat has had 24 hours of curing, I will apply some rubbing compound and various grades of polishing compound to level off the little bit of orange peel that is on there. It looks incredible. I am so happy with how this turned out. Below is a photo of the body as it sits on a tall can of truck bed liner that I had taped the body to when applying the clear coat. Tomorrow I'll get to install the headlights permanently, and hope to get the body attached to the chassis later tomorrow night. My back and hernia issue are still bothering me, but this model is helping me forget the pain and discomfort. I'm really happy with how this has turned out. Yes, I am a bit upset that the headlights didn't turn out perfect, but this is still a great build by my standards. The finished product is coming up soon. I'm just deciding if I want to keep the chrome plated front and rear bumpers, or remove the chrome and paint it the silver chrome trim MM paint that I have. Based on the mold lines and the issues with the kit plated chrome, I'll likely do the MM silver chrome trim paint just to keep things consistent. I'm REALLY happy with the bare metal foil I applied. And the wet coat of Gloss Clear over the top of it will allow me to buff out the paint job without worry of it lifting. I can see the end, and I'm very happy. (The photo below was taken in my living room where I have had to temporarily put my work spot due to my renovation of the work room upstairs into an office so I can work from home in the job I recently applied for). Edit: I decided to de-chrome the bumpers and side molding and use the MM Silver Chrome Trim paint to keep everything consistent. I will not be able to do the Silver Chrome Trim on the wheels as those are already painted, but I'll live with it. The BMF Chrome Trim on the window molding has the same type of coloring and sheen as the MM Silver Chrome Trim paint, so I think this will match better. There are still some items that will have the kit plated chrome, but I'll just have to deal with that. At this point, I'm just happy with how the paint came out (and again, I will FULLY support www.automotivetouchup.com for their selection of paint colors and customer service), and my first ever attempt at body modification came out satisfactory to me. Those are the headlights I cut out). In the future, I will plan on doing another of these kits, but cut the roof off and make it a convertible. That will be many years in the future as I need to conserve finances right now, and model building has really helped me beat some nasty "issues" that I brought upon myself years ago but do not want to get into detail right now. I'm just happy at how incredible this is turning out.
-
Hey guys. Sorry I've been so "slow" with my posts in this thread. The project went on a temporary hold when the last can of Clear Gloss Coat I had from automotivetouchup.com had a manufacturing defect which caused the paint to literally fountain out of the can. I called up the company and they were VERY apologetic and immediately shipped out a replacement can. I have to say, this is the second time I've had a defective Gloss Clear Coat aerosol can from them, but each time they have immediately sent out a replacement. I LOVE the clear coat from them, and even if every other can of Clear I buy from them has the same defect, I know that their customer service is top notch and their product is the absolute best. The replacement will arrive tomorrow, and with the weather looking good for the rest of this week I should be able to get the final clear coat on the body this week. That means I'm very close to finishing this thing. The only thing I can hope is that a potential surgery in my future doesn't negate my work. I had a roommate move in back in May and while moving some furniture around I felt a sharp pain in my left groin. I figured it was just a strain and did nothing about it. The sharp pain has been there ever since then, and only recently did it start causing issues again. So I'll be getting an MRI in the next few weeks and then need to decide if I want to go through physical therapy or surgery to correct it. So I may be a bit slower, if that's possible, with my updates. Regardless, this is still turning out great and I LOVE how the headlights are turning out. Can't wait to finish this thing.
-
1/12 #31 Corvette Daytona -68
Jdurg replied to maysula's topic in Other Racing: Road Racing, Salt Flat Racers
Hmm. Didn't know that they used a 1967 Corvette for the Daytona in '68. Very nice build! Got one going myself. Just waiting for a replacement can of gloss clear coat to come in from automotivetouchup.com. The second can I was using malfunctioned and the can just let out a fountain of spray all over my arms, gloved hands, and parts of the car. Had to sand down the clear coat which actually turned out okay and called the company to tell them what happened. It's the second time I've gotten a bad can, and once more, they proficiently apologized to me and have a replacement on its way. A great company for paint. Anyway, again, great looking build, especially the engine compartment! -
Living in New England my whole life, I'm pretty used to snow. I actually like winter more than summer because come winter time, if it gets cold you can always go and put on more clothes to stay warm. If it's really hot outside, there comes a point where you can't take off any more clothing without making things really awkward for guests, or draw the attention of the police. Of course, the cold weather does suck as it means I have to fill up my oil tank and that is NOT cheap in any sense of the word. (Generally speaking, it's about $600 to refill the tank each time, and over the winter I usually have to fill it two or three times. Hence why I have set the thermostat very low and just tell my roommate to wear long sleeves or a sweater if it's cold. Or pay me a bunch of money to cover the oil tank refills. ) We're supposed to be getting our first cold spell coming up in the next week. Last year, we got our first significant snowfall in late October which was kind of stunning as we generally don't start having significant snow (4" or more) until a few weeks before Christmas. Funny thing is, after the "Halloween Snow" last year, we really didn't get any more the rest of the year. The year prior, we got a LOT of snow in the middle of the winter but nothing on the tail ends. Don't really care if we get a bunch of snow this year as I'll just force my roommate to take care of it.
-
For ten years after graduating college, I worked for a very large pharmaceutical company. The first 4 years were spent working for a company that the pharmaceutical corporation outsourced work to, and the past 6 years were spent at the pharma company itself. I worked on the clinical trials that all drug compounds have to go through prior to, and after, approval from the domestic and international regulatory agencies. My work involved the entry and QC work of the Case Report Forms (CRFs) into the clinical databases that housed the data. I progressed on to the data management work on the clinical trials which involved designing databases to collect the data outlined in the protocol, ensuring the data was clean, and issuing data clarification forms (DCFs) to the sites running the trials to clarify conflicting or erroneous data. As time went on I was involved in giving presentations to the investigators at the meetings all over the world, and that allowed to travel to great places and meet a great number of people in the industry. I was the go-to guy on the study teams for questions about the data that was coming in and clarification on the data. I ensured that the data managers who performed the day-to-day work on the studies were following all SOPs and adhering to the ICH GCP standards. I sat on a board that ensured the data standards used to design the databases were being used consistently across all studies so that data from different clinical trials could be merged together and compared properly. I made sure that we had documented everything that was done so that in the case of an FDA, EMA, or MHRA inspection we could prove that we were following our SOPs and all federal and international requirements. Spent many long days making sure that our databases were clean and ready for freezing which basically means that we lock down the database and ensure that not a single thing can be changed by anyone. This way, we can unblind the double-blind, randomized studies and report out the results. I was well respected by my peers, my supervisors, and the data managers who worked under me as well. In late July of this year, however, the company decided to "change their philosophy" and outsourced every single part of the clinical trial process to external companies except for the clinicians who write the protocols. As a result, my job was eliminated and I was given a 60 day "departure period" whereby I wouldn't work but I'd still receive my paycheck. That period ended on the 25th of September and I am now officially unemployed. Been spending the last couple of months looking for a new job but have found nothing. The only things I've found have either offered a salary so far below what I was making that I would not be able to afford my mortgage payment, or required that I relocate at my expense for a temporary position. Suffice it to say, I haven't been able to find anything. With the bills I have, I calculated that I can take a job that will let me work from home if the salary is 75% of what I was making previously. It would be a little bit tough, but I could do it. I'm thankful that my previous employer has given me a severance package and payment for the vacation days that I had accrued but not used. That check should be deposited this coming week, and if I get absolutely nothing in terms of employment, it will keep me afloat until the end of February next year. Of course, the severance is being taxed at an insanely high rate, but I'll likely get that all back when I file my taxes next year. So it means that once I get my tax return I should be safe for another three months. Still, I would like to become employed again so that I can use that severance check for buying things I want but don't need. This is the time period where buying my own house has hurt me as I can't afford to move due to the work needed on the house, and the mortgage payment each month prevents me from being able to save up money so I could put a down payment on a new house. Had I just gone and moved into an apartment five years ago when I bought my first house, I'd be able to have a bunch of money saved up and be able to move relatively easily. I'm still fairly bitter towards my old company due to how the cuts were made and how they decided who was going to be kept and who was going to be cut. The only good thing is that talking to people who were retained there, they say that things are getting absolutely horrific there and that getting laid off was a better fate than getting retained. Too bad you can't build model cars for a living.
-
Just wanted to chime in and say "HOLY FREAKING SCHMIDT!!!!!" That just looks absolutely beautiful. The detail you've put in there is incredible. This is why I love building large scale model kits and wish there were more of them out there to buy. Makes it so much easier to add detail and clean things up with such a large scale.
-
Oh wow. If finances turn in my favor, I may have to look into getting one of those. Have always marveled at the level of detail the Japanese manufacturers put into those kits and can only imagine how amazing they look when put together. Looking at the kits I've built, the C3 era Corvettes are the one model type I haven't put together yet. Got C1 (1953 Corvette), C2 (1963 coupe and the 1967 coupe I'm building now), C3 (haven't built one yet), C4 (1/16 1985 Vette and the 1/24 Grand Sport Convertible), C5 (Realized I don't have one of those built yet, and it may be my next goal as those kits are generally very well done), and the C6 (Put together the coupe I have as my avatar). Can't wait to see more progress on your build. The wheels look incredible. What paint did you use to get that silky smooth gold on there? Looks almost like it was plated and not painted.
-
Thank you for the kind words. I love the green as well. Yes, the two 12 ounce spray cans of the Goodwood Green Metallic cost about $38 total, but the expense is well worth it as the paint is super sturdy, dries really quickly, and is a spot on perfect match with the real car. Today I went and got my second coat of clear on the body and ran into a nasty little issue. Just as I was finishing up my second coat, the can started to sputter and fizz around where the nozzle meets the metal can. A few seconds later and a fountain of clear was spraying out of the can into the air. A defective product, and the second such defective can I've gotten from automotivetouchup.com. Thankfully, the first time this happened they replaced the can no questions asked. I'm hoping they'll do the same here as some of the spatter got onto the clear coat and I'll need to rub that out. I'll also need to put on the decal for the front nose stripe and add a couple of clears over that. Something is definitely funky with their manufacturing process with the clear coats. I haven't had any issues with the primer or base colors I've purchased from them (and I've purchased quite a few), but their customer service is really good and the first time I had the issue they rush delivered a new can to me. On the bright side, this will give me plenty of time to let the existing clear coats fully cure.
-
For seatbelts, I've found that using first aid tape (the white stuff used when taping up a busted ankle) works great. Instead of painting it, I use a Sharpie marker as the ink will soak into the paper or fabric of the tape and still allow the belt to be fully flexible. If you plan on having the belt parts "fixed" in position on the seat, you just need to ink up one side of it and apply the tape to the seat in the position that you want. Take a look at my 1/12 1967 Corvette Coupe thread in here. I believe, amongst my novels of posts, I have some photos in there of the seatbelts I made for the Vette. At first I tried using masking tape and painting it, but if the tape moved at all the paint would crack and fall off. Plus, the tape was too "stiff" for what I wanted. I then found the first aid tape at the grocery store and there are so many varieties with different types of thread patterns on there. I tried painting them, but again, once the paint dried the belts got too stiff and unwilling to move. That's when I figured I'd give the black Sharpie a try (since my interior is black) and the ink soaked into the tape material and made it nice and dark while allowing the "pattern" on the tape to still show through and remain flexible. If you aren't going to "fix" the belts into position, you can just take a piece of tape, affix it to itself by bending it in half, mark up both sides with the Sharpie, cut the length and thickness you desire, then use the Sharpie to touch up the edges where the cuts were made. My roommate, who isn't into model building, took a look at the seatbelts and mentioned how real they looked. The tape costs about $4.00 for a roll that will last a long time, and the Sharpie markers are nice and cheap and available in many colors.
-
Man, those Japanese kits are amazing with regards to the detail and precision. As someone who only builds Corvette kits, it really makes me wish that the Japanese companies would put together a super detailed large scale kit for a Corvette. I can only imagine how incredible it would be putting together a C4 era Vette with photo-etched parts, detailed engine with full wiring/plumbing, opening doors, rotating headlights, etc. I'll definitely be following this build as mine is starting to come to an end (1/12 Scale Monogram 1967 Corvette Coupe) and who knows, perhaps seeing all these amazing non-US origin kits will inspire me to perhaps try one out.
-
Another quick little update here. I got the second, and what looks to be final, clear coat on the second headlight assembly as well as the second color coat on the body. I appear to be done with the color basecoat application now. The first clear coat went on the body as well. It cured pretty quickly and therefore has a lot of orange peel on it, but since I plan on putting MANY more clearcoats over the top it doesn't really concern me too much. The plan, like I did with the hood, is to put down two clear coats, smooth them out via wet-sanding and rubbing compound, apply the decal to the nose, let that dry for a good few days, apply a light clear coat, let it dry, apply a wetter clear coat, let it dry and cure then use wet-sanding and rubbing compound to remove any other orange peel, take a black Sharpie marker and go over the black part of the decal to provide uniformity with the hood (as I was forced to use black sharpie on that to fix a decal issue), let that dry and then go and put a final wet clear coat on. With the final clear coat on it will cure for a week or so (even though a couple of days is fine, I want to be super sure), then use progressively finer grades of rubbing compound and polishing compound in order to bring out a high gloss sheen like my first headlight bucket and my hood now have. I've got three pictures to show off. First is one of the four finished wheels attached to the car. If I go ahead and make a convertible version in the future, I'd de-chrome the wheels, spray an aluminum colored lacquer to it, let it dry, then do what I did with the chrome kit wheels; take flat black acrylic paint and brush it over the entire wheel, then using a damp rag wipe off the excess from the raised area and the exterior ring and the hub. I then used a toothpick to carefully rub away the paint from areas it shouldn't be. Painted the center area with the red acrylic paint I used to paint the red-lines on the tires, and again used a toothpick to clean it up. I finally used a fine toothpick to paint the black Chevy Bow-Tie in the center of the wheel. Just need to finish up the valve stems and apply them to the wheels. The second one is a view from the top showing the headlight buckets resting in place. I haven't permanently affixed them yet (that will come when I am preparing for final assembly), but wanted to get a test to see how they fit in there and if any paint needs to be carefully scraped from areas. The gaps around the edges are fairly large, but this is the first time I have EVER tried something like this so I think it's acceptable. The body, as mentioned earlier, had its first clear coat on there which has been lightly sanded and rubbing compound used to take away the roughness resulting from the first clear. I did it very lightly as I didn't want to sand down to the color layer and I know that I will be putting on MANY more clear coats later on so with a thicker layer of clear gloss on the body I can be a tad bit more aggressive with the sanding/buffing. The final pick is a view of the headlights in place in the raised position. They aren't perfect. The spacing between the lights on the driver's side bucket isn't the same as that on the passenger's side. But it's too late to correct that now and again, this is the first time I've ever tried doing anything like this so this is good enough for me. Still need to get the concave part of the lights painted silver, the plastic lens cut out of a CD case cover, and the black ring and plastic lens installed into the headlight assembly. The front grill was washed using black paint and I think it looks pretty good to me. The license plate frame was from the Model Car Garage photo-etch set, and the plate itself was printed on Testor's White Decal paper here at home. I found a 1967 era Connecticut License plate pattern and put my own license plate numbers on there (hence why it's blurred out in the photo ). The rear license plate is the same but with the registration sticker on it too. Kind of makes the Corvette look like it's a car I would have had my whole life if I was around back in 1967 and bought it then.
-
First color coat is on and drying. Body work came out beautiful. Just need to pray that there are no issues with the final assembly. Will post a photo once the final clear coat is applied and polished out, and the headlights are installed. (The preliminary checks on the installation show that they will work great. They didn't come out spot on perfect, but it's the best I could do at the moment.).
-
A couple more photos here. The chassis is basically done and the interior tub has been bonded to the chassis as per the assembly instructions. I got the first color coat on the driver's side headlight done, and while the headlights won't be perfect matches of each other, I think for my first ever attempt at something like this it's turning out fine. I will put another, and final, color coat on the second headlight assembly tomorrow (weather permitting) as well as the second primer coat on the body. The first primer coat did not show any flaws in the body work which is great. After the second coat goes on, I'll be able to sand that down a bit and start putting on the color coats for the body. I'm pretty psyched. Yeah, I'm still a bit upset that the black decal on the hood crinkled up a bit and so it doesn't have the perfectly smooth look to it, but it's good enough for my tastes. If I can get the body paint job to come out as glass smooth as the passenger's side headlight assembly came out, I'll be really happy. The test fit of the headlights and their rotation in the front part of the car was perfect. Will be quite excited once I get this thing done. I've had to take a break for a little while due to a small accident while using my router table. I was testing out embedding a groove into a piece of solid white oak for a base for the Vette once I'm done which will be encased in clear plexi. The bit bound while I was cutting the piece and flung the wood straight back at me catching me on the side of my face. My safety goggles prevented any serious injury, but I did get a concussion from it and a black eye with a split lip. The swelling and concussion symptoms have subsided, but it looks like I went and said something naughty to Mike Tyson at the moment. lol. Anyway, here are two photos. One from a top angle, and one from a lower front angle. A few more tweaks are needed to clean up wiring and the hoses, but overall I'm very happy with this.
-
Thanks guys. The impatient part of me couldn't wait so I went and applied the "427" scripts on the side of the hood scoop. Looks good thus far. I'll take pictures once I take pictures of some other components as well. Working on the tires which are a bit of a trick. They aren't perfectly round so the red-lines I painted on them kind of show this off a bit. Not much I can do. The chrome wired wheels got a dose of black paint in between the spokes which I quickly wiped off the actual wire parts using a damp rag. (A joy of using acrylic MM paints). They look REALLY good in there. Just going to work on the center emblem part. Got the red paint in the side portions which I'm carefully removing overspread on with a toothpick, then will need to put the black into the center Chevrolet symbol. Once the wheels are all set, which will include valve stems, I'll attach them to the chassis and take a photo of the bare chassis with wheels prior to adhering the interior to it. At that point, I'll just need to get the headlight stuff worked out and will be ready for body paint. Still have about 1.5 cans of the Goodwood Green Metallic paint from automotivetouchup.com to use, and a full can of the clear coat for the copious layers of clear that I'll be using. The hood isn't fully perfect due to wrinkles forming on the decals due to what I believe was too thick of a clear coat over it, but it still looks VERY good and in most lighting conditions it looks perfect. I'll try to get some photos up as soon as I can. Right now I'm just in SEVERE job search mode as my final paycheck from the job I was laid-off from back in July was deposited today, and frankly, it didn't turn out to be as large as I was expecting. (Basically, it all dissolved immediately into my mortgage payment). It'll be 2-3 weeks until they pay me my severance check, so I am going to be spending all of my time looking at spending and finances and figure out how to survive these next couple of weeks. God I hate the company I used to work for. Hope to find something soon, but thus far have only found jobs that basically insult me with their salary offers. (And before someone says "just take it since a job is a job", the salary offers would not cover my mortgage payment each month and taking the job would remove time needed to find a new job. It's basically akin to taking a job as a grocery store cashier when you have a mortgage to pay. Yes, I'm just ranting now but am frustrated and slowly developing some concern).
-
Just a small update to let you know this is still in progress. Just had to take a bit of time off to re-figure how I'm going to get the headlights to rotate properly as my first calculations were WAY off. (Got some of the styrene bonded into the body shell, but the alignment of the rods on the side aren't working right, so back to the drawing and measuring board). I did get the hood with its final coat of clear on today. The large black decals really wrinkled up a bit and the sanding of the earlier clear coats used to soften up the wrinkles just resulted in some issues with the decals. So I had to take a black Sharpie marker to coat over the black decal and then spray another wet clear coat over. End result? Preliminary results say "success!" Still not pristine and perfect, but a careful application of rubbing compound and polishing compound should due the job. Just want to let this fully cure for a week in order to ensure there are no marks made due to handling.
-
Very, very nice job. Always love seeing these large scale Corvettes.
-
1-8 scale 69 camaro pro mod (mike hill's car)
Jdurg replied to comp1839's topic in WIP: Drag Racing Models
Wow. Great car. Amazing how you also built all those other cars at the same scale, and all that work that was done on the buildings and ground. Amazing job there. Oh wait.......... that's a real car........... well based on your ability and skills it's hard to tell the difference now. ;-) -
Little bit of progress. Got the final coats of clear on the headlight bucket, and the first coat of clear on the hood after which I went and applied the stripe decals. At first, the clear part between the main stripe and the pin-stripe was pretty yellow and cloudy, but as the decal has dried over the past few hours that cloudiness has disappeared. I'll coat this with a second and third coat of clear on Tuesday so that the decals can be 100% dry. I also got the headlights placed in the bucket that I had finished. When doing so, I discovered a mistake I made in the building. I used thin styrene for the part of the bucket that has the two holes cut out. This styrene is too thin to allow for any pressure that was applied when the headlights themselves were being installed. So the thin sheet split a bit in between the two headlights and also did some funky stuff with the thick paint coat on the top. If I were trying to achieve perfection here, I'd scrap it all and start over, but I have used enough of the green paint on it and the clear coat and blood, sweat, and tears to worry about it. It's only going to be noticeable if I have the headlights up, and it's the passenger side one anyway so I'm not going to worry about it and just remember this mistake when working on the driver's side bucket. Anyway, onto the photos. Semi-blurry photo of the front where you can see the small crack in the plastic and how it kind of warped. Not really satisfied with this, but I'll take it since with the headlights down it won't be noticeable. Here's a bottom view of the same thing. The issue with the headlight insertion can be noticed here as well, but again, this side is the side that will be parallel to the ground when the headlights are up, and pointing to the inside of the car when they are down so I will just deal with this problem and ensure it doesn't happen to me again on the next headlight. My favorite view. This captures the color of the car PERFECTLY and also shows how nice and deep the clear coats are. My goal is to have the entire body of the car look the same. It's simply two coats of primer, two coats of Goodwood Green Metallic base coat, and three coats of the clear finish that was sanded lightly and rubbed between coats before the final coat was just buffed and polished.
-
Also, make sure that the filler you use is classified as a filler and not just a spot putty or glazing compound. I have a bunch of varieties of Bondo in my house. I have a larger "tub" of fiberglass reinforced Bondo that is used for when I need structural stability and need to mold and shape something. This stuff dries ROCK HARD and provides great structural stability. I've only been able to find it in fairly large sized tins with the red hardener in a separate tube. Another form of Bondo I use, when I need some subtle smoothing of some work or have some very small gaps is a two part glazing and spot putty. Like the fiberglass filler stuff, you need to mix the red hardener into the white paste that comes from the tube. It's MUCH softer than the fiberglass Bondo and therefore is not suitable for structural work. But it does do a great job of filling small gaps and for filling sink marks and depressions. Since it's a catalyzed compound, it won't shrink or crack over time. The third Bondo product that I generally use is also called a Spot Putty and Glazing Compound, but this stuff comes in a single tube and cures via solvent evaporation and not via a catalyzed reaction. It takes it about half an hour to cure and it's purpose is for filling in the small pits or bubbles that can form in the two part compounds and making things ultra smooth. After I do any work with the fiberglass Bondo and the softer putty, once it's fully cured I apply a very thin coat of this single tube stuff to smooth over the work. It can then be sanded and takes paint beautifully. Yeah, it's a bunch of extra work, but the results really do turn out great. I just started using this process when building the large scale '86 Corvette a while back as the body had quite a bit of issues with it, and have refined it a bit as I build my 1/12 Scale 1967 Corvette Coupe. (It's going to be critical for my working headlight project).