Eric Macleod
-
Posts
1,768 -
Joined
-
Last visited
Content Type
Profiles
Forums
Events
Gallery
Everything posted by Eric Macleod
-
Ooo-La-La! I can't wait to see how this shapes up.
-
I am curious what you are going to do about that Pyro grill...I will be watching. Impressive work so far!
-
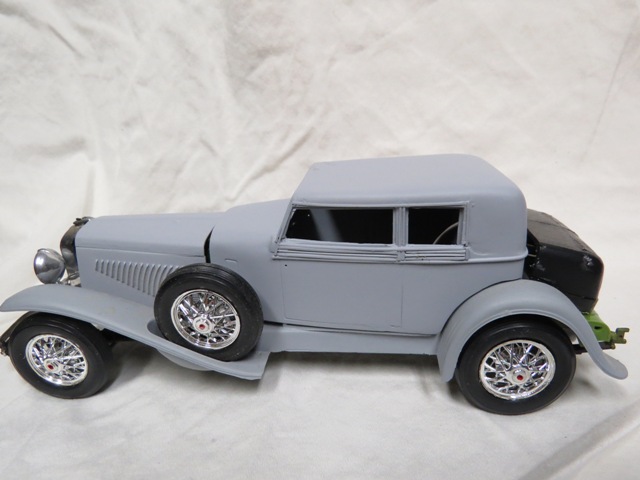
Duesie, Now that will be a good car to do! I can't help but wonder if it still exists as I have never seen the car. You are right, The Pursuit of Perfection is indeed an excellent resource. Fred Roe was a true gentleman and is someone those of us who knew him miss greatly, just as my friend and walking Duesenberg enthusiast Al Ferrara is missed. Great men and phenomenal Duesenberg enthusiasts both. We are fortunate to still have Terry Adderly among us who keeps on buying Duesenbergs and promises to deposit them in my back yard one day. I digress. Alas I cannot afford a Duesenberg of my own so here is my humble contribution to the hobby. I have finished the trunk of the model to a point where the general shape is correct though the final fitting has yet to be done.

-
Oh, wouldn't that be cool! I would even take a TCM 1/25! Thanks for looking! E-
-
I am curious, is your Rollston the Torpedo version? I built one many years ago. It was a long drawn out process of replicating a car that was long since "lost." Or so we thought. A couple days after finishing my model a guy by the name of Terry Adderly showed up with a Duesenberg J Rollston Torpedo Convertible Victoria at the Meadowbrook Hall Concours d'Elegance. I was a newbie to the show and had yet to attend, let alone start showing cars there. The event was a revelation. So many great cars. So many well restored cars. The best of the best! And best of all, there was the Rollston Torpedo painted a spectacular shade of maroon, in and out...and I had just finished my model...in dark green! Grrr...Anyway. Here is what I built. You can see my modeling skills have improved a bit in the subsequent years.
-
First the quick background. In 1974 my father bought my mother her first car for her 30th birthday, a 1947 Nash 600. We were not people of means so this actually was a pretty extravagant gift for her.The car needed a lot of work but ran pretty well. The car was driven home under her own power and was fixed up for my mom over the next few weeks. In this car I learned to bleed brakes, do tuneups and eventually drive. Mom graduated to a 1971 Volvo Wagon when I was in high school. In exchange for scraping and painting the house I recieved the 1947 Nash for my 16th birthday in 1980. Being a model car builder, naturally I wanted a model of my fist car. As one can imagine, such a model is not easy to find. Behold, with the miracle of eBay and resin modeling I present to you a model of my first car. You will note, it is not the most detailed model. I decided that I would forgo attempting to paint a stripe to duplicate the stainless steel along the sides of the body and skipped the trim around the windows and down the center of the hood. The model is in HO scale so such details are pretty difficult. Granted, this is a long way from a perfect model, but it was fun to have a quick and easy model of my first car.
-
Love the Miatas. This will be a nice model done!
-
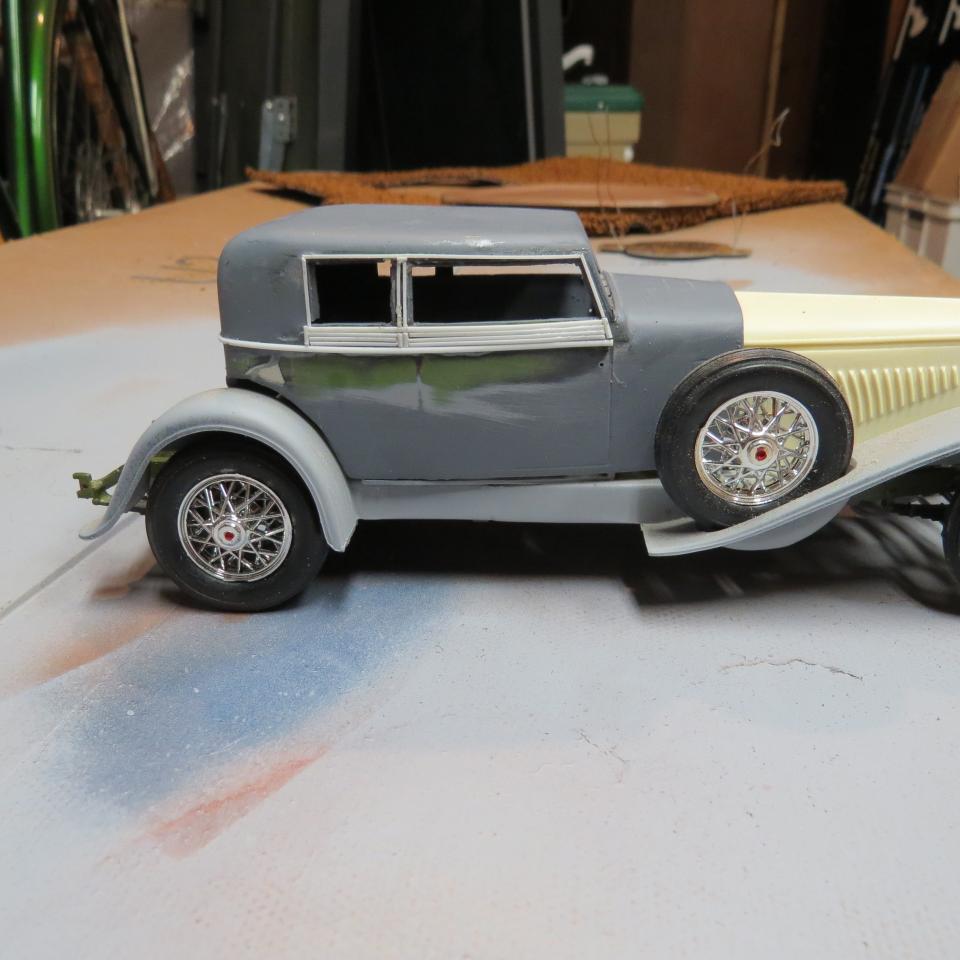
I do recognize the trunk is all cadywumpus on the car. It is just siting there and needs a trunk rack and a level surface to look right. More work will be done tomorrow and we'll see how it looks.
-
I decided to change plans. Today I started on the trunk and rear body assemblies. I used two more Duesenberg Town Car bodies for spares because the shape of the top matches the coutours of the trunk, which in turn matches the coutours of the top of the body. I also added a rear vallence pan to cover the gas tank. See what you think.
-
1953 Ford Country Squire Wagon - completed 3/18
Eric Macleod replied to IceMan Collections's topic in WIP: Model Cars
This looks both frustrating and ultimately rewarding. Keep up the good progress. -
I did not get a lot done yesterday other than printing off the gauges for the dashboard. I plan to do a bit more bodywork tonight and will finish with a light sanding. I am hoping to begin putting color on by the weekend. In the mean time I am also working up the interior which, by necessity, will be almost 100% scratch built. Photos this evening I hope.
-
Welcome back to the hobby from Battle Creek!
-
"Sweet" can't even come close to the praise I have for this one. Fabulous build of a fabulous subject!
-
One more shot. Starting to look a little like a car eh?
-
I have now installed all the trim on the body and hit it with two more coats of primer. I am at a point where I am ready to spray a guide coat and move to color. The latter will be a bit of a challenge as there will need to be some very detailed painting done here in order to make the car look right. I plan to use the base coat clear coat process though I also have to cover the top with fabric before moving on. I am thinkng I will "upholster" the top using masking tape with a bit of super glue around the seams. Meanwhile I am also working on the instrument panel, a real jewel on a Duesenberg. I have drilled out all the guages and made copies of actual Duesenberg instruments to mount behind them. I will use a layering process of kit panel face, thin clear plastic with guages mounted behind. I am also turing some knobs for use on the instrument panel to give it more of a 3-D effect.
-
This is 1:24 scale. As I look at the photos it looks pretty big doesn't it? I appreciate all the praise I have gotten so far. When the model is done I will share the back story and you will see why this has felt particularly gratifying to me. More work tonight and I promise to try to get some better photos. E-
-
(NEW Update! 6/19/15) IN progress, ICM '13 Model T For
Eric Macleod replied to Art Anderson's topic in WIP: Model Cars
I have an interesting picture on my wall showing a whole room full of brand new 1925 Ford Model T's at the end of the production line at the Highland Park plant. Interestingly, it is very clear that the tires on the open cars-the runabouts and the tourings are black. The tires on the closed cars-the sedans are light gray and the coupes are off white (like Art's tires, only with tread as by that time tire manufacturers clearly had figured out tread is a good idea). Light gray? Off white? Yup. How does one know? Because the stickers clearly visible through the windshields of the cars are even more white than the lightest colored tires, and the tires on the sedans were uniformly darker than the tires on the coupes. Pretty neat eh? I think Art has captured the essence of the tire color one would frequently see on brass cars of this era, both from a contemporary perspective and as they frequently appear today. Tires on tour cars particularly look exactly like Art has shown, though he probably should bugger up a couple rims as almost all of them have had tire changes so many times that the rims are a mess! -
Welcome from Battle Creek! What do you build?
-
(NEW Update! 6/19/15) IN progress, ICM '13 Model T For
Eric Macleod replied to Art Anderson's topic in WIP: Model Cars
Oh come on Art! There's not a lot on the car. All you need are stripes along the perimeters of all of the body panels, one on each spoke of the wheel and a dot on each bolt, plus a bit of perimeter striping on the hood. Oh...and on the real car it is 1/8" thick. Child's play right? In complete seriousness, the more I think about trying a brushed and buffed lacquer paint job when I do my runabout, the more appealing it gets. Paint that is well thinned might come out well. Let me get the Duesey done first! E- -
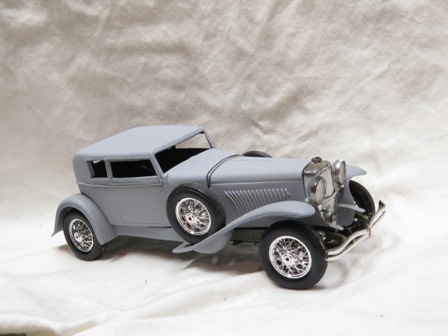
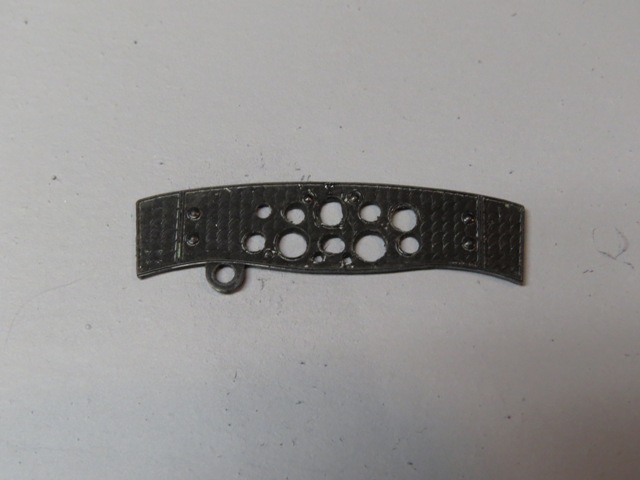
Good progress tonight. I added the trim moldings to the body. I need to let them dry a bit and then give them a VERY light sanding before hitting the body with another coat of primer. I know these look a bit heavy handed, but to me they look a bit heavy handed on the 1:1 car. I am also including a photo of the inside of the body that should give you an idea of the motifications made to the Town Car body.
-
Regarding the radiator...you are looking at a Livingston Super Vee that is easily available through the Brassworks, a manufacturer of new radiators for brass era cars. It was a popular era-appropriate accessory for builders of the Model T speedsters. For a paltry $5000 you can order one today!
-
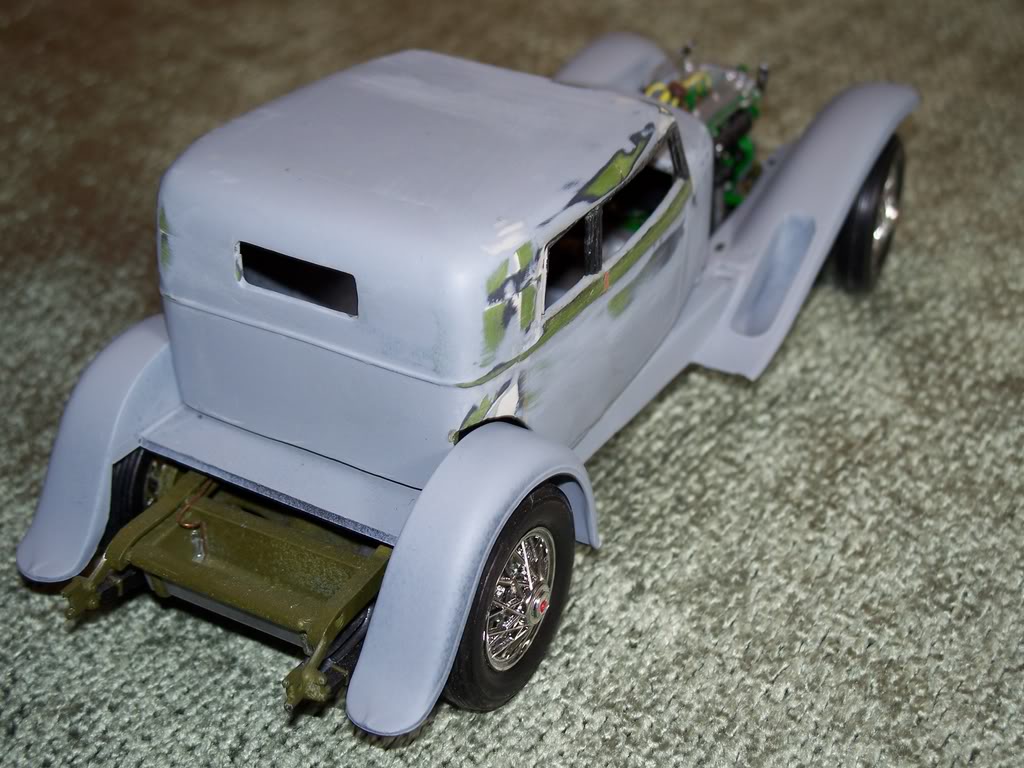
Here is a shot of the model very early in the build up of the model. I used a Monogram Duesenberg Town Car for the basis of the body. You can see looking at the photo that top was chopped slightly right in the middle of the rear window, for a lower profile and smaller window opening. I also sectioned a portion of the body out to eliminate the portion of the body hanging beyond the midpoint of the rear axle. The front of the roof had to be extended so I used the front portion of a roof from another open car model. I think (though I cannot remember for sure now as it has been so long) that I used the front portion of a roof from a JoHan Cadillac V-16 Cabriolet. This was reinforced using some sprue. The window frames were made from sections of the window frames of an Italleri 1933 Cadillac V-16 Convertible Sedan. Huge amounts of Bondo followed by a couple tubes of Squadron Green Stuff, and here you have it so far. Intially I tried to use molded in body trim which I intended to score and sculpt with my X-acto knife but realized I needed to start with flat sides (shown above) in order to add the trim moldings. I will post more progress photos tonight.
-
(NEW Update! 6/19/15) IN progress, ICM '13 Model T For
Eric Macleod replied to Art Anderson's topic in WIP: Model Cars
The bodies in 1913 were one of three colors, dark blue, dark green or black. Hoods, hood former (hood shelf) and wheels should be painted the same color as the body. Pinstriping should be gray for the blue cars, straw for the green cars. Black cars can be striped in either straw or gray. Hope that helps. E- -
(NEW Update! 6/19/15) IN progress, ICM '13 Model T For
Eric Macleod replied to Art Anderson's topic in WIP: Model Cars
There you go. Those look just right. You are correct to have the quite long valve stems in brass. This is coming along great. On the cars at our shop, the plywood floors are painted flat black. In the Ford Shops and Methods book that was written in 1915 it mentions the black wash for the floors which was a 50:50 combination of unspecified black paint and gasoline...applied with a brush. This was also true of the paint applied to the body. Sprayed on paint came later. Now...I don't know about you but I doubt I will be able to bring myself to brush paint my model, though it would actually be more authentic if it was done that way, then rubbed out afterwards. This is looking good. E- -
And one more with a bit of the mechanical detail included. This is exactly the color scheme I plan to use. You can clearly see the complexity of the moldings on the body...which is what I find so appealing.