Search the Community
Showing results for tags 'falcon'.
Found 7 results
-
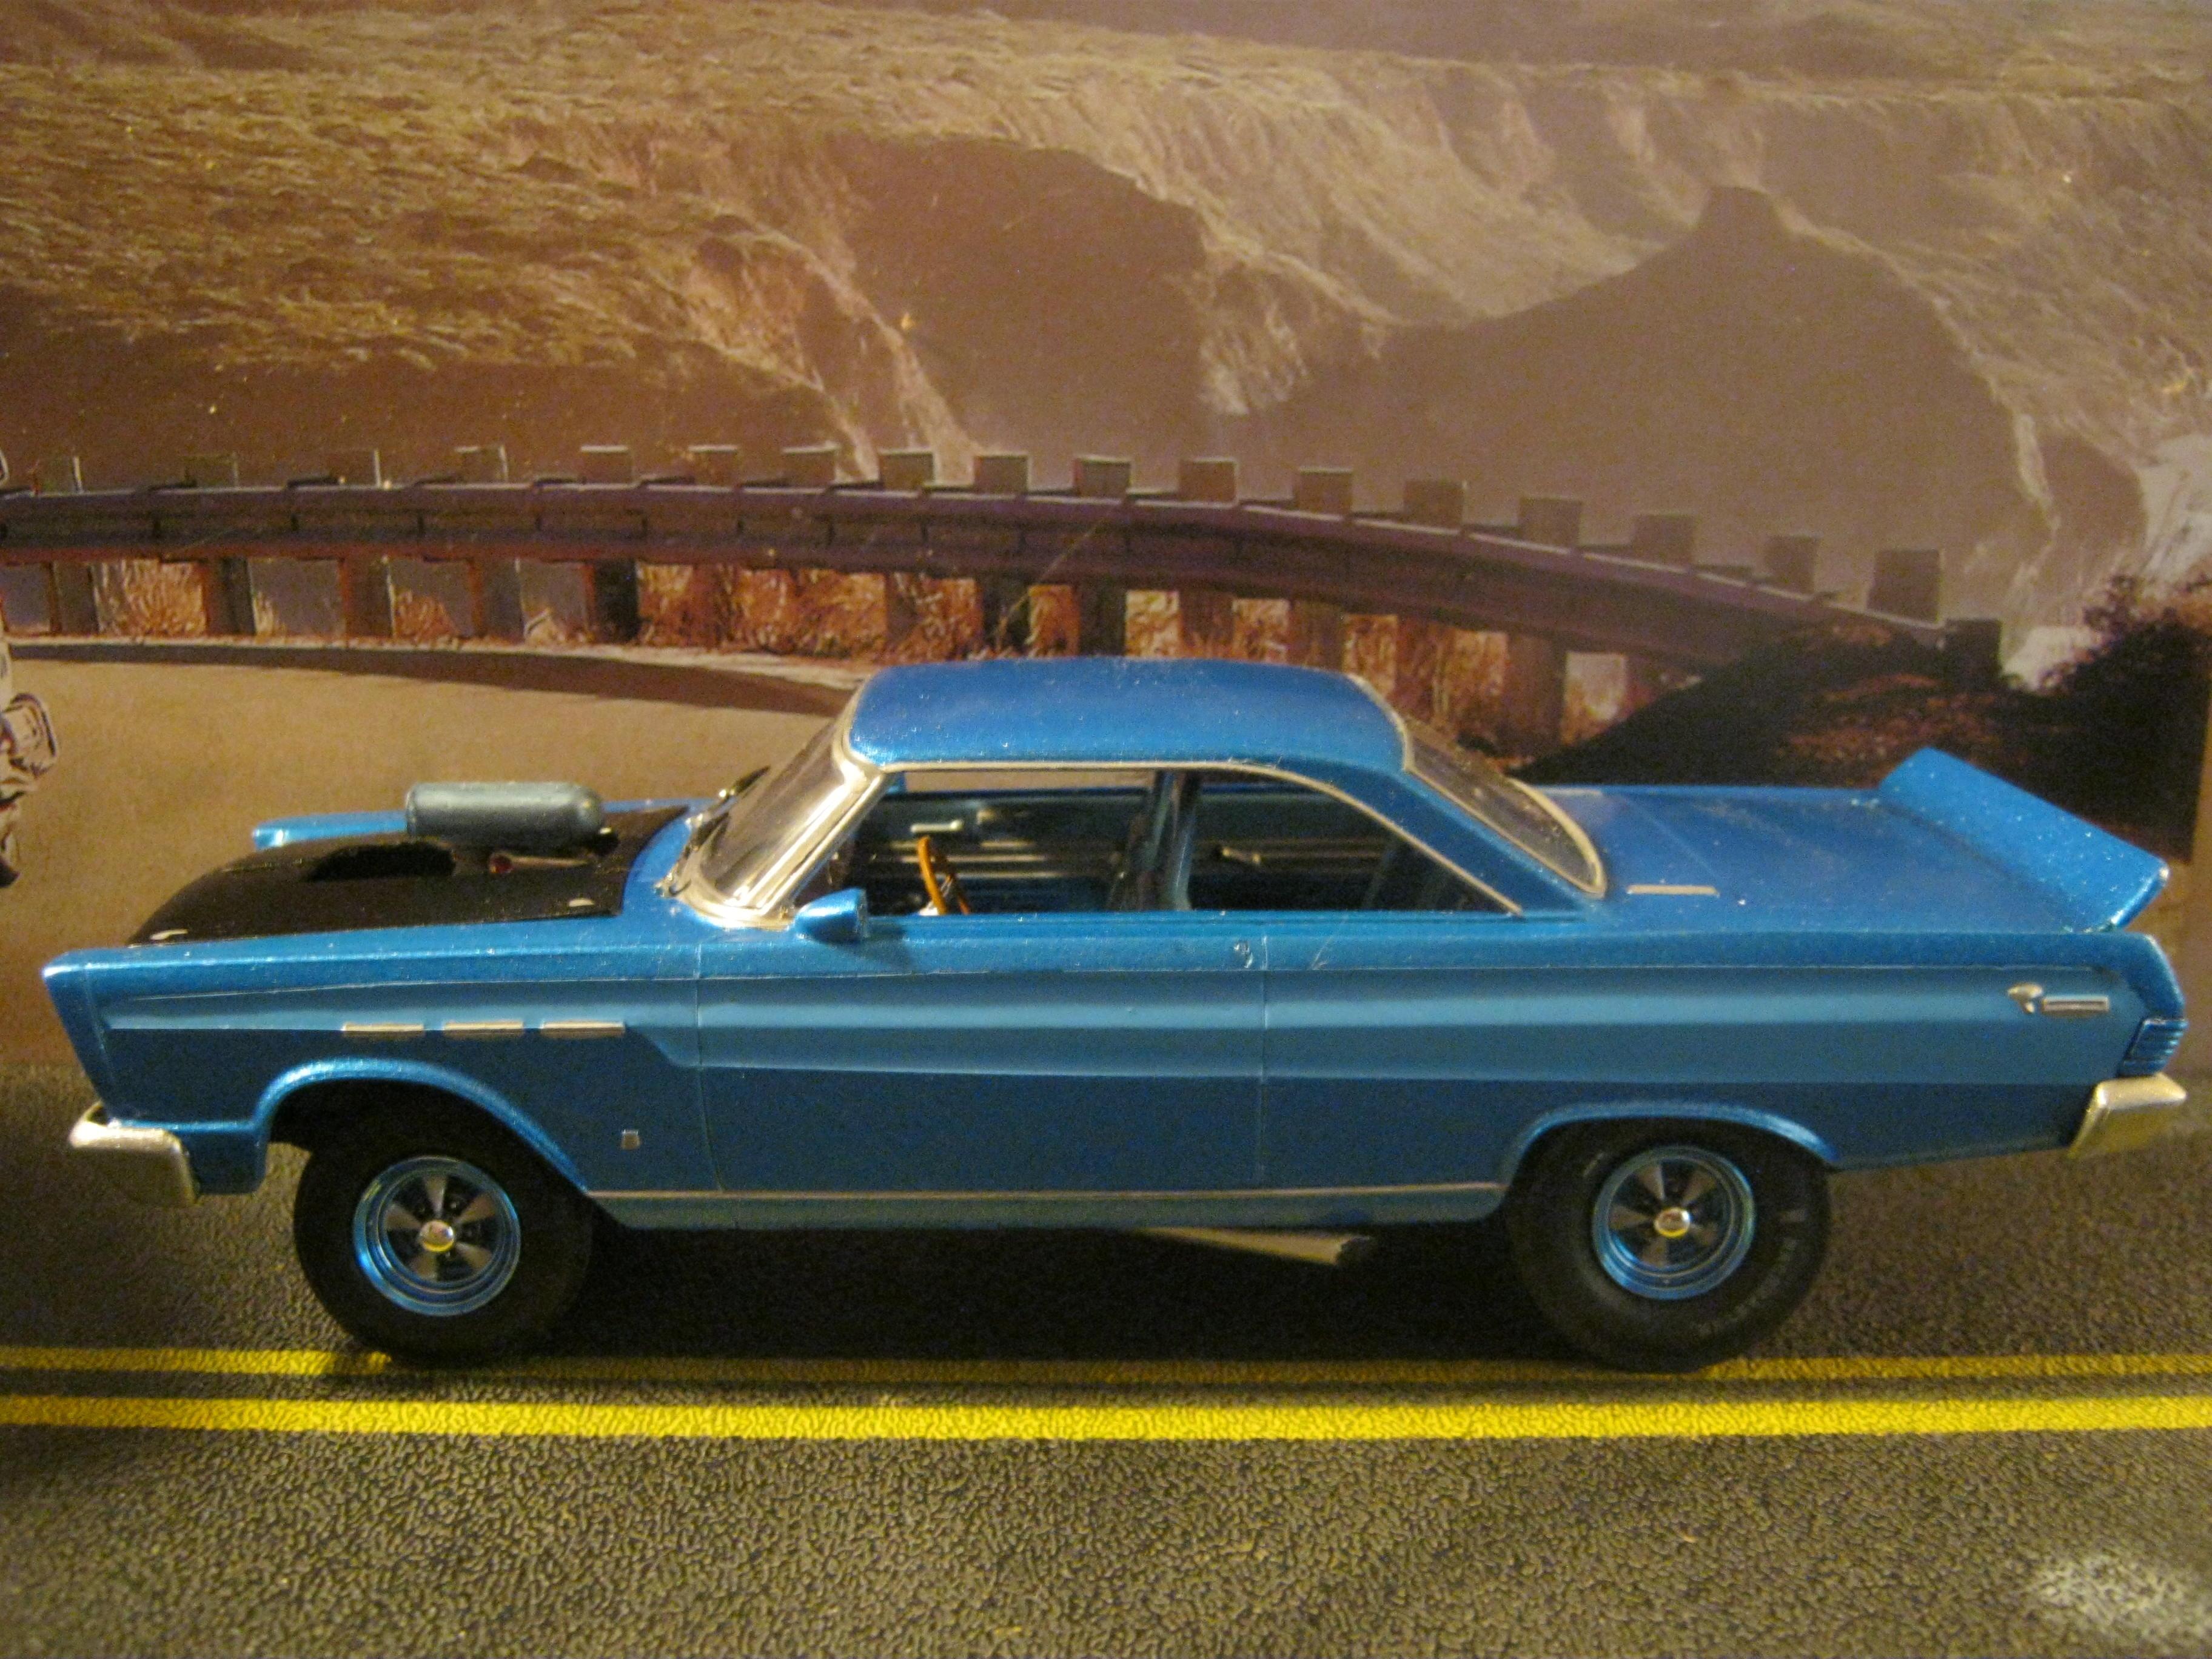
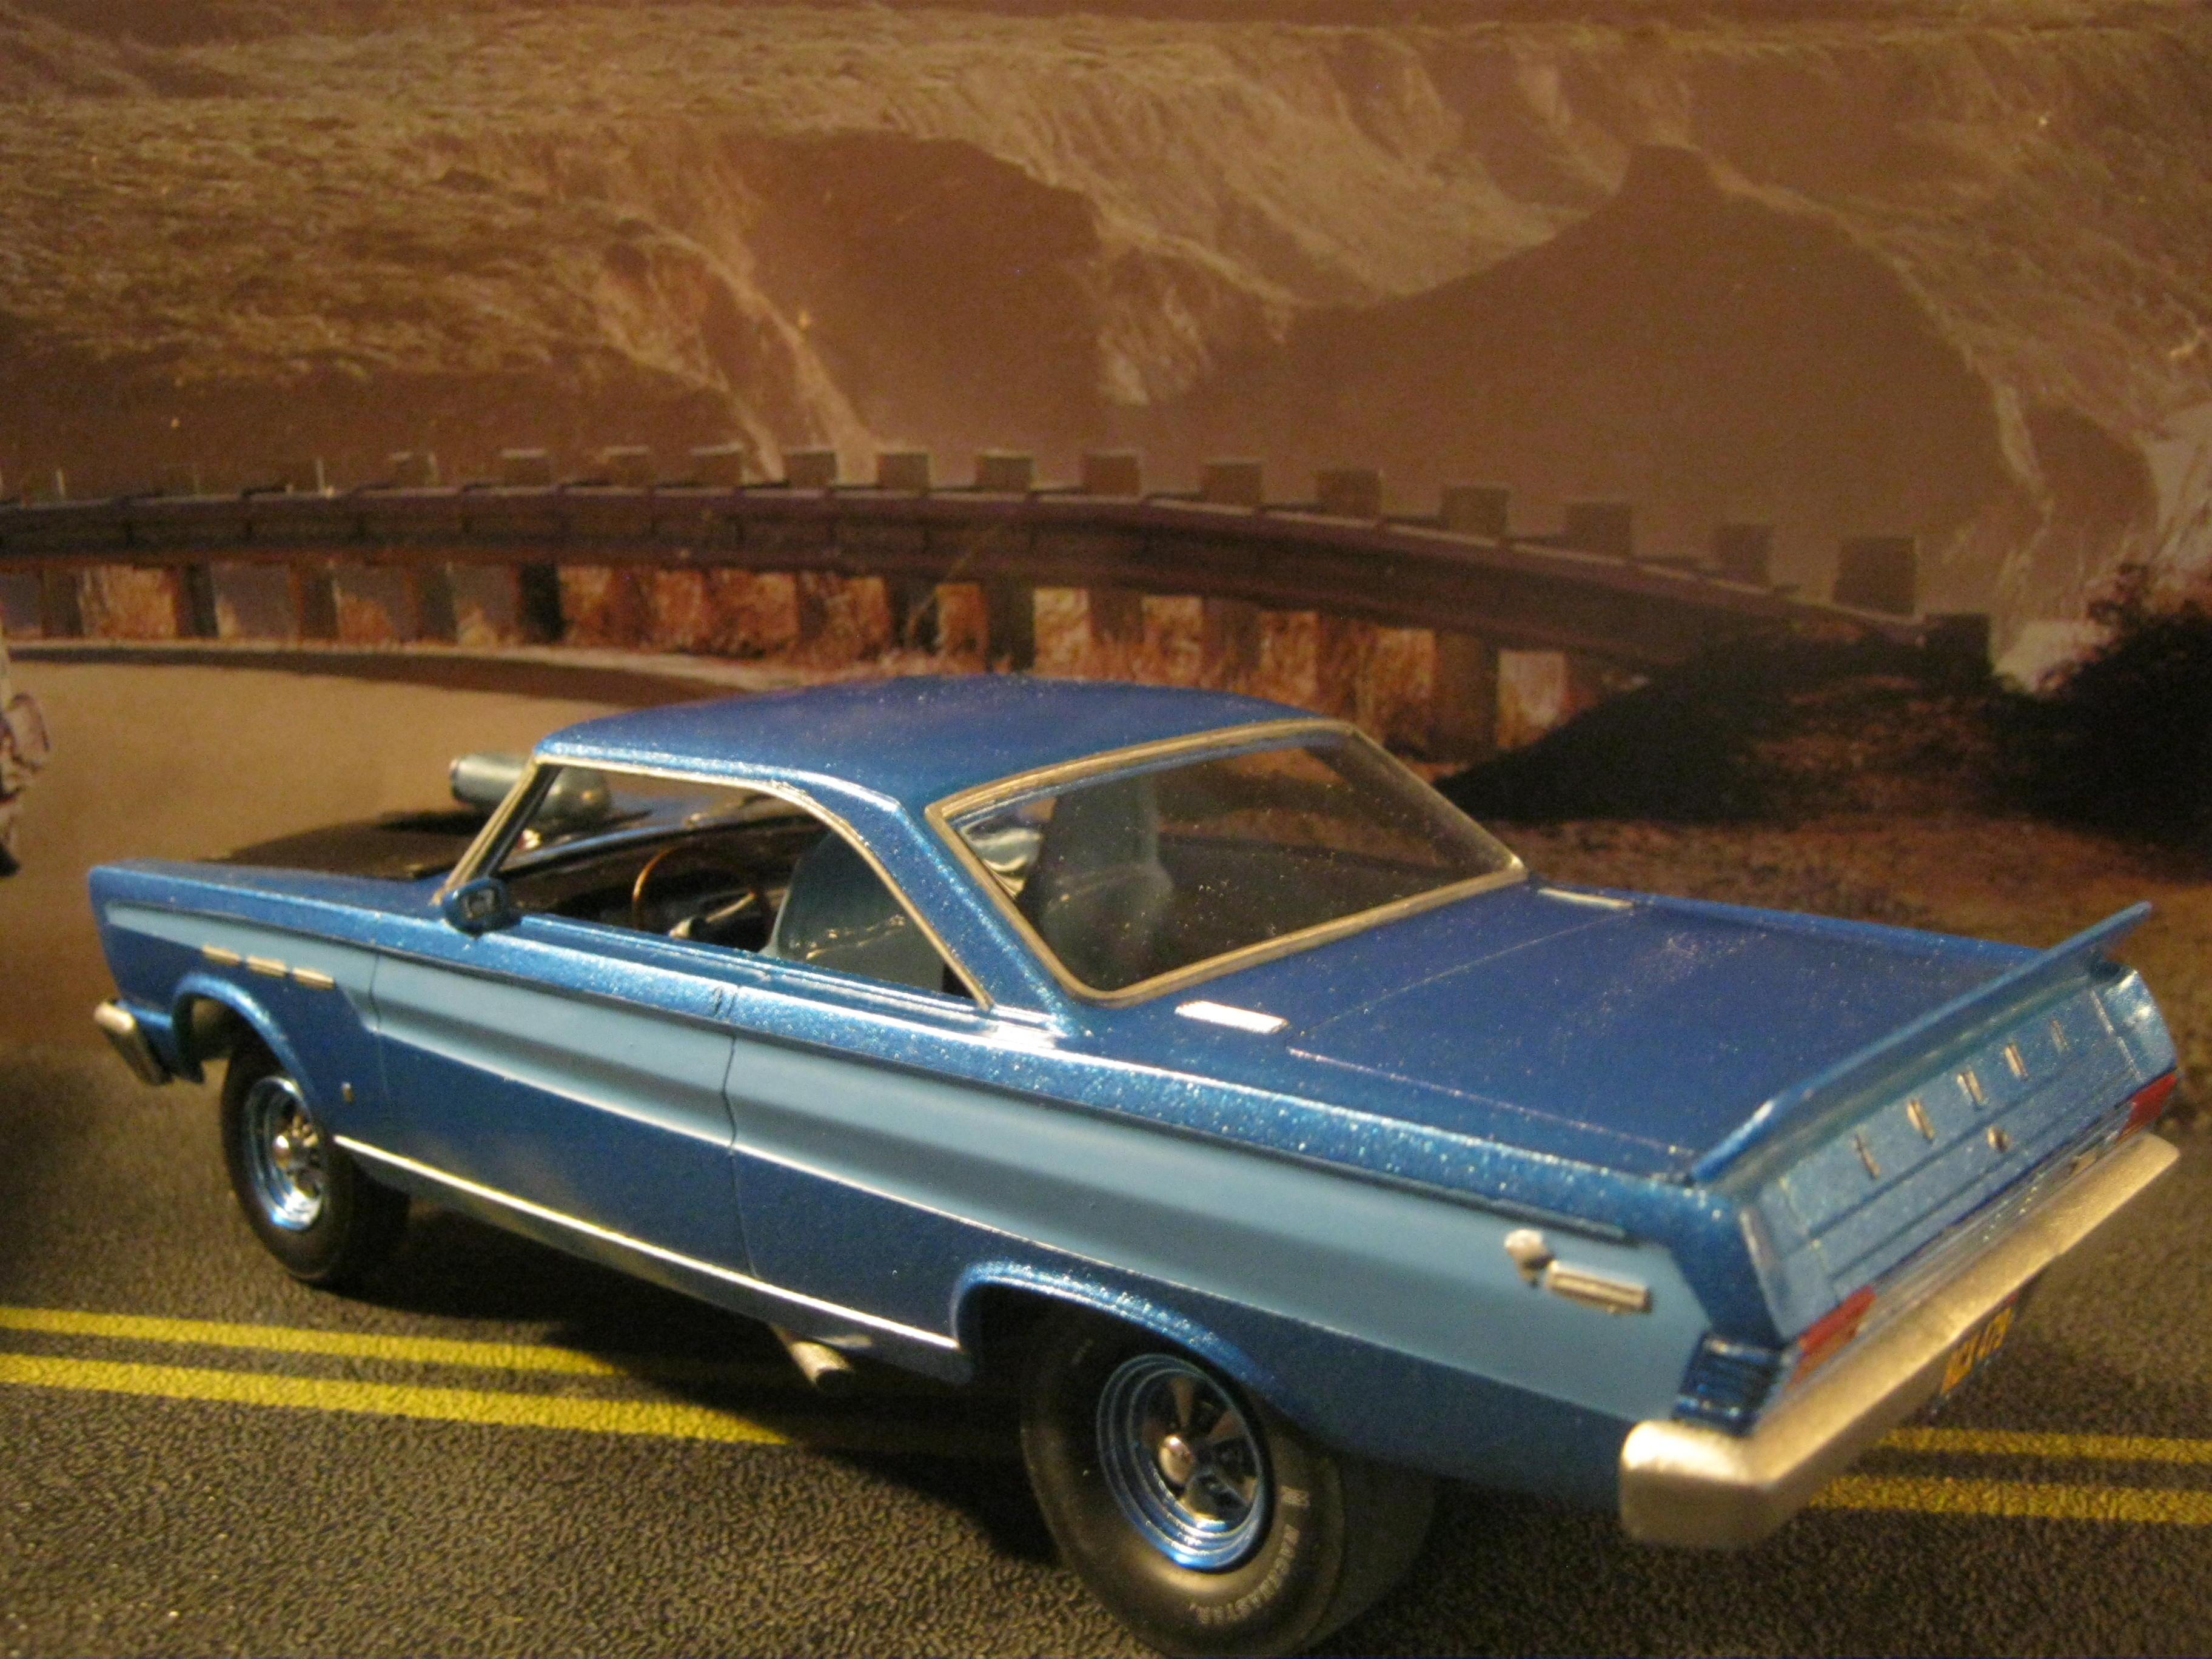
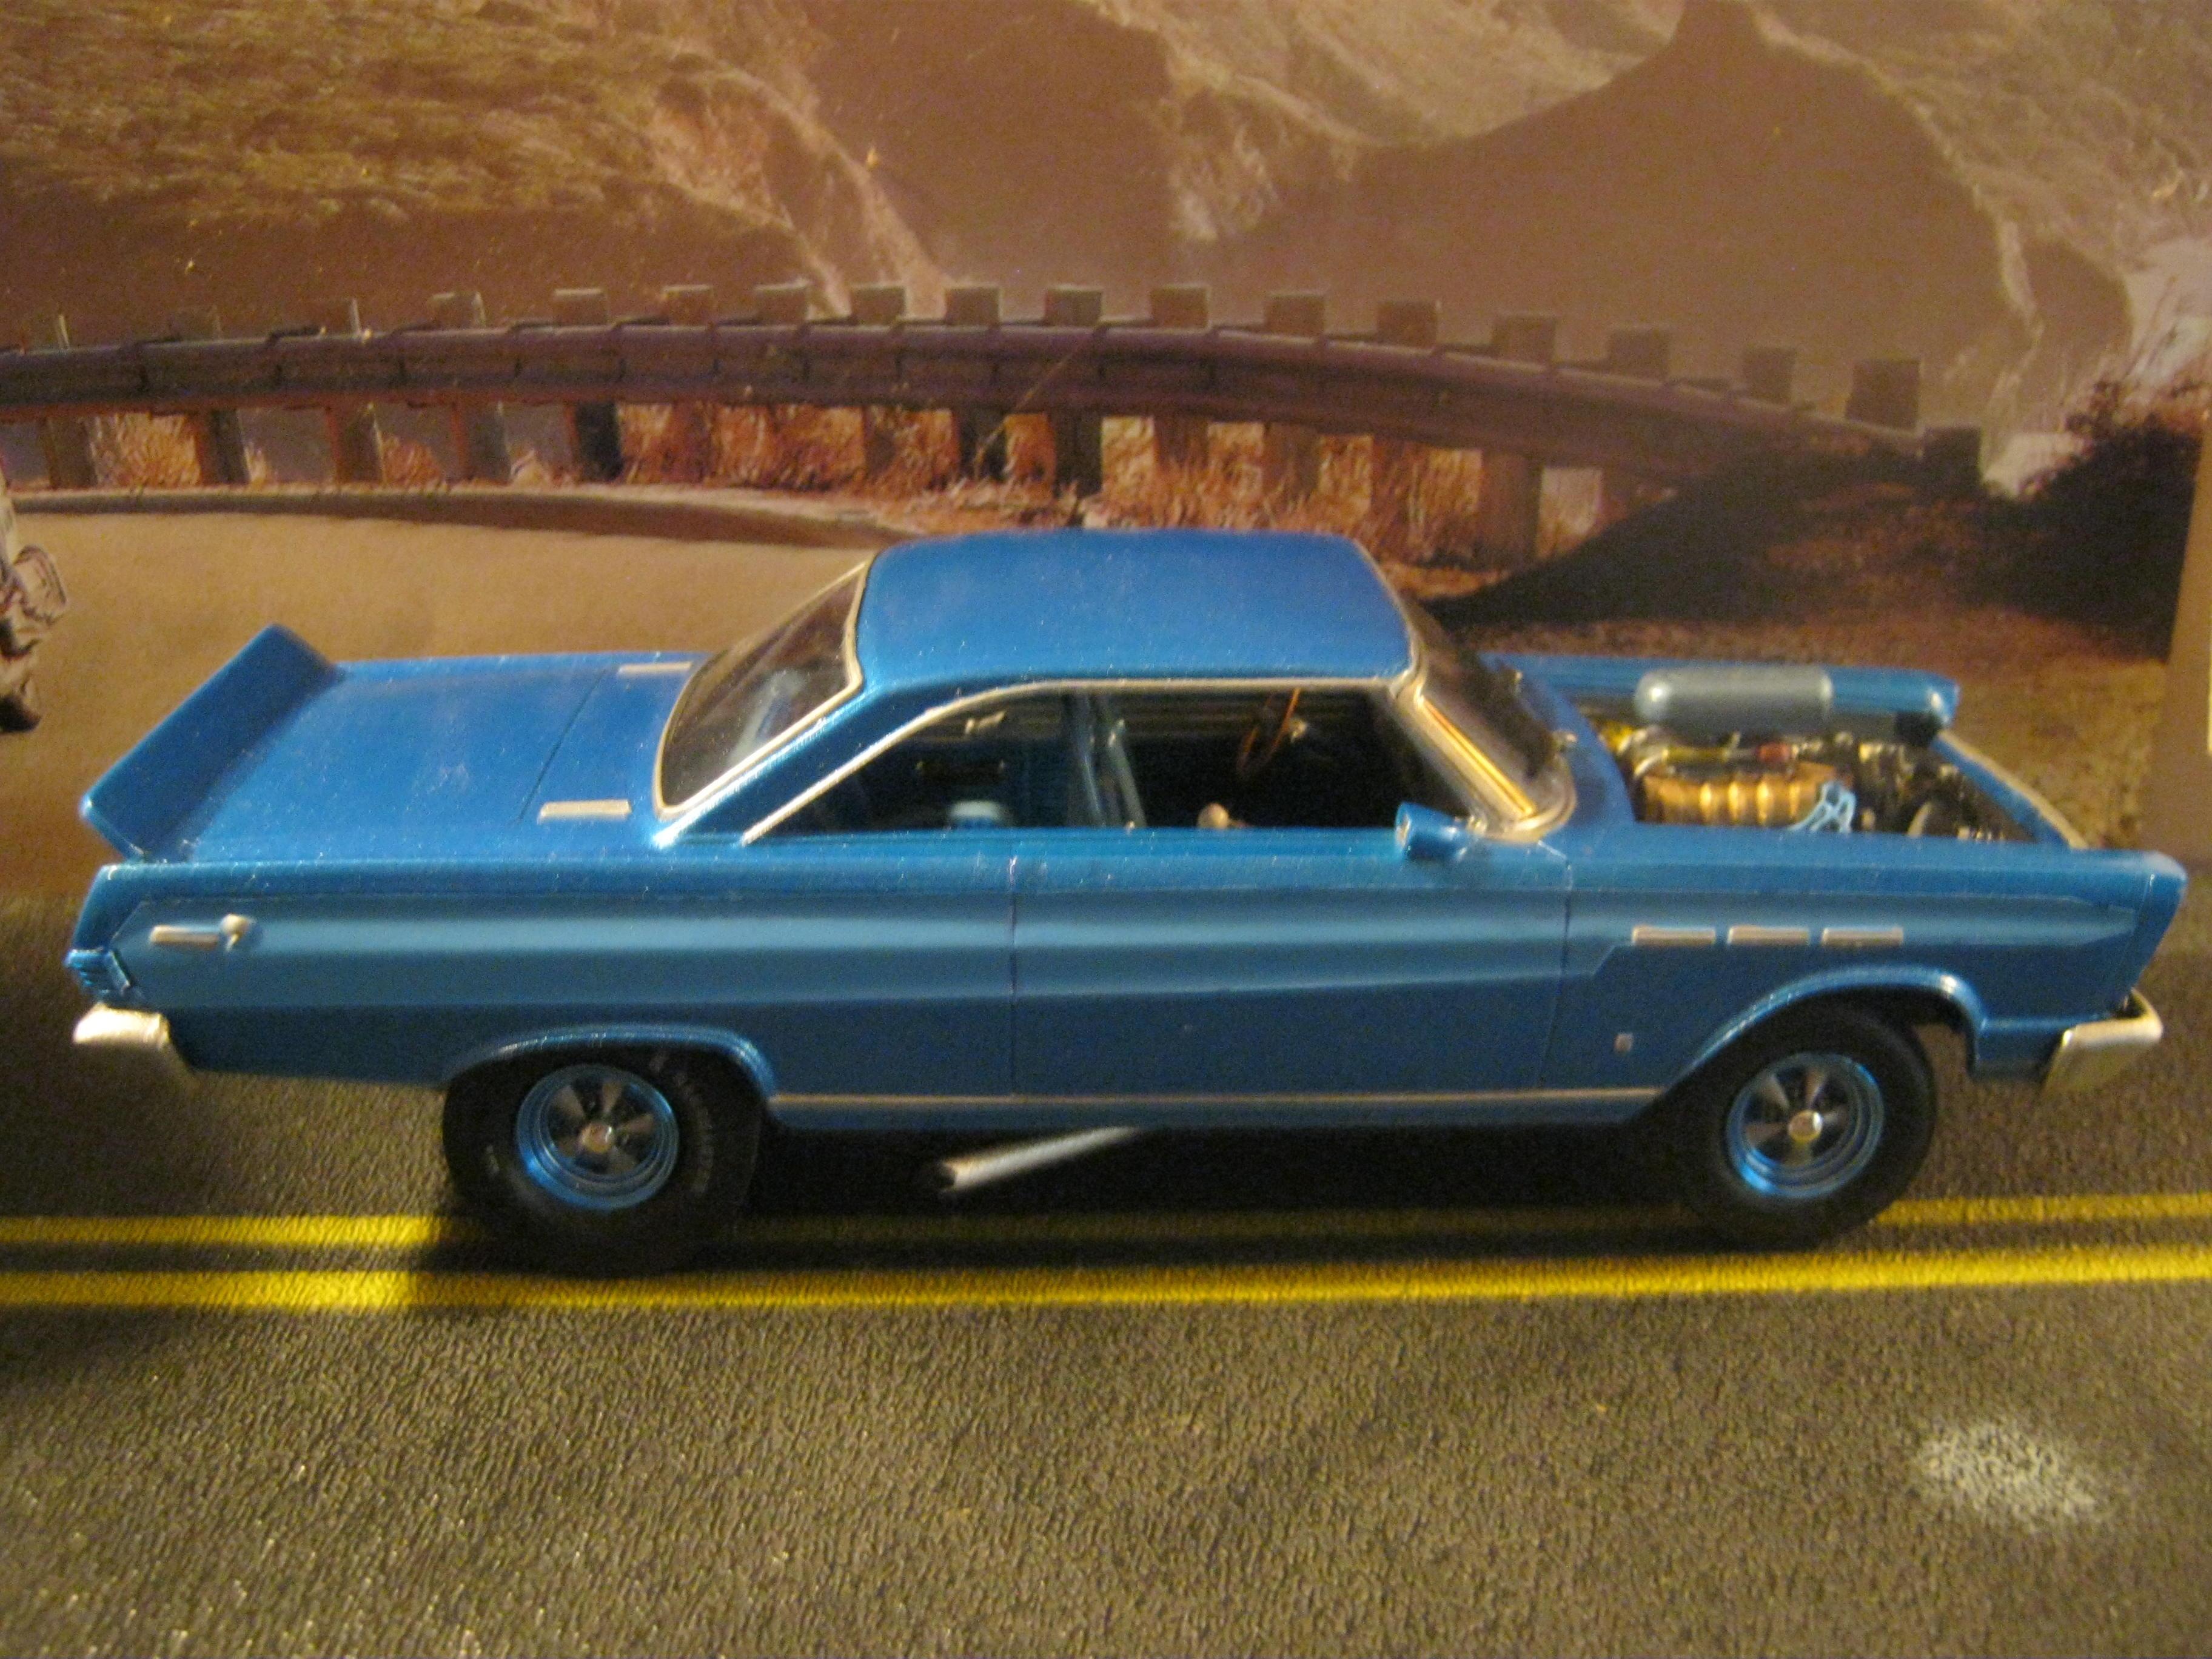
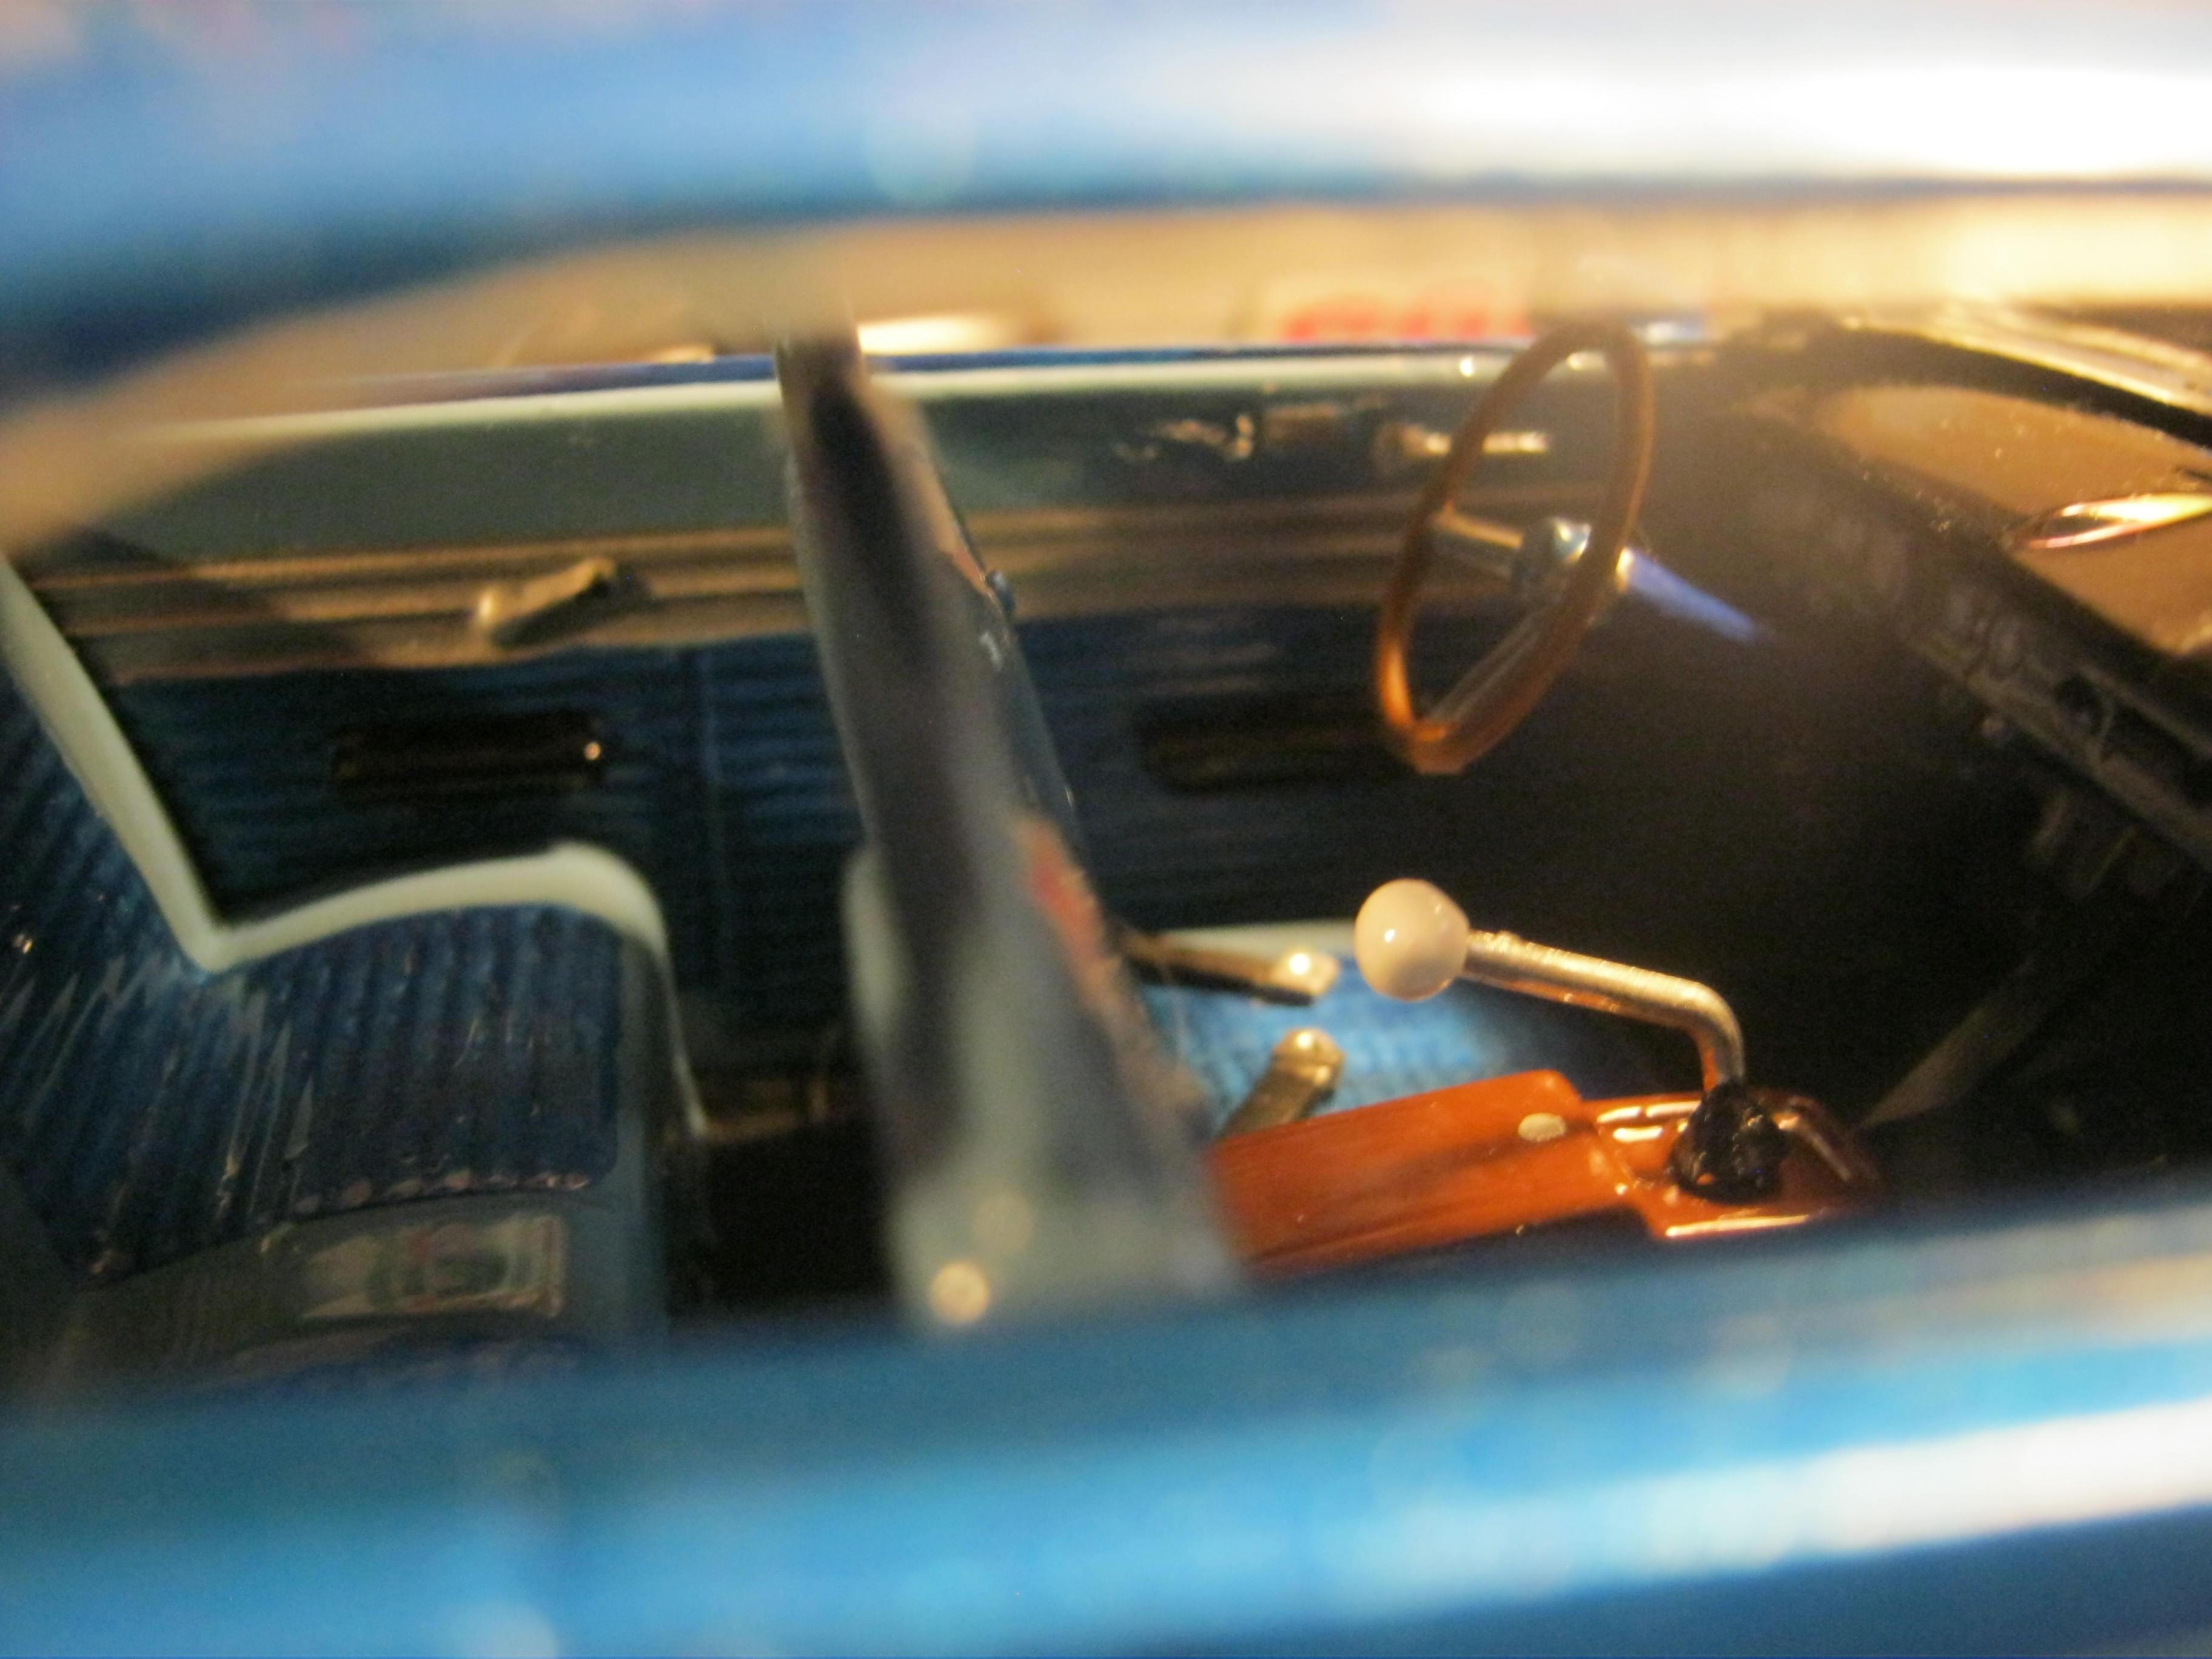
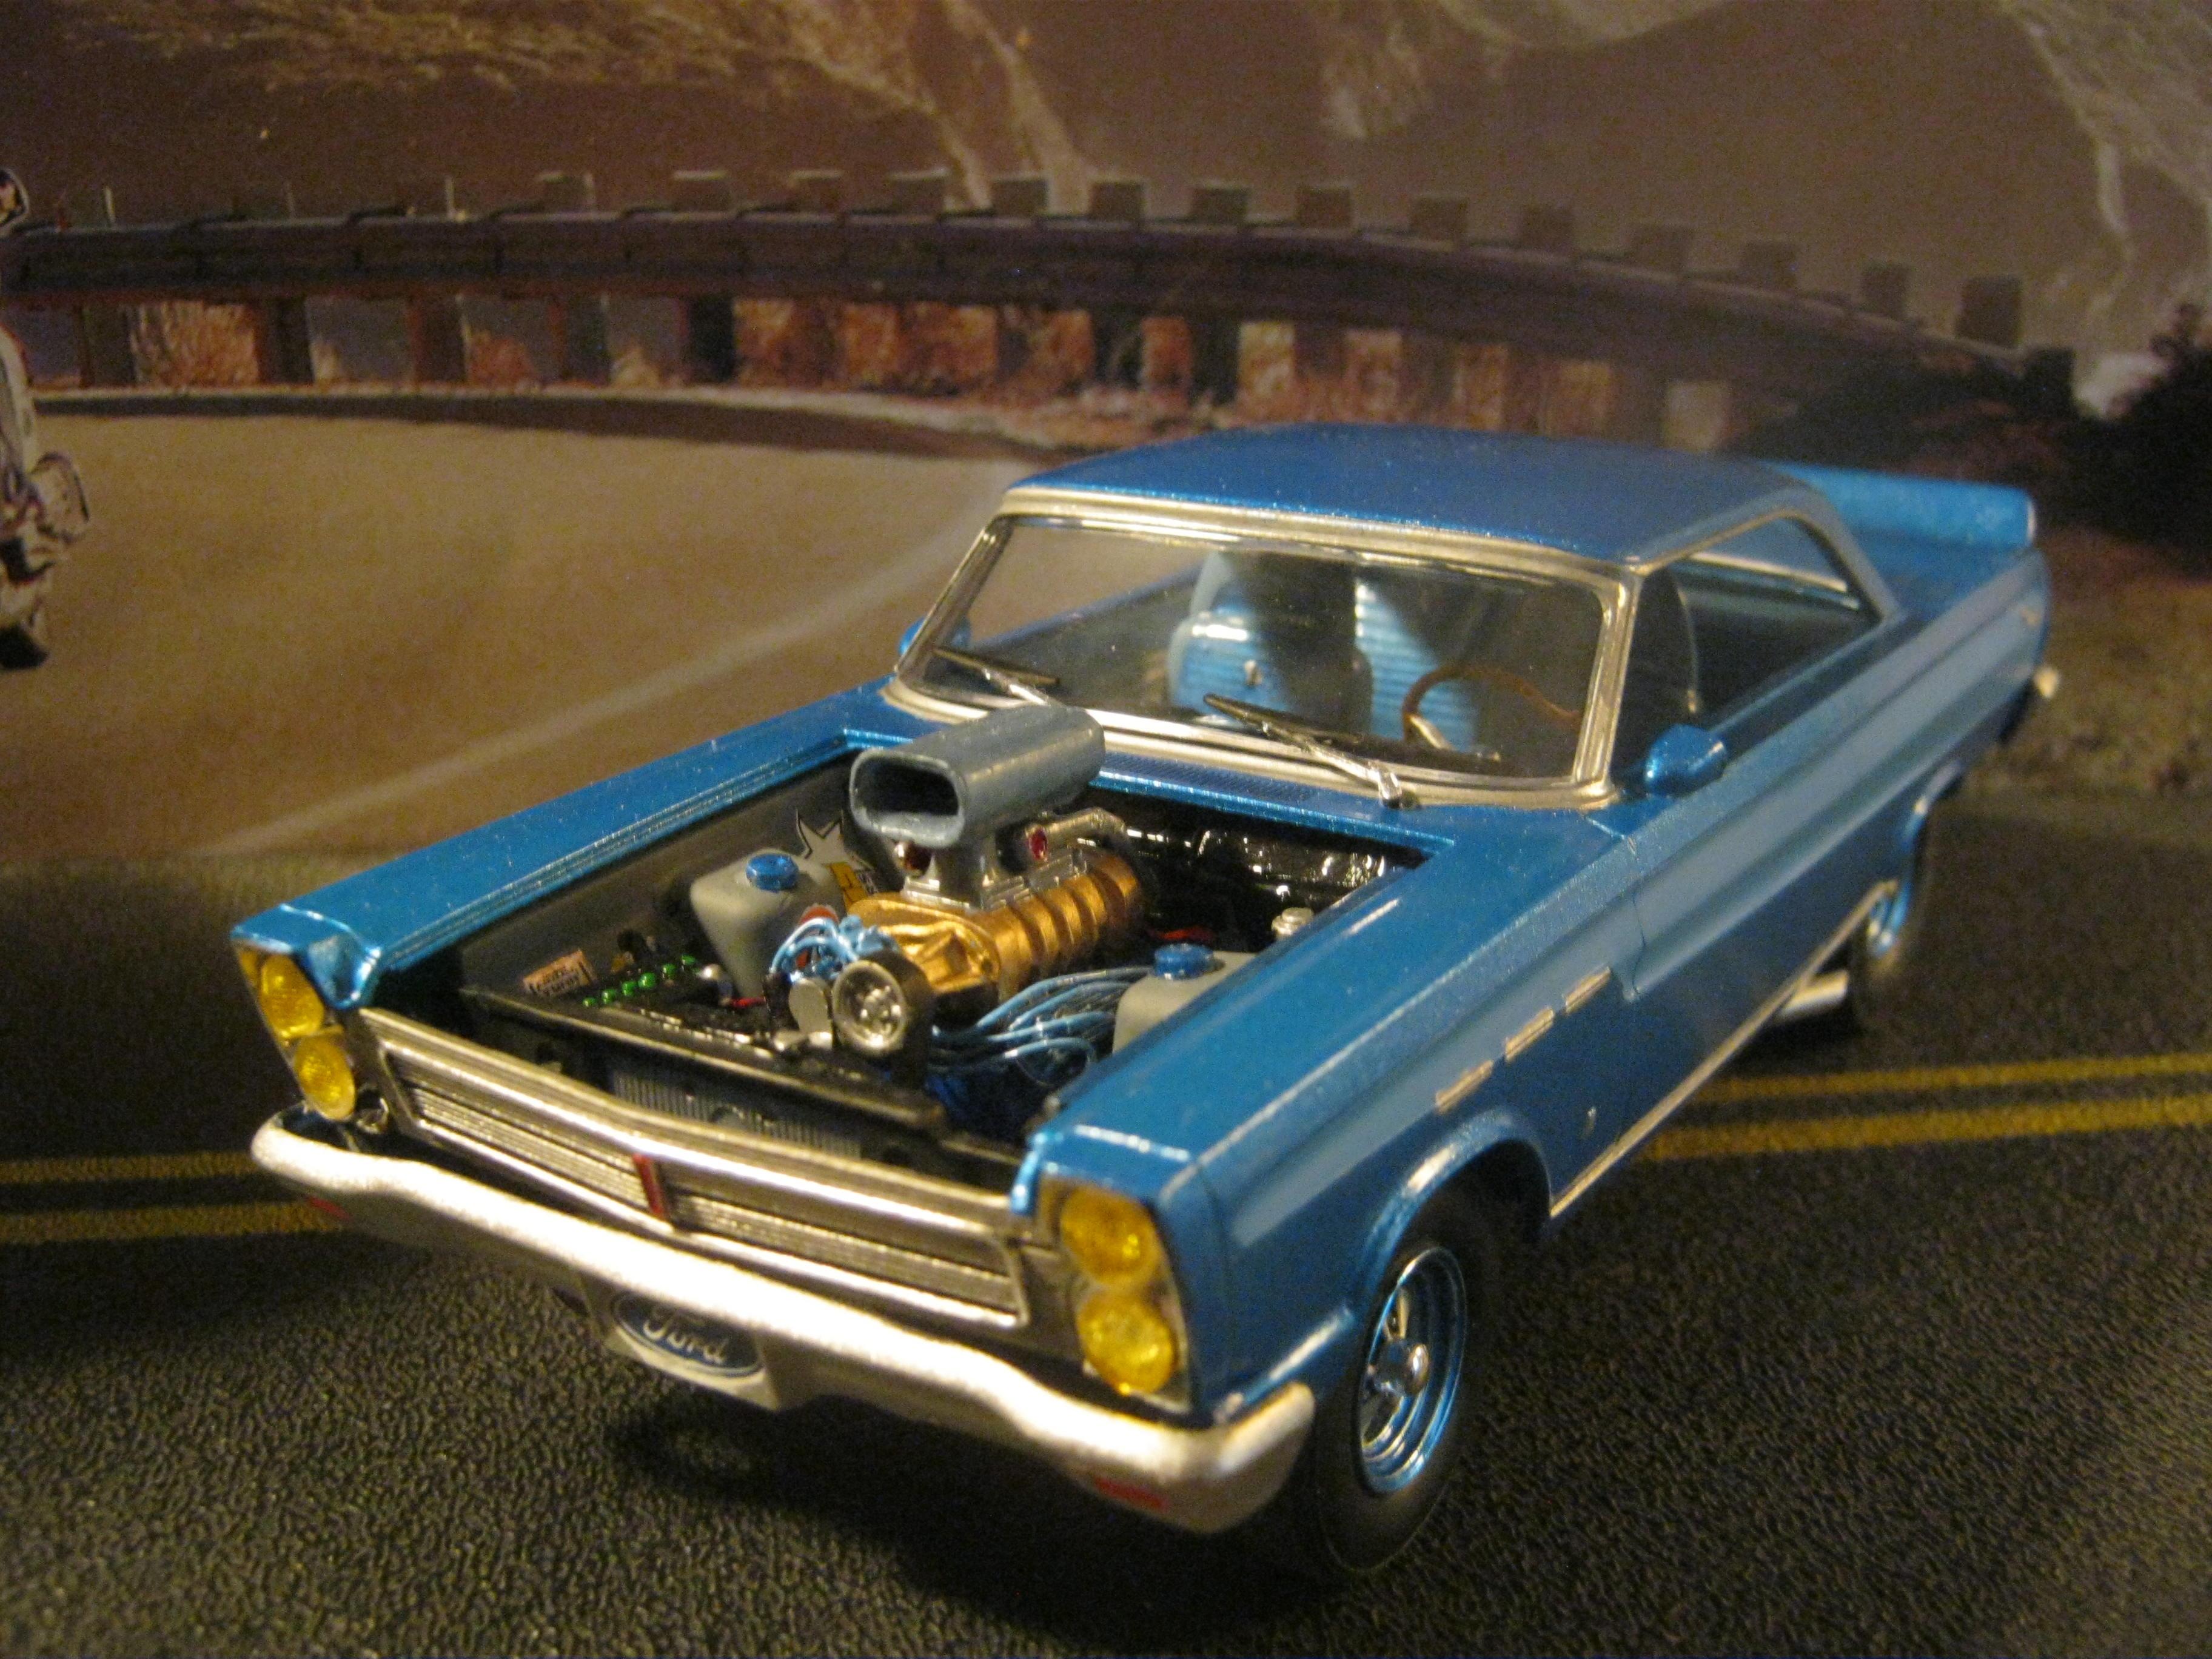
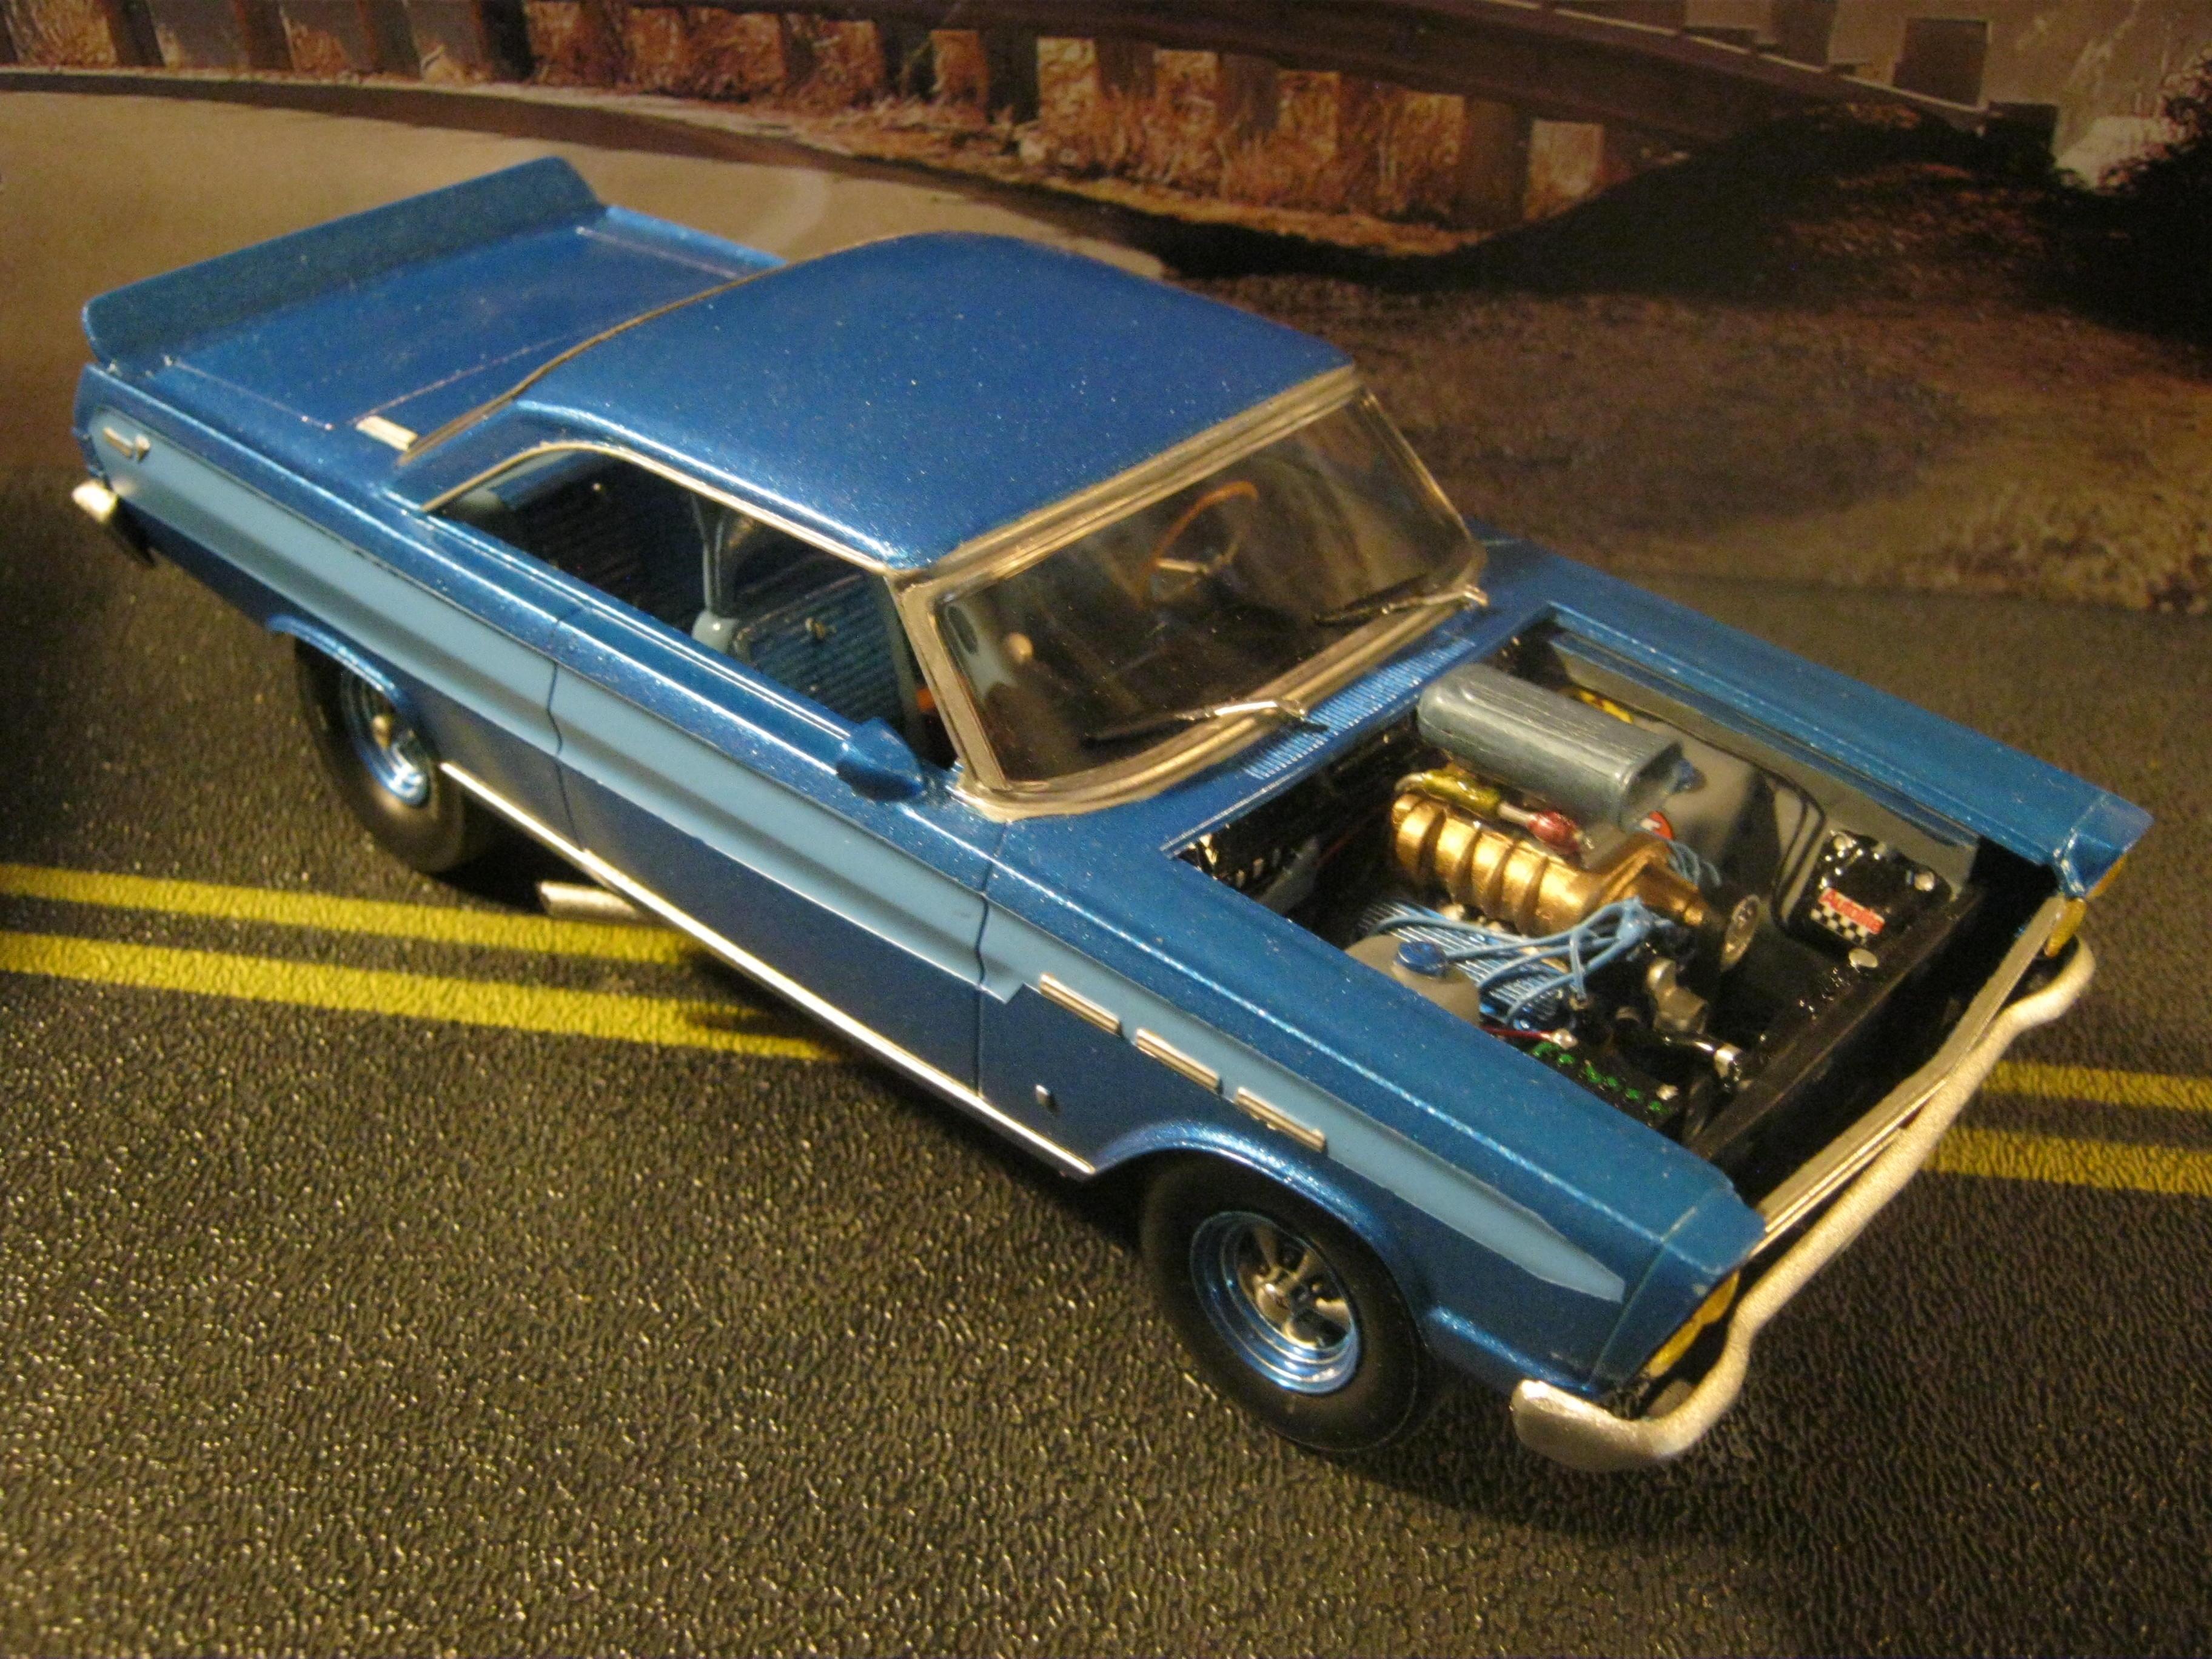
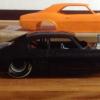
Howdy folks,,Does anyone ever unbox a bunch of ol' kits just to dust em off,,and revisit them? I forgot some of the kits I did years ago,,this being one. Moebius did a great job with these kits,,it has so many possible versions one can do. I did a street/strip racer, I ,saw somthin similar to this,,1:1 at Woodward this year,,it was an orange color PS Comet. I added a rear spoiler/wing,,because all cars should have a wing of some type. Even minivans and volkswagon rabbits. So this one got one. and some x-tra bits,,tyres+ rims from the spare parts bx,,minor wiring and stuff. One of my fav kits,,,,Onward! Thanks for lookin.

- 12 replies
-
- 1
-

-
- cometfairlane
- 427
- (and 2 more)
-
Ok Guys, It's been over 12 months on the bench but I'm calling this one pretty much done....just needs a rear screen and number plate (maybe a driver too) and a bit of detail paint for door handles, window trim and wipers. See WIP section for build details. Essentially started with a resin body and an early AMT Stock Car kit. Could not believe how well the two fitted together.....almost perfect match!!! Scratchbuilt rollcage, switch panel, handbrake, shifter mount, and MSD ignition box behind seat. Exterior details include aluminium tube exhausts, printed paper wilwood calipers and disc brakes, fujimi wheels and tires, and a plastic sheet fuel cell underneath with chart tape straps. Enjoy!! And as always your comments and feedback most welcome. Cheers....Geoff
-
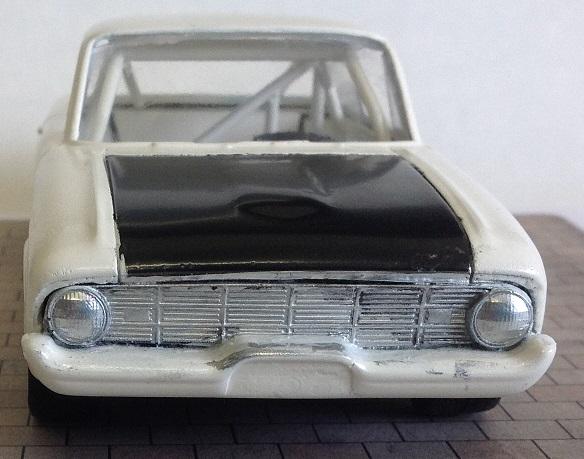
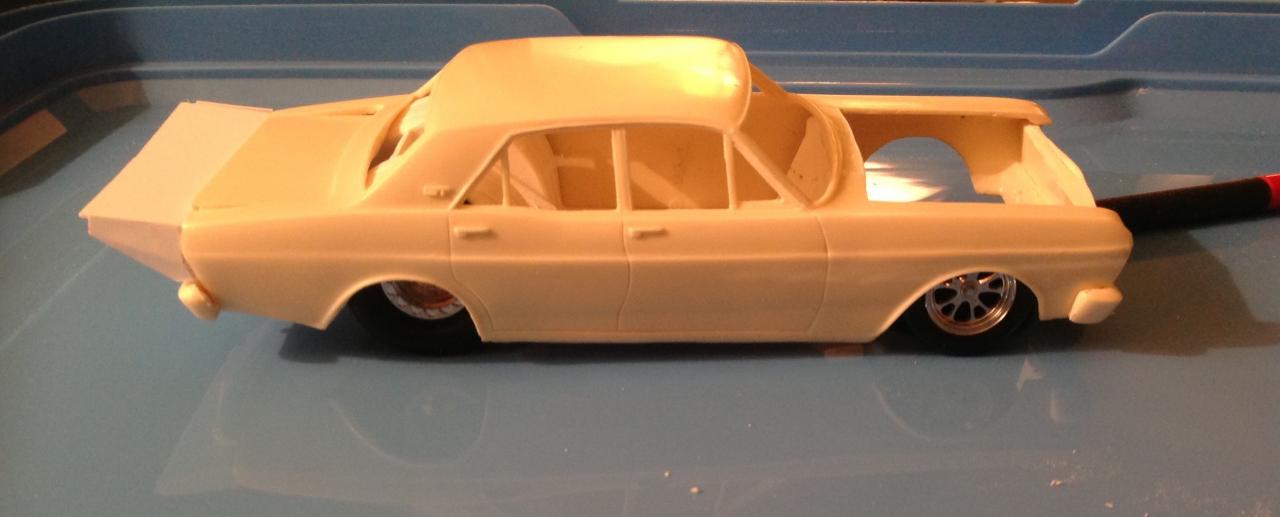
 I am looking for some info on this old Falcon junker I got years ago in a big parts lot. It is molded in white plastic like a regular model kit. Is not the funky plastic some promos are made of. Can't seem to figure out the year it represents. 60,61,62,63? Seats seem to be a different pattern from any others I have seen. Thanks for any help.
-
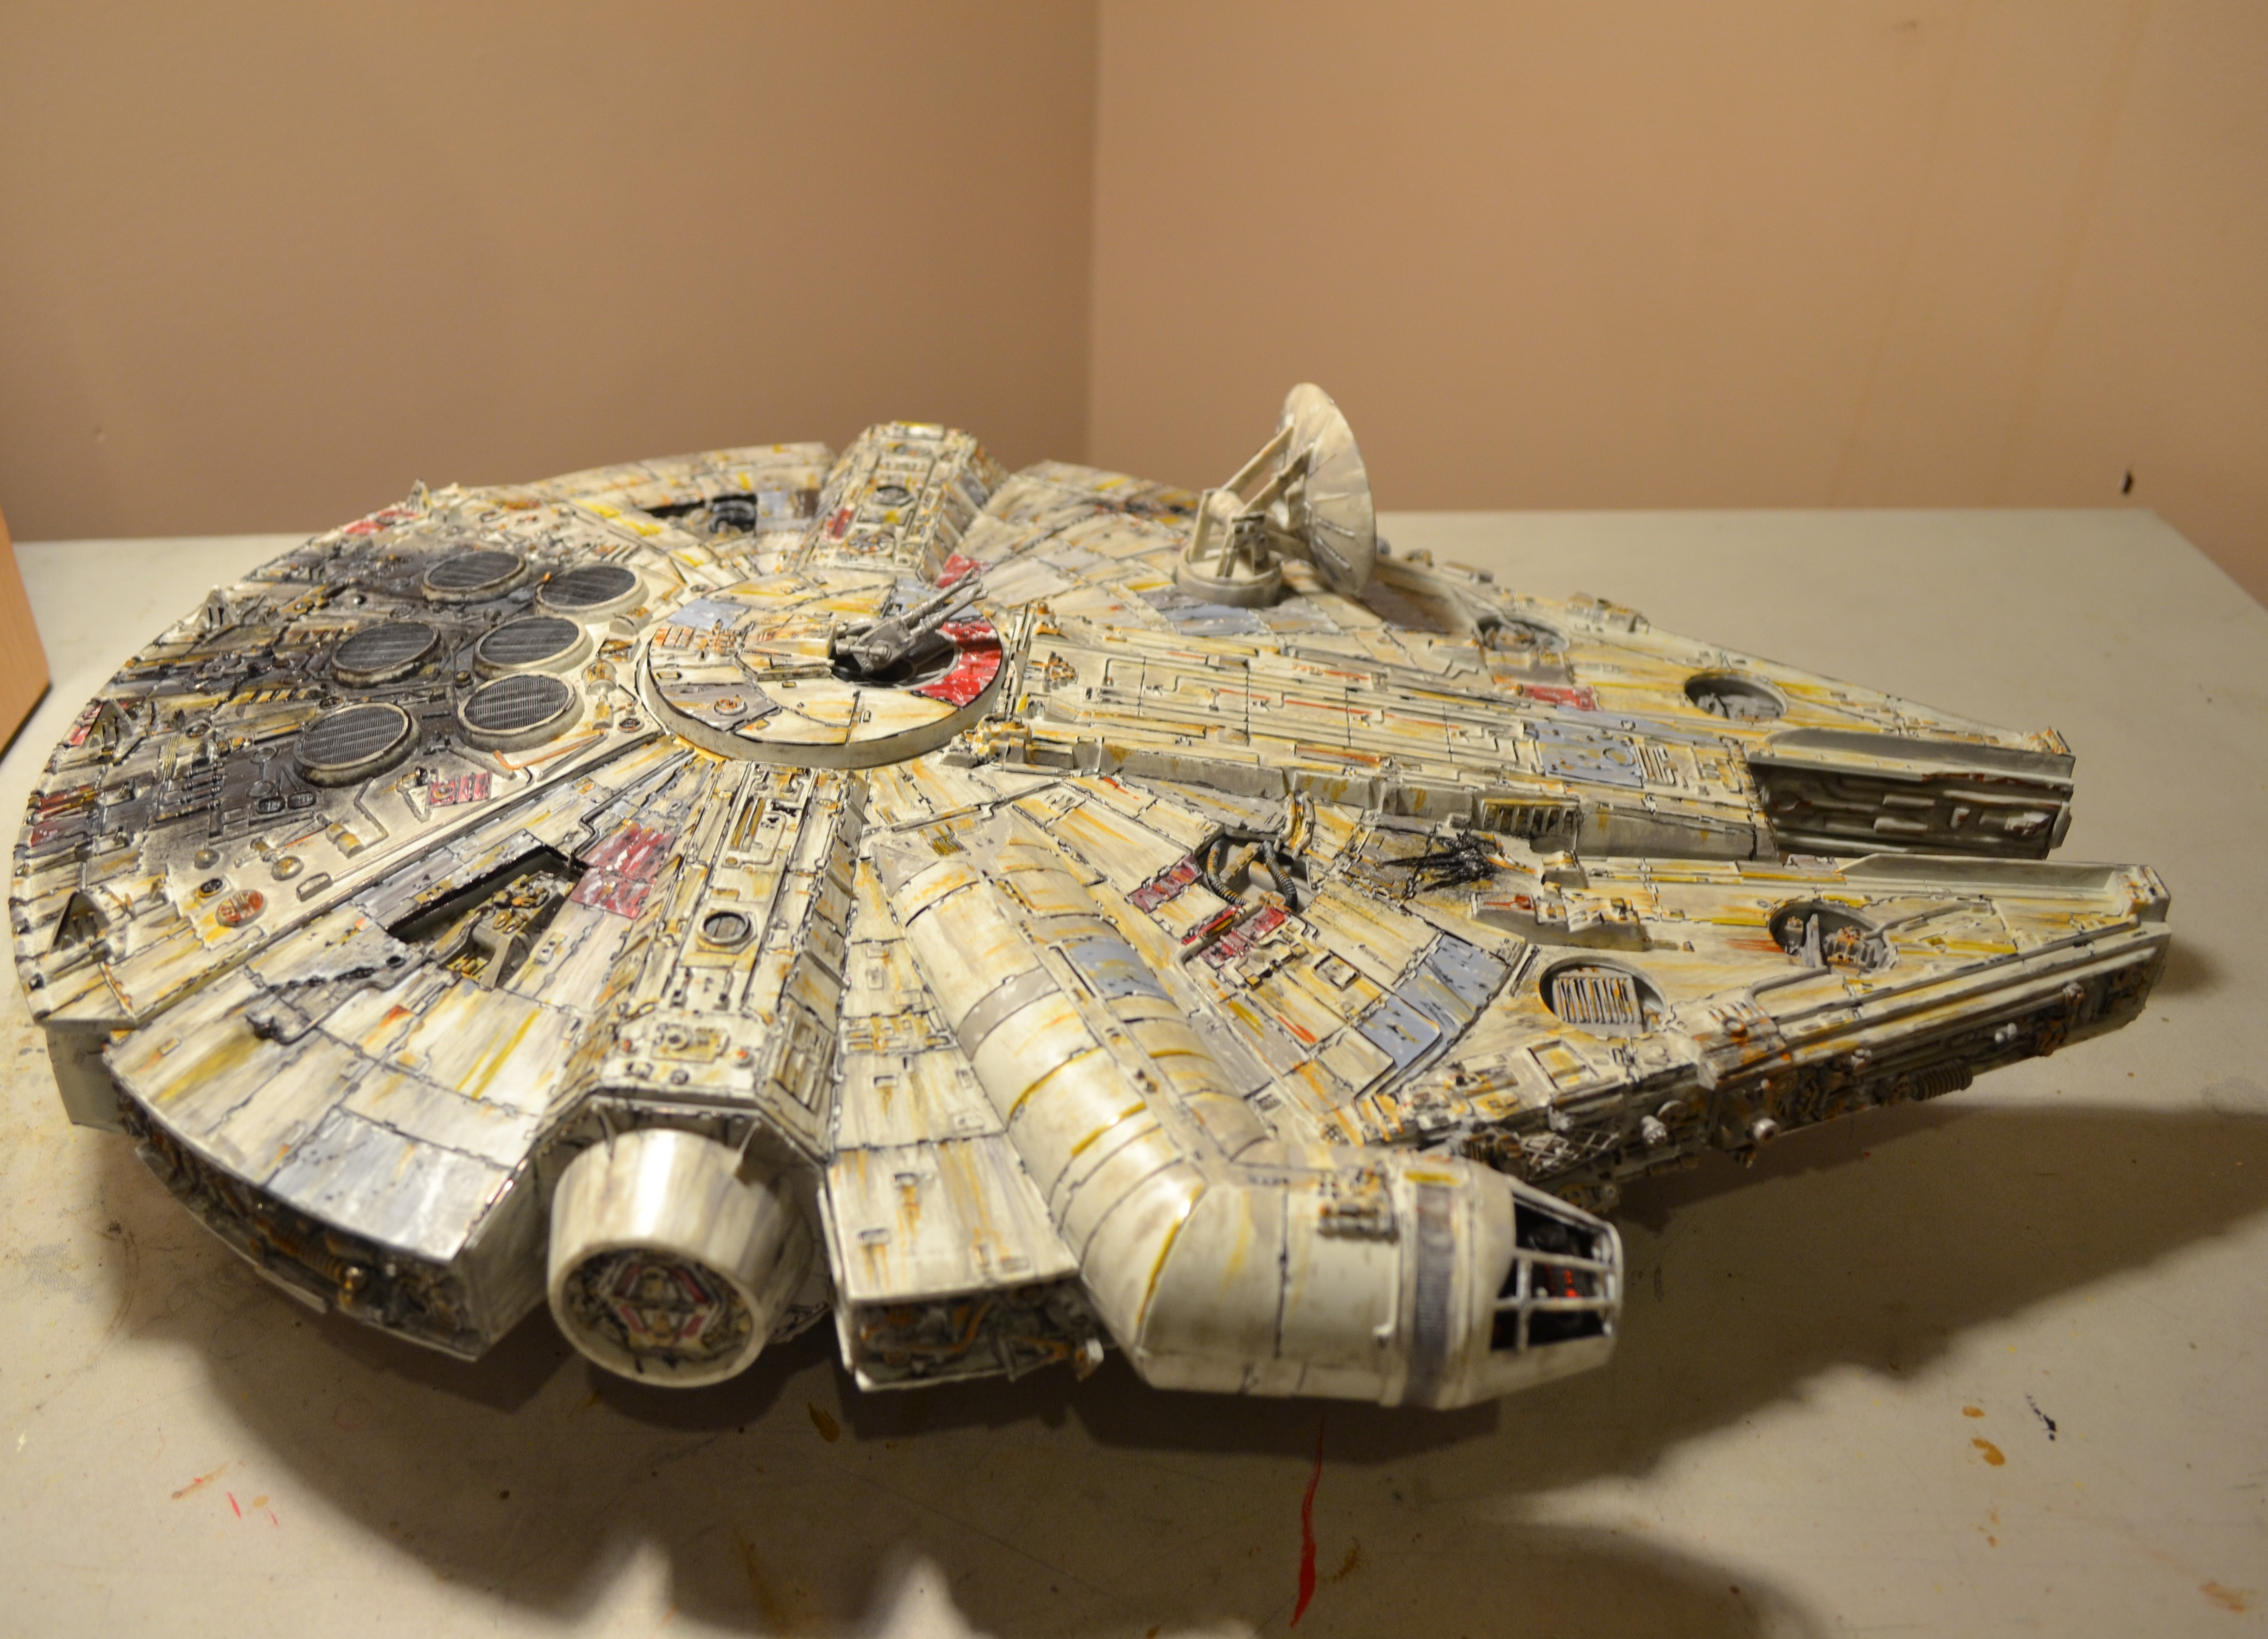
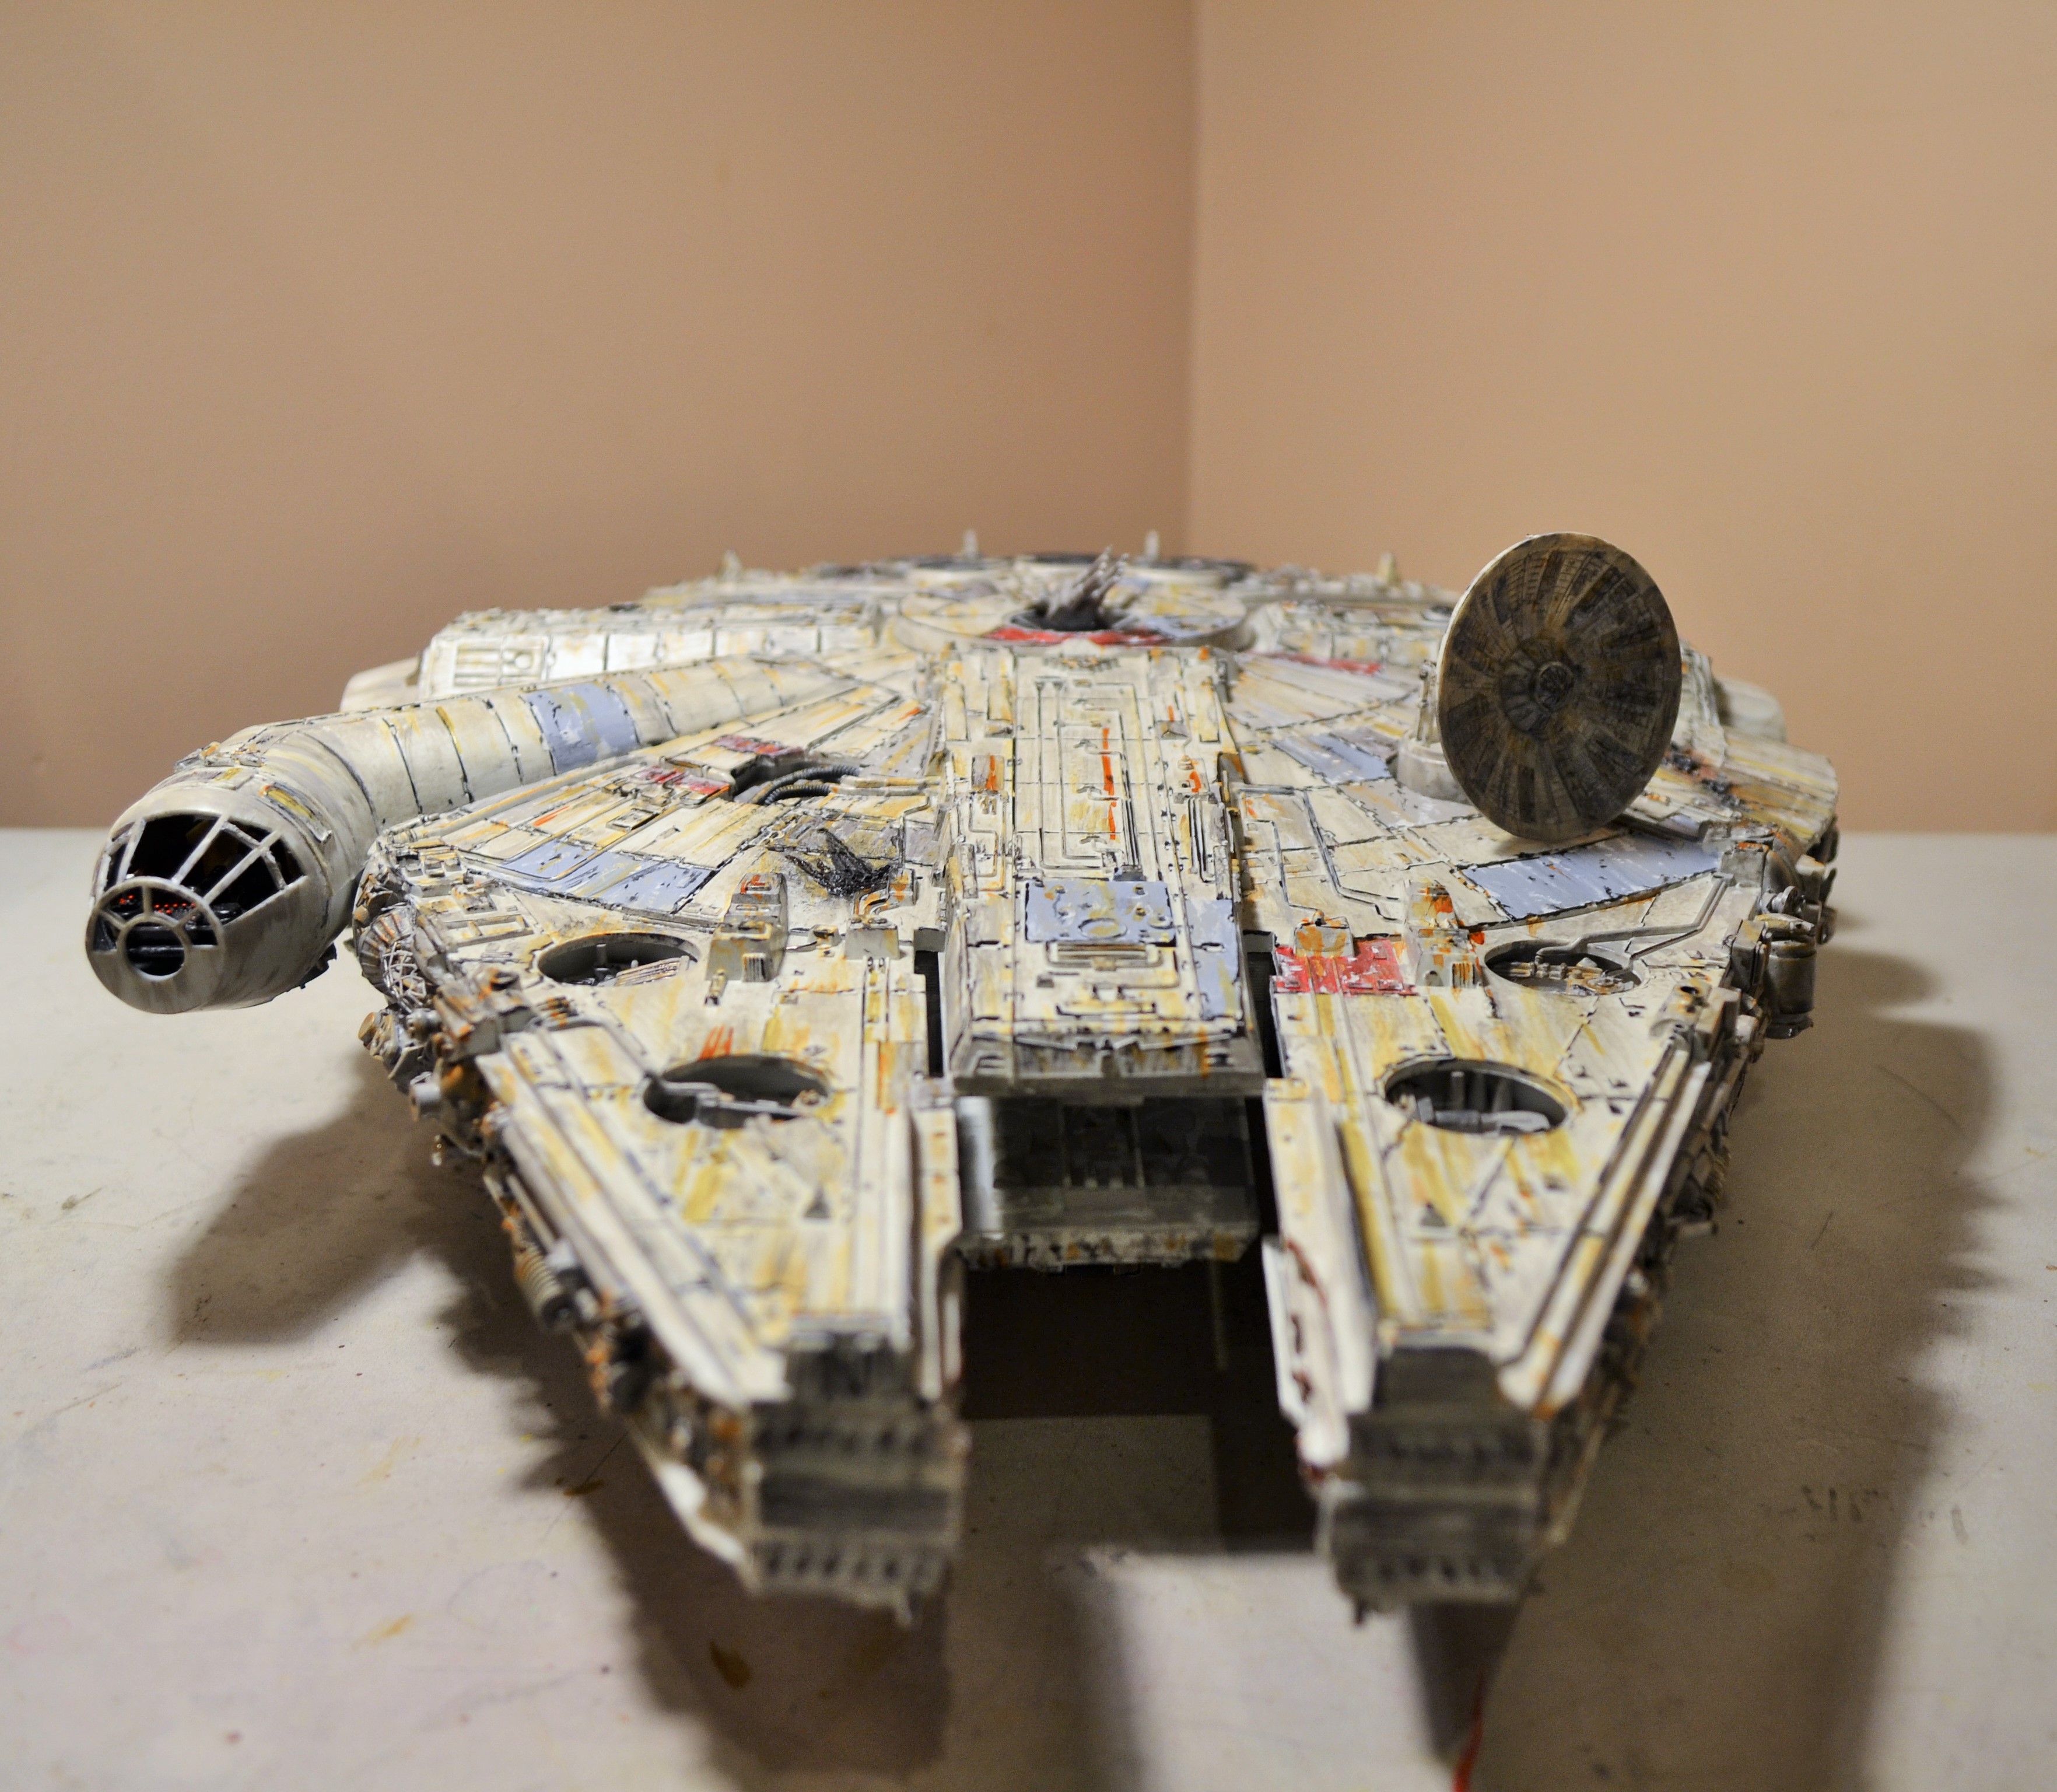
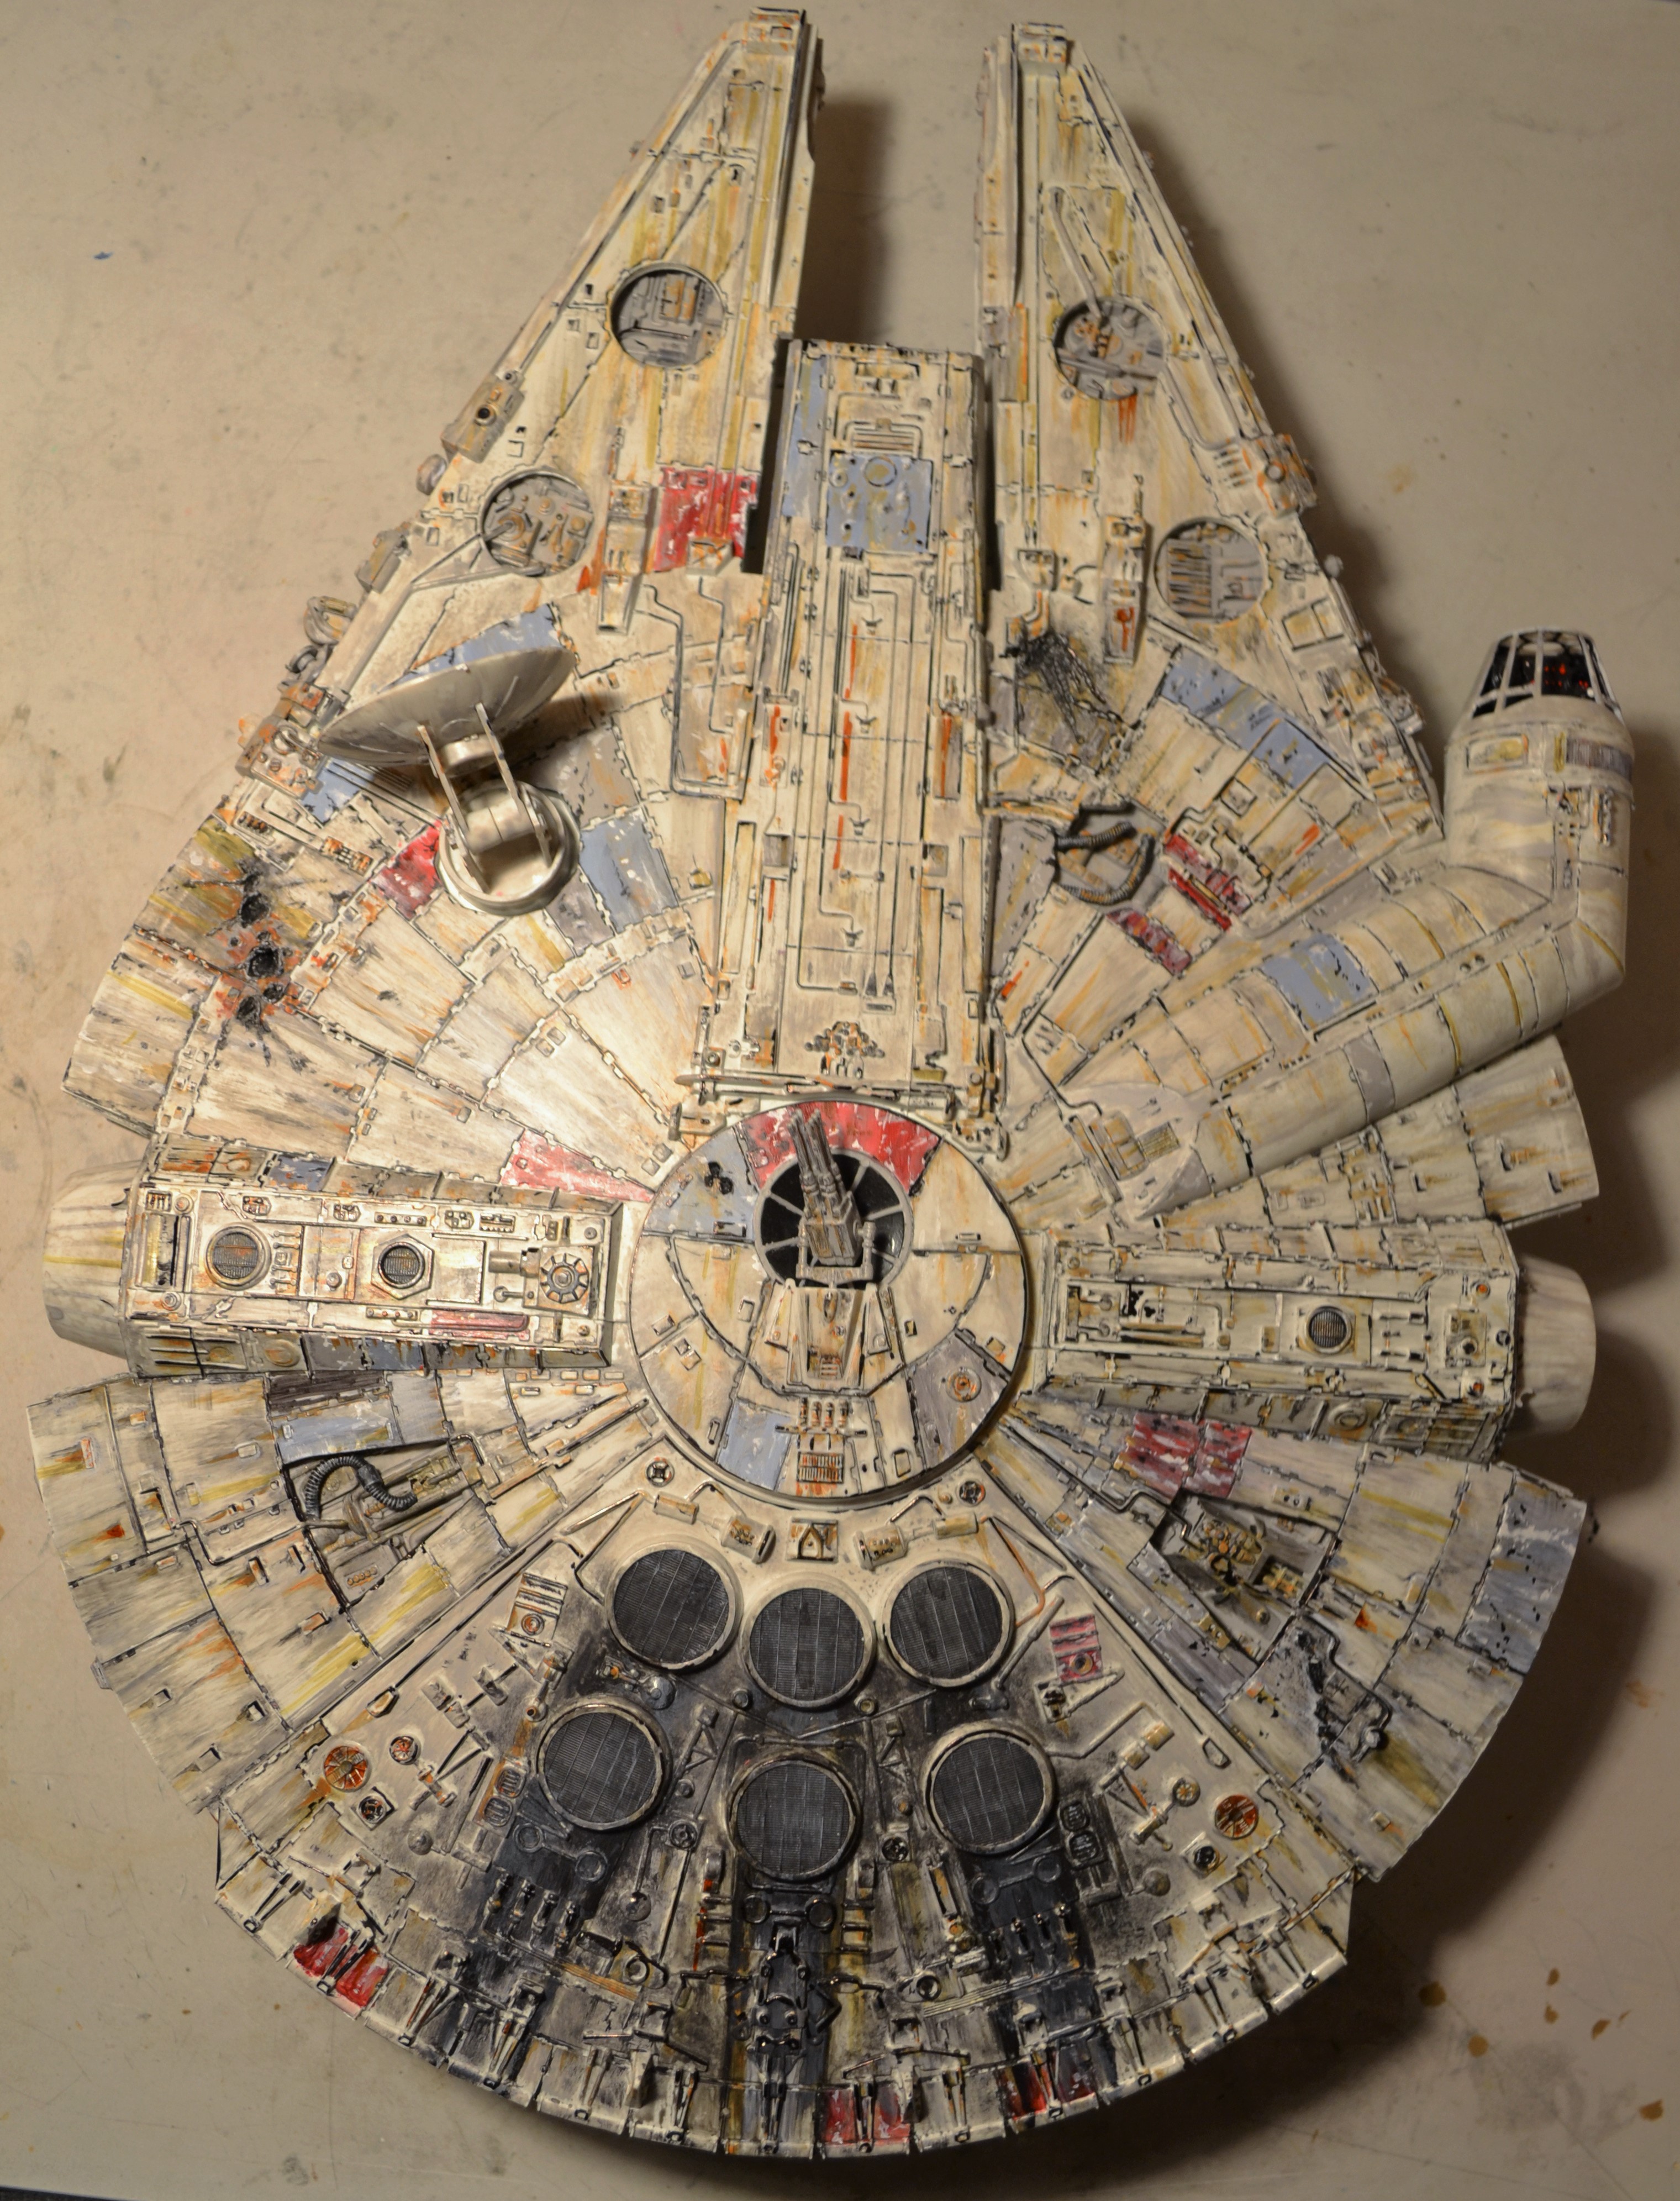
 My version of the old Return of the Jedi model kit. I added quite a bit of greebling around the sides, added hoses here and there and shortened the cockpit a bit, as it looked too long to me. I also added some scars on the hull too. I tentatively say it's done, but I want to work on the engine more. Sadly, I frosted the cockpit glass as well. I weathered it with acrylics.
-
This is how we roll in OZ
-
This is my build of Max's car from the first movie. It's an Aoshima Road Warrior kit with a mm1 resin transkit from Frank. the kit is the latest release with the photoetch extras. The build went very well, except for the boot lid, which i had major trouble with the hinge and making it fit. (brass rod snaps if you bend it too much!) I plan to use the left over upgrade parts to fix up my previously built Road Warrior Interceptor.
-
 Well you saw all the parts a few days ago, this will the start of the build up. I have to say after comparing this kit to some of Trmpeter's other kits like the 60 Pontiac and the Chevy Monte Carlo. There has been some noticeable improvements. Not to say there isn't room for more, because there is. I will cover the issues that I found concerning as we go. Gladly I haven't found anything I can't get past and that's a good thing. My goal is to work with what's in the box, using basic skills and materials most modelers have. I'll leave the kit bashing and super detailing to someone else. All my builds are done in a similar fashion, I put together as much as I can without paint, checking how things fit together along the way. When I'm satisfied, I'll break it down, add paint and detailing and then put it all back together again. Sounds easy right .... Like building a 1:1 car, I'm starting with the floor pan, interior tub and the bedfloor. The front inner structure is next along with the basic engine parts. The engine is just resting on the subframe for now. I also glued up the bench seat halves while I was at it. All these parts go together without a problem. I went ahead and glued the front suspension to the front sub frame but I'm only dry fitting it to the floor and the inner front sheet metal for now. I'm going use some tape to hold it in place. I'm also going to tape the rear axle housing in place and slip the tire and wheels on, also dry for now. Once that was done I flipped the chassis over and added the basic interior tub and bed using more tape as needed to hold it togther dry. Now it was just a matter of slipping the body over it all by slightly spreading the lower sections. Amazing ! It's looking like a Ranchero already, not bad for a couple hours work. If you look closely I started block sanding the hood, it has some very slight sink marks from the underside details. It's nothing I can't handle though. You may have noticed the engine in not in place yet, thats because I want glue the subfame to the floor and still be able to slide the engine in and out as needed but not so fast. There's a small problem that I caused not following the instructions. Next time I'll show you an easy fix that will let me do that along more of the build .... For all the photos just follow the link. Stay tuned ..... -Steve http://public.fotki.com/SteveG26/trumpeter-65-ford-r/