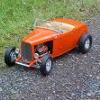
Sixties Sam Posted January 8, 2016 Posted January 8, 2016 (edited) Hey guys, I'm working on this 65 Chevy pickup in light blue, made to resemble a 65 that my late former father-in-law had years ago. The main modification on the model is to convert it to the bed mounted spare configuration. I cut the fender and made a curved insert from a plastic lid from a can of spray glue. The mount (music wire and styrene) for the spare is "sort of scale," not quite accurate, but close enough for me. I also hinged the tailgate, and will add chains. The bumpers and grille will be white instead of chrome. Paint is Testors light blue enamel, which is very close to the stock Chevy color. It's coming along, but that paint is really slow drying completely! Here are some pics. In the last one, the body & bed are just sitting on the chassis loosely. Edited January 8, 2016 by Sixties Sam
espo Posted January 8, 2016 Posted January 8, 2016 (edited) Great job on replicating the side mount spare. This was not a common option in many areas but would be very useful if your going to have to dig in the snow or mud to get the spare to change a flat. Many "working" trucks would sometimes have a fabric cover or a metal cover much like a Continental Kit with the business name on it. Edited January 8, 2016 by espo
wayne swayze Posted January 8, 2016 Posted January 8, 2016 Really like what you've done with the spare tire and mount. Looking forward to seeing this complete!
Ron Hamilton Posted January 8, 2016 Posted January 8, 2016 That one is very believable. Nice job on the spare mount and fender.
Sixties Sam Posted January 10, 2016 Author Posted January 10, 2016 I added a wooden bed floor, made from coffee stirrers and music wire, and some tailgate chains. It's coming along! Sam
OldNYJim Posted January 10, 2016 Posted January 10, 2016 Love that detail in the bed - the wood especially looks great! Love the chains too!
dragzz Posted January 10, 2016 Posted January 10, 2016 that came out looking great nice and clean work u did there
carrucha Posted January 10, 2016 Posted January 10, 2016 Coming along fine. Good job on the side spare tire mount.
Tom Geiger Posted January 18, 2016 Posted January 18, 2016 Overall nice work! I love the wood bed and chains. Most folks use chain that's too big but yours looks right. What size chain is that?Also I agree with the comments on the side mounted spare. I like the way you did that, and agree that I don't like spare tires that ride under a vehicle. My Dodge Caravan had (note I said had) and it was a pain in the tail. It rode with the outside up against the vehicle so you couldn't check the air in your spare without lowering it, and when you did need the spare it was always filthy. Not fun when you needed to change a tire wearing nice clothes. So my spare rides inside the back hatch in the interior.
Sixties Sam Posted January 19, 2016 Author Posted January 19, 2016 To all who commented on the spare tire treatment: Making that cutout would have been a lot easier if the fenders were separate pieces, but on this kit the bed and fenders are molded in one piece. The trick was cutting the plastic out with my Dremel abrasive wheel without damaging the bed rail. I taped a thin piece of aluminum against the rail during the cutting, and it got several nicks, but saved the bed from damage!Sam
Recommended Posts
Create an account or sign in to comment
You need to be a member in order to leave a comment
Create an account
Sign up for a new account in our community. It's easy!
Register a new accountSign in
Already have an account? Sign in here.
Sign In Now