Mark IV Posted December 19, 2018 Posted December 19, 2018 With a Monogram "Ultimates" 1/43 289 Cobra (I only have 4 more in the box) I am doing my dark blue/red leather car. I have redone the seats since this photo to better replicate the leather. The whitewalls are gel pen, wow! Where these years ago?
vamach1 Posted December 19, 2018 Posted December 19, 2018 Very nice to see a slab side Cobra. I had a FF 427 MKII but sold it this summer. I never got around to building a replica of my replica so it looks like you have a good start.
Gramps46 Posted December 19, 2018 Posted December 19, 2018 Looking real good Rick. Please keep us posted. These Monogram Ultimates are real gems.
mod3l Lover Posted December 19, 2018 Posted December 19, 2018 That paint looks nice on something so small! I have both of those little guys here, and I am afraid to build them anymore at this point!!! In fact, I just decided to put them up for trade! Someone can at least enjoy them, I guess!?! David S.
cobraman Posted December 19, 2018 Posted December 19, 2018 I love those little kits. Nice job on the WW's.
Mark IV Posted December 19, 2018 Author Posted December 19, 2018 The actual color on the 1/43 is closer to the actual color on the car. The lighting makes it "lighter" than reality. Some more progress has been made so additional photos coming.
Mark IV Posted December 24, 2018 Author Posted December 24, 2018 Al little more progress. Been really busy at "work" (when you sell GT40s, Cobras and Caterhams it's a stretch to call it "work") so not a lot of bench time available. Redid the seats, added the down tubes from the cowl to the front suspension tower and more. Working on the tubes that hold the bumperettes and over riders in lieu of the single, thick post Monogram supplied.
afx Posted December 24, 2018 Posted December 24, 2018 Coming along nicely Rick. How I wish Monogram would have scaled this kit up to 1/25 scale.
vamach1 Posted December 24, 2018 Posted December 24, 2018 1 hour ago, afx said: Coming along nicely Rick. How I wish Monogram would have scaled this kit up to 1/25 scale. Some times the most obvious things are sadly overlooked. Agree 1000% JC.
Mark IV Posted January 8, 2019 Author Posted January 8, 2019 (edited) Finally got some bench time. I had removed the single, large post Monogram used to locate the bumperettes and replaced with two thin posts as per the real car. I also removed the parting lines on the bumper hoops with a Flexi-File to improve the look. Of course this removed the plating, I could have sent them for plating but instead airbrushed them with Molotow "chrome". This stuff rocks! Wish we had it years ago when I was young and dinosaurs roamed the earth. Compare to the red car. Also did a new set of seats to better replicate the leather. Added some Chart Tape belts with buckles and the leather buckle under pad done with some paint and the aforementioned Molotow. Made a better shifter turning the boot out of sprue and using a piece of wire with a paint glob for the knob. Added a turn signal switch (and yes, on the Cobra they are on the right side of the column!) Installing emblems, I like to use Tamiya clear as it holds well and if smeared can be polished off if it is noticeable at all! Looking for something to use to replace the steering wheel rim as it is about 4 inches thick in scale. Looking at hard "O" rings, etc. to find something of proper thickness and diameter. Open to suggestions? Edited January 8, 2019 by Mark IV
Ron Hamilton Posted January 8, 2019 Posted January 8, 2019 Looking good. I have one of those kits in my dresser drawer. I haven't decided what color to build it yet.
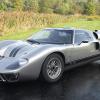
Mark IV Posted January 9, 2019 Author Posted January 9, 2019 Ron, Pull it out of the drawer and build it! White with red, Princess Blue with red, or whatever! Here is a Princess Alice Blue with red we recently did for a customer.
Mark IV Posted January 9, 2019 Author Posted January 9, 2019 (edited) Also used some craft store "glass paint" for the turn signals. This is for painting glass to replicate stained glass and when put over plating makes really good amber and red signals. Edited January 10, 2019 by Mark IV "Good" not "food"!!!
Mark IV Posted January 9, 2019 Author Posted January 9, 2019 And can anyone I.D. the car in the door over the Volvo hood?
afx Posted January 9, 2019 Posted January 9, 2019 1 hour ago, Mark IV said: And can anyone I.D. the car in the door over the Volvo hood? Lotus Europa is my guess
Mark IV Posted January 9, 2019 Author Posted January 9, 2019 DING, ,DING, DING we have a winner! 73 Europa Twin Cam special. The pieces are now in Chicago destined to go back together.
Mark IV Posted January 9, 2019 Author Posted January 9, 2019 A third party, out of state, postdated check made out to me!
MrObsessive Posted January 9, 2019 Posted January 9, 2019 I love this! I've had this kit (along with the '67 'Vette) ever since they came out, but I've never done a thing with it. Yours is coming along sooo nice! You've given me some inspiration to dig mine out and take a second hard look!
Mark IV Posted January 13, 2019 Author Posted January 13, 2019 Working on the windscreen mounting. The two little tabs that locate the unit are long since sanded away. The first paint job was ruined when I used some temporary tacking putty to hold the windscreen in place, the putty ate into the paint so a strip and repaint was required. I have now duplicated the black rubber molding that runs under the lower frame piece and am using Tamiya tape to locate the mounting. Still undecided about what to use to secure the frame to the body, slow or fast setting epoxy? Or something else? And also a shot of my solution for paint palettes, glue depositories for when you use a pin to apply, etc. These are Formica samples that you can get at home stores. I have a chain with about 200 that I have been using for years. When they are filled up, toss 'em and break out a new one!
Gramps46 Posted January 14, 2019 Posted January 14, 2019 Rick, your is the only model I have seen built with the raw fiberglass foot boxes, good on you.
Mark IV Posted January 14, 2019 Author Posted January 14, 2019 Most of the AC fiberglass was an "off-white" color. I mixed this but have now found an "aged flat white" in Model Master that is quite close.
Recommended Posts
Create an account or sign in to comment
You need to be a member in order to leave a comment
Create an account
Sign up for a new account in our community. It's easy!
Register a new accountSign in
Already have an account? Sign in here.
Sign In Now