David G. Posted May 29 Posted May 29 A lot of excellent detail and it just keeps getting better! David G.
Steve H Posted May 31 Posted May 31 Wicked cool !! It keeps getting better and better Anton. Hooking up a camper trailer to the back would take it to the next level… The trailer hitch is one of those details that would get people curious, especially with no context. Love that kind of stuff…
Mattilacken Posted May 31 Author Posted May 31 On 5/29/2025 at 1:27 PM, David G. said: A lot of excellent detail and it just keeps getting better! David G. Thanks David, appriciate that you take your time to comment, means allot! 23 hours ago, Dragline said: An absolutely sick machine. Thank you sir! 8 hours ago, Steve H said: Wicked cool !! It keeps getting better and better Anton. Hooking up a camper trailer to the back would take it to the next level… The trailer hitch is one of those details that would get people curious, especially with no context. Love that kind of stuff… Thanks Steve! For sure it would! Would mean to scrach one I guess. Hehe for sure would rise a question or two, but perfect for Dragweek!
Mattilacken Posted June 1 Author Posted June 1 The exhaust is getting hangers. 3d printed and installed in what seems to be good spots I also made a new tailpipe, single ”3 thet goes to 2x3,5”. Gonna look good I believe. only had clear ressin to print with. 1
Mattilacken Posted June 3 Author Posted June 3 Have added some paint on the middle parts of the exhaust and fixated it to the downpipes and joined them with CA and filled and then repainted the joints I am so glad that Vallejo paints leave no brush strokes. Al joints at the engine side exhaust also got filled and same treatment. I also added the battery shut off handle on the switch, here it can also be seen how the fire tank looks now. I did also print some articles on the Blackout Impala, the inspiration for the build, and bent them to resemble a magazine. Google docs is good for shrinking those pictures. 3
David G. Posted June 7 Posted June 7 Excellent work on the exhaust! All the fittings look great and the color of the metal looks just right. David G.
Mattilacken Posted August 18 Author Posted August 18 Finally some Impala progress! I have gotten forward with the plumbing, oil filter and catch tank are located. Next up is ac filter and condenser as well as radiator hoses. 4
David G. Posted August 20 Posted August 20 Wow, I'd almost forgotten about this one Anton! I'm glad you didn't though. Seeing all the detail you're throwing into this makes me smile. David G.
Mattilacken Posted August 21 Author Posted August 21 23 hours ago, David G. said: Wow, I'd almost forgotten about this one Anton! I'm glad you didn't though. Seeing all the detail you're throwing into this makes me smile. David G. Haha I am not surprised! Long time since my last update and even longer since I started! Haha
Mattilacken Posted August 21 Author Posted August 21 (edited) some more plumbing done. Preassure and suction side of the dry sump system is plumbed, only the tank left. Also got some more hoses on the engine. And I started front brake lines. Also replace the revell starter with a printed one that I modified To fit with my ignition placement. Edited August 21 by Mattilacken 2
Mattilacken Posted Wednesday at 04:20 PM Author Posted Wednesday at 04:20 PM Have made some progress on the Impala. Will try to finish it these coming days. 3
Kanada Kustoms Posted yesterday at 12:04 AM Posted yesterday at 12:04 AM Looking good... Love the magazines on the package tray, nice touch! 1
Mattilacken Posted yesterday at 02:02 PM Author Posted yesterday at 02:02 PM This rear connection that never was intended to be seen by revell has been fighting me.. might have to do with all the mods and the fact that everything have been cut apart and fitted to an other chassis, but any how.. third time trying to fixate this.. epoxy every time but the glue areal is small and the tension for pulling them apart is high. Now I use Tamiya epoxy and try with leaving a small gap so it’s not as much tension. There is now way I can make a cut to make the tension less. cross my fingers. and so far so good!
Mattilacken Posted 21 hours ago Author Posted 21 hours ago (edited) Was laying some black paint on the booth lid, had a problem with sanding through when polishing. So I stripped it and put bmf on the emblem and painted again. Looks good straight out of the AB, LP Clear is not as “hot” as TS clear which is good. Did an other wet coat after this. . Edited 20 hours ago by Mattilacken
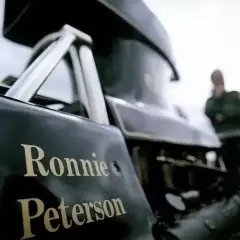
Mattilacken Posted 7 hours ago Author Posted 7 hours ago (edited) Getting there… Details left and a good final cleaning! I am considering if I need to make new lenses or just go with these even though they are a bit cloudy despite polish. Edited 7 hours ago by Mattilacken
Recommended Posts
Create an account or sign in to comment
You need to be a member in order to leave a comment
Create an account
Sign up for a new account in our community. It's easy!
Register a new accountSign in
Already have an account? Sign in here.
Sign In Now