Steve H
-
Posts
1,981 -
Joined
-
Last visited
Content Type
Profiles
Forums
Events
Gallery
Everything posted by Steve H
-
This will be good…. I will place a vote for the Brockmeyer look, that thing is really cool. Maybe with the Foose Caddy wheels, not that you need my opinion 🤪 Look forward to watching you work your magic on this one.
-
Another very nice looking build Donald. Lights definitely add more interest, especially the dash lights. 👍👍
-
Hi David, this coming together nicely. That Tamiya pearl white does not cover well at all. In my opinion it needs a white base, exactly what you have done. Looks right to me sir. Doesn’t look like you found too many rabbit holes on this one yet!😀
-
Looks fantastic all finished up Dave. The engine compartment is full of great detail work, and the interior is equally impressive. Very nice build indeed!
-
If I were you I would still blame AMT, they are at least indirectly responsible….😀 We all know you will have it whipped back into shape and, if I know you, there will be yet another improvement of some kind as well. Frustrating though for sure…
-

71 Olds 442 W30 (replica of my brother in law’s car)
Steve H replied to Steve H's topic in WIP: Model Cars
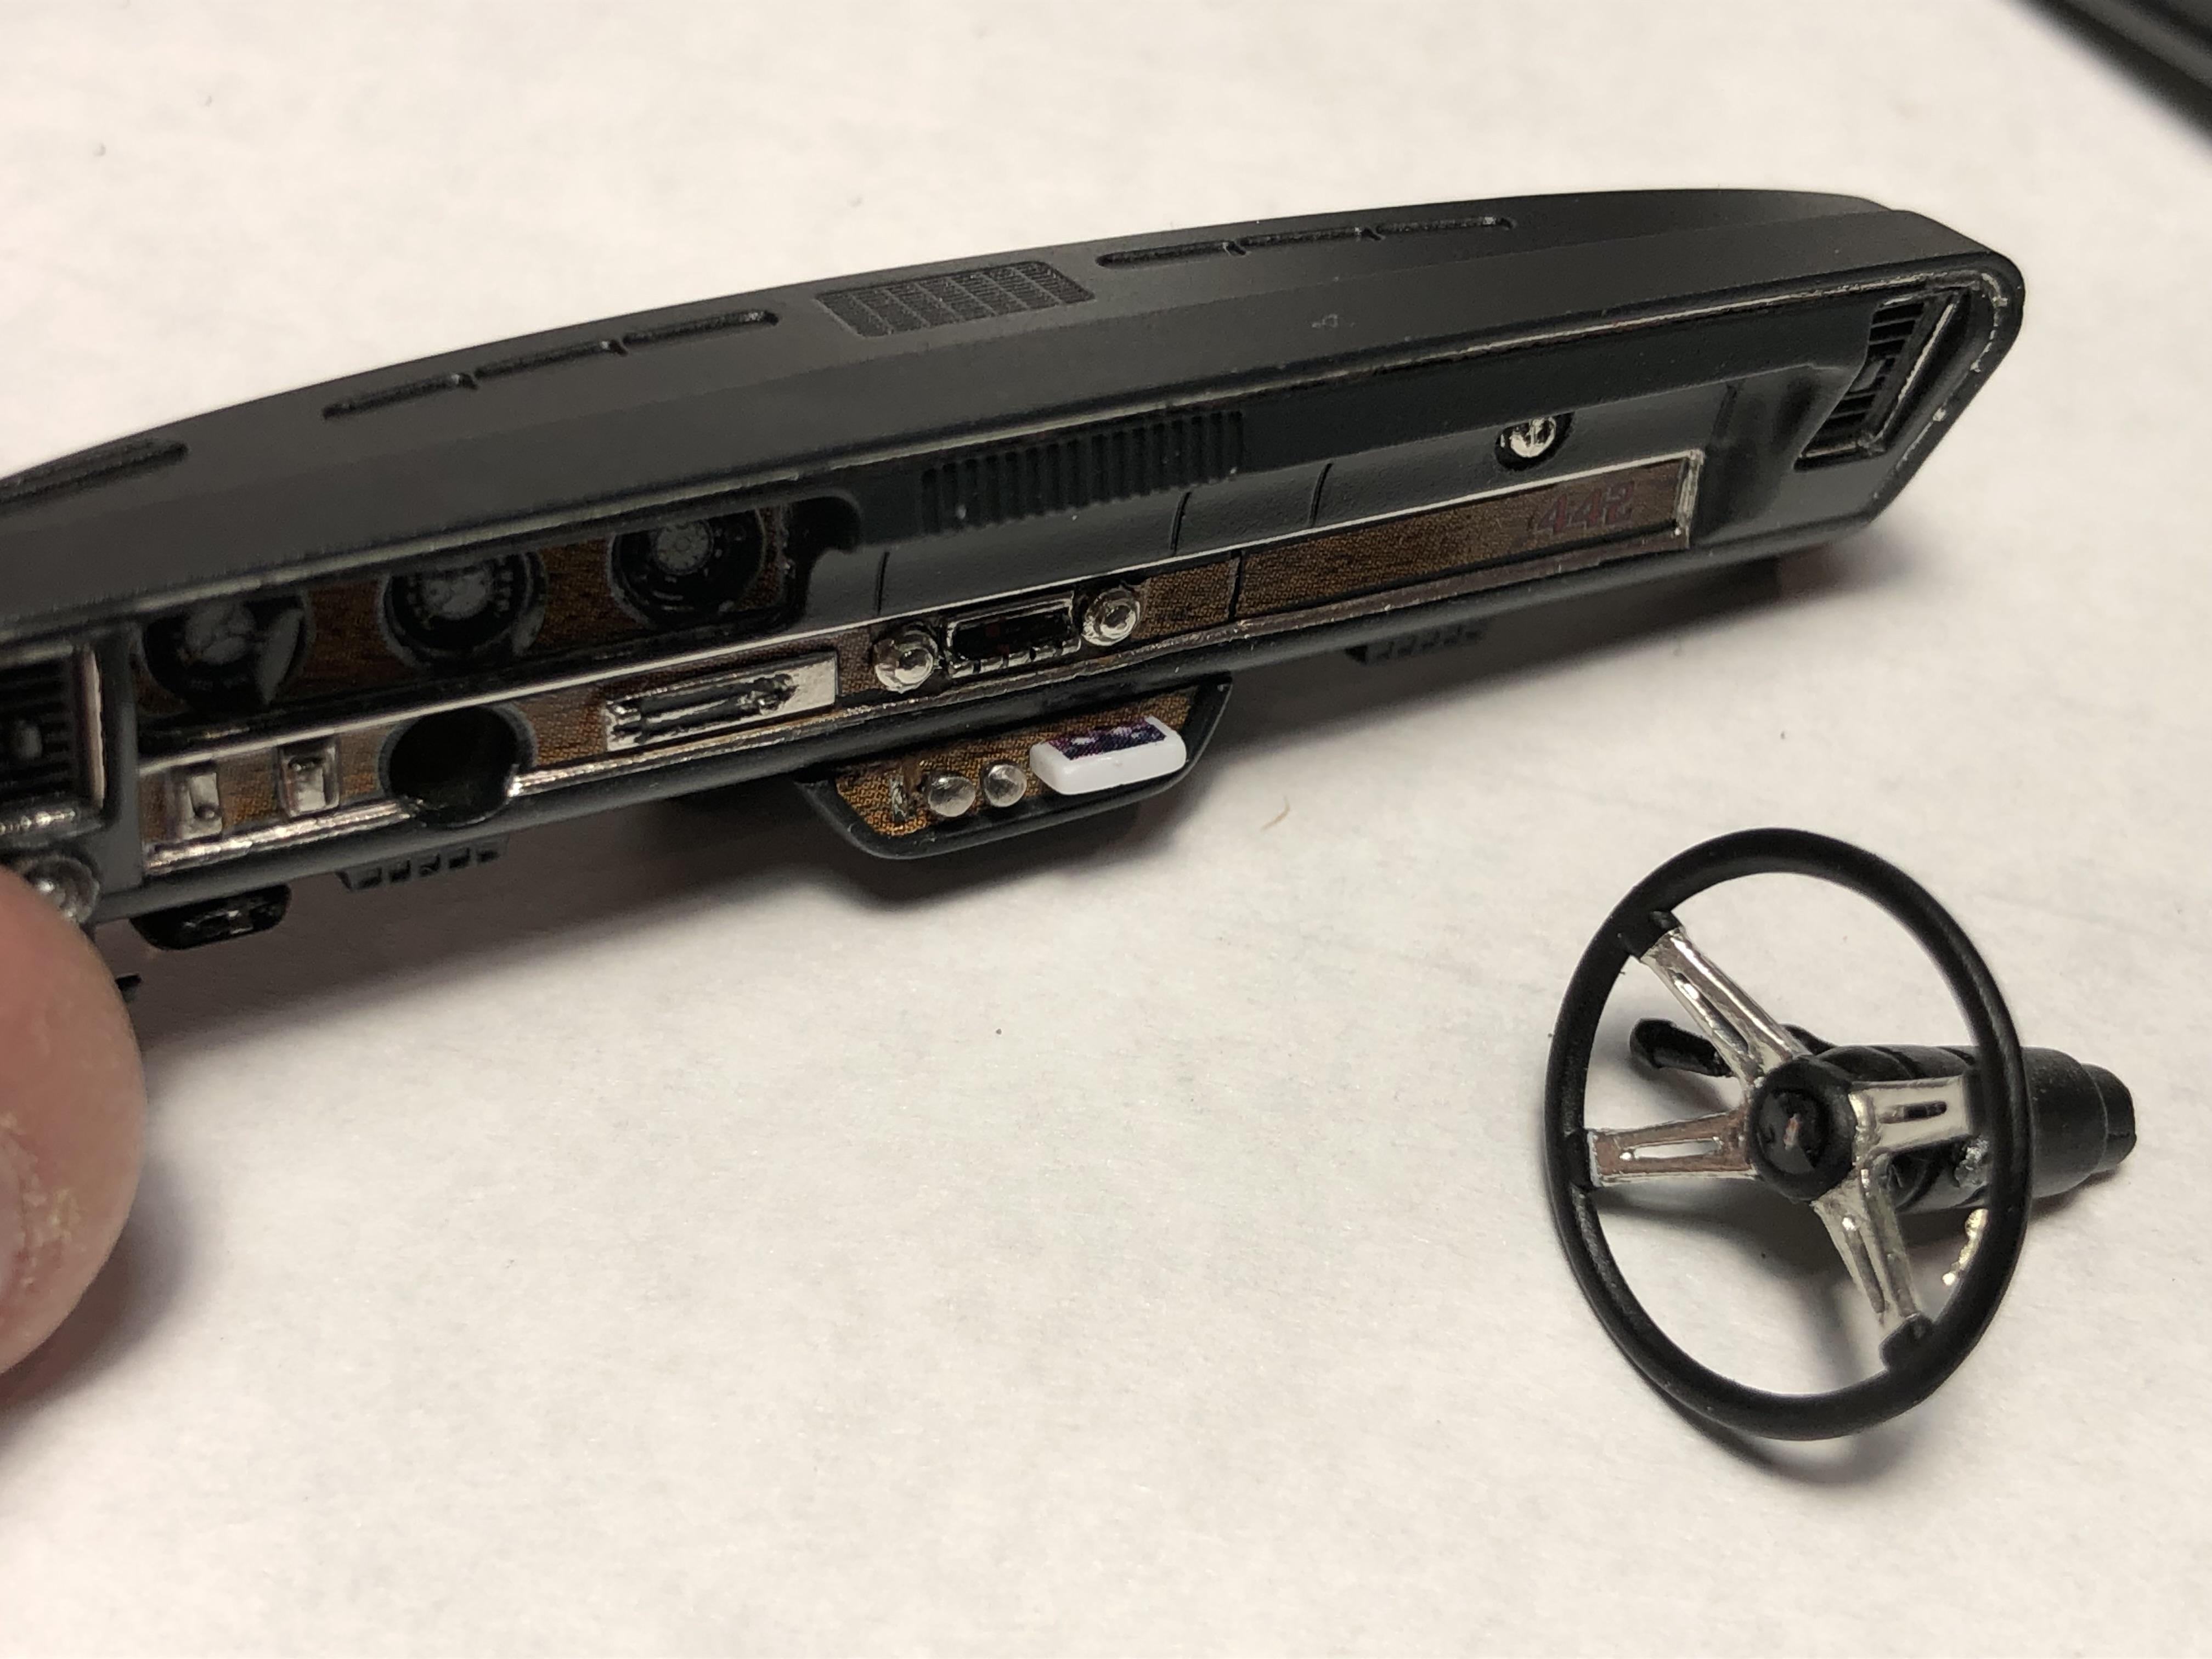
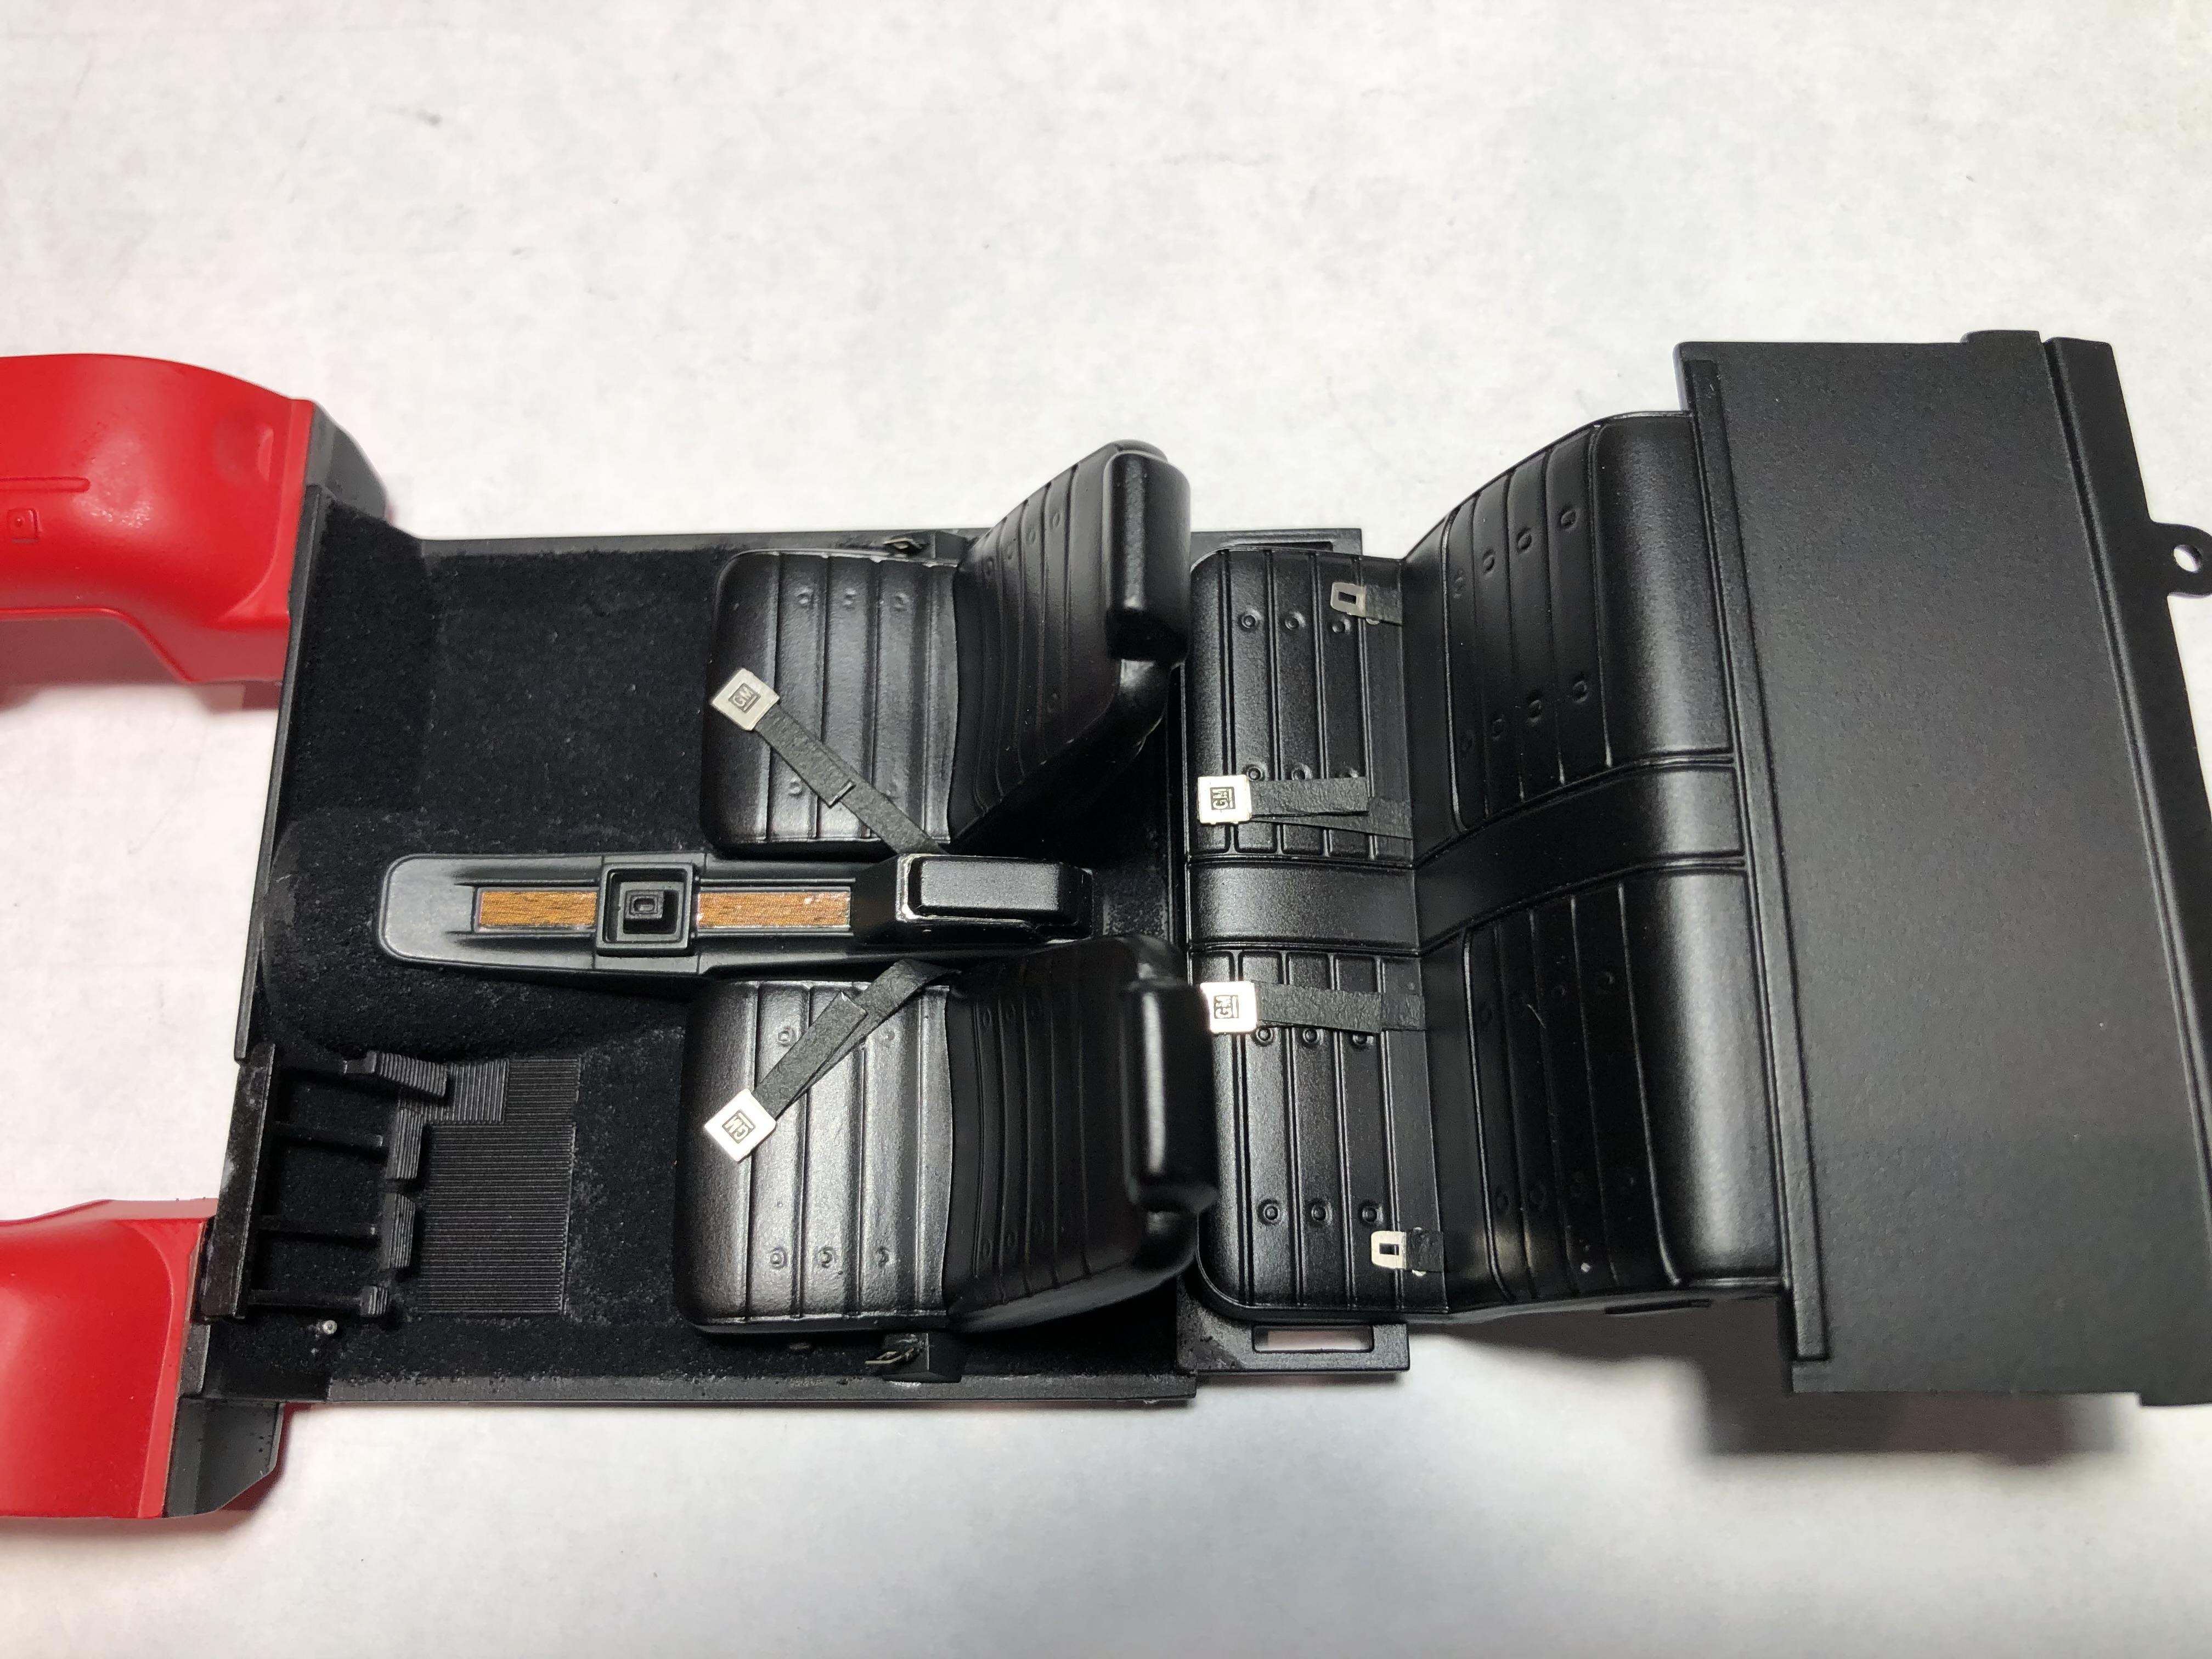
Thanks Greg. Most of the detail work is behind me now, I will add some details under hood once I get there. The tape wasn’t my first choice, but still better than the oversized ribbon material I had on hand. It was quite easy to work with, and I think it looks reasonable. I used a double thickness of tape, placing two pieces together sticky side to sticky side, then glued them on the seats. I also added a small piece of sheet styrene to the bottom of the photo etch buckle, giving them a slightly more accurate scale thickness. Thank you Trevor! As mentioned somewhere above, many of the details won’t be seen, but it’s been fun pushing myself a bit to try and have a somewhat accurate replica. Much appreciated Rich. -
Wow Scott, both are very nice builds. The “junker” though is over the top. Lots of great details, the peeling vinyl top, ripped seats, excellent rust effects, my favourite tho, is the hole in the muffler! That’s the first time I’ve seen that done, love it! I’ll be borrowing that for future use. Thanks for sharing. Cheers, Steve
-
’72 Dodge Demon Drag Racer 1/25 scale
Steve H replied to AmericanMuscleFan's topic in WIP: Drag Racing Models
Truly amazing Francis, I have no idea how you do it my friend. You should be in the jewelry business too. I imagine you could make some stunning custom jewelry. I don’t check in here often enough, but it’s always enjoyable to see the master at work. I always smile, and it’s not unusual for me to chuckle (in amazement) at the artwork you create. Thank you 🙏 -
71 Olds 442 W30 (replica of my brother in law’s car)
Steve H replied to Steve H's topic in WIP: Model Cars
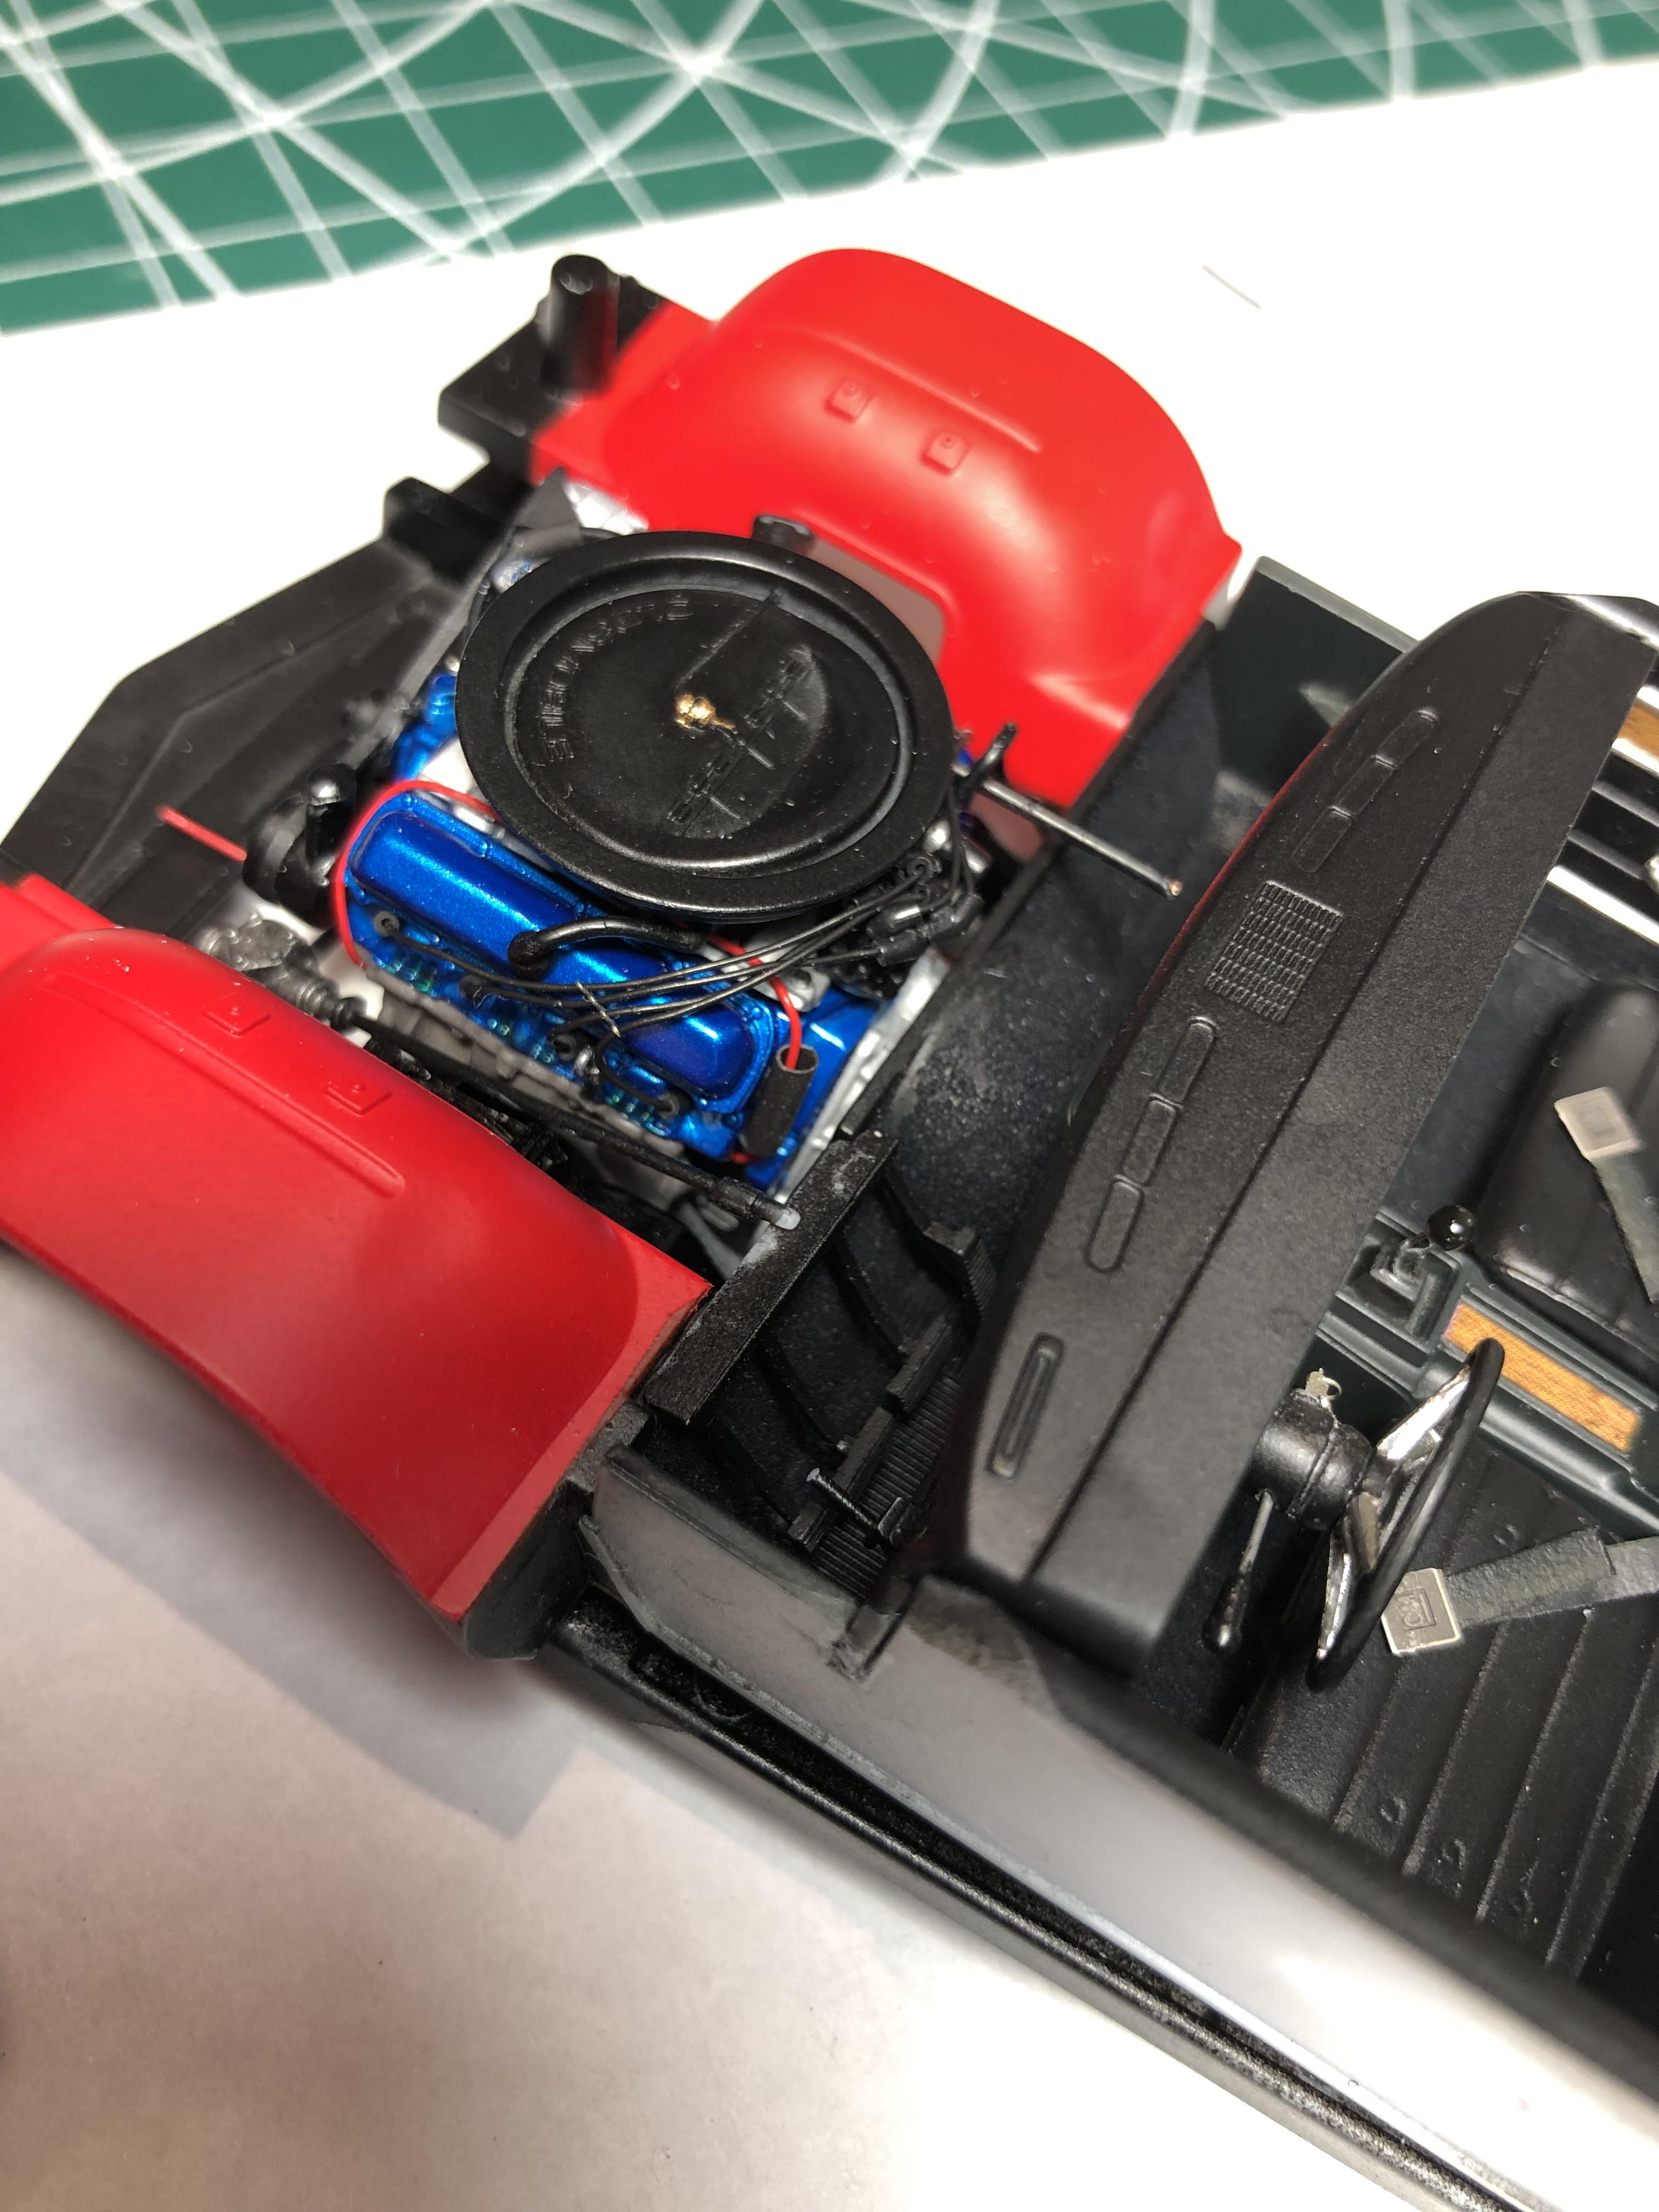
I finally got around to gluing the engine and driveshaft into the chassis. Not really a big deal obviously, but it was a satisfying step forward. Couldn’t resist plonking the chassis and interior together to see how the engine looked against the red fenders… So now, I need to get my act together, and figure out my hood hinges…
-
71 Olds 442 W30 (replica of my brother in law’s car)
Steve H replied to Steve H's topic in WIP: Model Cars
Haha! Well from one Steve H, to another Steve H, thanks for the compliment. Looks like you are fairly new to the forum, so welcome aboard. Thanks for having a look, and taking the time to comment. Thanks Paul. I knew a fair bit would either not be seen, or really hard to see, but like you said, it’s there, and the journey has been fun. Yes… I should have had a hinged, opening driver side door. I’ll probably do that when I get around to doing a replica of my own car. Oh sheesh, no pressure right?! I will add some wiring under the hood, but I’m not going to get too carried away with it. I appreciate you following along Paul. It means a lot to me to have someone with your talent complimenting my build, I’m humbled, and thank you. Here’s, Steve -
Hi Greg, you certainly have shown that kit who’s the boss. Very nice work all round sir. The headlight bezels would be tough to foil, but I think you are the man for the job. That colour looks suitable for the build. It might look interesting, but not period correct, with a coat of pearl clear, then the semi gloss. Just a thought, and likely too late…
-
Whoa!…. That is some spectacular engine detailing, and top shelf weathering.. VERY nice.👍👍 Looks like you are fairly new to the forum, so welcome aboard. I look forward to seeing more of your work. Cheers, Steve
-
71 Olds 442 W30 (replica of my brother in law’s car)
Steve H replied to Steve H's topic in WIP: Model Cars
Thank you Noah, one of my better efforts. Oh good,it actually works!🤣😜 Thank you Donald. After looking at your builds I did VERY BRIEFLY consider LED lights for gauges/interior lights, but I’ll save that for another build. Thanks for having a look. Nice looking heater box Dominick. You have to bring out the “McMonte”, after you finish the “Super bird” 😄 Thanks Clay! -
Replica of my 1970 Superbird Tribute car
Steve H replied to Superbird McMonte's topic in WIP: Model Cars
Nice progress Dominick. Paintwork looks great, and certainly captures the colour of the 1:1 near perfect. It takes a sick man to admit he likes foilwork…😜 I like the finished product, but getting from A to B is not all that enjoyable for me. -
Hi Luke! Hope all is well mate. That green Holden is spectacular. I love seeing huge motors shoe horned into cars, looks to be a tight fit in there! I agree with Jim above ^^ those panel lines are crisp. Your builds are always so clean, nice work as always.
- 337 replies
-
- 1
-

-
- stalled builds
- quick builds
- (and 2 more)
-
Great paint, and very period correct looking colours David. Nice work on the interior so far, it will look even better once you get the details done.
-
Looking good James. Removing some of the trim will definitely add some interest to the build, good call.
-
Super cool build Claude. You actually managed to make the Hornet look racey! That paint effect is quite striking, and adds even more interest to an already unusual subject. The engine details are impressive, that’s a lot of motor stuffed in there. Another beauty from the house of Claude.
-
71 Olds 442 W30 (replica of my brother in law’s car)
Steve H replied to Steve H's topic in WIP: Model Cars
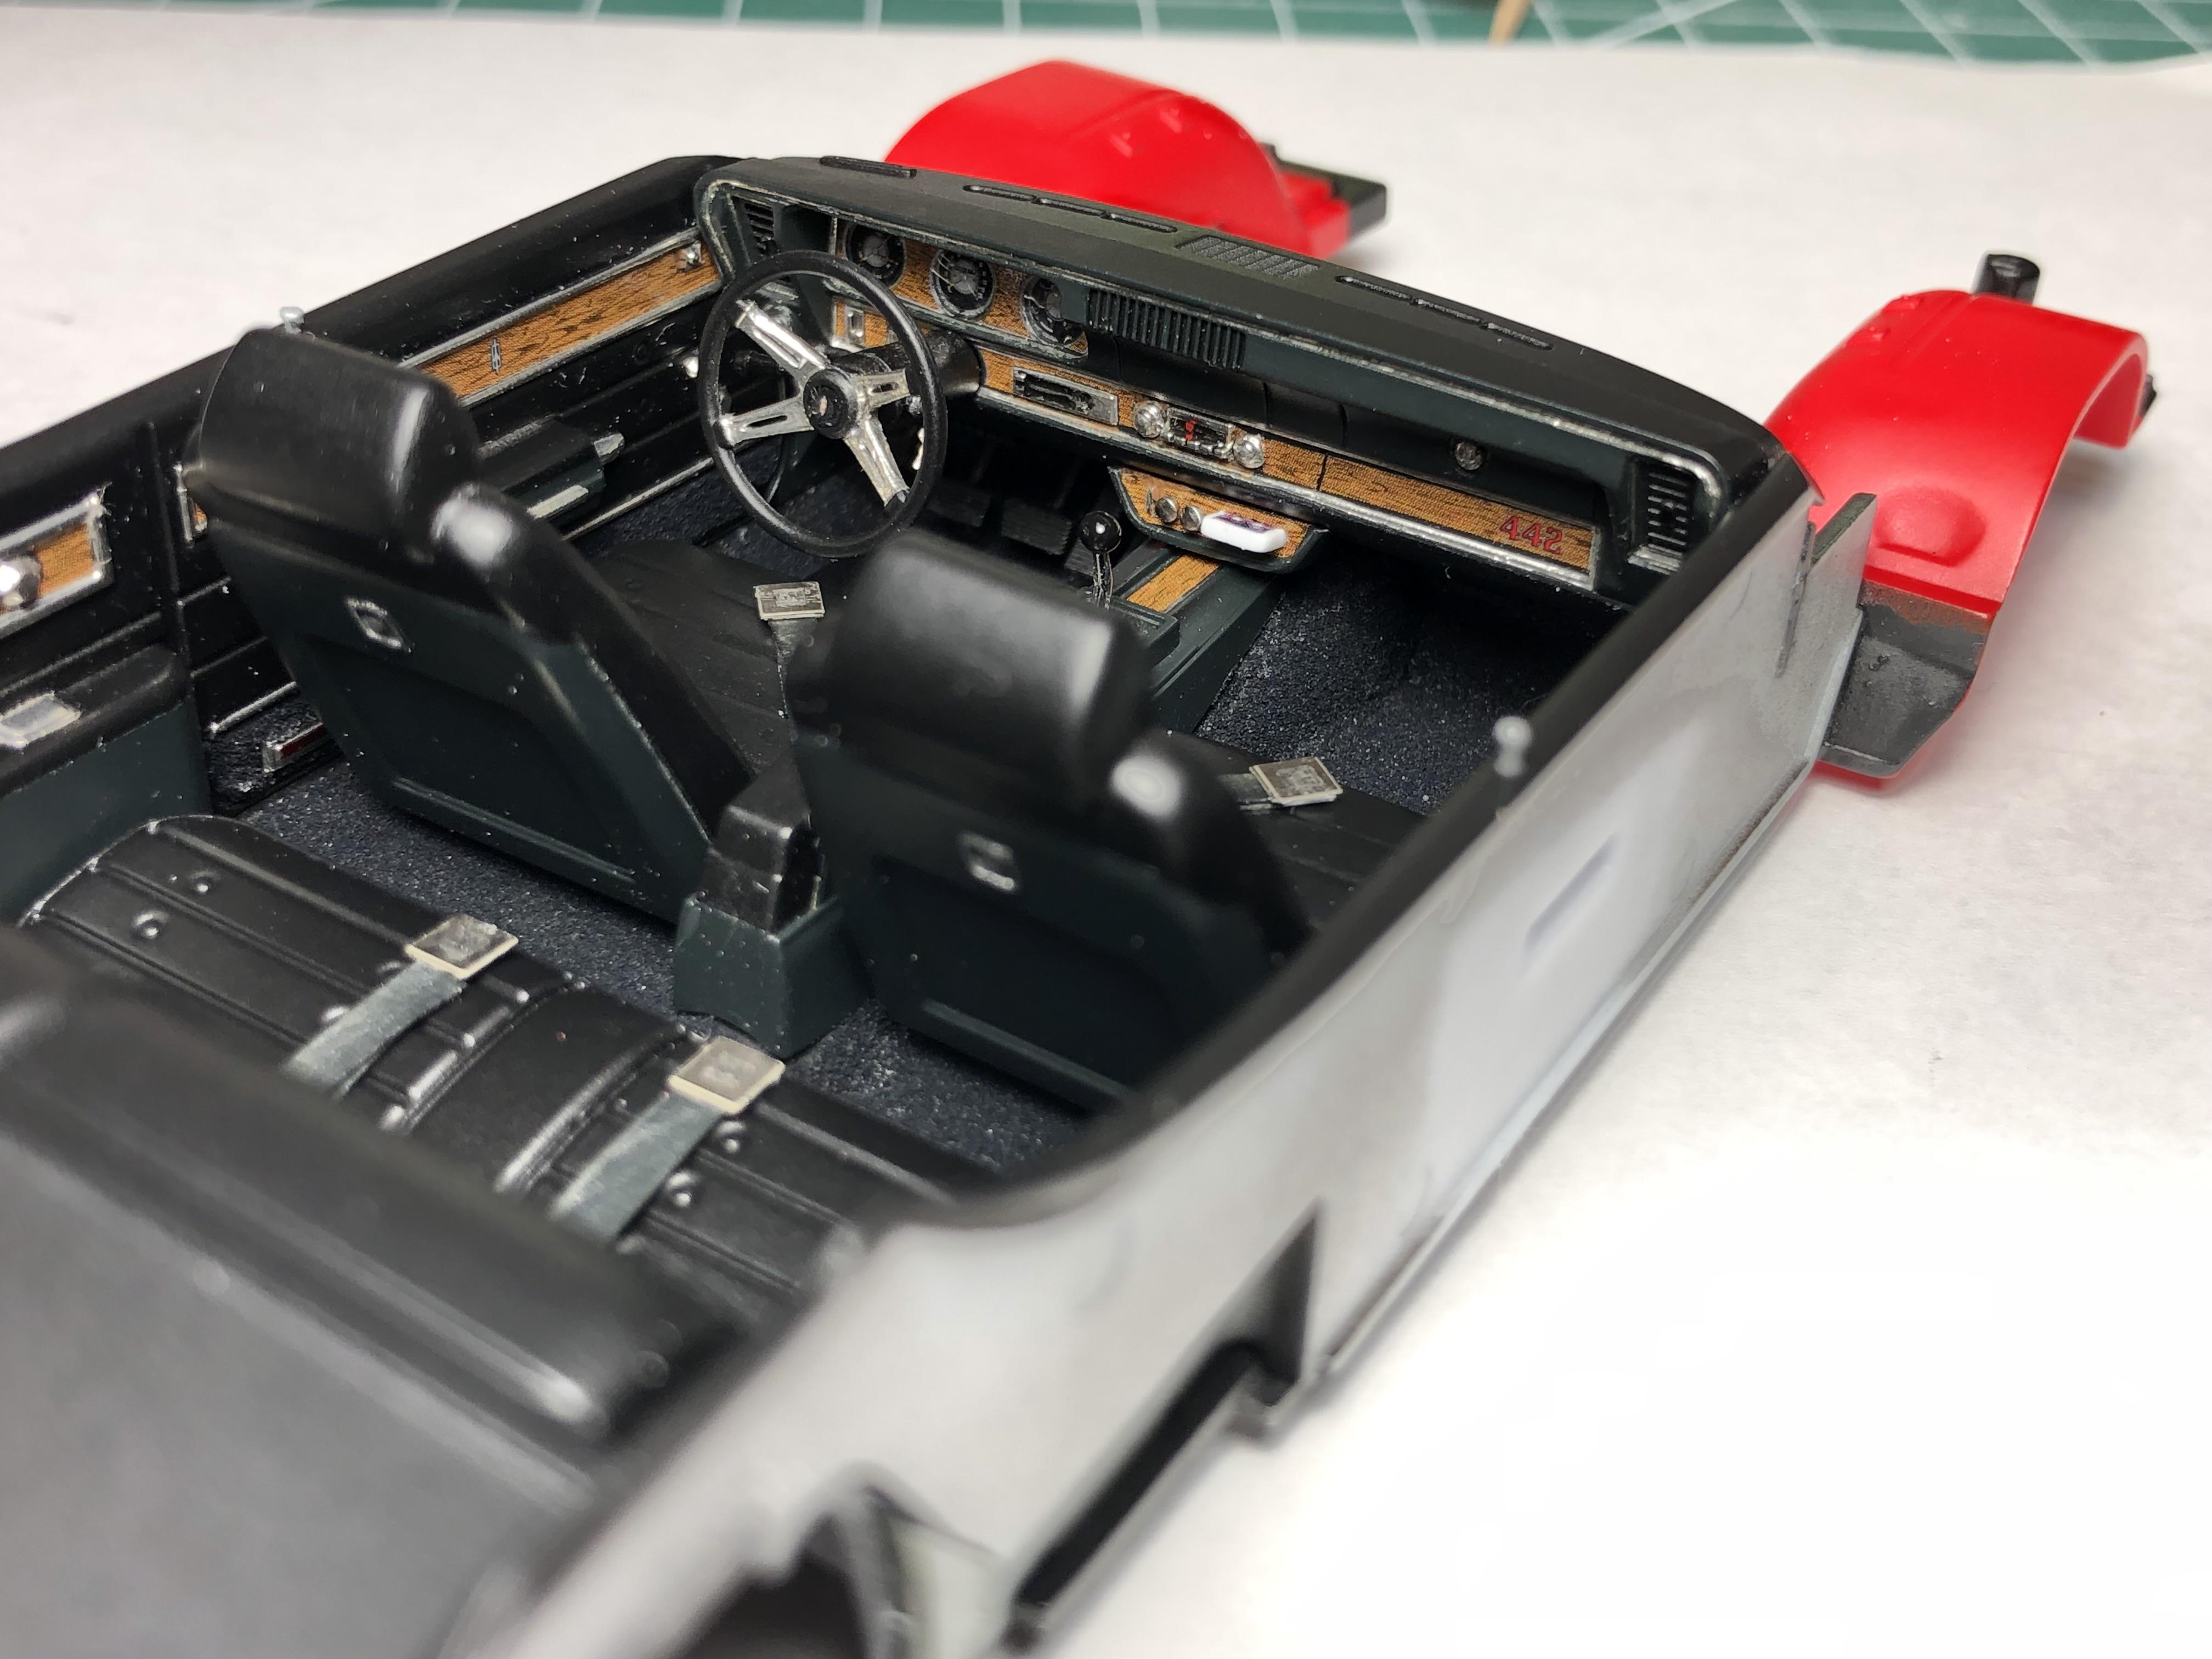
And now the sum of the parts… All in all, I’m really happy with how it turned out. One thing (there’s many) that I definitely could have improved on was the radio. After “finishing” it, I was doing a dive through my decals trying to find a decal for the shifter ball, (unsuccessfully) and stumbled across a couple of perfect radio face decals, dang! Anyway, still pleased. Cheers, Steve
-
71 Olds 442 W30 (replica of my brother in law’s car)
Steve H replied to Steve H's topic in WIP: Model Cars
Haha. “Old man”, I resemble that remark! Well, oldish anyway… Thanks Jim, this is my best effort to date on an interior. -
71 Olds 442 W30 (replica of my brother in law’s car)
Steve H replied to Steve H's topic in WIP: Model Cars
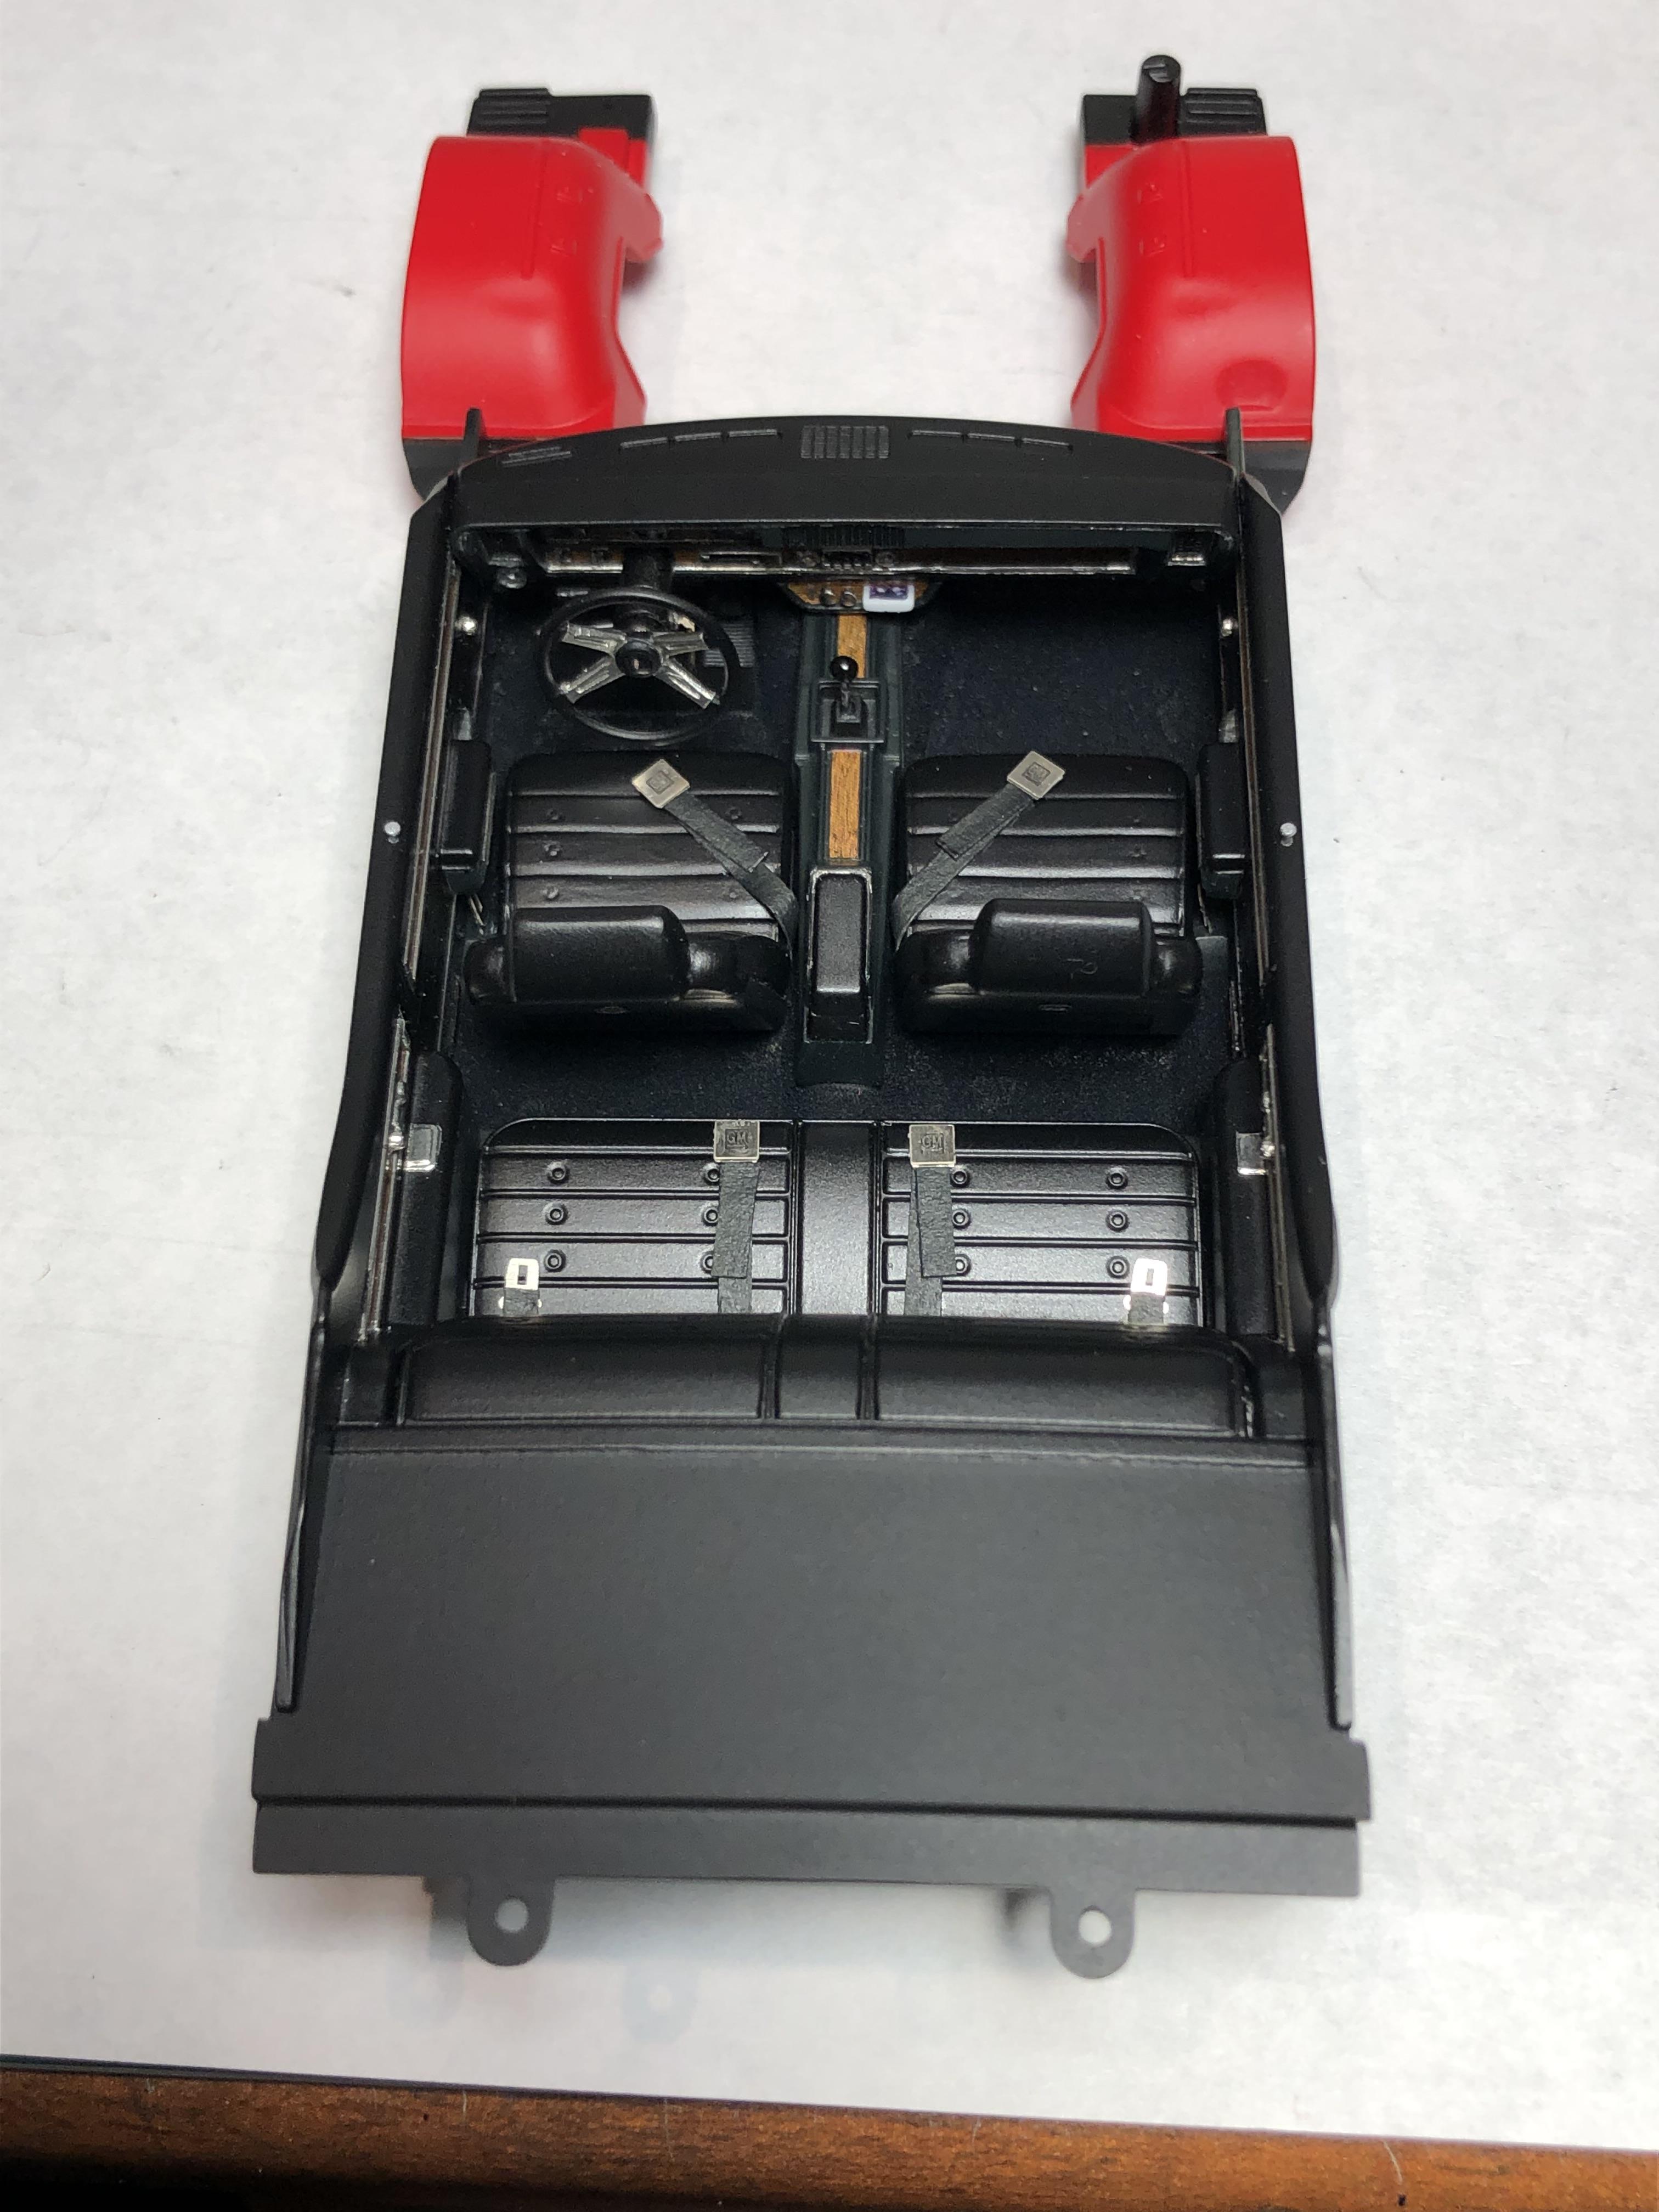
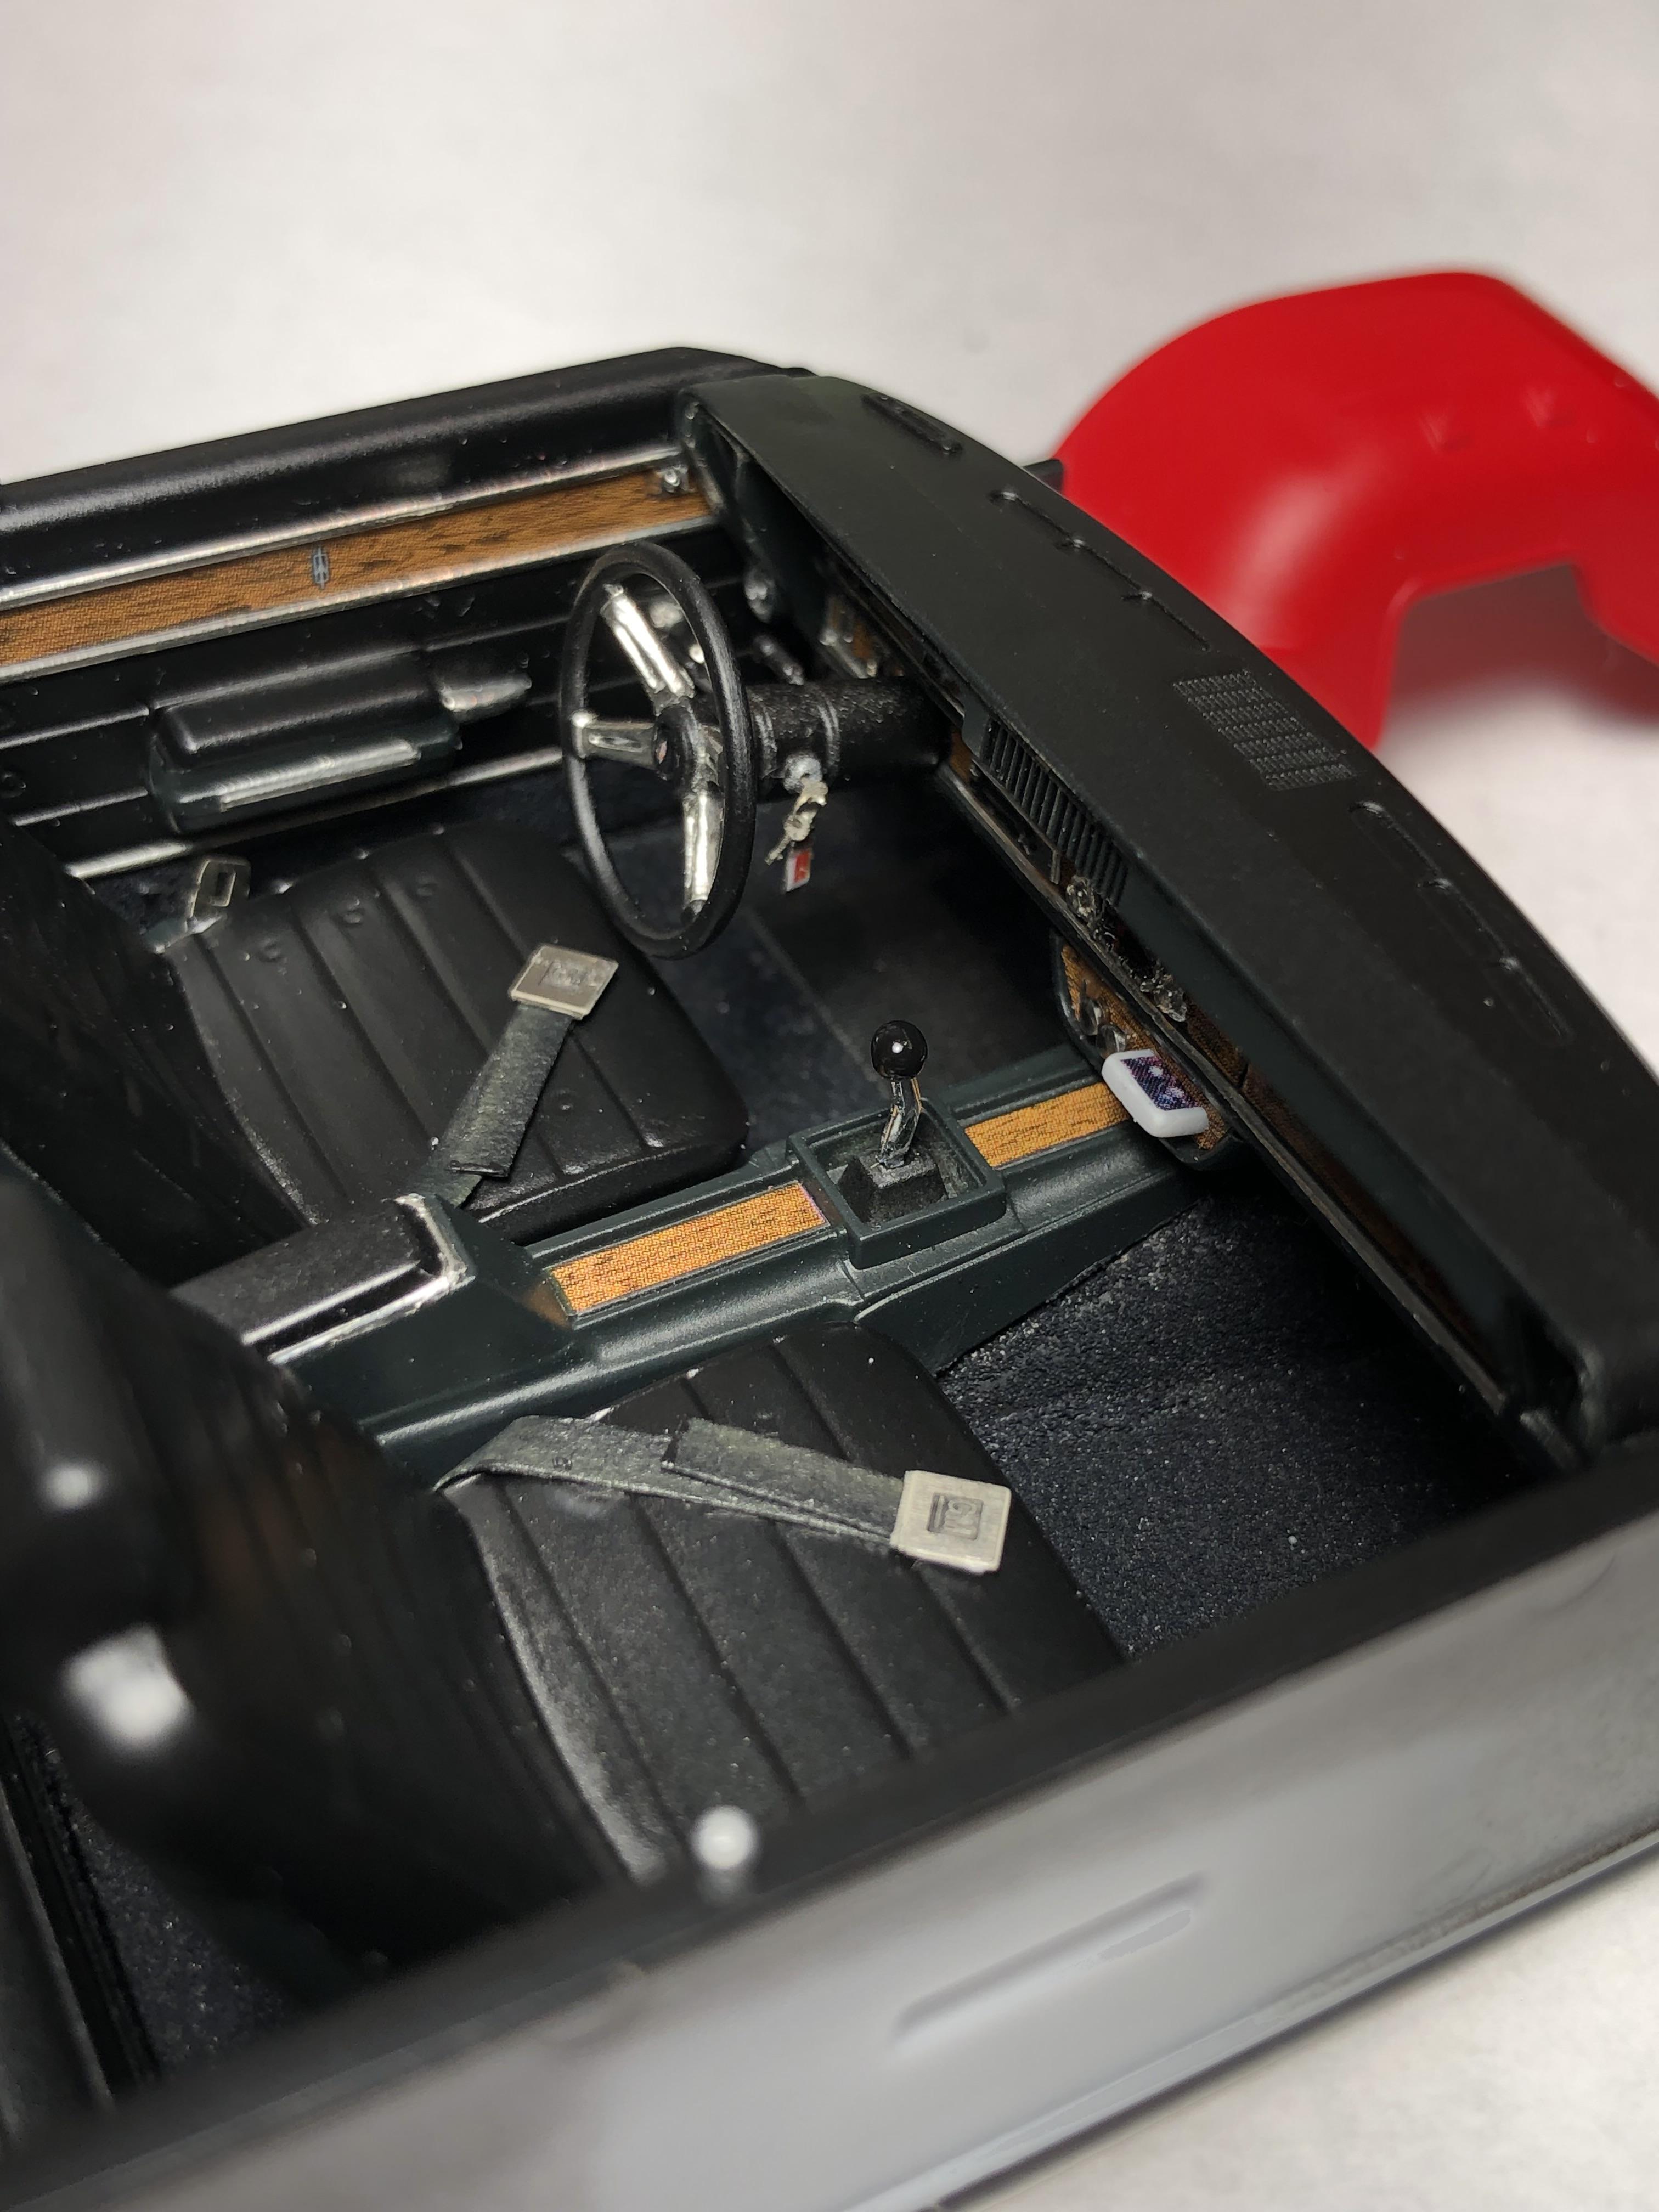
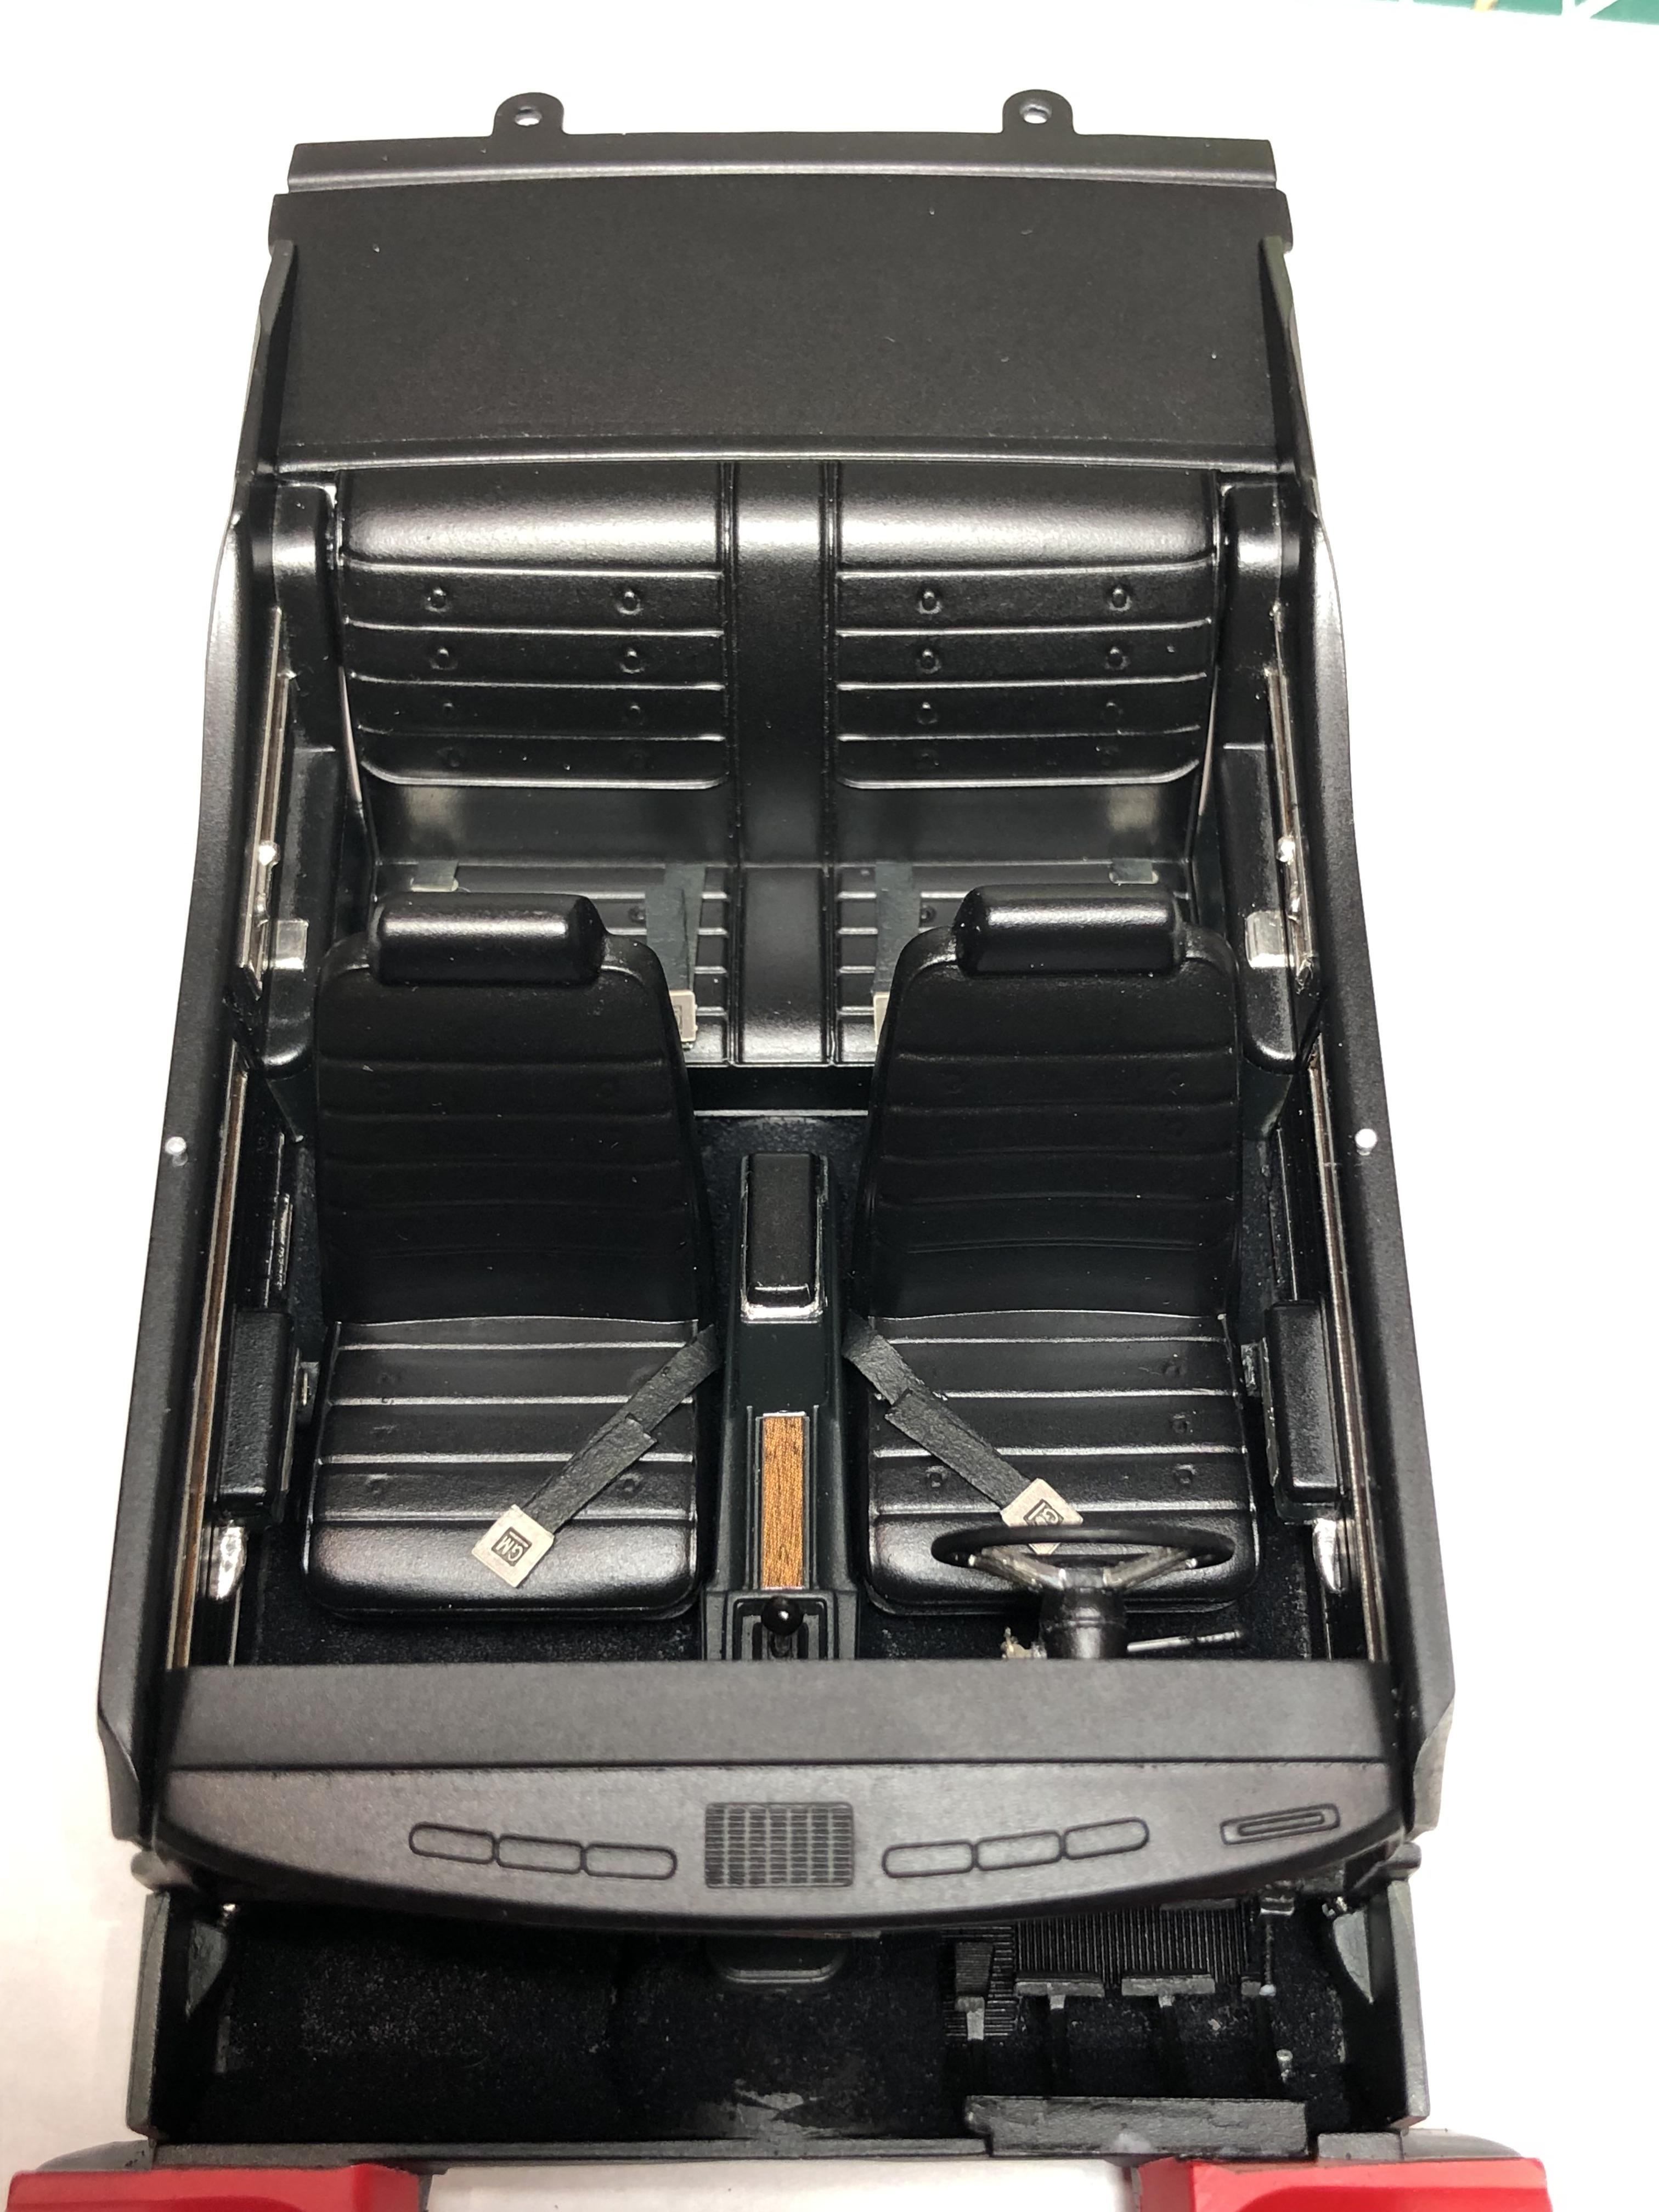
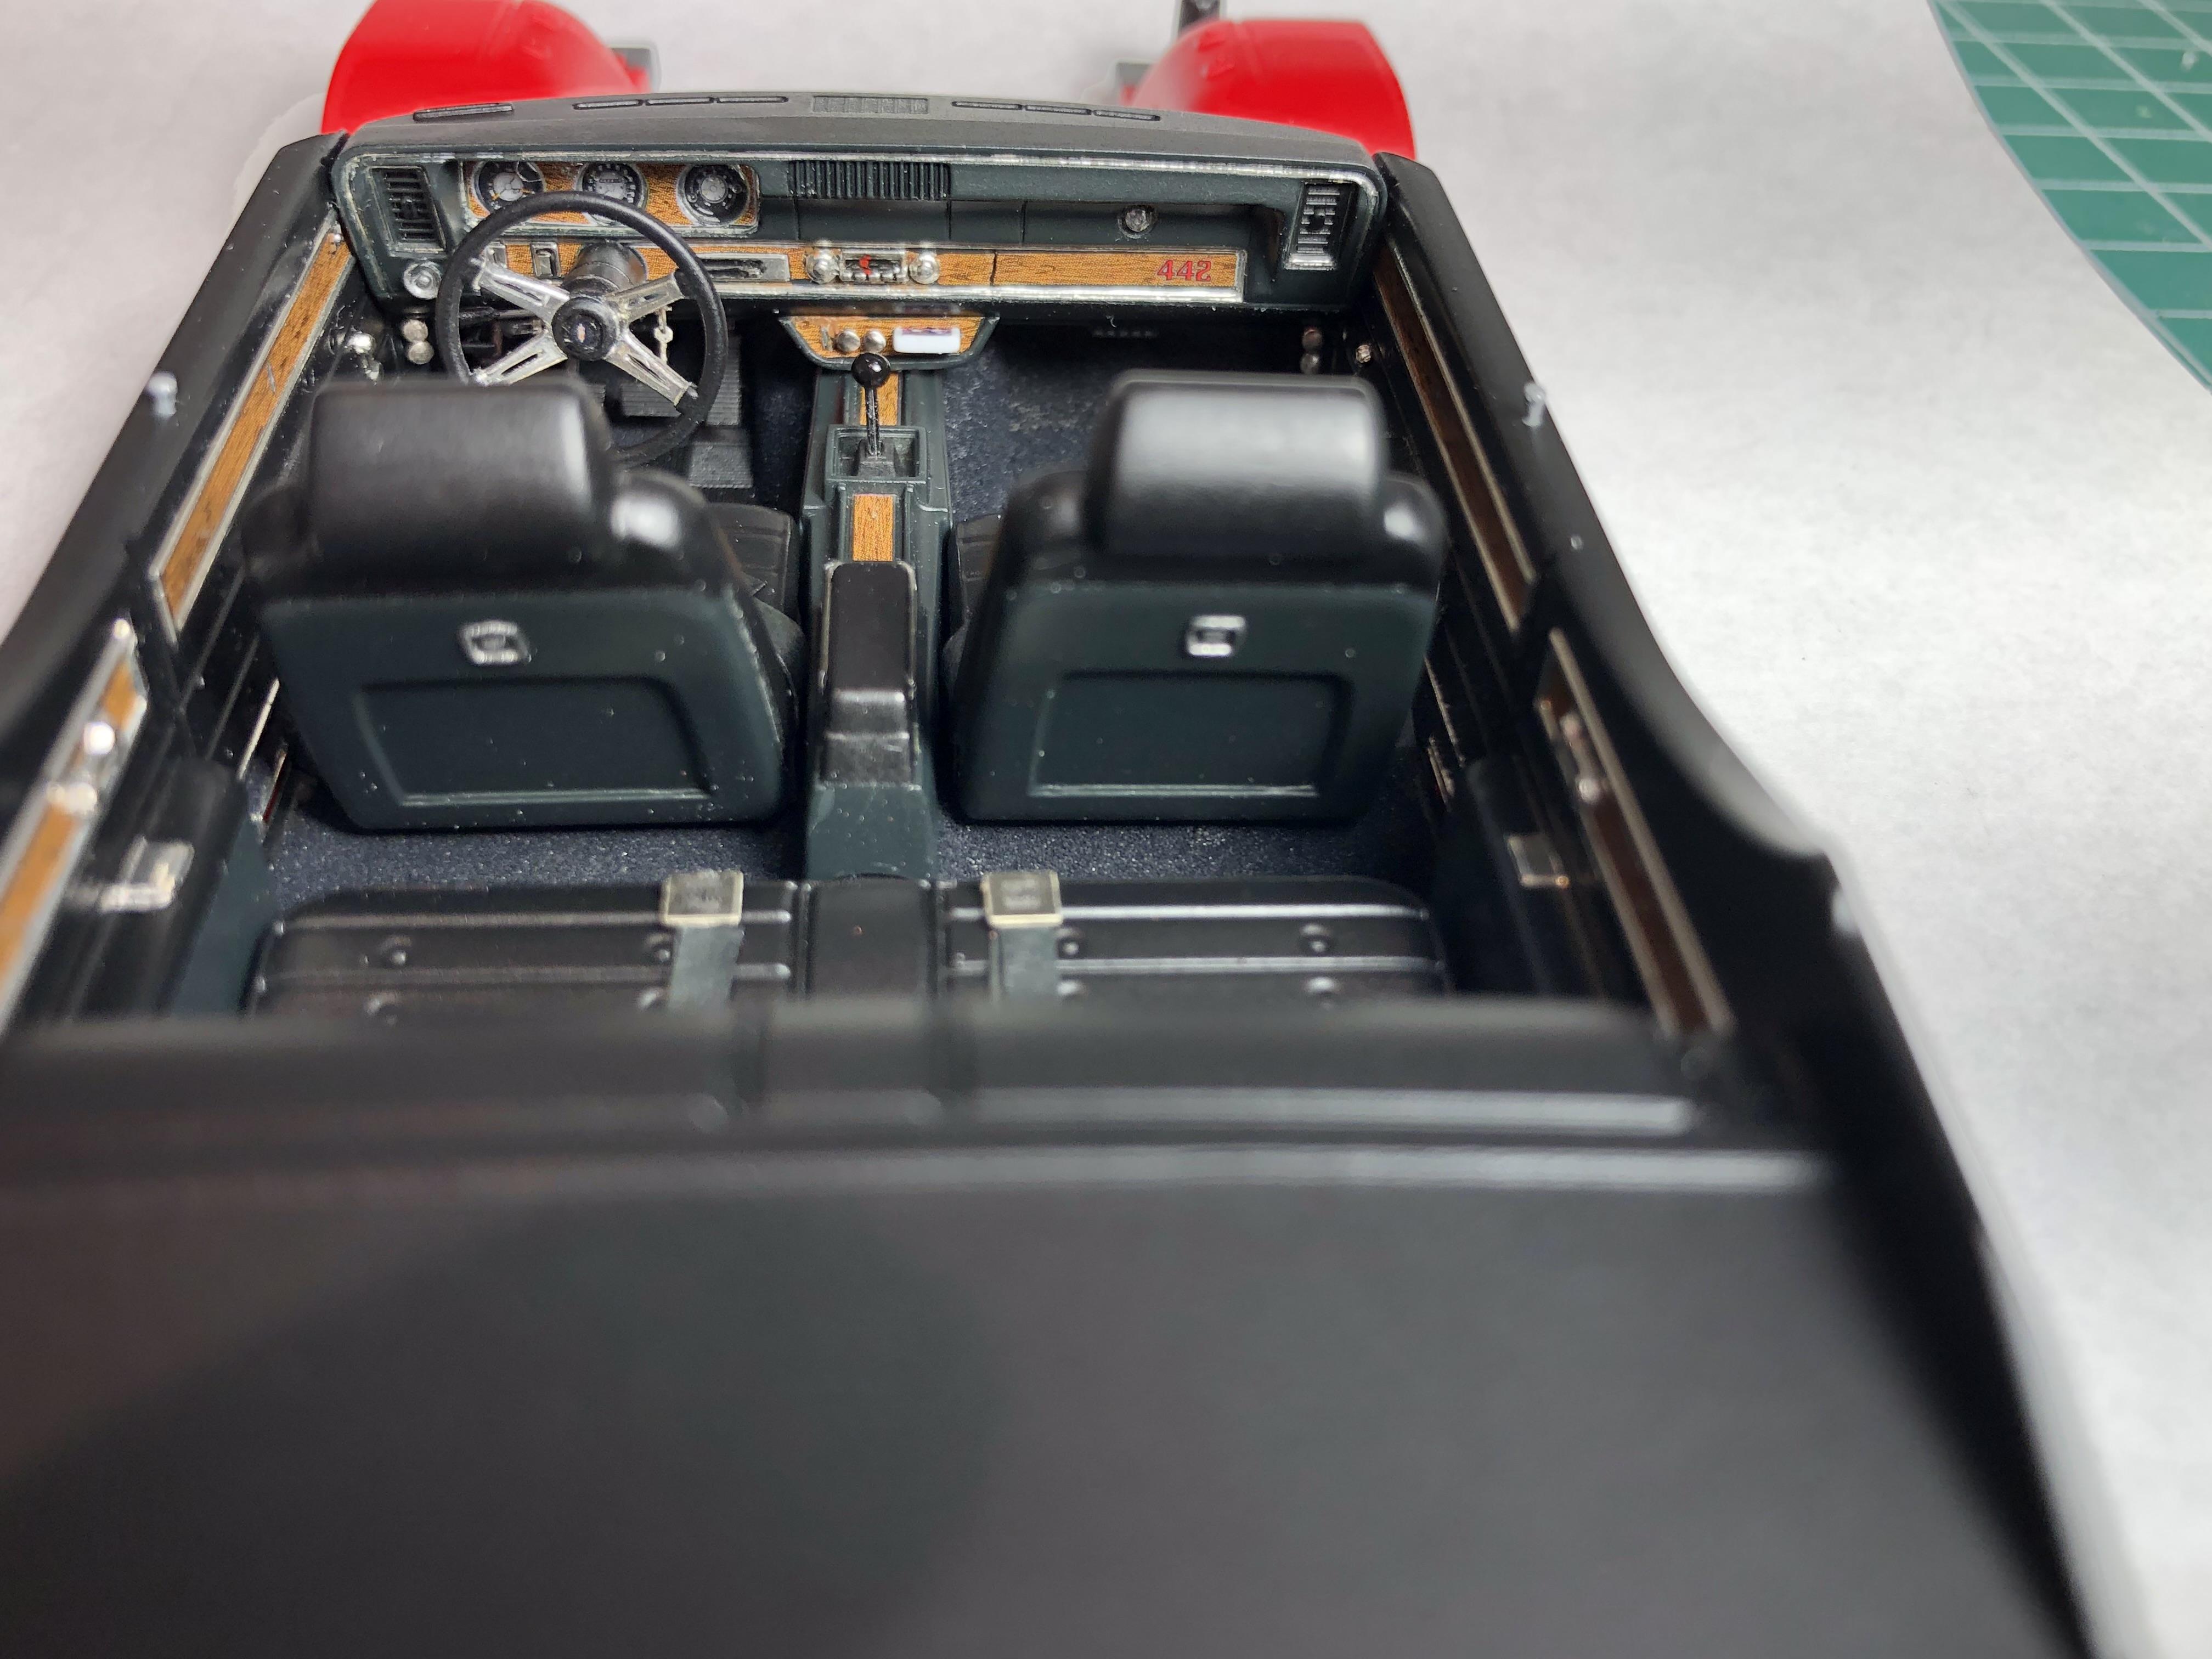
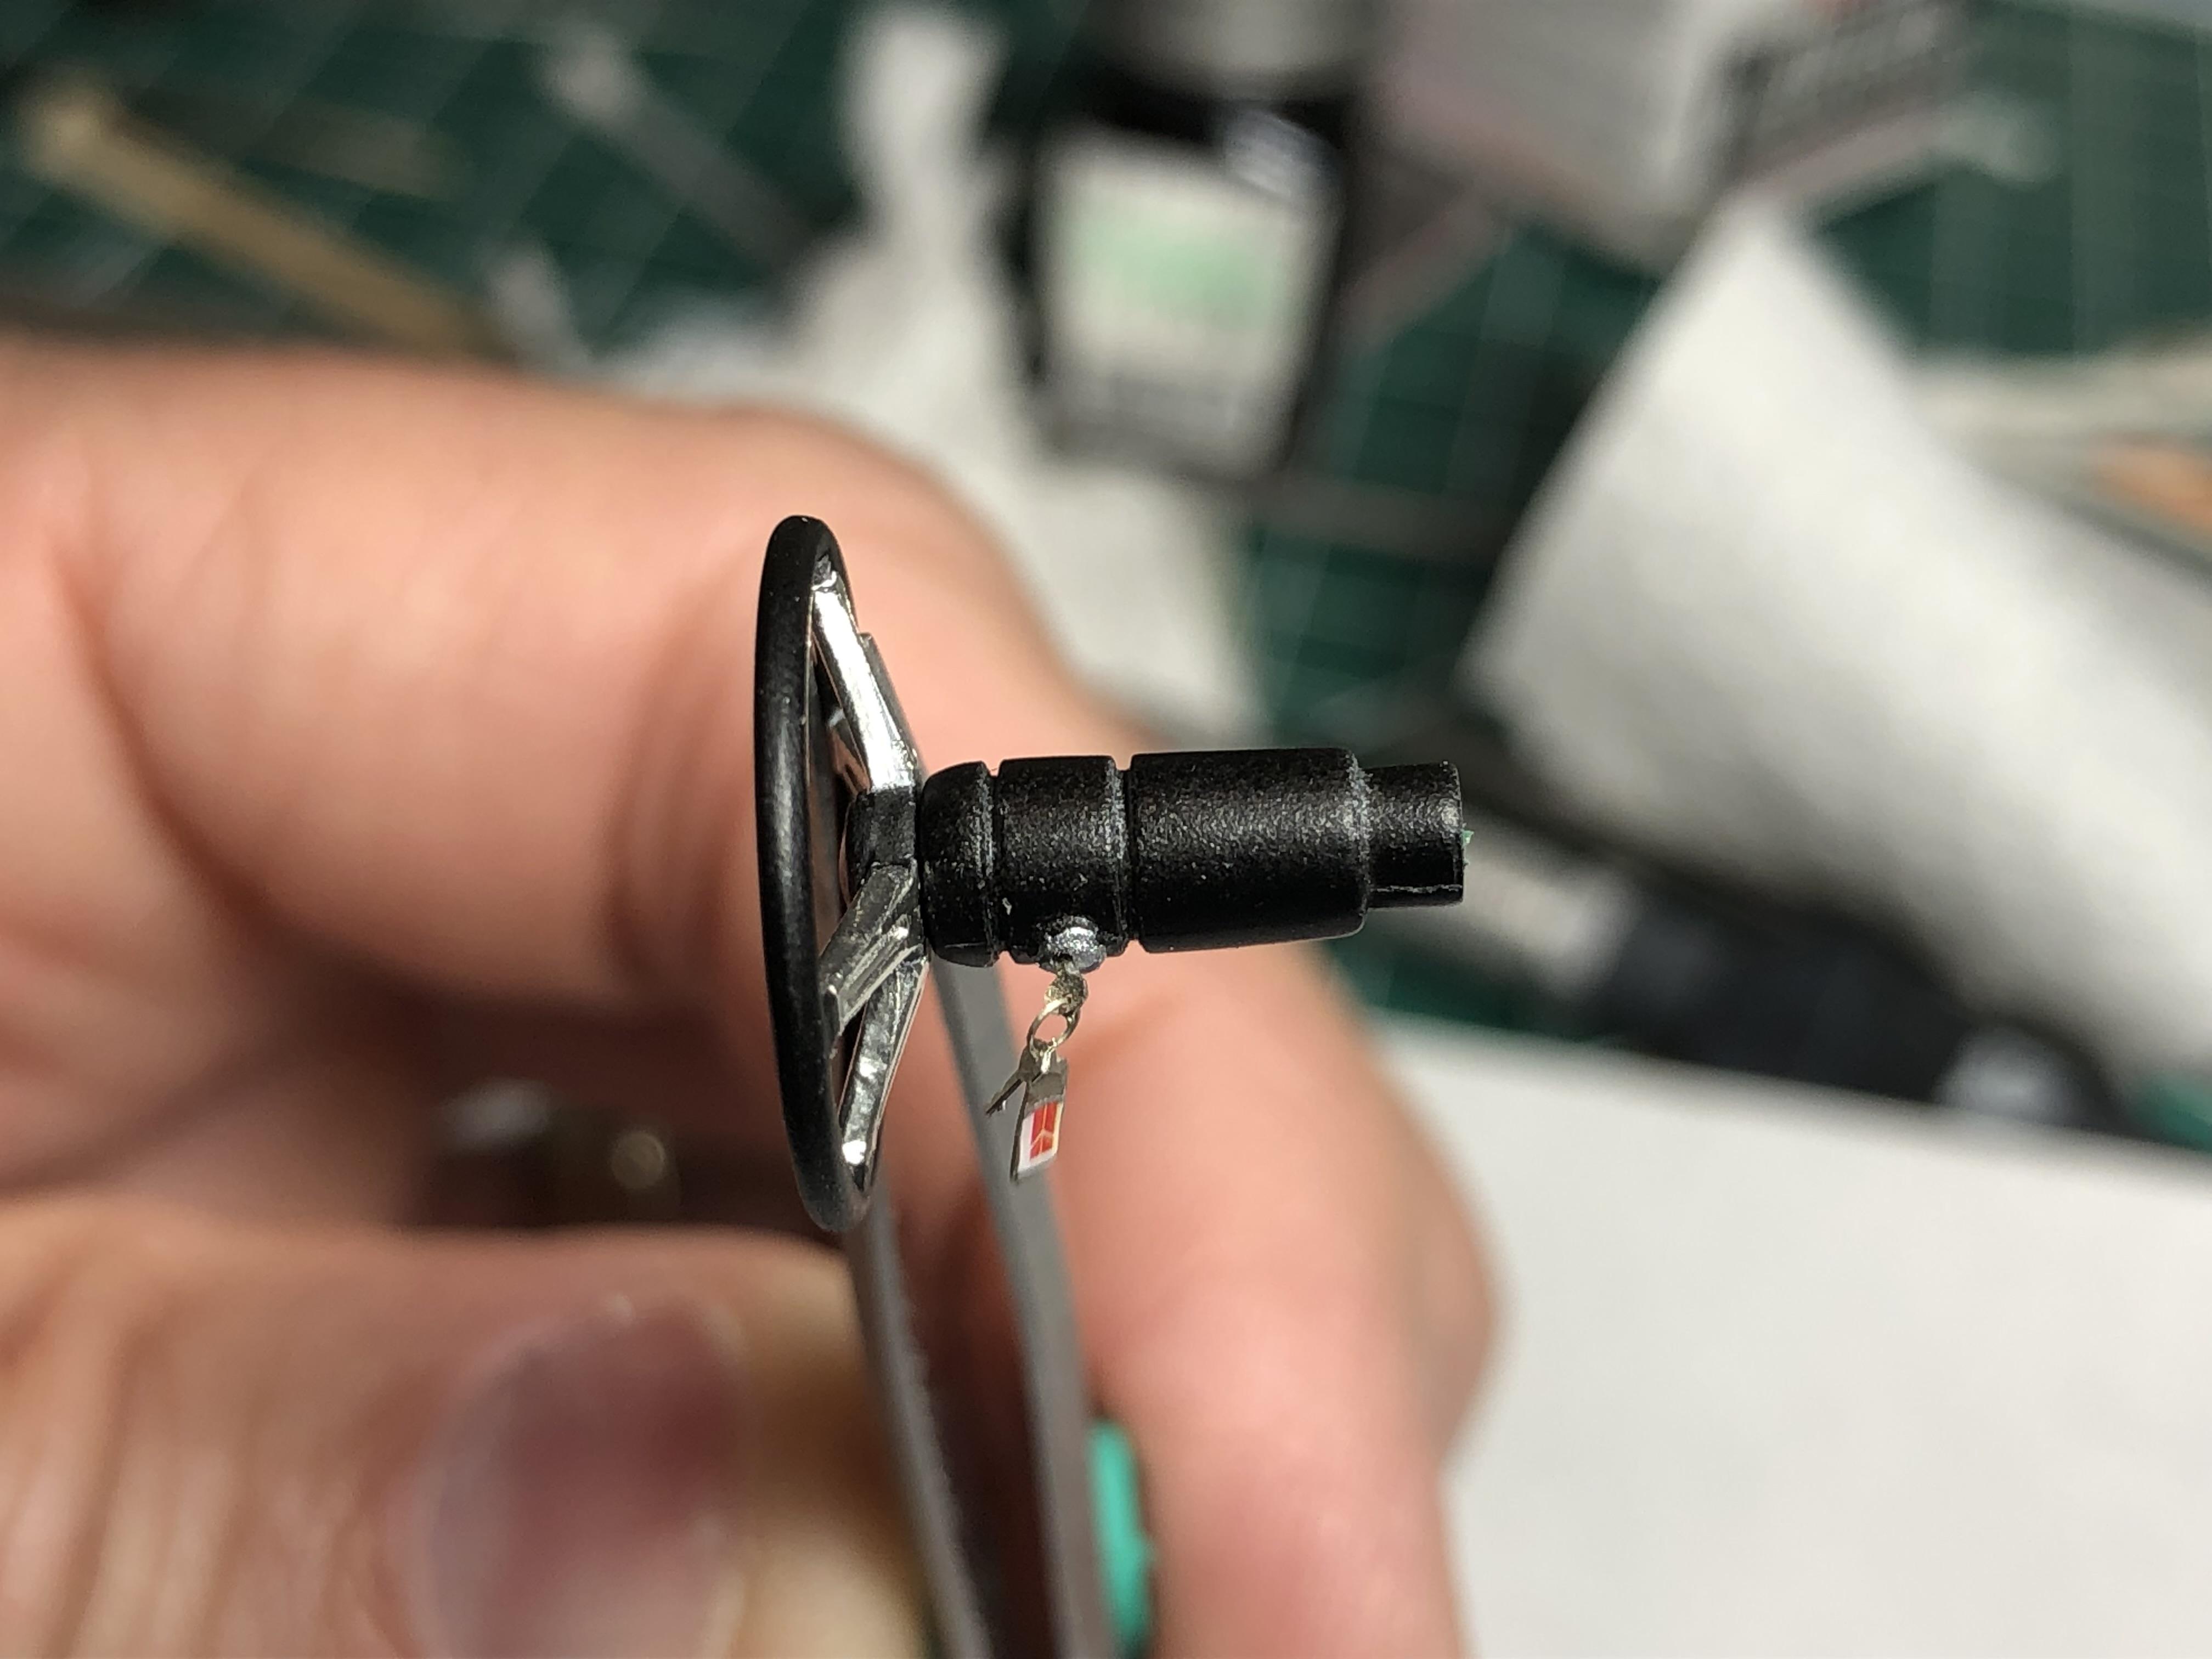
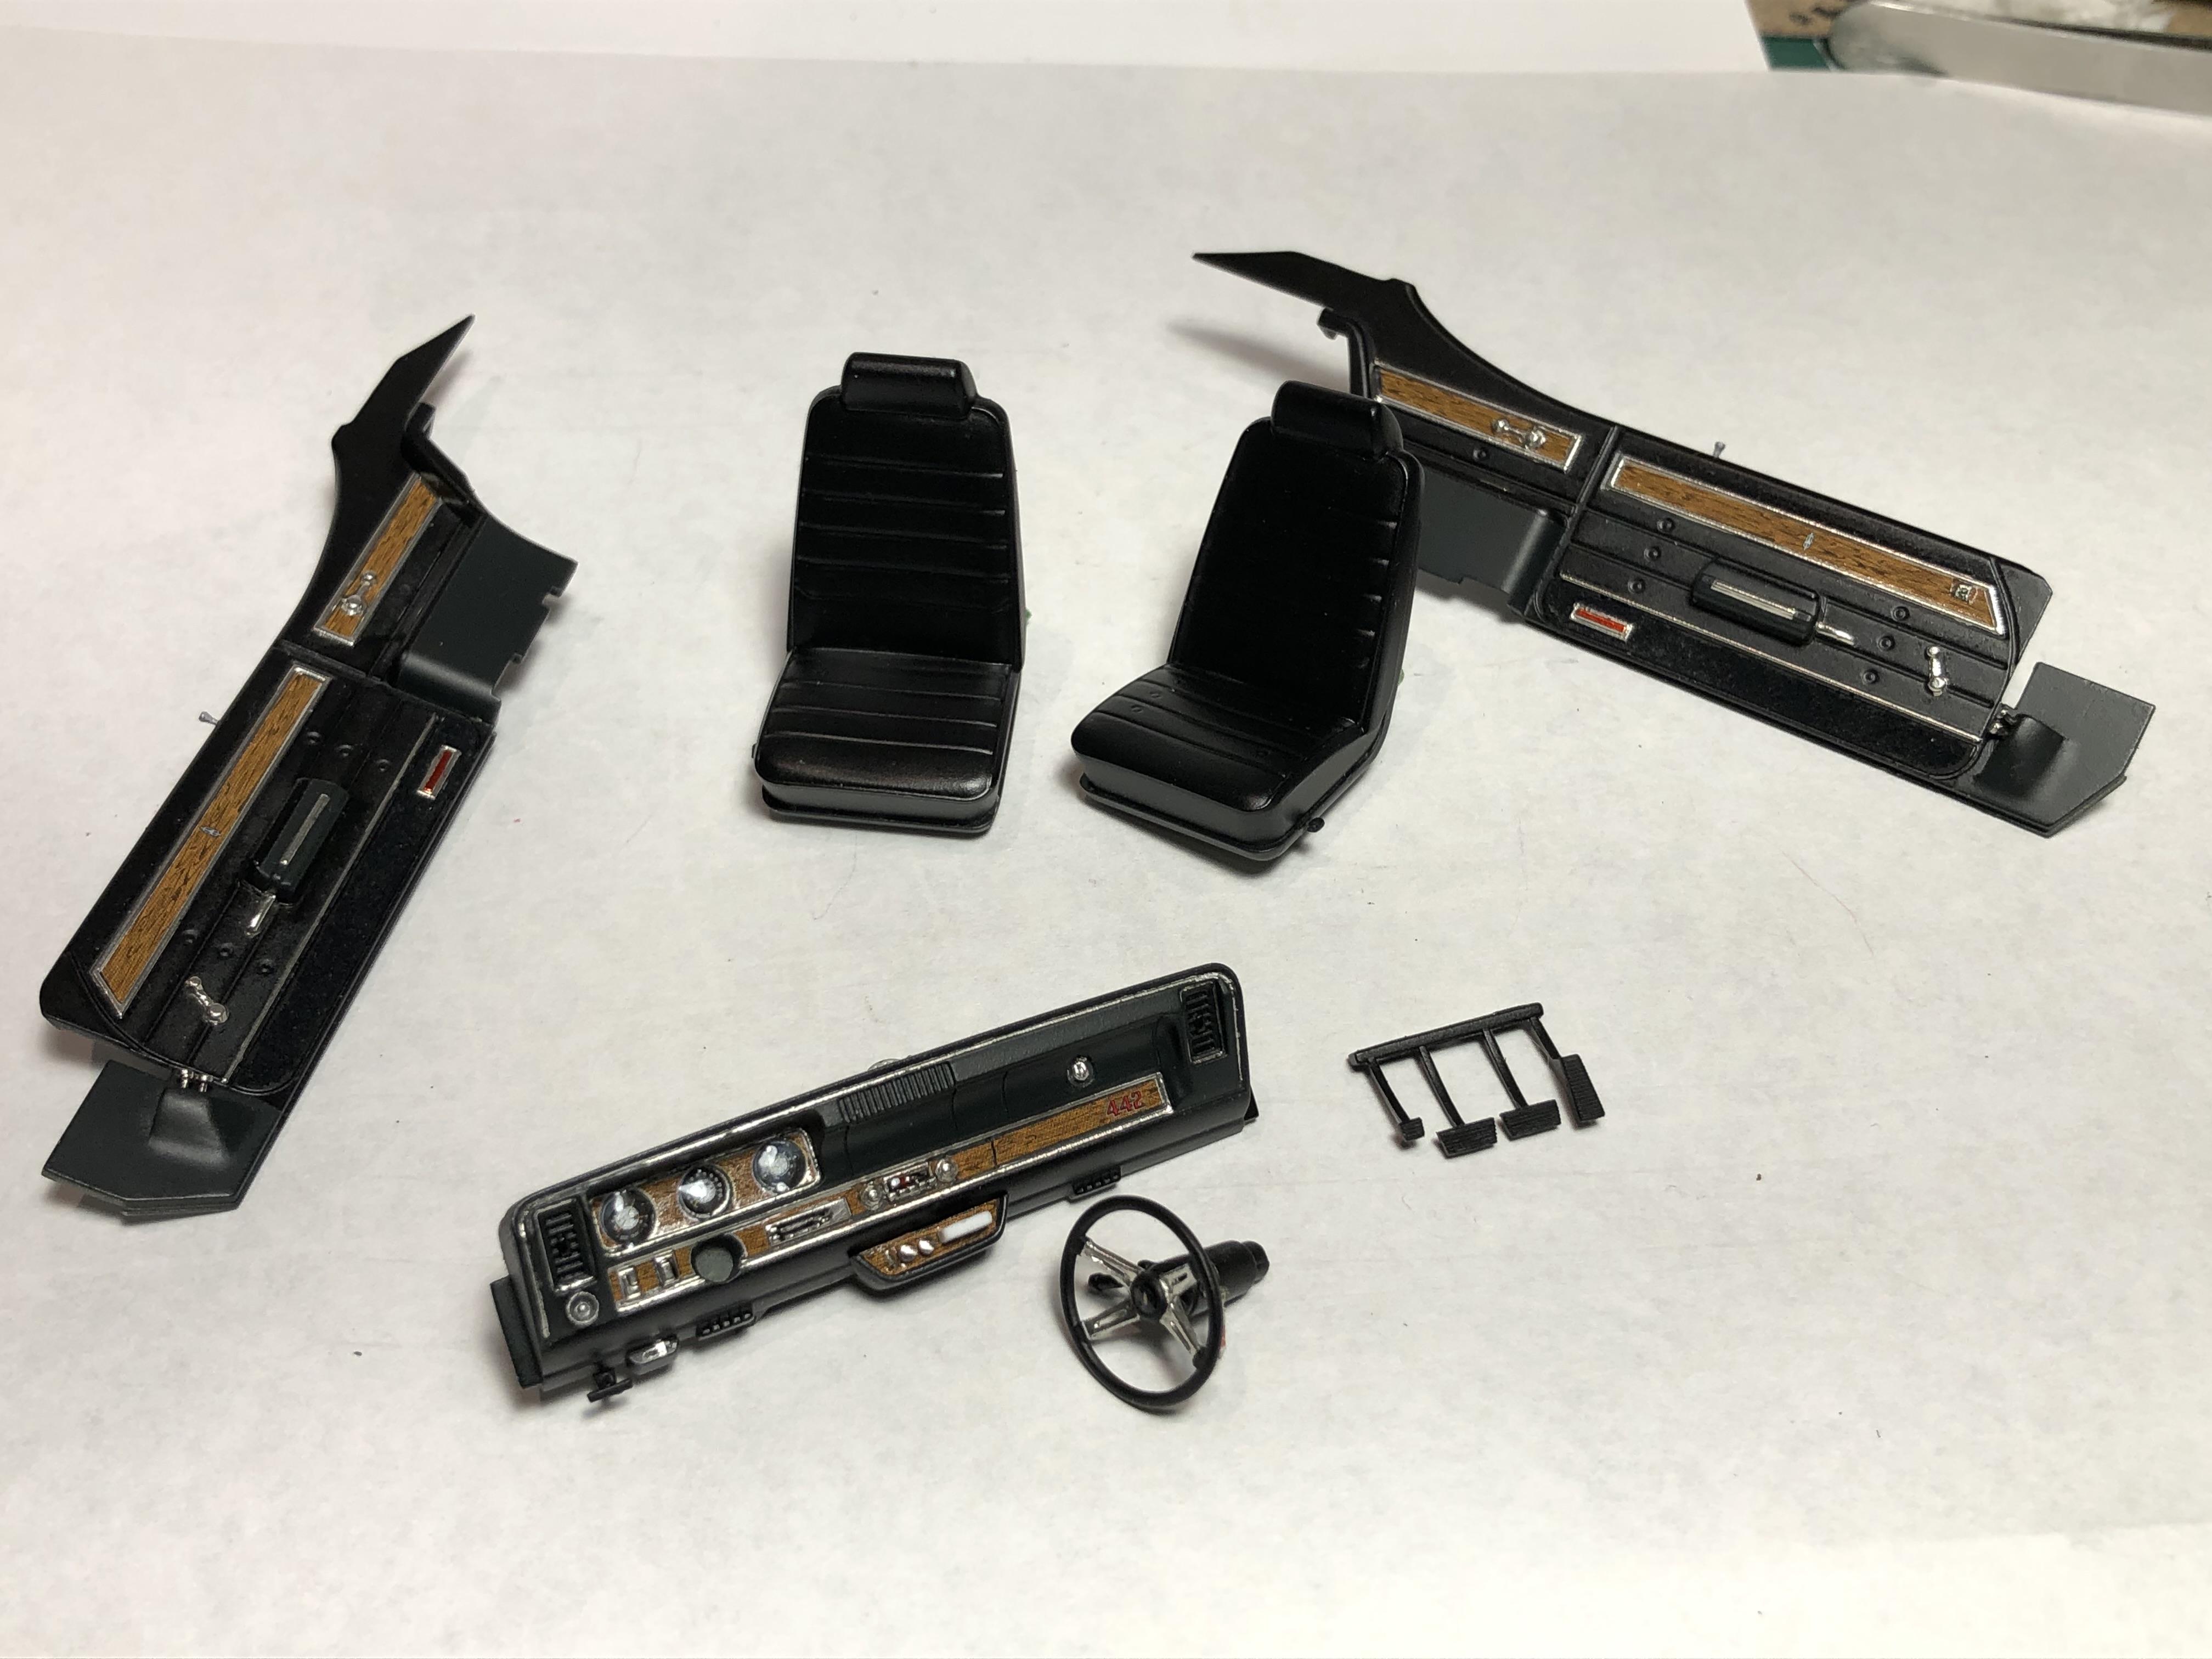
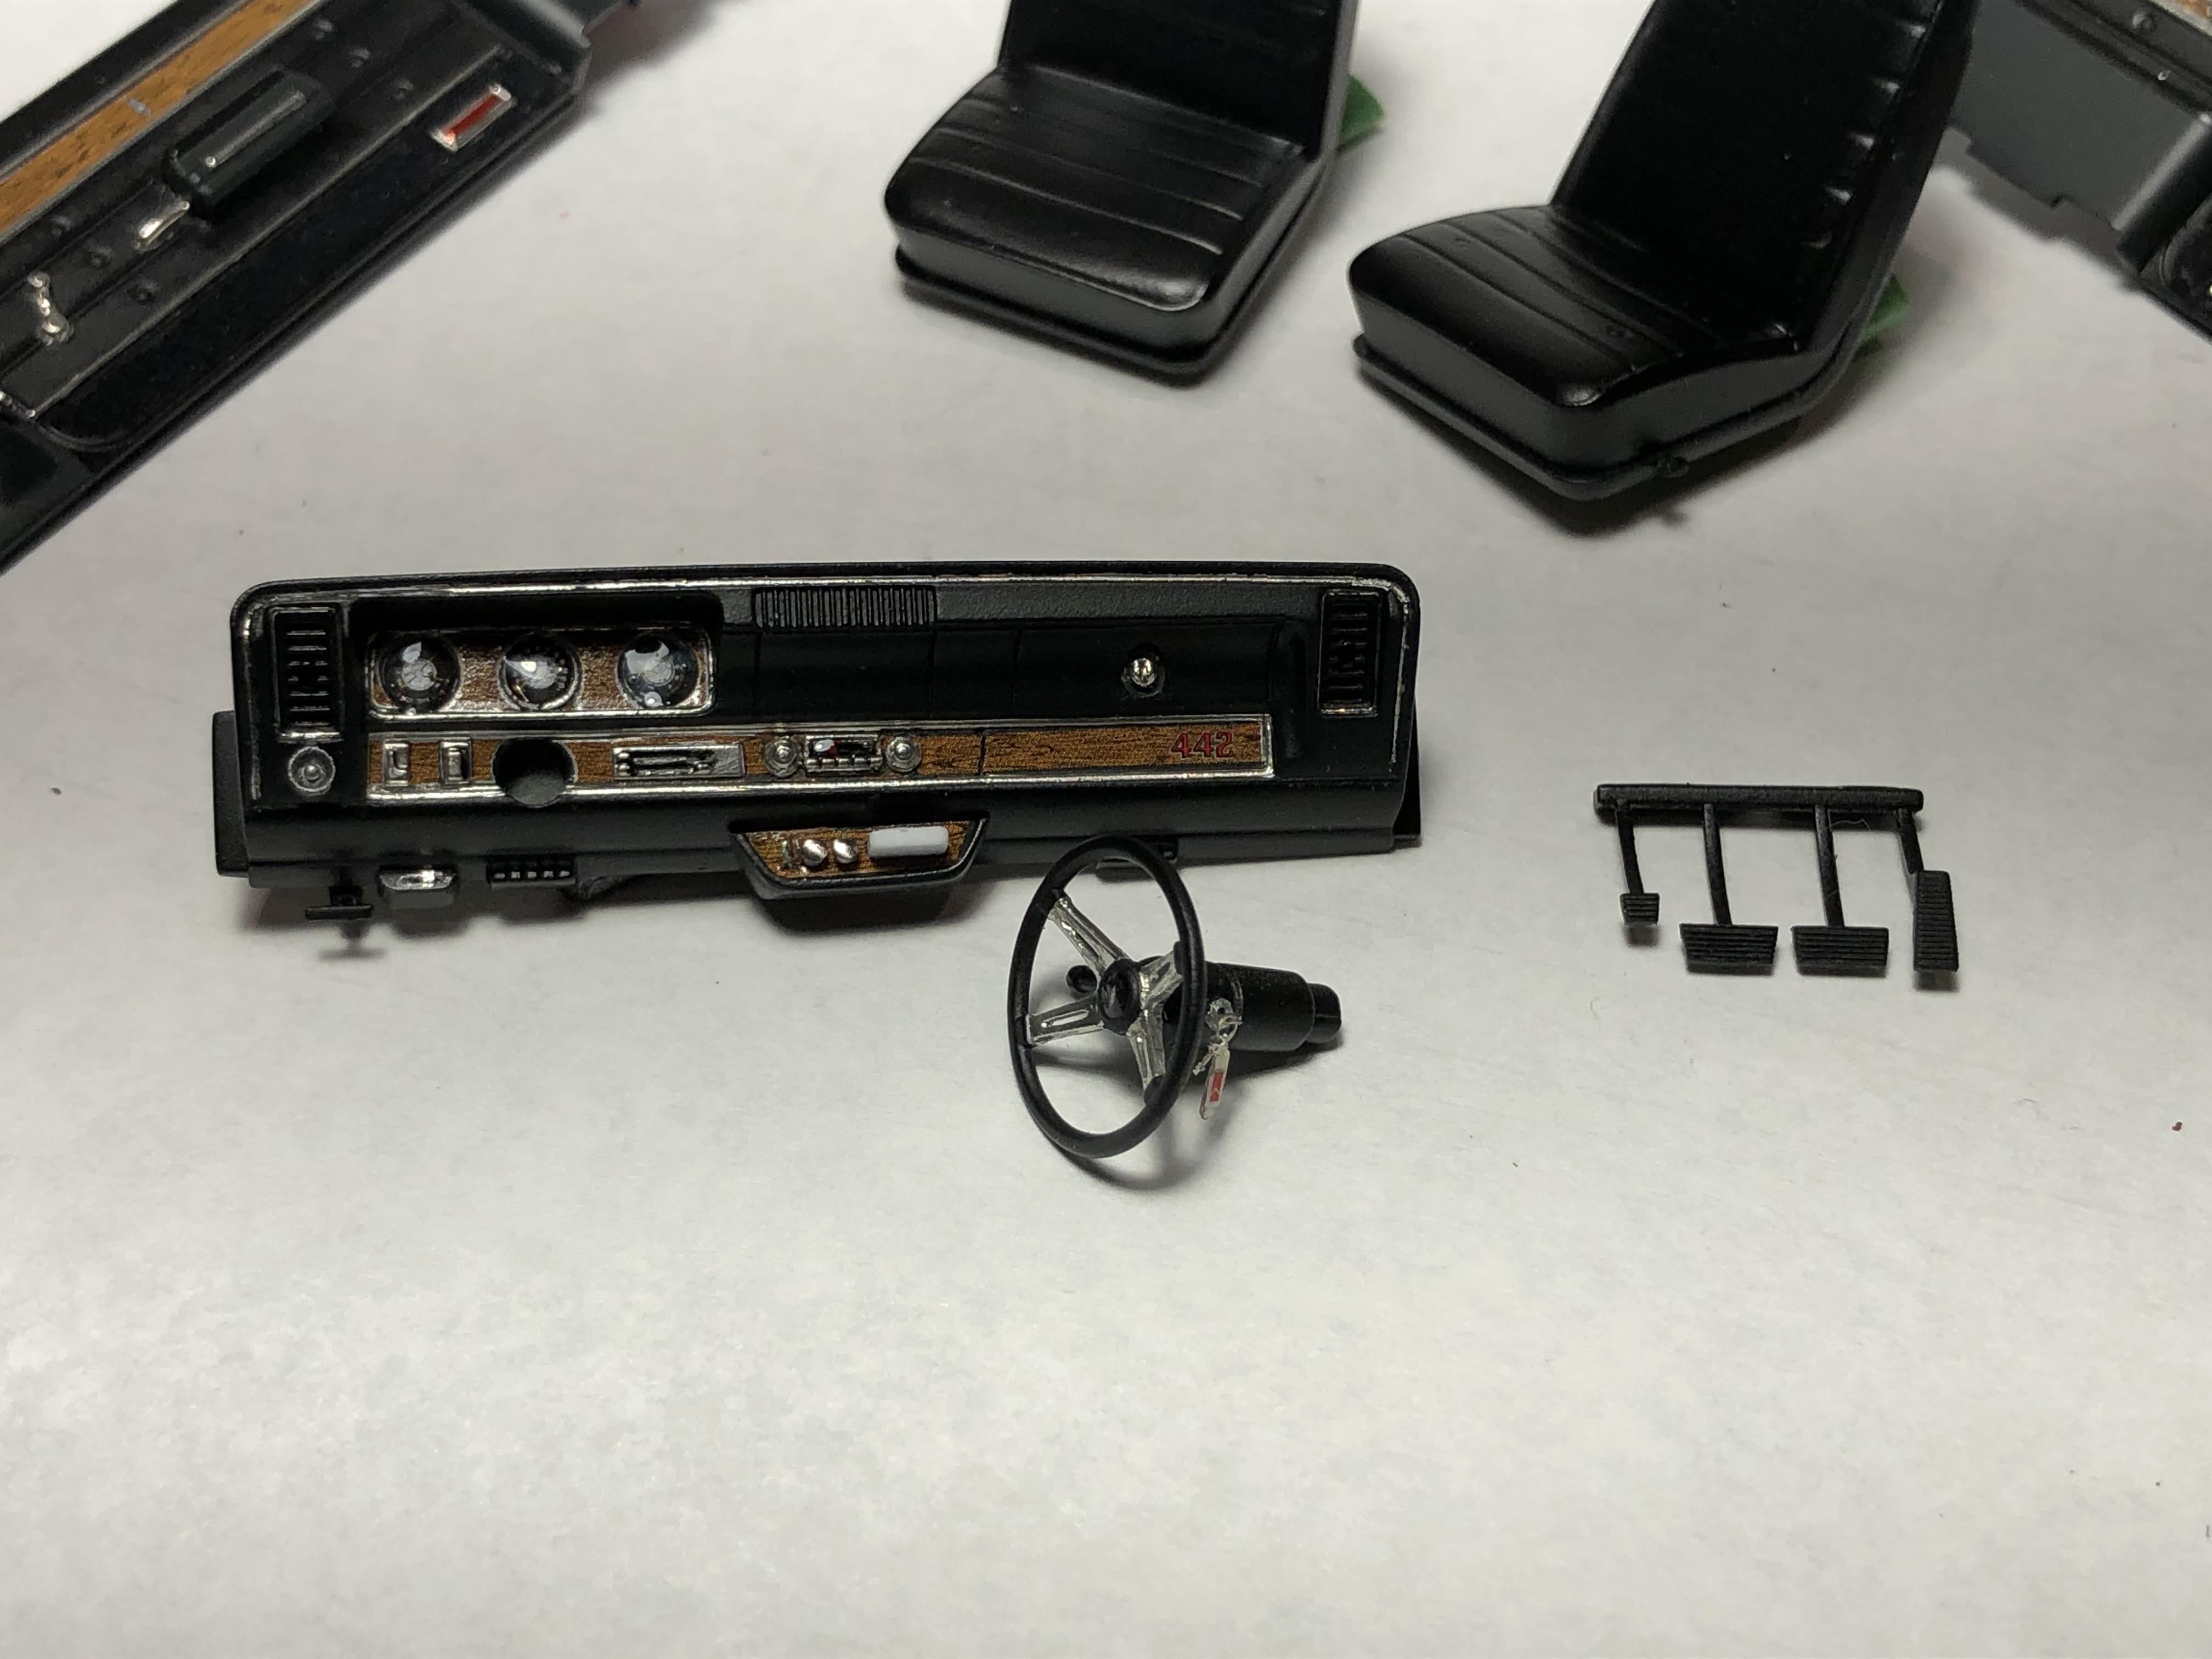
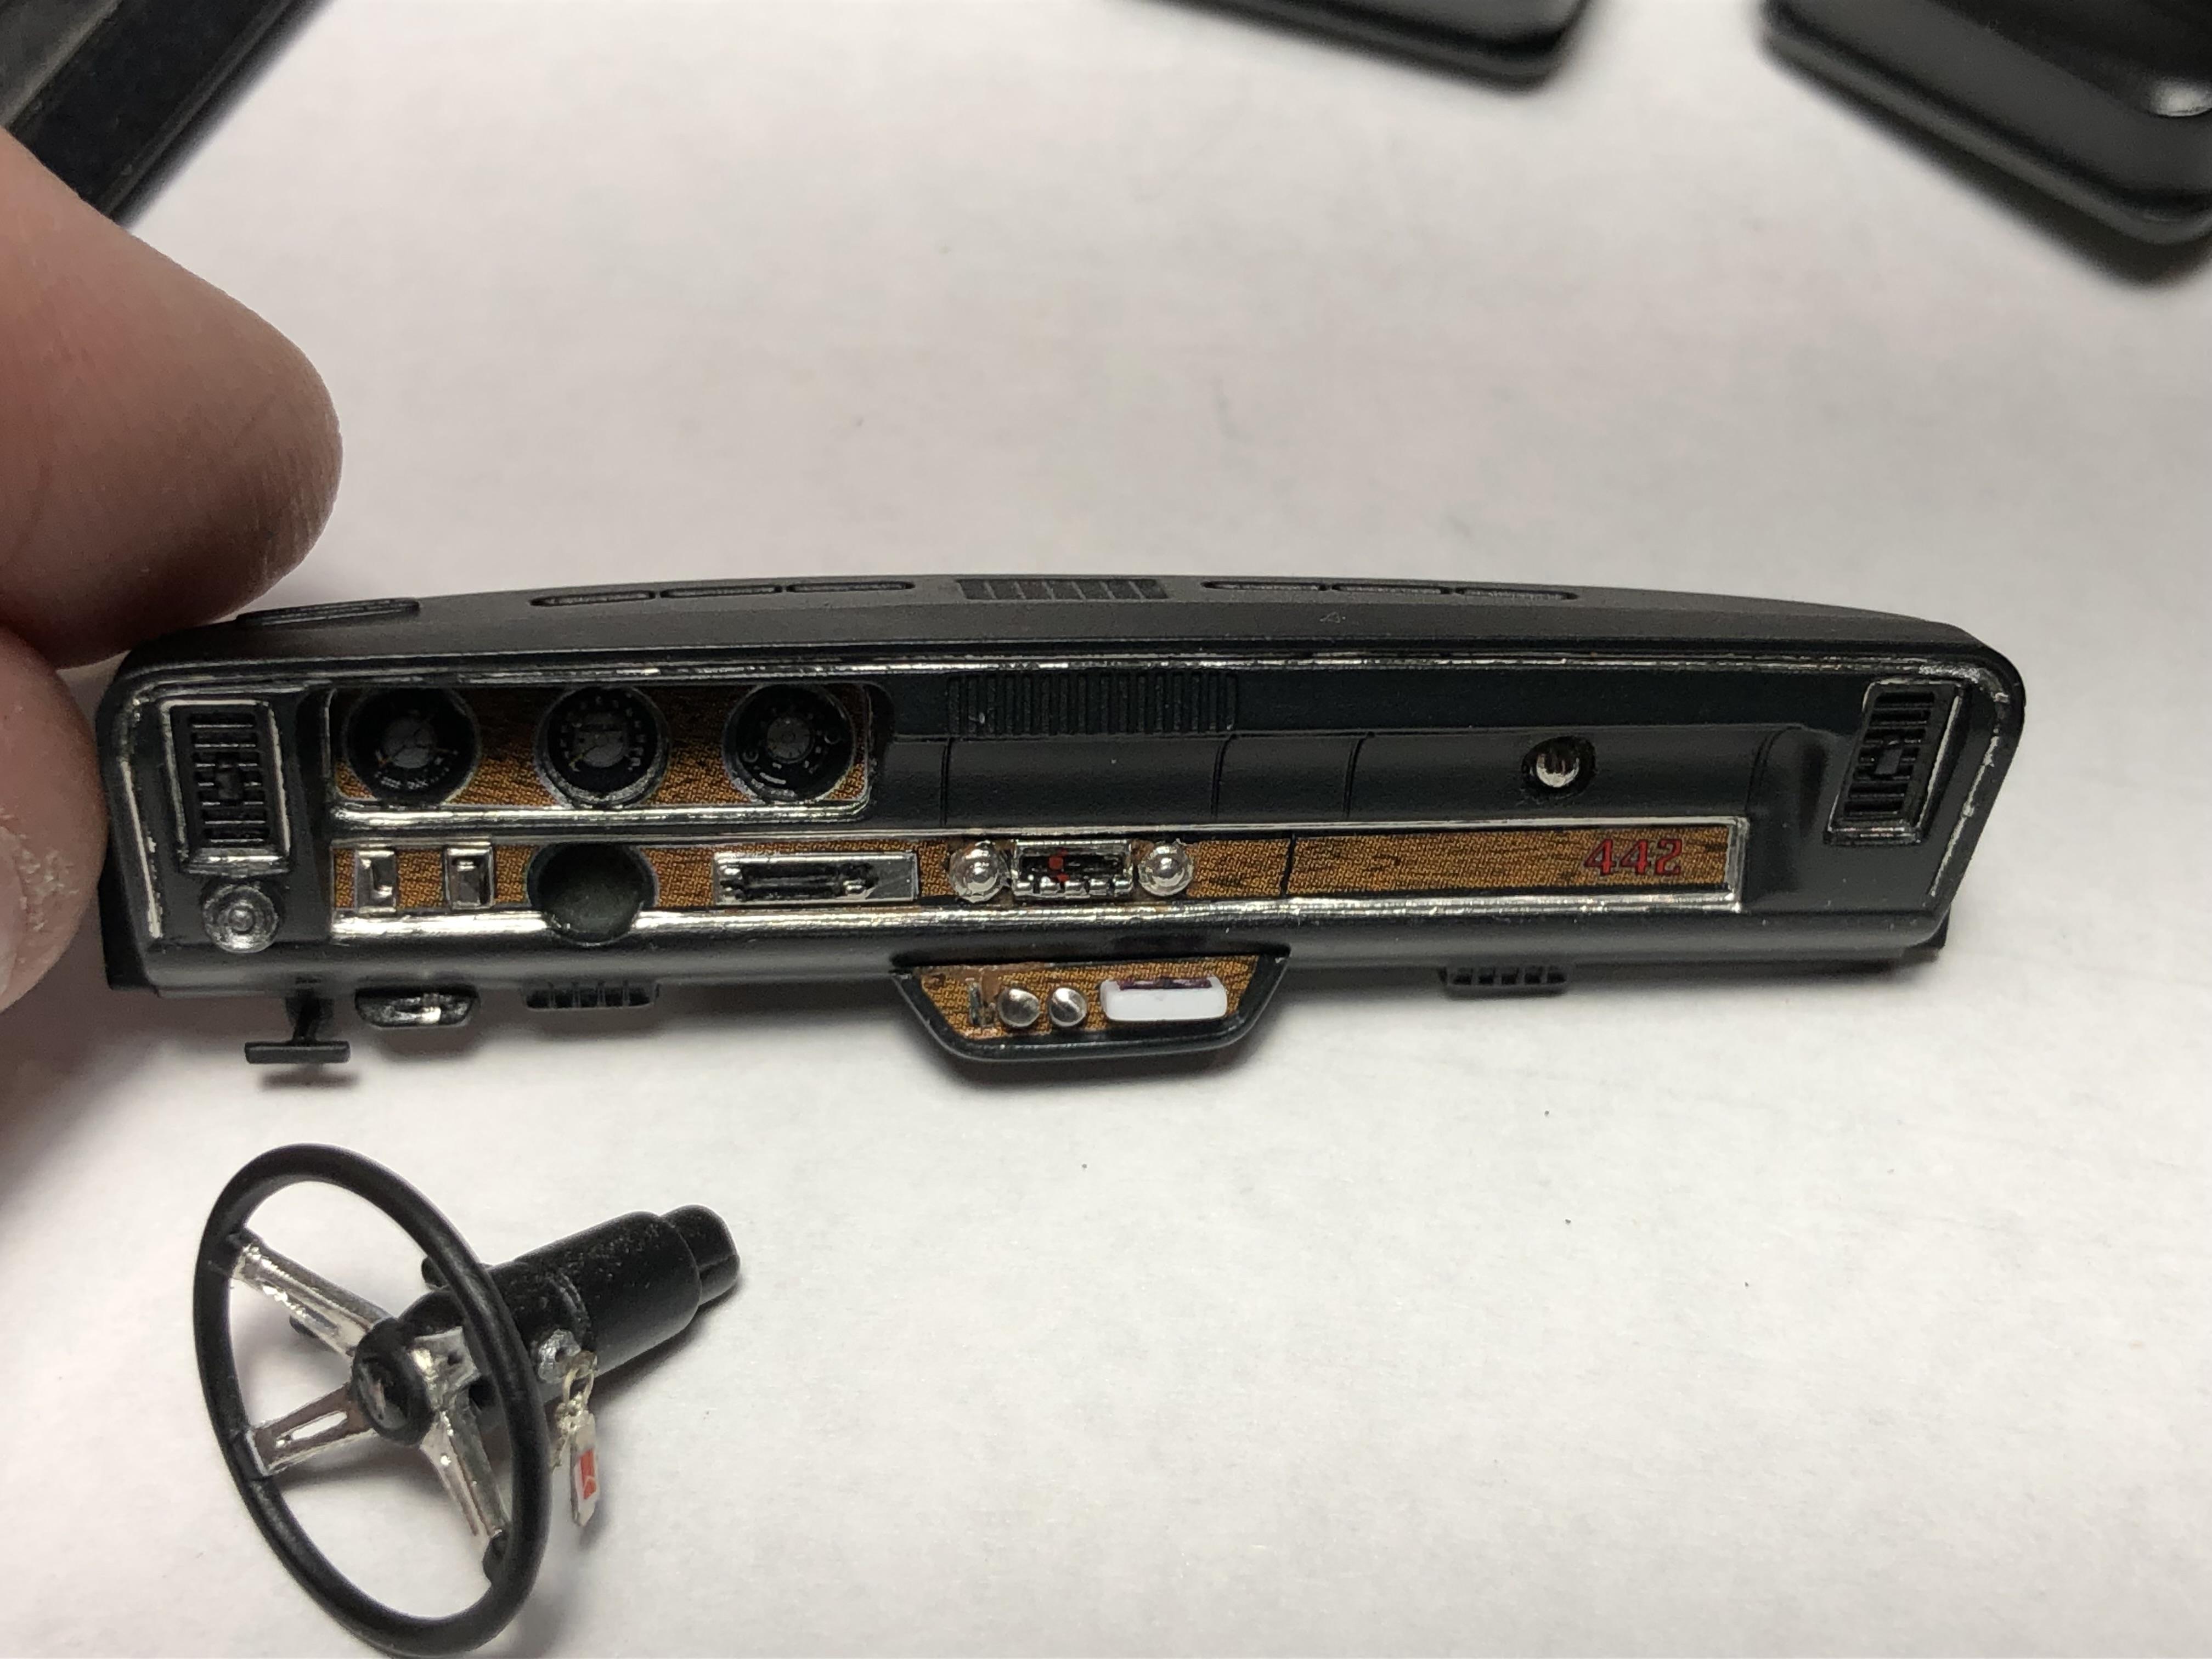
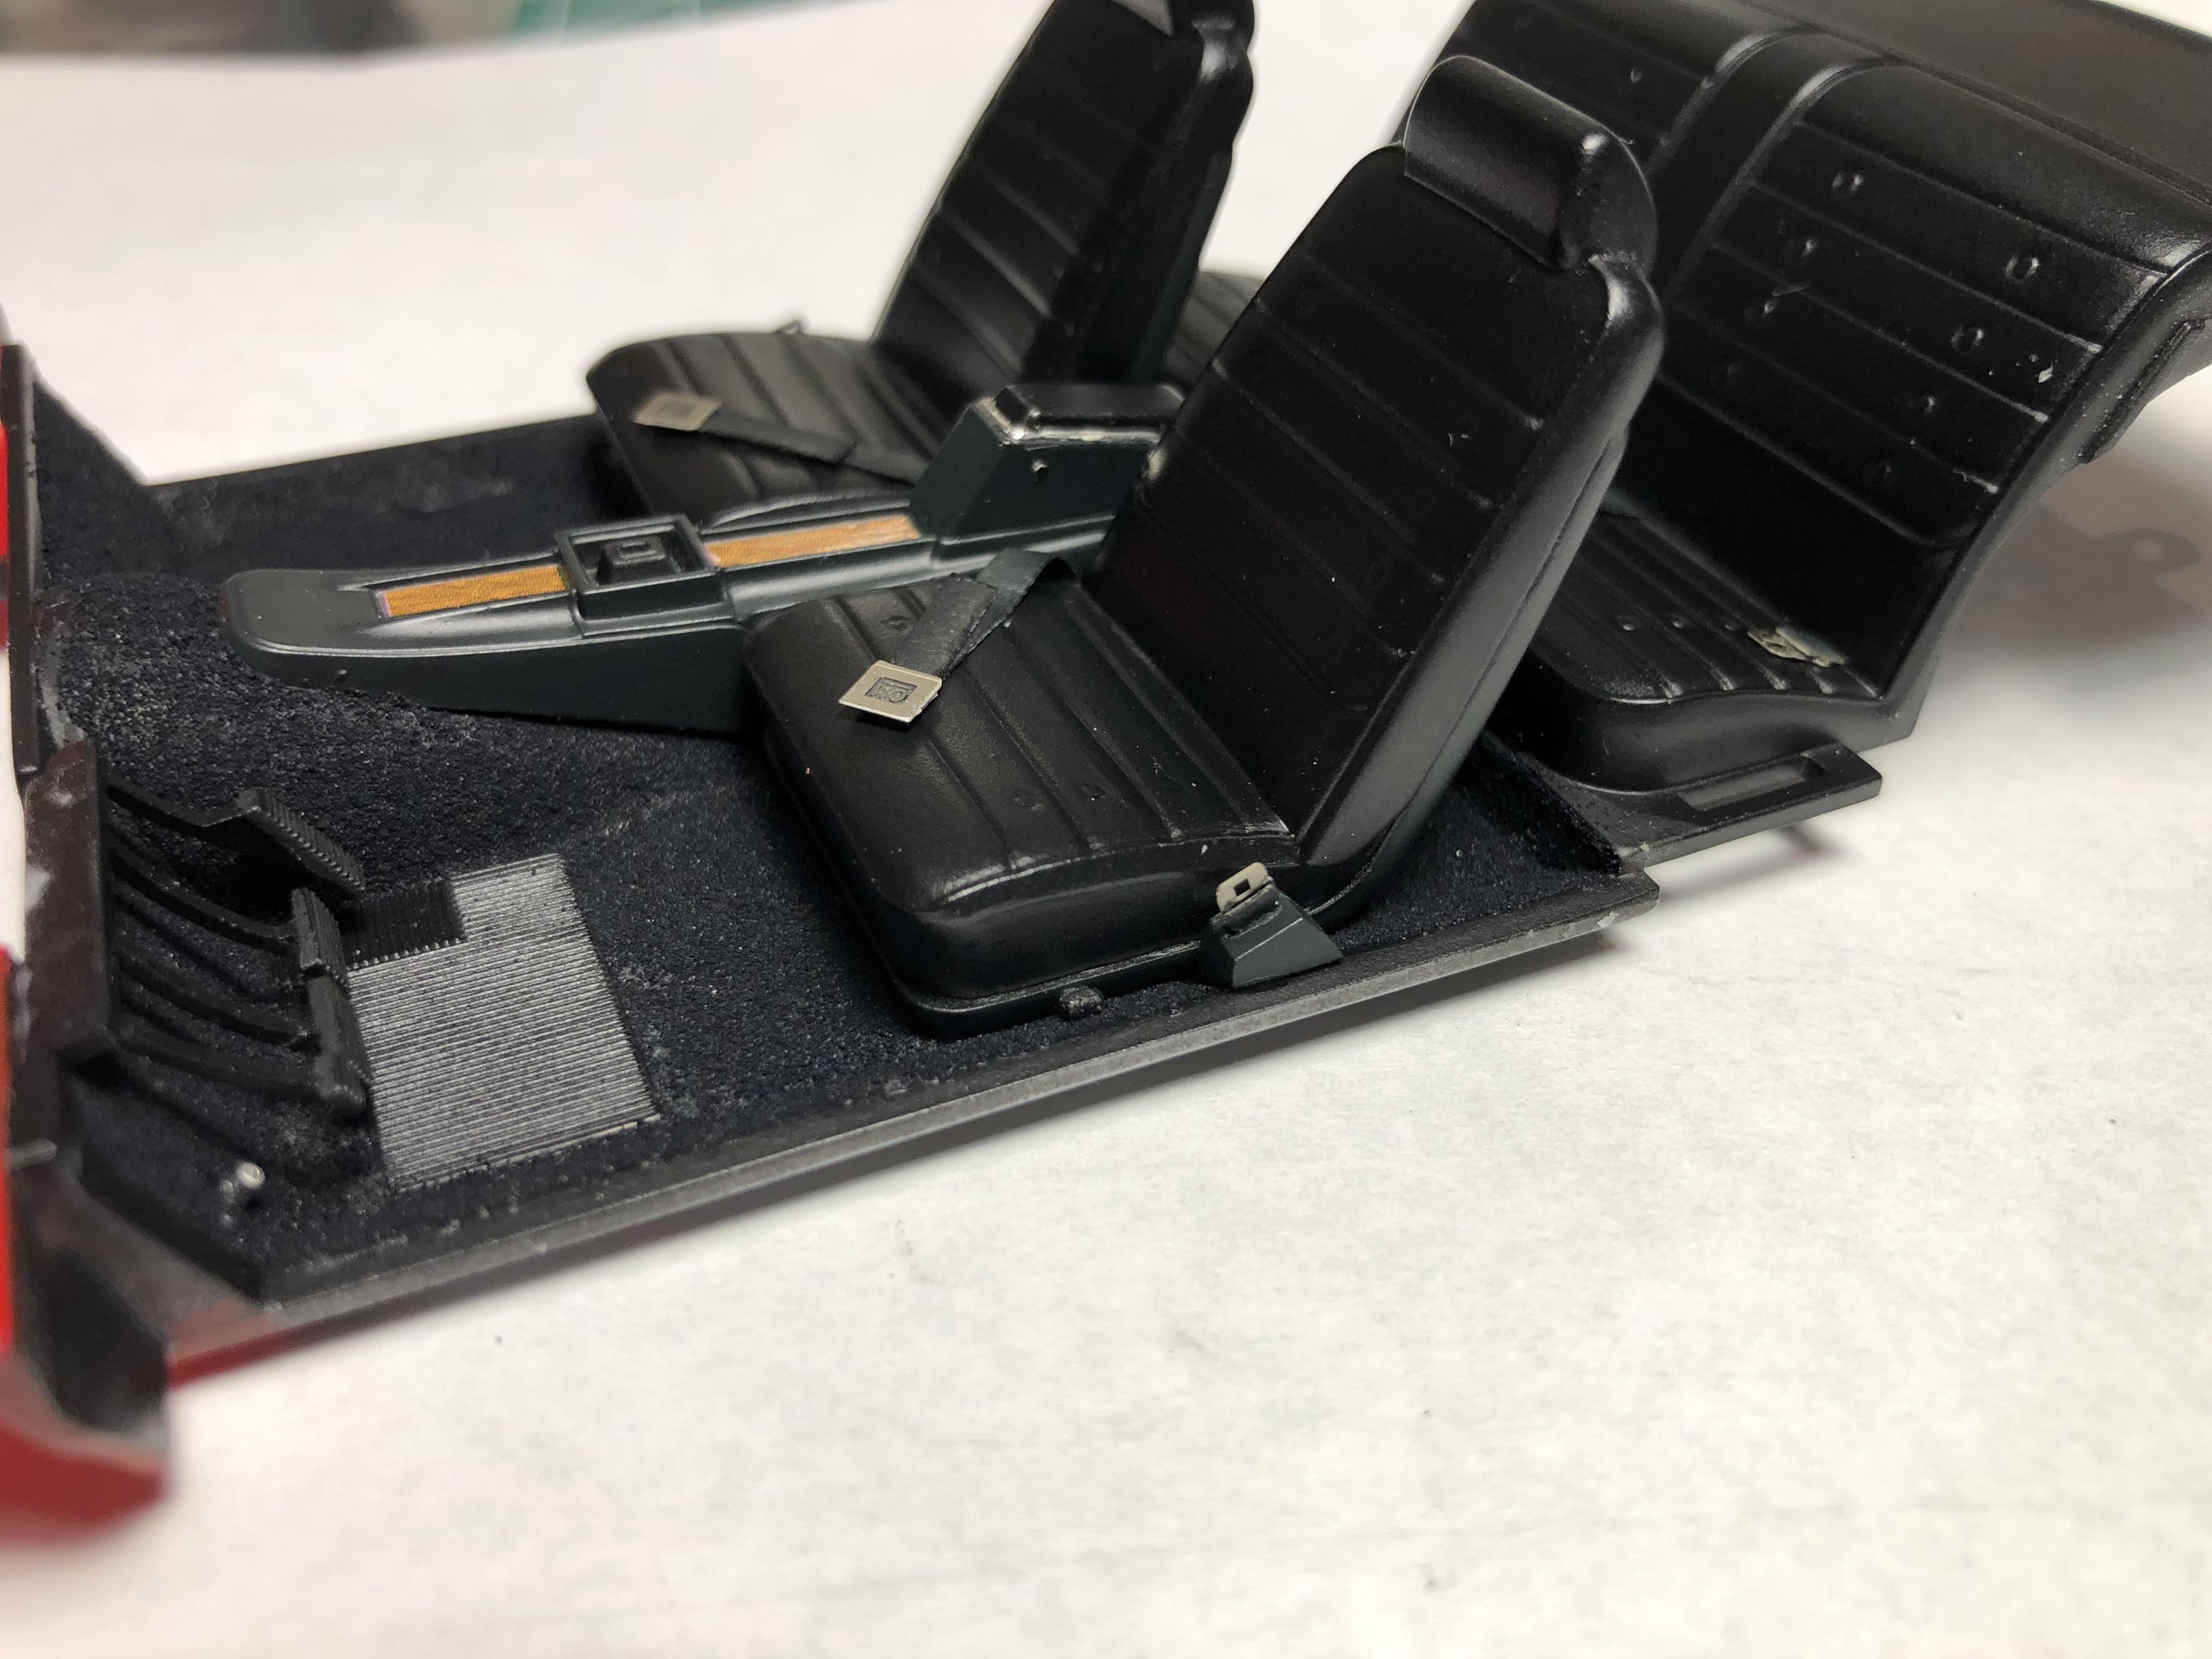
Some progress on the interior. Steering wheel and column are now one piece. Added photo etched keys and tag. I liberated an Olds Rocket logo decal from another kit for the key tag, and the turn signal lever and tilt lever are installed. All the interior parts are finished now. The dash has the 8 track player now, along with an 8 track ready to insert. Added a random decal on the cassette to give it some interest. Wood grain decals were all trimmed to fit around the radio etc. 5min epoxy was used for the “glass” on the gauges, and radio face. Parking brake release is installed too. The foil work on the dash looks a little rough in the photos, but actually looks quite good to the naked eye. Door cards are complete… door lock knobs will get touched up after everything is assembled. The knobs are just round styrene rod that was sanded to shape. I didn’t love the seat belt material I had on hand, it was a bit wide for scale belts. So… I made some out of a double layer of masking tape, not perfect, but not terrible either. Assembly has started! Finally… That’s it for now, but I think I’ll have it assembled today, so maybe another update later today or tomorrow. As always, thanks for looking and all comments welcome. Cheers, Steve
-
71 Olds 442 W30 (replica of my brother in law’s car)
Steve H replied to Steve H's topic in WIP: Model Cars
Thanks Bill! Hopefully looks good once assembled… -
Hi Tom, nice to see another one of these being built. The one I built last year had very crisp details, especially the badges and script. Double check the hood alignment with the grill in place and make sure everything plays nice. I had to massage things a bit for good fitment. I’ll be watching this come together. Cheers, Steve
-
1937 Ford Pickup Monster Truck
Steve H replied to Zippi's topic in WIP: Model Trucks: Pickups, Vans, SUVs, Light Commercial
Wow, lots of progress here Bob. Looking great, those colours work well together. It’s a beast! -
Ah yes… another slice and dice special from Dennis. Looks fantastic so so far my friend, keep at it!! Those wheels look really nice. As Greg mentioned above, you seem to have a very methodical approach to your builds, love it. Cheers, Steve