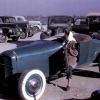
James W Posted February 7, 2009 Posted February 7, 2009 Originally built as a rat, When I chose the wheels, they were just too nice for a rust bomb. The bed was inspired by a magazine photo of a truck with a 57 Ford bed about 5 years ago. Cab was chopped and channeled severly, painted Krylon Ivory and finished in Tamiya clear with pearl added. 60 Ford trunk was narrowed and cut down, roll pan added and filler panel is painted red to simulate full width taillight. 66 Buick engine was detailed, air cleaner was vacuum formed over parts box unit so I can use it over and over. This one took a while to finish. I have trouble building clean and the paint has lots of flaws so it was hard to keep going. Thanks for looking, your comments are welcome.
crazyjim Posted February 7, 2009 Posted February 7, 2009 Looks very nice. I like the details on your fuel line - gonna have to try that.
Bernard Kron Posted February 7, 2009 Posted February 7, 2009 Originally built as a rat, When I chose the wheels, they were just too nice for a rust bomb. ...This one took a while to finish. I have trouble building clean and the paint has lots of flaws so it was hard to keep going. Good call on avoiding the rusted look. Nice wheel/tire choice to go with the bodywork. Whatever troubles you may have had "building clean", you've certainly overcome them. Your perseverance has been well rewarded. The detailing of the engine and the chassis work are outstanding. And that paint job looks plenty sanitary from here! Two thumbs up on a cool rod! BTW, where do those very nice radius rods come from?
Smart-Resins Posted February 7, 2009 Posted February 7, 2009 Very cool. Nice style and stance to it! Jody
Raul_Perez Posted February 7, 2009 Posted February 7, 2009 Very nice build!! I really like the back end!! Thanks for sharing,
RJWood Posted February 7, 2009 Posted February 7, 2009 Great work on the bed and chopped top. Very well done Hotrod.
fordh8r Posted February 7, 2009 Posted February 7, 2009 (edited) This is a fantastic build! With so many good builds on this forum it's difficult to know what kinda build I wanna try first. Thanks for making this decision yet more difficult than ever. Edited February 7, 2009 by fordh8r
tim boyd Posted February 7, 2009 Posted February 7, 2009 James - very, very nice job on that model. Particularly like the detailed '66 Buick 425 mill. Congratulations. TIM BOYD
Dr. Cranky Posted February 7, 2009 Posted February 7, 2009 It looks beautiful. Clean and smooth, and well done. Congrats.
outlaw035 Posted February 8, 2009 Posted February 8, 2009 (edited) james....very KQQL....wish i thought of it...lol....the bed is super and the engine detail is grt8....neal Edited February 8, 2009 by outlaw035
James W Posted February 8, 2009 Author Posted February 8, 2009 BTW, where do those very nice radius rods come from? Bernard, I really can't remember where the radius rods came from, but I think what caught your eye were the rod ends fastened by these tiny nuts and bolts found in the R/C hardware section of the hobby shop. Thanks guys for all the kind comments. Over-all I am pleased with how this thing turned out. Might even try some more shiny stuff. Now on to the next build...
Bernard Kron Posted February 8, 2009 Posted February 8, 2009 Bernard, I really can't remember where the radius rods came from, but I think what caught your eye were the rod ends fastened by these tiny nuts and bolts found in the R/C hardware section of the hobby shop. James, you're right. It's those kind of details that make this build really pop. Maybe you could tell us a little about the detailing of that Buick. The fuel system in particular is a knockout.
E St. Kruiser50 Posted February 8, 2009 Posted February 8, 2009 JAMES, JAMES, JAMES This is just so COOOOOOOOOOOL . I love all of it!!! There's another guy on this forum that's buildin' one like this with a '59 caddy rear end on it. I would live to drive something like yours. You need to bring this to the club sometime or one of the events. I would love to see this up-close and personal Great job - dave
James W Posted February 9, 2009 Author Posted February 9, 2009 Bernard, I'm kind of a one-trick-pony in detailing engines. I'v got a few tricks I just use over and over so I'll try to highlight some here. The fuel line between the carbs is some soft .020 wire bent into a 'U' of appropriate size. The fuel block is Evergreen that I drilled as a "T' fitting and slipped over the 'U' The fuel feed line then connects up and I paint it silver. On this one I got tricky and glued a gauge on top of the fuel block. It was detail painted using a pin to highlight the engraved details. The fuel filter is some clear sprue chopped off to about .060 to .080. I then drill down the center of the sprue and flow in some yellow transparent paint. Slip it over the fuel line, glue it and paint the ends silver. (OOPS, I missed that step on this one.) Throttle return spring visible ahead of the carb under the front of the air cleaner is some fine wire used in electronics for wire wrapping circuits. Availiable at Radio Shack it is about .008" diameter. I take about 3 inches and wrap the middle section 8 or 10 times around a small diameter drill bit. leave a tail at both ends, one attaches to the carb linkage, the other to the intake manifold. These springs are not that hard to make and the depth of detail they create is worth the effort. Carb linkage is usually a straight pin, the head is filed flat and one side of the pin head filed down to form a 'C' shape. Drill the carb and insert. The radiator hoses have bare metal foil hose clamps. I cut a peice very narrow but long enough to work with, wrap it around the hose ends and secure with CA glue. The radiator cap is filed flat on top, then I drill a pilot hole with a .020 drill followed by a 1/16 or so drill bit to create a dish in the cap. Hope this helps, let me know if you still have questions. George, I may take you up on the offer... for the air cleaners. The model is already spoken for. Send me a PM. Thanks again for the comments.
Bernard Kron Posted February 9, 2009 Posted February 9, 2009 James, thankls for the blow by blow. I'll read this over more than once for the simple and incredibly effective techniques. You may be a one trick pony but it's a heck of a trick!
VW Dave Posted February 9, 2009 Posted February 9, 2009 What can I say that hasn't already been said? I like it a lot, and it was a good call making it shiny and nice.
fordh8r Posted February 9, 2009 Posted February 9, 2009 Thanks for sharing your detailing techniques. Looks like it's time to start clearing out some stuff from the ol' memory banks to make room for stuff like this.
carrucha Posted February 13, 2009 Posted February 13, 2009 Cool hot rod pickup. Very good engine details. Thanks for the engine detailing tips. carrucha
Dennis Lacy Posted February 13, 2009 Posted February 13, 2009 Great looking truck and you definately made the right choice when you finished it shiney. Normally I don't care for 1:1 builds like this, but I've never seen one "finished". It makes all the difference in the world and all your period details make it even better. Love the Buick engine, they don't get nearly enough love. What kit did it come from?
MikeMc Posted February 13, 2009 Posted February 13, 2009 Great Look!!! What a fun kit to work....I'm thinking a 60's look on my next one!!
Recommended Posts
Create an account or sign in to comment
You need to be a member in order to leave a comment
Create an account
Sign up for a new account in our community. It's easy!
Register a new accountSign in
Already have an account? Sign in here.
Sign In Now