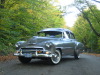
brewsterg6 Posted March 28, 2009 Posted March 28, 2009 In the summer of 1972, My Mom and Dad were out for a drive near Smith Falls, Ont. They used to drive the back roads looking for old cars, specificly a 1951 Chevrolet Convertible to match the 1951 2dr sedan that has been in the family since it was new. My Mom spotted what she thought was the roof of the elusive '51 'vert sitting in a farmers grain field. (to this day, I hold out it was me that kicked her from within) The car turned out to be a 1950... sunk six inches into the muck and holding it's share of rust. $300 changed hands, and the car was towed home. Fourteen years later it hit the road again, good as new. The restoration was not as a show car, but as a driver. It has toured with the VCCA and local car shows for years... I have wanted to build a model of it for years now, but have put it off due to my inexperiance, and inability to find the right parts. Joining this and other forums has got my confidence and skill to the point that I feel I can tackle the job. I found a 1950 die cast hard top for parts, and this week the final piece of the puzzle fell into my lap... the reintroduction of this... I am no stranger to the AMT '51 Convertible, as I have my Dad's kit from the 1970's that I rebuilt a few years back... My goal for this model is to build the 1950 how my Dad's would have left the factory. Our car started life in the colours of Seafoam Green, with a black canvas top. When they bought the car, it had been painted over in an off-white. The restoration was done in black with a white top. I am going to do my model in the green because I already have the black convert in my cabinet, and because if the real car ever gets redone (and it needs it now!) It will likely be done factory stock... This is the pic I'll be working from at home... I pulled this from an E-bay listing. A few things wrong with it (rear window), but I will fill in the details on the model! First thing I have done is strip the trim from the front fender, and started reshaping the rear fender and trunklid. The correct bumpers are from the diecast... My areas of concern are the back window, the rear fenders, the dash, and the side trim. I finished one of the side spears using .040 Evergreen strip. This is the first time I have used Evergreen, and it was easier than I thought it would be. The dash that I have from the die cast is too narrow, but after looking at the real deal, the fix is going to be fairly easy. I thought the whole dash was smaller, but it appears that it was shortened on the glove box side to fit. The radio grille was off-centre in the diecast, and it will centre up by extending the dash on the right side.
RJWood Posted March 29, 2009 Posted March 29, 2009 I think you will do a nice job with it, your off to a great start. Are you going to use the straight 6 from the kit? Keep up the great work.
59 Impala Posted March 29, 2009 Posted March 29, 2009 Nice start on this. Please keep posting pics of your progress. I'm interested in this one. I'd like to maybe try and convert a 51 to 49 or 50. Thanks for the inspiration. Dan
CB Posted March 29, 2009 Posted March 29, 2009 Really cool project there Bruce. Man, you lucked out with the deadcast fer parts. Don't know that I'd wanna buid up one of my Dad's vehicles (that I remember him having) coz they was pretty much all Falcons Looks really good so far. Good luck with it.
Foxer Posted March 29, 2009 Posted March 29, 2009 I love building old family cars so gonna be keeping eye peeled on this. Looks like a good start. Looks like a decent fit on that rear bumper. (don't tell my 51 Plymouth sitting in the box that he ain't coming out till I clean up some other projects .. this made his doors squeak)
brewsterg6 Posted March 30, 2009 Author Posted March 30, 2009 Thanks for the comments, guys... Yes, it will have the straight six, with three on the tree. The rear bumpers are off the diecast, and have the correct guards and optional corner guards on them. Right now they stick out a bit too far to the rear of the car and will require som trimming to tuck them in closer.
Slim Louis Posted March 31, 2009 Posted March 31, 2009 Thanks for posting the great story! This looks like a cool build, and I love that year of Chevies. I'll be watching the progress, so please keep us posted!
brewsterg6 Posted April 28, 2009 Author Posted April 28, 2009 I started to piece together the interior last night. The seats are from the diecast, with a lot of trimming. I may still have to section the rear seat. The rear panels are from the '51 kit, and the fronts are from the diecast with the upper trim from the '51 kit. The dash has been all stretched out to fit the body. I cut the top of the AMT'51 dash to fill in the curve against the windshield, and lengthened the glove box side to centre the radio grill with the centre line of the car (It was off centre in the diecast car)
brewsterg6 Posted May 1, 2009 Author Posted May 1, 2009 Last night I tackled the roof issue. The back glass is from a Jo-han 1931 Cadillac Cabriolet kit. It is a bit too big yet, but I don't want to risk sanding it down and ending up with something not straight. The canvas zip up is masking tape, but I am going to re-do it so it goes right to the bottom of the roof and attatches at the belt line. Another thing I did was reverse the angle of the edge of the beltline where it touches the roof so that it is angled parallel to the roof angle. Now the top comes from under the body, like on the real car, instead of sitting on top of the belt line like the kit does. I primered the body, but still have some smoothing to do...
Eshaver Posted May 2, 2009 Posted May 2, 2009 Hey .keep us posted as to hoe this one comes out , Firdt I appaide the use of a not common color and the cact that it's an over looked subject ( 50-51 Chevrolets ) Ed Shaver
RJWood Posted May 3, 2009 Posted May 3, 2009 Its comming along real nice. I like how you did the top & back window. Great work, keep it going.
brewsterg6 Posted June 5, 2009 Author Posted June 5, 2009 I took a couple weeks off and went to Europe on vacation. (Lots of donkeys, but few old Chevies in Moracco!) I'm back into the swing of things here now that work has settled down again, so it's back to the work table A trip to my parents house, and my first paint job by airbrush is done. I'll be doing a little body work and going back for another couple coats, but here is the first attempt. The colour is Tamiya Pale Green, mixed with white. It is a flat colour, so I will be clearing it after.
noname Posted June 5, 2009 Posted June 5, 2009 Thats funny. I read the first part of your post . You never really came across to me as inexperianced. Everything i've seen you do is as clean as a whistle.
brewsterg6 Posted December 30, 2010 Author Posted December 30, 2010 I am back on the table, and still working away at this... I finished painting it, added the BMF, but still have to clear it.
W-409 Posted December 30, 2010 Posted December 30, 2010 Great project you have there! Somehow I have missed this one before, but now when I look at it, I can say that you are doing great job with it. I like that how it looks now, and interior looks very very good to me. Great job on the modifications too, now just waiting to see this thing cleared. I'm building the same kit as a custom, but I think, I'm maybe hide it forever, when I saw this. Nice work!
Rob Z Posted December 30, 2010 Posted December 30, 2010 Reading what you have posted through the progress and history of this build, all I can say is that you are doing an amazing job. This is going to be one very fine looking ride when your finished...
brewsterg6 Posted December 31, 2010 Author Posted December 31, 2010 I also forgot to add that I fixed the rear of the roof. The kit has a solidpiece that runs below the window, and the entire opening is too high. I didn't want to lose the shape of the opening, so I cut the entire window and moved it down, and filled the gap at the top. I still need to redo the fold down part in the tape, as it has a wrinkle in it.
cruz Posted December 31, 2010 Posted December 31, 2010 Interesting project, please keep us posted, you're doing a great job!!!!
Rob D Posted January 17, 2011 Posted January 17, 2011 Sharp lines on that interior. How do you get them so cut? Do you use tape or just a steady hand? Also, do you custom mix your paints or buy them somewhere? Those don't look like run of the mill Testors' colors? I started to piece together the interior last night. The seats are from the diecast, with a lot of trimming. I may still have to section the rear seat. The rear panels are from the '51 kit, and the fronts are from the diecast with the upper trim from the '51 kit. The dash has been all stretched out to fit the body. I cut the top of the AMT'51 dash to fill in the curve against the windshield, and lengthened the glove box side to centre the radio grill with the centre line of the car (It was off centre in the diecast car) <img src="http://i150.photobucket.com/albums/s84/brewsterg6/1950%20Chevrolet%20Deluxe%20Convertible/1950ChevroletConvertible003.jpg" border="0" class="linked-image" /> <img src="http://i150.photobucket.com/albums/s84/brewsterg6/1950%20Chevrolet%20Deluxe%20Convertible/1950ChevroletConvertible006.jpg" border="0" class="linked-image" /> <img src="http://i150.photobucket.com/albums/s84/brewsterg6/1950%20Chevrolet%20Deluxe%20Convertible/1950ChevroletConvertible009.jpg" border="0" class="linked-image" />
brewsterg6 Posted February 15, 2011 Author Posted February 15, 2011 Sharp lines on that interior. How do you get them so cut? Do you use tape or just a steady hand? Also, do you custom mix your paints or buy them somewhere? Those don't look like run of the mill Testors' colors? Rob... sorry I missed your reply... I haven't been around in a bit! I've finally got the interior sorted out... The paint was giving me fits, as I couldn't match the Beige to what it should be like, and I kept getting it running with the green. The paint is Tamiya acrylics... I airbrushed the green, and hand brushed the beige over white. Then I had to touch up the green by hand. The interior panels are just the plastic from the die cast. The back seat and window garnish are spliced in from the '51 kit.
LAone Posted February 15, 2011 Posted February 15, 2011 hey bud, got some great work going on here. i like these old chevy's. keep up the great work. by far my favorite shot. <img src="http://i150.photobucket.com/albums/s84/brewsterg6/1950%20Chevrolet%20Deluxe%20Convertible/1950Chevrolet006.jpg" border="0" class="linked-image" />
charlie8575 Posted February 25, 2011 Posted February 25, 2011 (edited) I was surprised to find out that gray was the only color of cloth upholstery offered by Chevrolet from the factory in 1951, except for brown vinyl on the wagons (the only color available,) and the convertibles and Bel-Airs used gray cloth with black, green, red or blue leather, depending on exterior color. 1950 must've been different, and I must say, I like that combination much, much better. My '51 will be Thistle gray, which came with red and gray interior and a black top. Great build. Charlie Larkin Edited February 25, 2011 by charlie8575
Recommended Posts
Create an account or sign in to comment
You need to be a member in order to leave a comment
Create an account
Sign up for a new account in our community. It's easy!
Register a new accountSign in
Already have an account? Sign in here.
Sign In Now