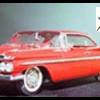
59 Impala Posted June 15, 2009 Share Posted June 15, 2009 (edited) I built this in the early 60's and then I customized it in the early 70's and then I dropped a pair of pliers on it and broke the top. I was really mad at myself. Well, I'm trying to restore it now. The 1st pic shows it before the purple pond bath. You can see the damage that was done also. This pic show it right after the bath and a little clean up. Next shows the pieces of the puzzle that has to be put back together. A little glue putty and a mini close pin and she's starting to go back together. Redoing the front end. Thanks fer lookin. Dan Edited July 20, 2009 by 59 Chevy Impala Quote Link to comment Share on other sites More sharing options...
RJWood Posted June 15, 2009 Share Posted June 15, 2009 WOW, 40+ years old. Good work so far. I'm gonna keep watching this. Good luck with the restoration. Quote Link to comment Share on other sites More sharing options...
59 Impala Posted June 15, 2009 Author Share Posted June 15, 2009 Thanks Ron. This one is going to take some tender loving care to get it fixed and I really want to fix it. The glue putty and filler are still drying out so now progress yet. Stay tuned. Dan Quote Link to comment Share on other sites More sharing options...
Foxer Posted June 15, 2009 Share Posted June 15, 2009 Man .. that's some aged plastic. And a shame the purple pond hates custom bodywork. But, I'm sure it will be better than ever. All Sture's deserve a comeback. Quote Link to comment Share on other sites More sharing options...
59 Impala Posted June 16, 2009 Author Share Posted June 16, 2009 I have a small update on the body work. Here are some pics I took this morning. In this 1st pic you can see the green vent window piece. This came from one that I chopped the top off of for the Bonniville flats car "Mr.Speed". I saved this top for just in case and it came in handy. In this pic you can see the headlights from the 65 GTO. I lost the clear pieces for the lights and I have no clue where or if I can get them replaced. I'm looking for them in my parts box but I dought that they'er there. Thanks fer lookin. Dan Quote Link to comment Share on other sites More sharing options...
mr moto Posted June 17, 2009 Share Posted June 17, 2009 Very cool! I'm a big Studebaker fan and I really like what you're doing with the headlights. I'll be following this with great interest! Quote Link to comment Share on other sites More sharing options...
beefheart22 Posted June 18, 2009 Share Posted June 18, 2009 Looks like you got your work cut out for ya. It's going to be cool to watch it take shape. Quote Link to comment Share on other sites More sharing options...
59 Impala Posted June 19, 2009 Author Share Posted June 19, 2009 Thanks guys. I got the first coat of primer on it last night to see what needs to be gone over again and I'm doing a little more body work. Hope to have some pics up tonight if the storms allow. Stay tuned. Dan Quote Link to comment Share on other sites More sharing options...
59 Impala Posted June 21, 2009 Author Share Posted June 21, 2009 (edited) I got updated pics of this. These are after the first coat of primer. These next ones are after the second coat of primer. I still need to do a little more bodywork yet. Now I have to decide which hood to use, the one with the V8 or the one without. Any suggestions? Thanks fer lookin. Dan Edited June 21, 2009 by 59 Chevy Impala Quote Link to comment Share on other sites More sharing options...
Clay Posted June 21, 2009 Share Posted June 21, 2009 Nice job so far. Don't know if I am digging the GTO headlights though. If you were missinf the headlights from the stude I have a failed kit that I could have sent you the ones out of it. Quote Link to comment Share on other sites More sharing options...
Modlbldr Posted June 21, 2009 Share Posted June 21, 2009 Nice job. Looks like your repair job went well. I, for one, like the looks of your front end treatment. I never was a fan of the stock Stude headlights. Here Is a photo of what I did to mine. They are Porsche headlight buckets from a Fujimi kit. Keep up the good work and let us see it finished. Later- Quote Link to comment Share on other sites More sharing options...
59 Impala Posted June 21, 2009 Author Share Posted June 21, 2009 Thanks guys, and Clay, I customized this way back in the early 70's and that's when I also broke it. I just now got it back out of the box to fix and I've lost the 65 GTO's clear lens, so I don't know what I'm gonna do now. I hope that I can find them on the net from someone. The fenders are cut out for these so I can't use the stock lights. M, I like what you've done to yours also. Looks kinda cool. I'll keep ya posted on the progress. Later, Dan Quote Link to comment Share on other sites More sharing options...
Custom Hearse Posted June 22, 2009 Share Posted June 22, 2009 Looking good my friend! I'm gonna send you a P.M. with a question. I'm looking forward to seeing you work your magic on this one! Quote Link to comment Share on other sites More sharing options...
59 Impala Posted June 22, 2009 Author Share Posted June 22, 2009 (edited) Thanks Marshall, I got your PM and returned one back at ya. As far as magic, weeeelllllll, I don't know about that , but thanks. This build means alot to me. I started it in the early 60's and customized it in the early 70's and that's when I broke it and now I've gotten up the courage to finish it (fix it also). Boy, I think this has to be the longest time period for finishing a model, 40 some odd years. Dan Edited June 22, 2009 by 59 Chevy Impala Quote Link to comment Share on other sites More sharing options...
59 Impala Posted June 24, 2009 Author Share Posted June 24, 2009 I got the colors on tonight. SNJ silver on the bottom, then antique silver pearl in the middle and true blue pearl on top. Here are some pics. Thanks fer lookin. Dan Quote Link to comment Share on other sites More sharing options...
Modlbldr Posted June 26, 2009 Share Posted June 26, 2009 I'm still liking the work you've done on this one. If it is any consolation to you, I started my Stude that I posted the pictures of earlier around 1998 and it still sits in the same condition. I really want to finish it too, but I've hit some snags in it and I've put it aside twice now. Some day I'll get it done. Later- Quote Link to comment Share on other sites More sharing options...
59 Impala Posted June 27, 2009 Author Share Posted June 27, 2009 I'm still liking the work you've done on this one. If it is any consolation to you, I started my Stude that I posted the pictures of earlier around 1998 and it still sits in the same condition. I really want to finish it too, but I've hit some snags in it and I've put it aside twice now. Some day I'll get it done. Later- Thanks. This sat in the box since the early 70's cause I didn't think that I could fix it or have the skills to fix it. Well, now I just took a chance to see if I could fix it and it didn't come out to bad so far. I really like the 53 Studebakers. Real nice design ifin ya ask me. I'm letting it set for a few days to really dry out and in the meantime, I'm working on the interior and chassis. I'll post more pics when I get some more work done. So stay tuned. Dan Quote Link to comment Share on other sites More sharing options...
george 53 Posted June 27, 2009 Share Posted June 27, 2009 Dan, send me your addy an I'll send you the lenses out of one of my 65 GTO kits. I NEVER build customs, so I know I got those parts still in the boxes, on the sprues. Let me know if ya want 'em an they's yours. It's nice to be able to bring an old kit back, it gives a weird sense of pride and accomplishment. Your doin yer ol Bomb PROUD!!!! Quote Link to comment Share on other sites More sharing options...
george 53 Posted June 27, 2009 Share Posted June 27, 2009 Dan, I just checked my stash, an the re-issued kits DON'T come with the custom parts that the original did! The custon CHROME headlights aren't even on the TREES!!!!! I am SO SORRY! I just assumed those parts were still in the re-issued kits,and they're not. Hopefully one of the guys may have an ORIGINAL kit, an can spare those peices. It would just be a shame if somethin like that kept that model from commin back to show off it's new improved look! How "bout it fellas, can we help a Brutha out????? Quote Link to comment Share on other sites More sharing options...
PlasticWagens Posted June 28, 2009 Share Posted June 28, 2009 Looks great, cannot wait to see the finished product. Quote Link to comment Share on other sites More sharing options...
george 53 Posted June 28, 2009 Share Posted June 28, 2009 Well Matt, lets hope SOMEONE has those darn lenses for Dan, or that lil Studie may be born sightless! Quote Link to comment Share on other sites More sharing options...
59 Impala Posted June 29, 2009 Author Share Posted June 29, 2009 WOW, thanks guys for the moral support and trying to come up with the lights. Marshall might have something that I can use. If not I'll come up with something. I love this kit and really want to finish it. Since this thing has sat in the box for over 30 years, I've lost one of the tail lights also. The original issue kits have the red lens and the reissued ones have the lights built in the chrome part. Bummer. I think that I can make a red one from a piece of red sprue. I sure hope so. Dan Quote Link to comment Share on other sites More sharing options...
59 Impala Posted July 10, 2009 Author Share Posted July 10, 2009 Thanks guys. Sorry for taken so long to post something. The wife had other plans, like cleaning out the basement and other stupid stuff Anyway, I got some plastic that looks just like the vinal seat covers back in the 50's and 60's and I'm trying it out on this build. Here are a couple of pics to show how it looks so far. Thanks fer lookin. Dan Quote Link to comment Share on other sites More sharing options...
mr moto Posted July 10, 2009 Share Posted July 10, 2009 I think I might have some extra Stude tailights that you can have if you still need some. I'll make myself a note to look for them and PM you if they show up. The seat covers look great! I hope it works out. Do you remember the source of that quilted plastic material? Is that some kind of food wrap? If that stuff is paintable, it might also be usable for quilted uphostelry as well as clear seat covers. Quote Link to comment Share on other sites More sharing options...
59 Impala Posted July 10, 2009 Author Share Posted July 10, 2009 Thanks Manuel. Yea, if you have the red tail lights I sure could use them. You wouldn't possibly have the 65 GTO custom lights would ya? They are rectangular. I lost the ones I had over the 30 some odd years this sat in the box. I've looked in every box totry and find them and no luck. Bummer. This plastic is from something my wife got at the Japanese food store. I don't know what they were used for, but believe me, I'm really going to try and find some more. I will look at everything in the store to see if I can find it again. Seriously, I will try and find it again and when I do, I'll post what it is used for. I don't know if it's paintable or not yet. It is very thin so you would have to be careful I guess. If I have any left over I'll try and paint it to see if it works Ok. Later, Dan Quote Link to comment Share on other sites More sharing options...
Recommended Posts
Join the conversation
You can post now and register later. If you have an account, sign in now to post with your account.
Note: Your post will require moderator approval before it will be visible.