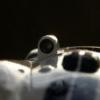
Karmodeler2 Posted June 9, 2010 Posted June 9, 2010 (edited) Finally decided to finish something I started a few years ago. I know I'm the only one who has "works in the works", so I'm sorry if this is a new concept to all of you. (yes, this is pure sarcasm). I am doing a curbside with some small detail. I deepened all the lines with a needle in a pin vice. I have drilled holes for "snaps" and "buttons" based on what goes where. I have removed the molded lip for the windscreen and replaced it with one made from brass (15 pieces) so that a .005 piece of clear plastic will fit in the channel and wrap the way I want it to. I have removed some molded on stuff and made it in plastic, will paint it and then after polishing the car, will add it back. This keeps the polishing easy, so to speak, and gives a smooth finish all the way to the edge of the detail. The big "can" sitting on the cowl just aft of the hood is the oil cooler. It will have screen and screen holders with a coil (probably solder wire) inside so you can see through it. I added some rings to the dash to give it some more depth. The whole thing gets painted black. I still have to machine all the lights and some of the lenses and cast them. While this is an obscure car for some, it's another great kit from Mr. Fisher. His D-type Jaguar was a great kit too. For those familiar with the history of Briggs Cunningham, you will appreciate the build. Hope you enjoy it. David Edited July 11, 2010 by Karmodeler2
curt raitz Posted June 9, 2010 Posted June 9, 2010 Seeing you build this kit brings back good memories of when I built this kit when it first came out. I picked up a "caddie engine" conversion for it as well, have no idea were from had to remove a lot of resin to make it fit I became a big fan of Briggs Cunningham and his race cars. Saw all of his cars at Laguna Seca (Monterey Historics) before they shipped 'em all to Florida good luck and I'll be watching your progress on this rare car
Karmodeler2 Posted June 9, 2010 Author Posted June 9, 2010 Thanks Curt. I have the body painted with the signature stripes and will try and post some more pics by weeks end.I have the blue too dark, but it will do. Thanks for looking. David
mcandela Posted June 9, 2010 Posted June 9, 2010 Nice work, like the details. Can you tell us more on how You detailed the gauges?
Jon Cole Posted June 9, 2010 Posted June 9, 2010 Amazing! How did you build a channel for the window? It would be easy for someone to not notice there are two upright strips, with just enough of a gap for the windscreen! That is good work!
Zoom Zoom Posted June 9, 2010 Posted June 9, 2010 Looking forward to seeing more of this one! Your models never disappoint...
MonoPed Posted June 9, 2010 Posted June 9, 2010 Sweet project! If I ever do another Fisher kit, this is at the top of the list...
Jim Gibbons Posted June 9, 2010 Posted June 9, 2010 Beautiful work. I have a Nicholas Watts print of the C5-R at LeMans in '53 that hangs above my computer, and to top it off, it's autographed by John Fitch! I love these cars, and will be watching your progress.
Karmodeler2 Posted June 10, 2010 Author Posted June 10, 2010 Nice work, like the details. Can you tell us more on how You detailed the gauges? Hey Mike, What I did was to use the photo etch one supplied in the kit. The bezels were raised, but I wanted a little more depth or reveal. I used Norm's Wizard "O"s ( he has the replica and miniatures of Maryland Co). These are different sizes of "O" rings and I just stacked them on top of the existing ones. The reference books I have show the bezel rings to be a little bit "taller" than the ones on the photo etch dash. I put the ring in place, and then take a paint brush with thinned down clear (lacquer thinner and MM clear top coat) and bring the brush up through the hole from the back side of the dash for the gauge that I'm working on. The clear will capillary under the ring and when dry, it will secure it in place. After that, I take the .015 piece of plastic that I have cut to match the outline of the dash. I have a collection of gauges that I have xeroxed from my collection of gauges. I use normal copy paper and I just copy about every set I ever get for a model. I then cut the paper gauge out, use a little bit of Elmers, and put a dot of it on the plastic piece, put the gauge down, then place the dash on top and take a toothpick and stick through the opening in the dash to move the gauge around to match the opening. I then repeat all of that for every gauge. When done, I place a piece of clear .005 that I have cut to match the dash outline, and glue it on top of the plastic piece. When dry, I glue the dash onto the clear plastic piece. This give the appearance of "3-D" gauges and not a bad detail for a little work. If your kit does not have a PE dash, take the plastic one, remove the material from the back of the dash to form a flat area for a piece of plastic that will hold your gauges. Then use the correct size drill bit to drill out the round gauge and then do the process listed above, just glue it in from behind. Hope this helps and is not too confusing!!! When I first bought this kit years ago, it came with a resin dash. Paul Fisher now has PE for the dash and I was able to get one from him. If I did not have the PE one, I would have removed material from the resin one from the back, and done exactly as I described above. Also, if you do race cars..sometimes the dash is nothing more than a flat piece of metal on the real thing. Get you a punch set (no, not the kind you drink out of) and mark your holes and punch them out. Then you have a simple looking one that you can add detail to. I will get some more photos up this week to show the final product. I cut plastic rod in small "cookies" to simulate the bolts that hold the dash. I secure them with a drop of the clear, and I use hex rod sometimes and even make little knobs and stuff from different sized rods. Once it's painted and in the car, it's hard to see it the way the camera does, so if it looks good or great in the camera shot, no one will be able to see it any better. David
Karmodeler2 Posted June 10, 2010 Author Posted June 10, 2010 Amazing! How did you build a channel for the window? It would be easy for someone to not notice there are two upright strips, with just enough of a gap for the windscreen! That is good work! Thanks Jon for your kind words. I took some .015 brass sheet, and trimmed a piece, filed it to shape, and then did that again to get my two channels for just the door piece. I then made a template out of plastic, coated my brass with Dykem, (a tool makers die....basically lacquer thinner with some blue dye in it...you wipe it on the metal, let it dry...about 10-15 seconds, and then place your template down, scribe the metal with a scribe, and remove your template and you will have an outline) and then cut and filed the base to the shape I wanted. Then I just kept bending it to match the contour of the door lip. When I got it right, I took the vertical pieces that would form the channel, and soldered them in place one at a time. I sandwiched a .010 piece of brass between the two ( and slightly elevated so it would not get soldered in the process) and had to do it several times to get the correct angle. It was not fun, but it was rewarding. I then put two .032 "pins" on the base so it will always be in the same place each time on the model. The placement is important, as the stripes on the car will cut across two of these windshield holders. This also lets me polish the car, then add this later and the paint at the base of the windscreen holder will look good. I won't have to try and cram a piece of polishing cloth between the base of my brass and the top of the car. And rub the paint off the brass!!! Then, just repeat all that for the other two window holders........sounds great doesn't it? David
Karmodeler2 Posted June 10, 2010 Author Posted June 10, 2010 Beautiful work. I have a Nicholas Watts print of the C5-R at LeMans in '53 that hangs above my computer, and to top it off, it's autographed by John Fitch! I love these cars, and will be watching your progress. Thanks for the kind words. That is pretty cool. Especially autographed!!!!! I wish someone would do the C4-RK. Now THAT was a mean looking race car. How would you like to see that coming up behind you at Le Man?
Joseph Posted June 10, 2010 Posted June 10, 2010 David, Fantastic job! Interesting car, looks like your really giving it a go! Keep the photos and the "How-I-Dun-Its" coming! Looking forward to more! Cheers! Joseph
Karmodeler2 Posted June 10, 2010 Author Posted June 10, 2010 David, Fantastic job! Interesting car, looks like your really giving it a go! Keep the photos and the "How-I-Dun-Its" coming! Looking forward to more! Cheers! Joseph Thanks! Will Do! David
Modelmartin Posted June 10, 2010 Posted June 10, 2010 Cool car and great project! Who's going to be the first to get a ModelHaus 50 Caddy and do the Lemans car?
curt raitz Posted June 10, 2010 Posted June 10, 2010 Cool car and great project! Who's going to be the first to get a ModelHaus 50 Caddy and do the Lemans car? "Le Monstre"...now that would be one scary car in 1/24th and/or 1/25th scale
Foxer Posted June 10, 2010 Posted June 10, 2010 (edited) Cool car and great project! Who's going to be the first to get a ModelHaus 50 Caddy and do the Lemans car? Would you really need a body? .. just a 5 carb Caddy engine and LOTS of custom bodywork! Edited June 10, 2010 by Foxer
ScaleCentral Posted June 10, 2010 Posted June 10, 2010 The C4RK will possibly be coming soon from Fisher. He has also redone this kit to include better tires, PE, and some body updates. Nic
curt raitz Posted June 10, 2010 Posted June 10, 2010 I think Andy was refering to this car: I was thinkin' of this car: anyway back to the CR4...
MrObsessive Posted June 10, 2010 Posted June 10, 2010 David, you're doing a fantastic job with what's probably a very underrated race car. You just don't see much written about the Cunninghams (unlike Cobras or Ferraris) much less many models done of them. They could be quite formidable with their Chrysler Hemis and a good driver! Keep up the good work!
Karmodeler2 Posted June 10, 2010 Author Posted June 10, 2010 Here are some more pics. You can see through the oil cooler and the solder I put in there to simulate the oil lines. The stripes came out okay. I still have to cut and buff everything. I noticed in the front view pic that the stripe is off. I did not see this with the naked eye....amazing how this is that far off!!! The last pic shows how bad the orange peel is!!!!
Karmodeler2 Posted June 10, 2010 Author Posted June 10, 2010 Seriously...looks like it's coming along fine to me. But what do I know? Not sure...is that you asking or is that me?
simonr Posted June 11, 2010 Posted June 11, 2010 Hey Dave, I didn't know you have a new kit in the block..looking good! Simón P. Rivera Torres
Steve Keck Posted June 11, 2010 Posted June 11, 2010 Look'n good, David! I really like the oil cooler. I know you can fix the orange peel. I wish you hadn't pointed out the stripes. Maybe you can delete that picture and only post future pictures at an angle (so only you and I will know).
Karmodeler2 Posted June 11, 2010 Author Posted June 11, 2010 Look'n good, David! I really like the oil cooler. I know you can fix the orange peel. I wish you hadn't pointed out the stripes. Maybe you can delete that picture and only post future pictures at an angle (so only you and I will know). Great Idea! It will be our secret. I went back and looked at it with my eye, and not the camera, and you can't see the little jink in the stripe that I see that is forward of the front edge of the hood and aft of the grille opening. I guess I'm getting older and my eye sight is not what it used to be. Let me know what else we can keep as our little secret. David
Steve Keck Posted June 11, 2010 Posted June 11, 2010 It will be our secret. I guess I'm getting older and my eye sight is not what it used to be. Let me know what else we can keep as our little secret. David So I'm posting our secrets on a public forum? It's not just your eye sight you're losing.
Recommended Posts
Create an account or sign in to comment
You need to be a member in order to leave a comment
Create an account
Sign up for a new account in our community. It's easy!
Register a new accountSign in
Already have an account? Sign in here.
Sign In Now