Dragracer Posted September 1, 2011 Posted September 1, 2011 The chute brackets look much better lower then they were,and Bart seems to be right, maybe a little more angle to the chute backings.
baddgass Posted September 1, 2011 Author Posted September 1, 2011 Thanx Bart and all for the info and the input. Very helpful, so #3 redid the angle and put the aluminum cans for the spring, for the chute. Hope this works better. What do you guys thing?
Dragracer Posted September 1, 2011 Posted September 1, 2011 I think it hits the nail right on the head. Looks perfect now Derrick, can't wait to see more.
eviltwincustoms Posted September 1, 2011 Posted September 1, 2011 Spot on... TWO THUMBS UP! That looks frikin awesome sitting off the back of the camaro, even adding the cans it looks sweet.... I am excited to see your car in paint next! Keep us updated.
Mooneyzs Posted September 1, 2011 Posted September 1, 2011 Derrick this is coming along sweet and lookibg great. The chutes look much better making those adjustments to it. Keep up the great work. Any ideas for paint yet?
tyrone Posted September 3, 2011 Posted September 3, 2011 Derrick the chutes look way better this way, awesome work pal...
eviltwincustoms Posted September 5, 2011 Posted September 5, 2011 (edited) Derrick, the other thing that I just noticed is it looks like you are tying off the chute hold downs up high if I am looking at this right. The actual place for the tie off is on the rear diff. At least this is where I have noticed them being mounted on the cars I have viewed at the ADRL Independence Drags. I stand corrected, anyone know what or how it is determined where the tie off is for chutes? What determines if it is mounted off of the rear end or on the mount off of the chassis? Edited September 5, 2011 by eviltwincustoms
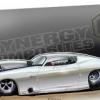
outlaw105 Posted September 5, 2011 Posted September 5, 2011 His chute tie offs look fine. I guess its all in what location you prefer. Heres a picture of our outlaw 10.5 car while getting built. Chute tie offs right below the bracket like his. (sorry for the bad pic)
baddgass Posted September 5, 2011 Author Posted September 5, 2011 Thanks Bros. for all the great info. for the build. Some do run the tie down to the rear end, but i had no room, wheelie bars in the way. So i run them like on my old super pro. T/A, off the frame like this one from S&W Race Cars. Nice 10.5 RG ( T/A? )
Randy D Posted September 5, 2011 Posted September 5, 2011 Hi Derrick, What an outstanding build!!! More great reference here. Randy
baddgass Posted September 5, 2011 Author Posted September 5, 2011 Thanks Randy we all are trying. If you have something to add please do! Brother. I can use the help.
stump Posted September 6, 2011 Posted September 6, 2011 Aye Derrick, now you're in the zone mate. Love it. Keep at it mate, you're inching closer to that line by the second.
outlaw105 Posted September 6, 2011 Posted September 6, 2011 Thanks Bros. for all the great info. for the build. Some do run the tie down to the rear end, but i had no room, wheelie bars in the way. So i run them like on my old super pro. T/A, off the frame like this one from S&W Race Cars. Nice 10.5 RG ( T/A? ) yep 2000 firebird with big block twin turbo combination
eviltwincustoms Posted September 9, 2011 Posted September 9, 2011 I'm jones'in here Derrick.... gotta see some updated progress pics! Having a 5yr old Son, he doesn't let me spend much time on my project. As soon as I get off work, gotta go outside and play soccer with him. Plus my 17yr old daughter is coming up to see me this weekend, so no time to myself to work on my car. I need to live vicariously through your build.... LOL
my80malibu Posted September 10, 2011 Posted September 10, 2011 Your Car is turning out to be quite a detail machine. I am liking every minute and picture of this cool dragracer. thanks for posting all of the progress done so far.
Romell R Posted September 10, 2011 Posted September 10, 2011 Man Derrick this baby is coming together nicely , What are your plans for paint? cant wait for your next update your build is inspirational.
baddgass Posted September 11, 2011 Author Posted September 11, 2011 I'm jones'in here Derrick.... gotta see some updated progress pics! Having a 5yr old Son, he doesn't let me spend much time on my project. As soon as I get off work, gotta go outside and play soccer with him. Plus my 17yr old daughter is coming up to see me this weekend, so no time to myself to work on my car. I need to live vicariously through your build.... LOL Appreciate you looking in on the build, but the time you spend with your son and daughter is the best of times, You can always build models ,but their only young once. So,in the mean time i'll be posted some pics.soon Thanks Bart.
baddgass Posted September 16, 2011 Author Posted September 16, 2011 Thanks Romell , Gilbert, RG, Greg and all my brother builder for looking in. Well brother i'm doing the last work on the chassis. The battery mount and padales assemblie, then a little sanding and off to paint. And i started work on the engine. I like the shotgun look. So i cut the center out of the 3 hole blower hat with the 1671 blower.
baddgass Posted September 16, 2011 Author Posted September 16, 2011 Still some work to do, but you can see were i'm going.
Wayne Buck Posted September 16, 2011 Posted September 16, 2011 Absolutely OUTSTANDING work! Gonna be one bad Camaro! Some real eye candy here...that's for sure! Thanks for sharing!
Mooneyzs Posted September 16, 2011 Posted September 16, 2011 Derrick.... Awesome work my friend on the Shotgun Injector. Love how you modifed it. This is looking great. Glad to see you are getting more done to this. Can't wait for more updated pics.
Randy D Posted September 16, 2011 Posted September 16, 2011 Derrick , jUST AMAZING work !!!!! Using this as ref for my work so keep going :D Randy
eviltwincustoms Posted September 18, 2011 Posted September 18, 2011 Derrick, nice mod to the 3port Hat... can't even tell it was cut and a section taken out.
stump Posted September 22, 2011 Posted September 22, 2011 Nice touch. Might have to try that myself Derrick. With two 1/16 Promods to build, I really don't want both with matching scoops. GREAT work my friend.
Recommended Posts
Create an account or sign in to comment
You need to be a member in order to leave a comment
Create an account
Sign up for a new account in our community. It's easy!
Register a new accountSign in
Already have an account? Sign in here.
Sign In Now