ModelcarJR
-
Posts
1,648 -
Joined
-
Last visited
Content Type
Profiles
Forums
Events
Gallery
Everything posted by ModelcarJR
-
1933 Cadillac Fleetwood All Weather Phaeton
ModelcarJR replied to ModelcarJR's topic in WIP: Model Cars
I finished all the hardware on the rear and then I thought I better put the wheels on it or I might knock some of the hardware off trying to wait until the end. So I've installed the wheels now, knocking off the rear bumper in the process but everything is together now. I also installed the right spare tire and cover. Still waiting on the weather to finish the hood but I have plenty of pieces up front to install. Thanks for looking! ?
-
1933 Cadillac Fleetwood All Weather Phaeton
ModelcarJR replied to ModelcarJR's topic in WIP: Model Cars
Thanks, Carl and Noel! I appreciate your comments! Finished the right side and the body is complete! I think I'll finish the rest of the hardware and then put the wheels on since it is going well, knock on wood. The top sits on it well with no glue. I might change the color of the top to Ivory since this color looks a bit dark. But I can do that last. Thanks for looking! ?
-
1933 Cadillac Fleetwood All Weather Phaeton
ModelcarJR replied to ModelcarJR's topic in WIP: Model Cars
Thanks, Jim and Louis! I appreciate your comments! I've been working all day on this one and I think I am finally making some progress toward the final product. I really didn't pay much attention to the sprue attachment spots on the hood and thought I could live with them when I first started this kit. But after further inspection, I can't live with them. So I sanded off the edges and the raised engraved edge that I think was meant to be foiled down the center of the hood. It never got less than 60% humidity today. I added a half-round piece of plastic strip to the middle of the hood after gluing the halves together and painted it with some primer. I'll have to wait for the rest of the painting later as it started raining again this evening. I did manage to get the left door foiled, windows in, interior door panels, door handles and window cranks installed and then mounted the door. One more door to finish and I can get this one on wheels and do all the final hardware. I think it will work out that the top will snap in place and I won't have to glue it. I would keep my fingers crossed but then I wouldn't get much done! Thanks for looking! ?
-
Thanks, Bob. I have a roll of 1" black masking tape but that won't work for vinyl tops. It has to be two inch tape. I haven't seen any in black but it might be out there somewhere.
-
Thanks, Gareth, David, and David! I appreciate your comments! David, I am going with a black and white interior.
-
1933 Cadillac Fleetwood All Weather Phaeton
ModelcarJR replied to ModelcarJR's topic in WIP: Model Cars
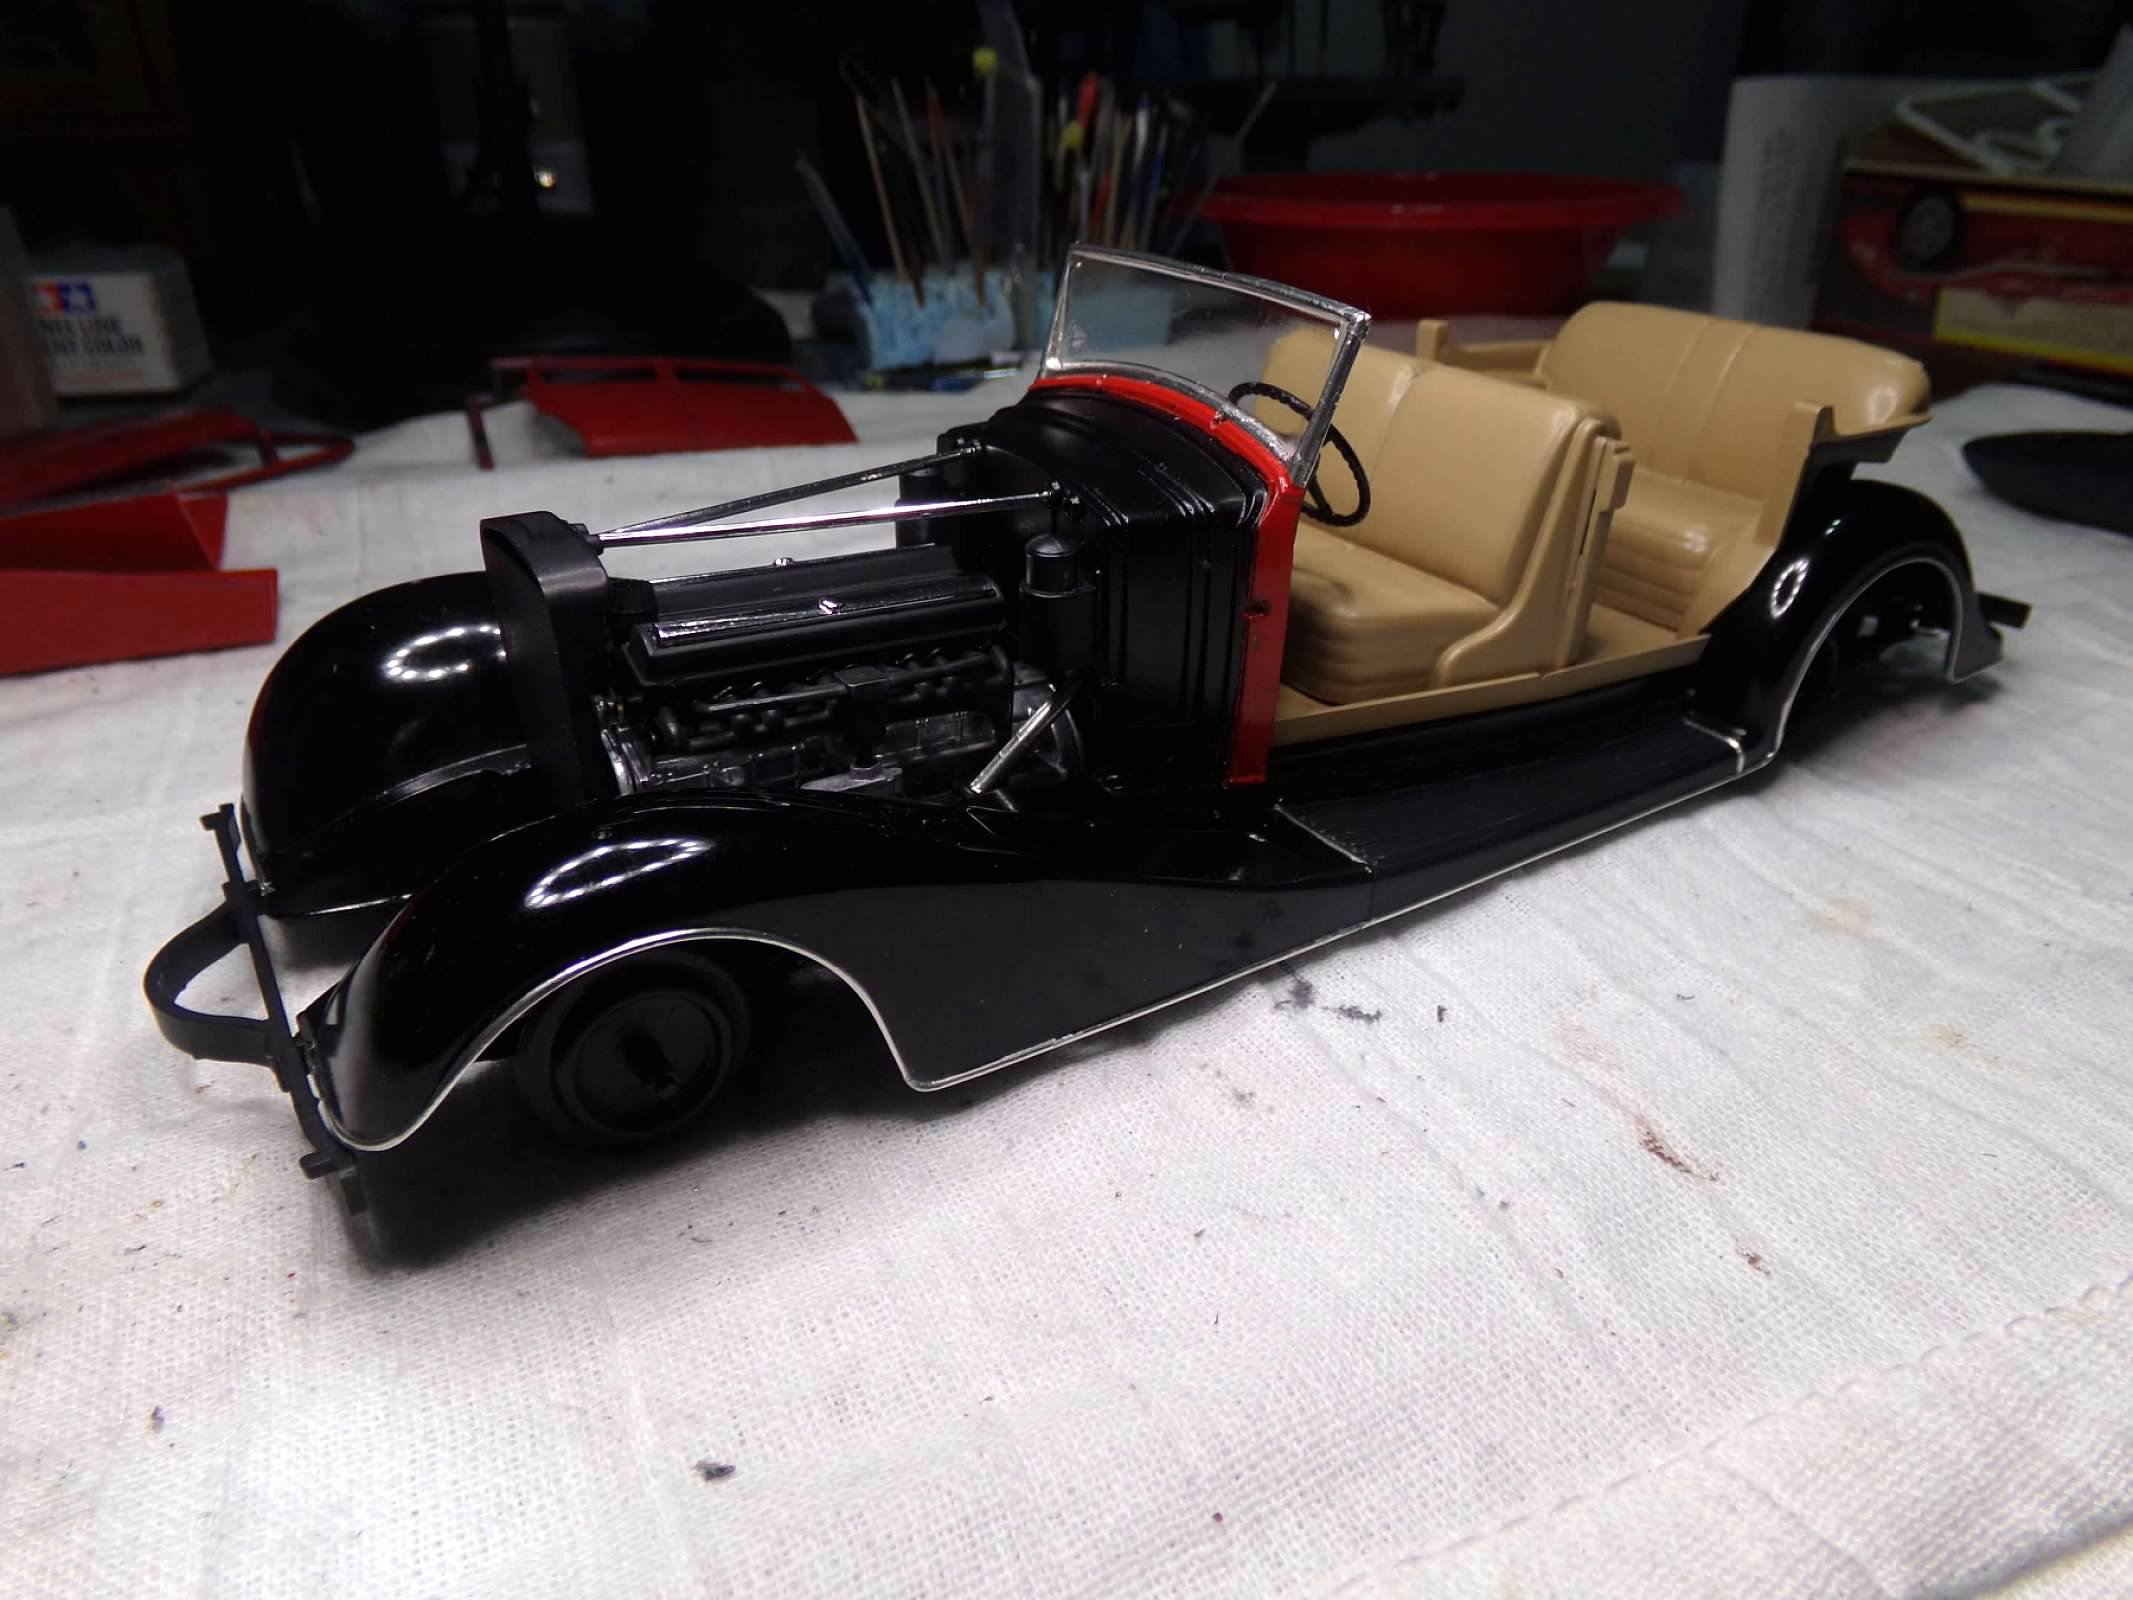
Thanks, Carl and Jim! I appreciate your comments! Jim, I usually just spray from a rattle can. I have two airbrushes and a compressor and I use them occasionally. The reason I don't use them more is because I have to paint outside. I wish I had a workshop or even a paint booth but don't. There isn't anywhere in this house that I could vent a paint booth out of a window. All the windows are double-paned heavy composite frames with screens and Grandma would have a cow if I opened them and vented outside. So wishing isn't going to do me any good. hen I do airbrush, I carry my compressor outside and set it up on my patio table where I do all my painting. Once have it plugged into an extension cord and set up so it will run, I then carry out my airbrush, thinner, paint, two bottles, a rag and a screwdriver to open the can of thinner. Once I mix the paint, set my PSI and I'm ready to paint it takes about 5 minutes. Then I have to clean the brush, clean the bottles, get rid of the dirty thinner, and carry everything back in because I can't leave it out in the weather to collect moister and dirt. The whole ordeal takes about an hour for 5 minutes of paint. Whereas, I can heat a rattle can grab it and the model and go. I can be done in about 10 minutes for paint and another 10 for clear in both cases. That's why I use rattle cans. As for the wired distributor, I learned on another website that the sixteen spark plugs are in the valley. So the 16 wires go from the distributor on the front of the engine right down into the valley and and then the valley cover goes over them. So the wires woud be visible for about 3 scale inches I could leave the valley cover loose and remove it to show off the work... Naw, not worth it. Here's where I am so far. No big issues yet. The windshield frame was difficult to foil and I might have painted it with Alclad but I never have had much luck with that. One benefit to foil is that I didn't need to use any glue for the windshield. Its in tight without it. I'm sure I'm in for it when I try to put the body sides and rear on. Should be fun. Thanks for looking! ?
-
Thanks, Bob! I just saw your comments as I was answering the other comments! I appreciate your comment! Maroon was an exterior color for 1965.
-
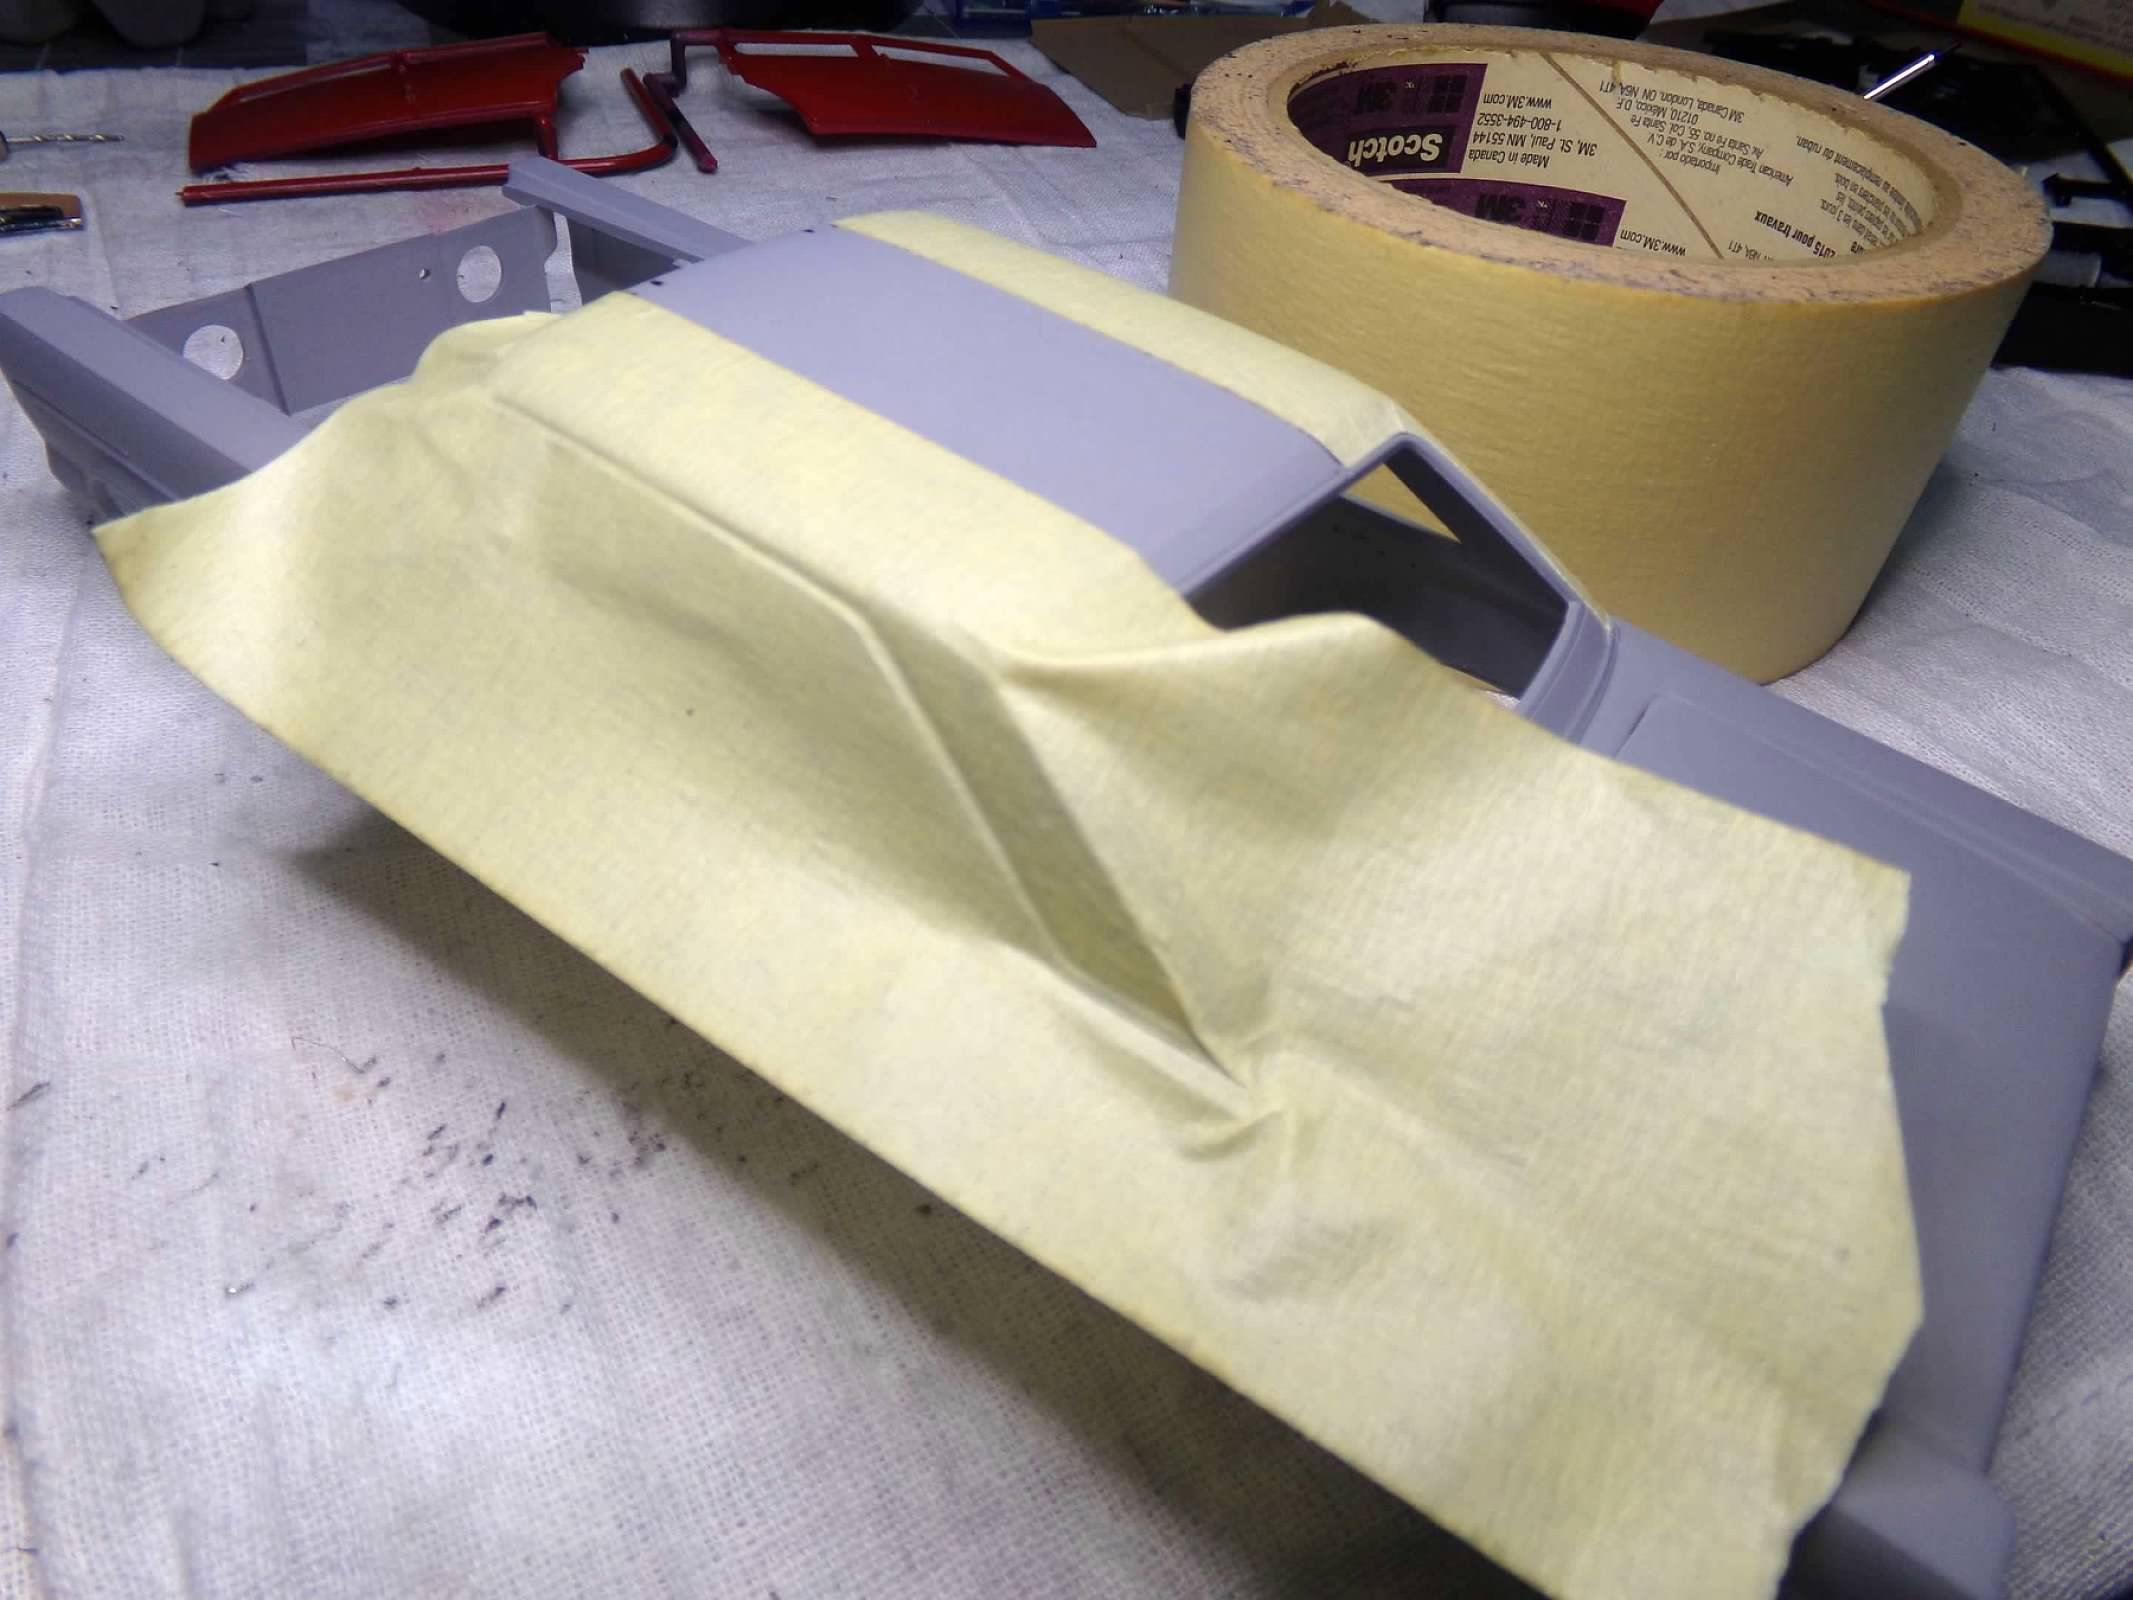
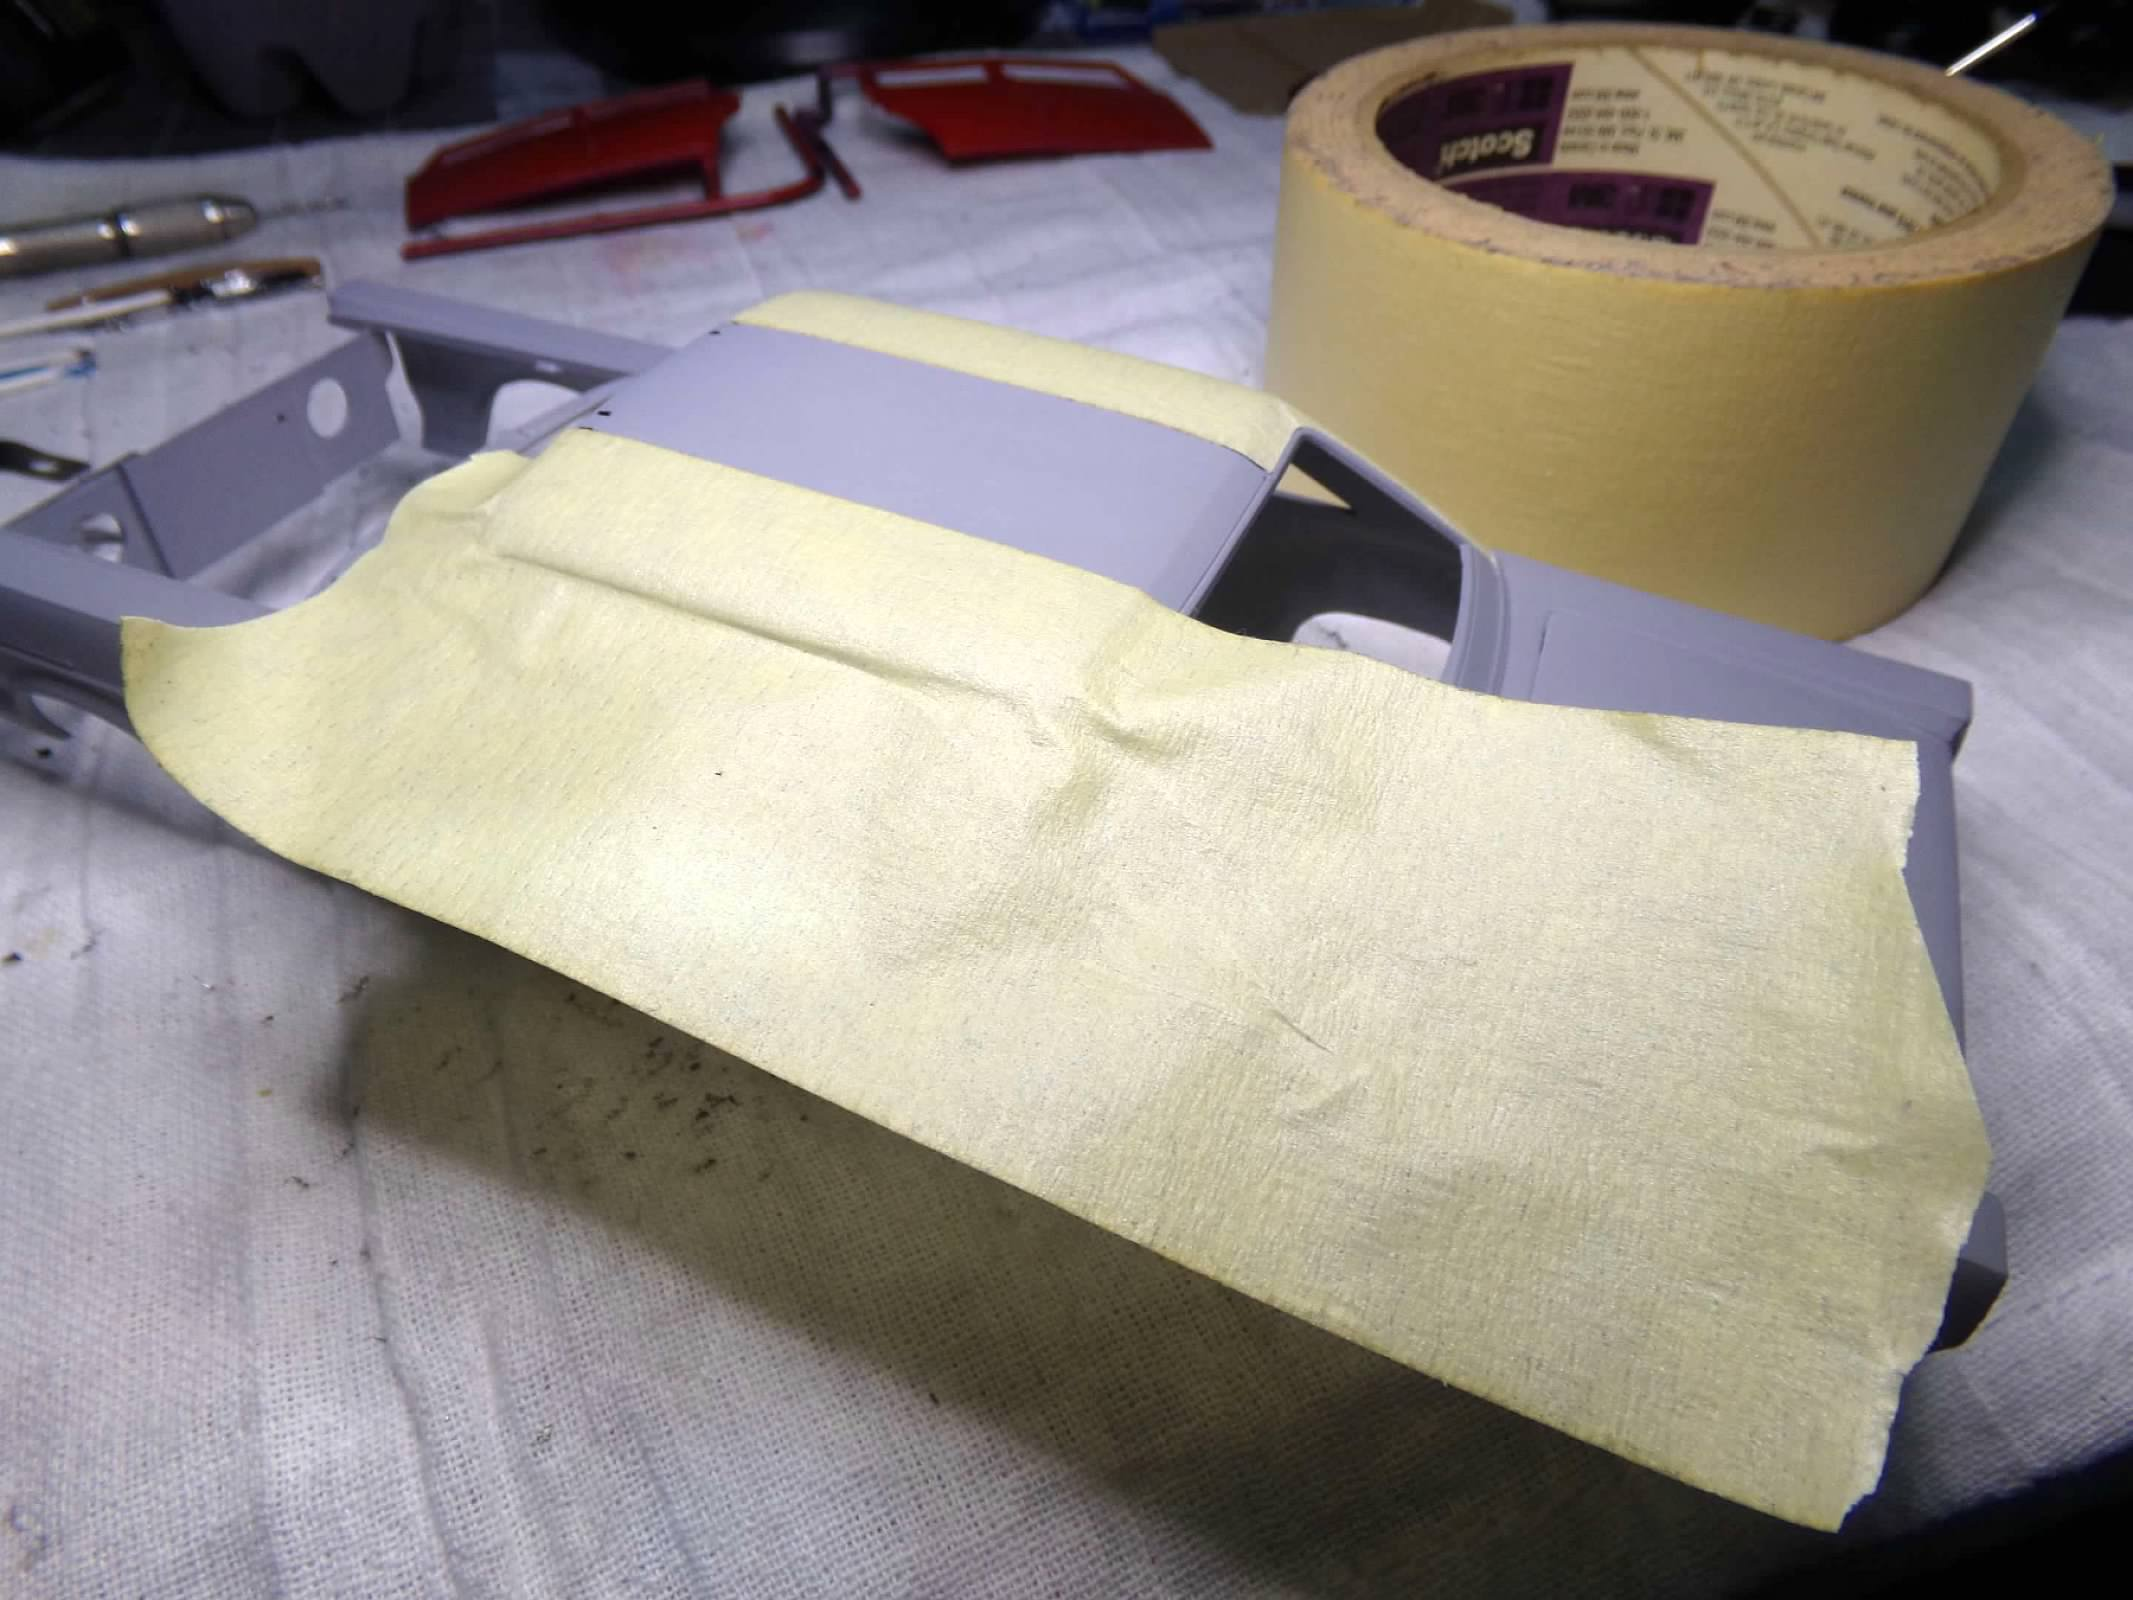
Thanks, Steve and Matt! I appreciate your comments! Steve, your comment is very well received. I, too, am always open to constructive criticism. My method is always the product of math when it comes to the vinyl top. The top is 2 1/4" wide so I first went with 3/4" wide across the top. That didn't look right so I then measured 5/8", 1 inch, 5/8" which made the center actually 1 1/8" so that I could have 1/16" overlap for the seam on each side. That's a lot of math at 7 AM while I am still drinking coffee trying to wake up. I now see I should have gone with 3/8", 1 1/2" (1 5/8"), and 3/8". That would have looked better, the 2" tape would still work widthwise, and it would have probably worked better with the square corners (less stretching). So in the future, I'll keep that in mind. Thanks for the comment, Steve!
-
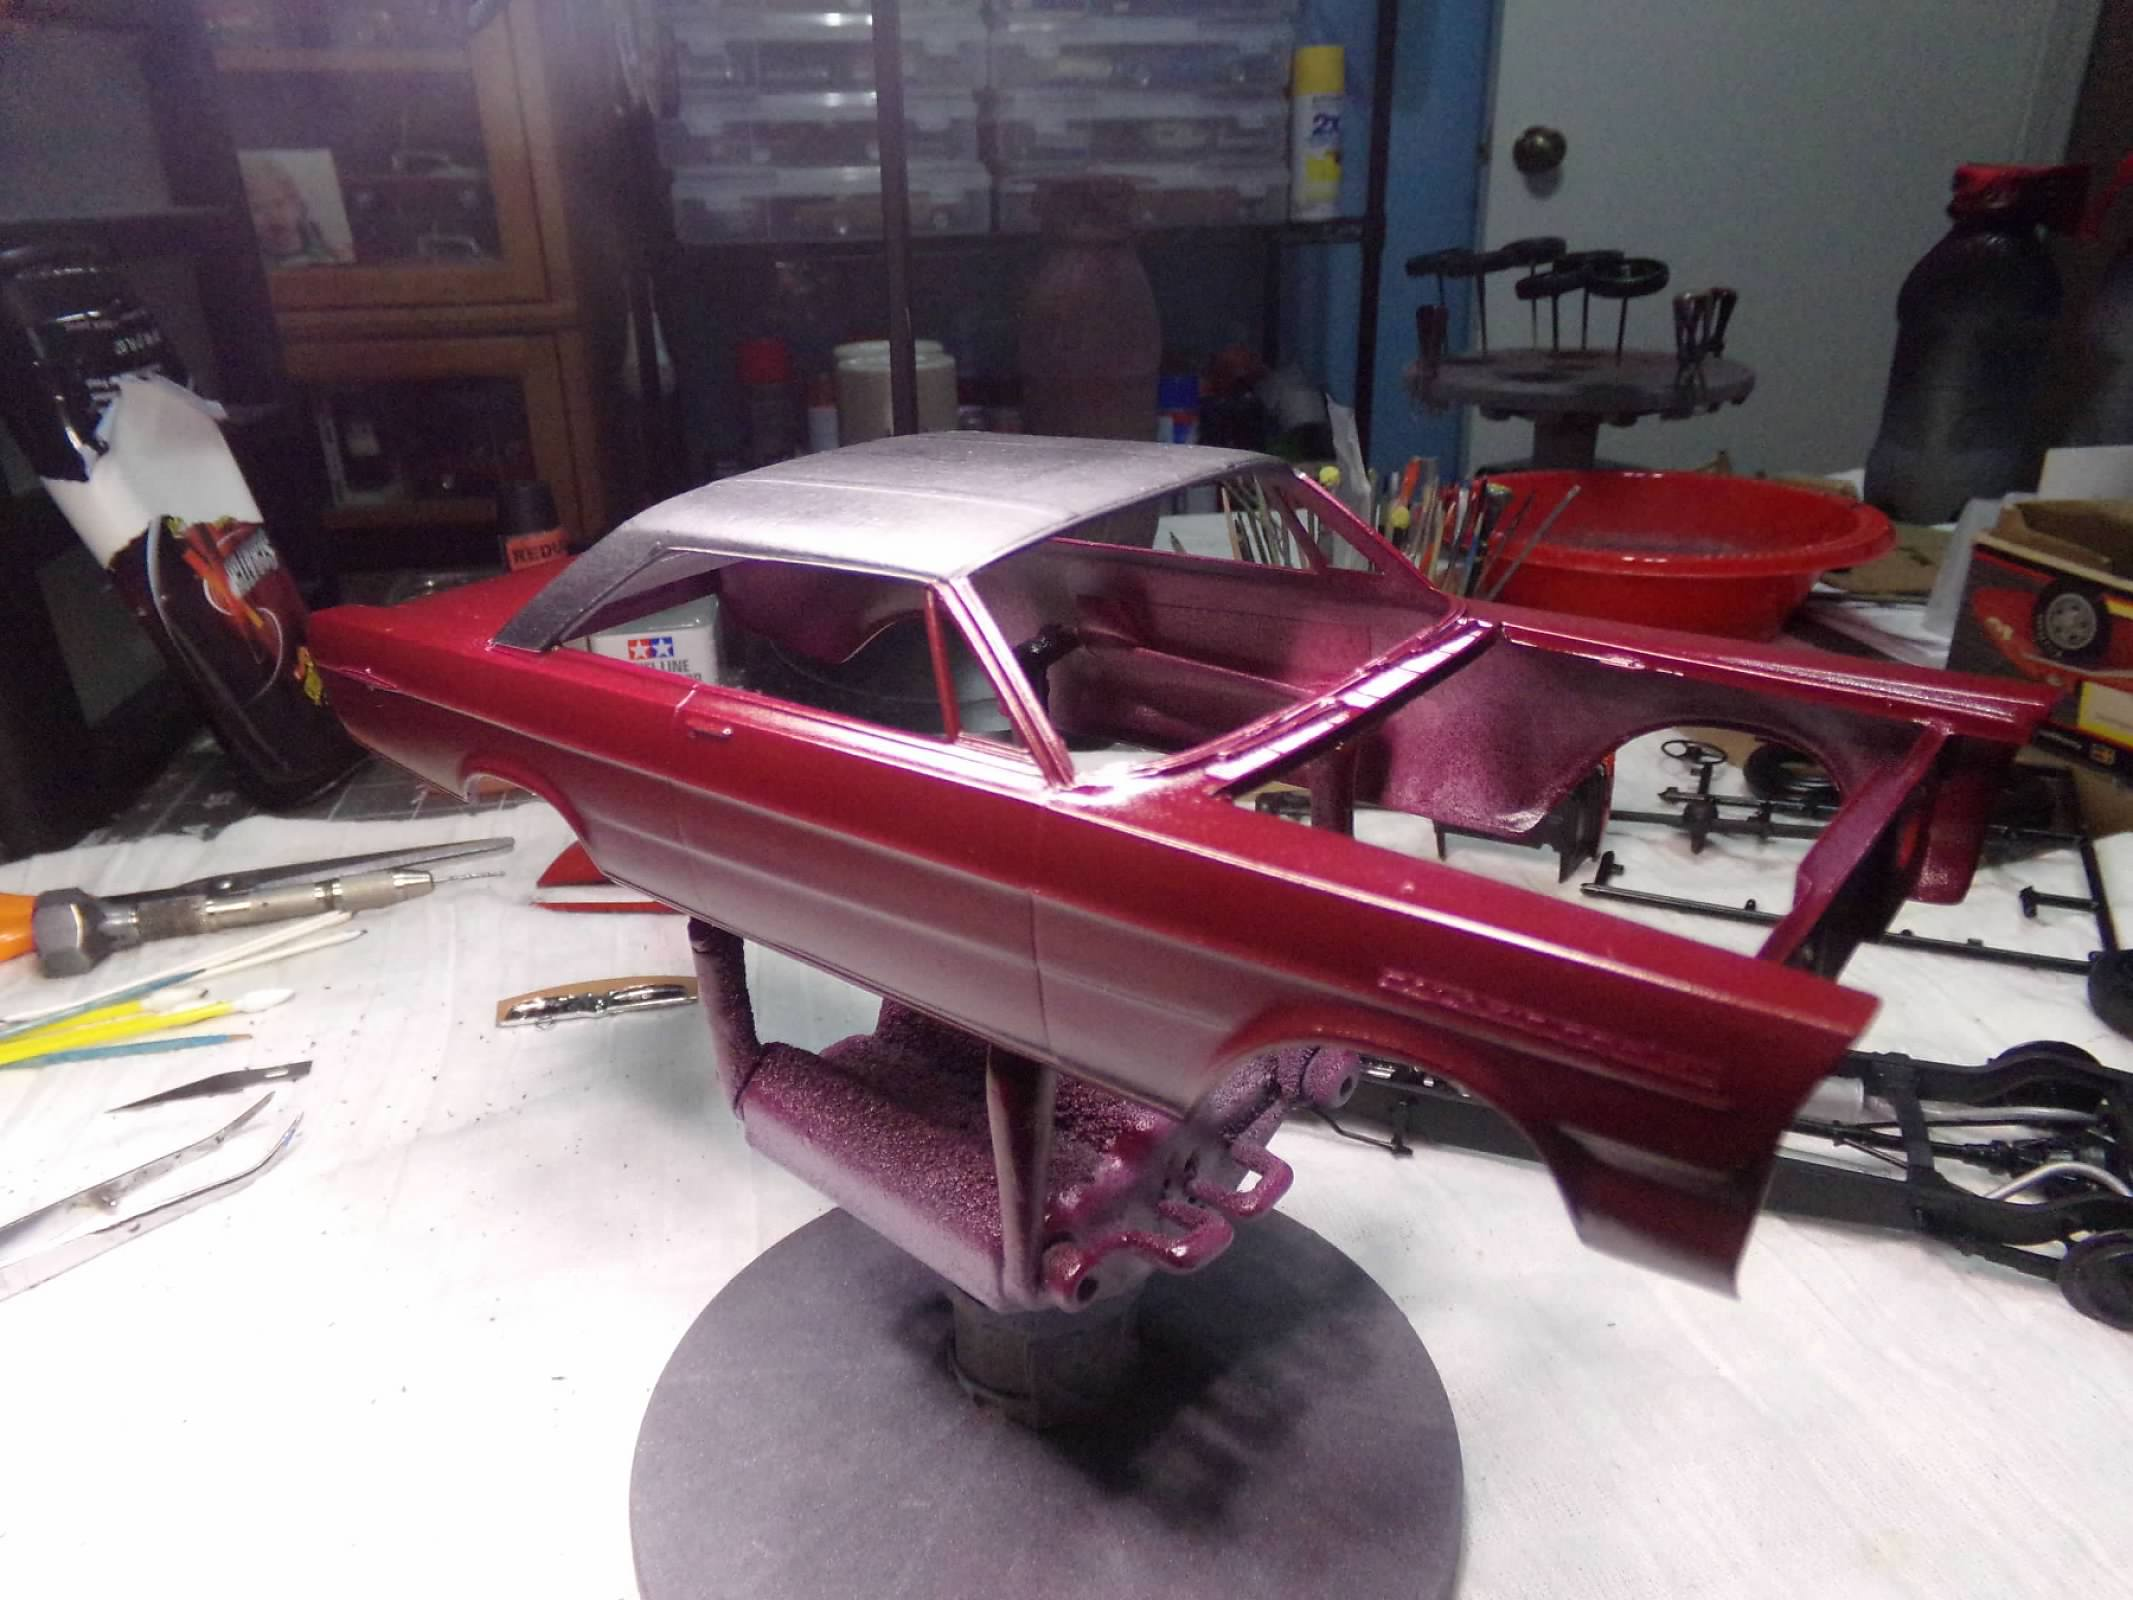
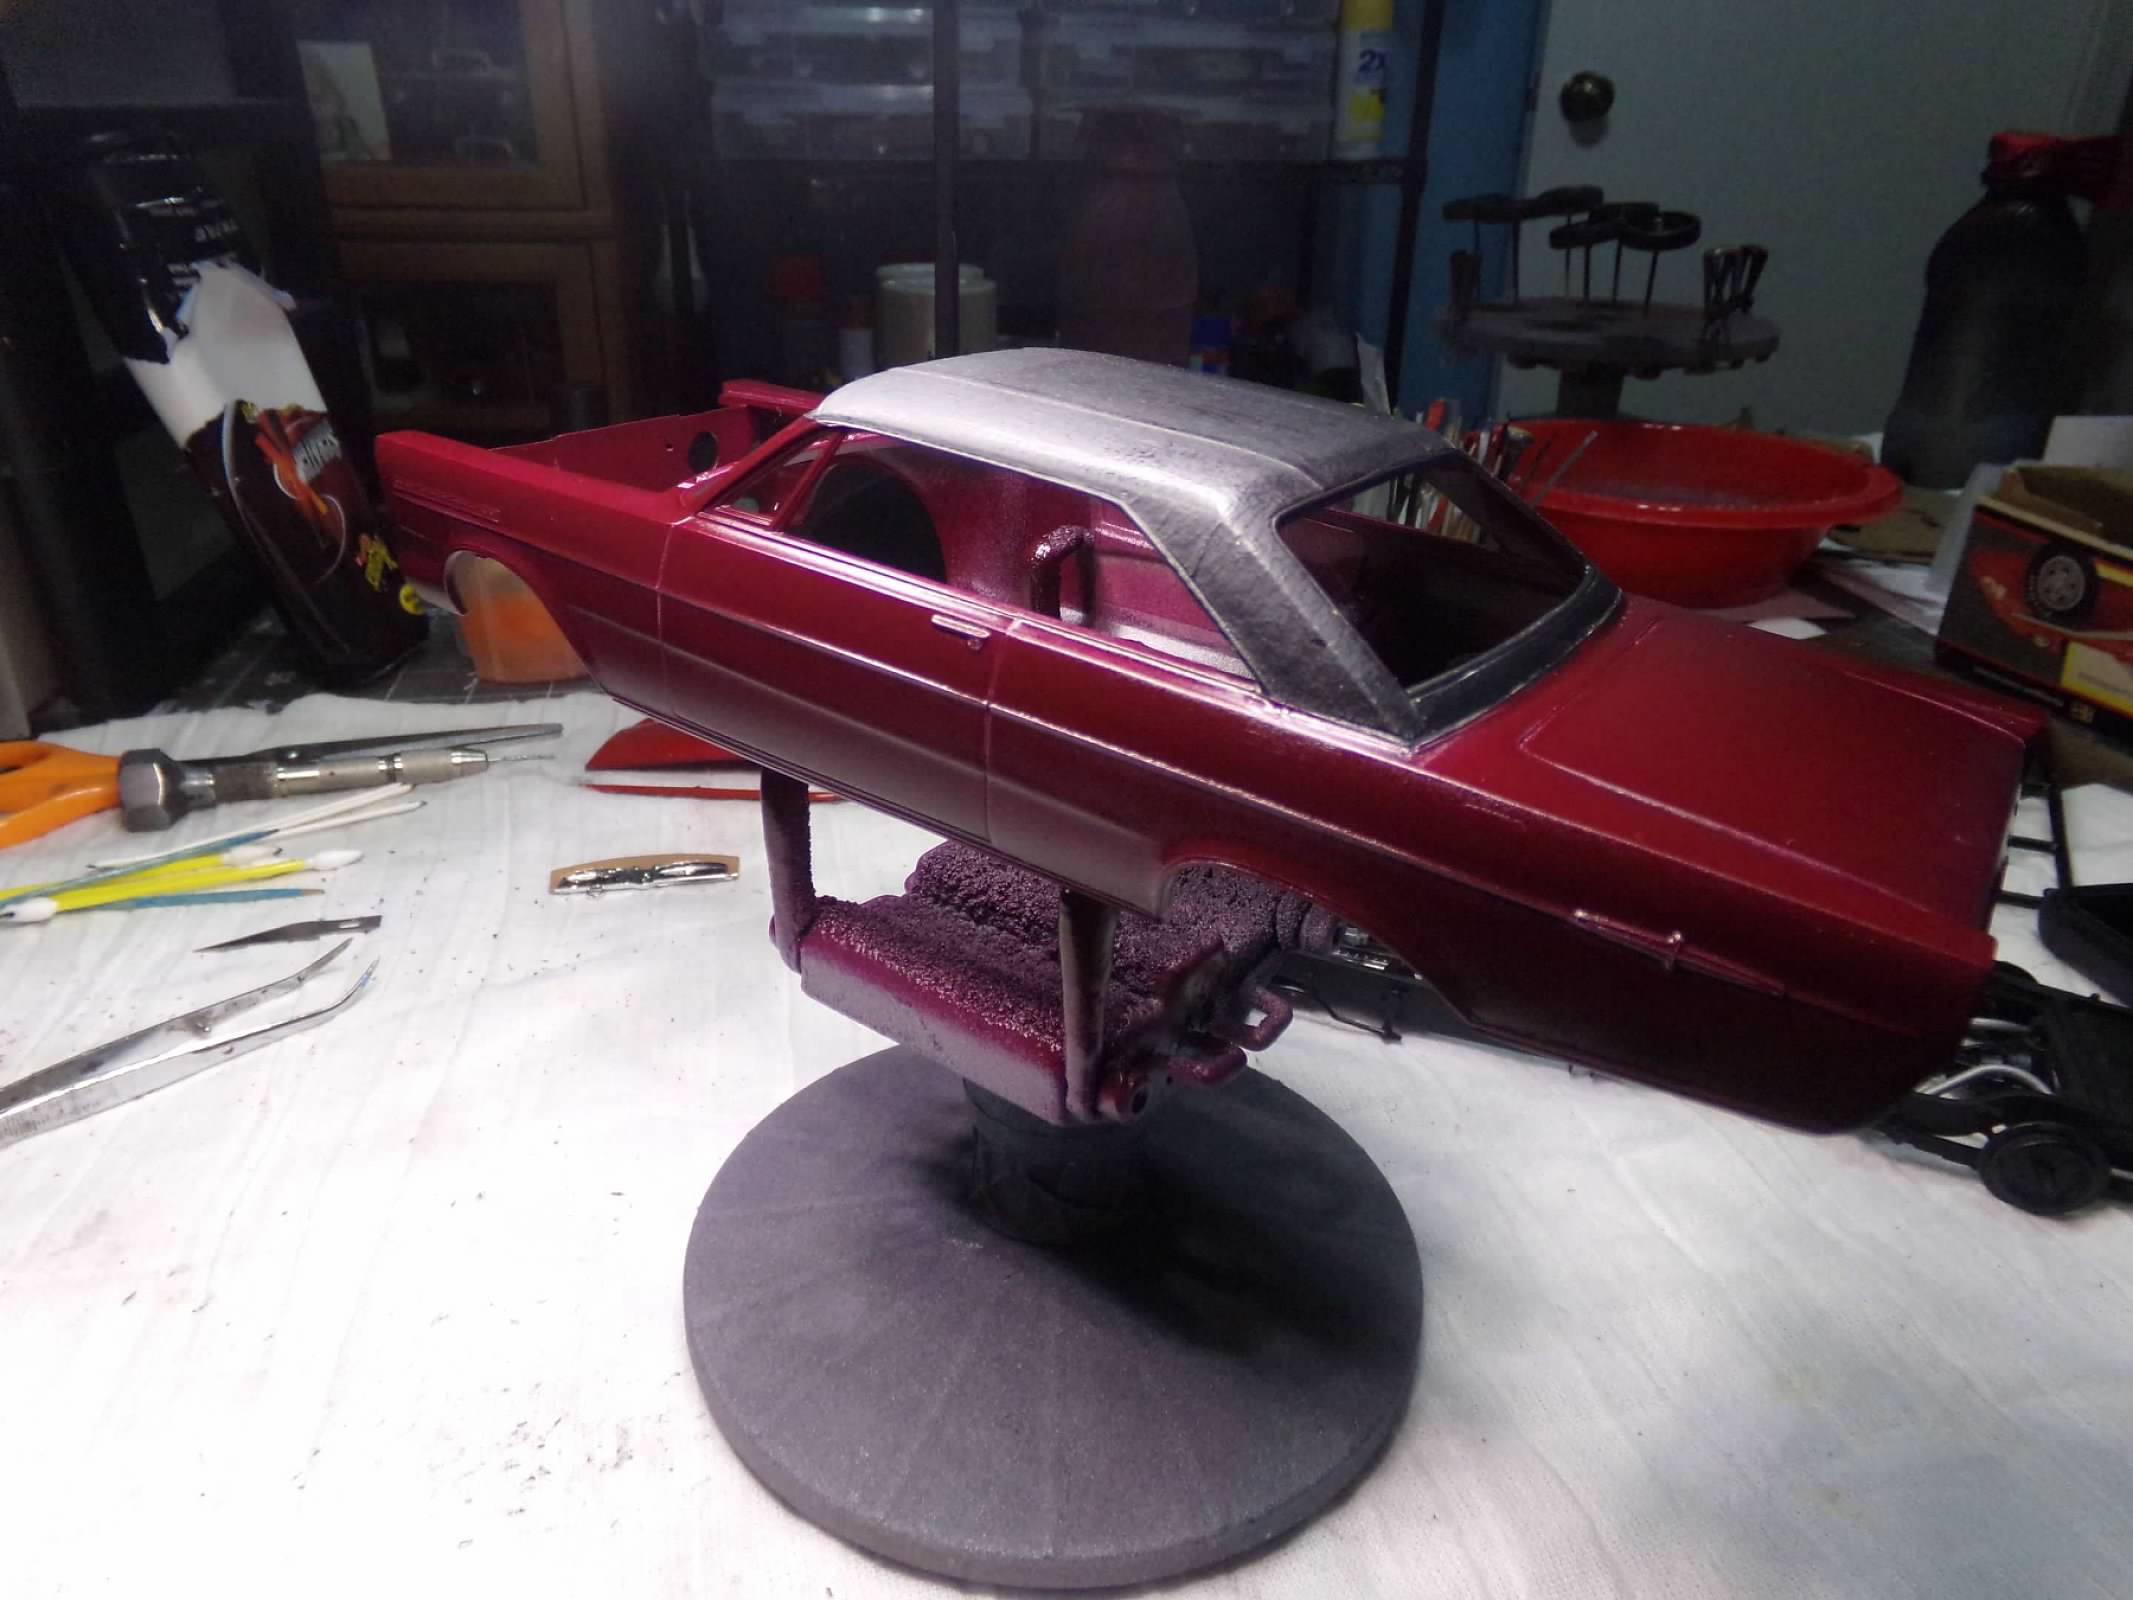
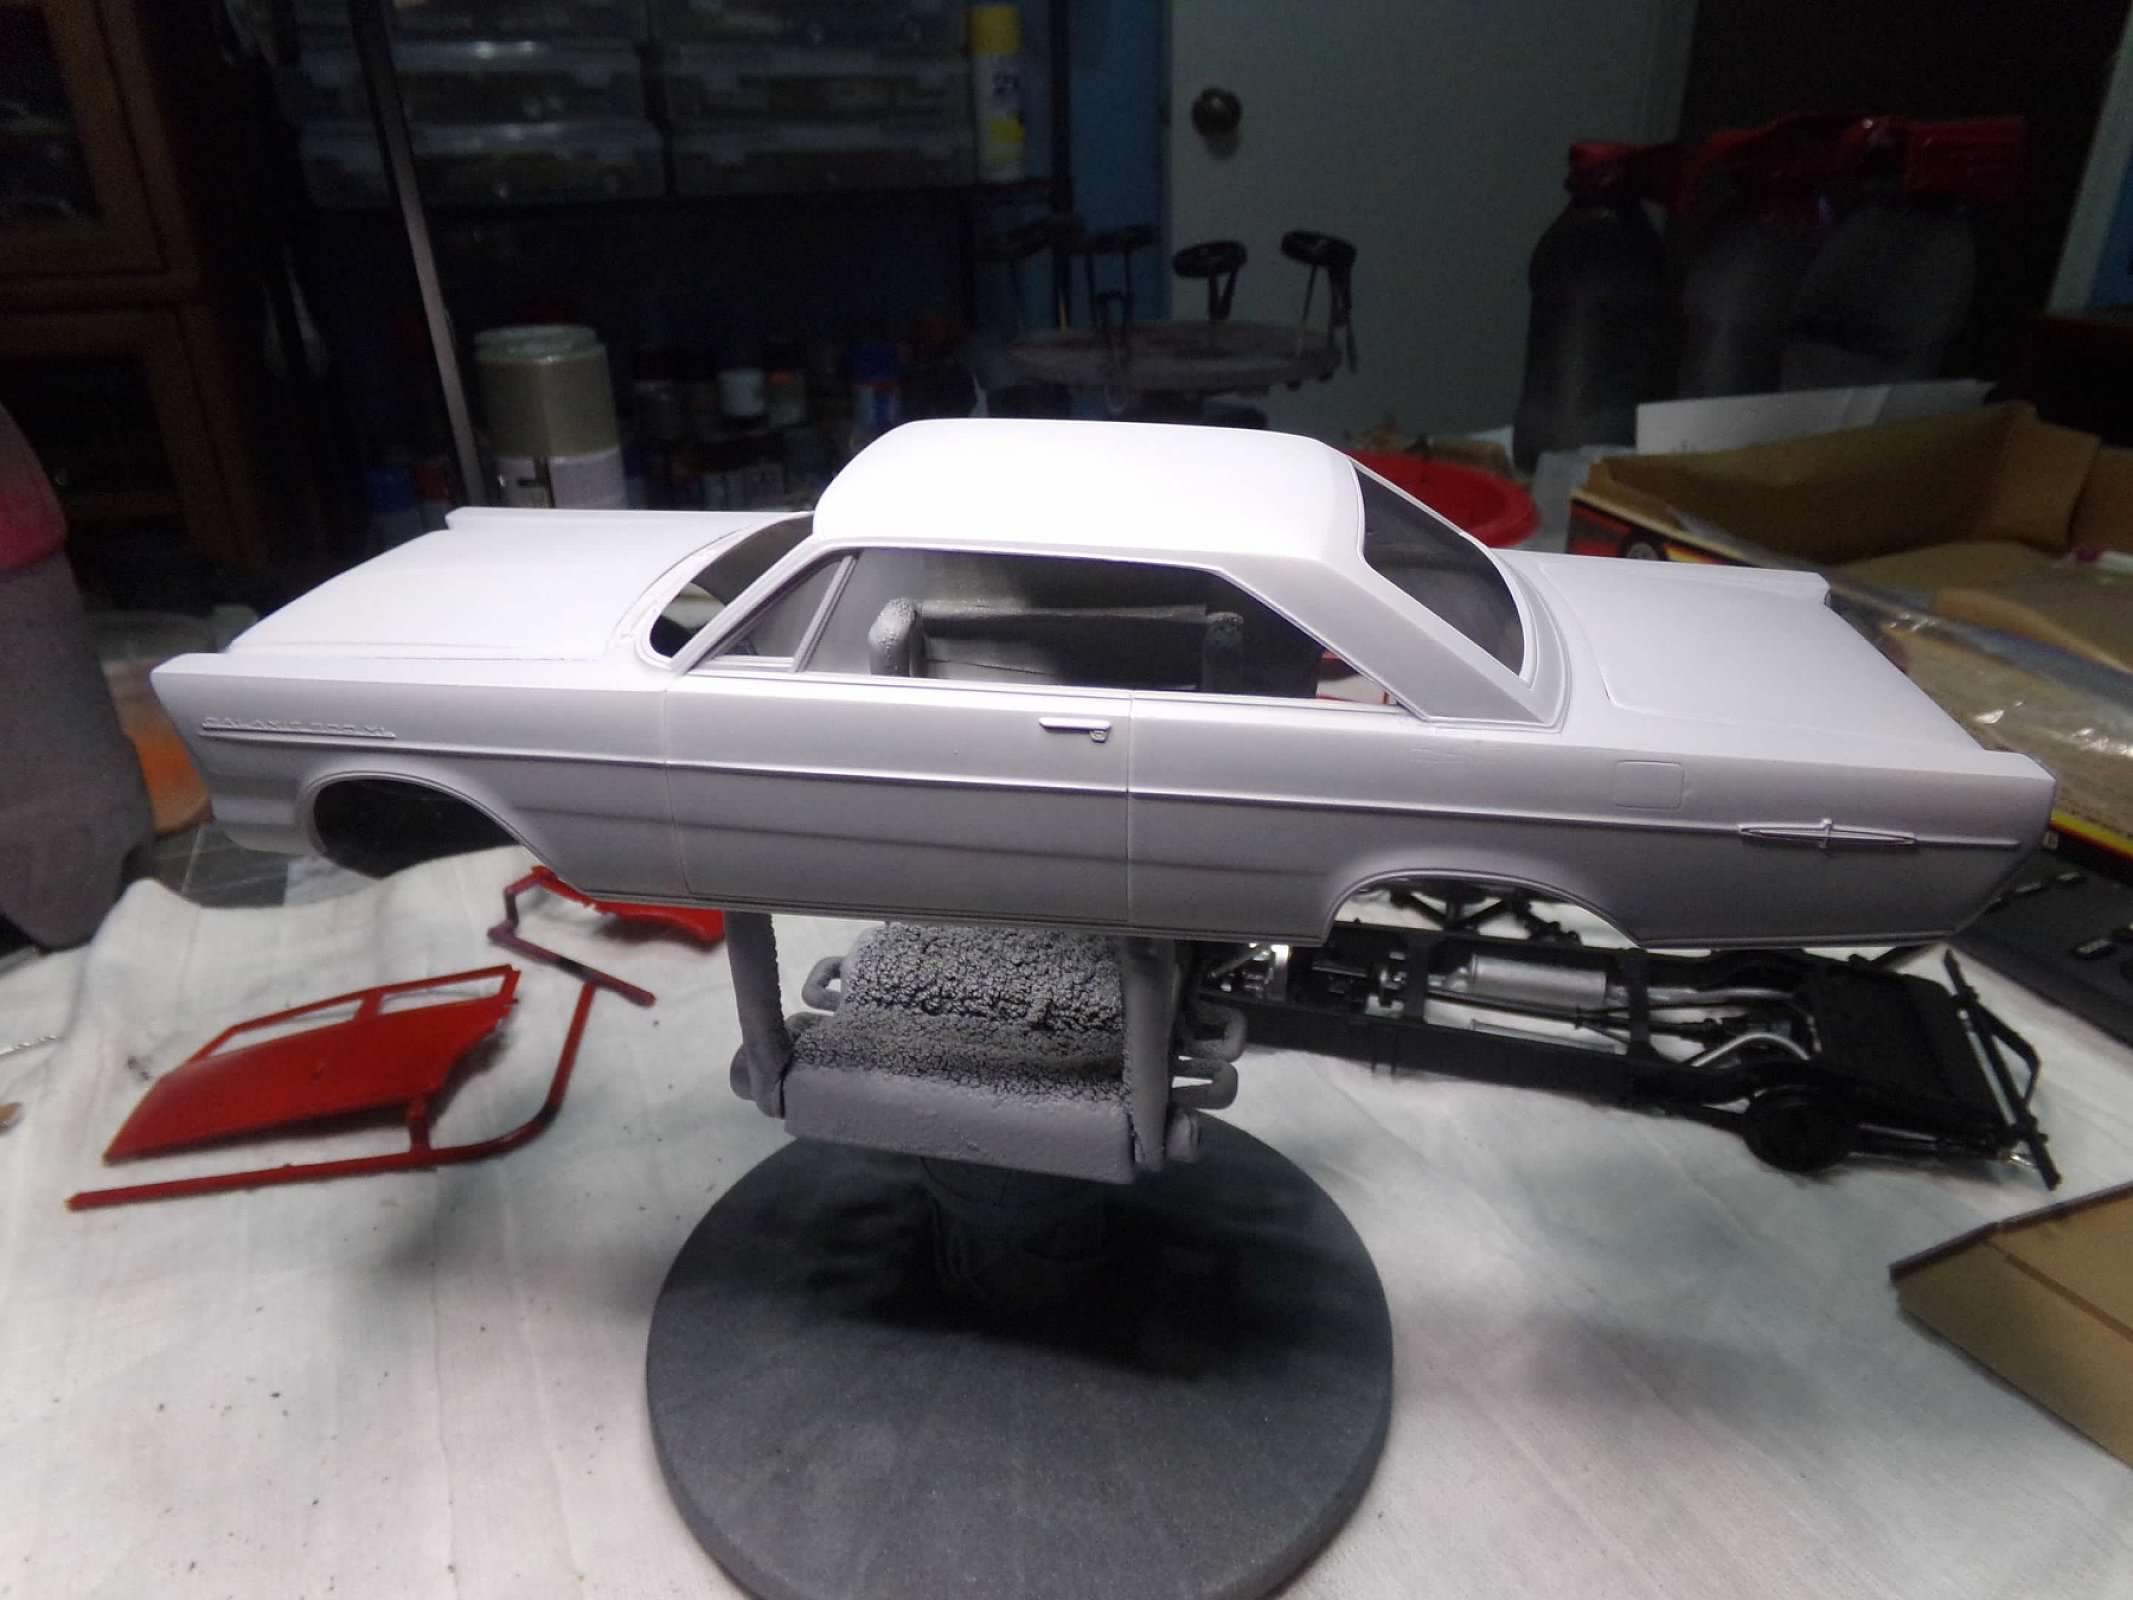
I started this one yesterday, prepping the body and adding a coat of primer. Its gonna rain starting tomorrow and the weather may be bad through the weekend. So while I am completing work on the Caddy, I wanted to get a body painted so I could at least rub it out and foil it while the weather is bad. So I thought I would have a vinyl top and started on it this morning. The square corners at the back made the tape method a little more difficult. See the issue? So I got the top on and painted it black before lunch. After lunch and a nap, I taped off the top and foiled the Ford lettering and small Galaxie 500 XL lettering on the front fenders. So now its about 4.30 PM and I need to get paint on it before I lose daylight. So I painted two coats of Tamiya Maroon and 1 coat of clear finishing about 5:15 PM. So here's the results. Finish is pretty smooth and should rub out well. I'll probably give the top a light coat of clear later. I removed the paint from the foiled lettering with some lacquer thinner and small Tamiya cotton swabs. Thanks for looking!
-
1933 Cadillac Fleetwood All Weather Phaeton
ModelcarJR replied to ModelcarJR's topic in WIP: Model Cars
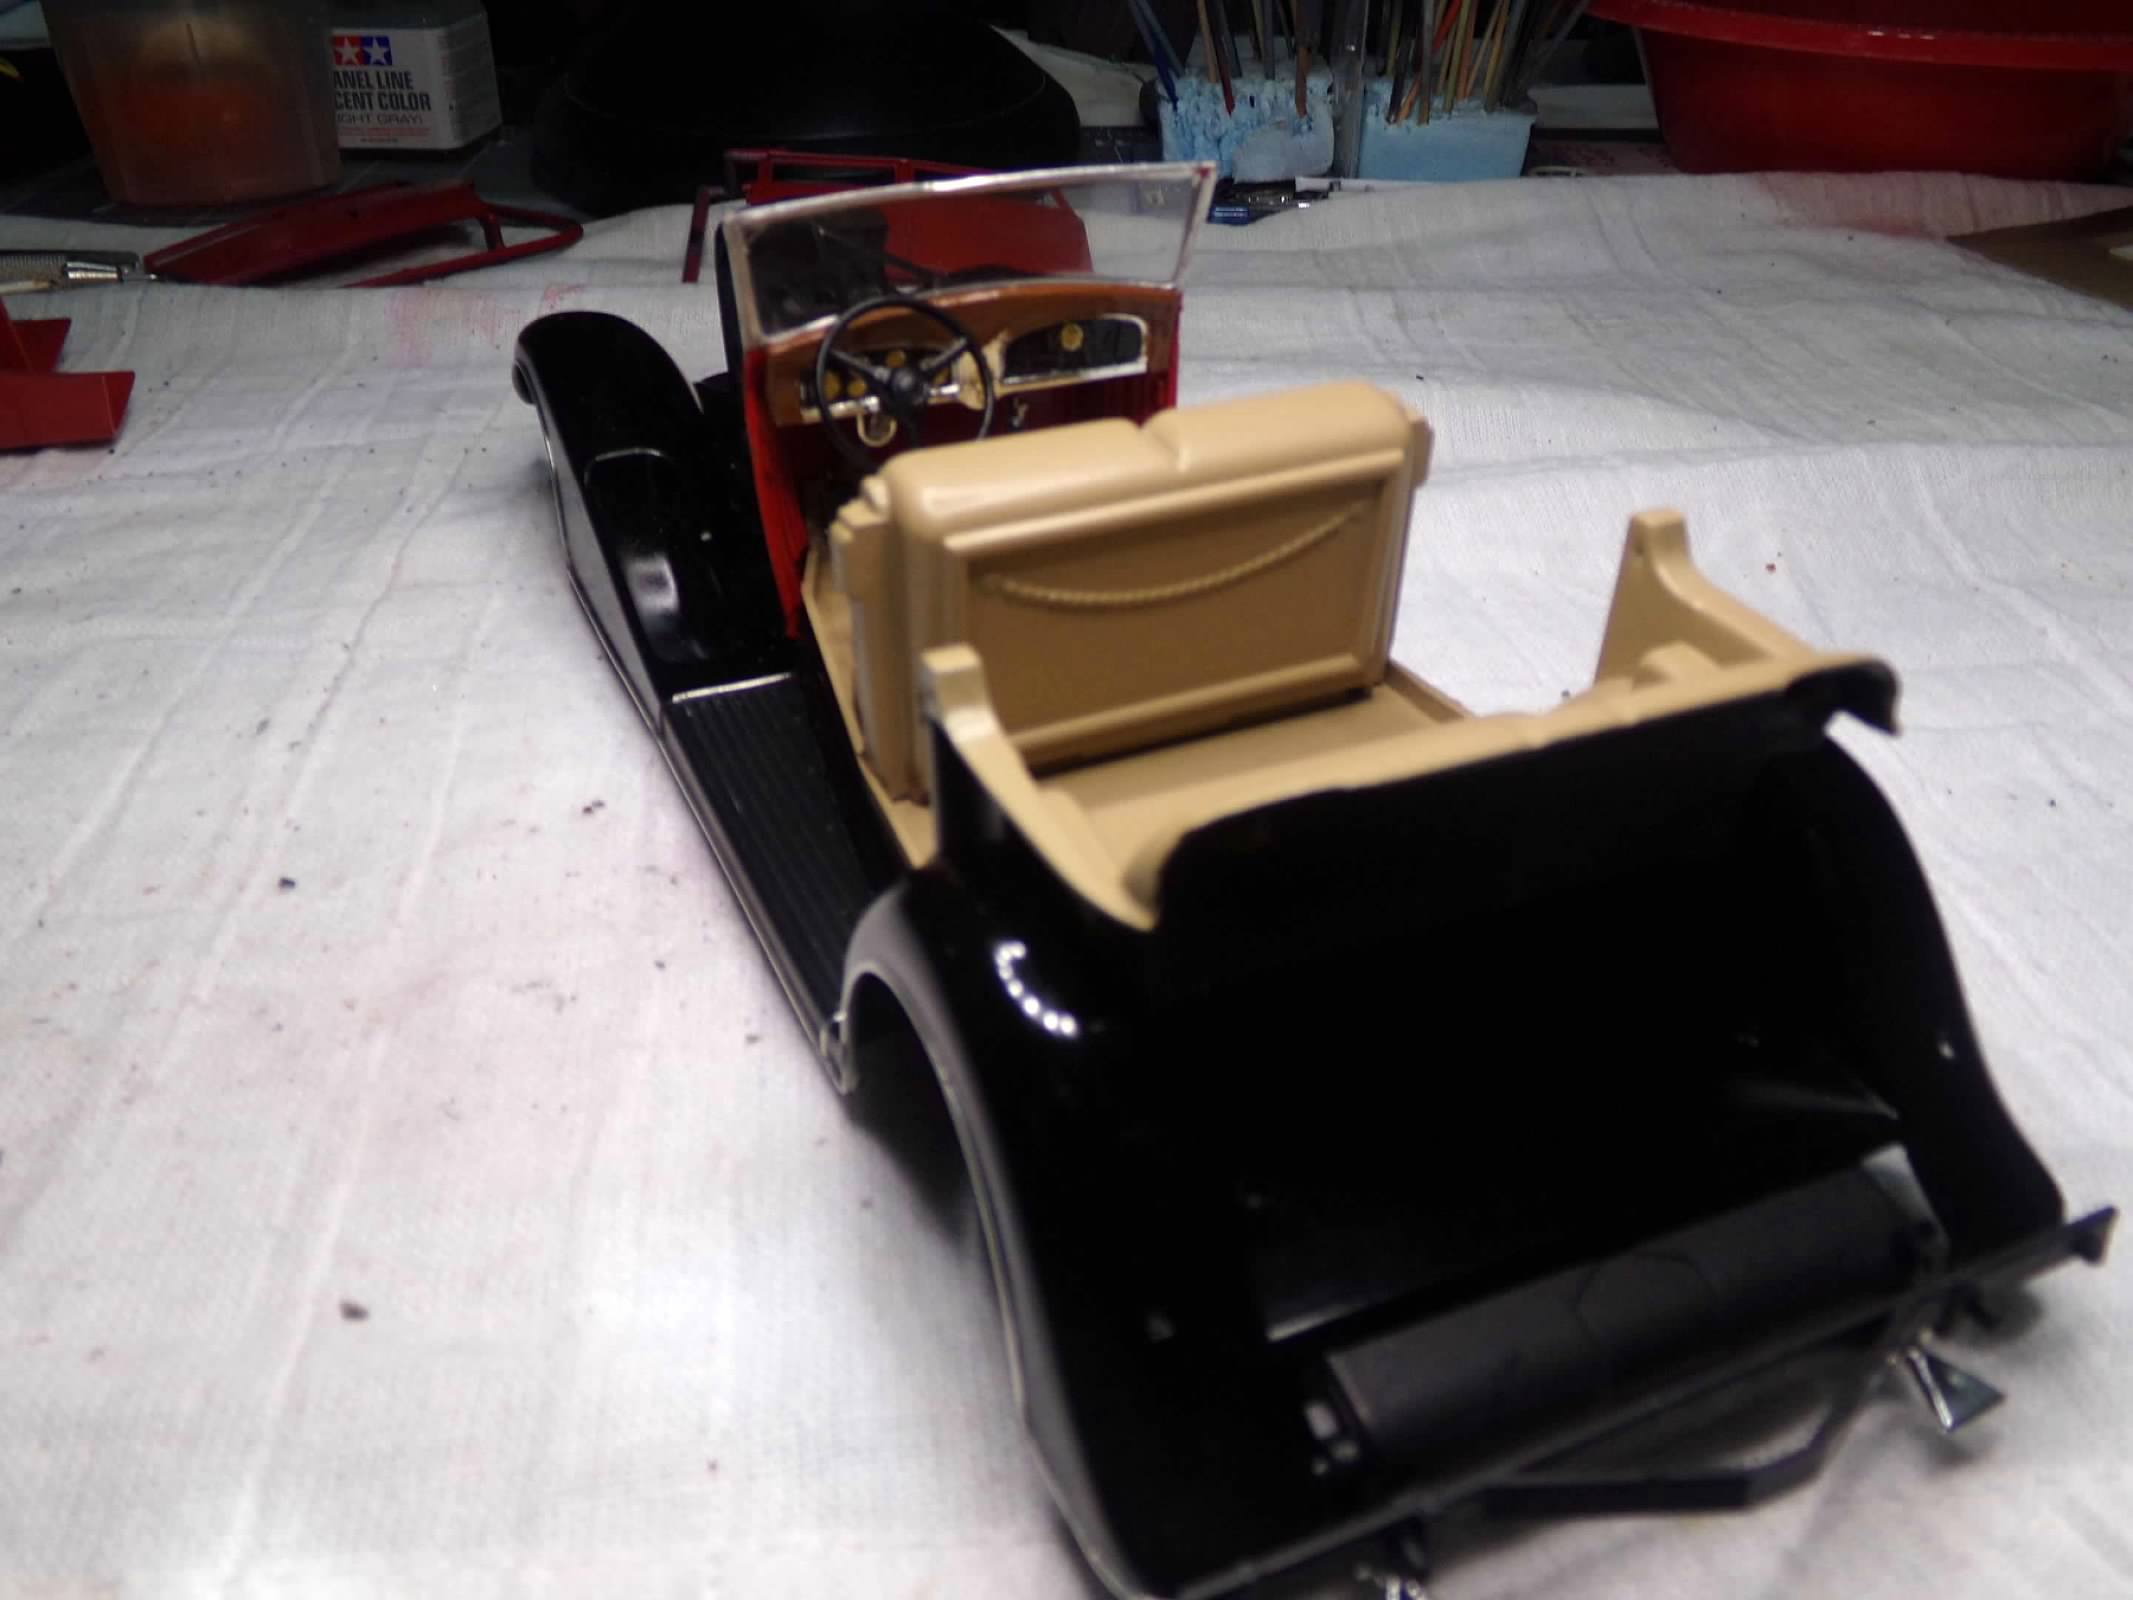
Thanks, Bob, David, Carl and John! I appreciate your comments! I looked a few photos of this Caddy and decided I would jazz this one up a little. I foiled the steering column and installed it. But I should have installed it before the engine as it was a real challenge installing it after the engine is in on the inside of the frame rail, especially since the bottom of the frame is closed off around the engine. I enjoy foiling but it does take a lot of time and patience. I started by foiling the edges of the fender unit on the left side. But after a couple of hours, I took a break and then when returning thought about getting another body painted since its gonna rain on Thursday. I picked a 65 Ford Galaxie 500 XL out of the closet and prepped the body. This model has an opening trunk but I have glued it shut. Tomorrow, I'll foil the small lettering on the trunk, hood, and front fender before paint to be revealed after paint. I'm also gonna put on a vinyl top, using masking tape since the border is already built into the body. Next is paint for the body which will be Tamiya Maroon. The interior will be black and white. But for now, I just get the body painted and continue on the Caddy. Thanks for looking! ?
-
1933 Cadillac Fleetwood All Weather Phaeton
ModelcarJR replied to ModelcarJR's topic in WIP: Model Cars
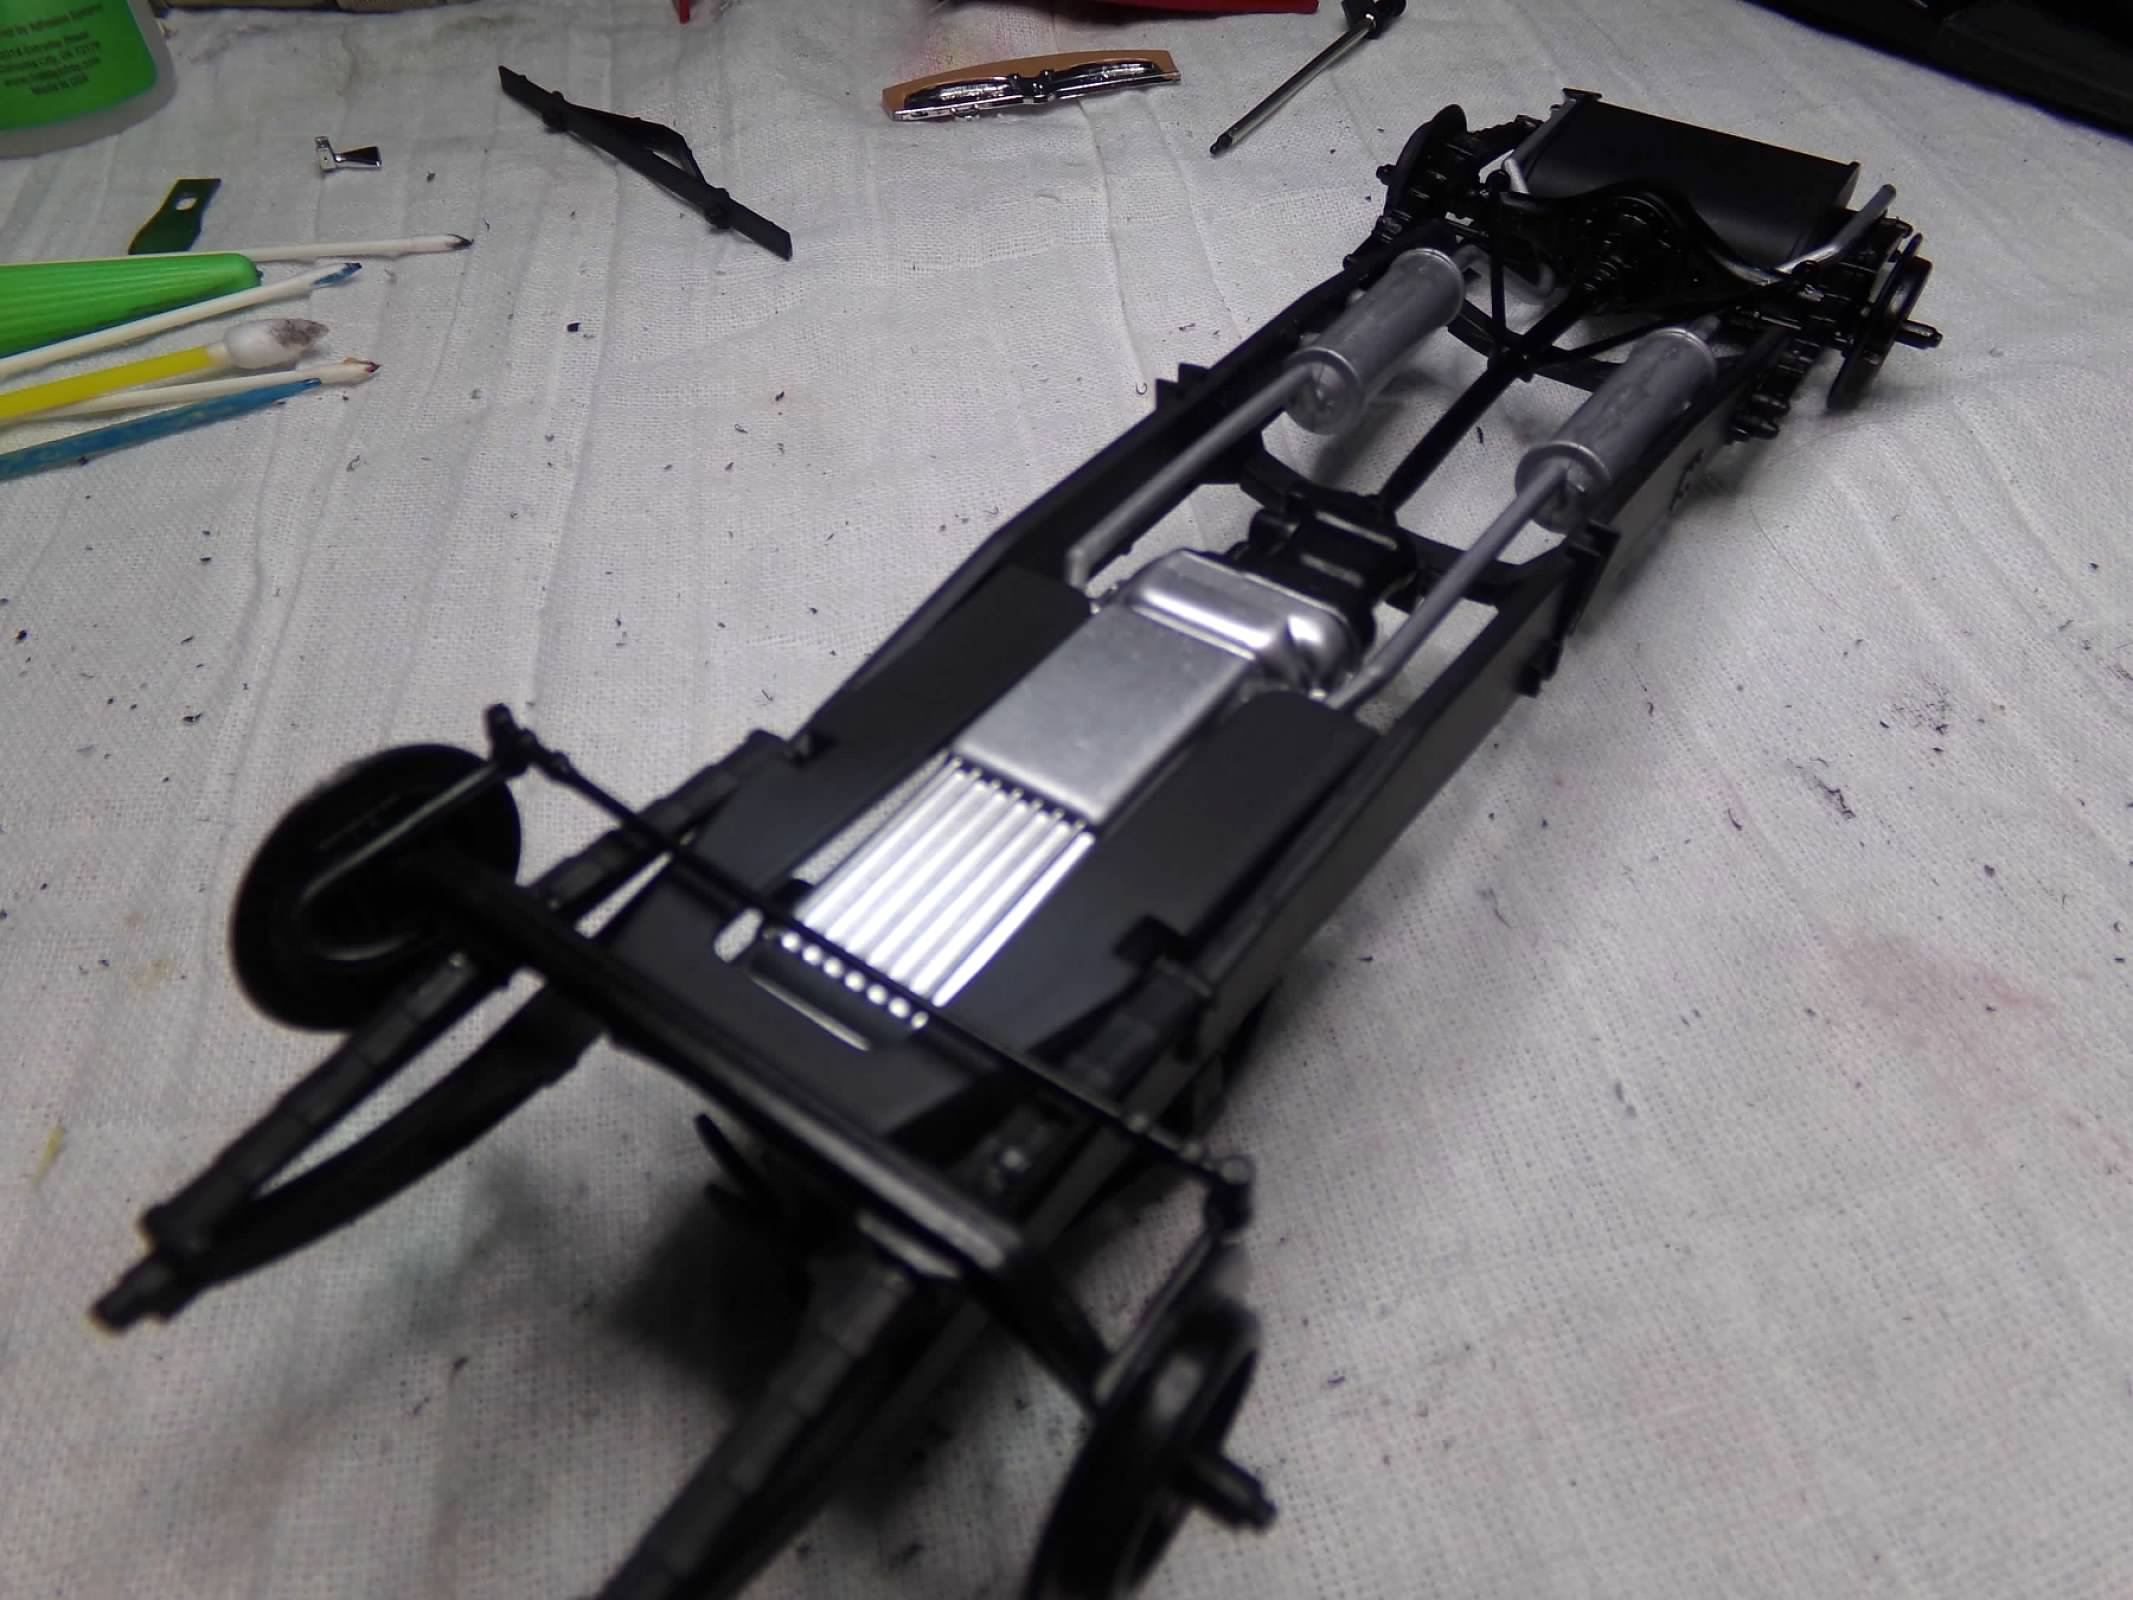
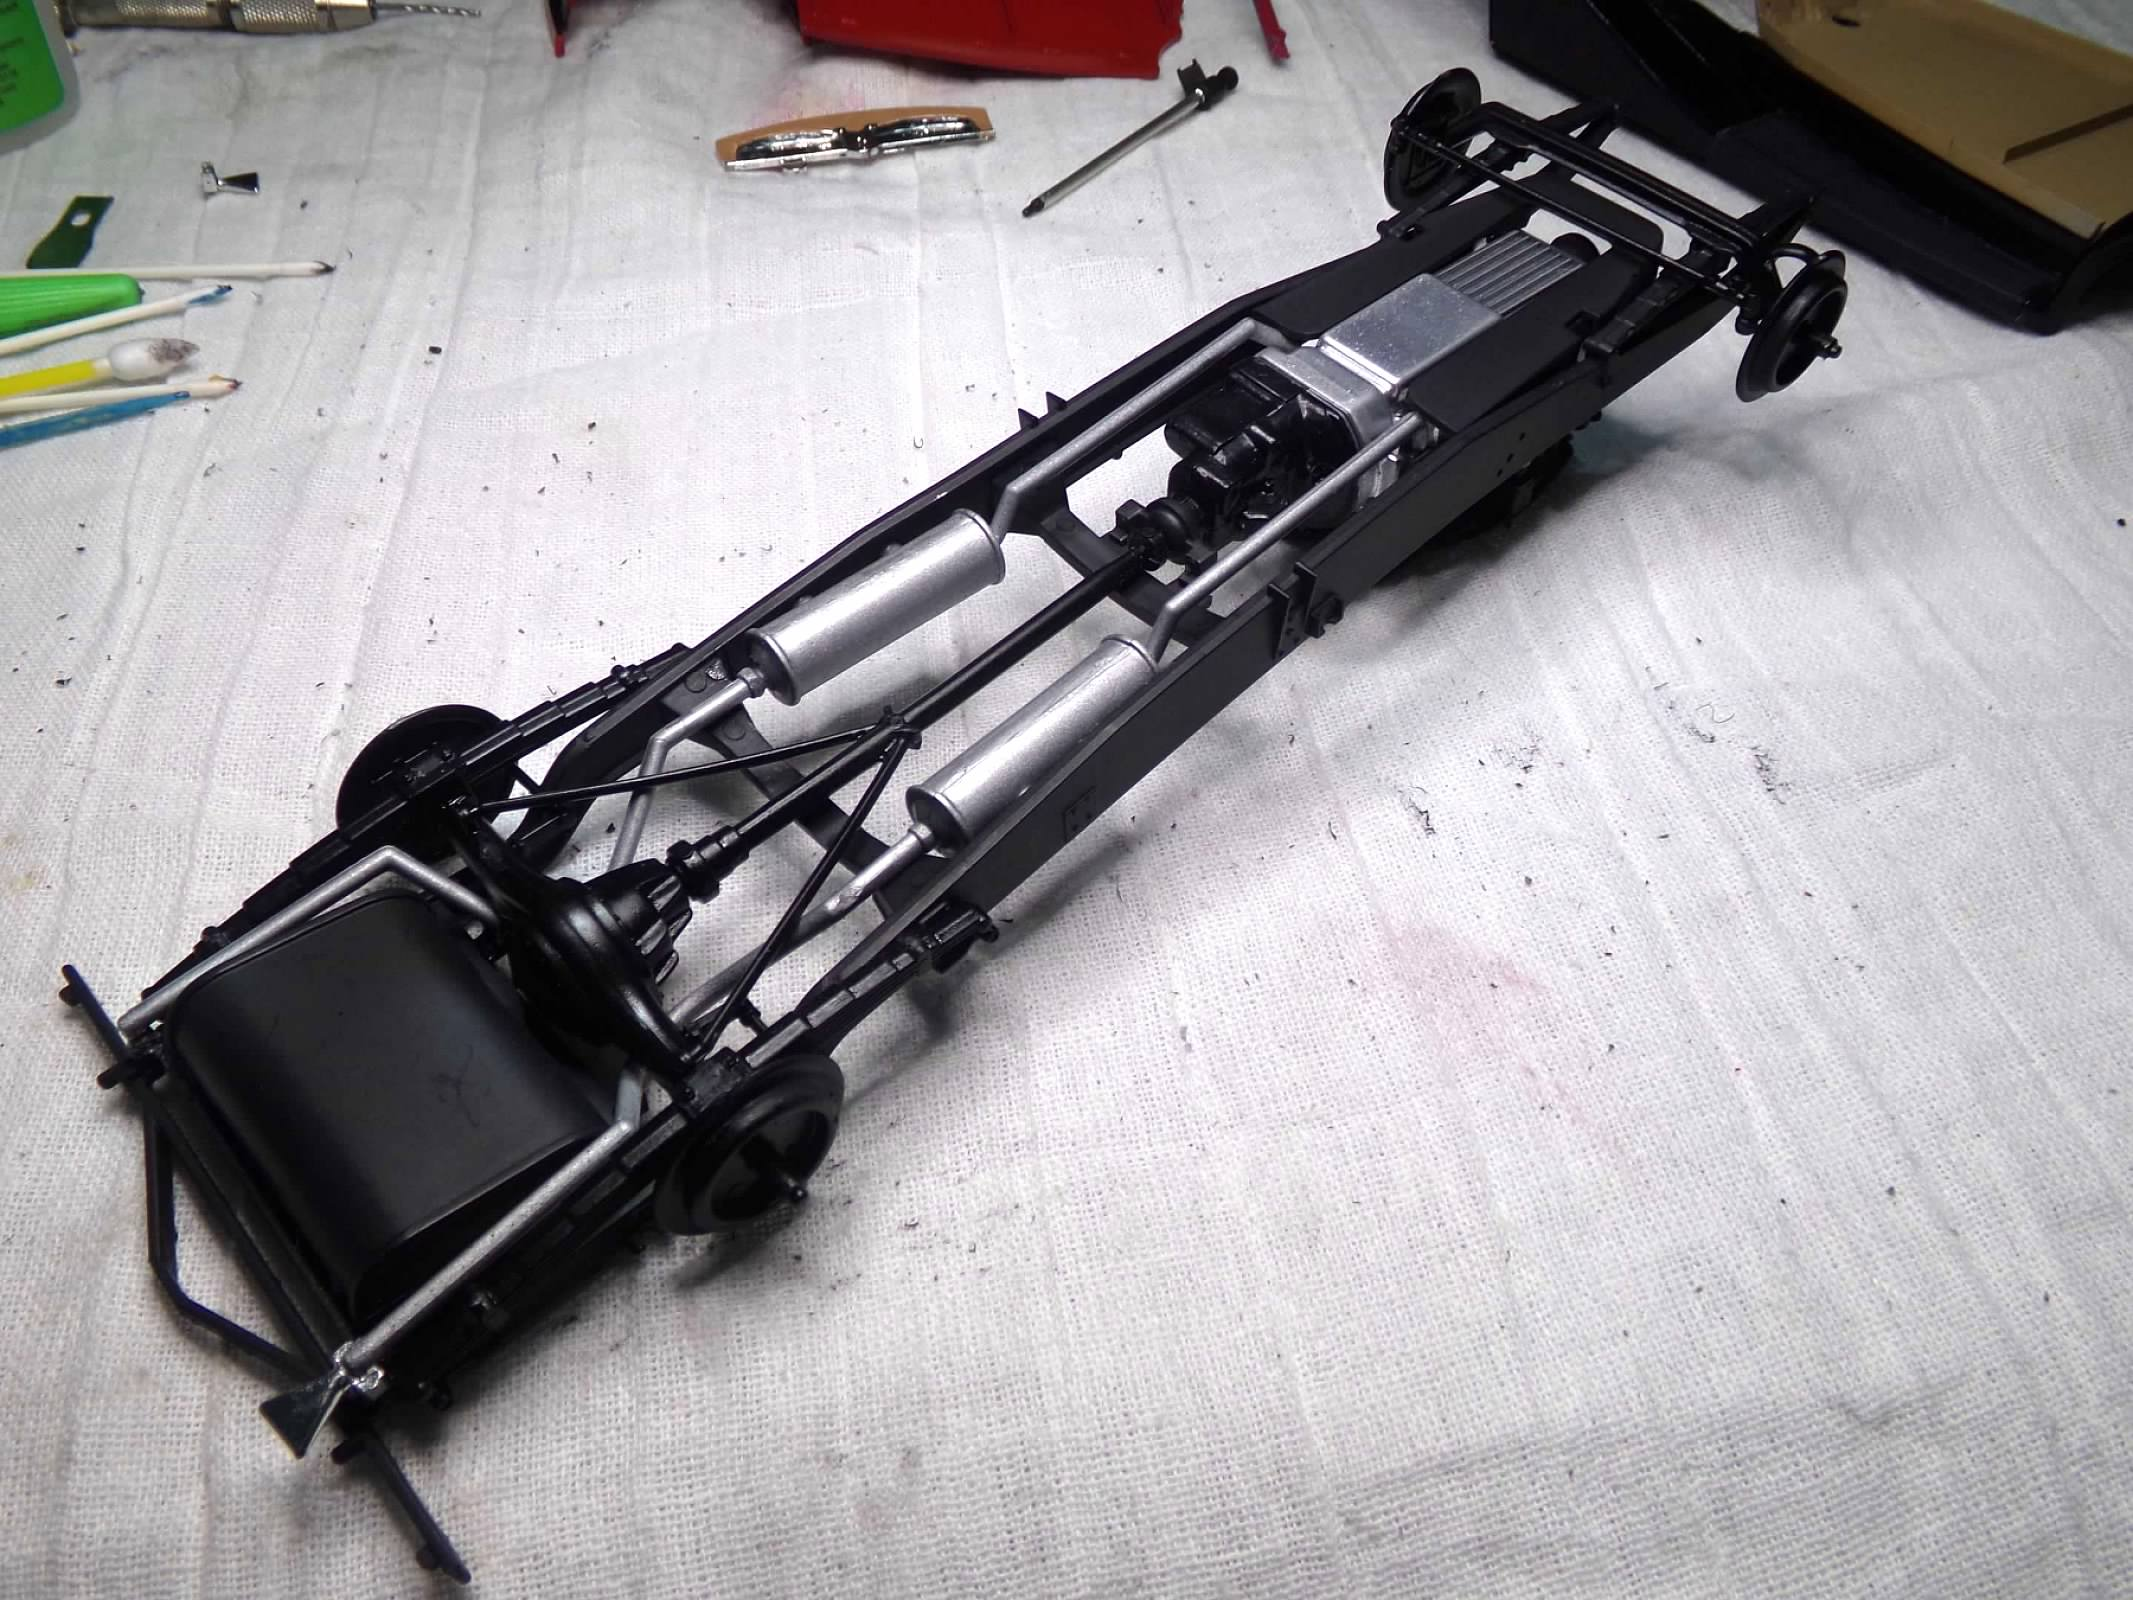
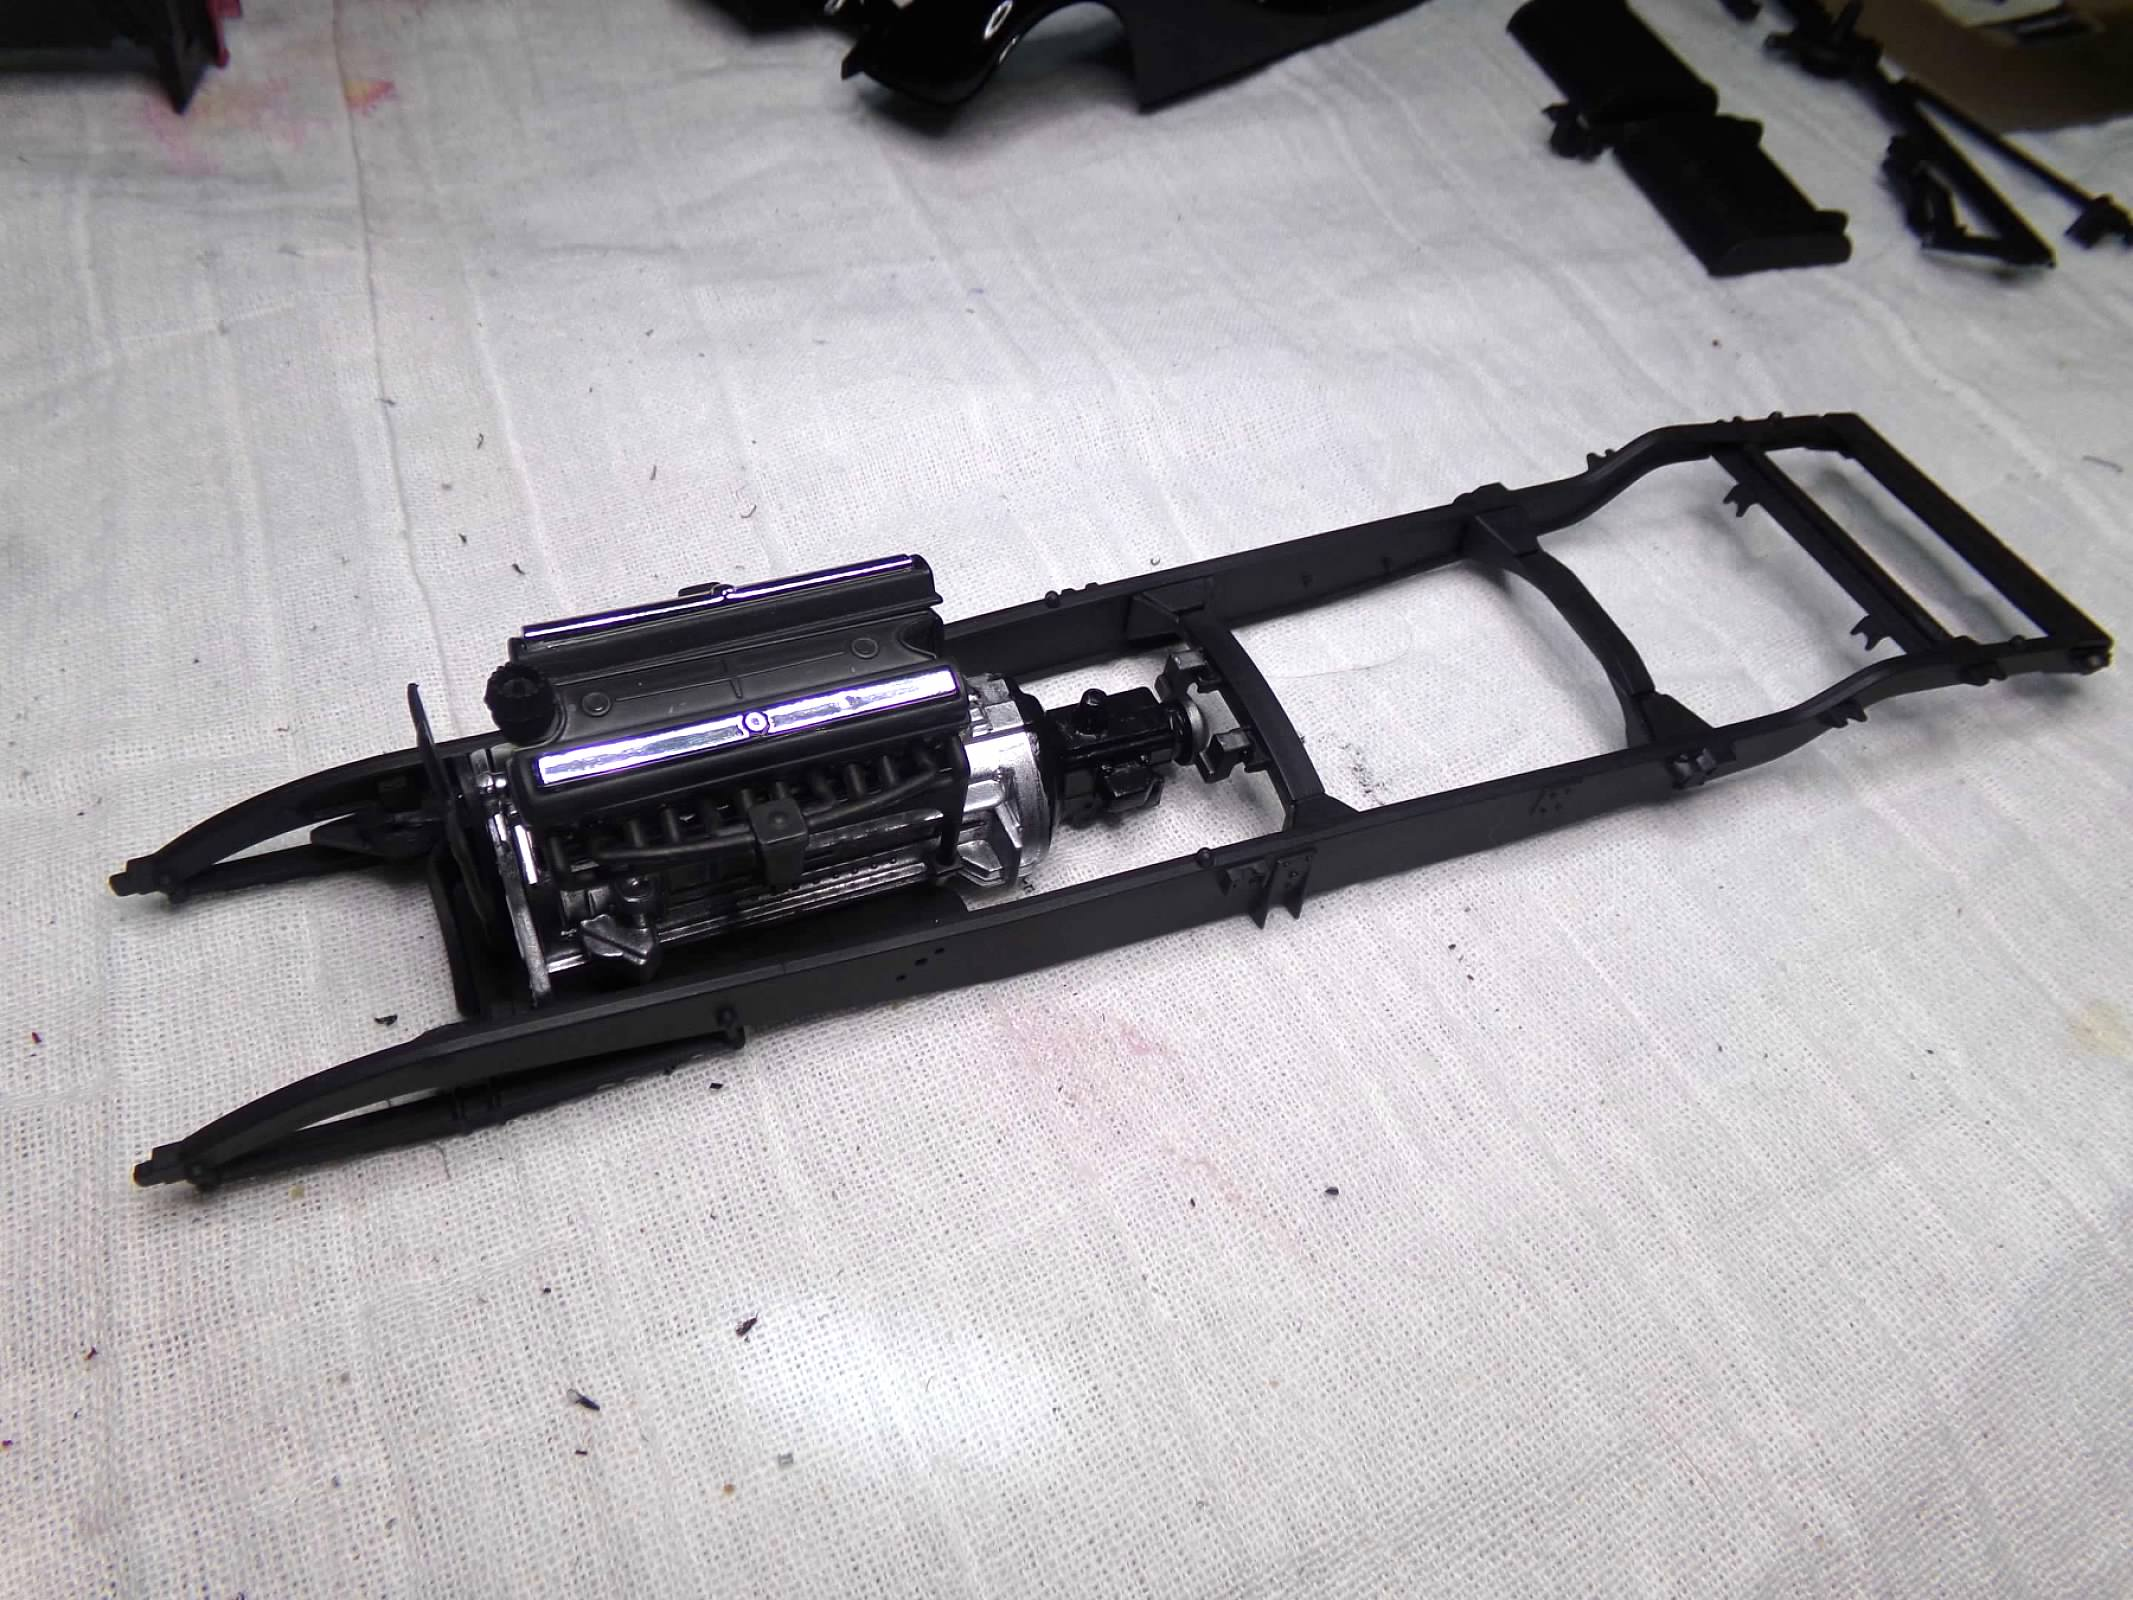
Thanks, Carl! I appreciate your comment! Finished the chassis today. I kept looking for problems in these old instructions or parts that didn't fit but I haven't found anything yet. Everything went together well with good pins and pin locating holes. Gas tank, exhaust pipes, front and rear suspensions, engine, and driveshaft all located well and are complete. I knocked off an exhaust tip but I'll wait and add it back after its on wheels. I also rubbed out the fender unit and in the morning I'll get started putting the interior together. Thanks for looking! ?
-
Thanks, all! I appreciate your comments! Bill, my camera has a lot of problems - but I can't fix 'em. Maybe Santa will bring me a new one!
-
Thanks, again everyone! I appreciate your kind comments! ?
-
1933 Cadillac Fleetwood All Weather Phaeton
ModelcarJR replied to ModelcarJR's topic in WIP: Model Cars
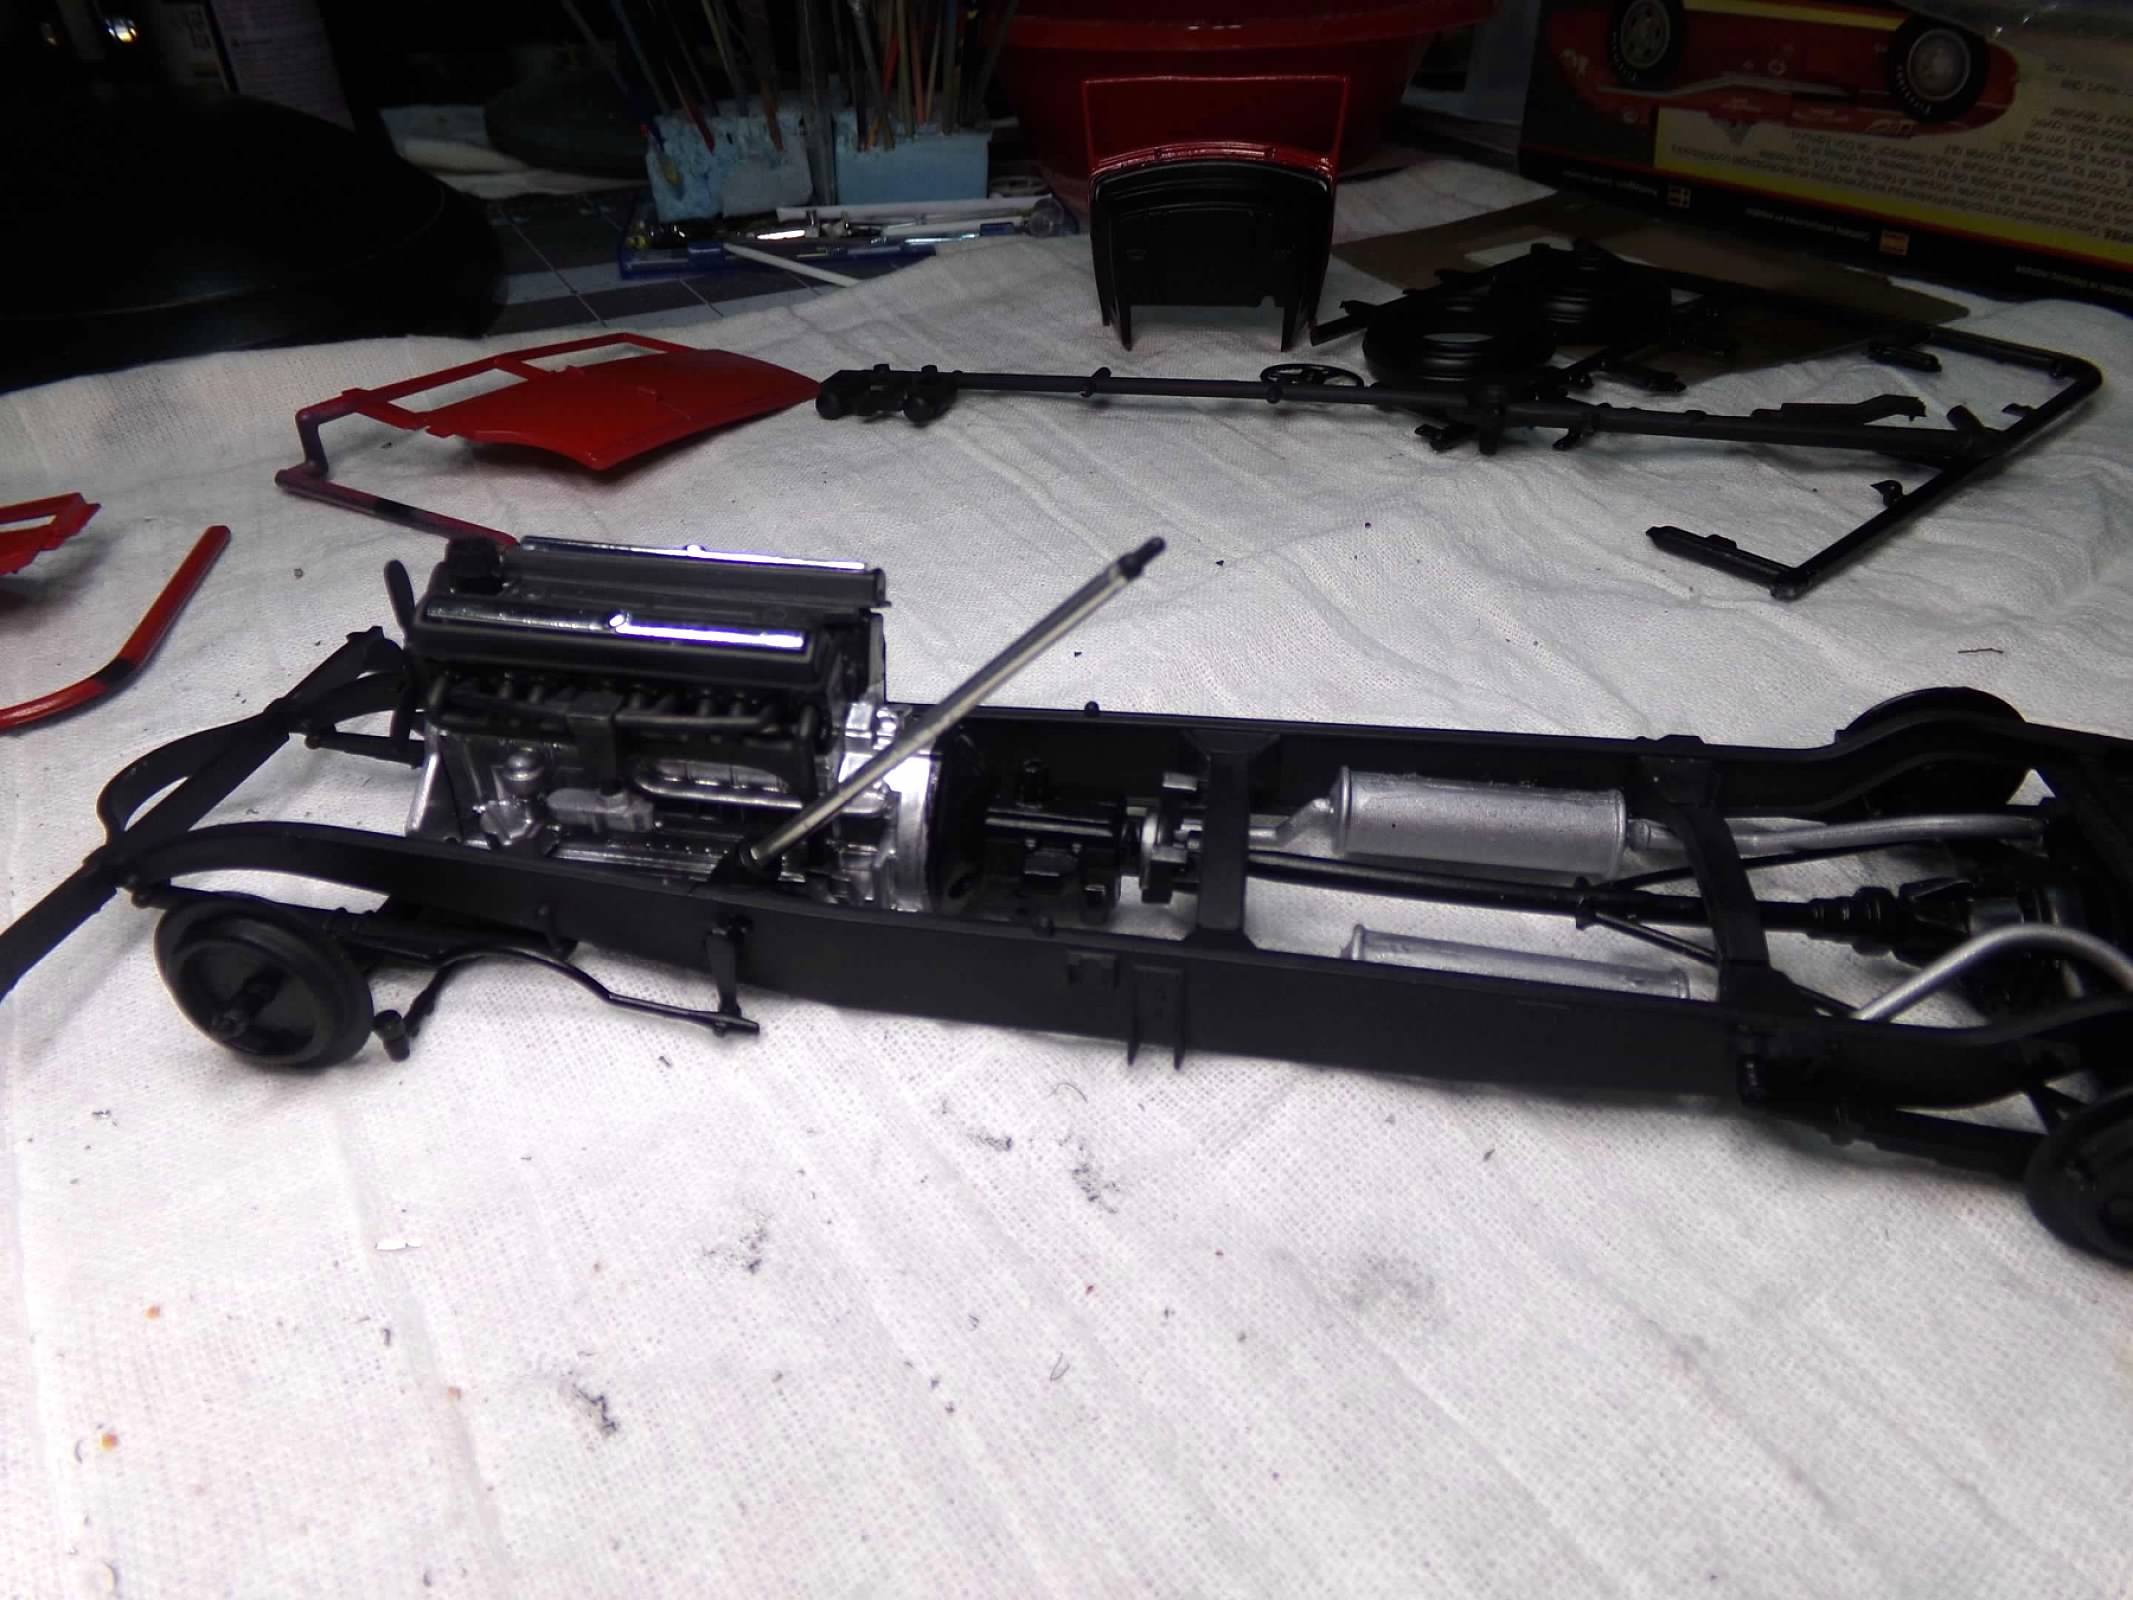
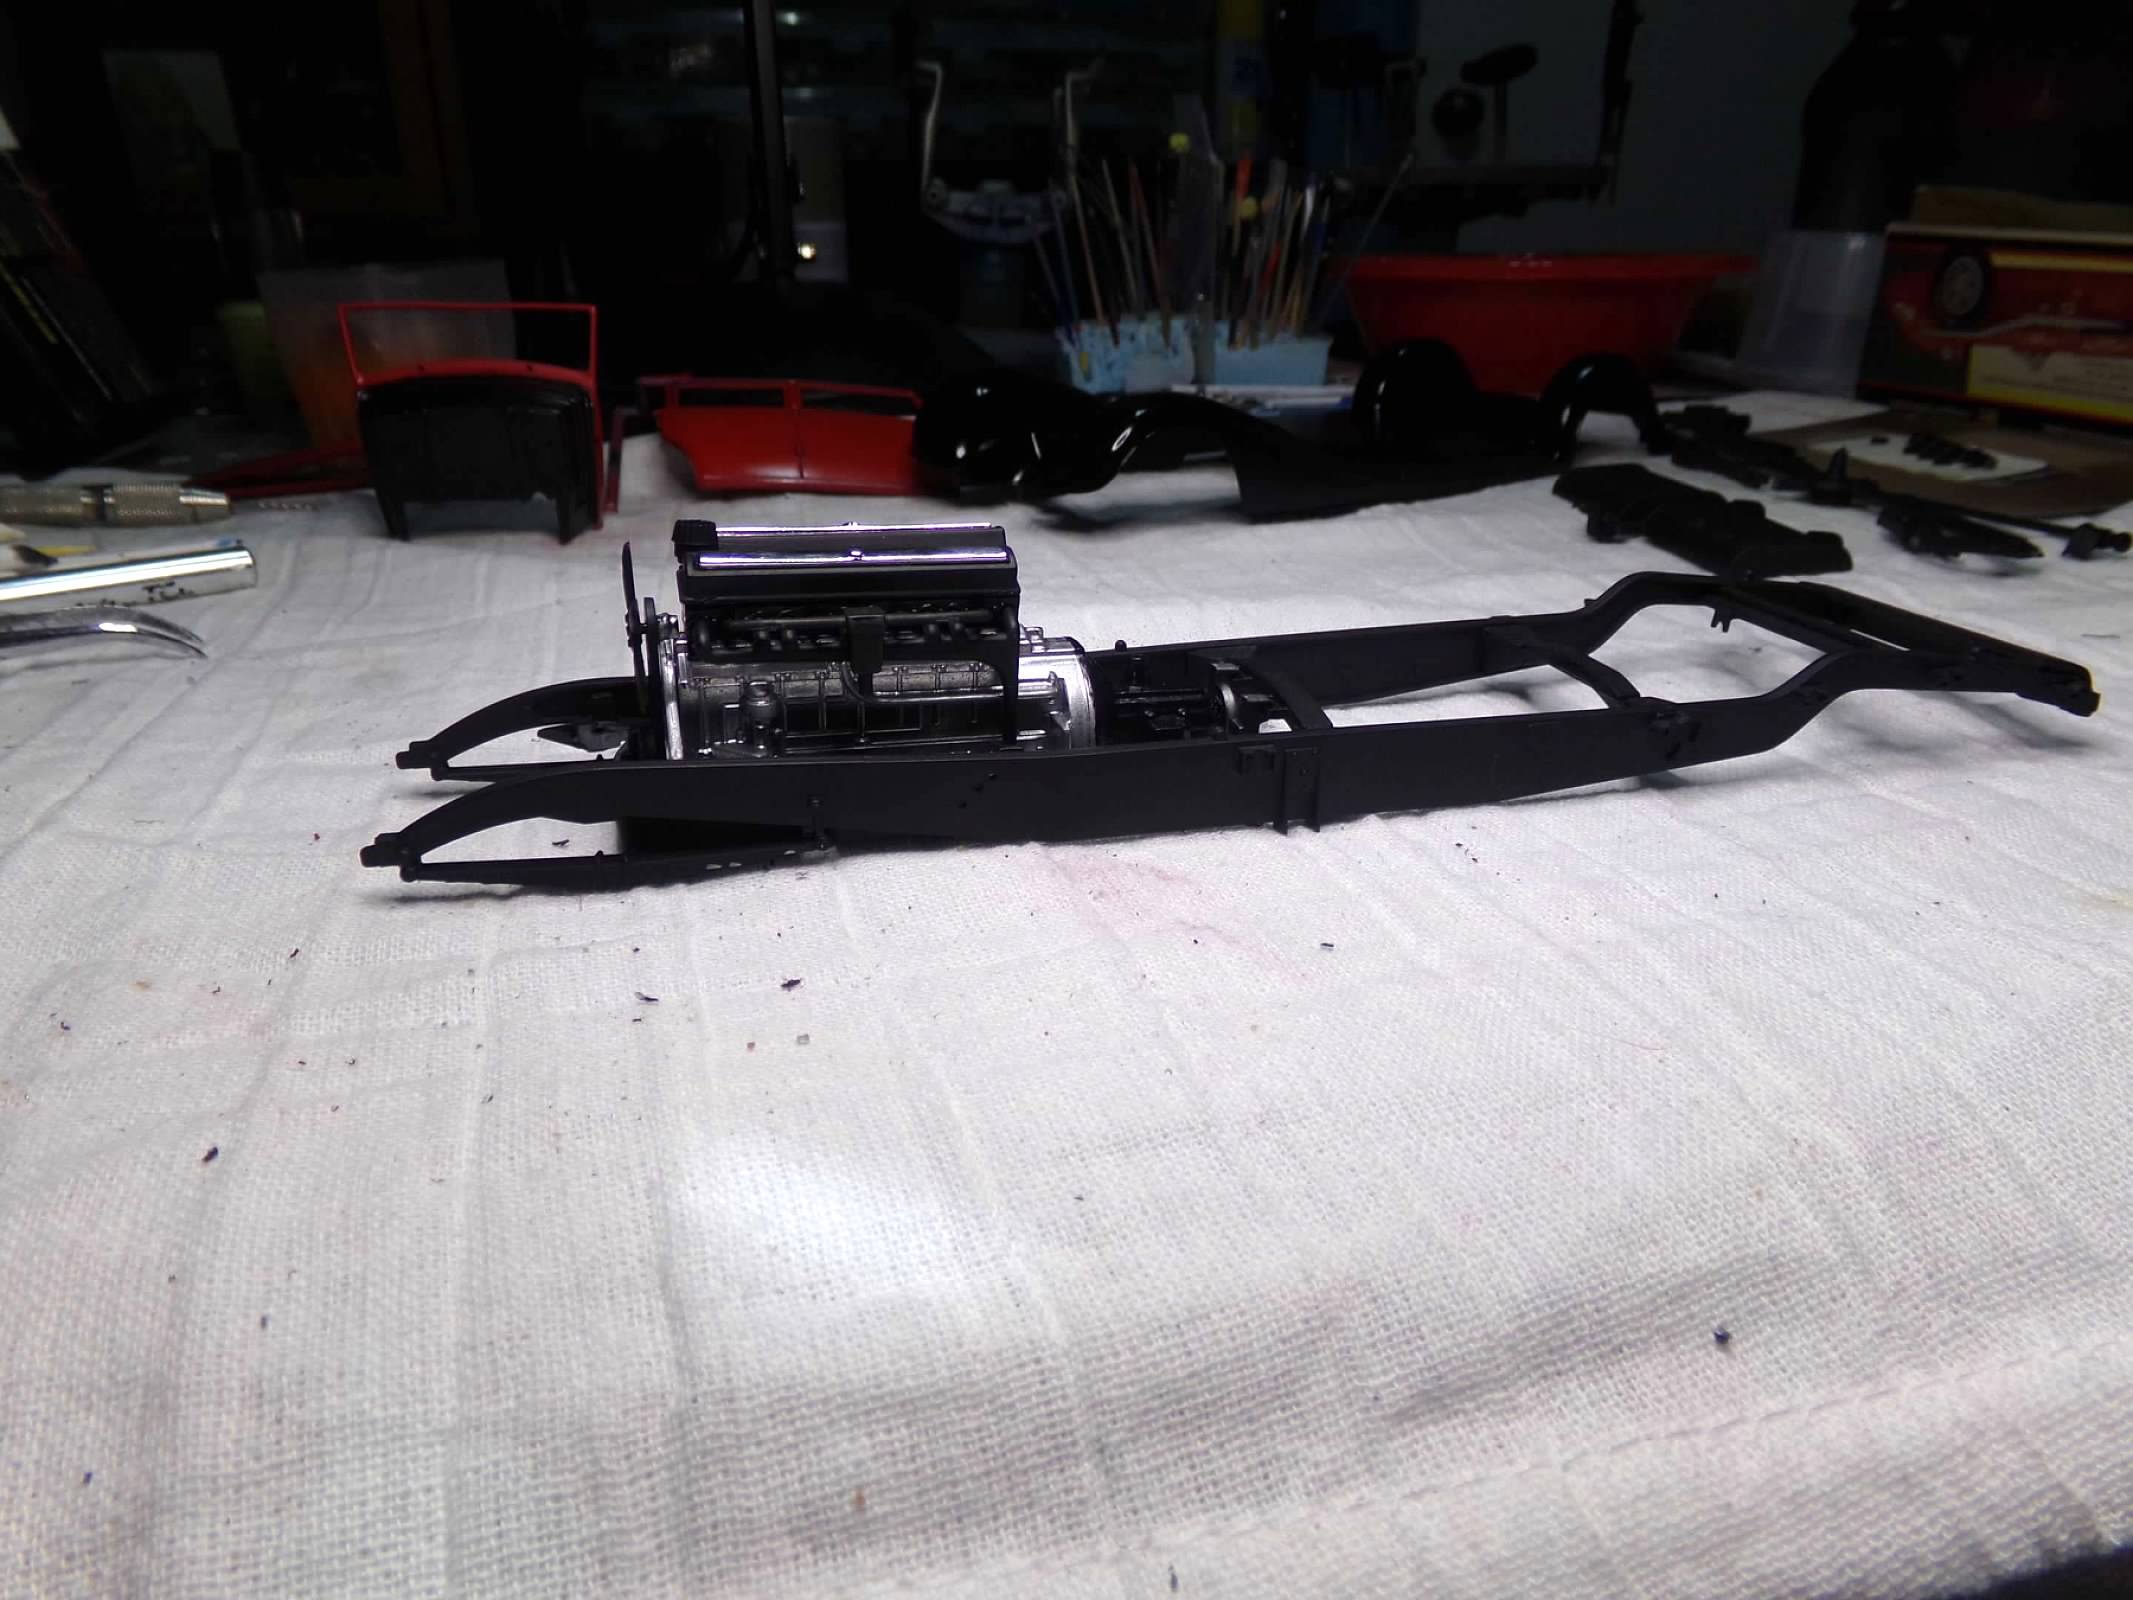
Thanks, Dave and Carl! I appreciate your comments! Off to a good start I think. I put the frame together and everything looks square. I also built the engine and it is in the frame. I would have wired it up but I don't have a pre-wired distributor for a 16 cyl. engine and I don't think I can drill 16 holes in this distributor. I finished all the other painting today as it didn't rain. Cool and breezy but the humidity was good. I'll rub out the paint tomorrow and move on to the chassis exhaust and suspension. Thanks for looking! ?
-
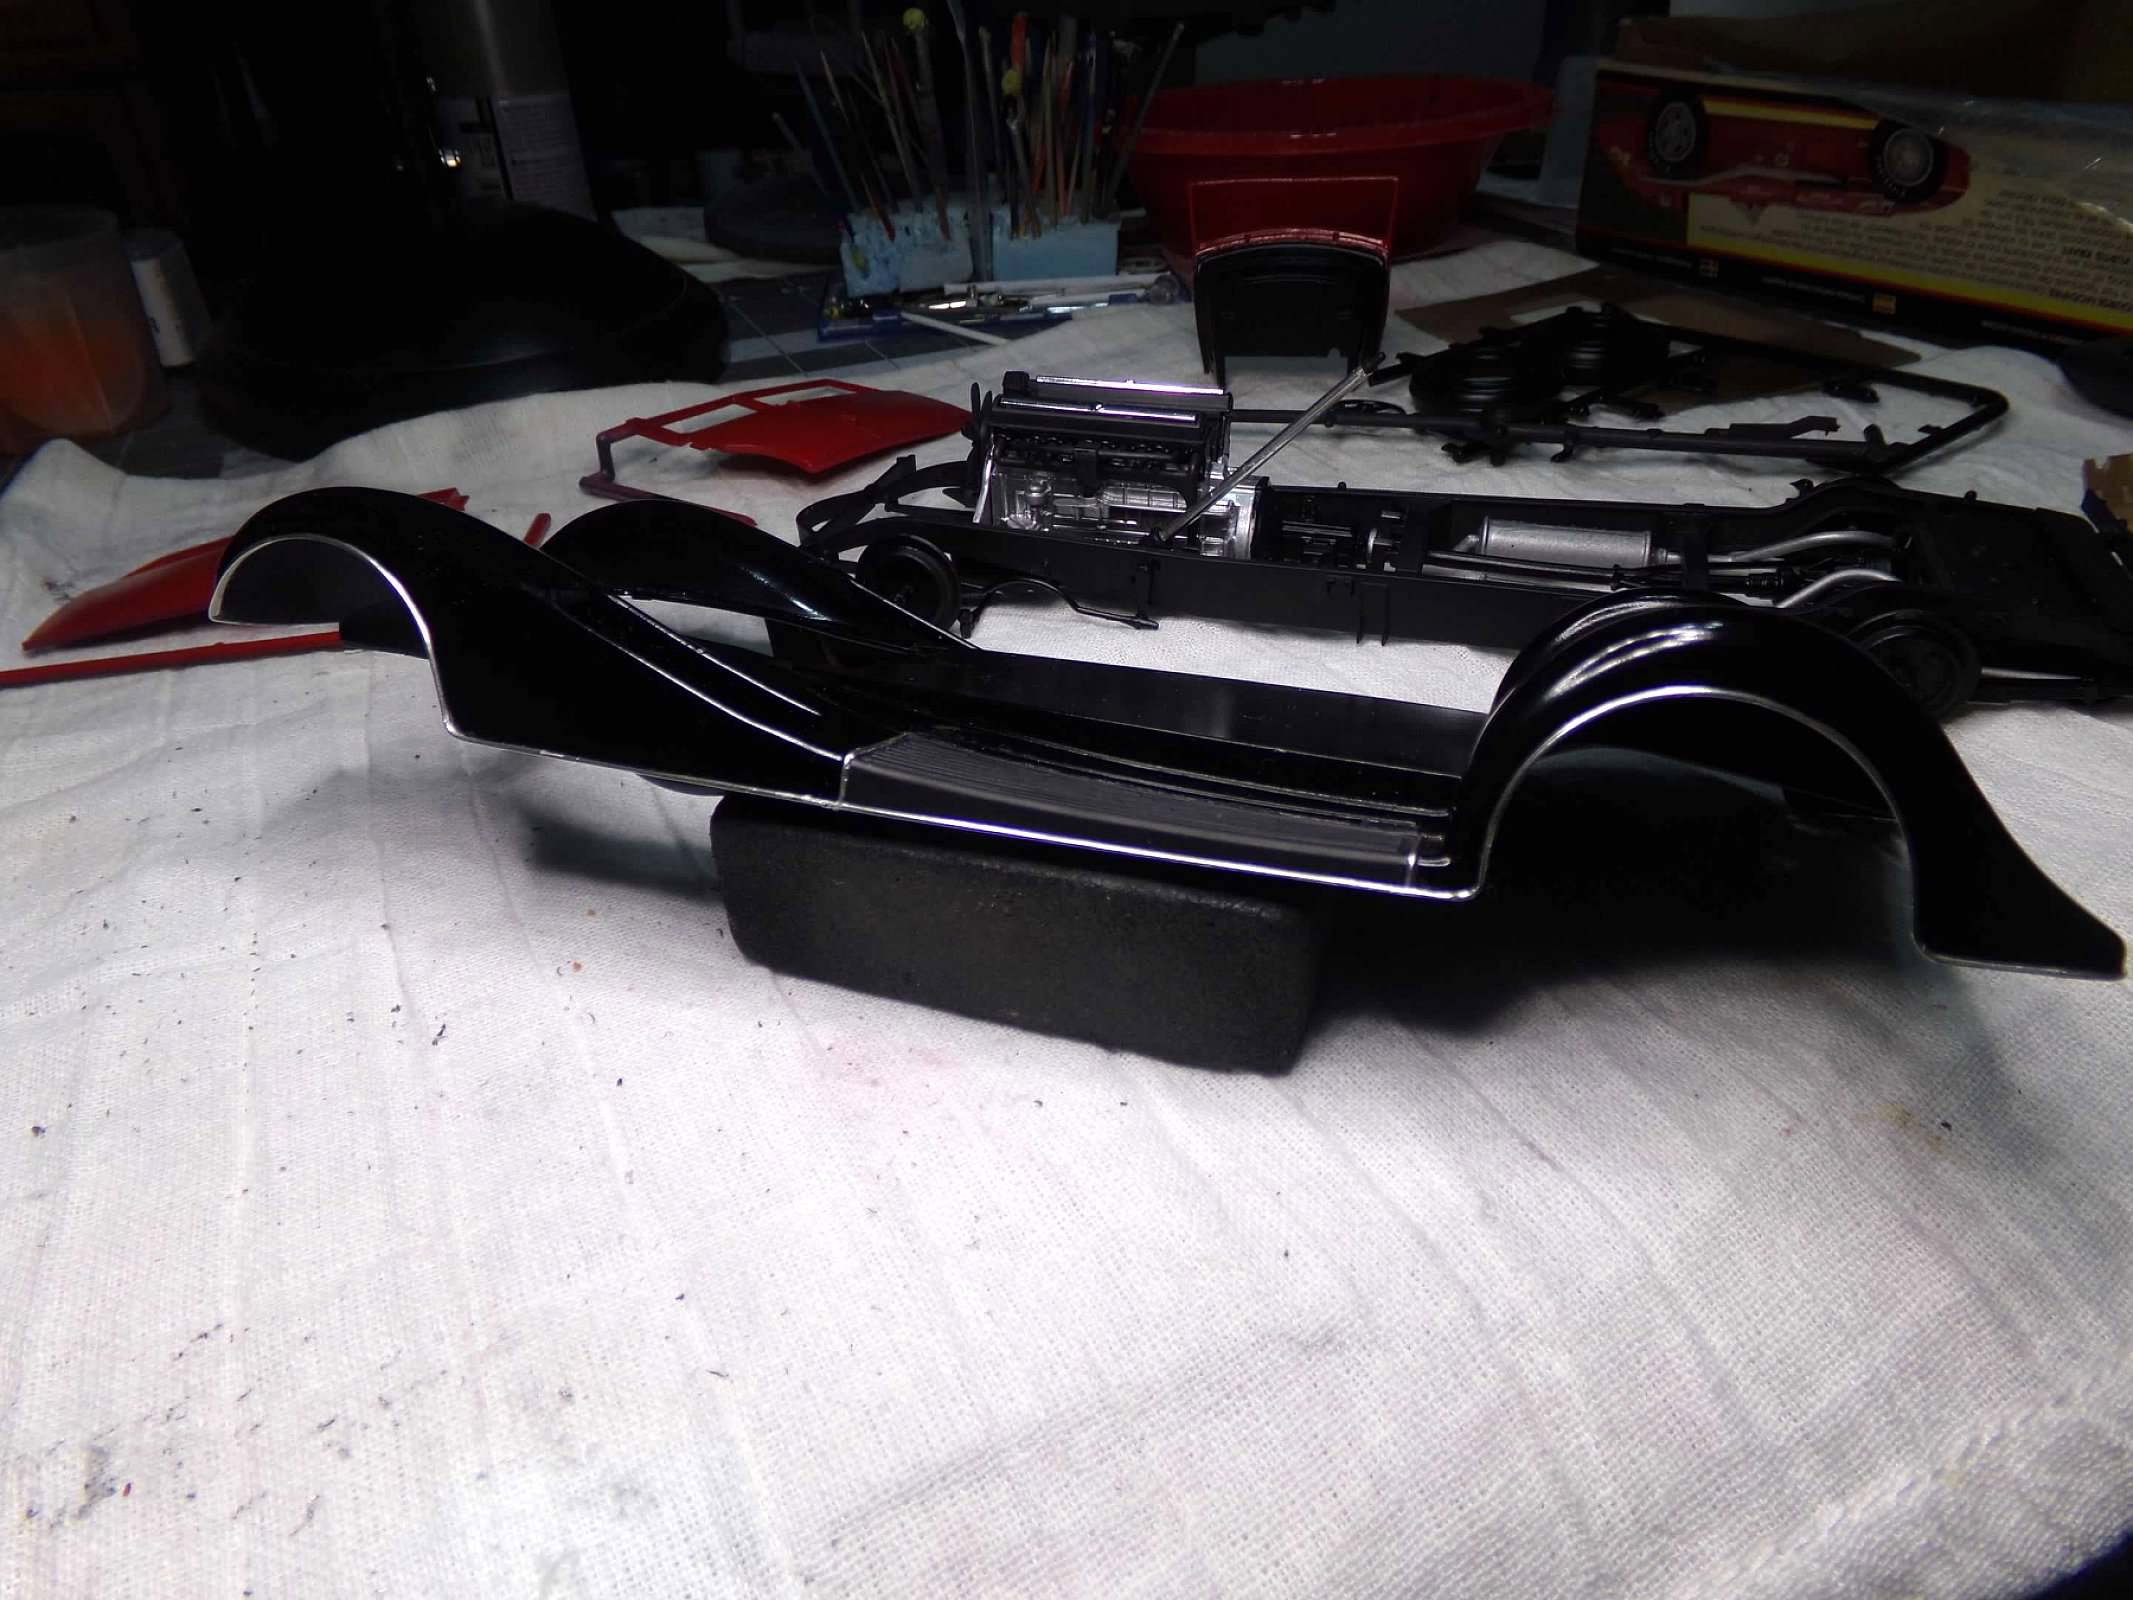
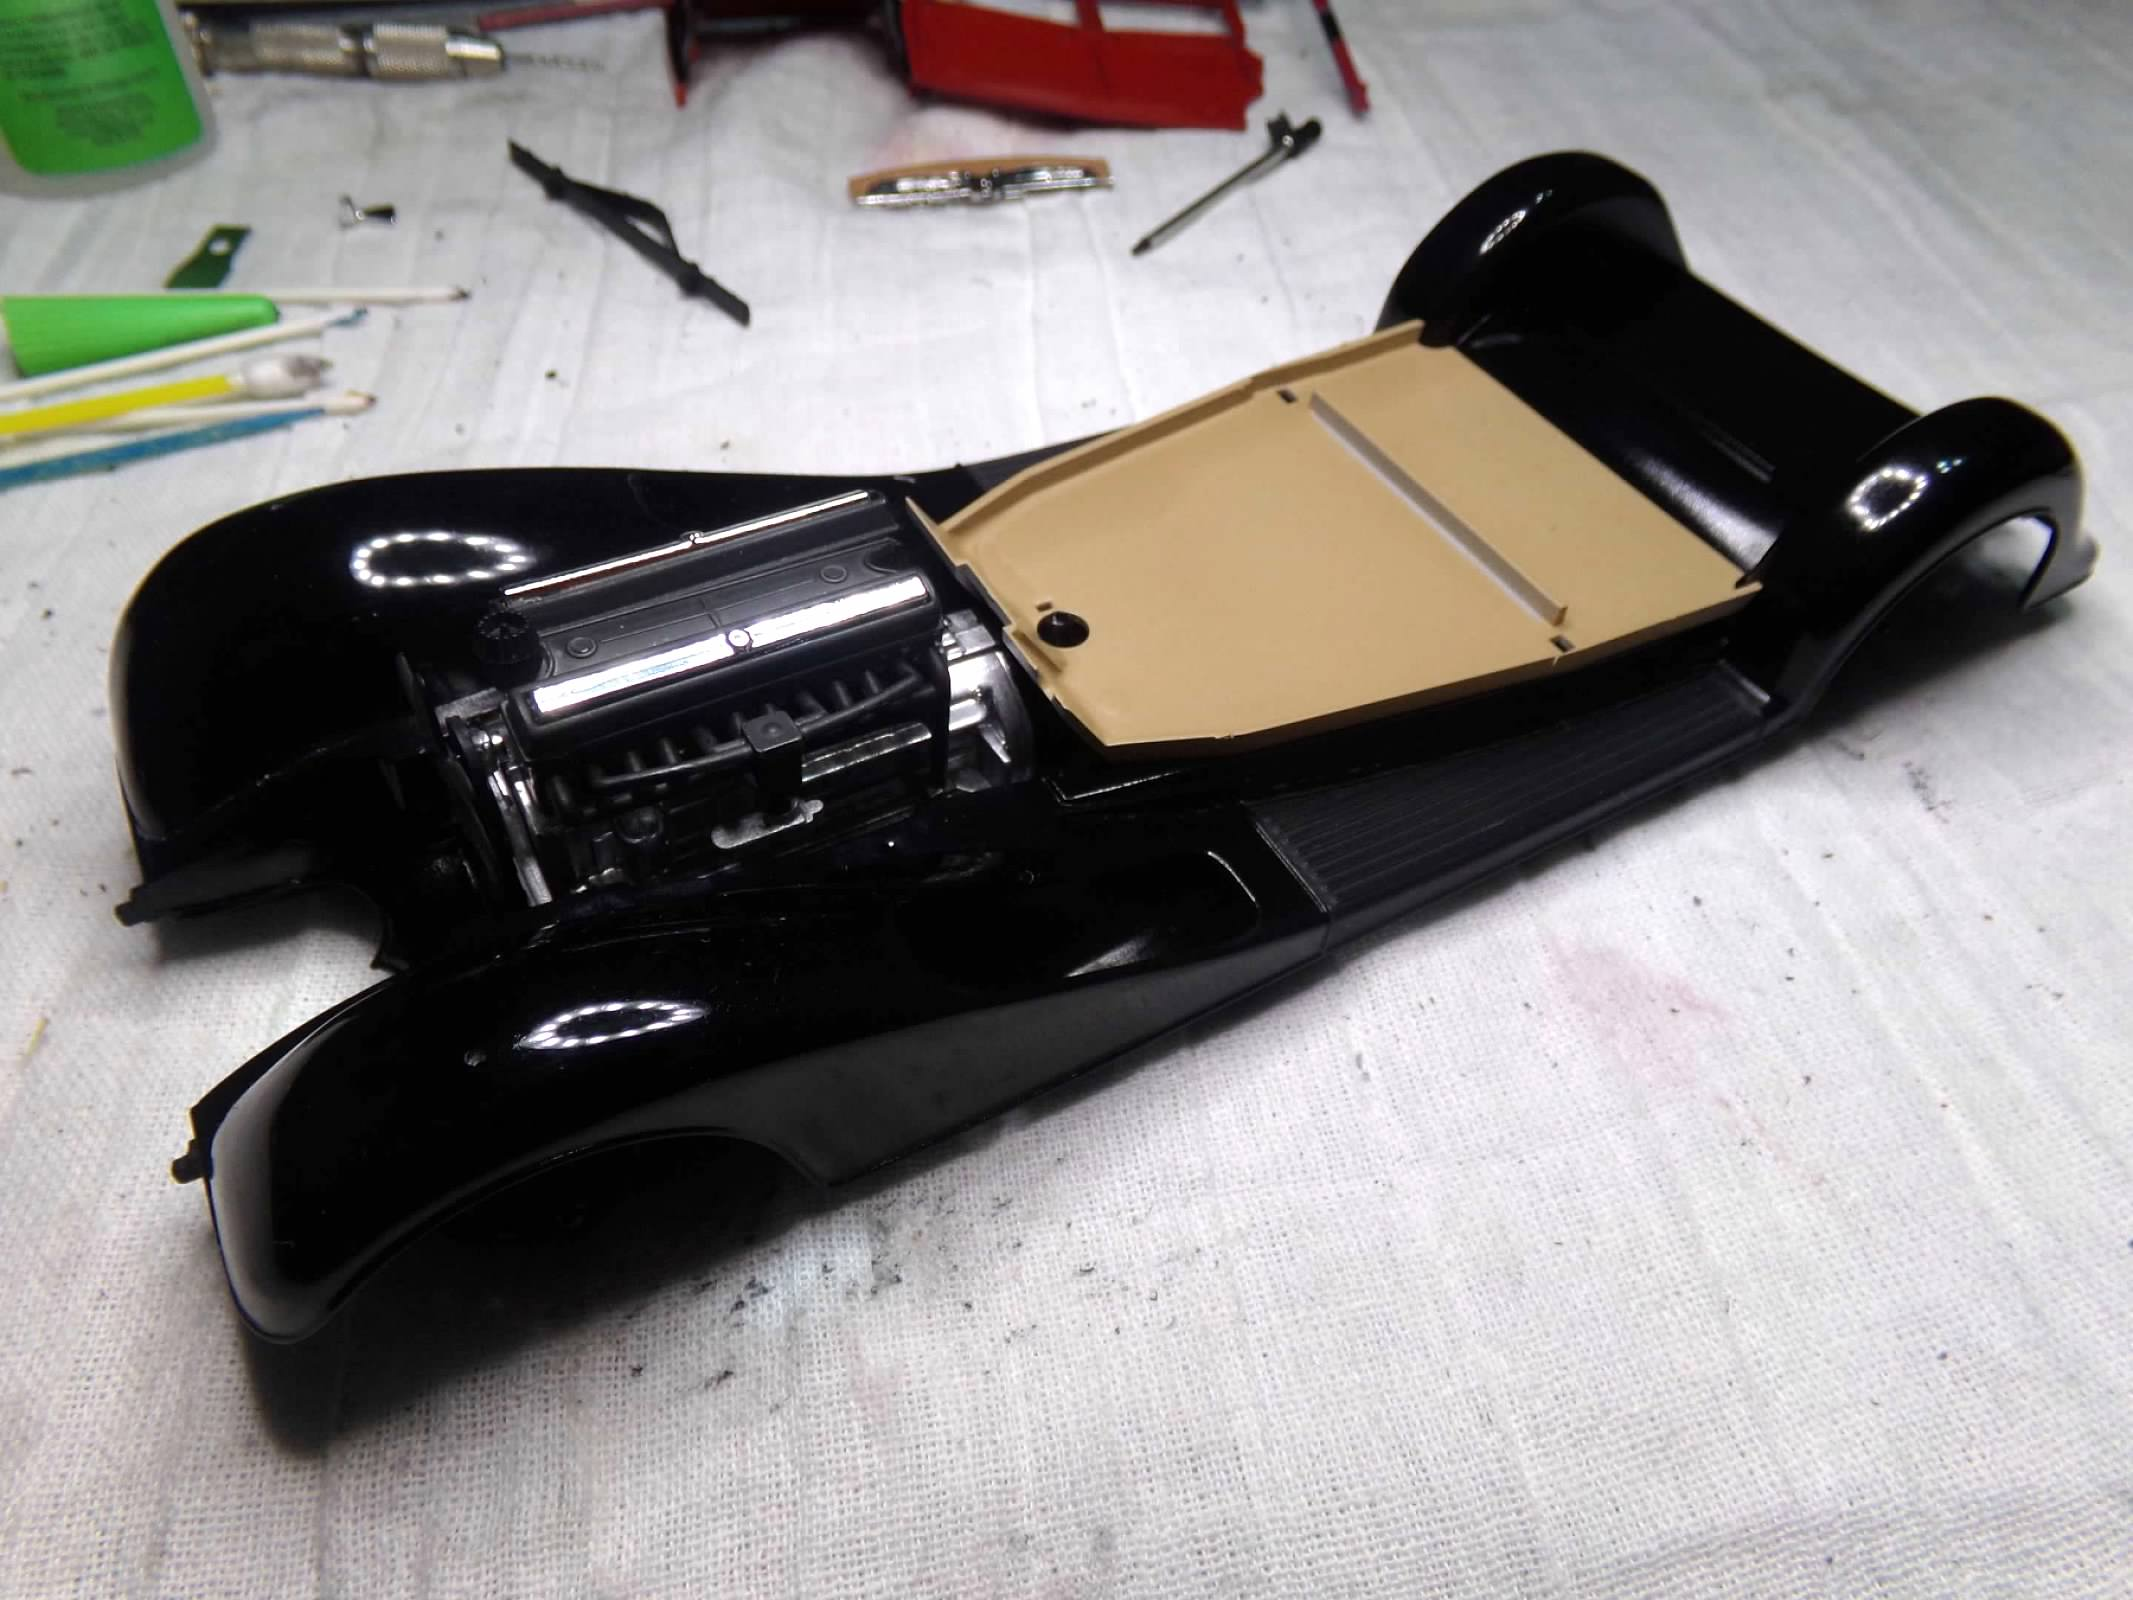
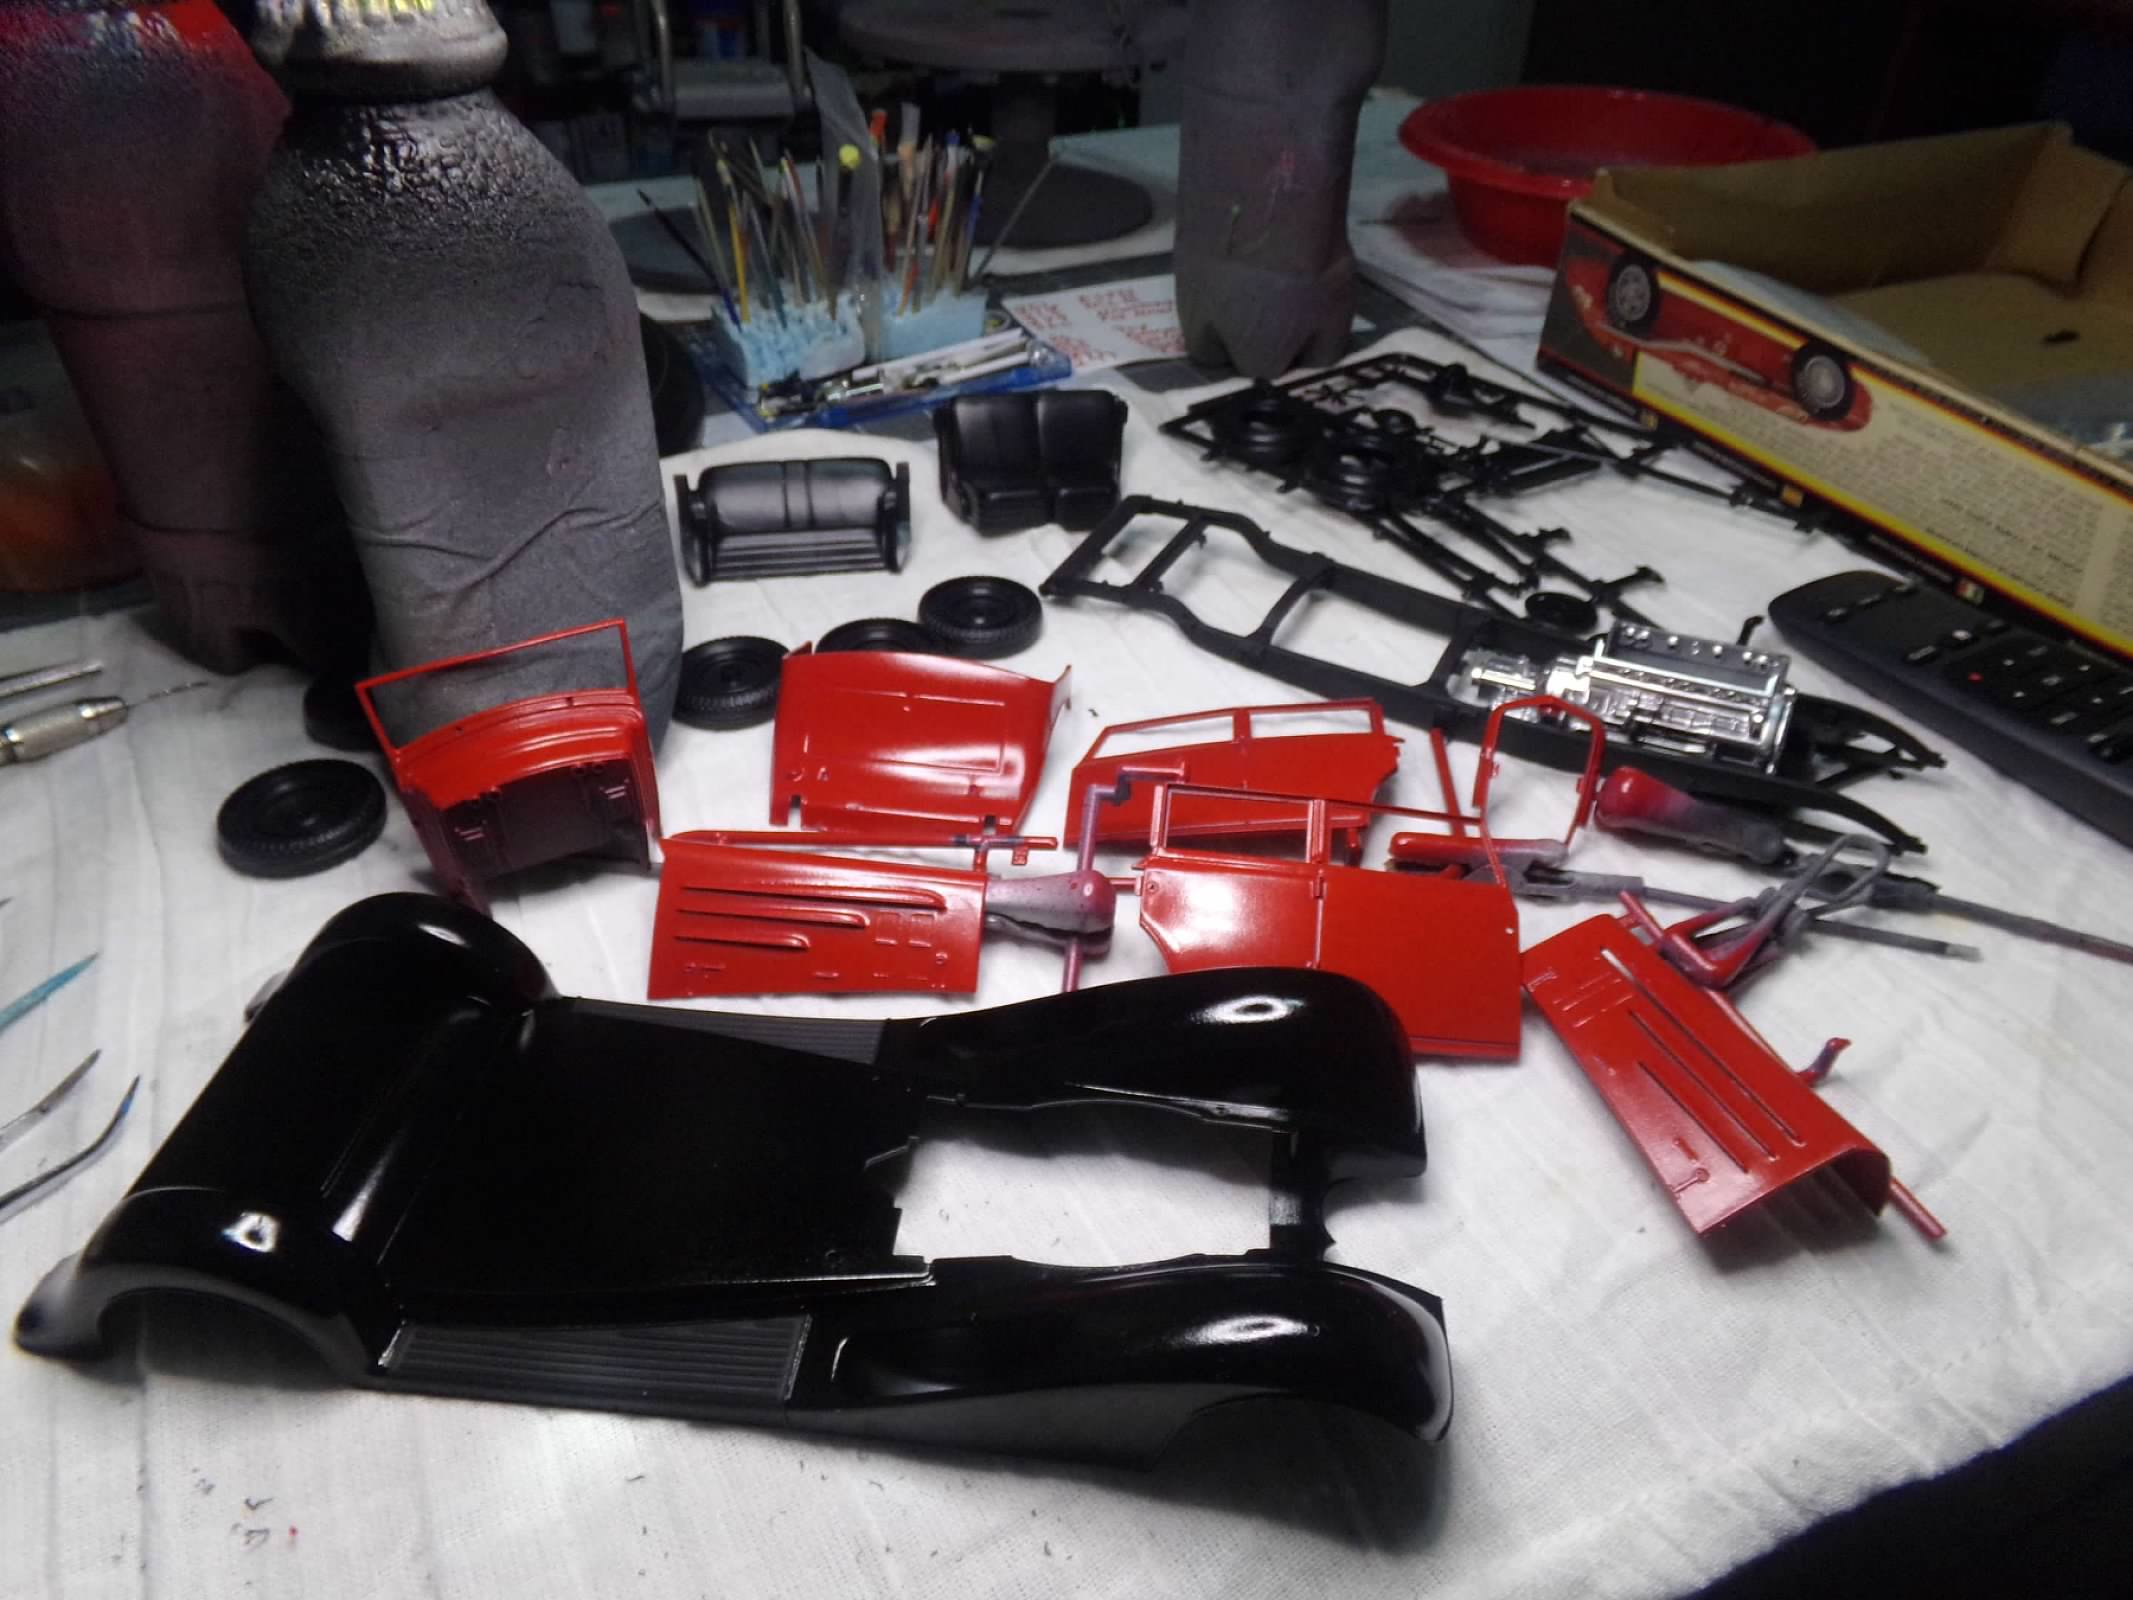
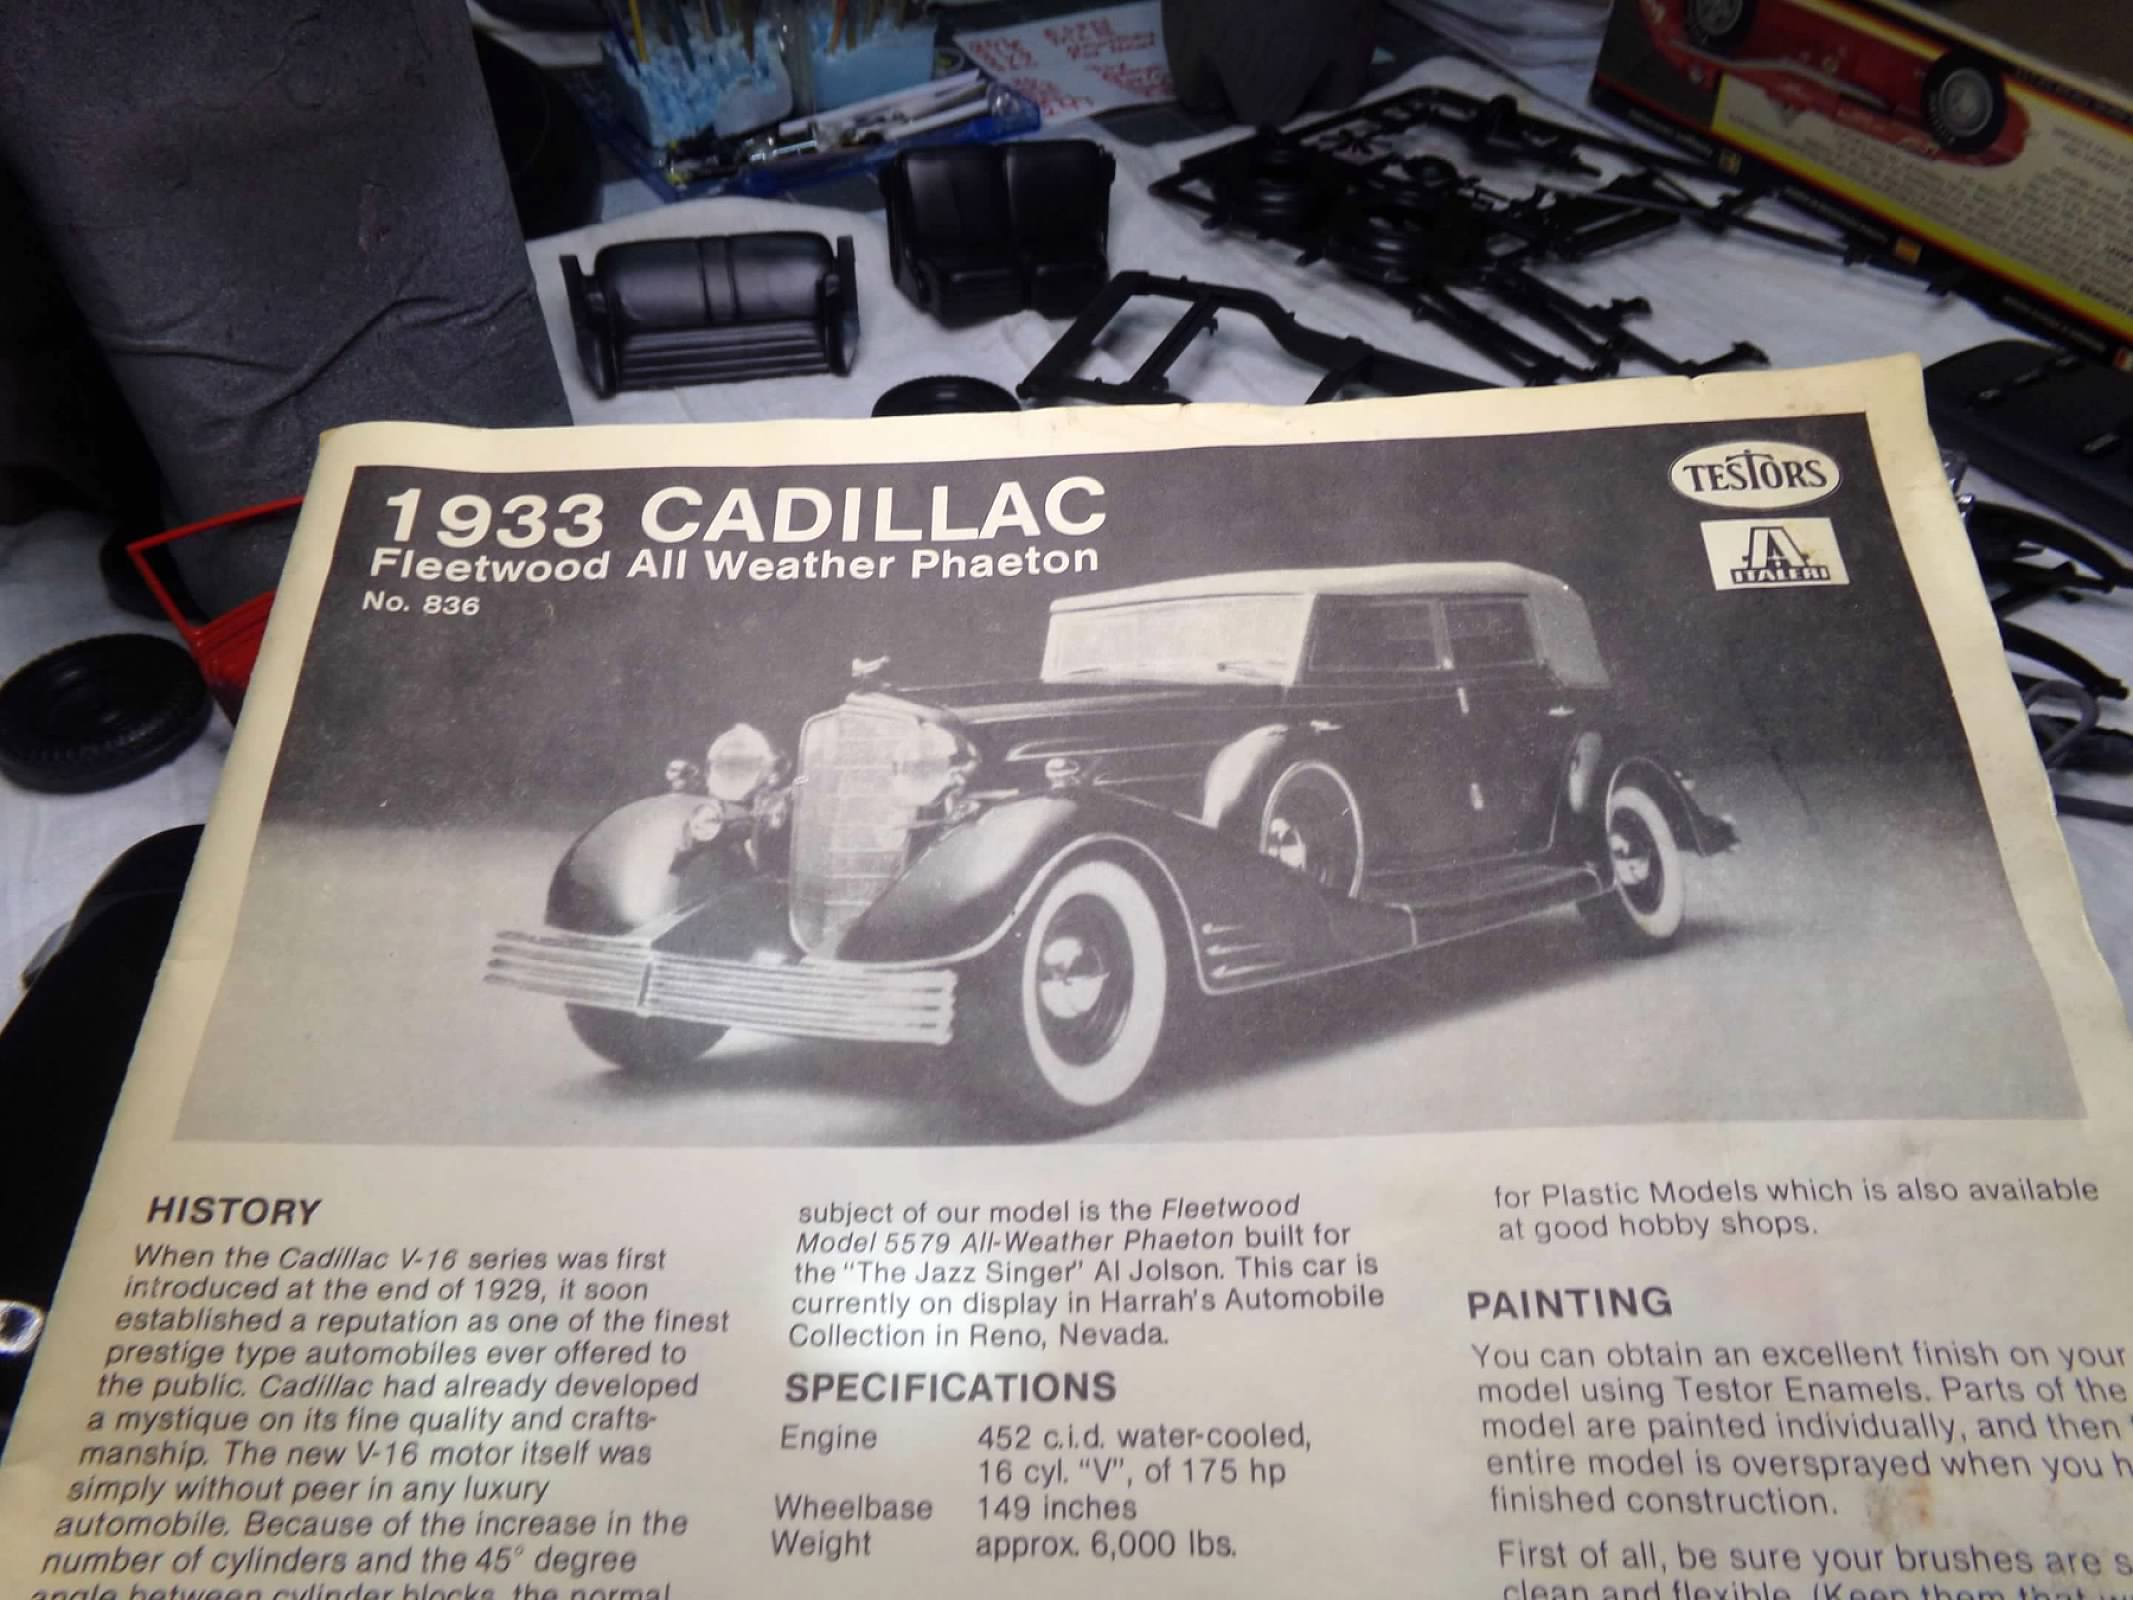
I bought this Testors kit years ago, mid-90s I think, on a mark down at Larry's Hobby Shop which has been gone for about 20 years. I don't even have the box anymore and the parts and instructions have been stored in another box. I have most of the parts painted, mainly body, engine, and chassis parts. I don't know if I'll be able to finish tomorrow as it is suppose to rain. But I have plenty to get started with. I painted the fender unit Dupli-Color Universal Black and the body parts are Dupli-Color Flash Red. So I am off to a good start. Thanks for looking!
-
I hope everyone had a Happy Thanksgiving and are enjoying the holiday! I finished this one this morning and although I am not a super drag racing fan but thought I could build this one. the paint is Tamiya Champagne Gold exterior with a black interior. I added plug wires and a fuel line to the engine. I used a roll cage from a 67 Chevelle (I think) a seat and fire extinguisher from the parts box. I also added a five-point harness made from black masking tape and MCG PE buckles. All other parts are from the kit, including the decals. After taking these photos outdoors, I think I'll blackwash the wheels. Thanks for looking! ?
-
I hope everyone had a Happy Thanksgiving and are enjoying the holiday! This one is done and final photos are in the 'Under Glass" section. Here's one - thanks for looking! ?
-
Body/interior/chassis are together. I had a little bit of an issue with the rear wheel position being to far back. I was able to remove the axle from the leaf springs and driveshaft. Nothing else had to be removed. I shortened the end of the driveshaft and then re-glued the axle about 1/16" forward on the leaf springs while also gluing the driveshaft in place. Now the tire is very close to the front of the wheel opening and looks much better. Chassis fits snug and no need for any glue. Hood fits nicely. Next the hardware and decals. Thanks for looking! ?
-
Matt, you probably have too much paint and you have some orange peel. At this point, you should stop painting, rub out what you have being careful not to expose edges. Use some Tamiya tape over things like the dart on the trunk and then get some 3600-8000 sanding cloths and go through them on the top, trunk and other surfaces until you have a smoother finish. You can also use a rubbing compound like Meguiar's Scratch-X which is what I use in between cloths to help the finish. Once you have a finish that you are happy with you can touch up any exposed plastic and then add a clear coat or two. After that has dried, repeat the rubbing out session finishing with a wax and see what you have. P.S. You don't have to start a new topic, just add to this one.
-
Paint looks good, Matt! I just recently finished a 60 Chevy that is much the same kit. The only issue I had was the body fit with the interior in and onto the frame. Take a look at the grove on the dash and door cards where the windshield is suppose to sit. I am told that is the issue. My solution was to use clamps over the frame and body. But a better solution might be to make sure the windshield sits properly in the grove on the dash and door cards. To answer your question, i think you could just clear it and it will look fine. I like to protect the paint and rub it out to give it a deep gloss look. Good luck with your build! ?
-
Chassis is done and the wheels are on. Glass is next and then on to final assembly. Thanks for looking! ?
-
Thanks, Mike! I appreciate your comment! Finished the interior and it fits well into the body. It would be better with some adjustment PE on the belts and maybe some Simpson decals. But I like it better than just using what was supplied in the kit. BTW, I would think that the seat would be adjusted forward to get the driver up on the wheel or else that driver would have to have long legs to reach the pedals! ? Thanks for looking! ?
-
I added a few things from the parts box for this build. I wanted to use a seat that at least looked like a drag car seat so I found one and cut the headrest off. I also found a Co2 bottle and the roll bar that from either a 67 Chevelle or 66 Nova kit, not sure which. I modified the roll cage to fit and I wanted to add a five-point harness to the seat. I painted all three and kept the roll cage and seat in primer since I am using black masking tape for seat belts. I used some MCG PE for the seat hardware and taped in the belts with the hardware. So here the parts added and a mock-up. Thanks for looking!
-
Thanks, Bob and Chris! I appreciate your comments! Spent a good part of the day yesterday assembling and detailing the engine. Added a fuel line with a piece of the boot material that comes with the MAD plug wires so that I could push the pin on the second carb onto the rubber wire and then continue on to the fuel pump. I then painted it aluminum. for the plug wires using the MAD pre-wired distributor, I saw a photo of one that had much more structure but I sorta copied it. It had more hangers at each wire loom on each side but it essentially strung the wire through a four-hole loom, drop one wire to the plug, then a three-hole loom, drop another wire to the plug, and then finally a two-hole loom for the front two plugs. It worked out pretty well, keeping the wire tight so that it would fit through the opening in the exhaust headers and into holes drilled in the block easily. Thanks for looking! ?
-
Thanks, everyone! I appreciate all the very nice comments! ?