ModelcarJR
-
Posts
1,648 -
Joined
-
Last visited
Content Type
Profiles
Forums
Events
Gallery
Everything posted by ModelcarJR
-
Thanks, Rico! I appreciate your comment! I have good news and bad news! The good news is that this one is on wheels! The bad news is that I haven't built this one before - Oh wait; maybe that is good news too. It means that I am building something I haven't built before! Its going together well and really no problems with the chassis, glass or mounting interior in the body or body and interior on the chassis. Everything is going pretty well. I have to glue the front end down and glue the wheels on but the mock-up looks pretty good. Thanks for looking! ?

-
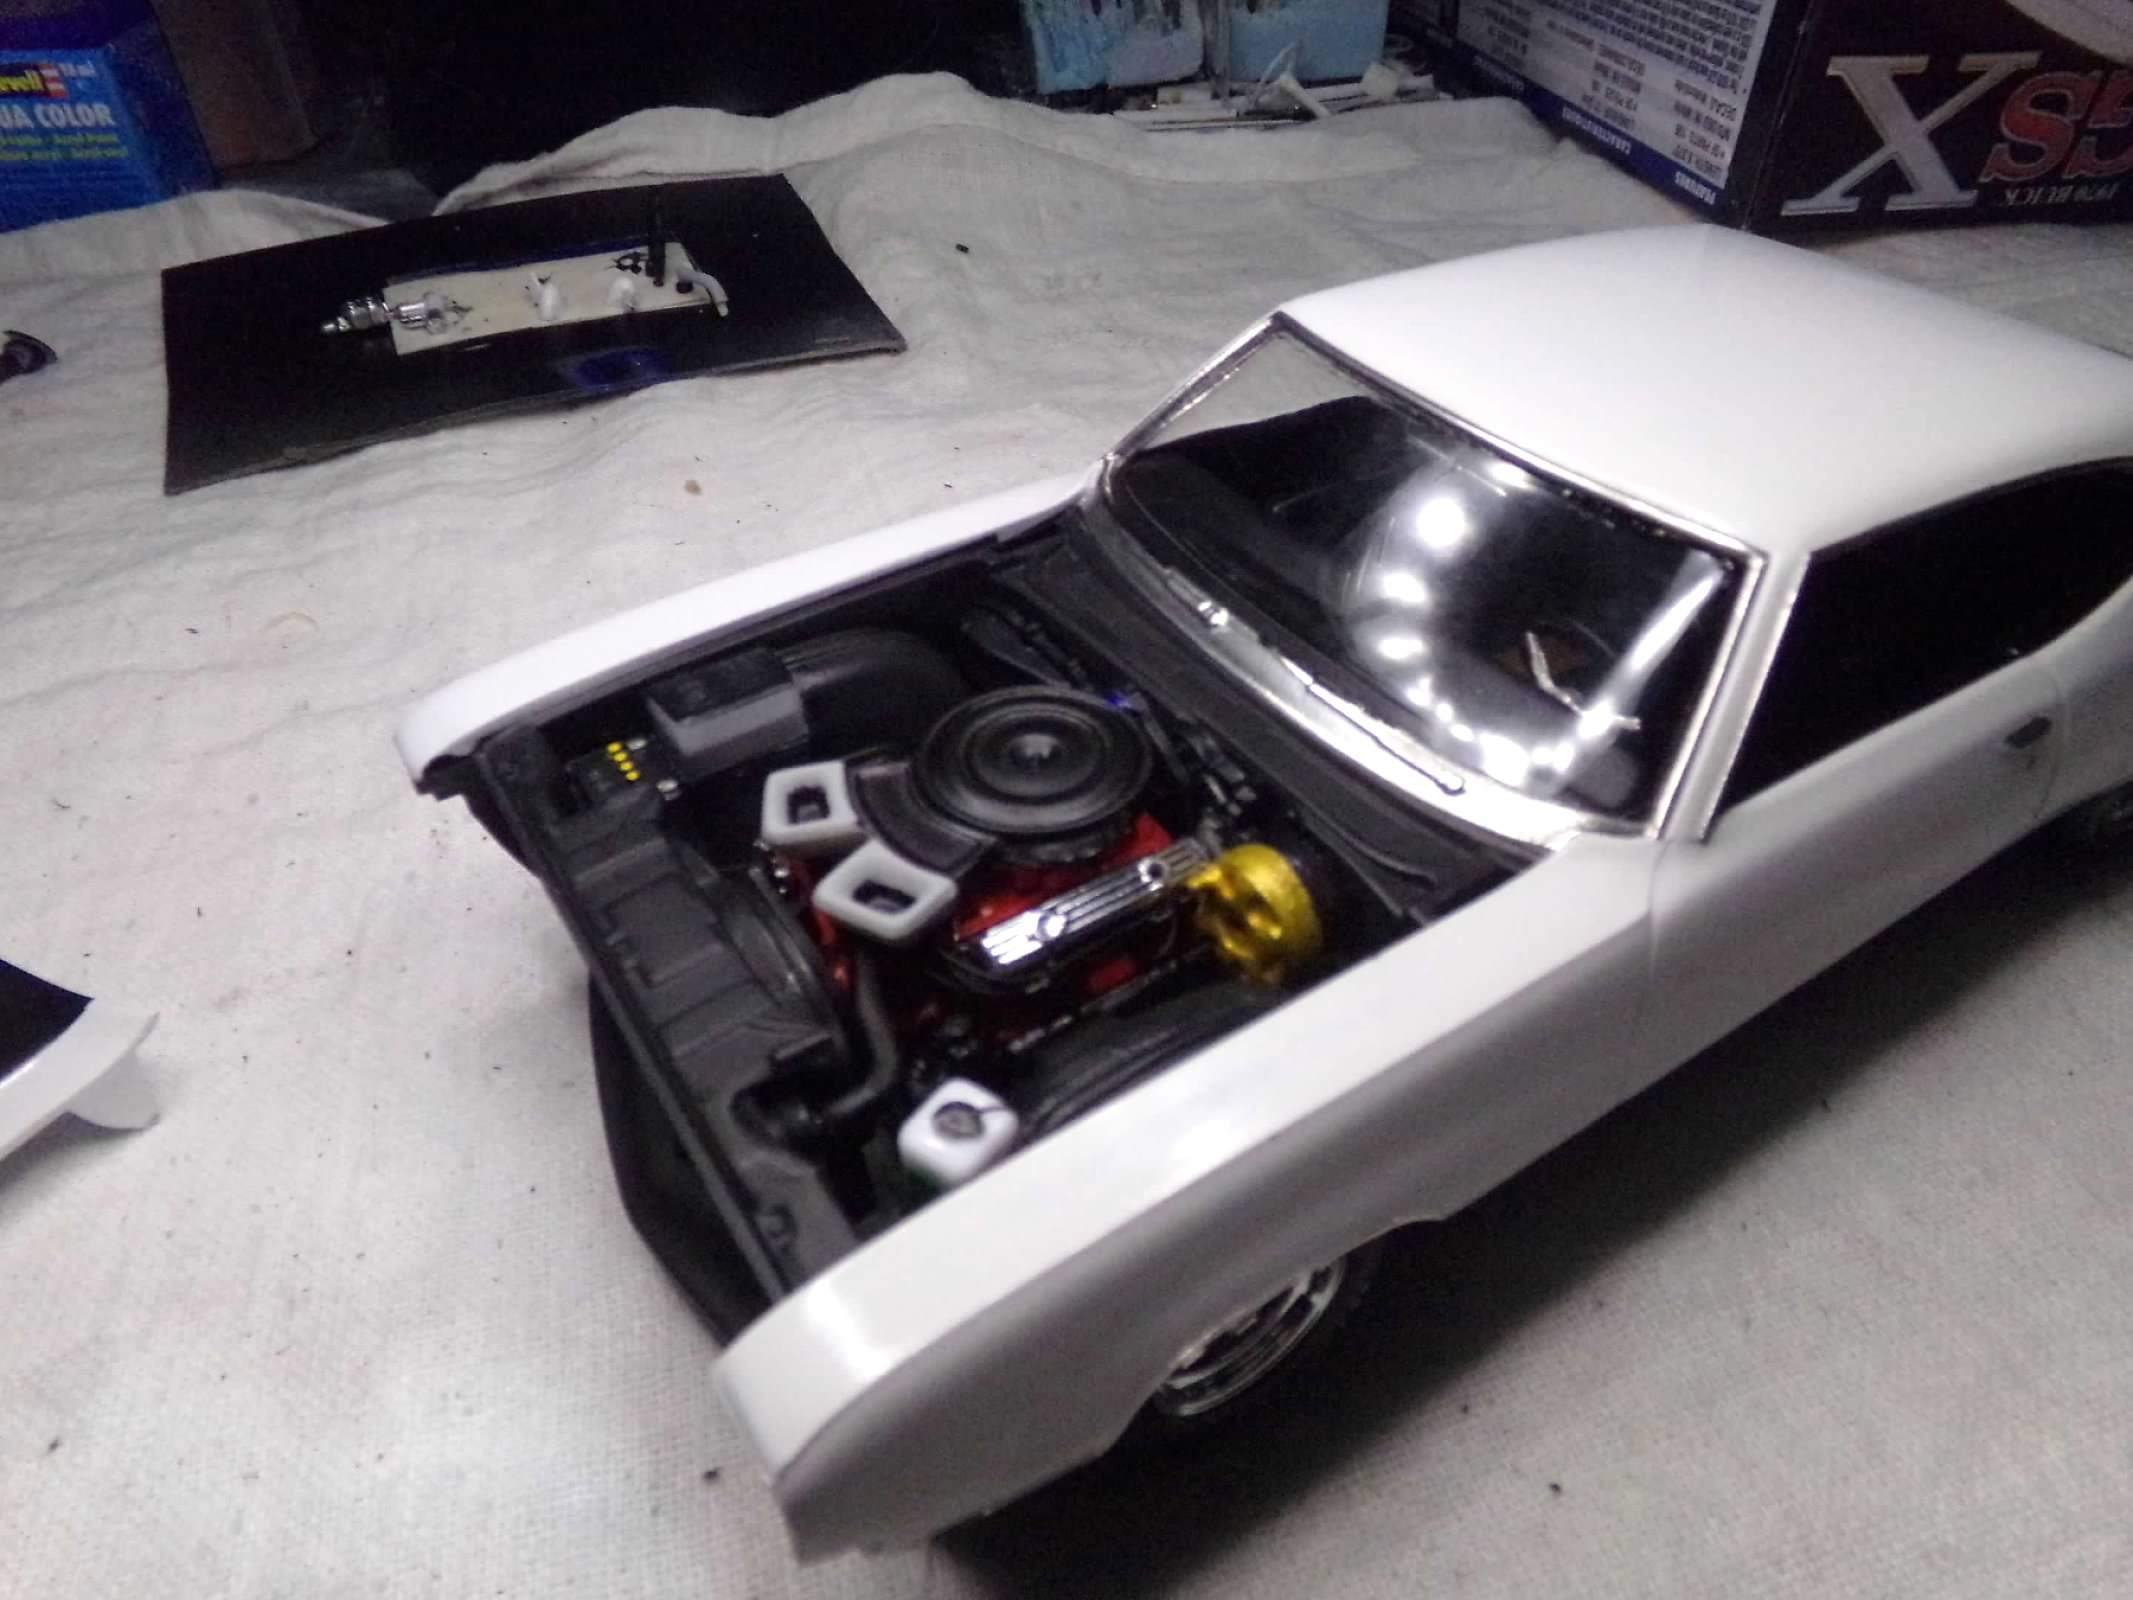
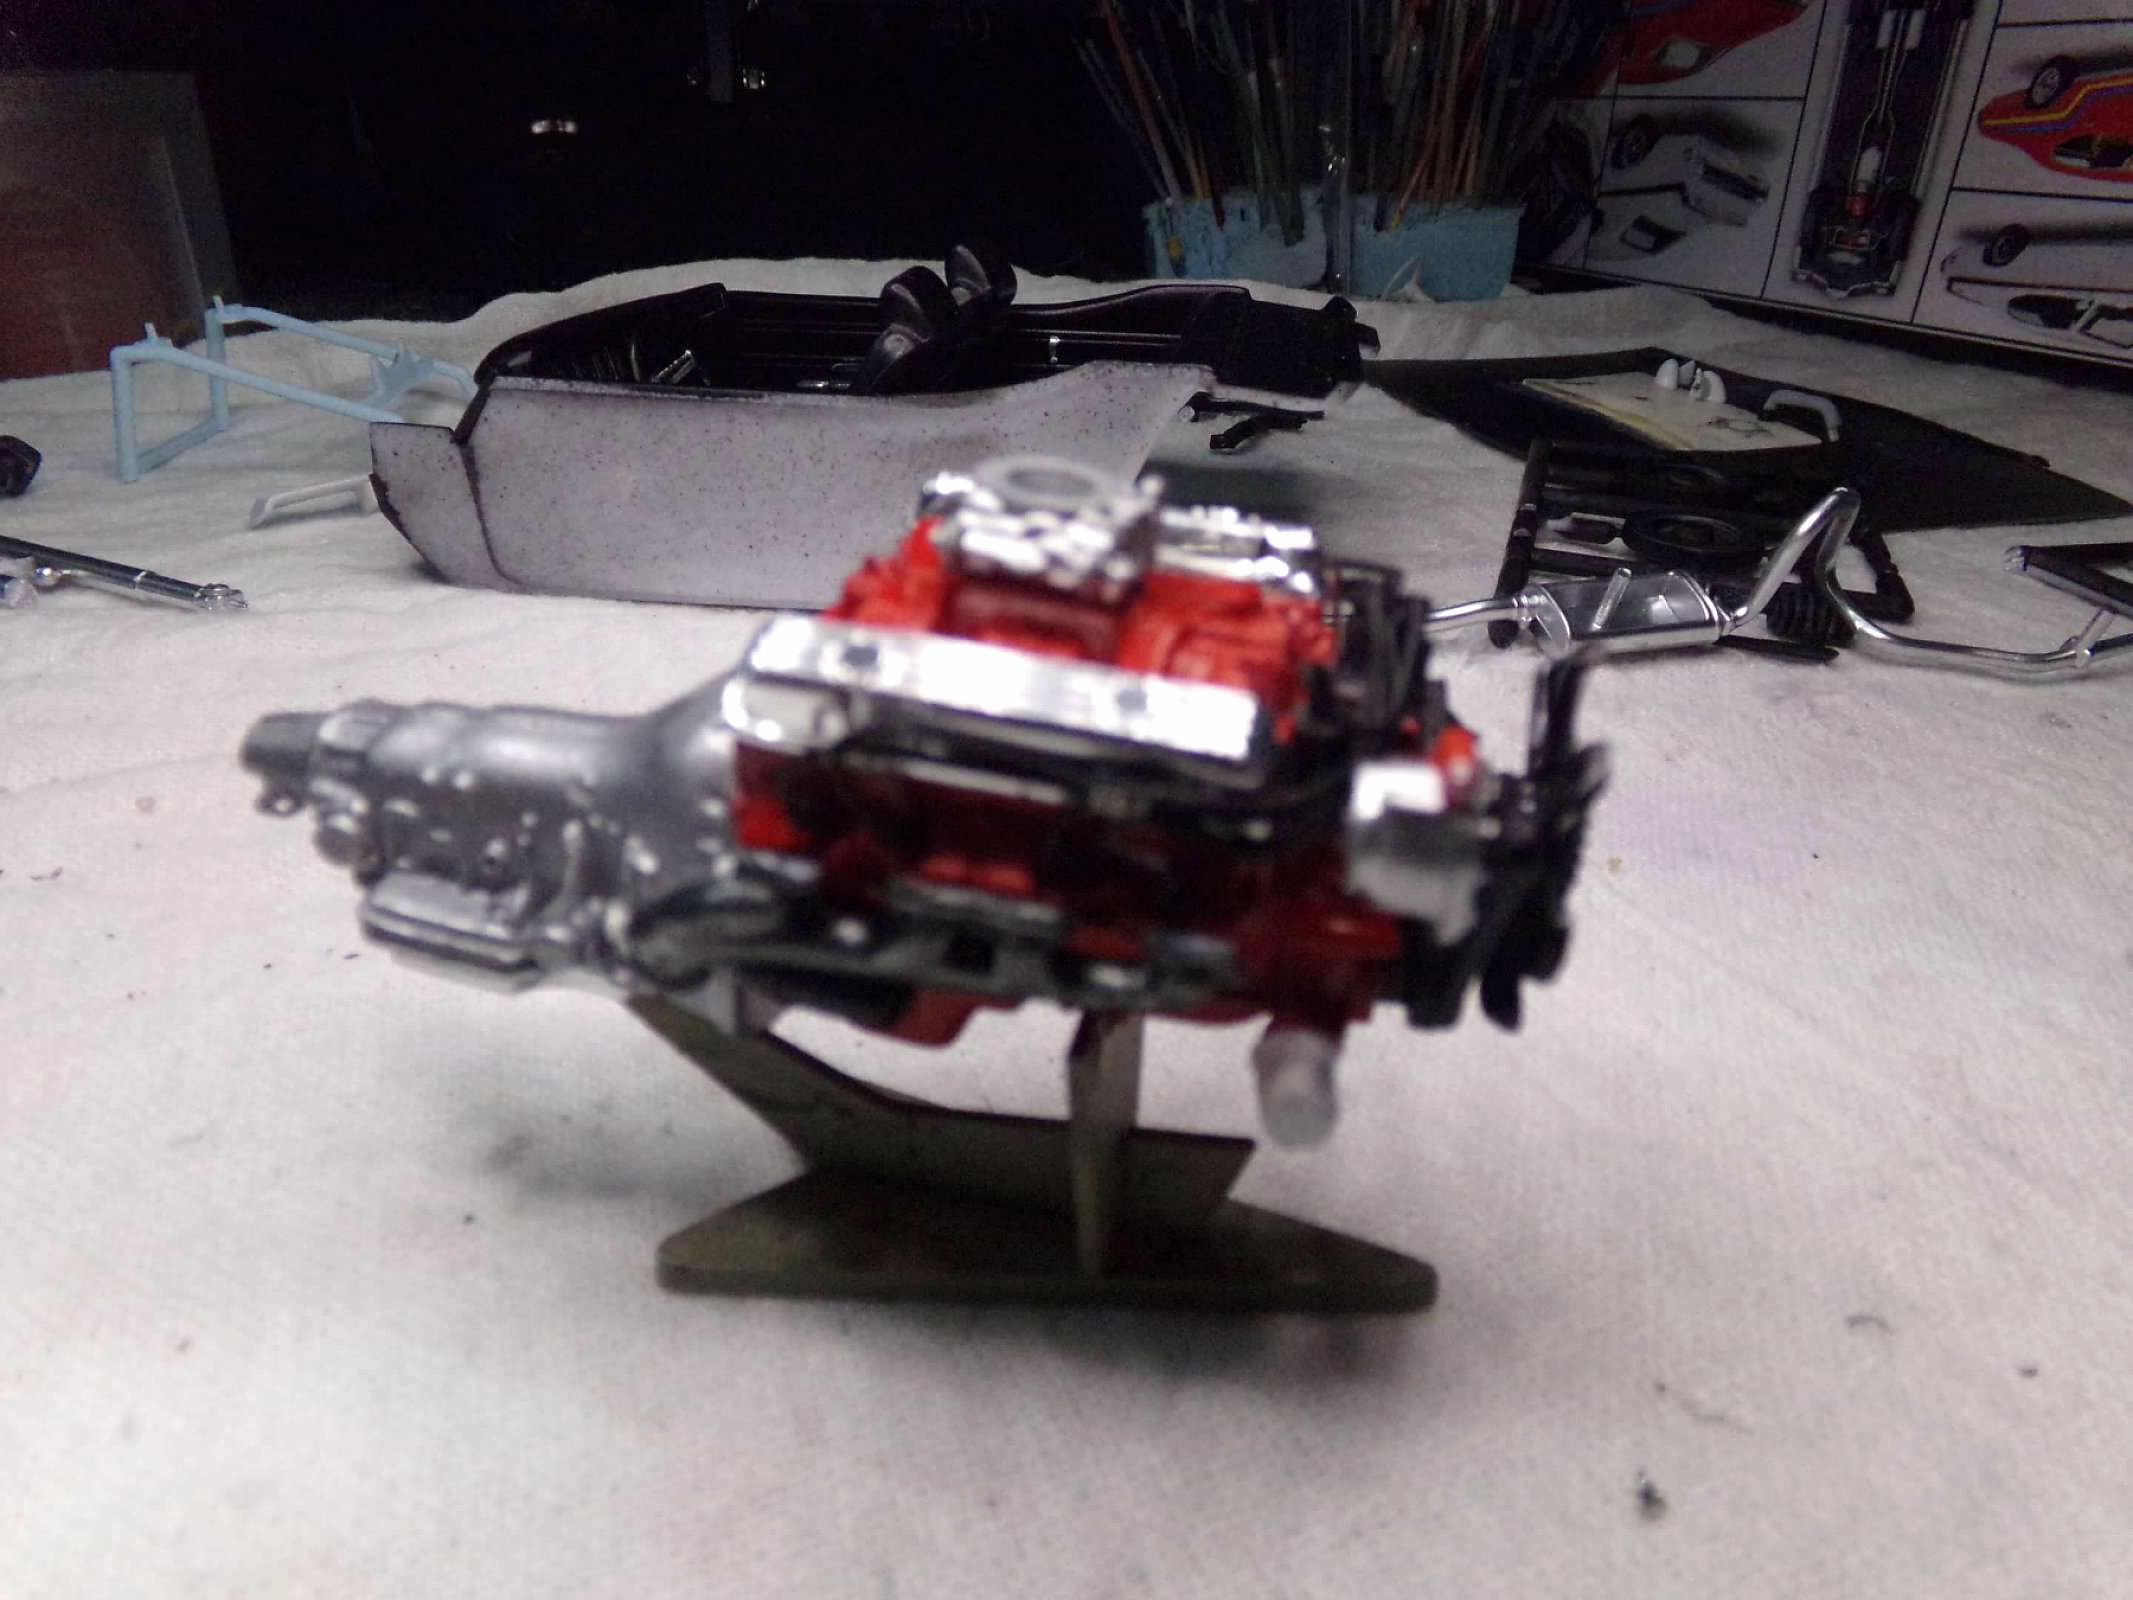
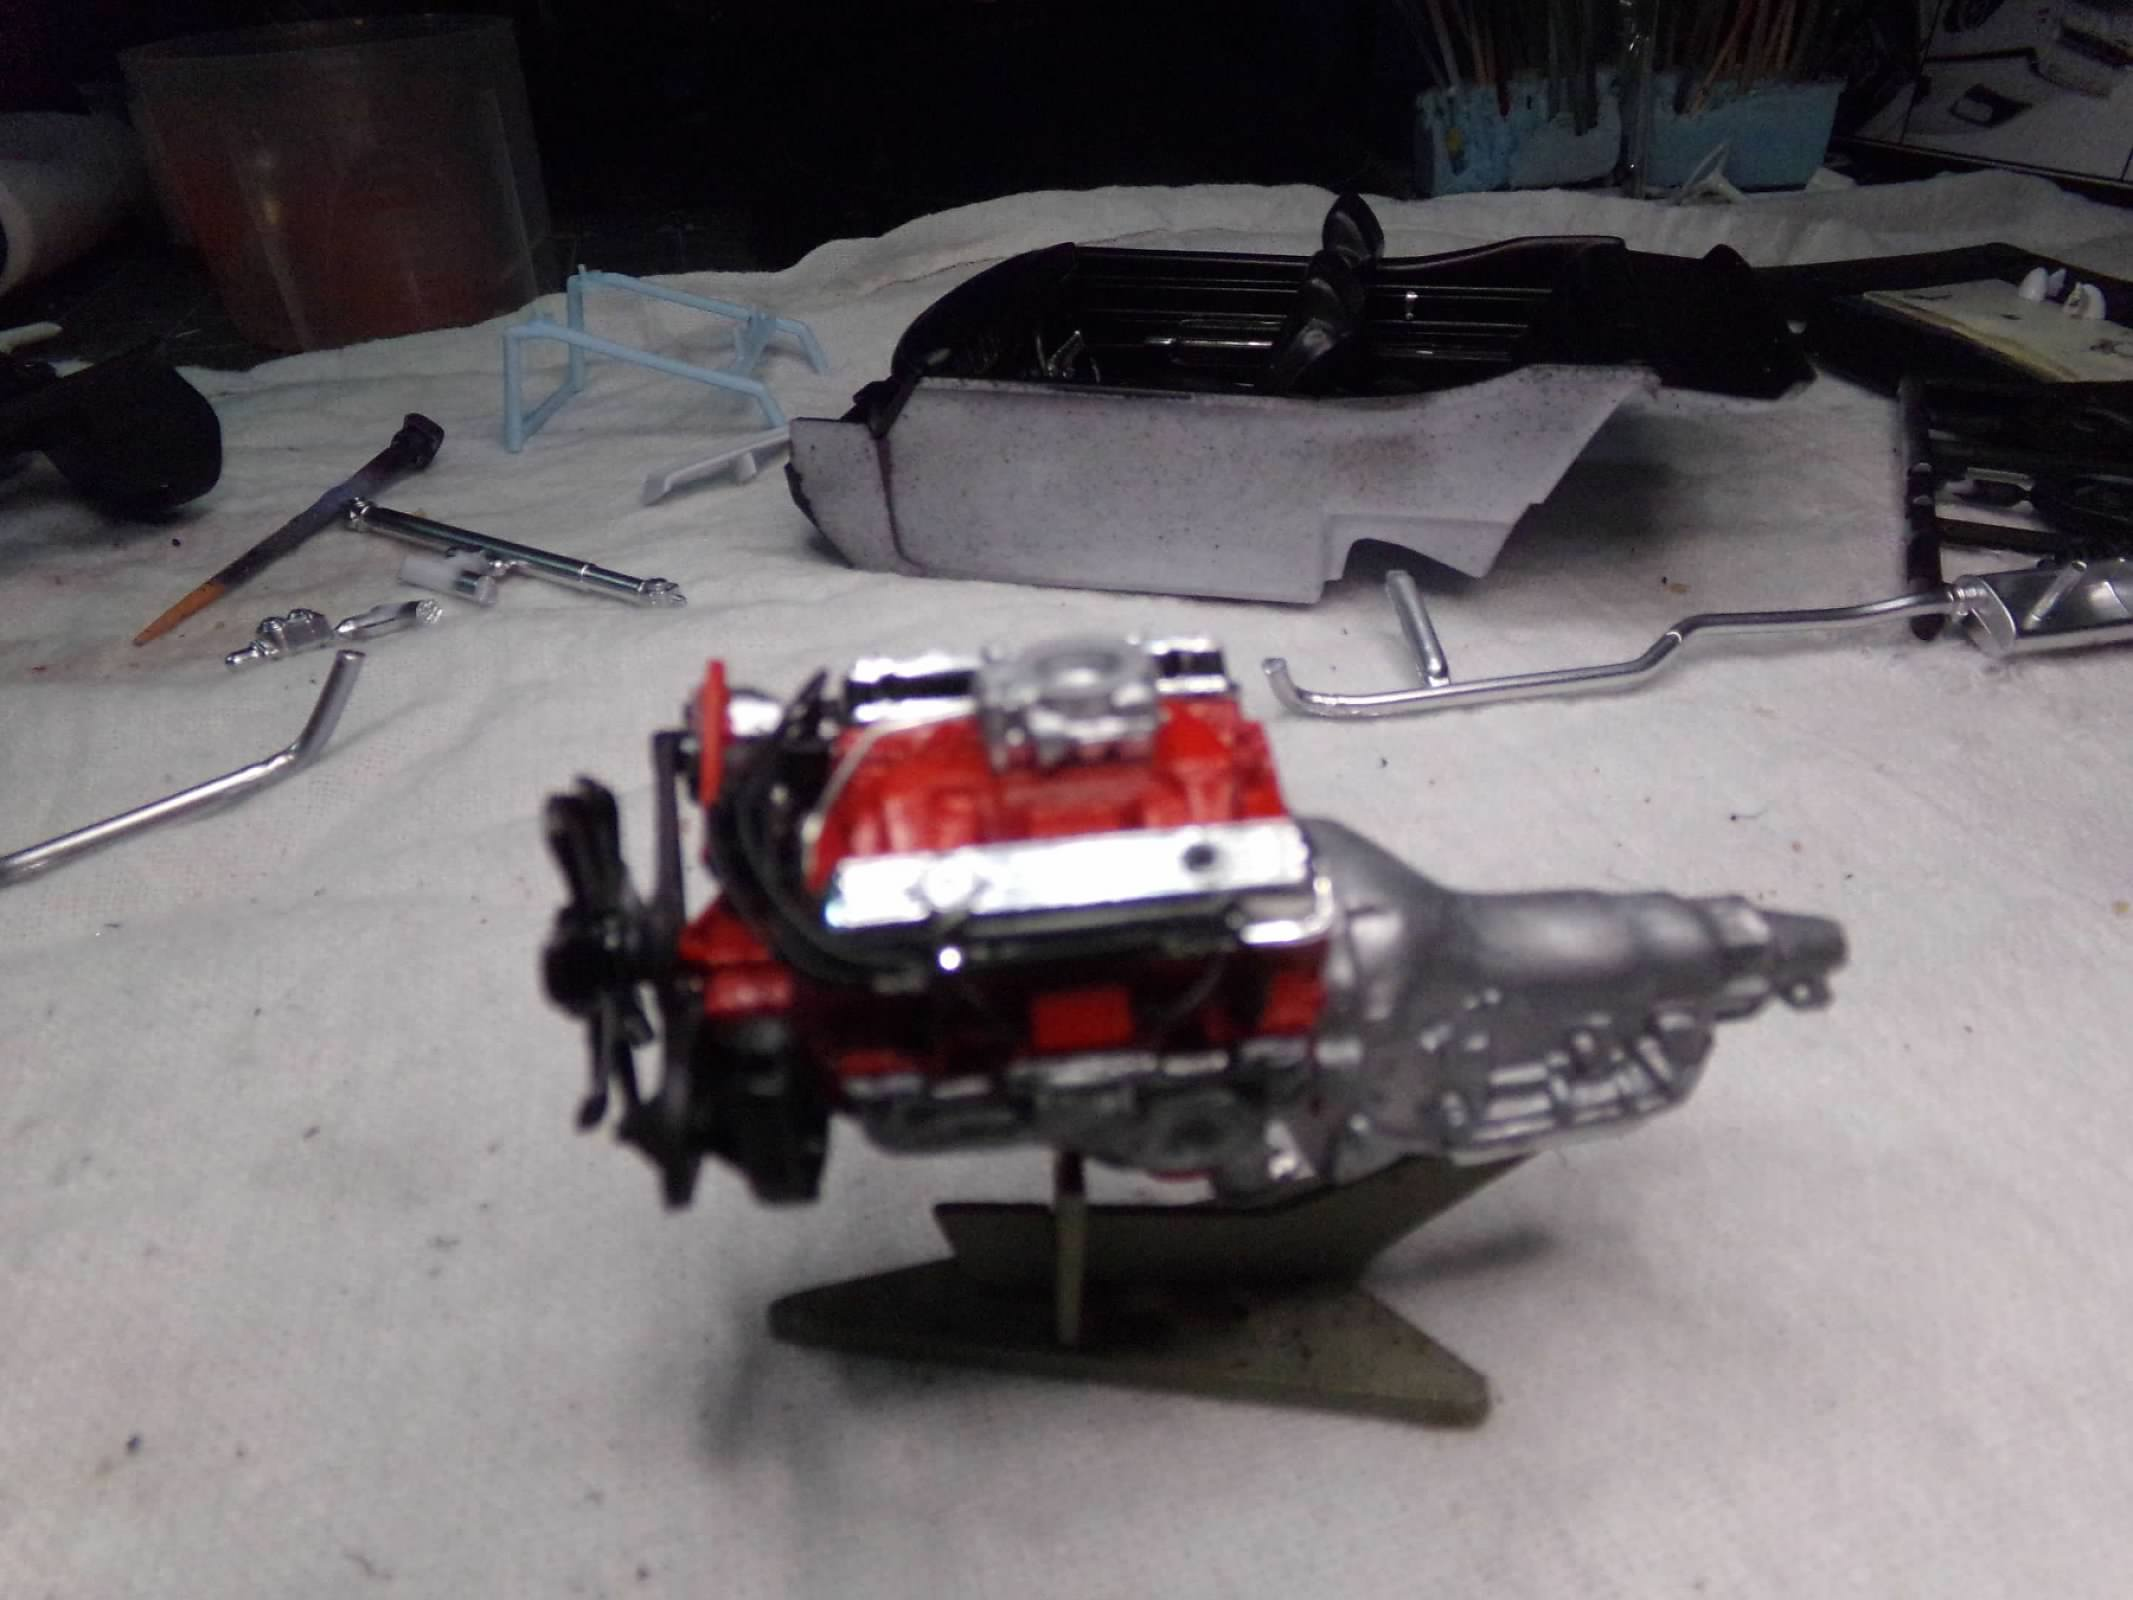
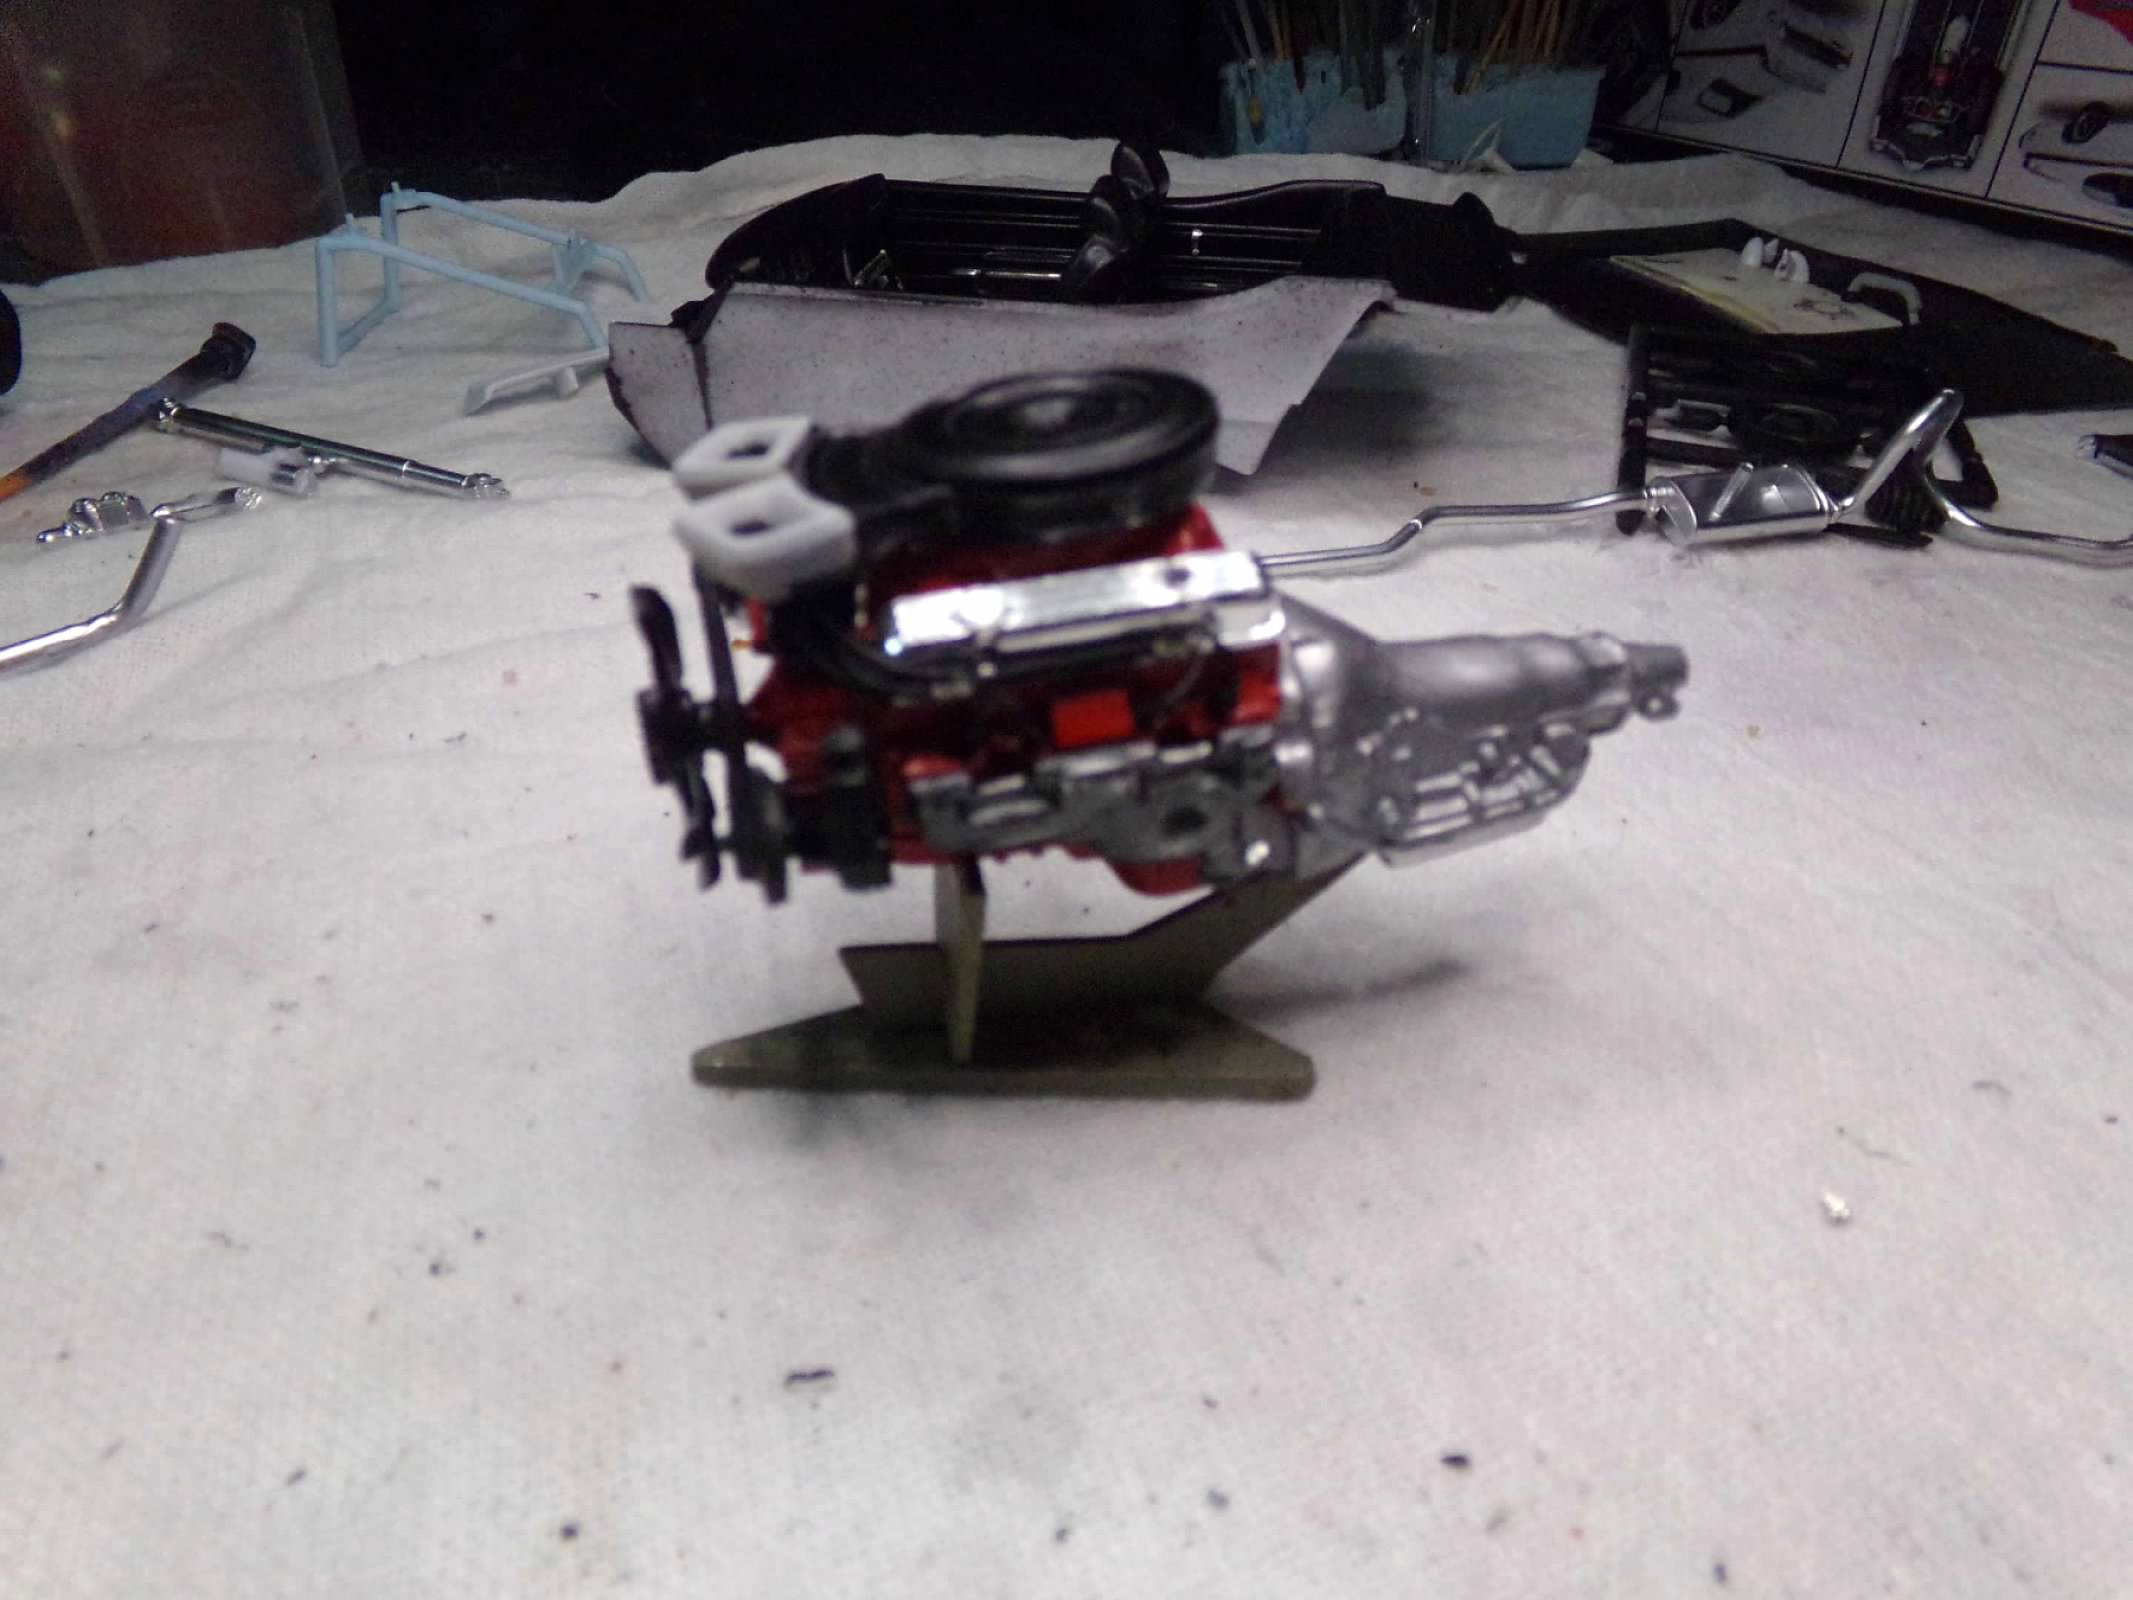
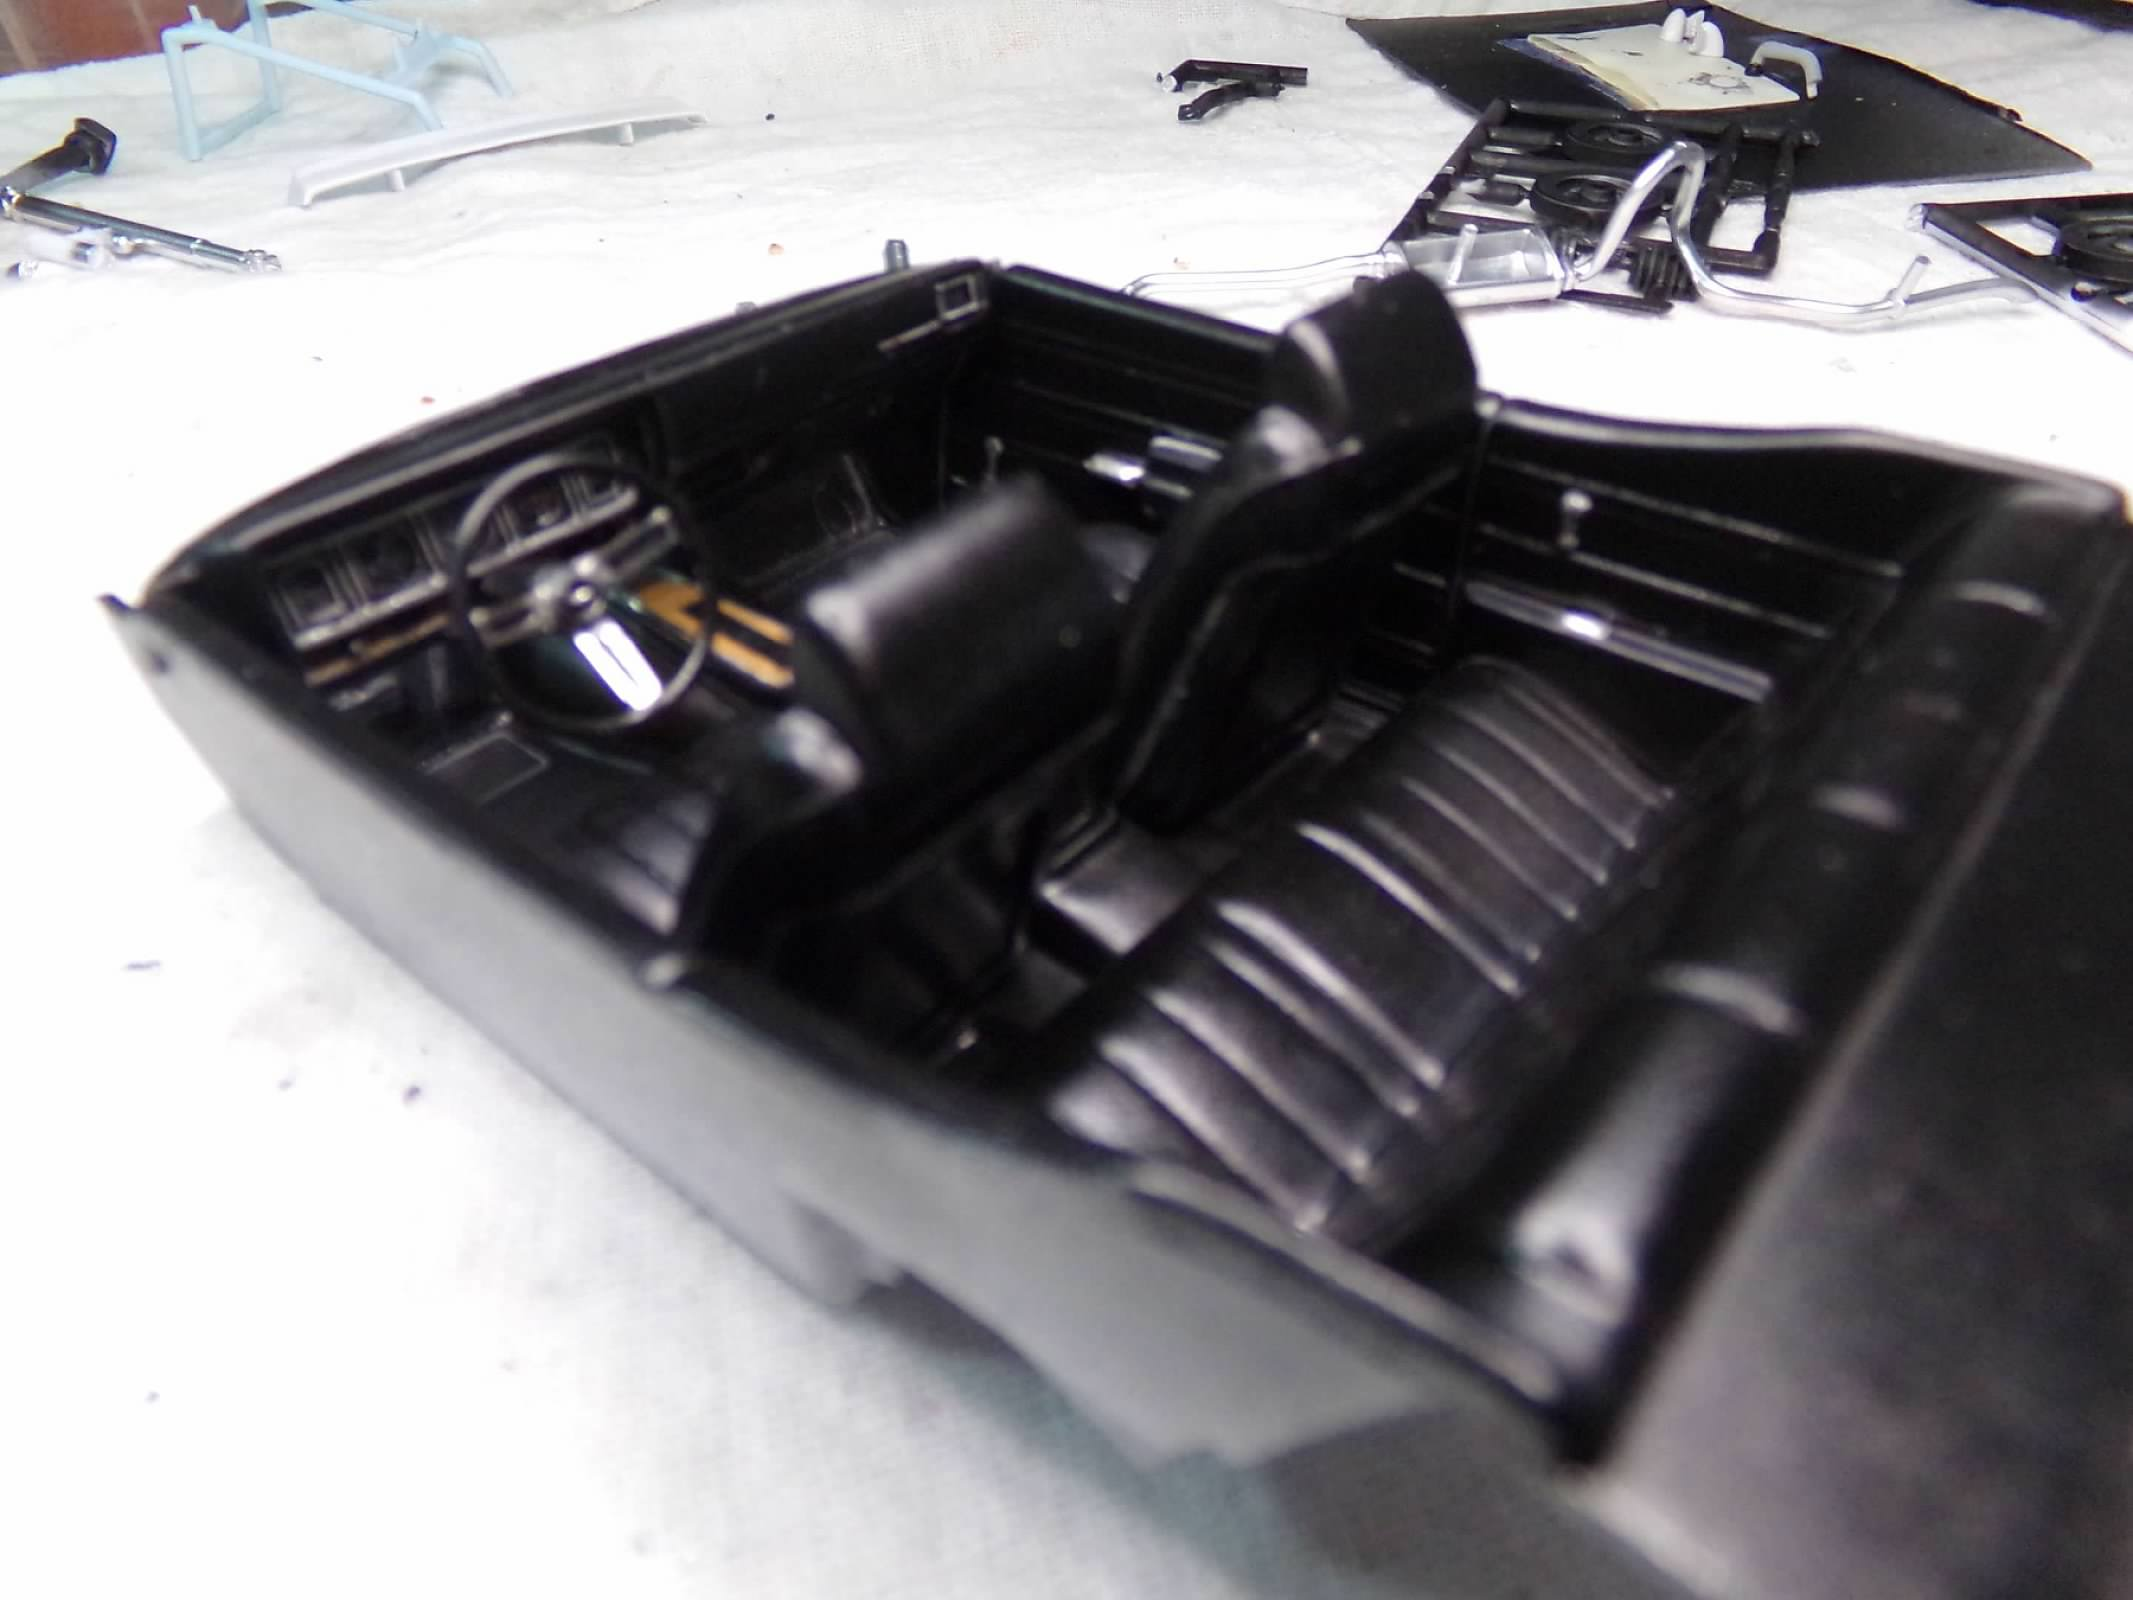
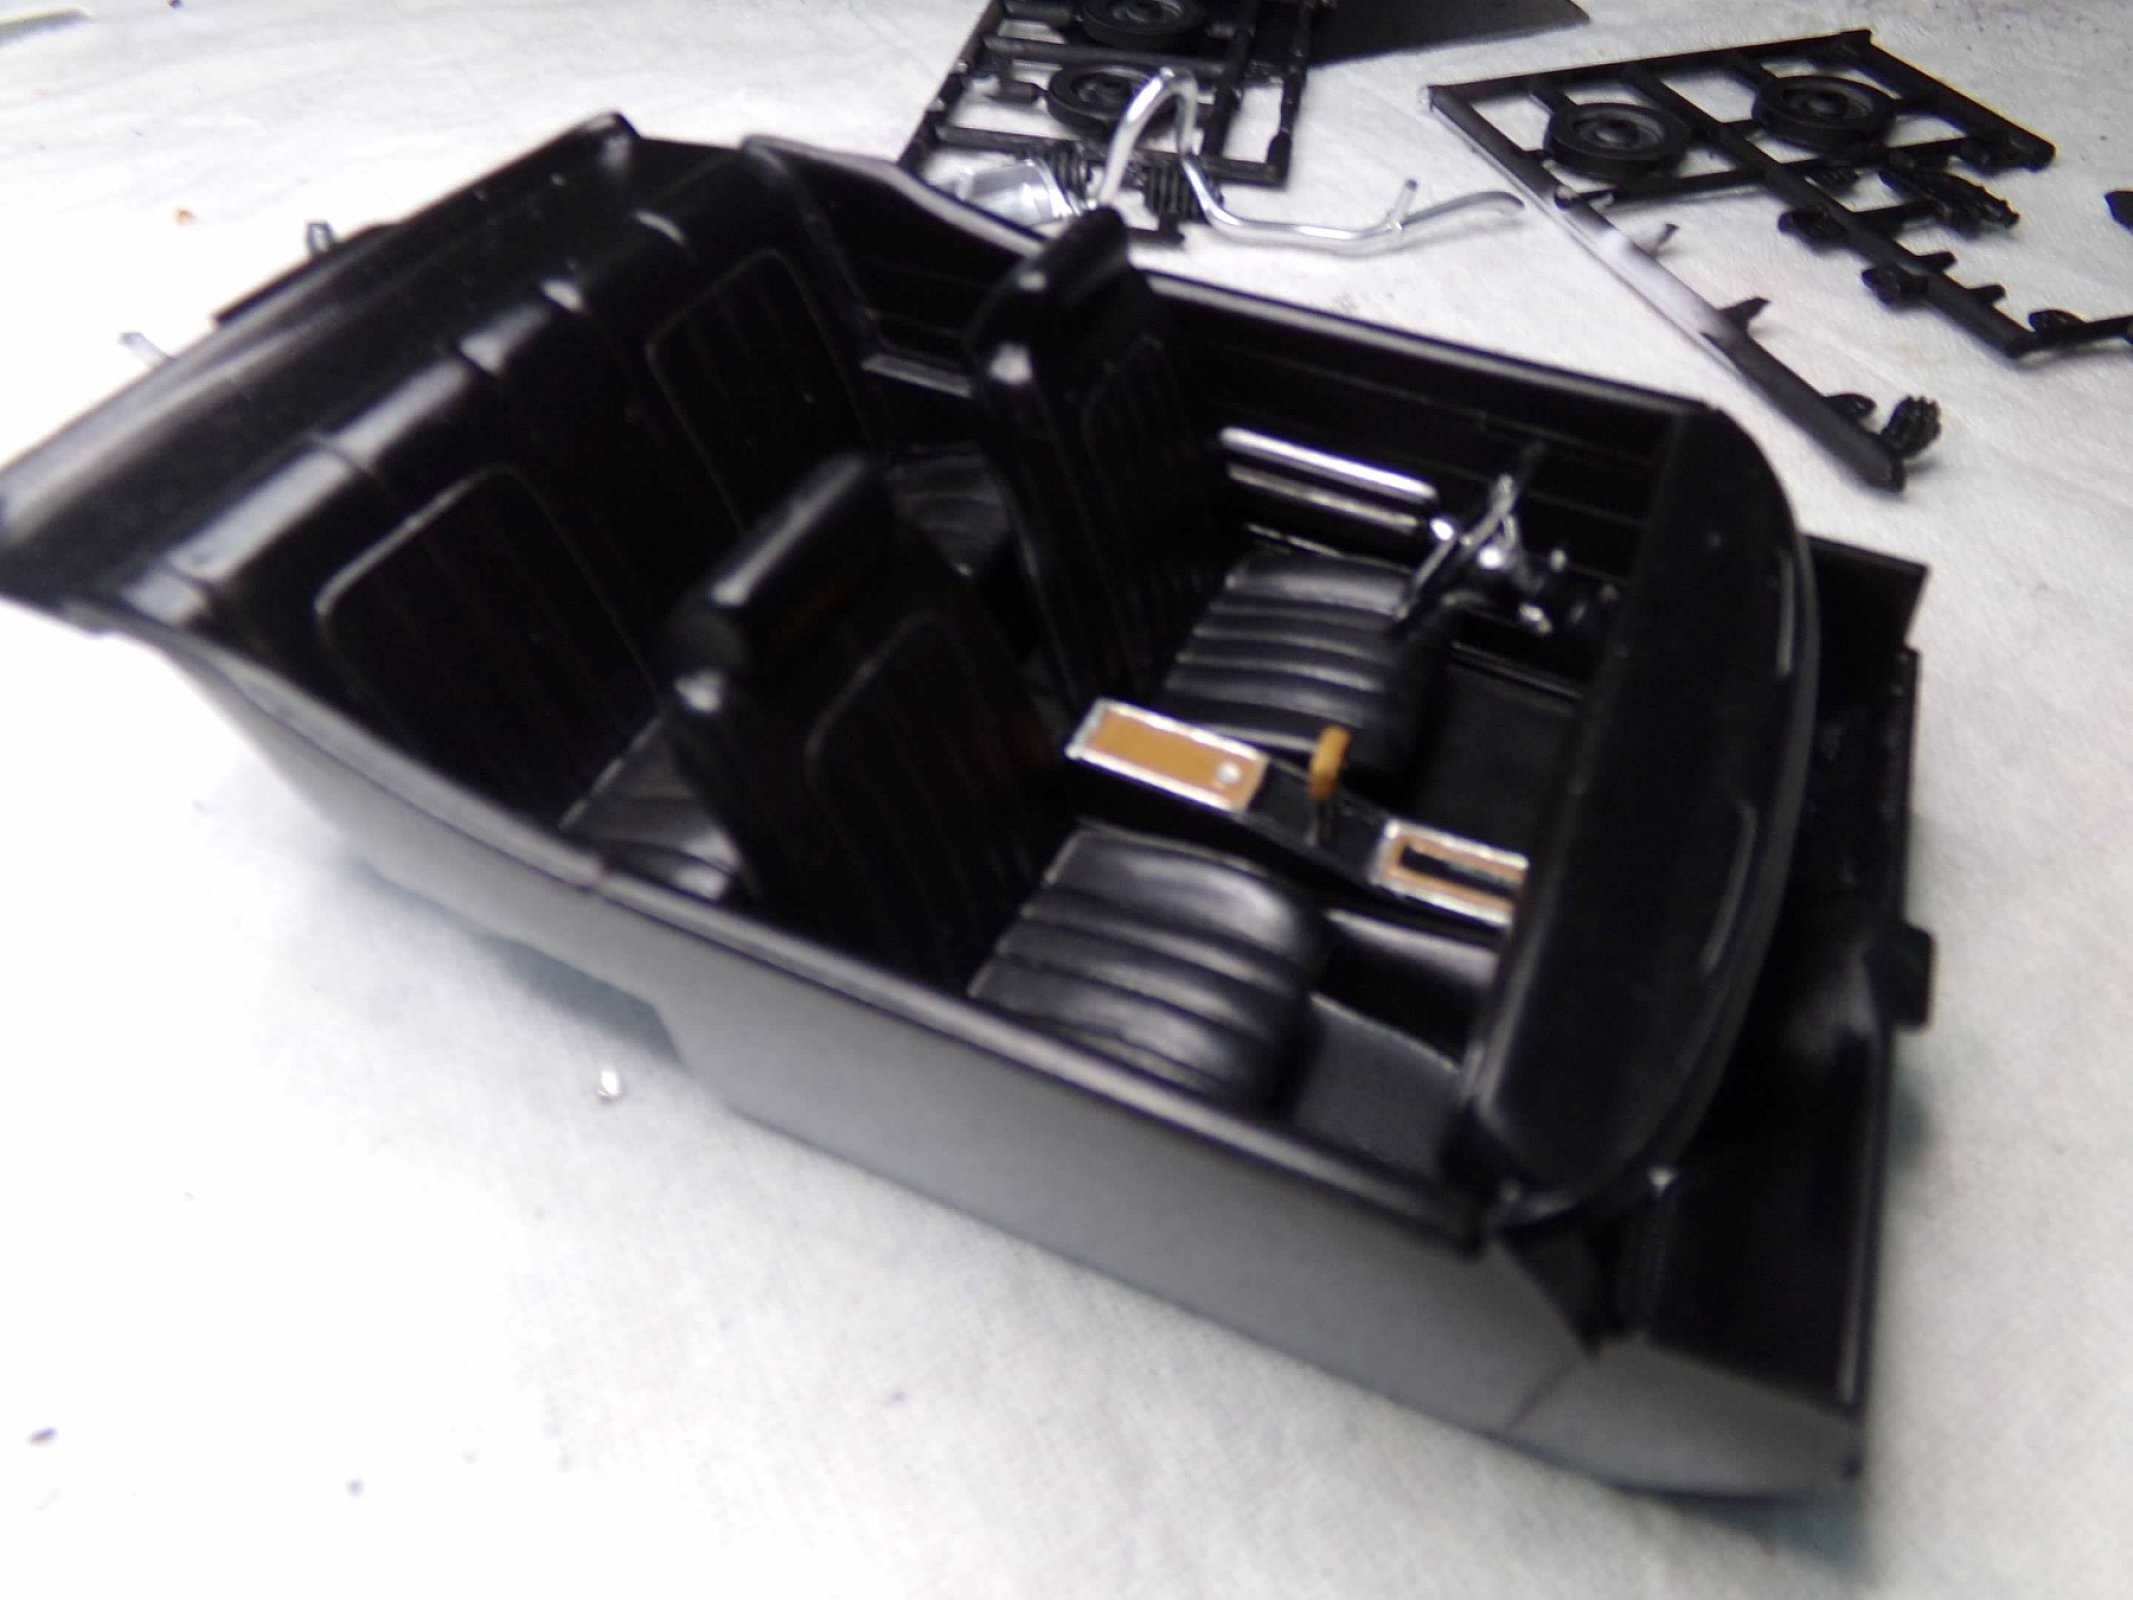
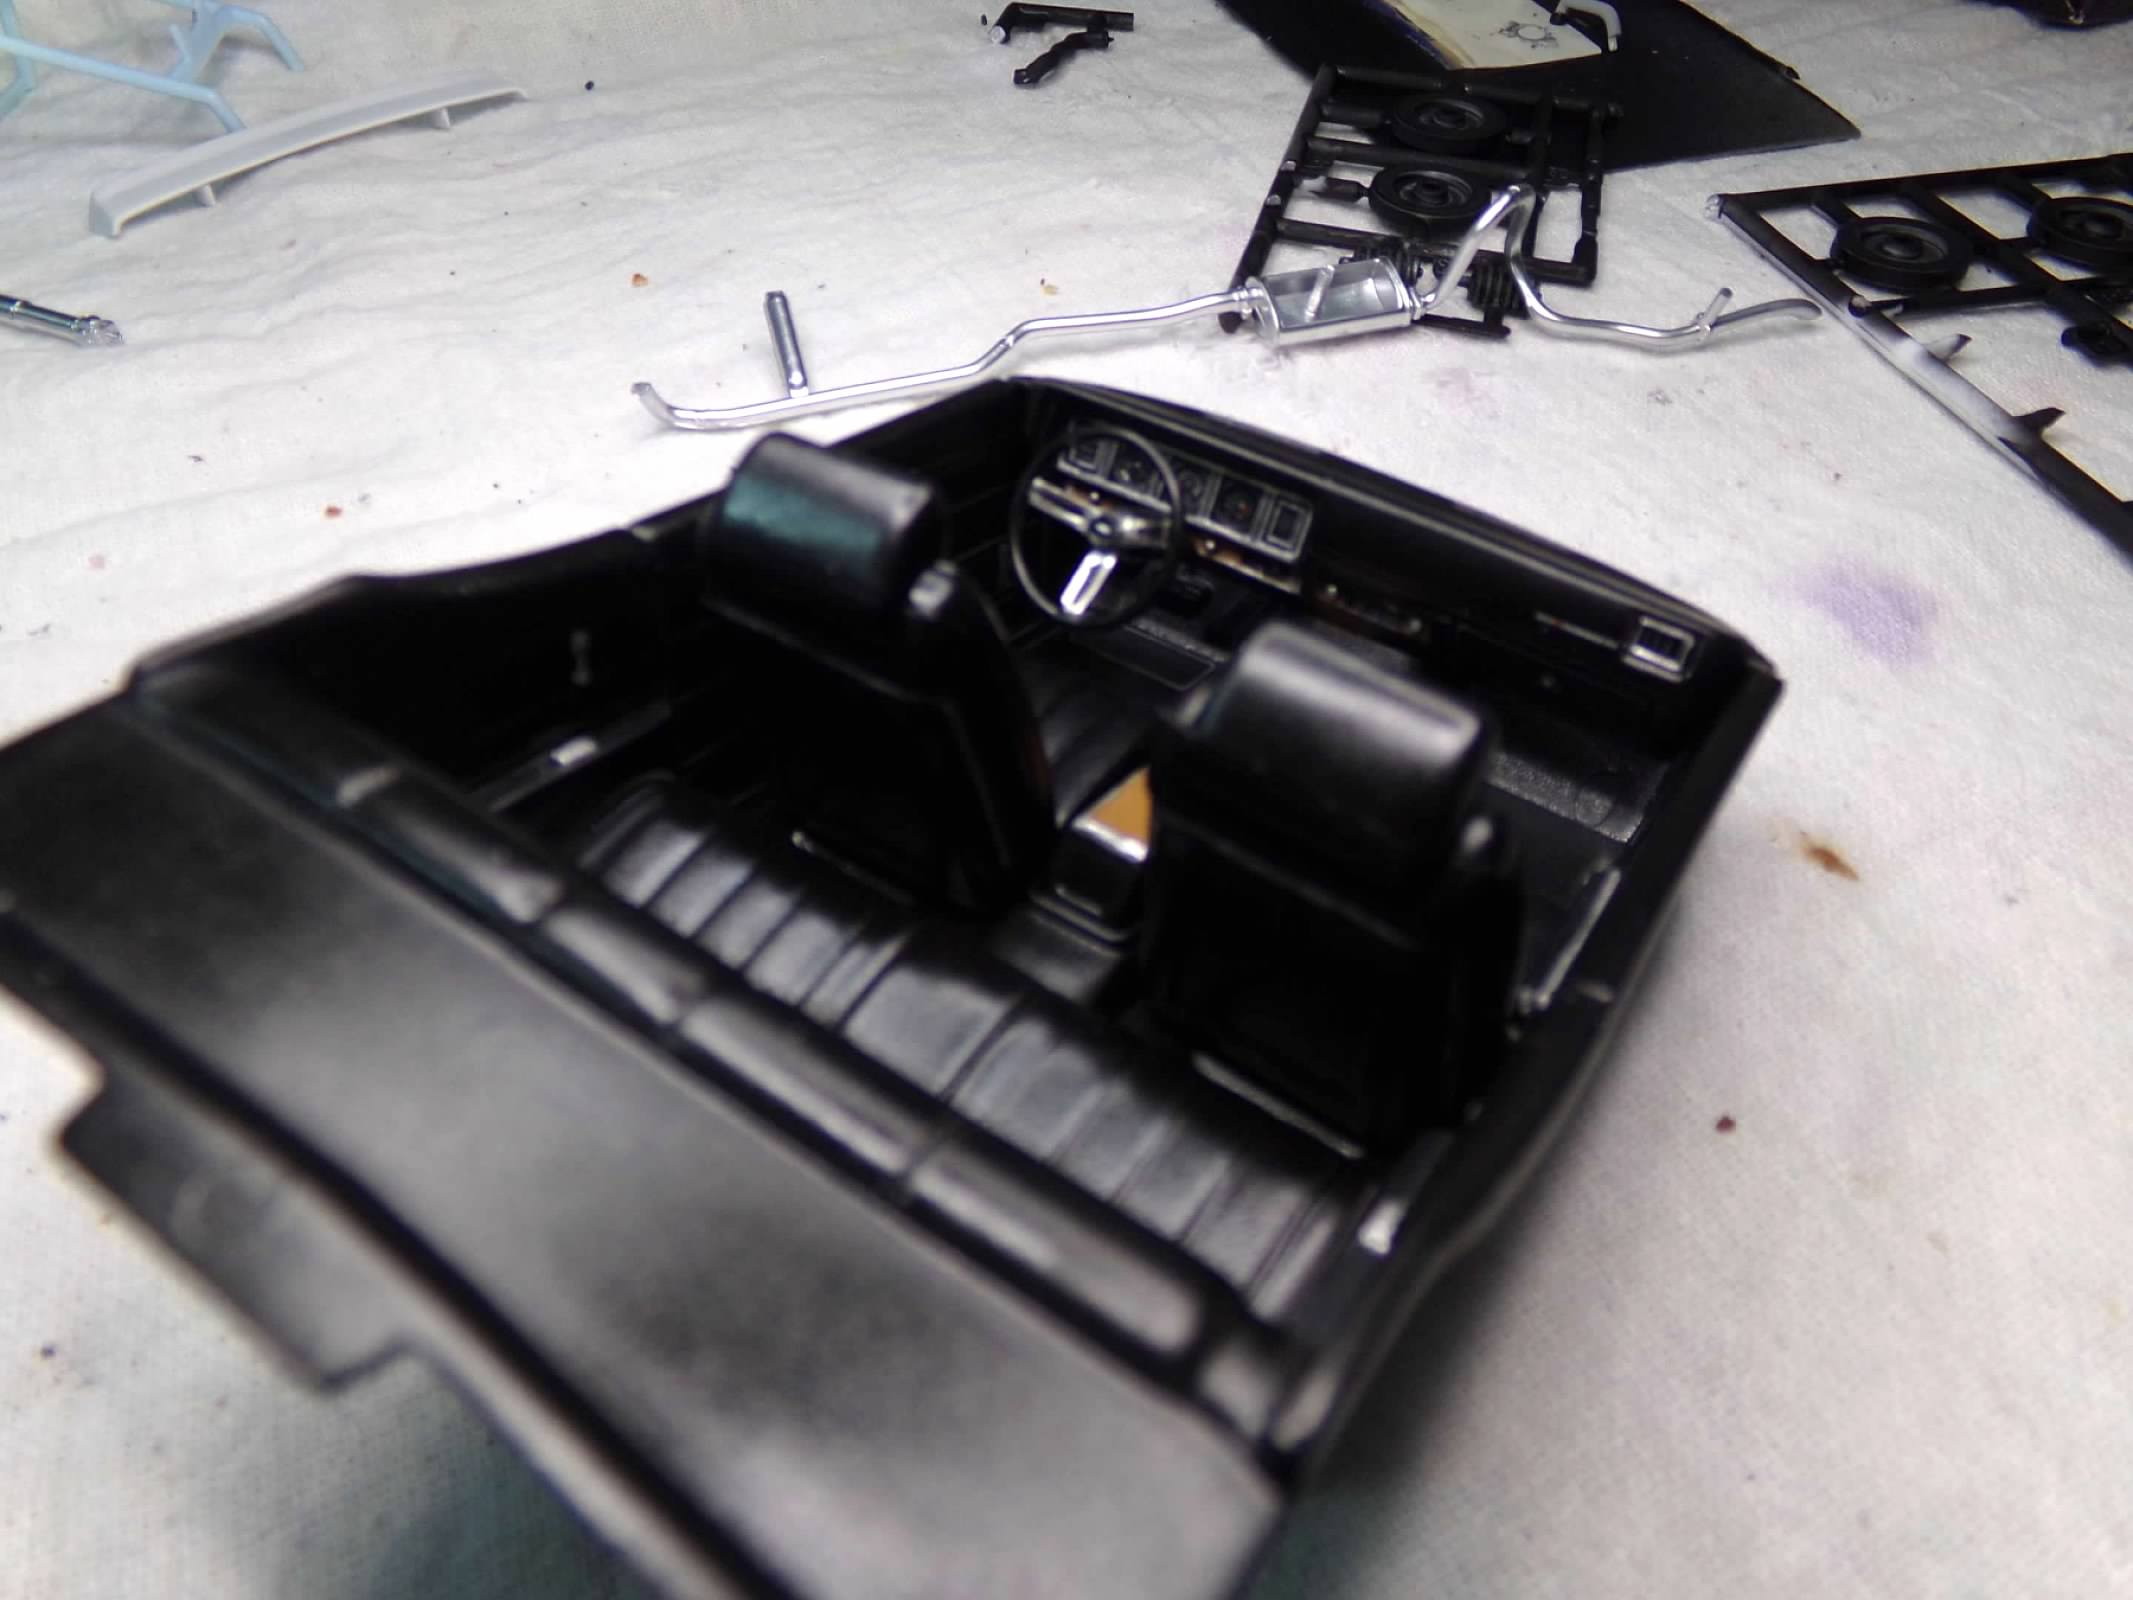
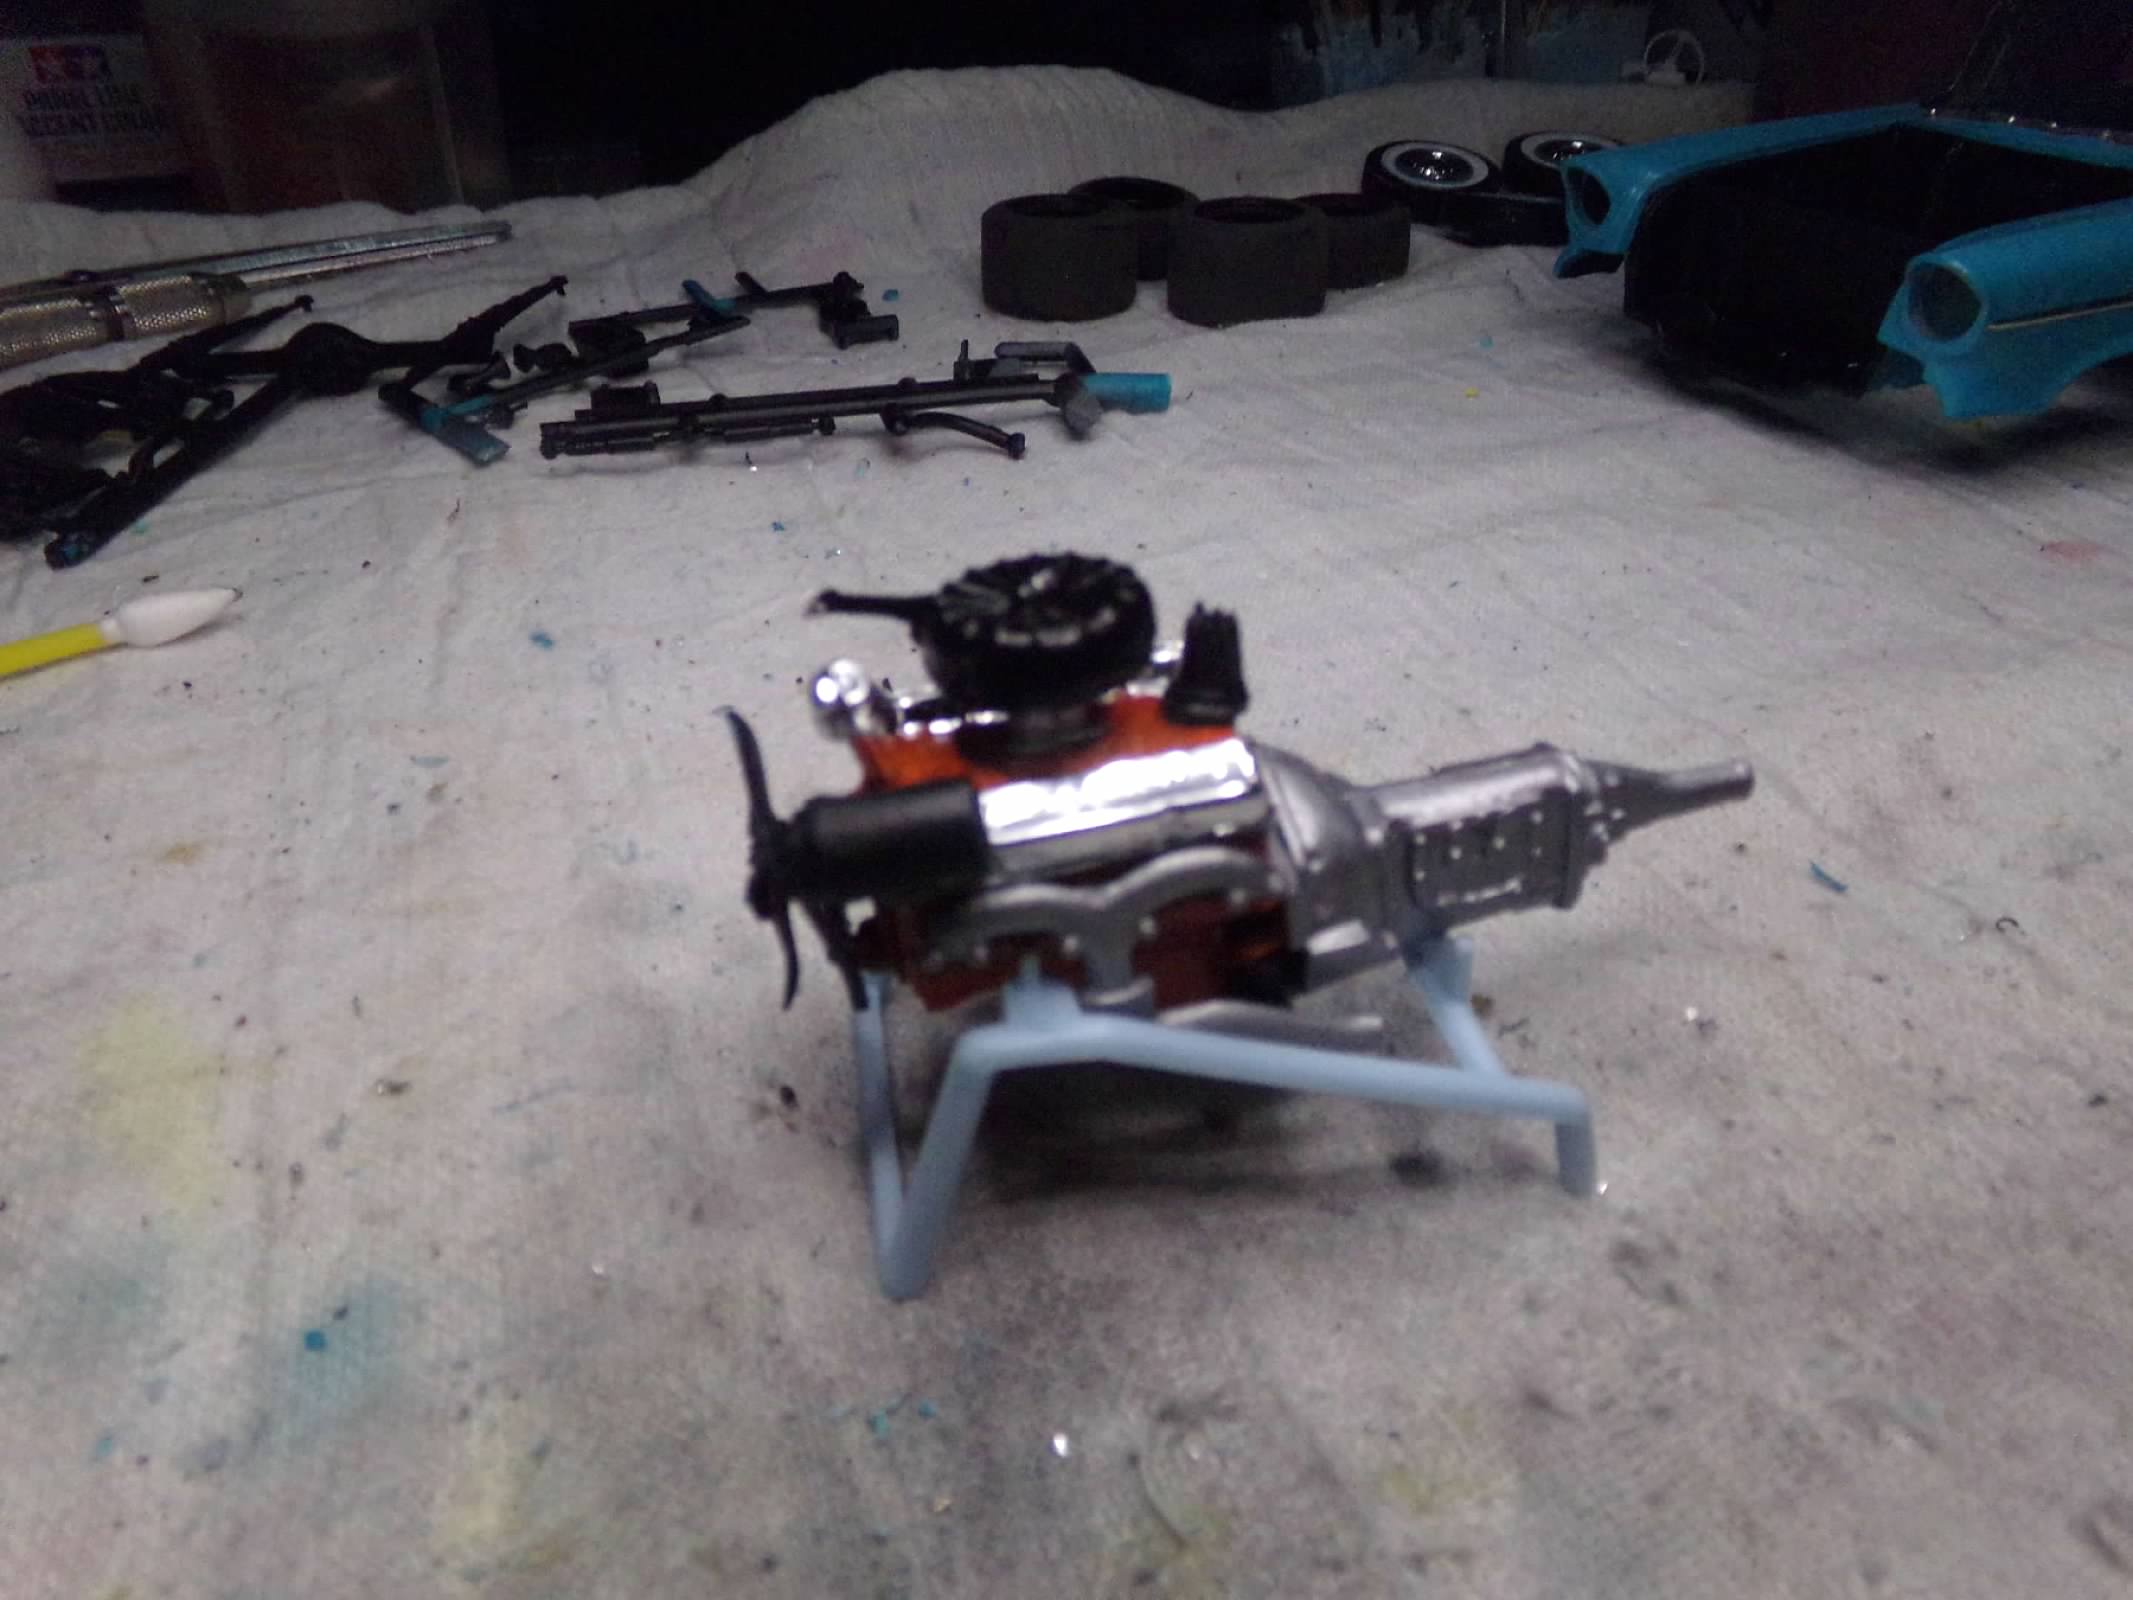
Thanks, All! I appreciate your comments! I finished the engine and the interior yesterday and today while awaiting the winter freeze. For the engine, I wired it and added a fuel line. Heater hoses will be added later. I had a feeling that there would be clearance issues on the wiring so I used four long two-hole wire looms as "L" brackets to hold the wires tight against the valve covers and then curl down with boots to the plug locations. I scratched a coil and mounted it on the right side of the engine. I still need to add a hose to the left valve cover and air cleaner and the heat riser tube to the left side of the engine and air cleaner. Both coming later with the heater hoses. The interior is pretty straight-forward. I added wood color to the lower dash and console and then added chrome trim with some foil and mainly chrome pen. The only shortcomi1nng is that the instructions would have you put the speedo in the left most position but the engraving indicated to me that the speedo should be in the center, as most are. But it doesn't make much difference since they are black gauges on black paint so they are hard to see and probably won't be seen once ensconced in the interior. But to those who view with a pen flashlight and tiny magnifying glass, it should look correct! Sorry for the poor photos. A new camera is on my To-Do list! Thanks for looking! ?
-
Thanks, Misha and Donald! I appreciate your comments! Donald, good luck with your build. Remember it is a very basic kit. It can be improved with some PE and other work but you don't have to do that to make it look good!
-
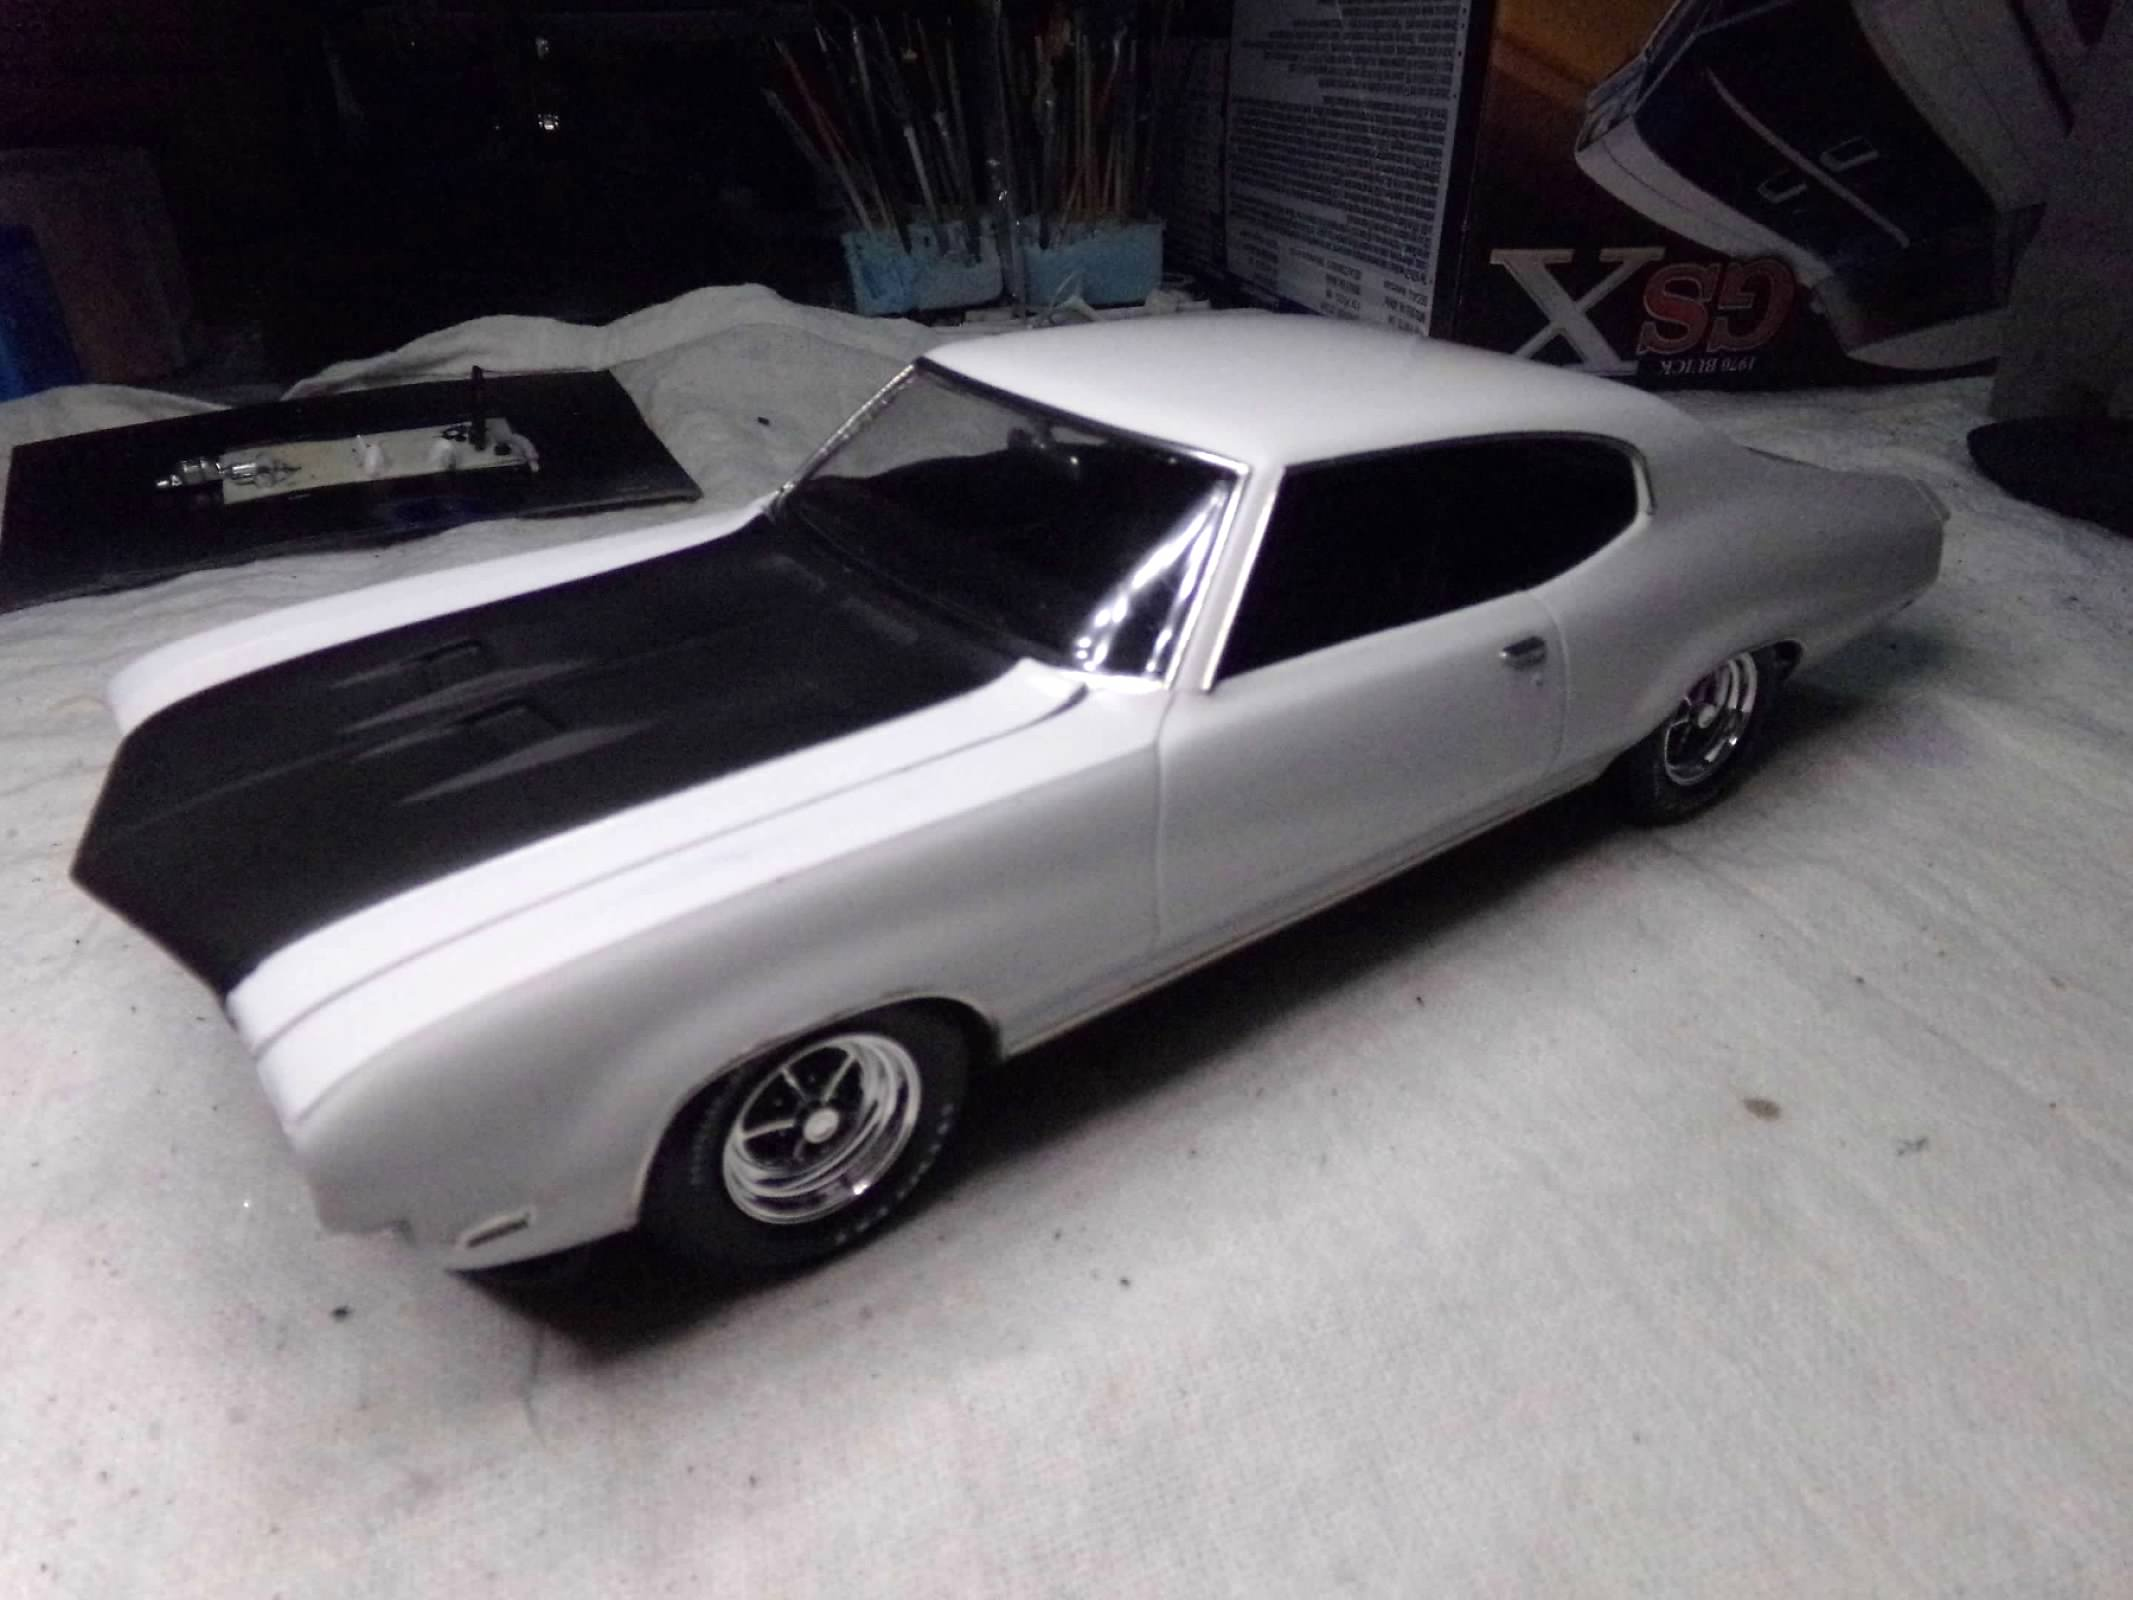
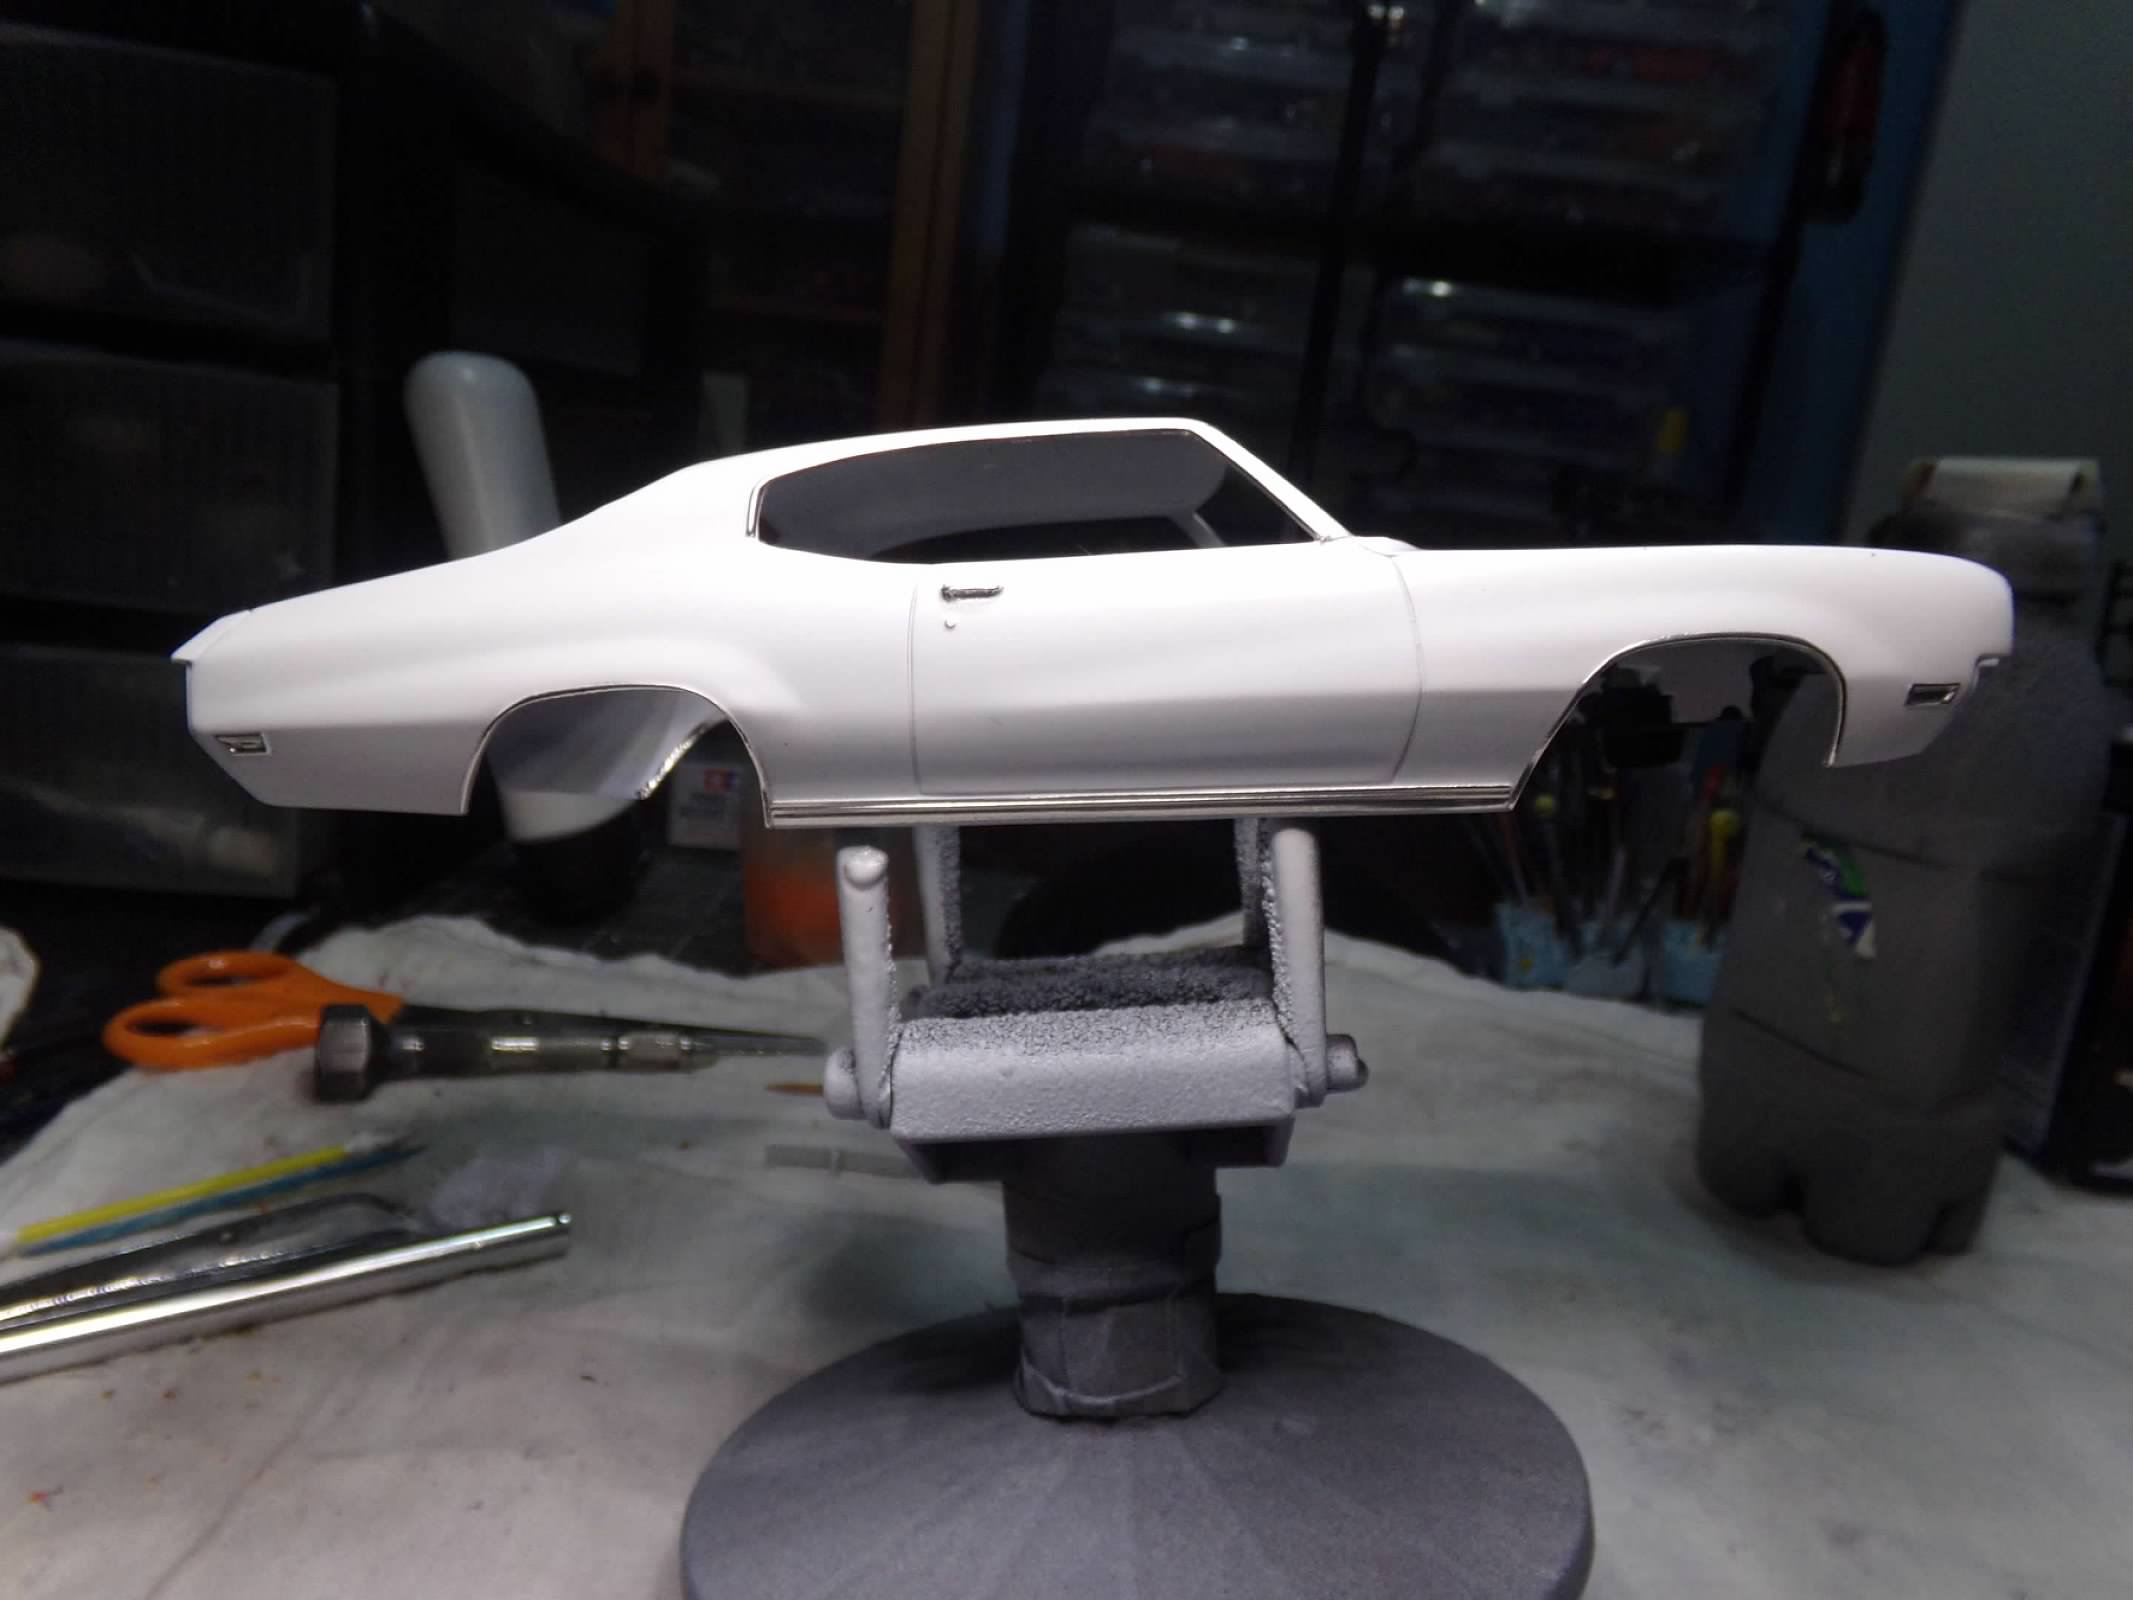
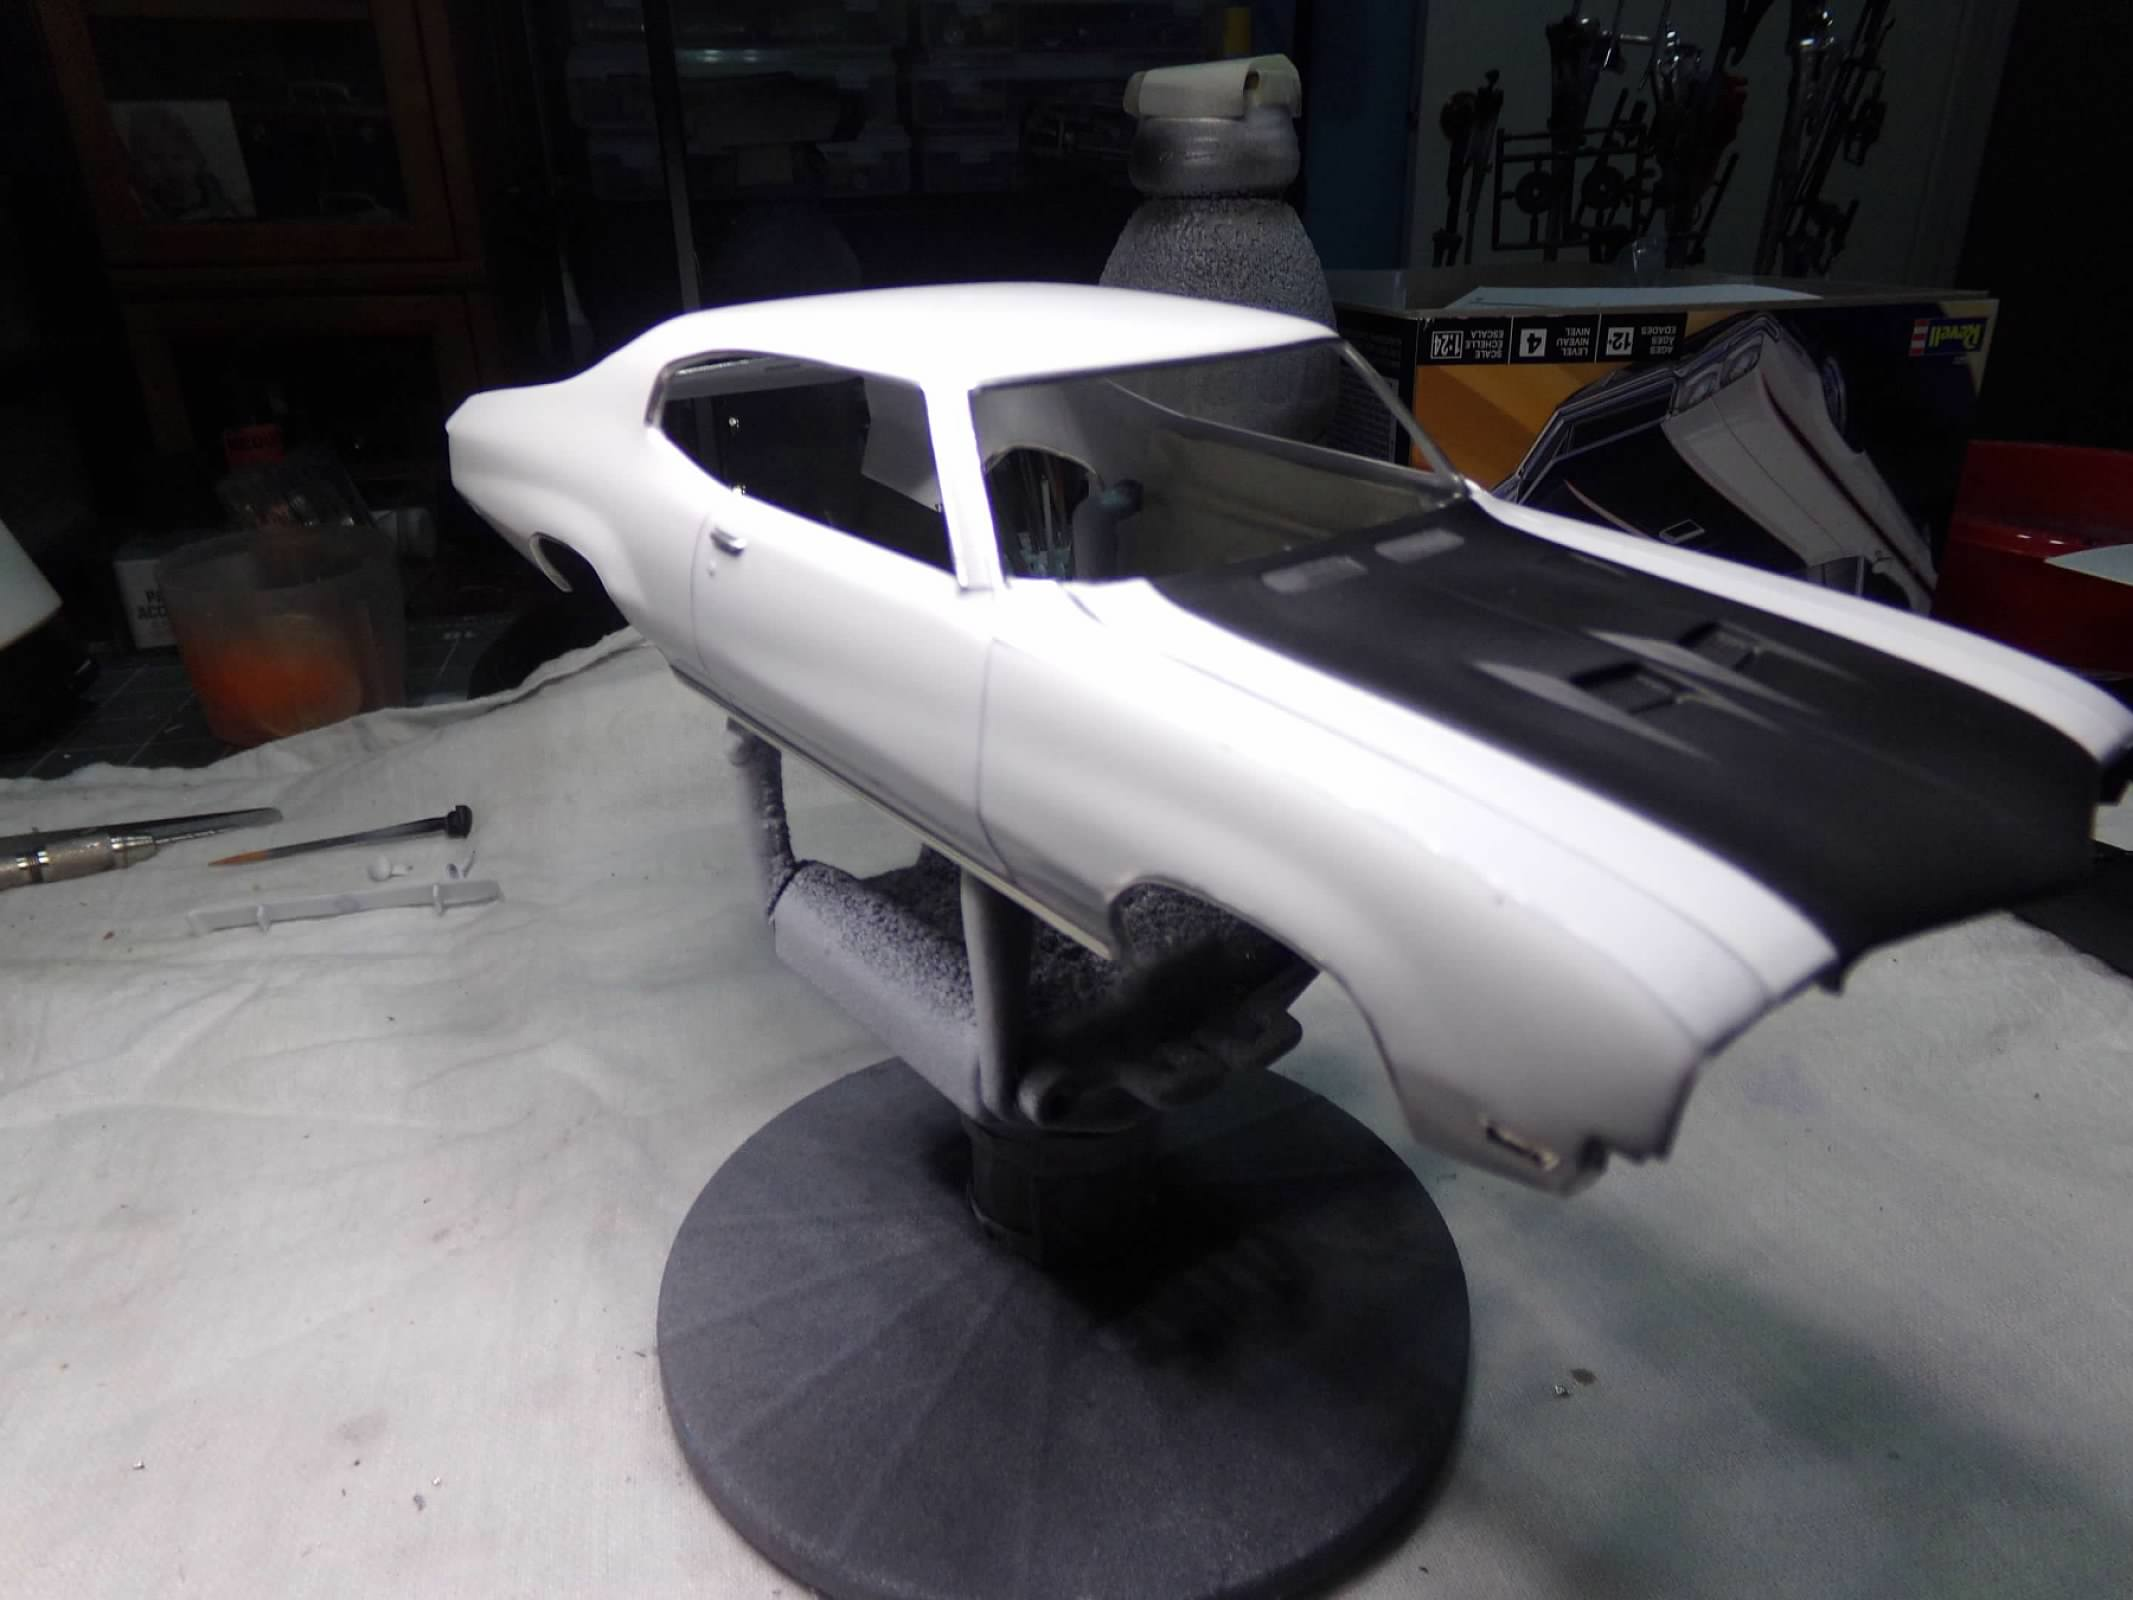
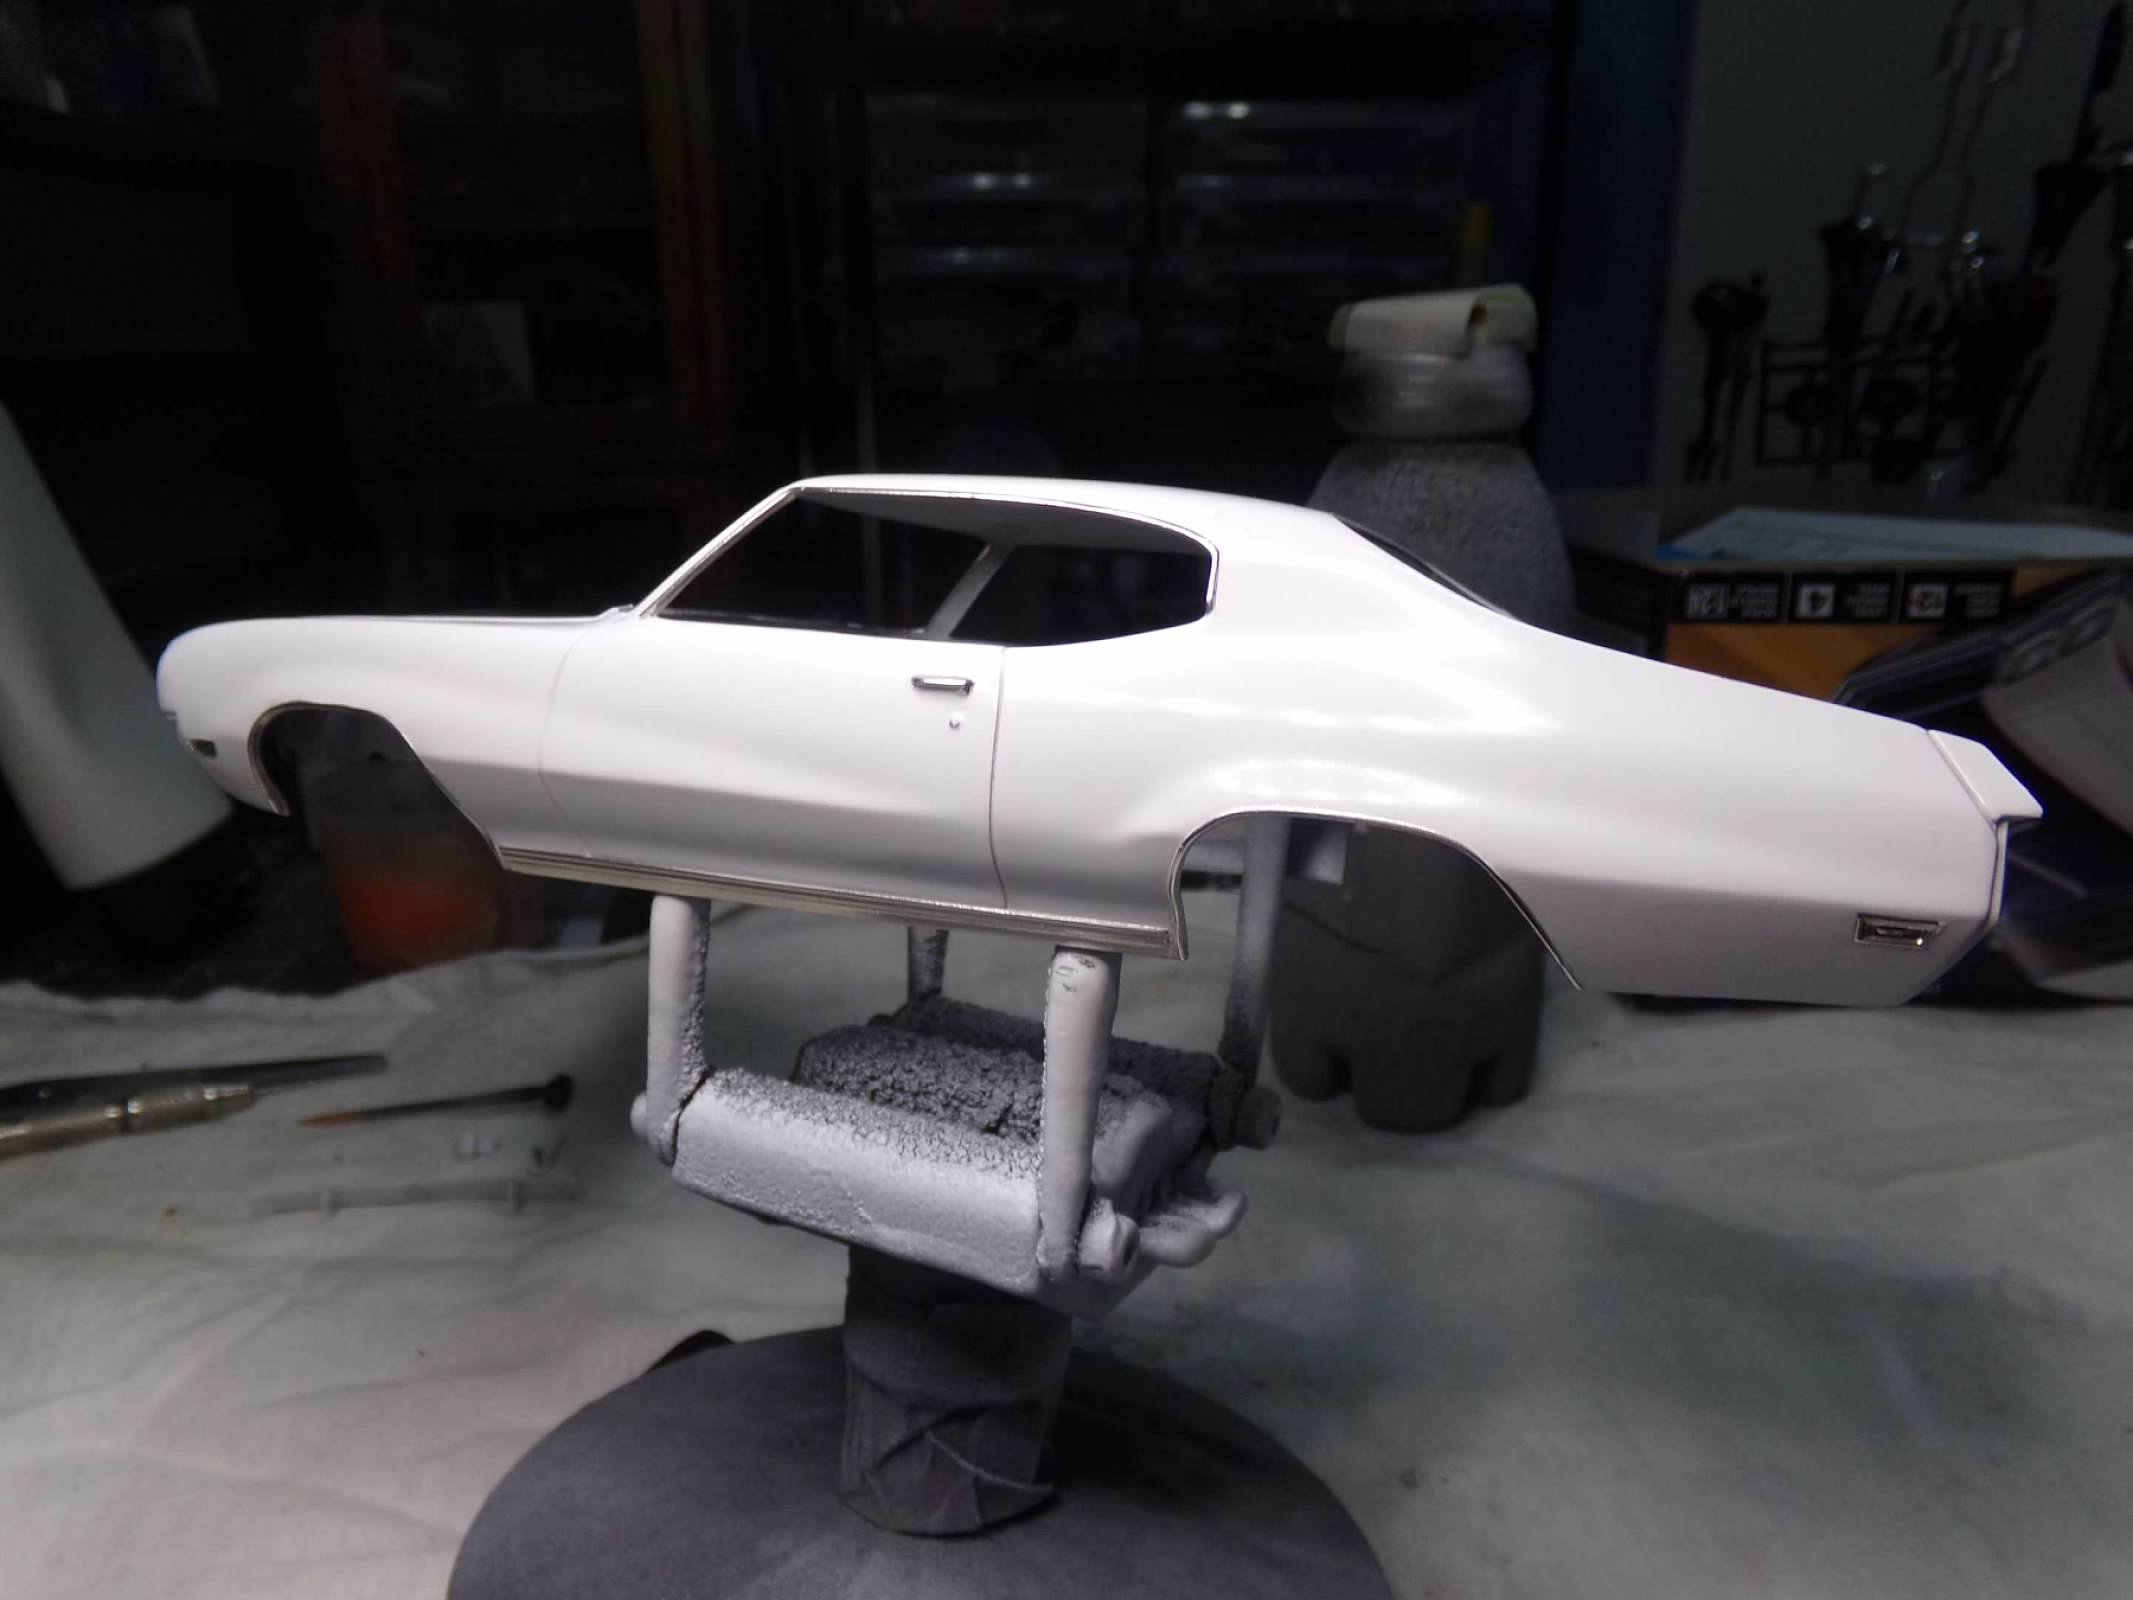
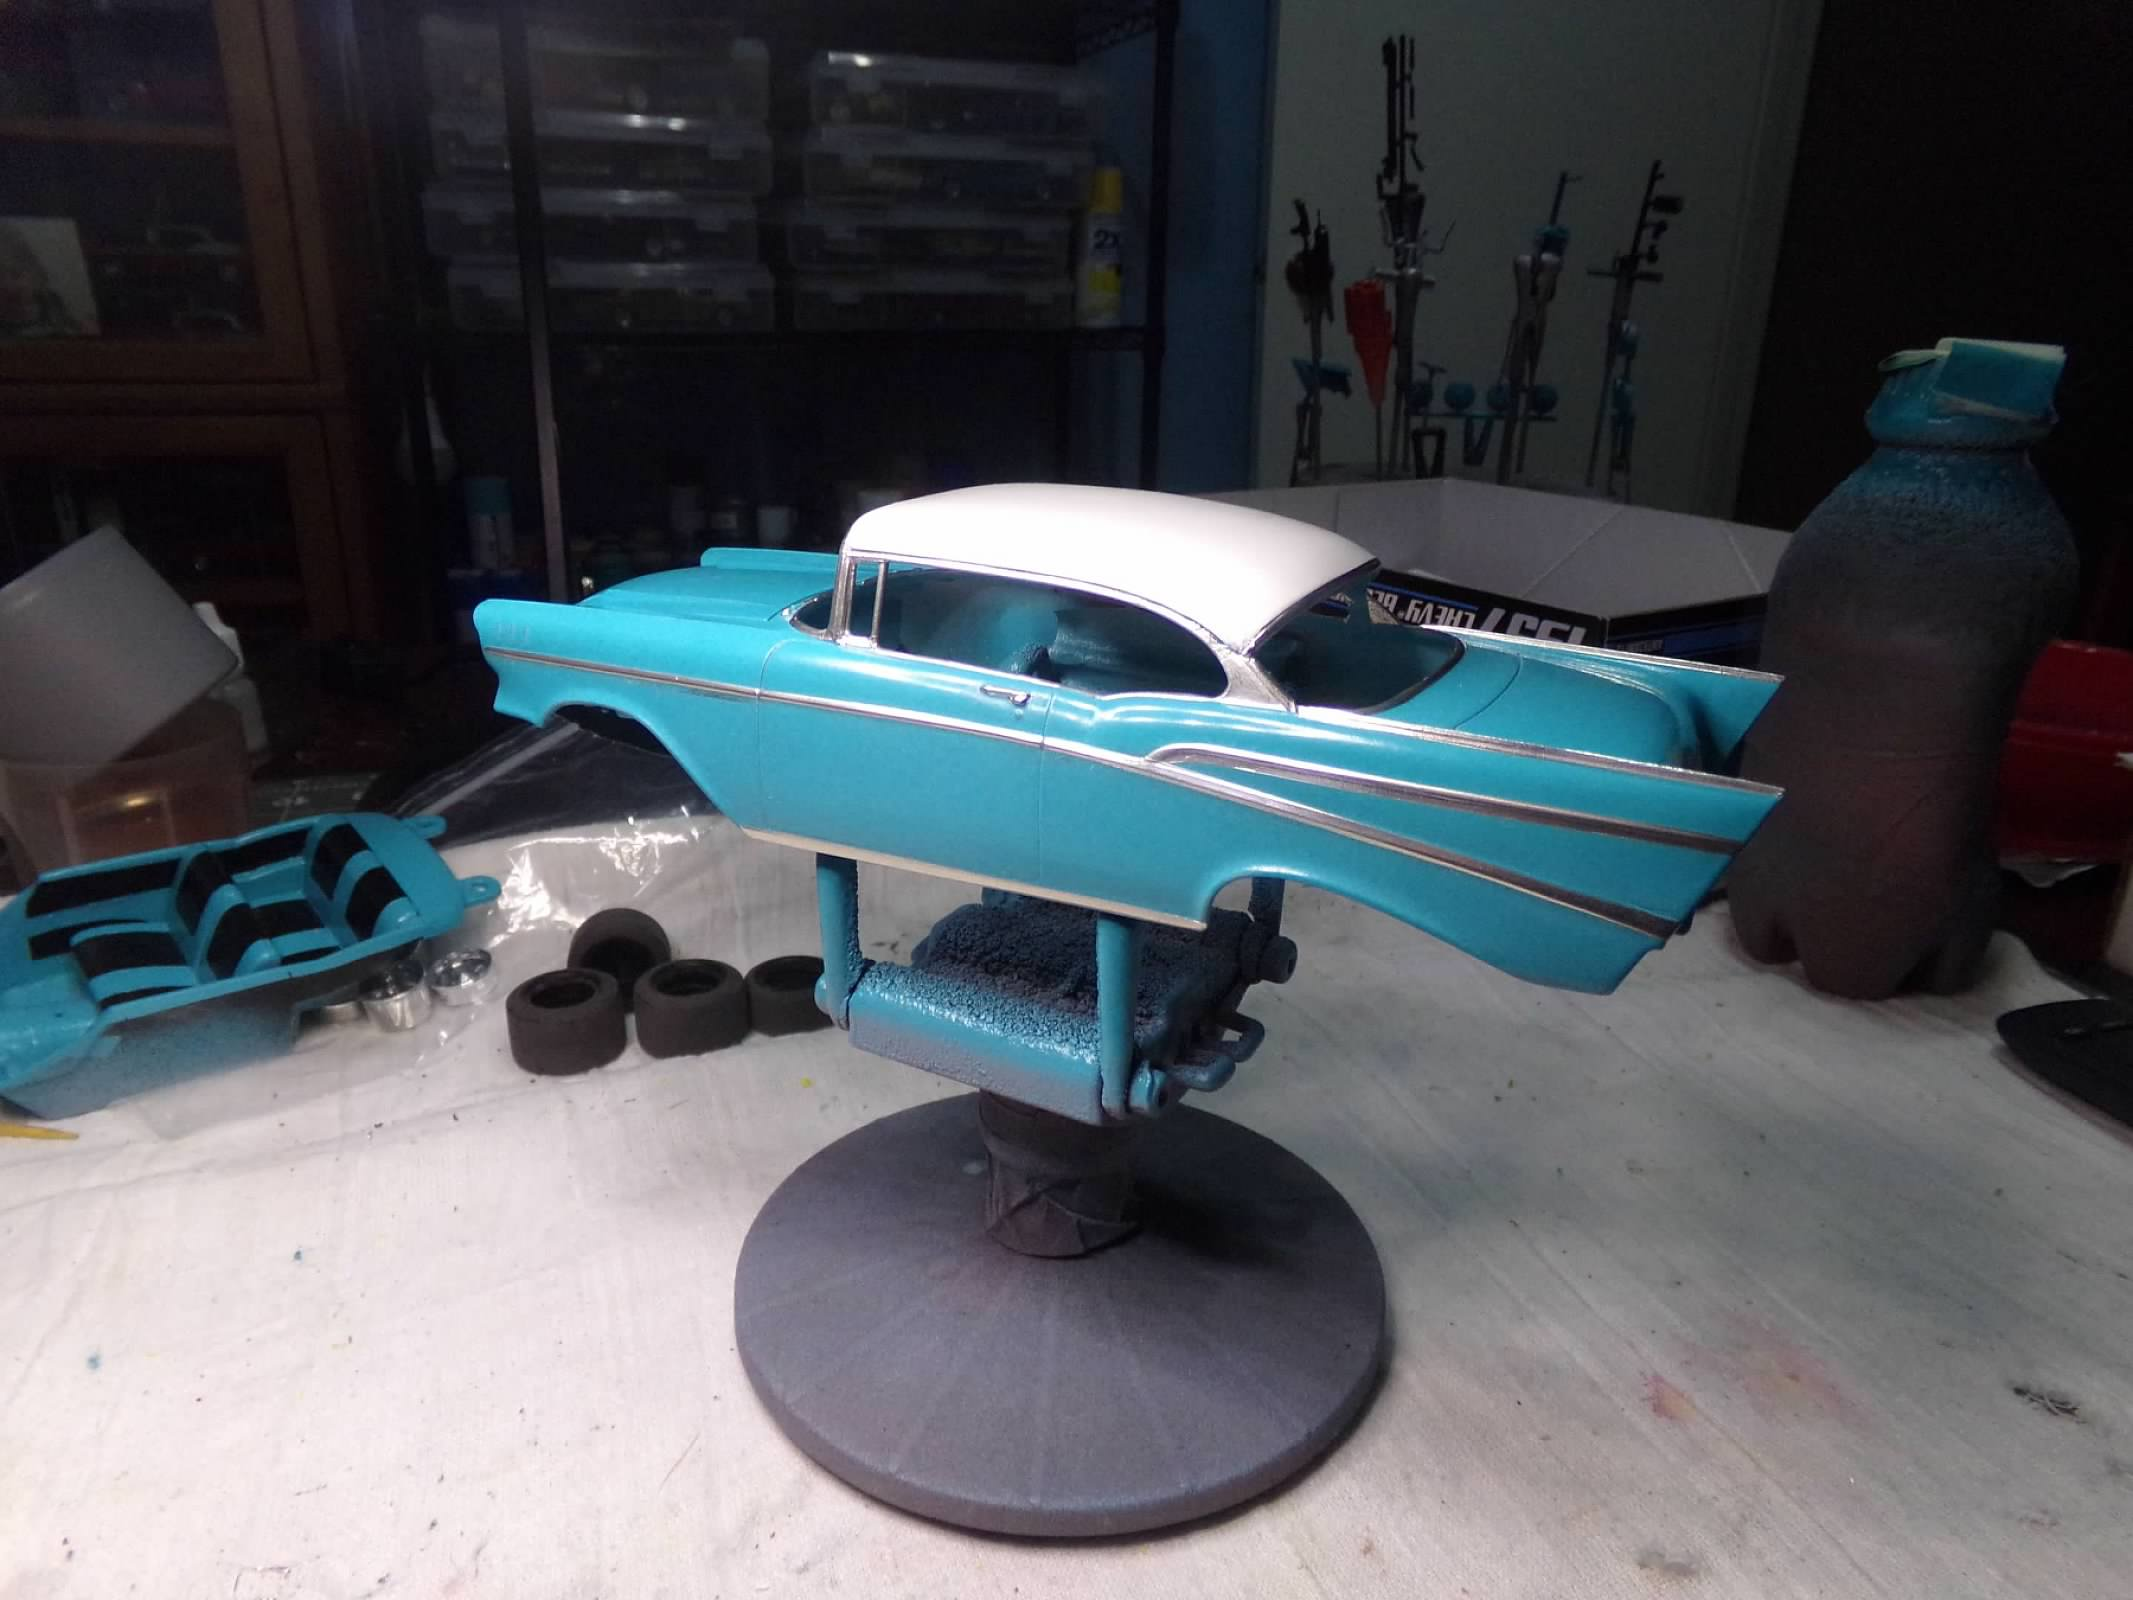
Thanks, David and Robert! I appreciate your comments! Finished rubbing out the paint and finished the foil on the body. I know the hood should be gloss but I like the flat black on the hood. I don't have to rub it out or touch up any edges on the scoops when I rub them out. the body was in good shape coming out of the box and I only had to remove the mold lines across the "B" pillar on both sides. The scale is 1/24 so I guess this was originally a Monogram kit although it is now labeled as a Revell kit. I did get the other pieces painted today so now I can just work on the interior, engine and chassis while the weather turns cold and wet. I'm also looking for the one that I previously built and painted yellow but I haven't found it yet. Thanks for looking! ?
-
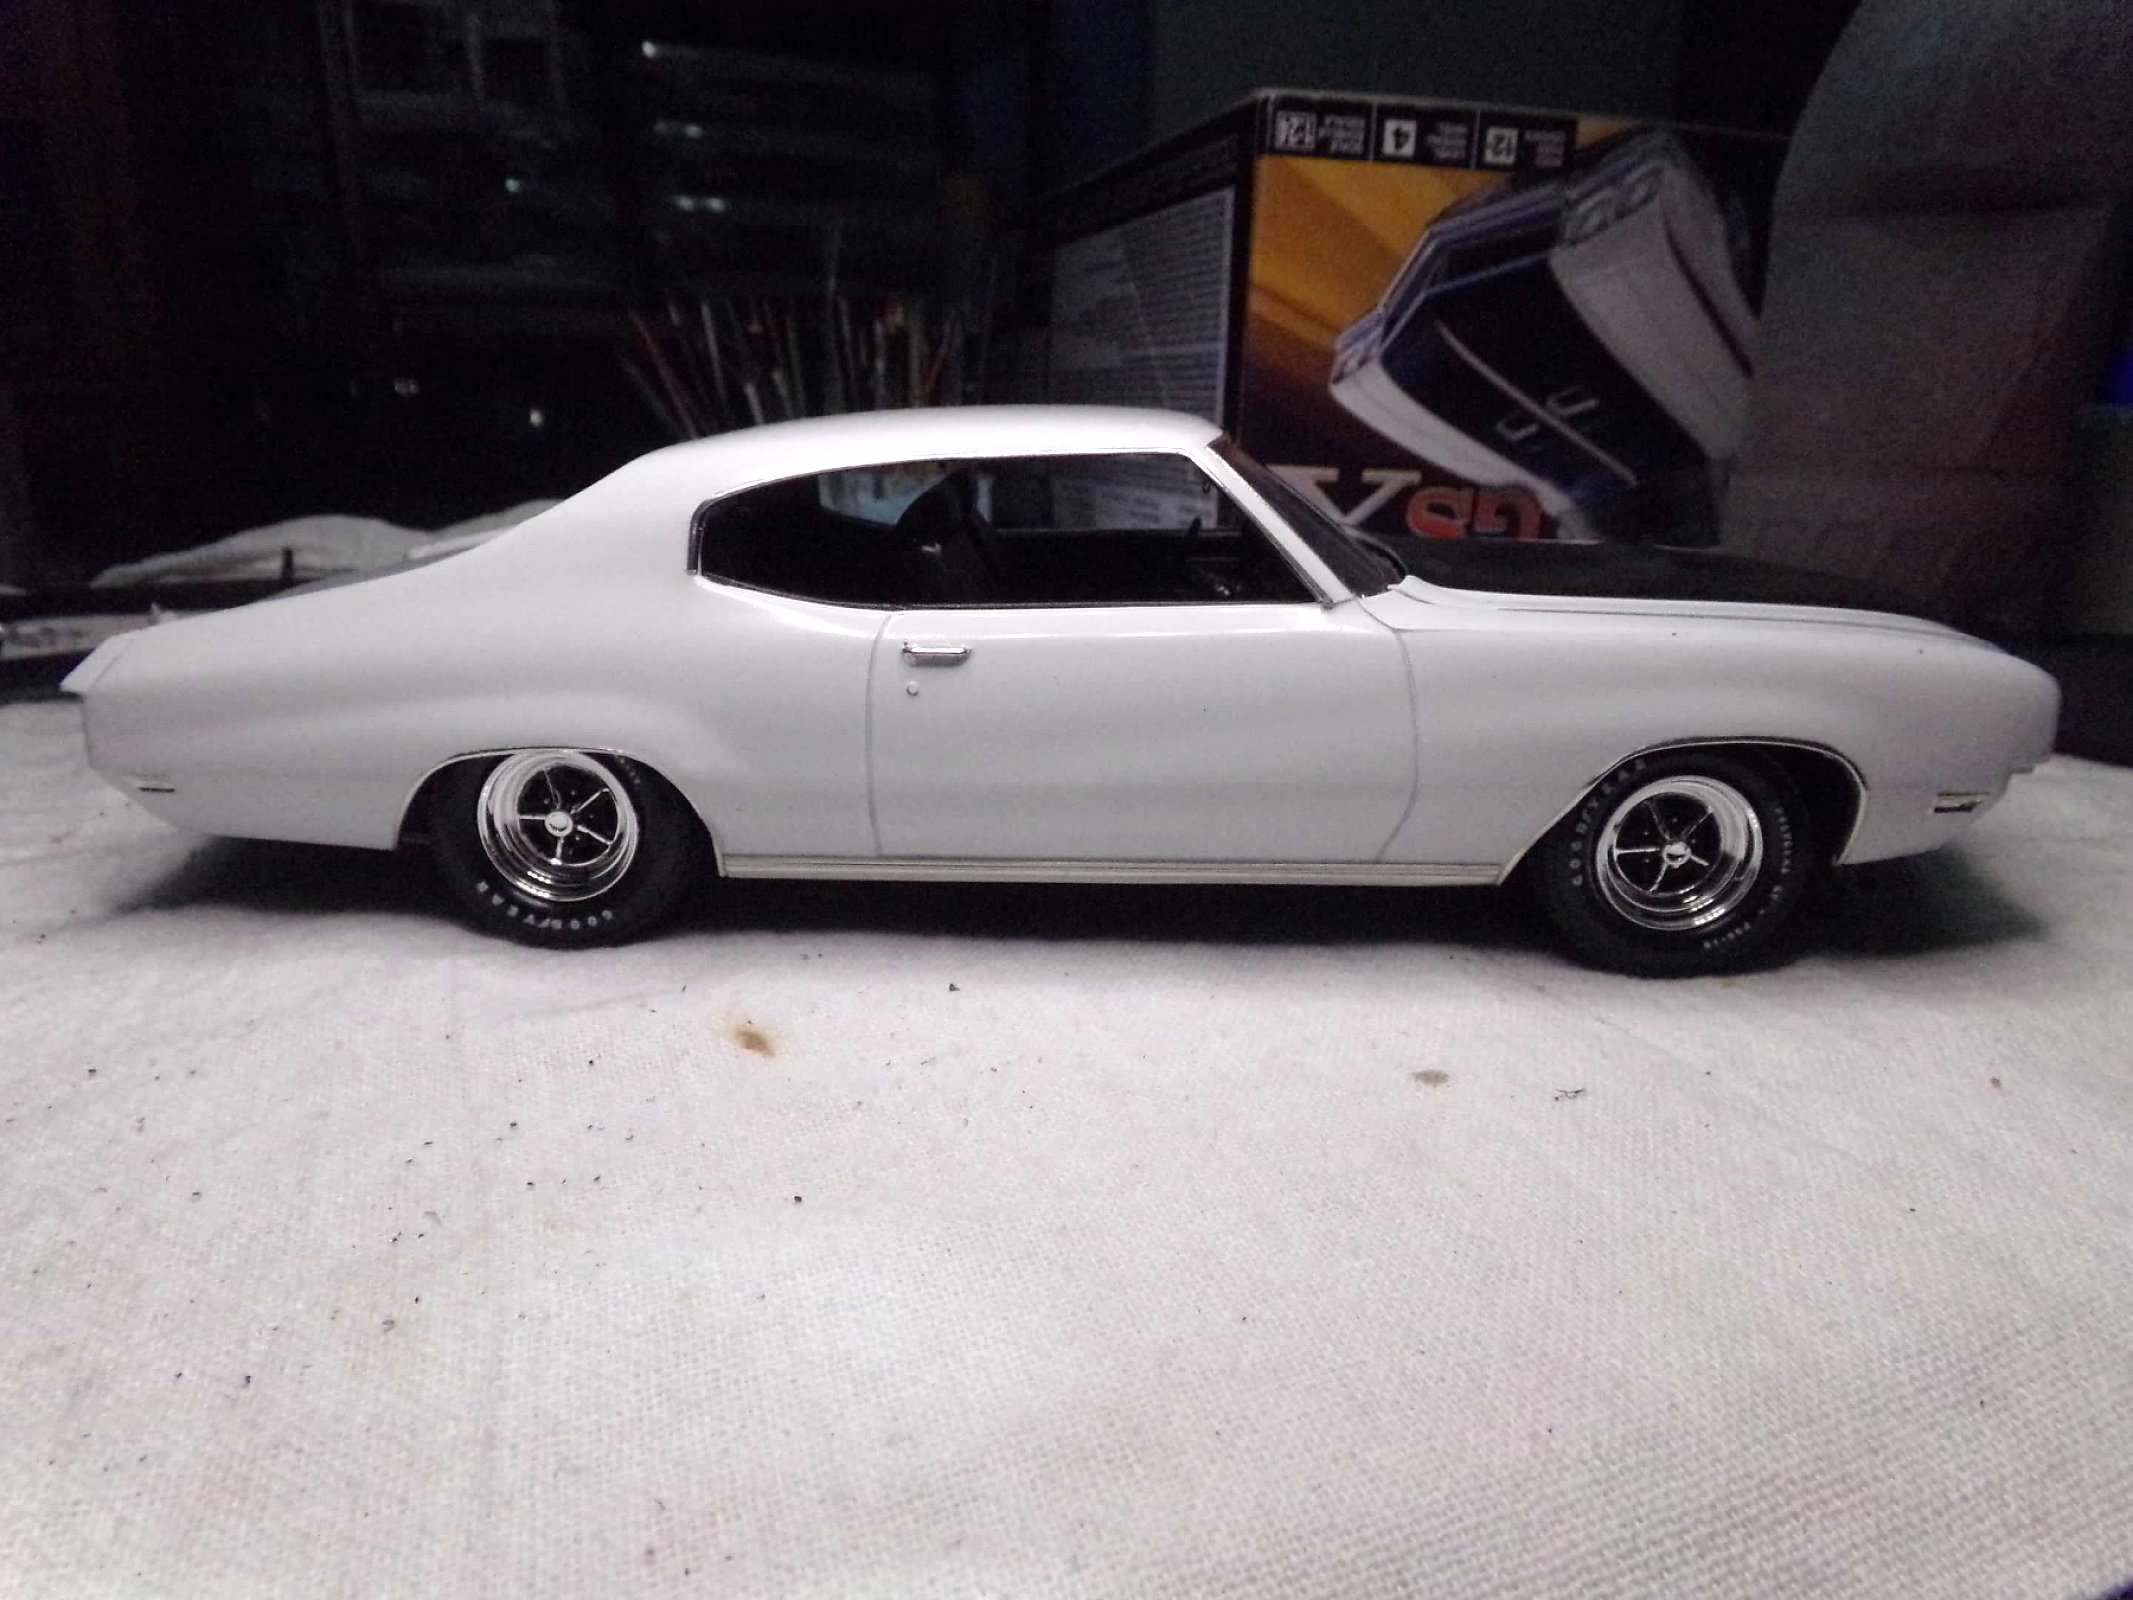
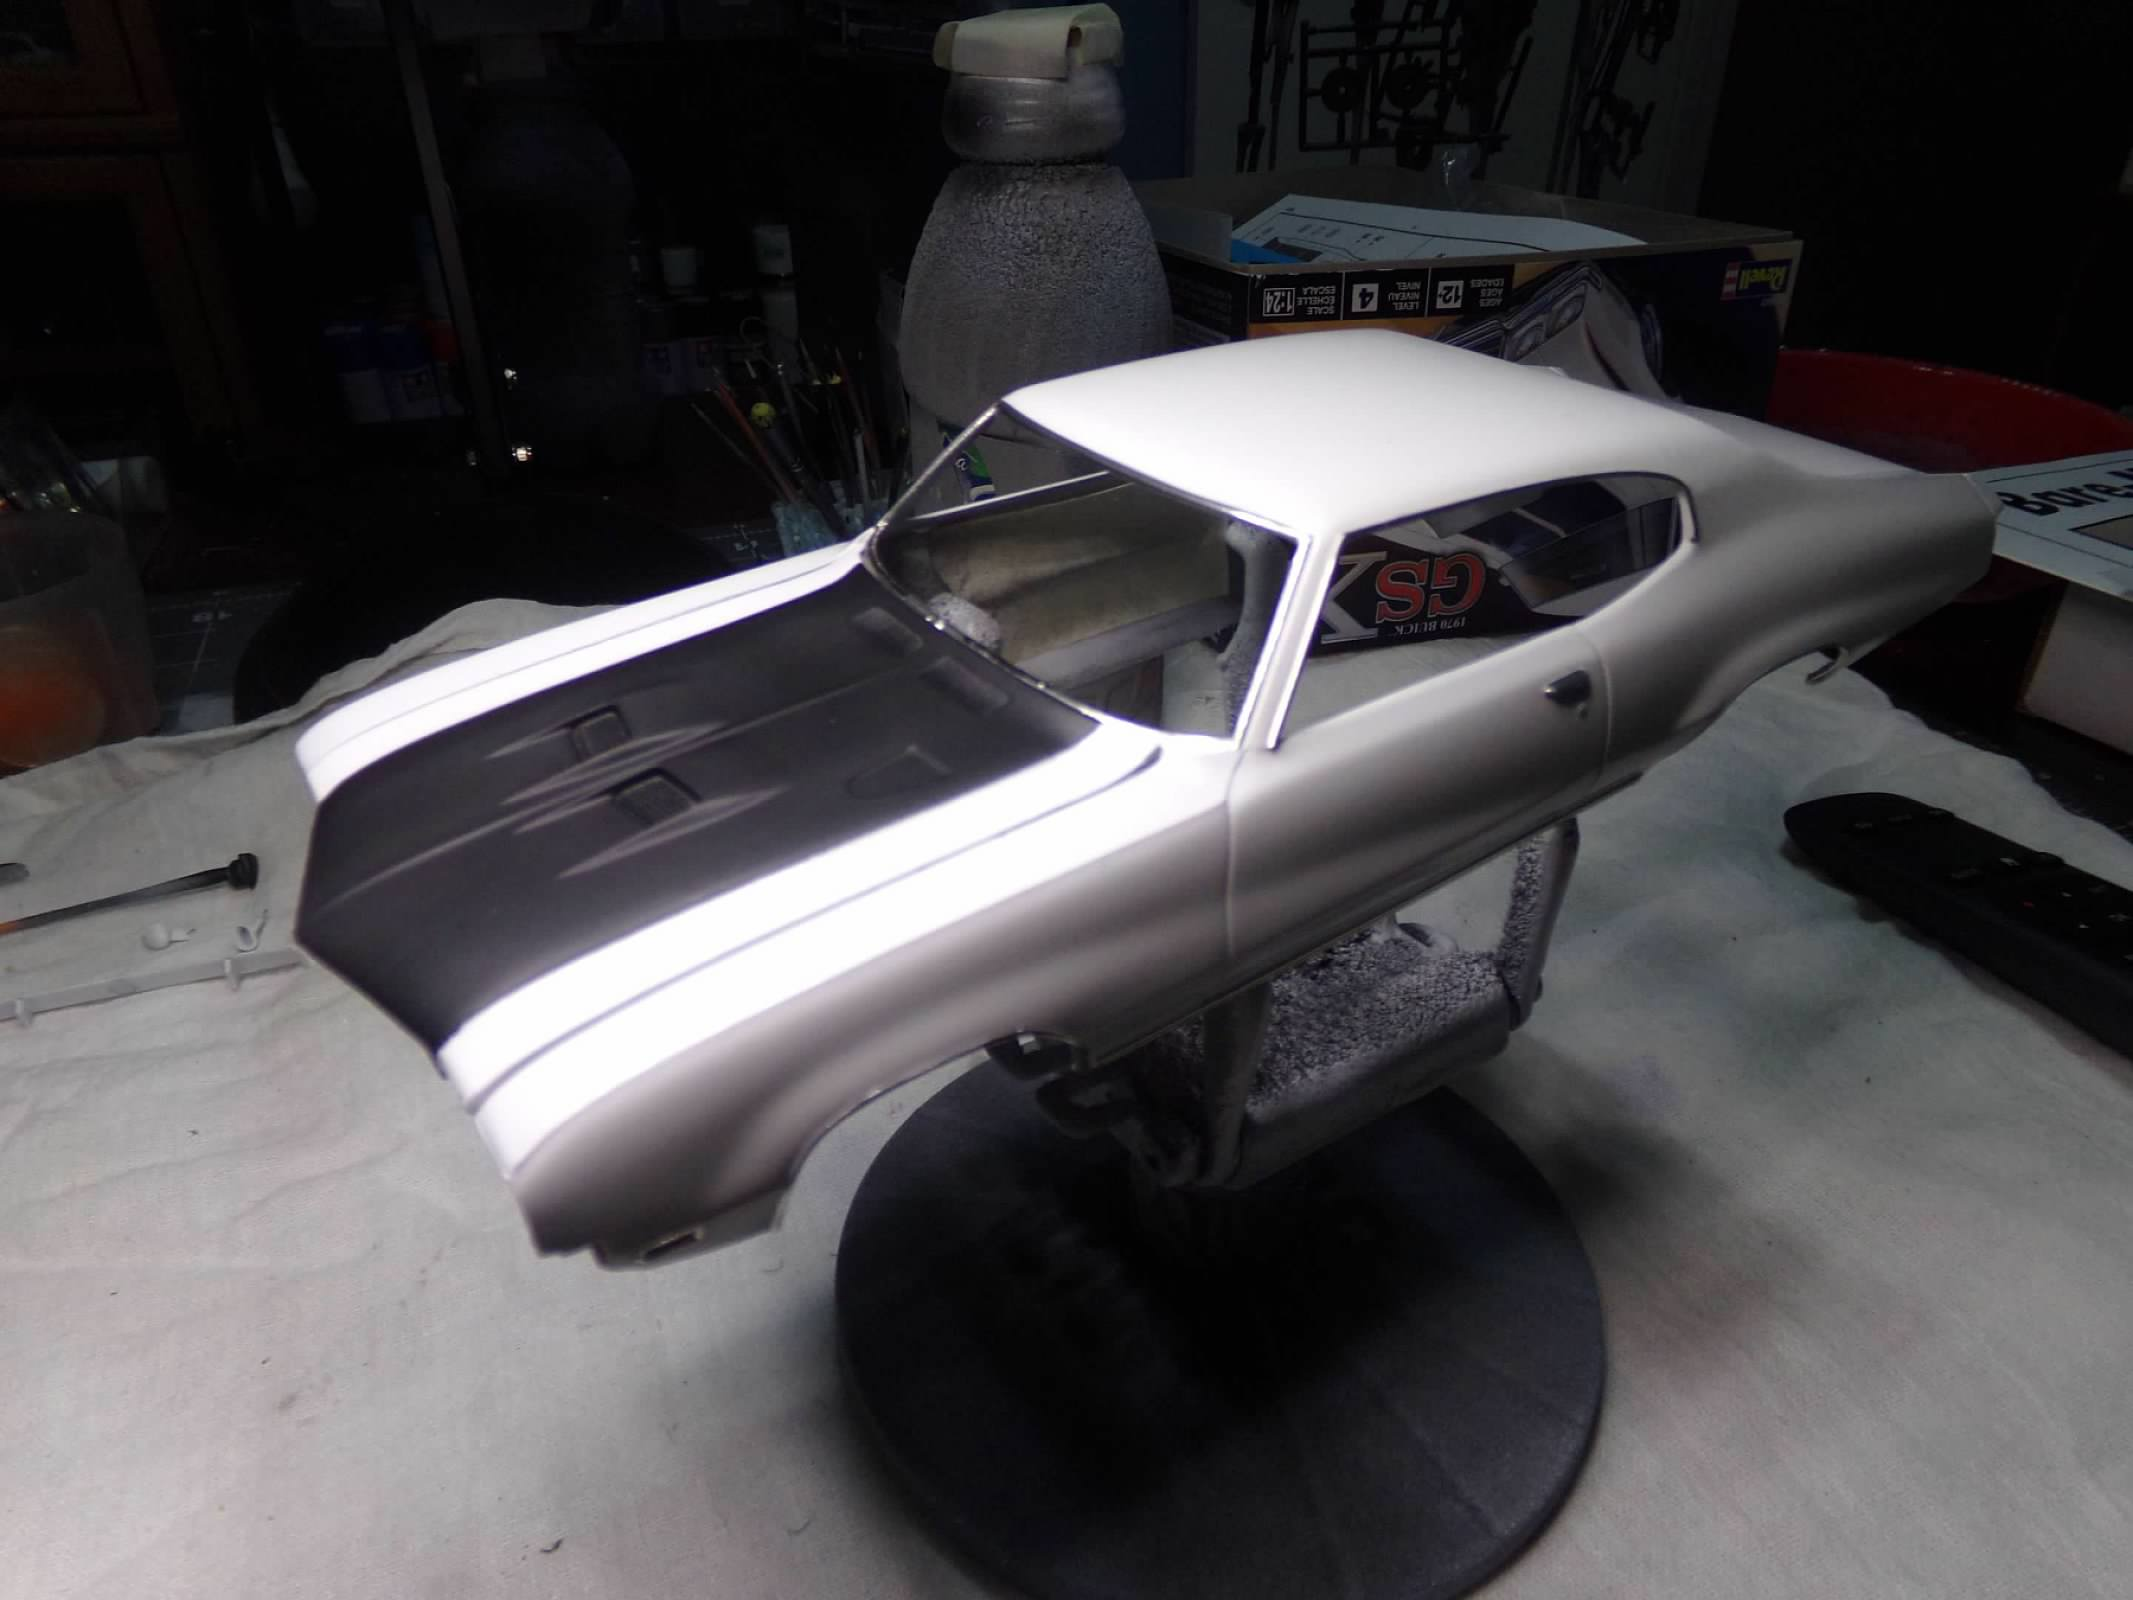
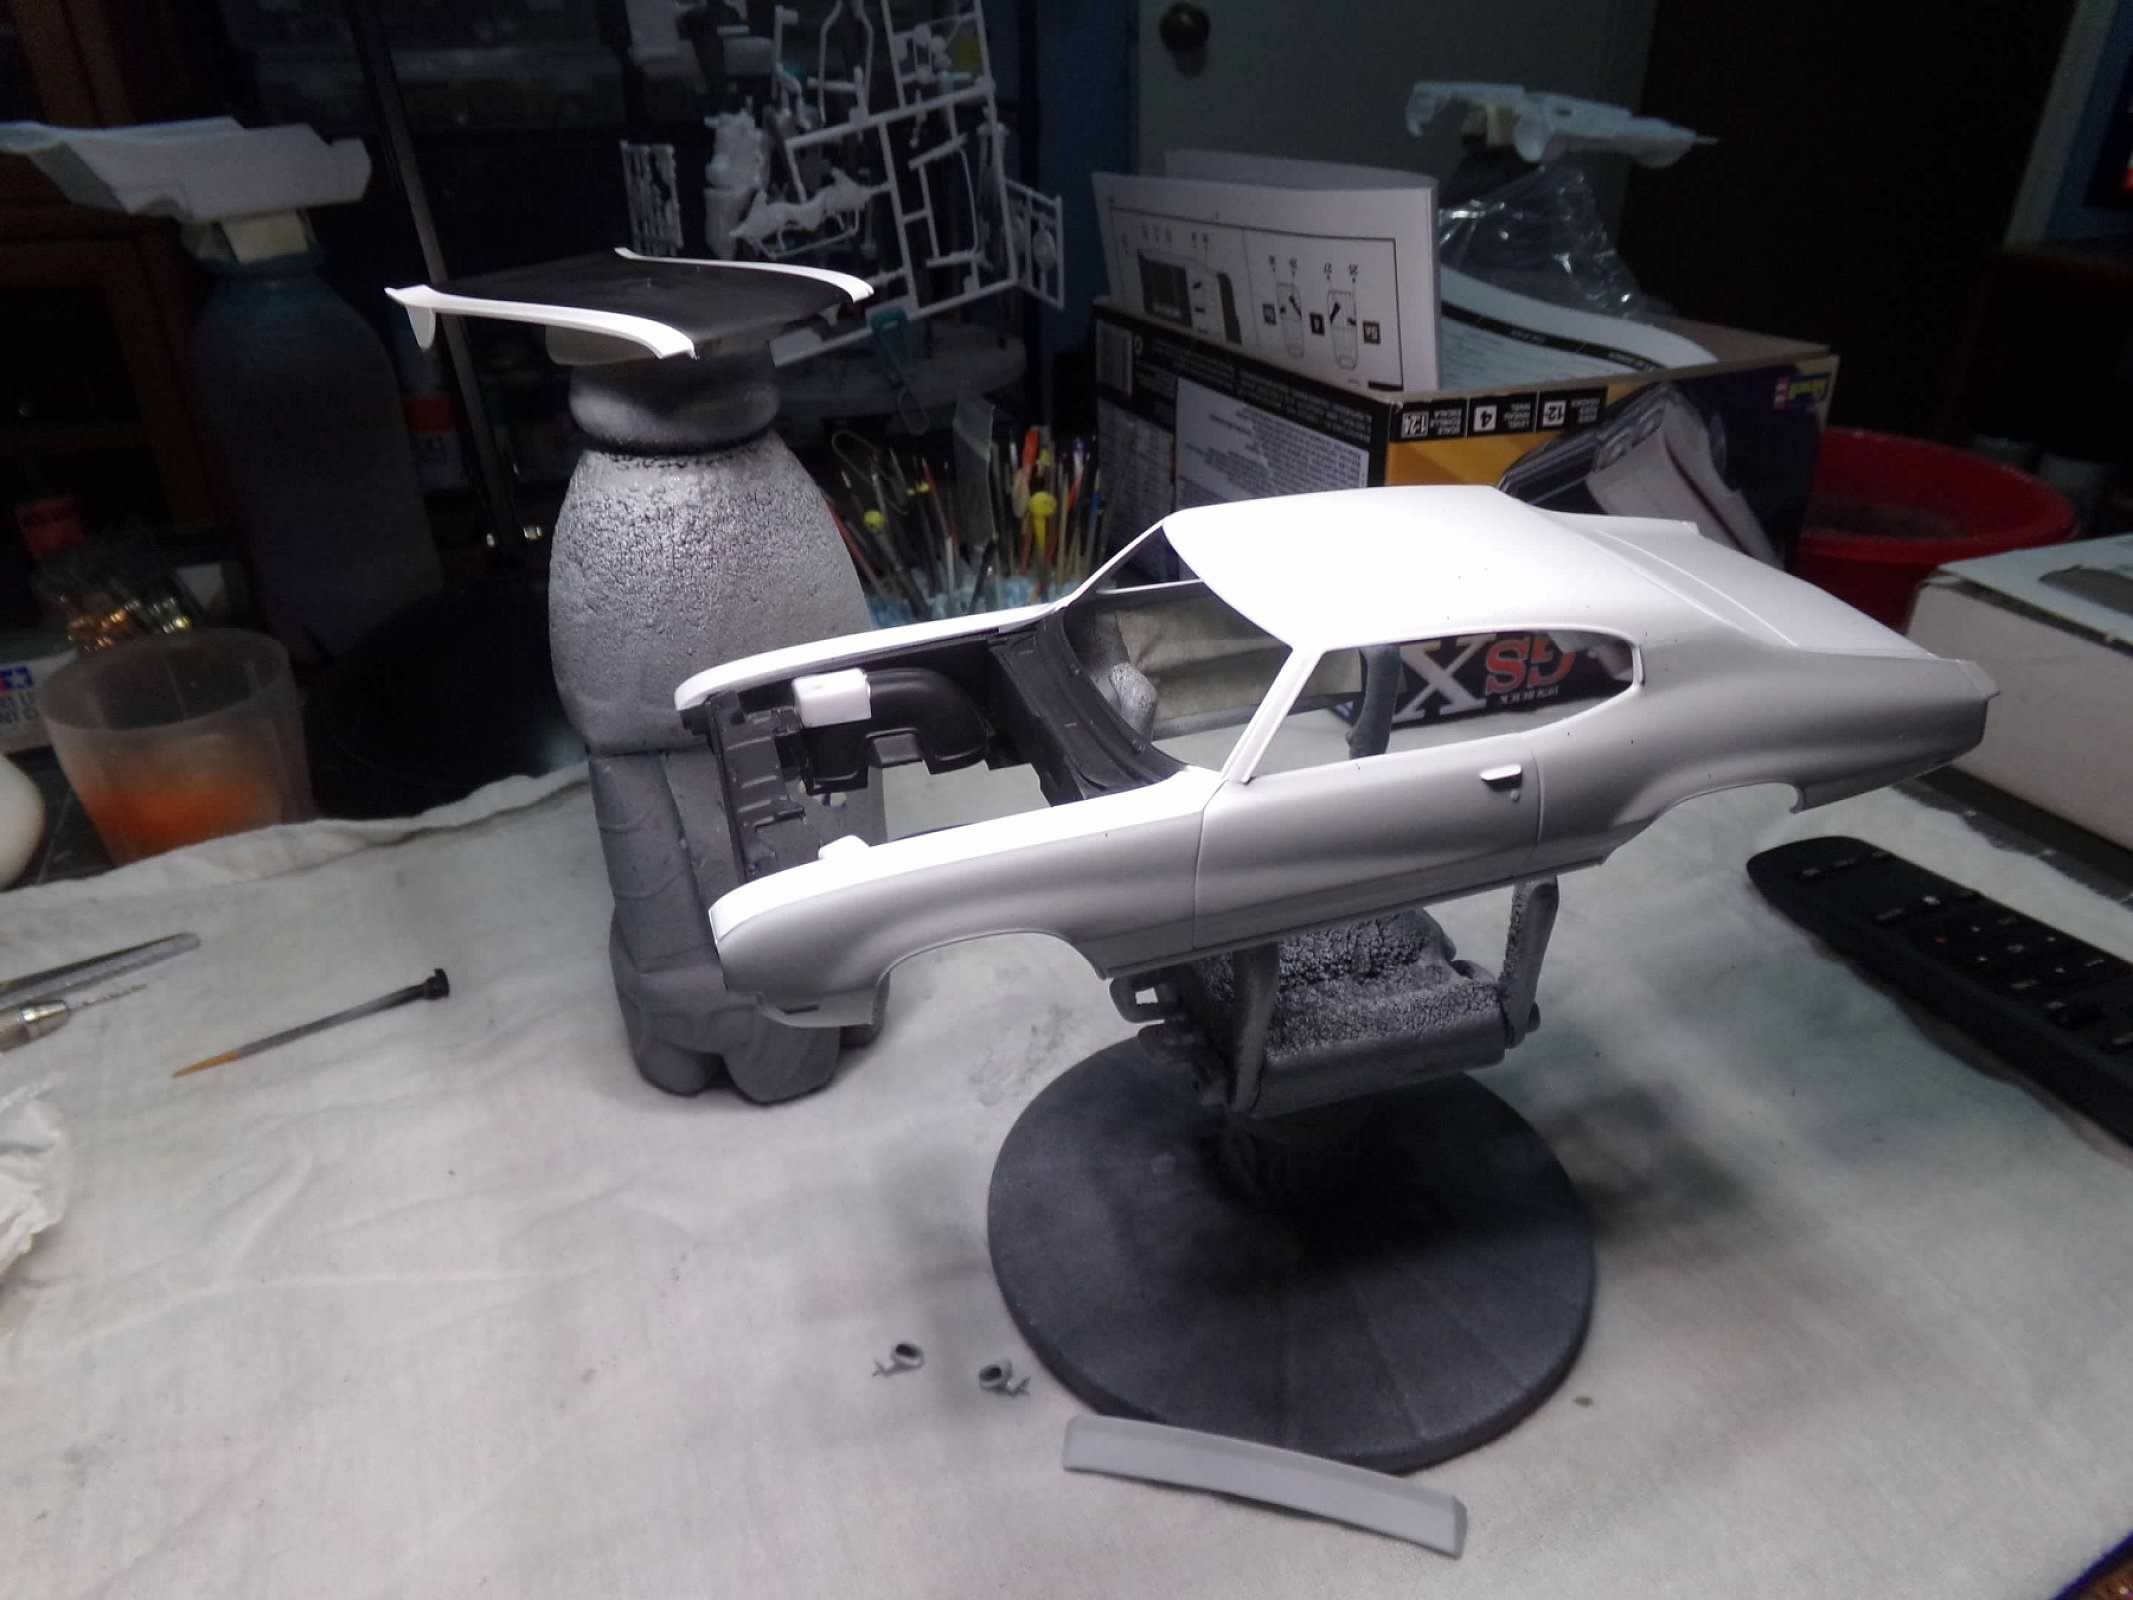
Although it looks like a Chevelle to me (maybe the same body) I'll go with Buick GSX. I've painted this one Dupli-Color Pure White as the box indicates that the only colors this car was painted are white and yellow. I already have a yellow one, hence the white. Everything on the body is painted and I have all the other parts ready to go tomorrow. With some luck I'll have everything painted so that I can build while the temps go below freezing late this weekend and into the early part of next week. At least it won't b below 0 like some other parts of the country but we are not built for below freezing for very long. Interior will be black. Thanks for looking!
-
Thanks, All! I appreciate all your comments! ?
-
Looks good, David! I built this one not long ago and agree with your issues. That said, it looks good as a standard Dodge of the era. Nice work! ??
-
Thanks, LM and Mike! I appreciate your comments!
-
1977 McLaren M24 - Tom Sneva
ModelcarJR replied to ModelcarJR's topic in WIP: Other Racing: Road Racing, Land Speed Racers
I have done that before but the only Hobby shop in town is about 30-35 miles away in downtown Houston near the Medical Center. Probably $10 in gas, another $8 - 10 in toll road tolls, a couple of hours on the road and in the Hobby Shop, the possibility that I won't buy only 1 can of paint but may spend up to $100, which Grandma will frown upon, and a long nap when I get back. I have already ordered and paid for the paint. If I were a younger working man I probably would have done that but there's nothing but downside at this point. -
1977 McLaren M24 - Tom Sneva
ModelcarJR replied to ModelcarJR's topic in WIP: Other Racing: Road Racing, Land Speed Racers
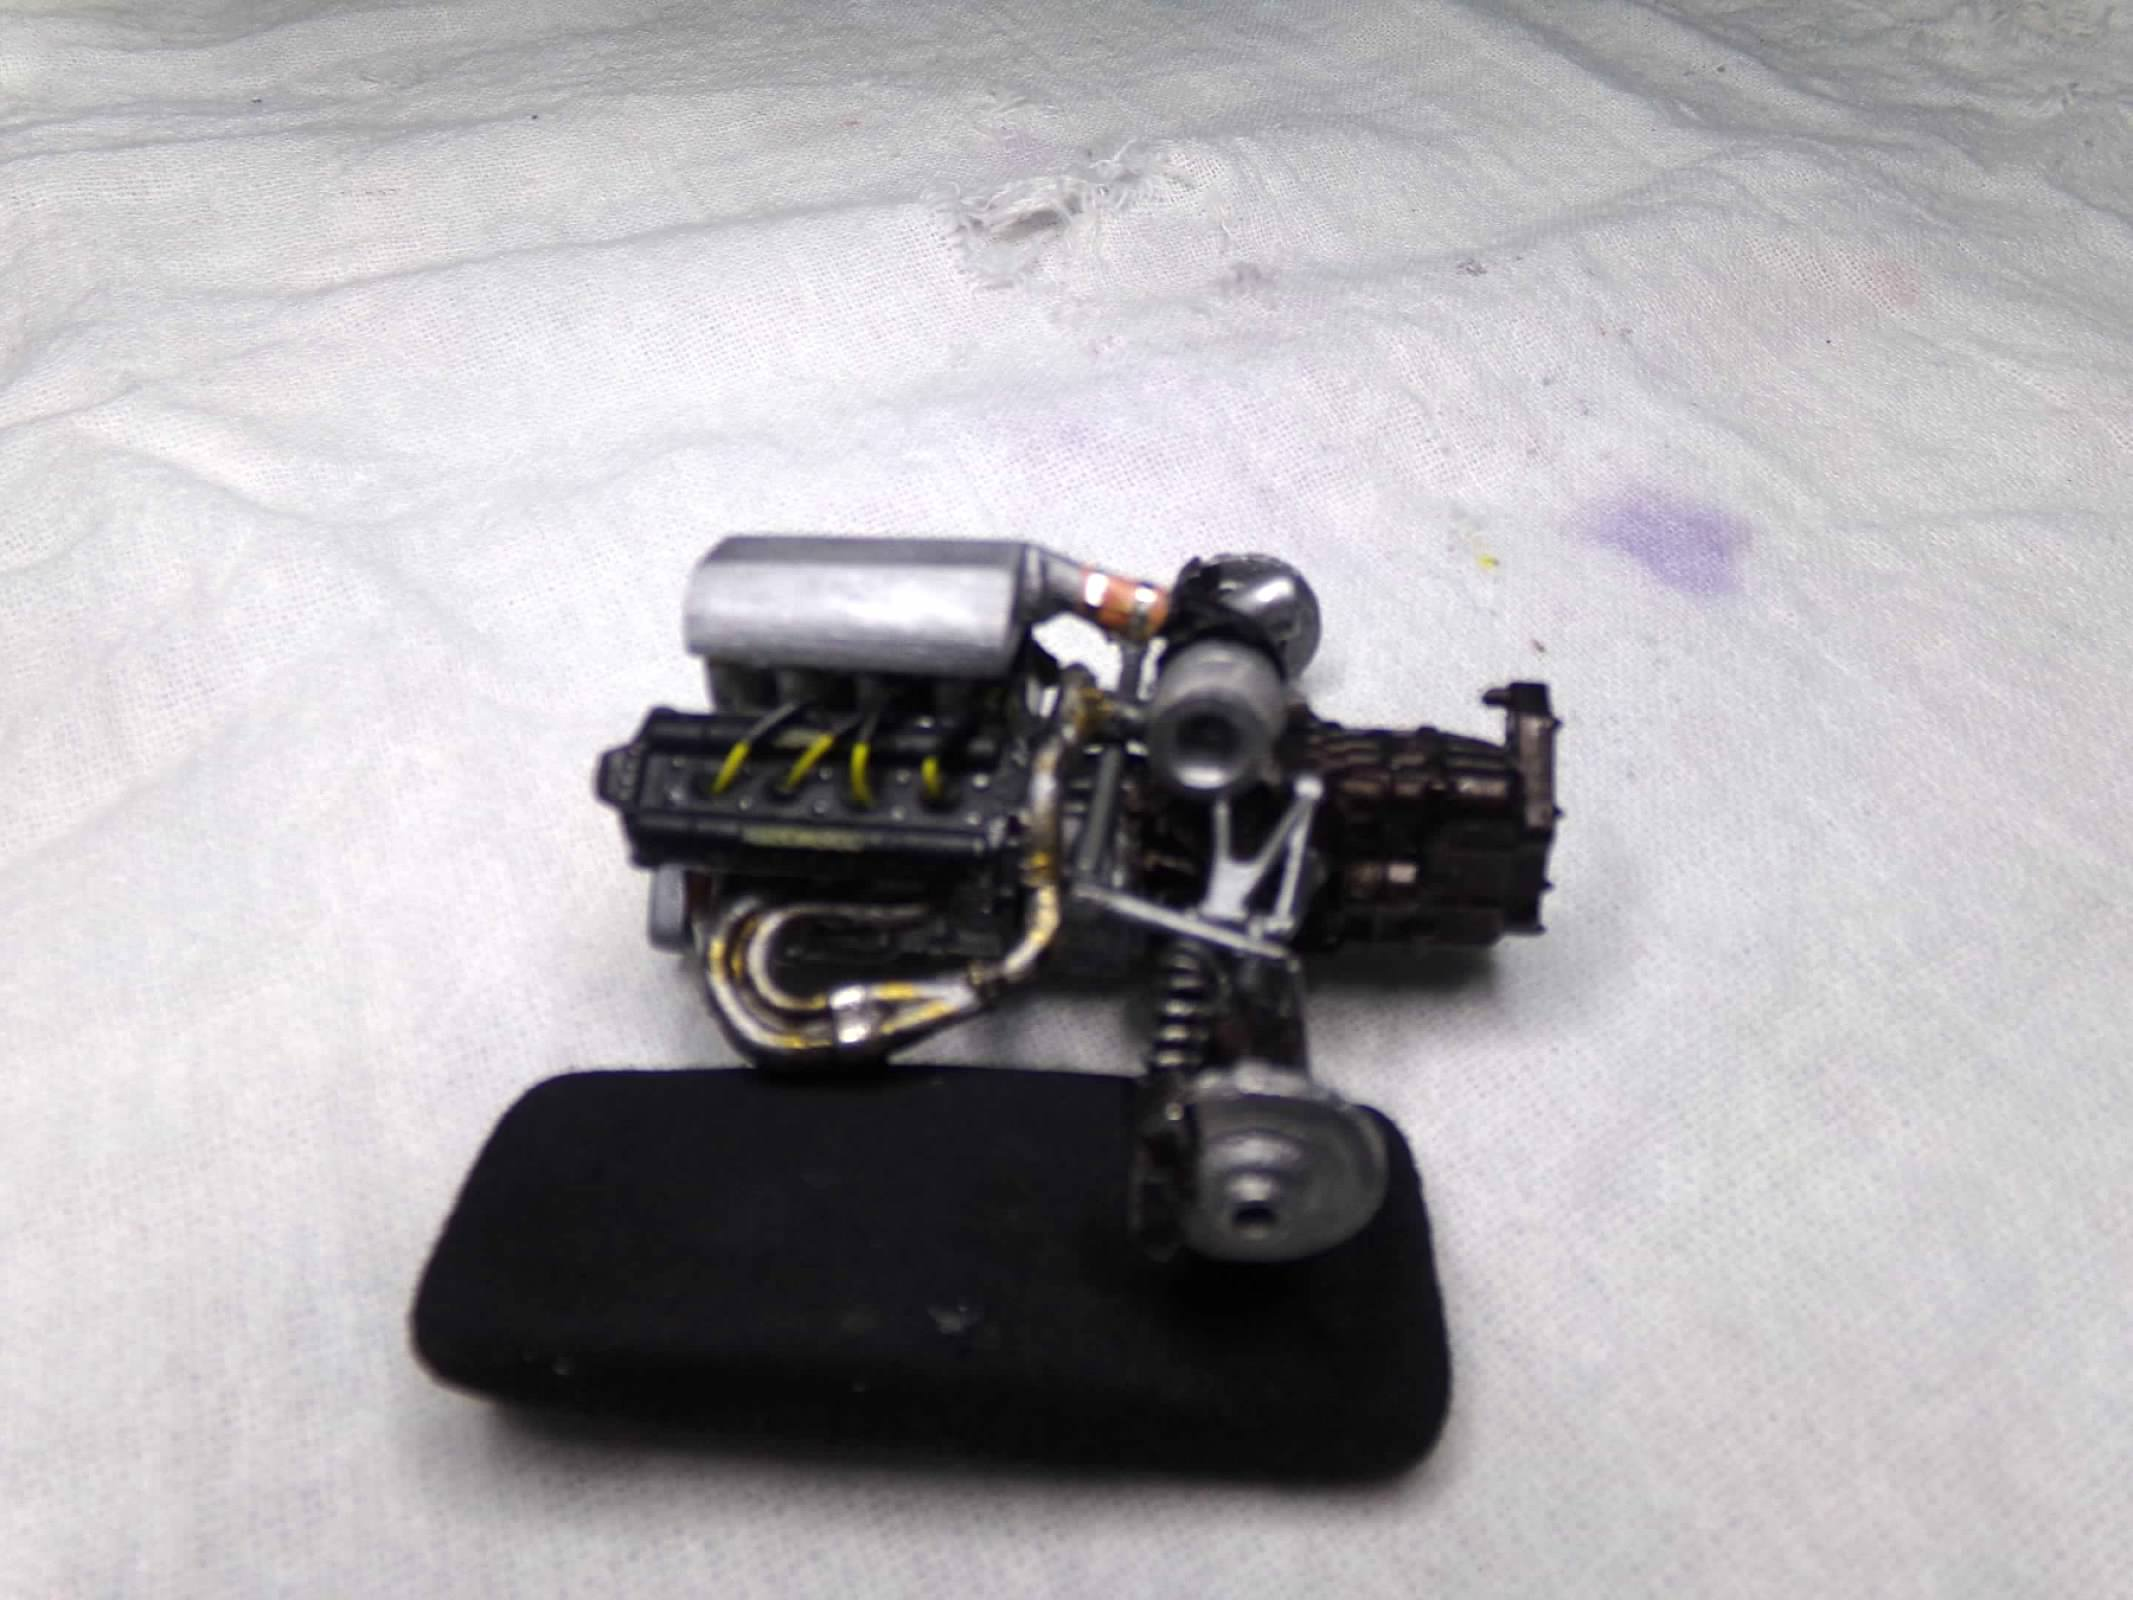
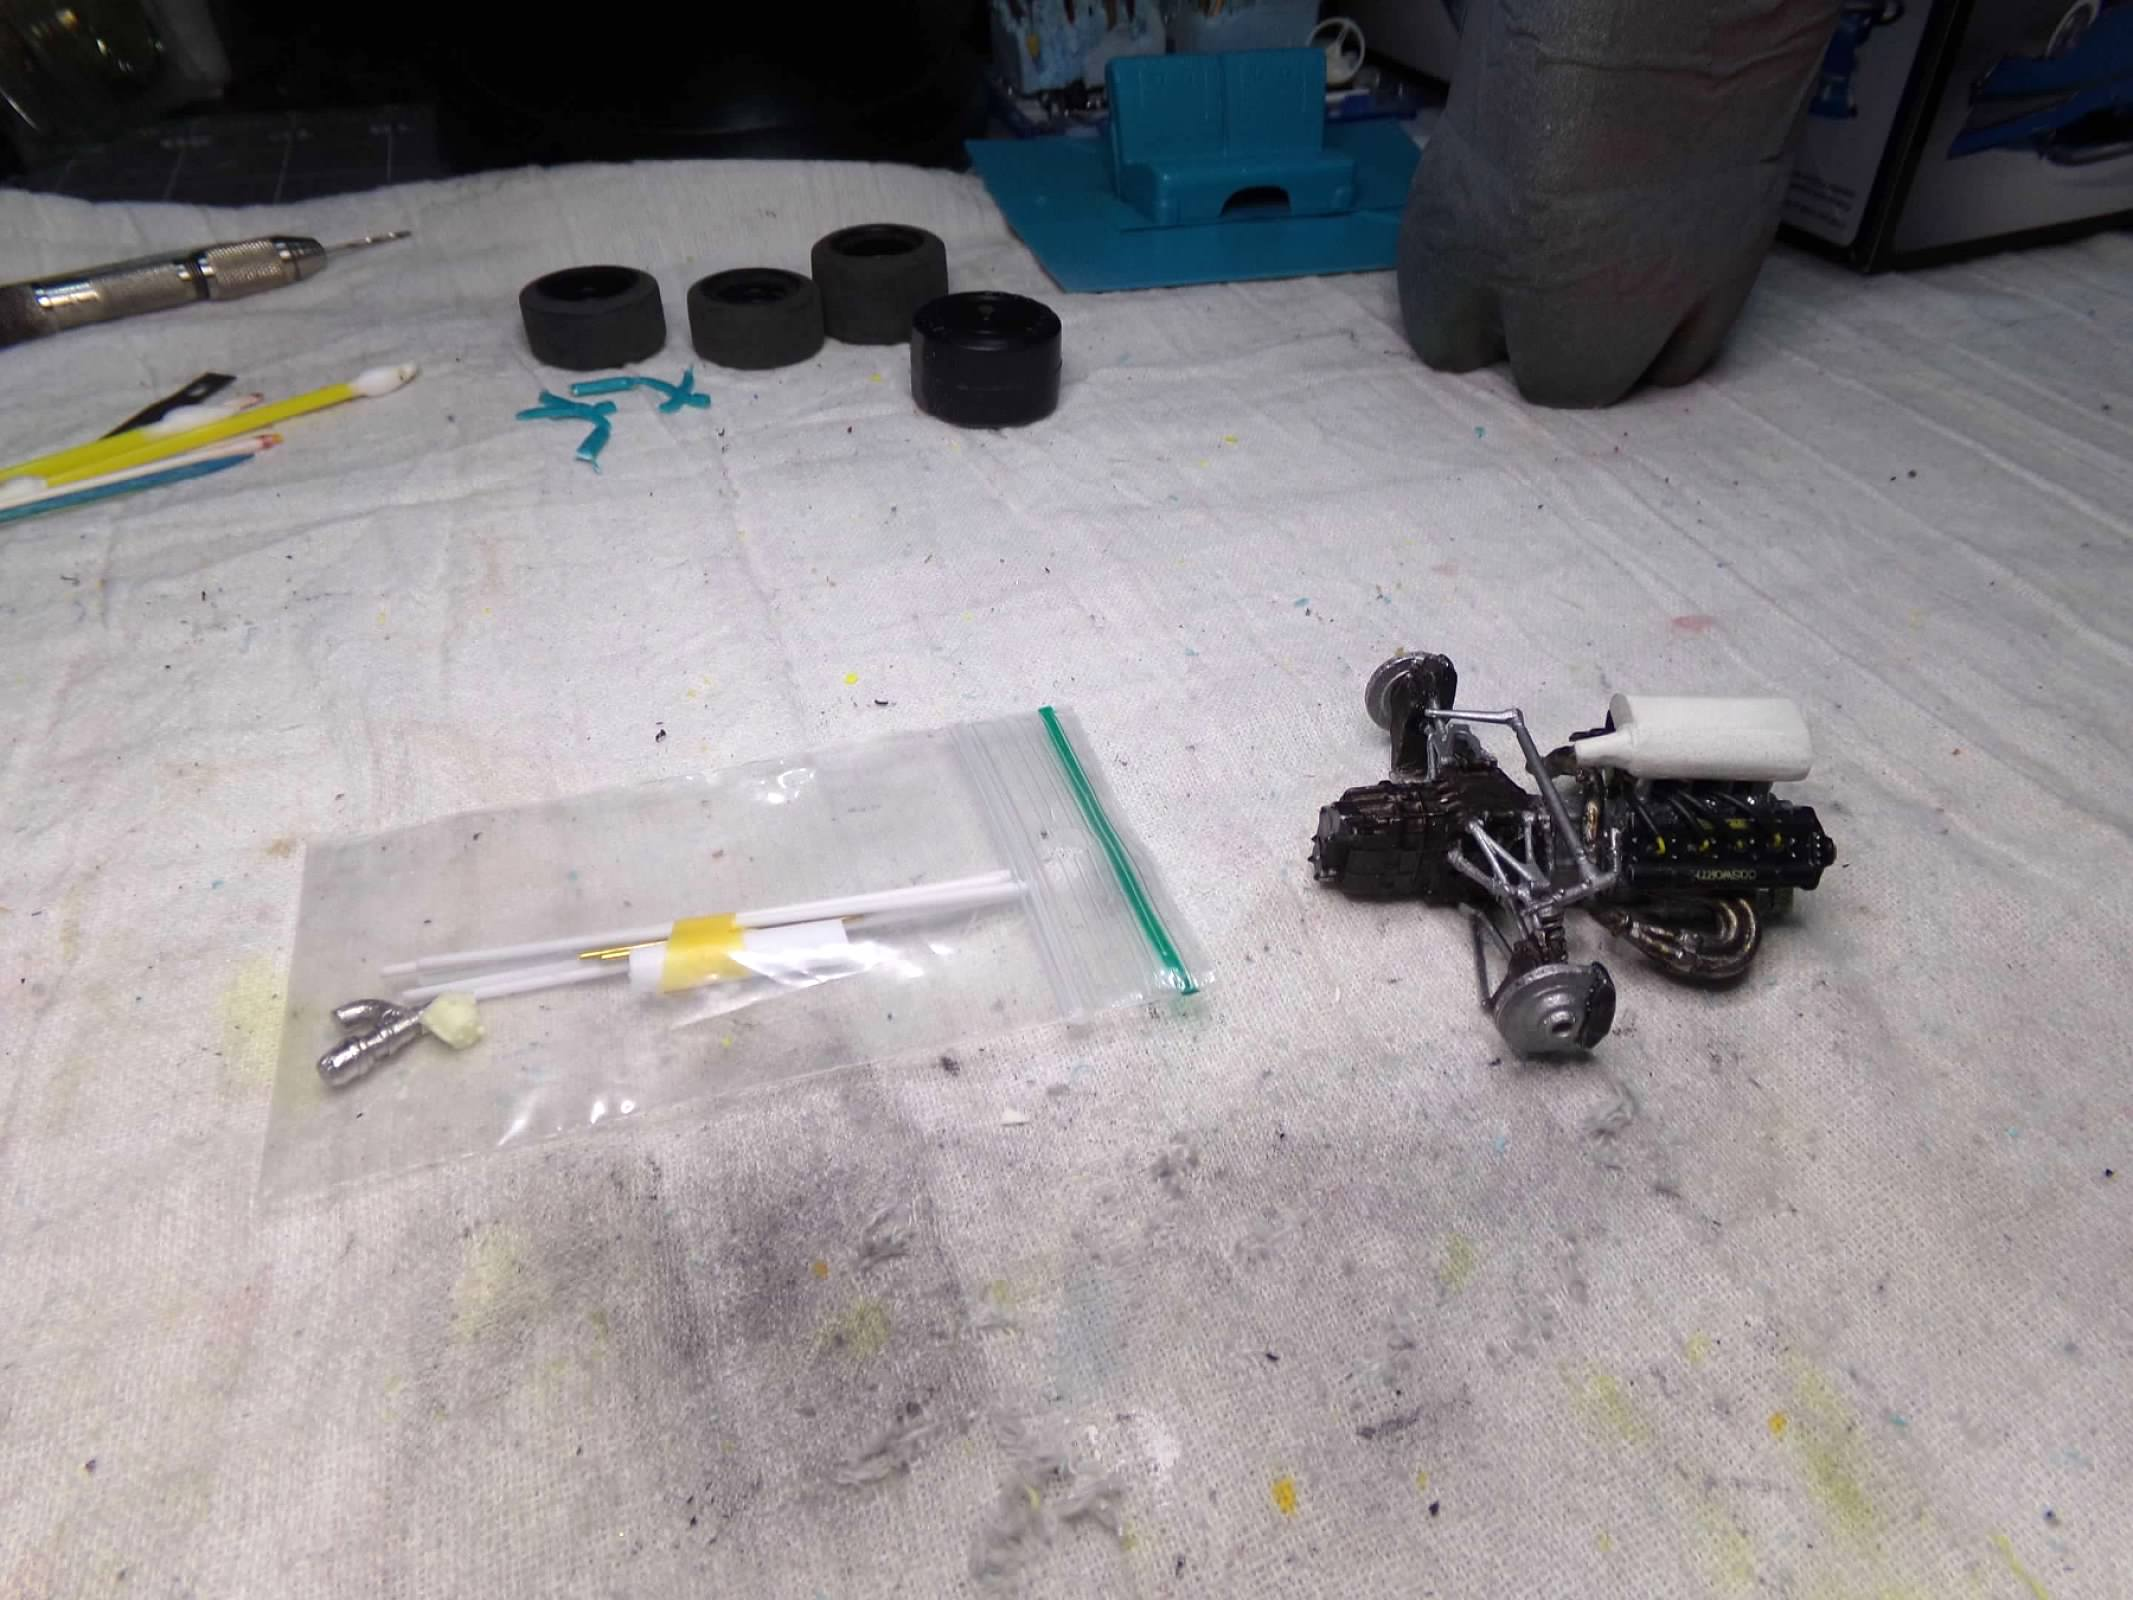
Still waiting on paint but I have made a little progress since receiving the parts that were missing from the original kit. The engine is complete but I can't attach it to the bulkhead until I paint the body. I glued a piece of crossover pipe from the extra Kraco kit underneath the turbine to crossover the sway bar to the crossover pipe that crosses over the transmission. So now that I have crossed over to the crossover, the circuit is complete! The exhaust comes out of the cylinders into the pipes, then into the turbo, is supercharged and into the plenum, then into the injectors and finally the cylinders and the cycle starts again. I am going to assume that the turbo contains an internal wastegate so when disengaged the wastegate will open and the exhaust will exit with the normal exhaust. That causes that whining sound and backfires when coming to a yellow, i think. So other than that I have sanded out the tires and will apply the decals but I can't do much more until next week when I receive paint and we are suppose to have a hard freeze next week. Thanks for looking! ?
-
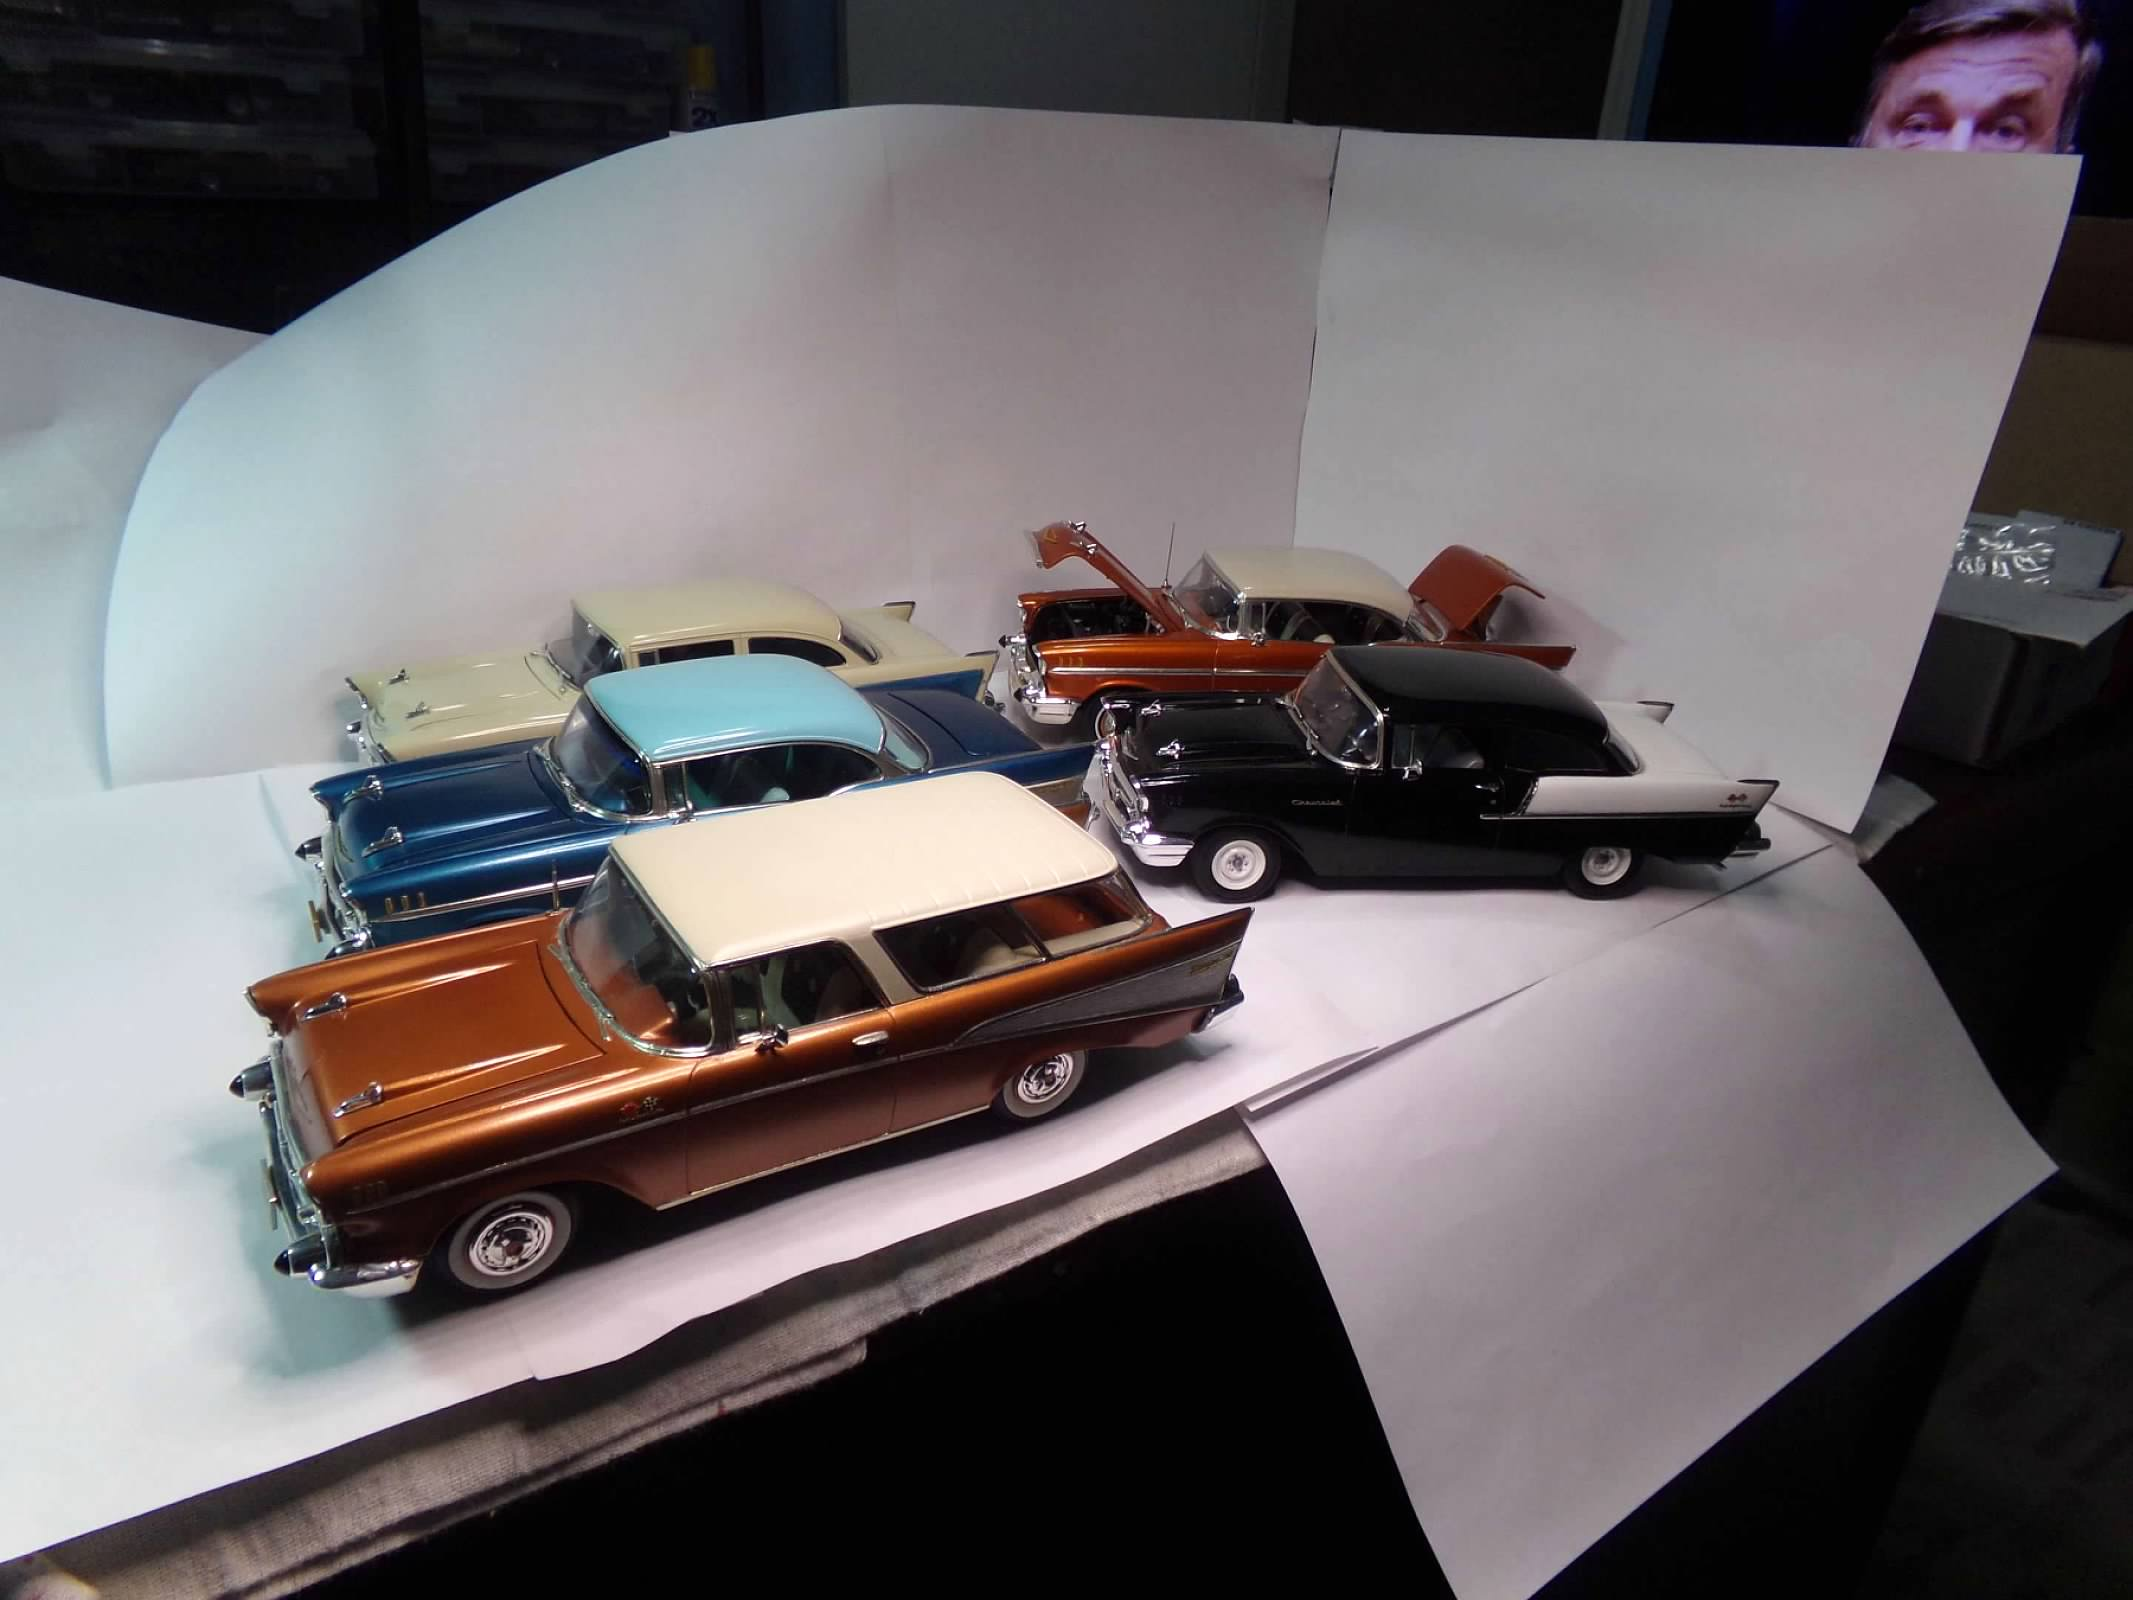
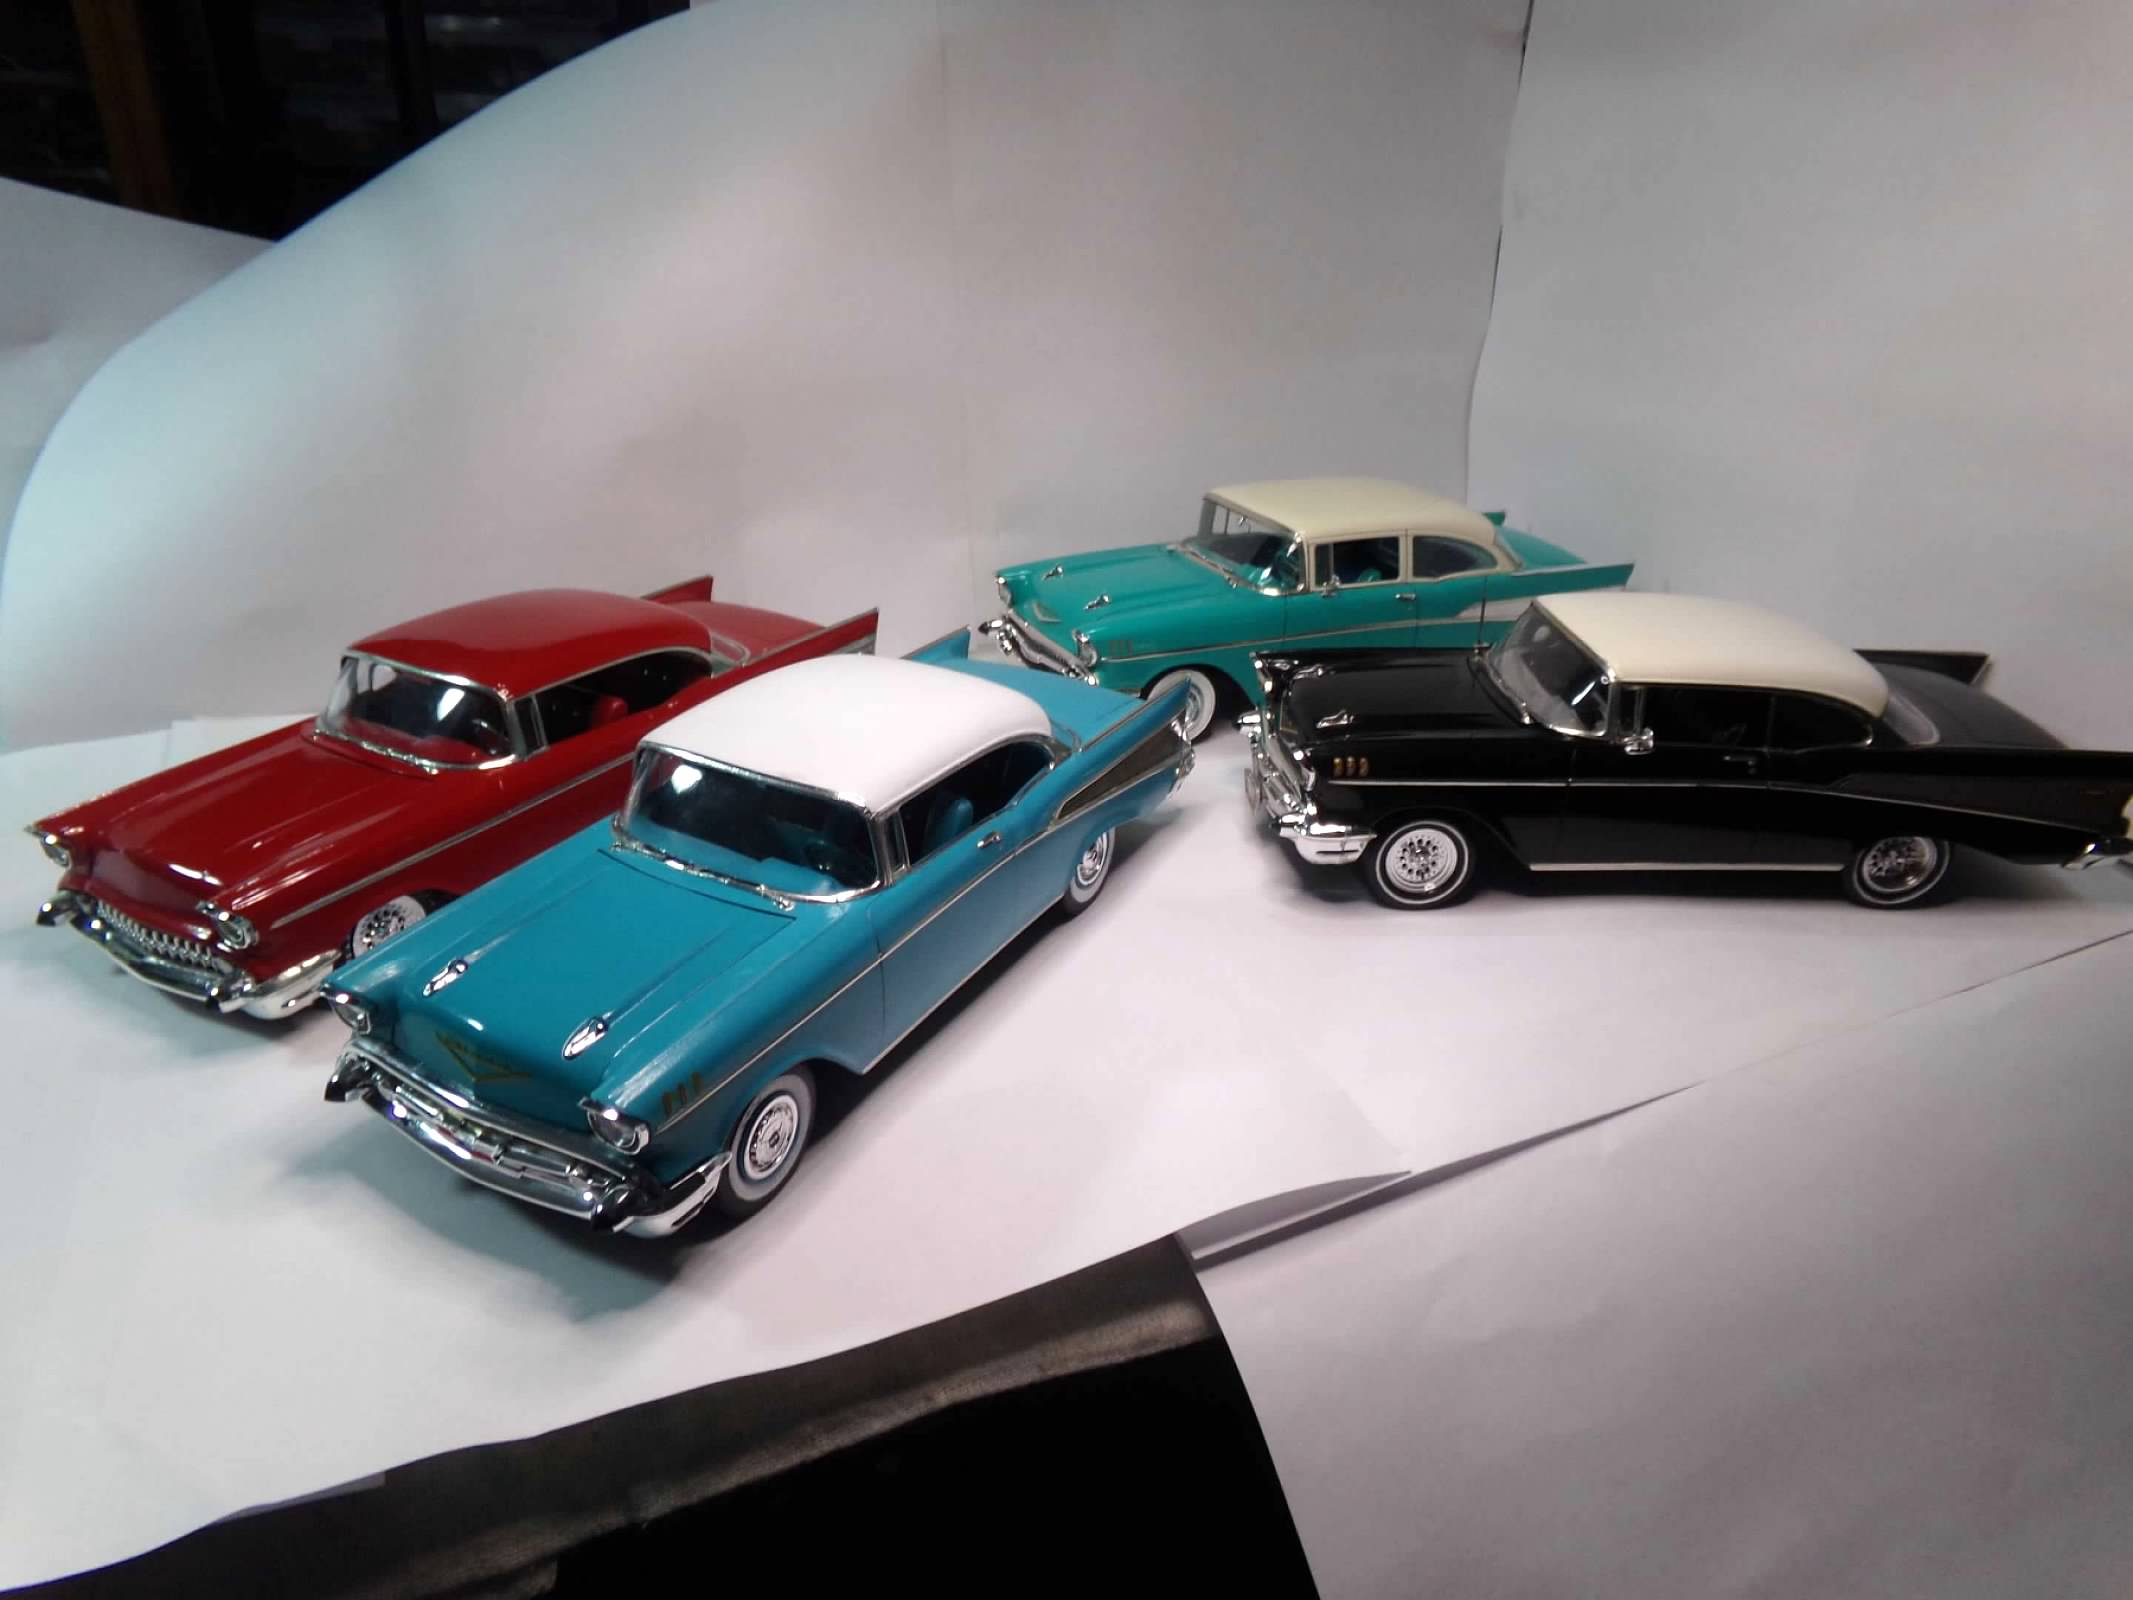
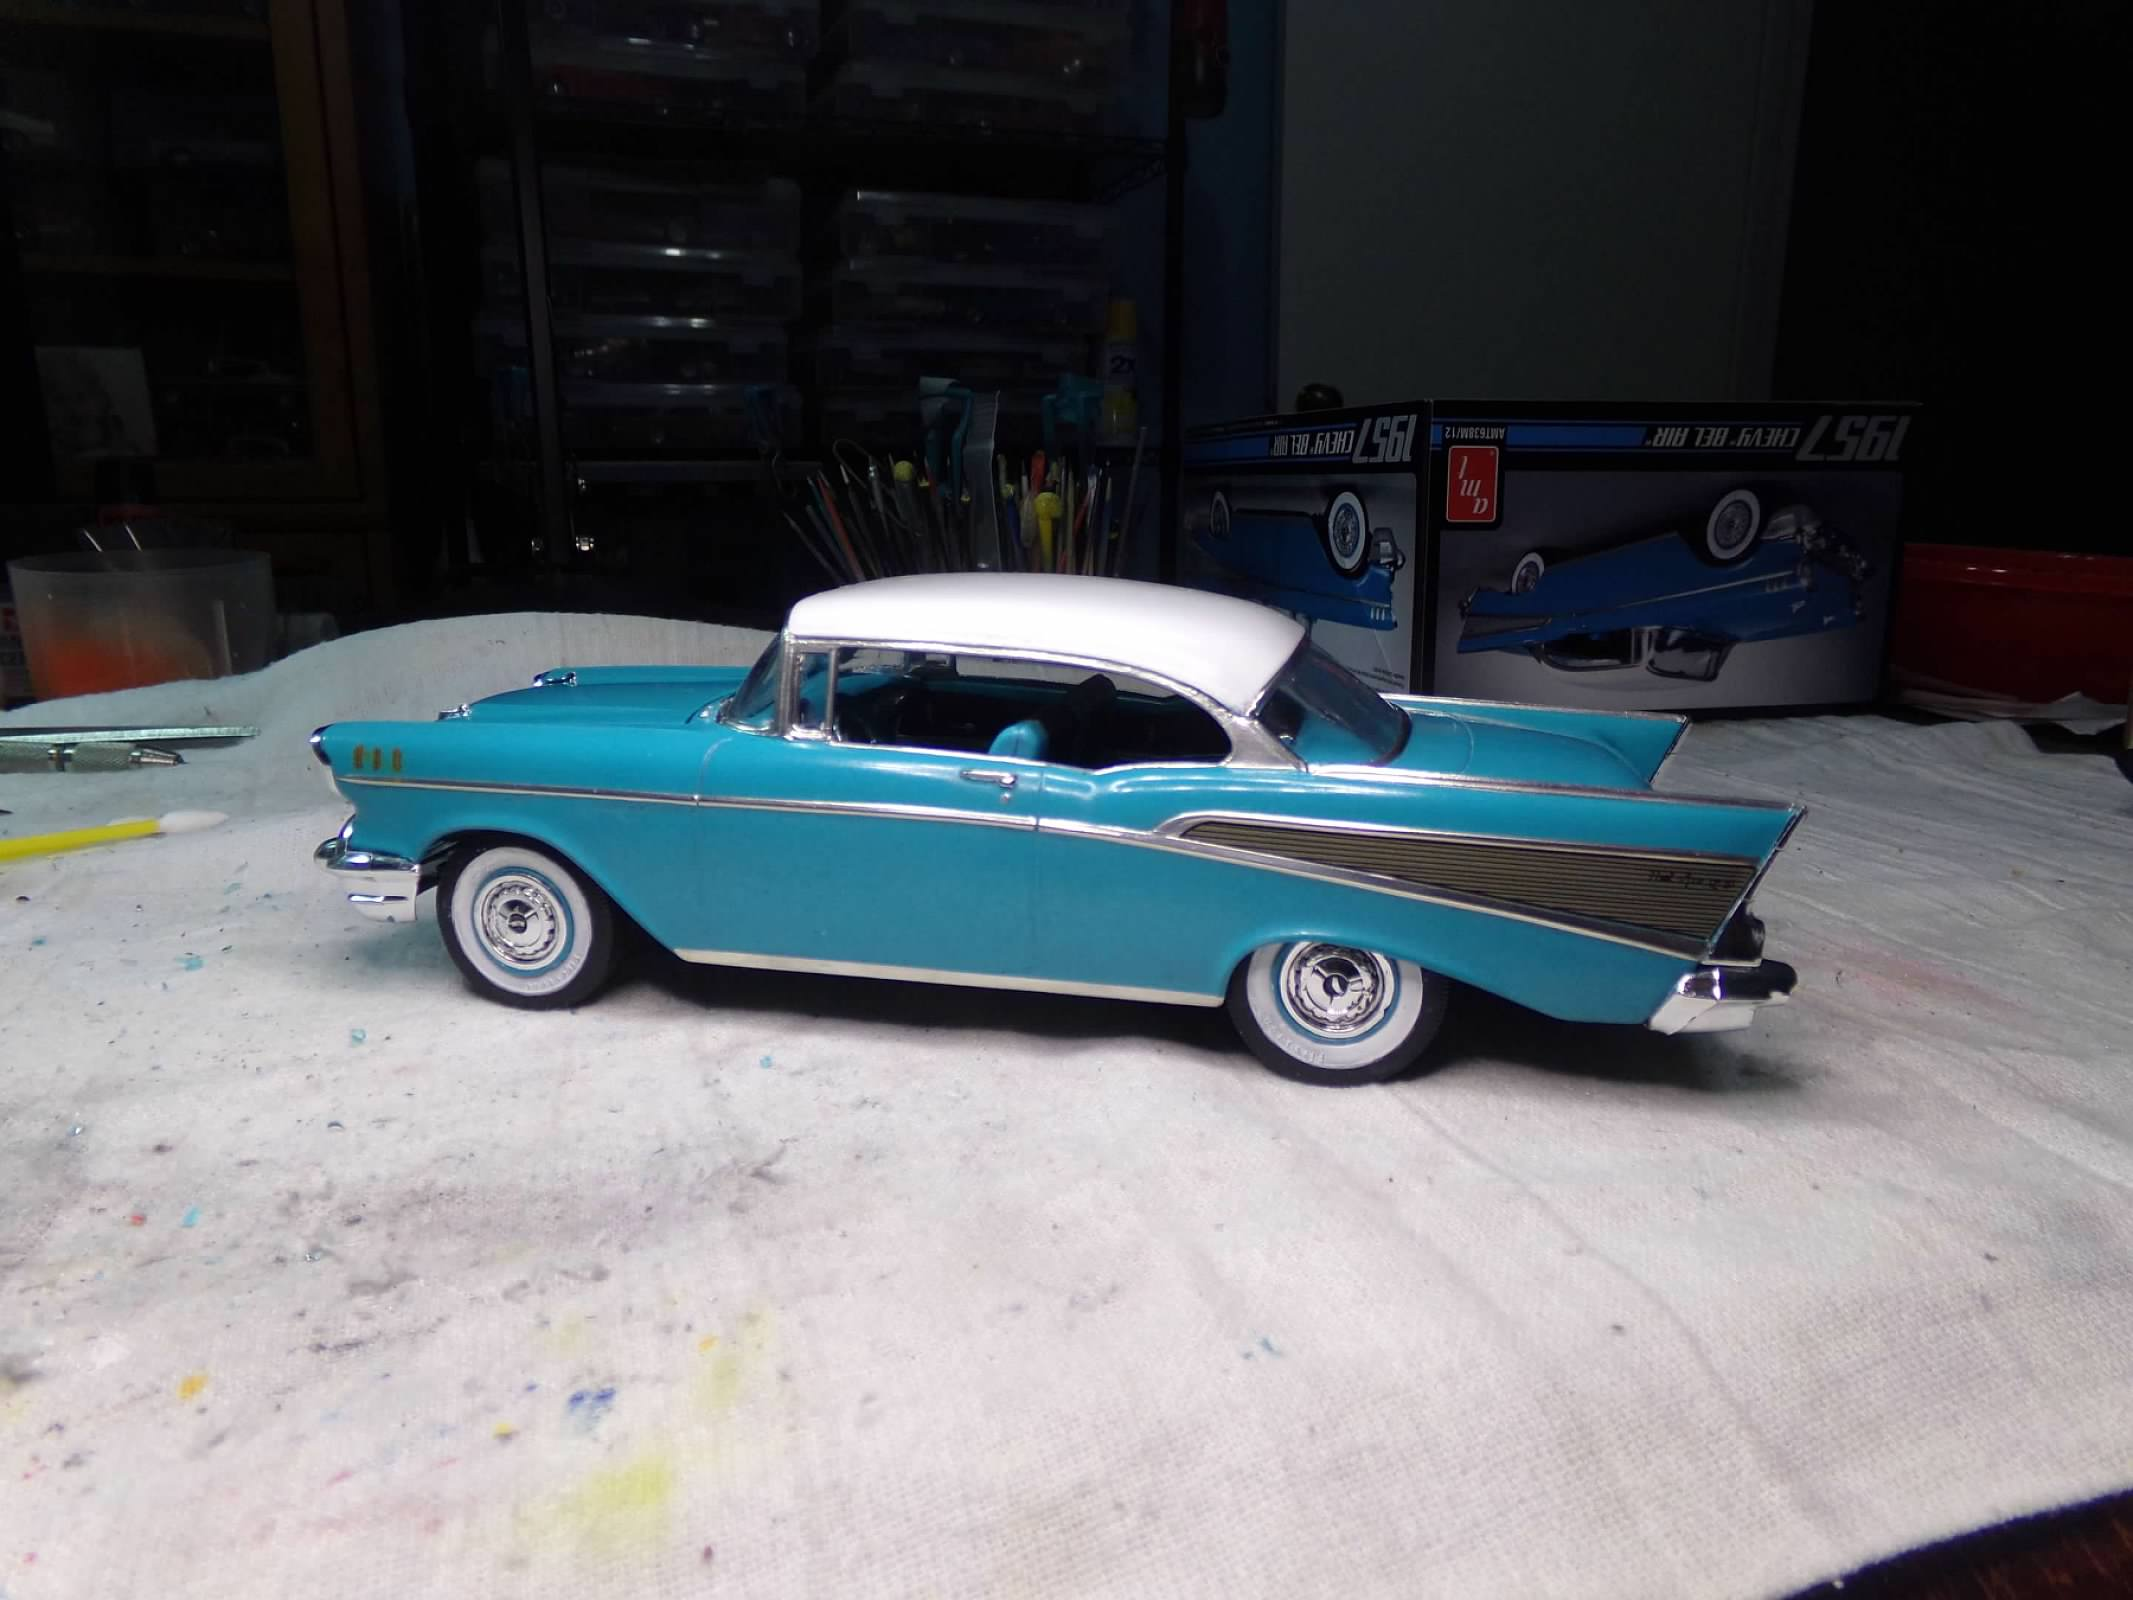
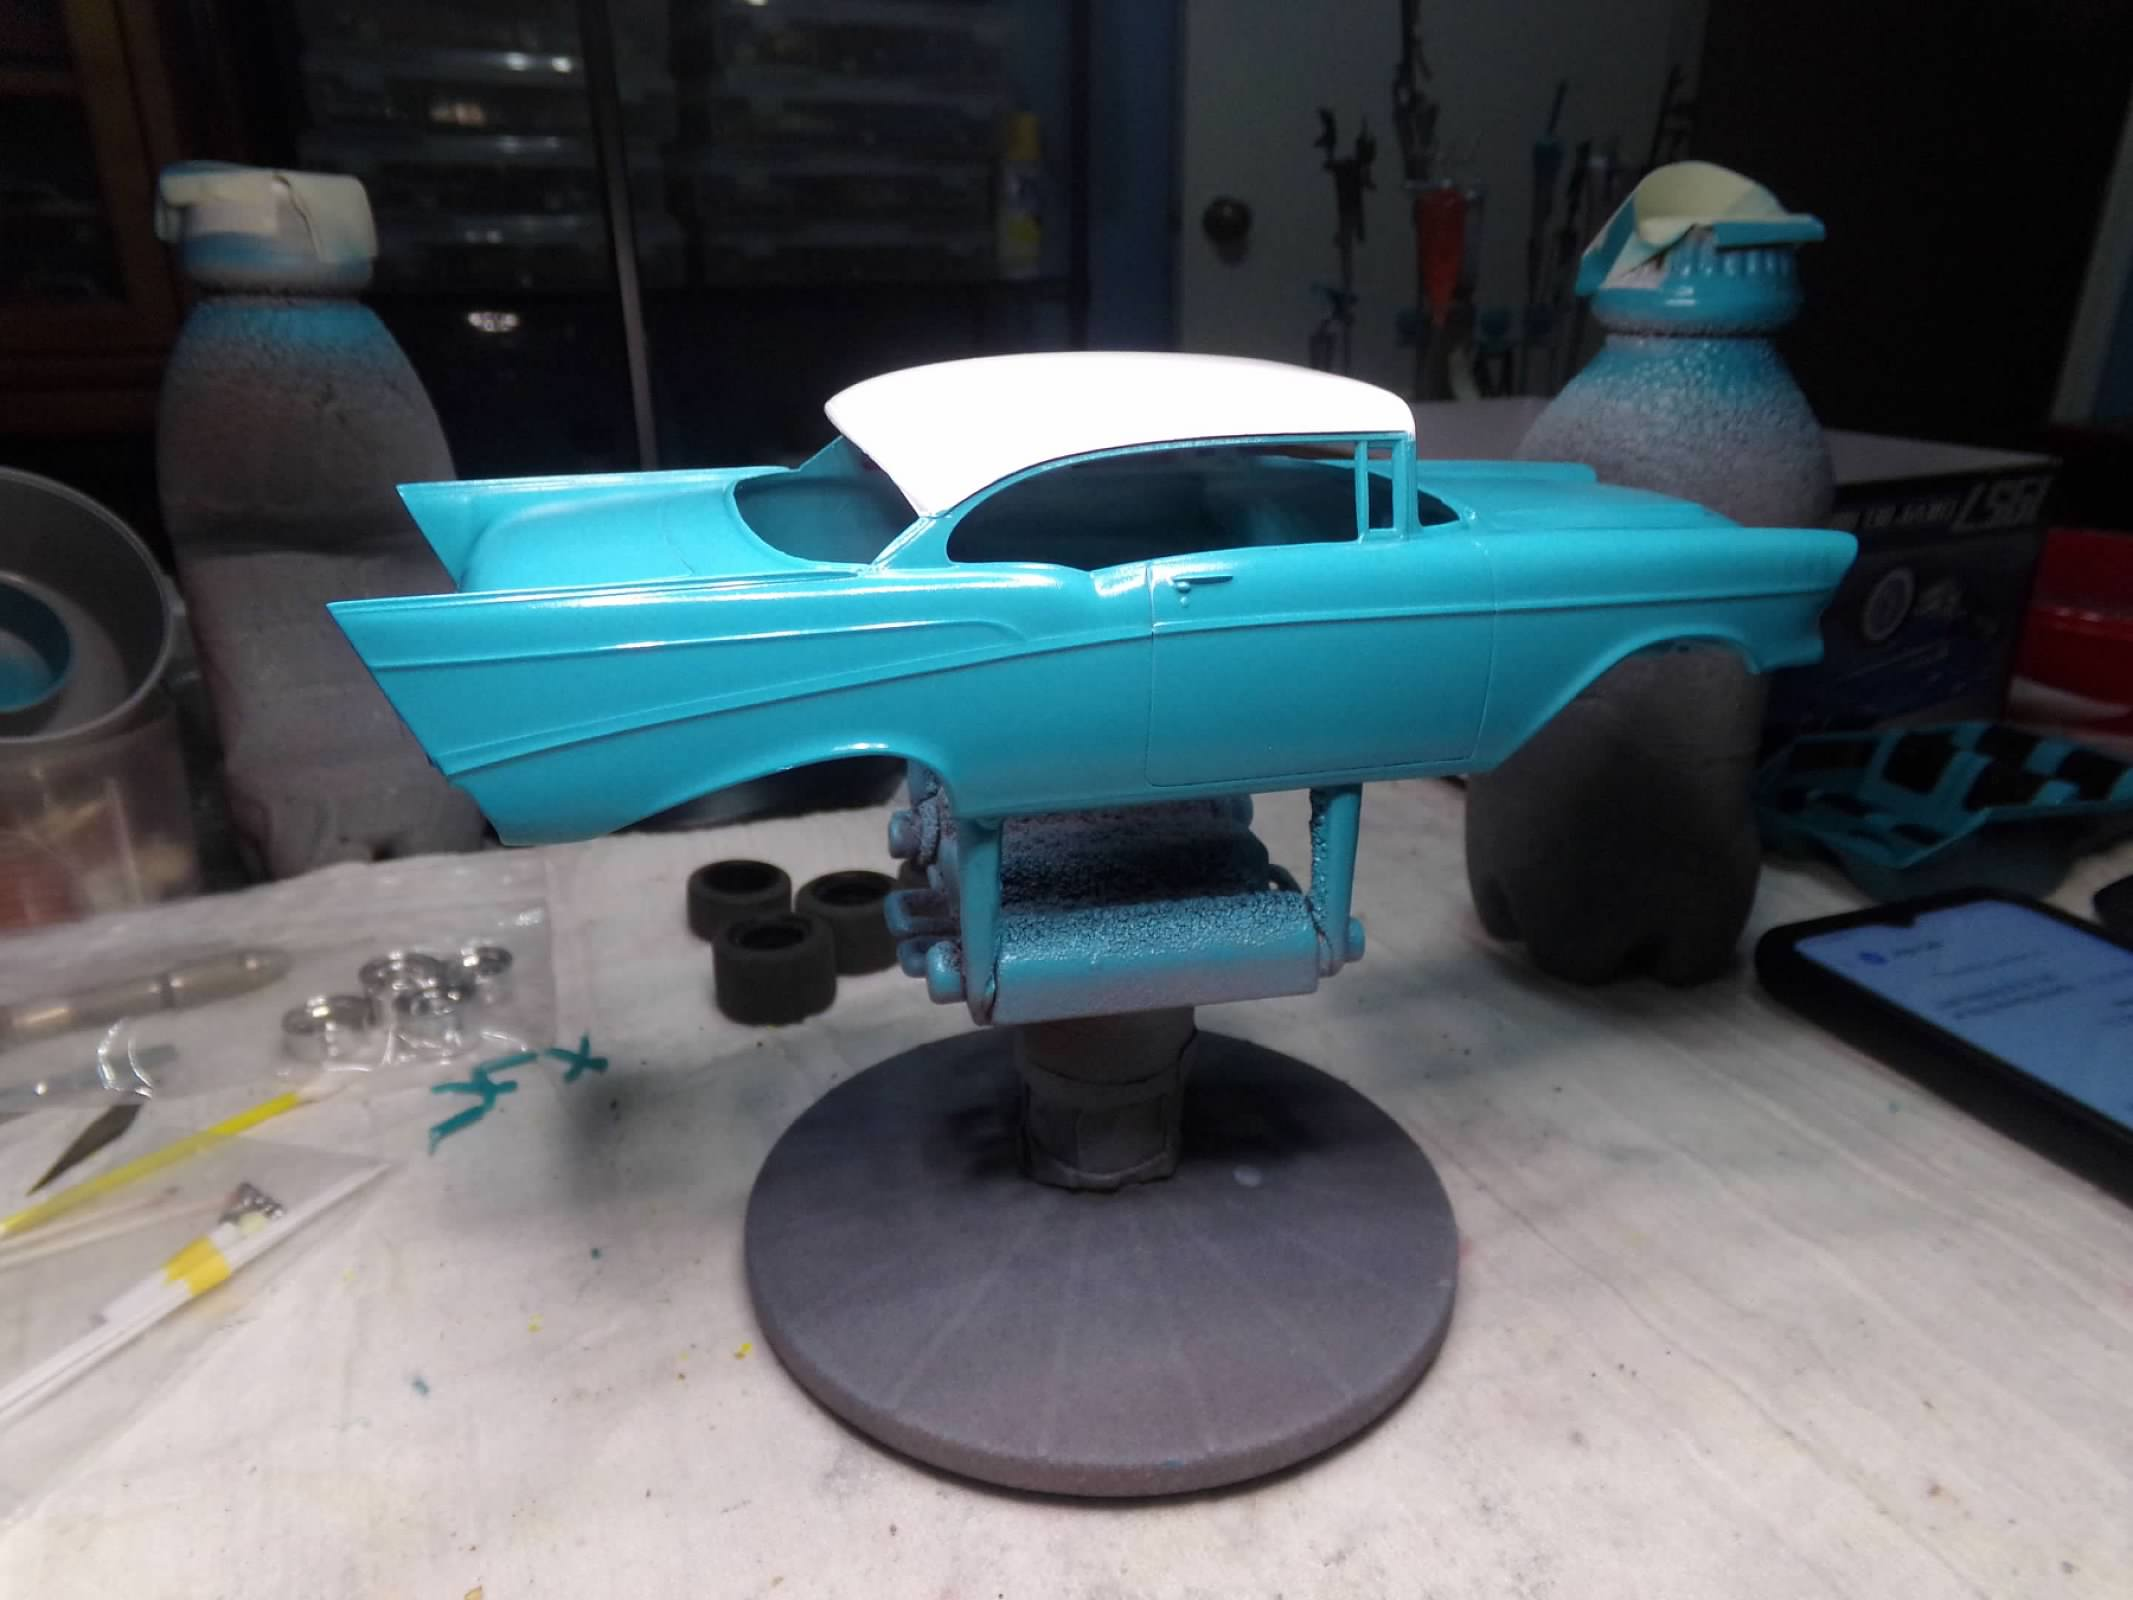
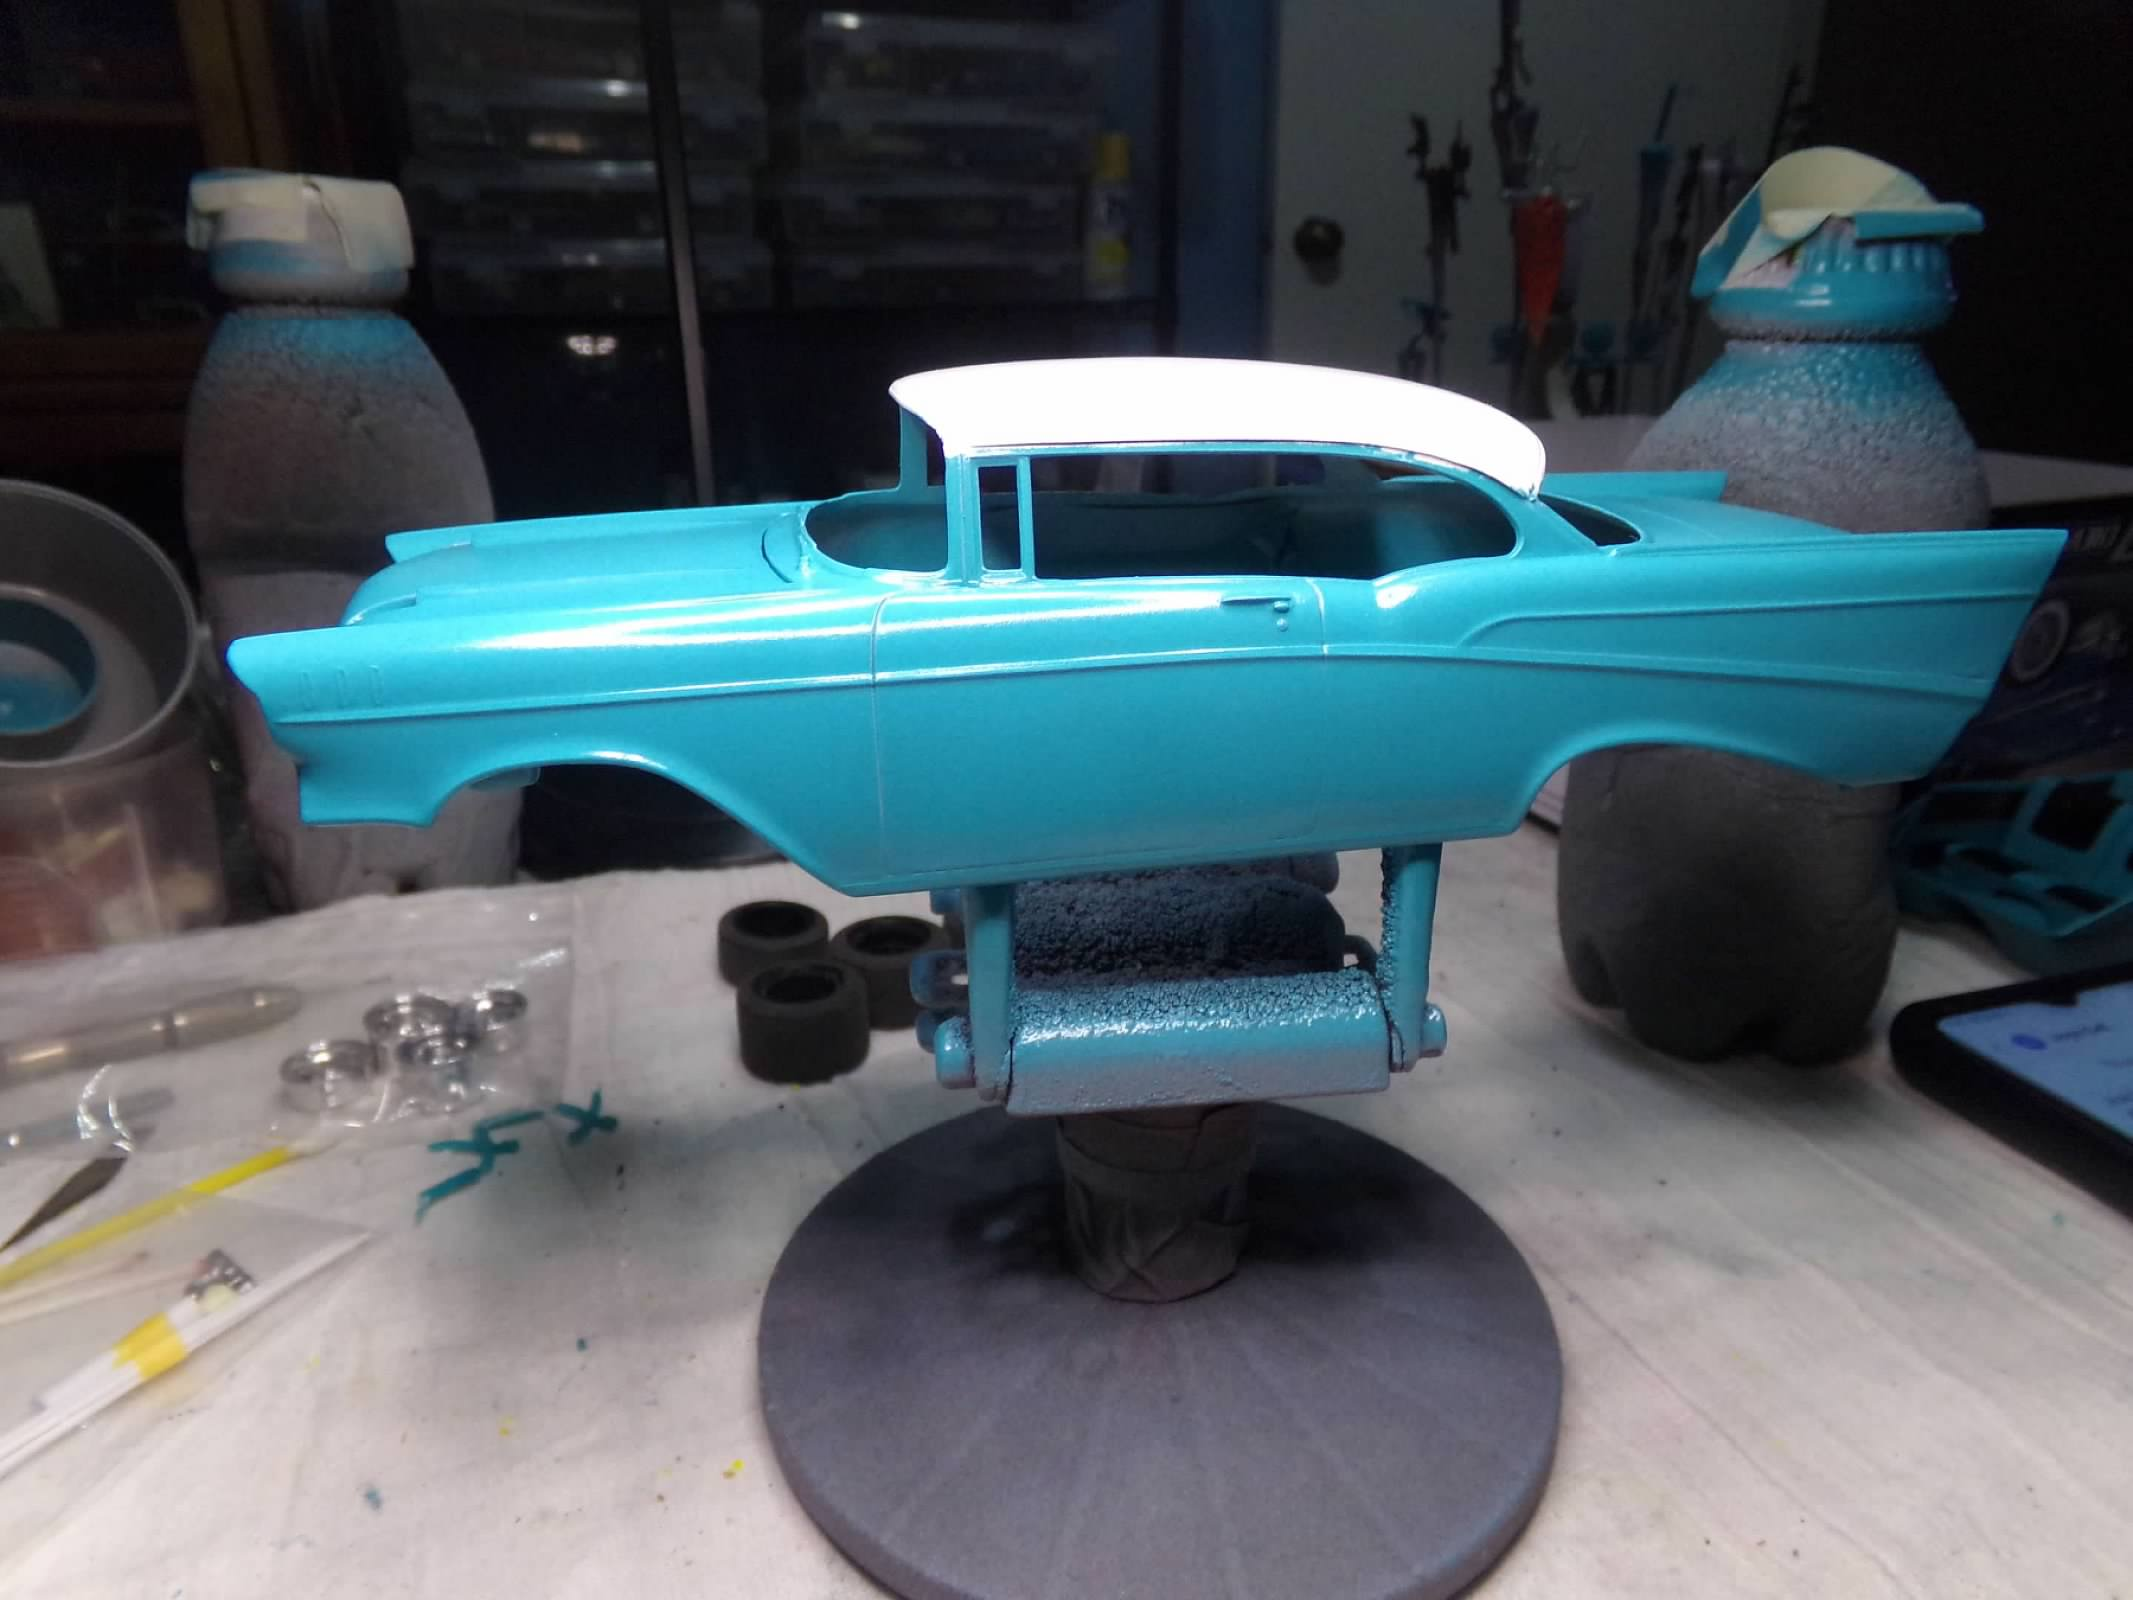
This is another 57 Chevy using the very basic AMT version on the shelves now. Completely box stock and painted Coral Blue with black seat and door panel inserts in the interior. I've also posted some of my other 57 Chevy builds in my makeshift showroom that is falling apart! There are Revell kits, AMT Pro Shop kits, and a Monogram kit represented in these two photos of one-fifties, two-tens, Bel Airs, a station wagon, and this is not all of my 57 chevy builds. The black and white one in the first group photo most closely replicates my 1:1 57 Chevy in the garage. Thanks for looking!
-
Looks great! ? I've always liked this Chevy and you did a nice job on it! Sorry for your loss.
-
Thanks for reminding me, Bob. I pulled out my Street Rod version and its amazing how different that is from the Gasser version. You still did a nice job making it look good!
-
This one is done completely box stock. I didn't separate the hood bar from the grill, no exterior mirrors in the kit (at least there was an interior mirror) and a decal for the rear fender aluminum insert. It used to be more silver than black so that has changed over the years. Everything went together pretty well once extra flash was removed. Thanks for looking!
-
Looks great, Bob! You have added some pulleys and belts to that engine. I know the kit engine was deficient in that area. But I wouldn't know where to begin to add all those pulleys. Nice work! ??
-
Thanks, James! I appreciate your comment! The interior is done, engine is done box stock, chassis is done, interior is in, wheels are on and a test fit of body to the chassis! One complication - I forgot that one side of the tailpiece for the chassis has to be body color! Since its raining I'll give it a shot in the garage. Thanks for looking! ?
-
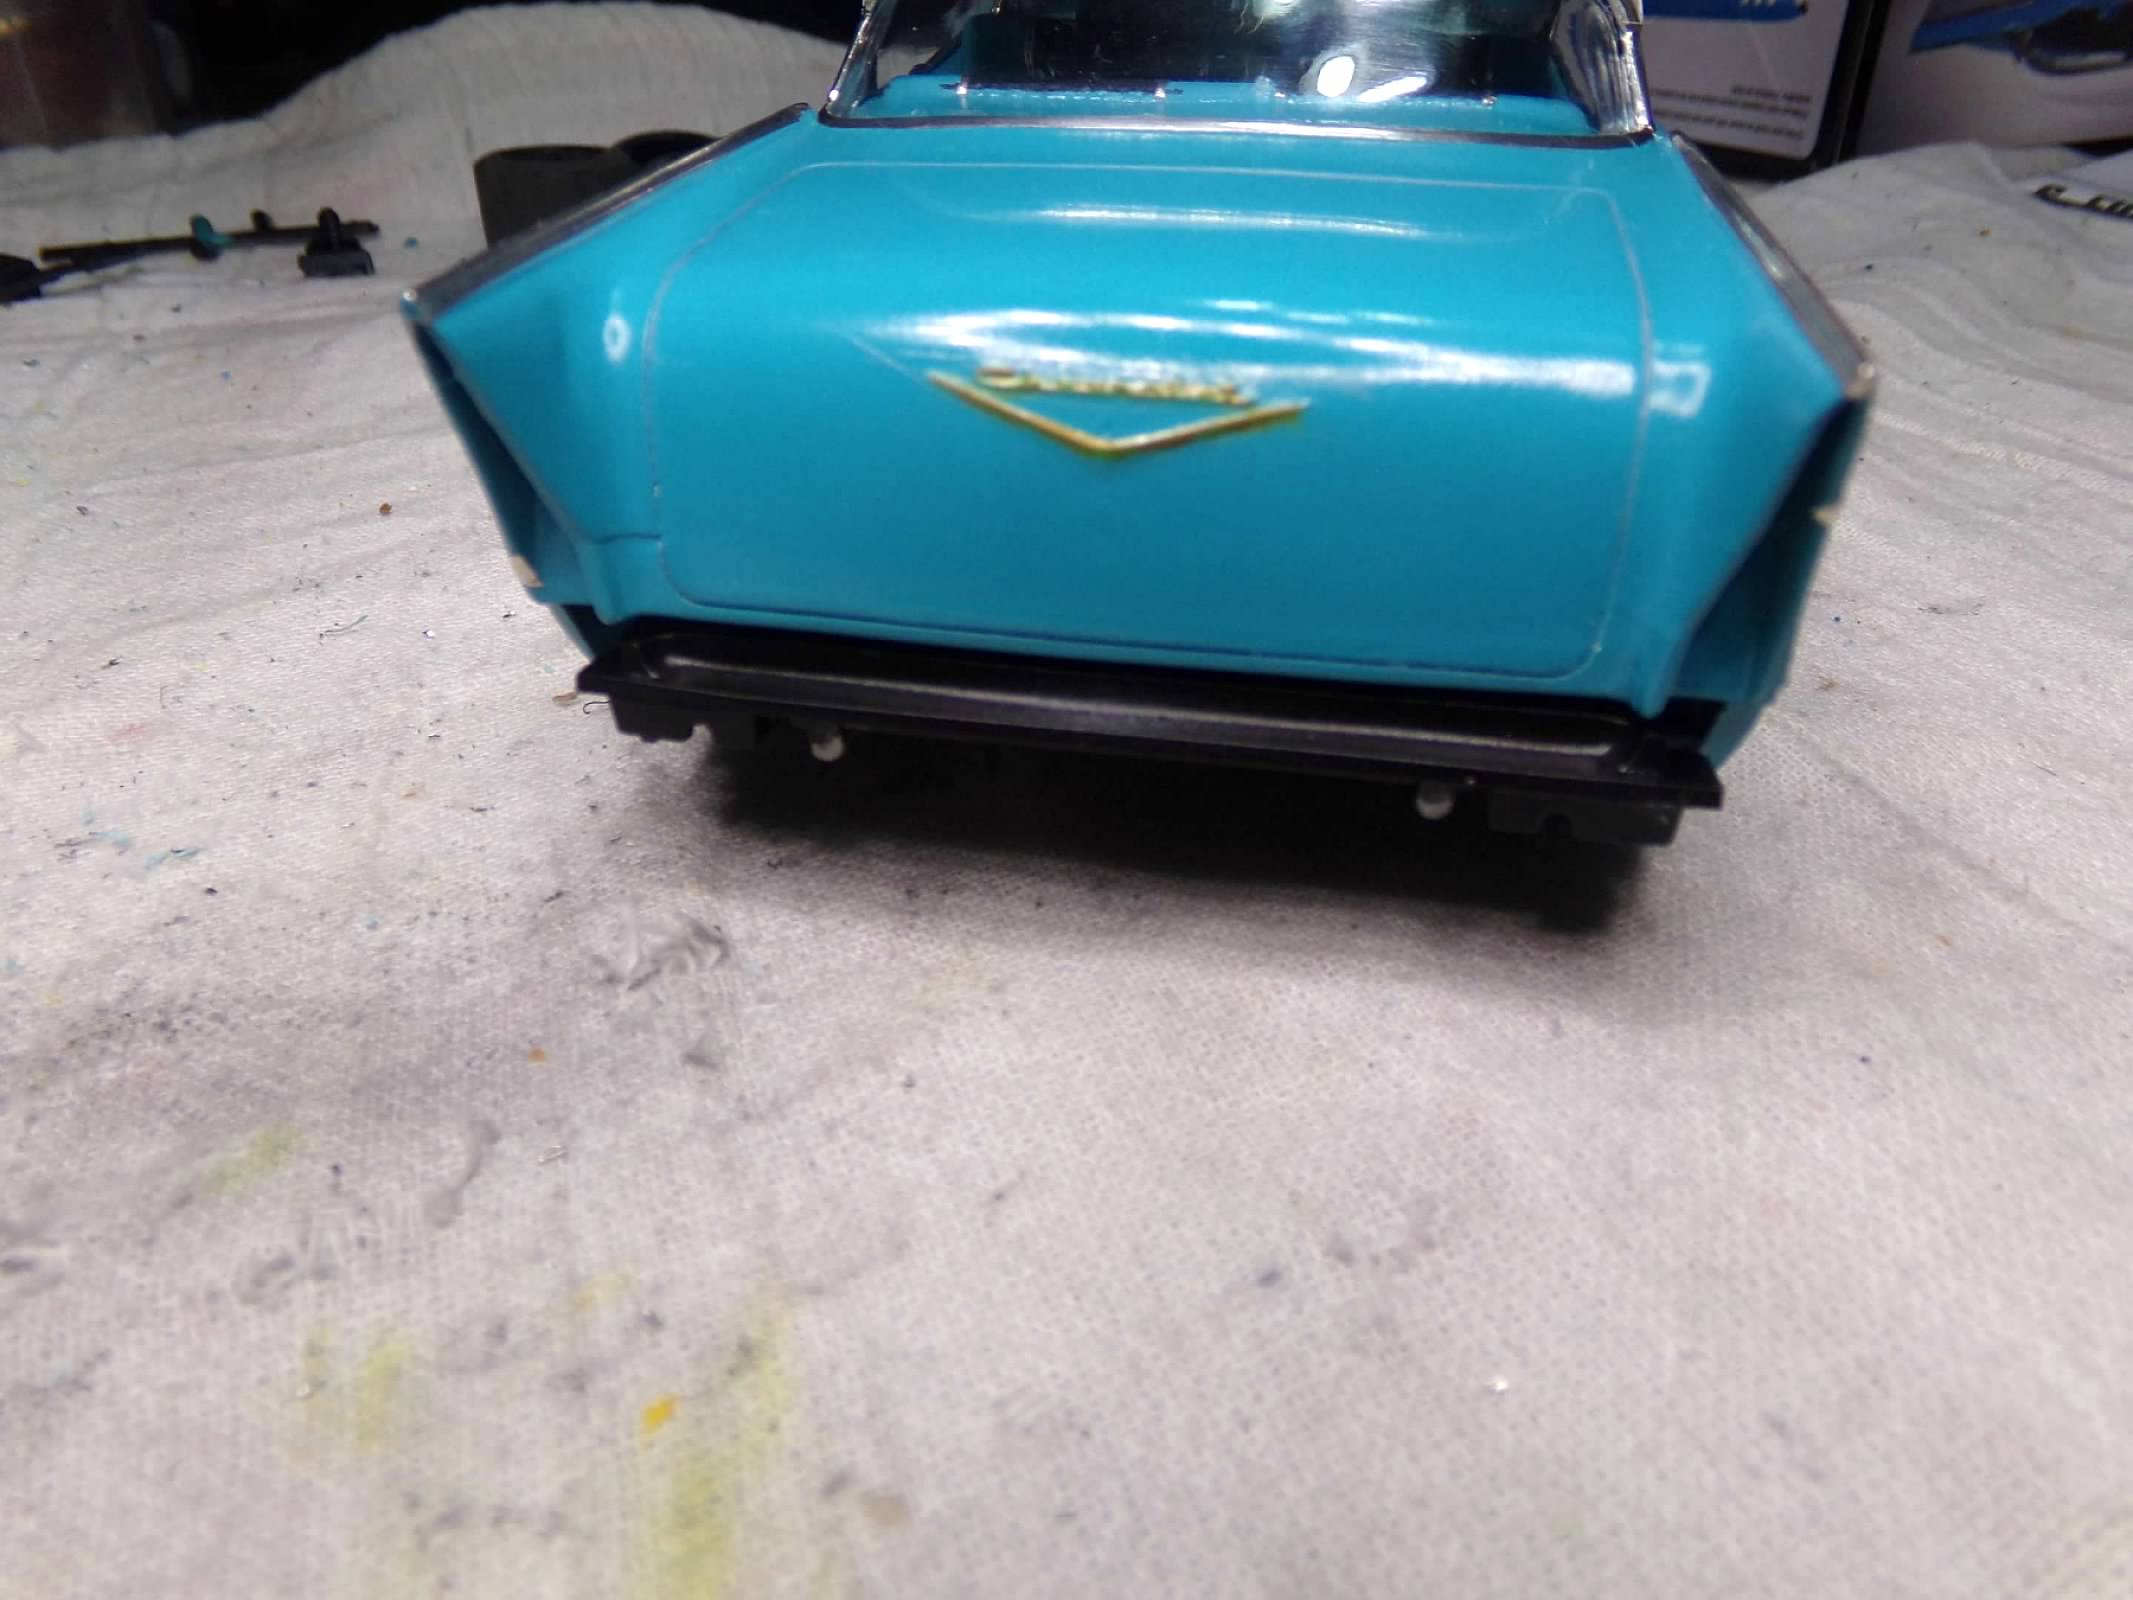
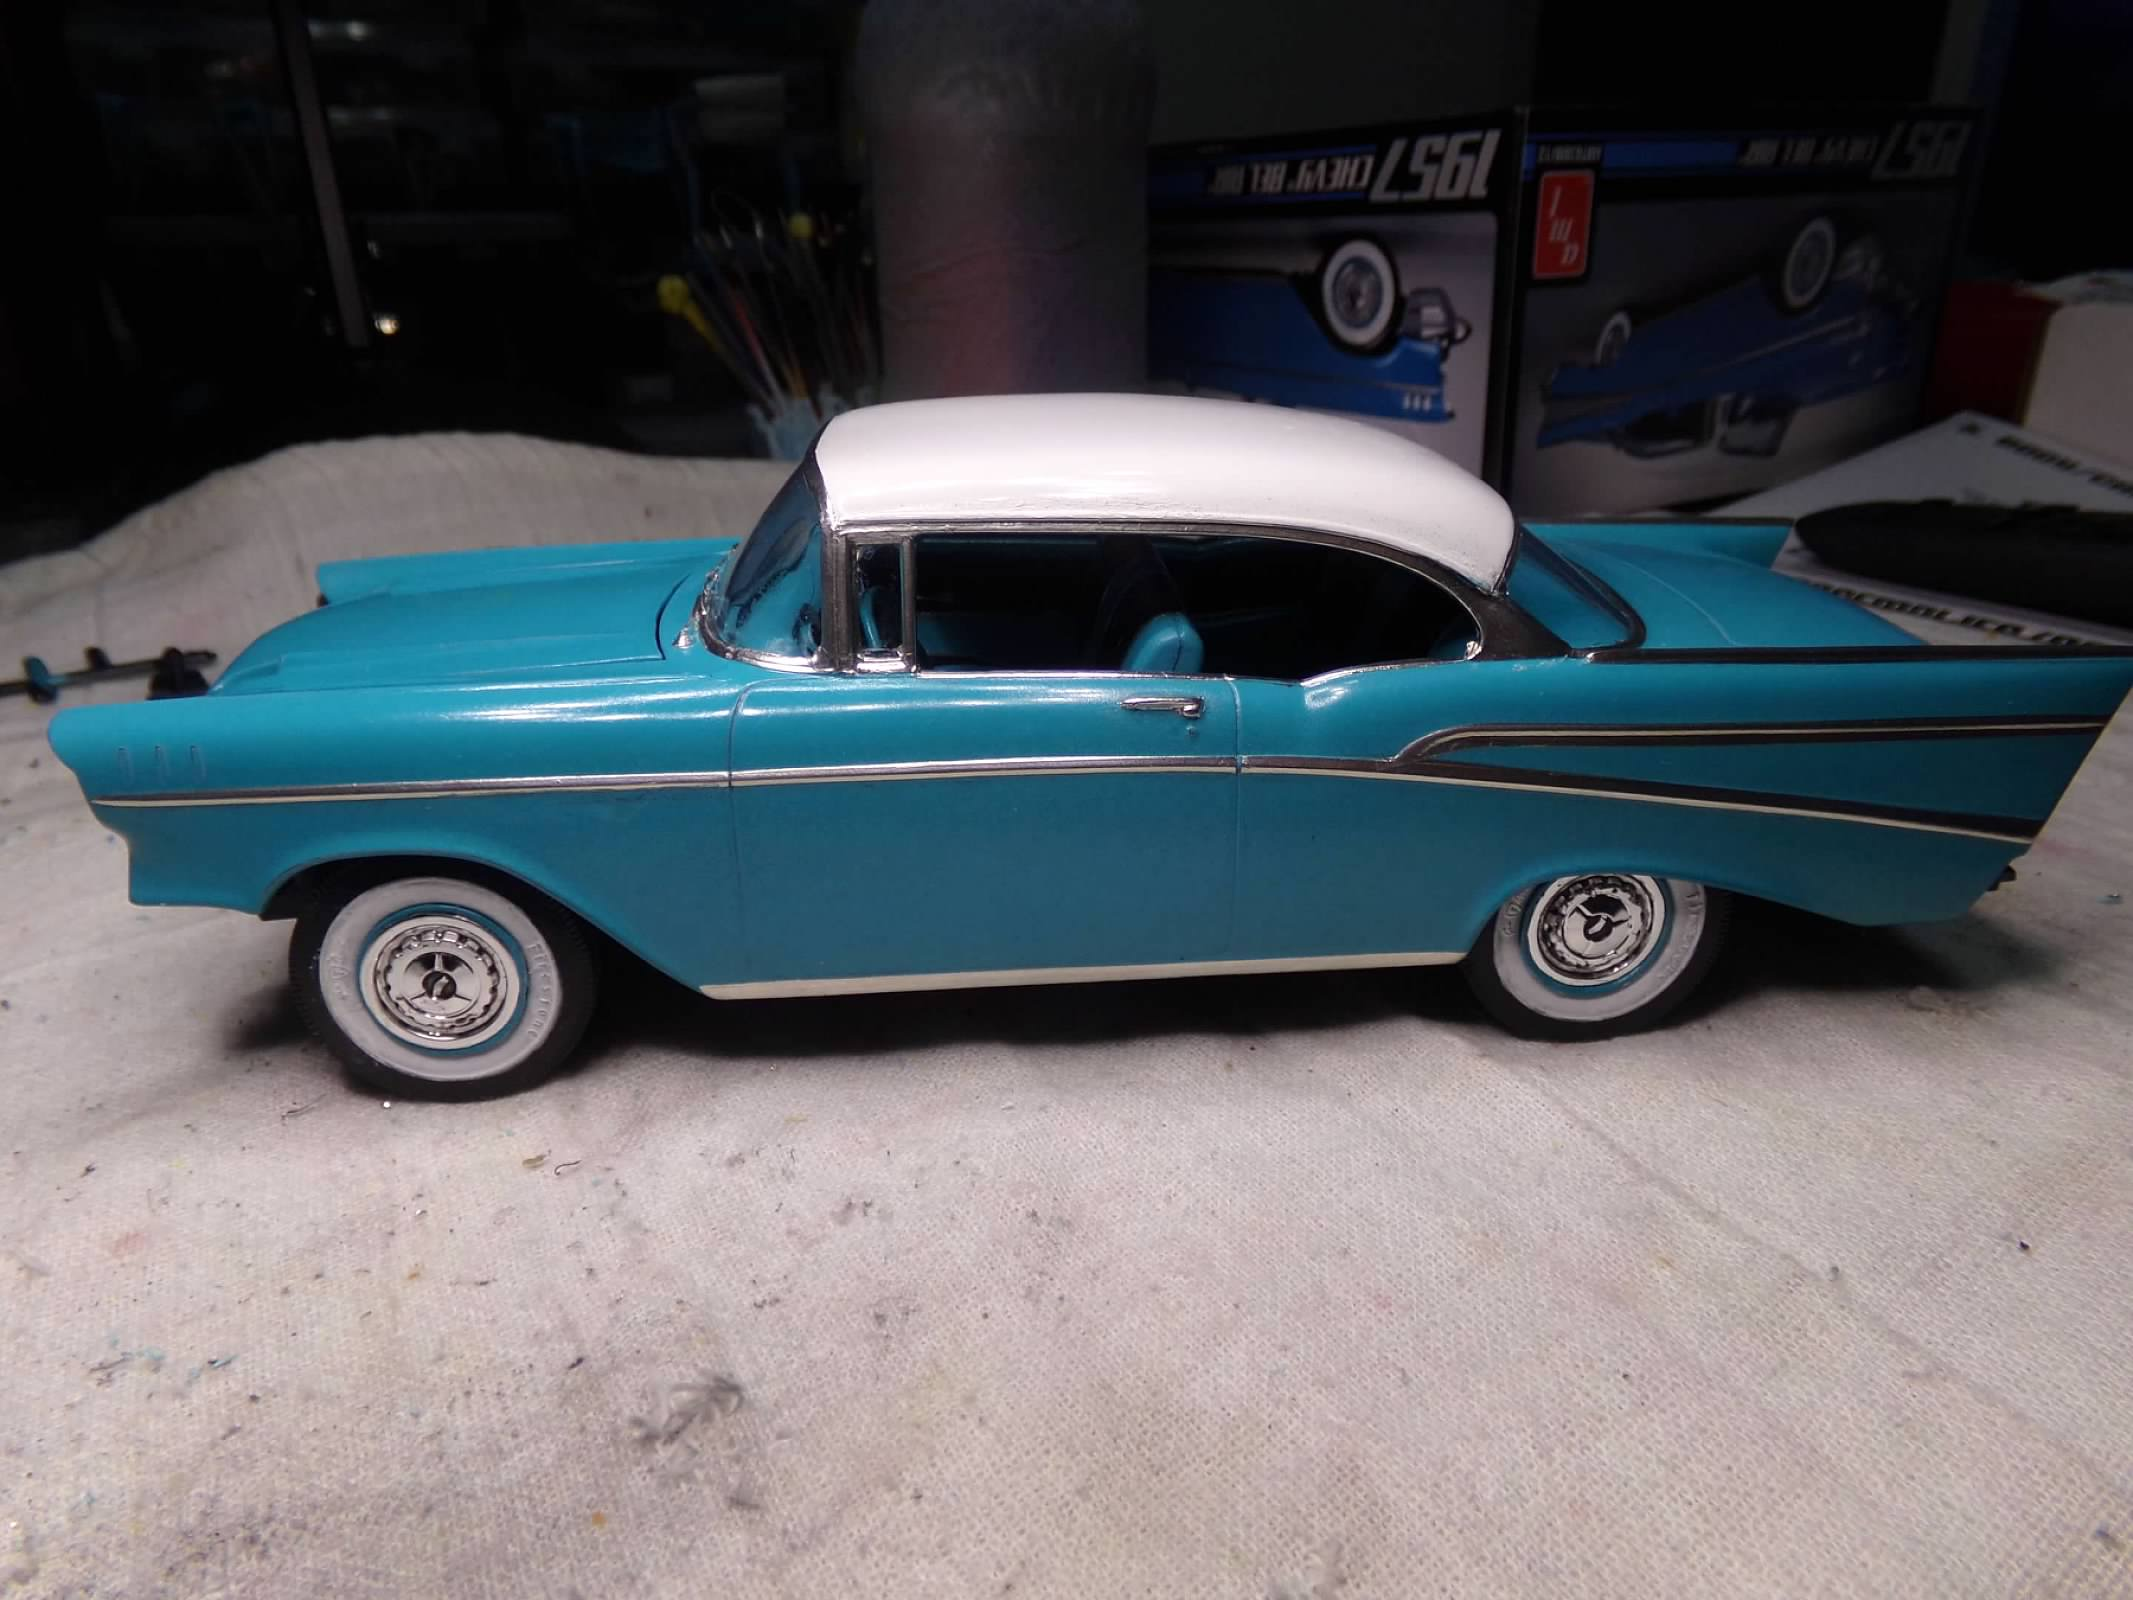
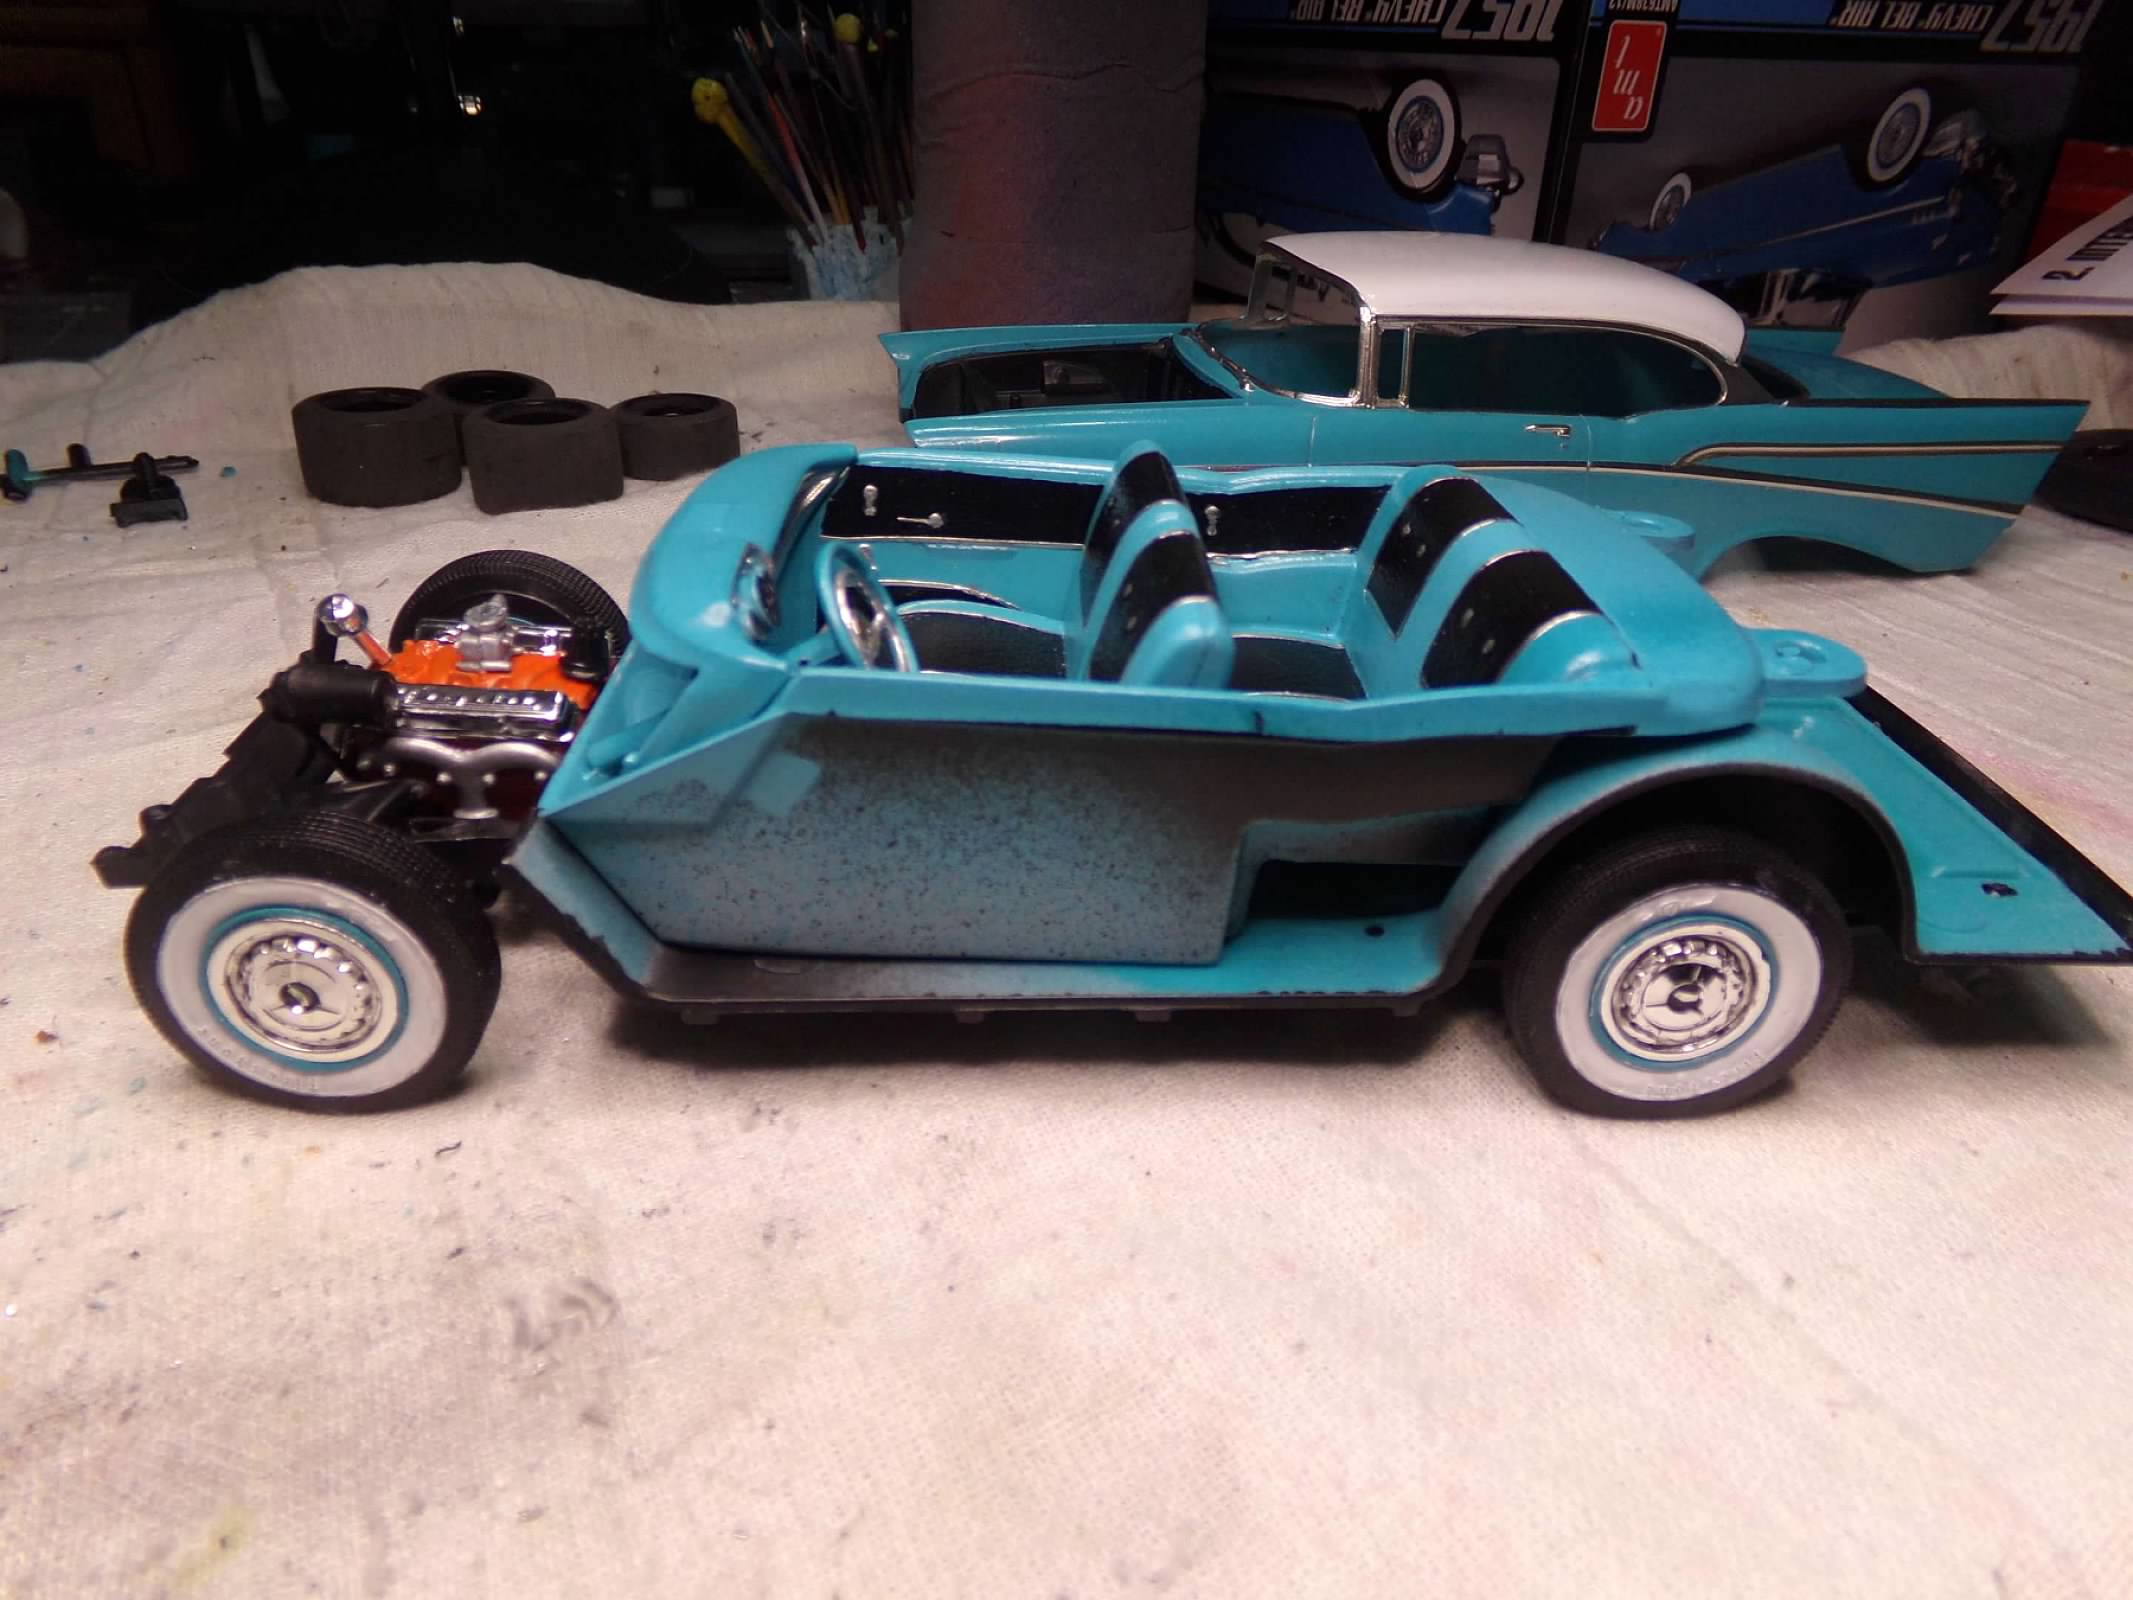
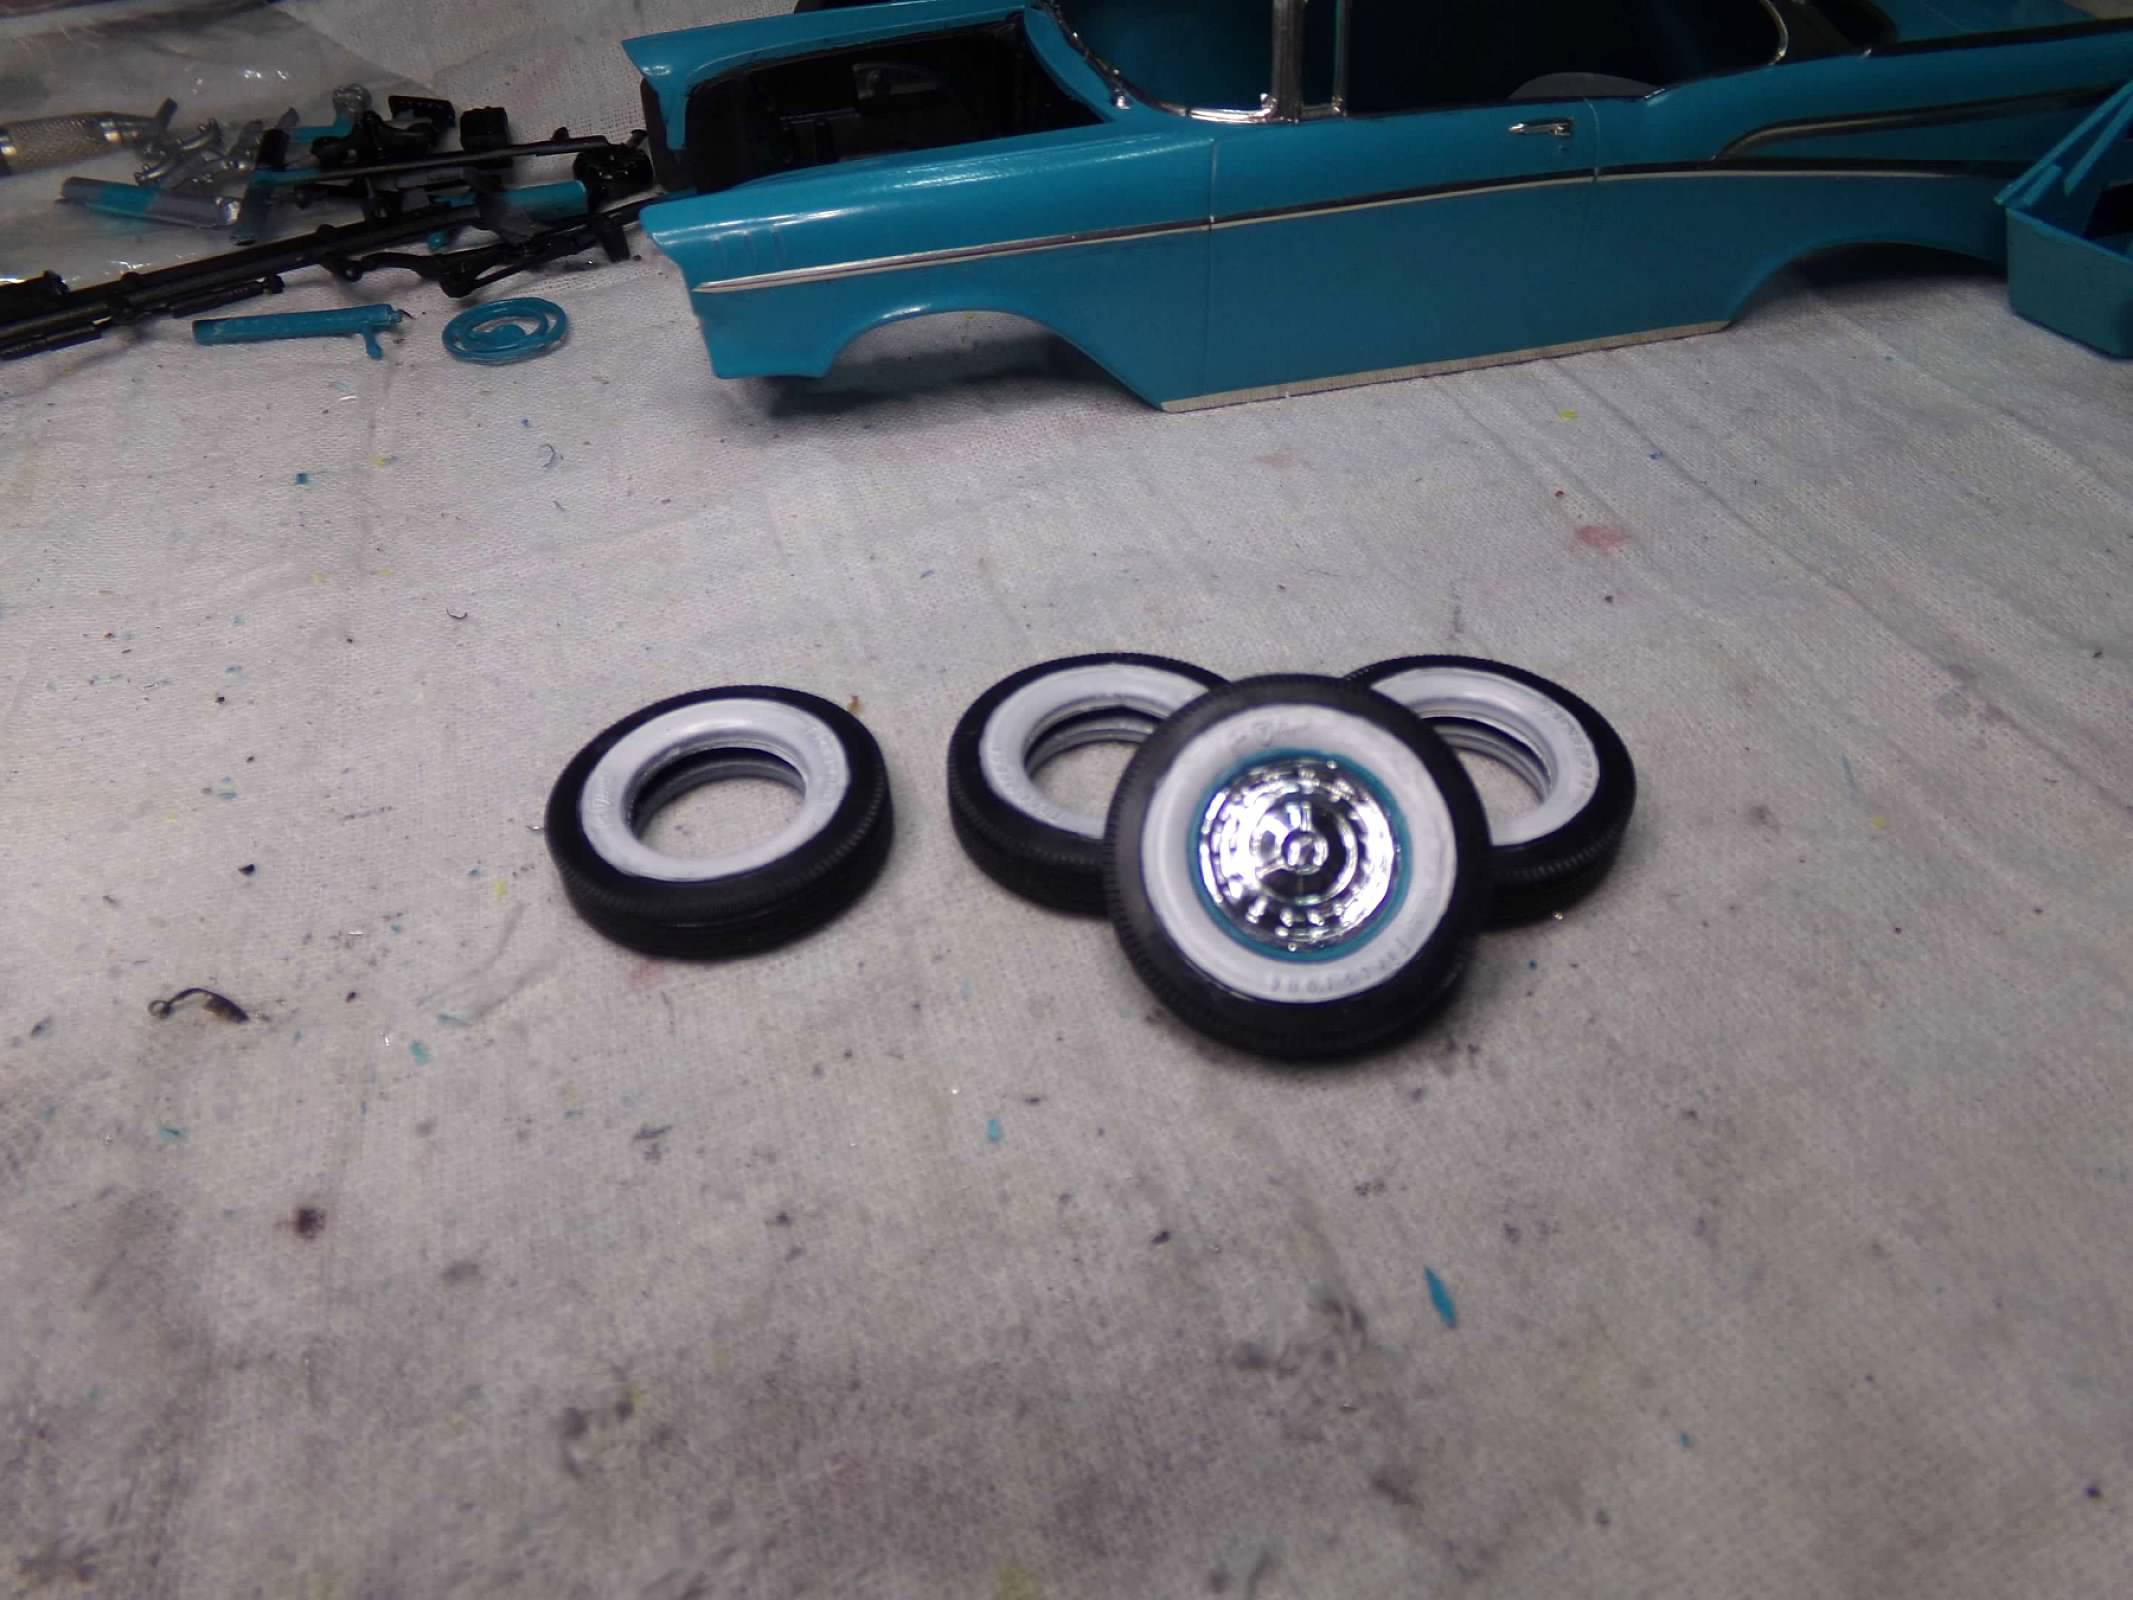
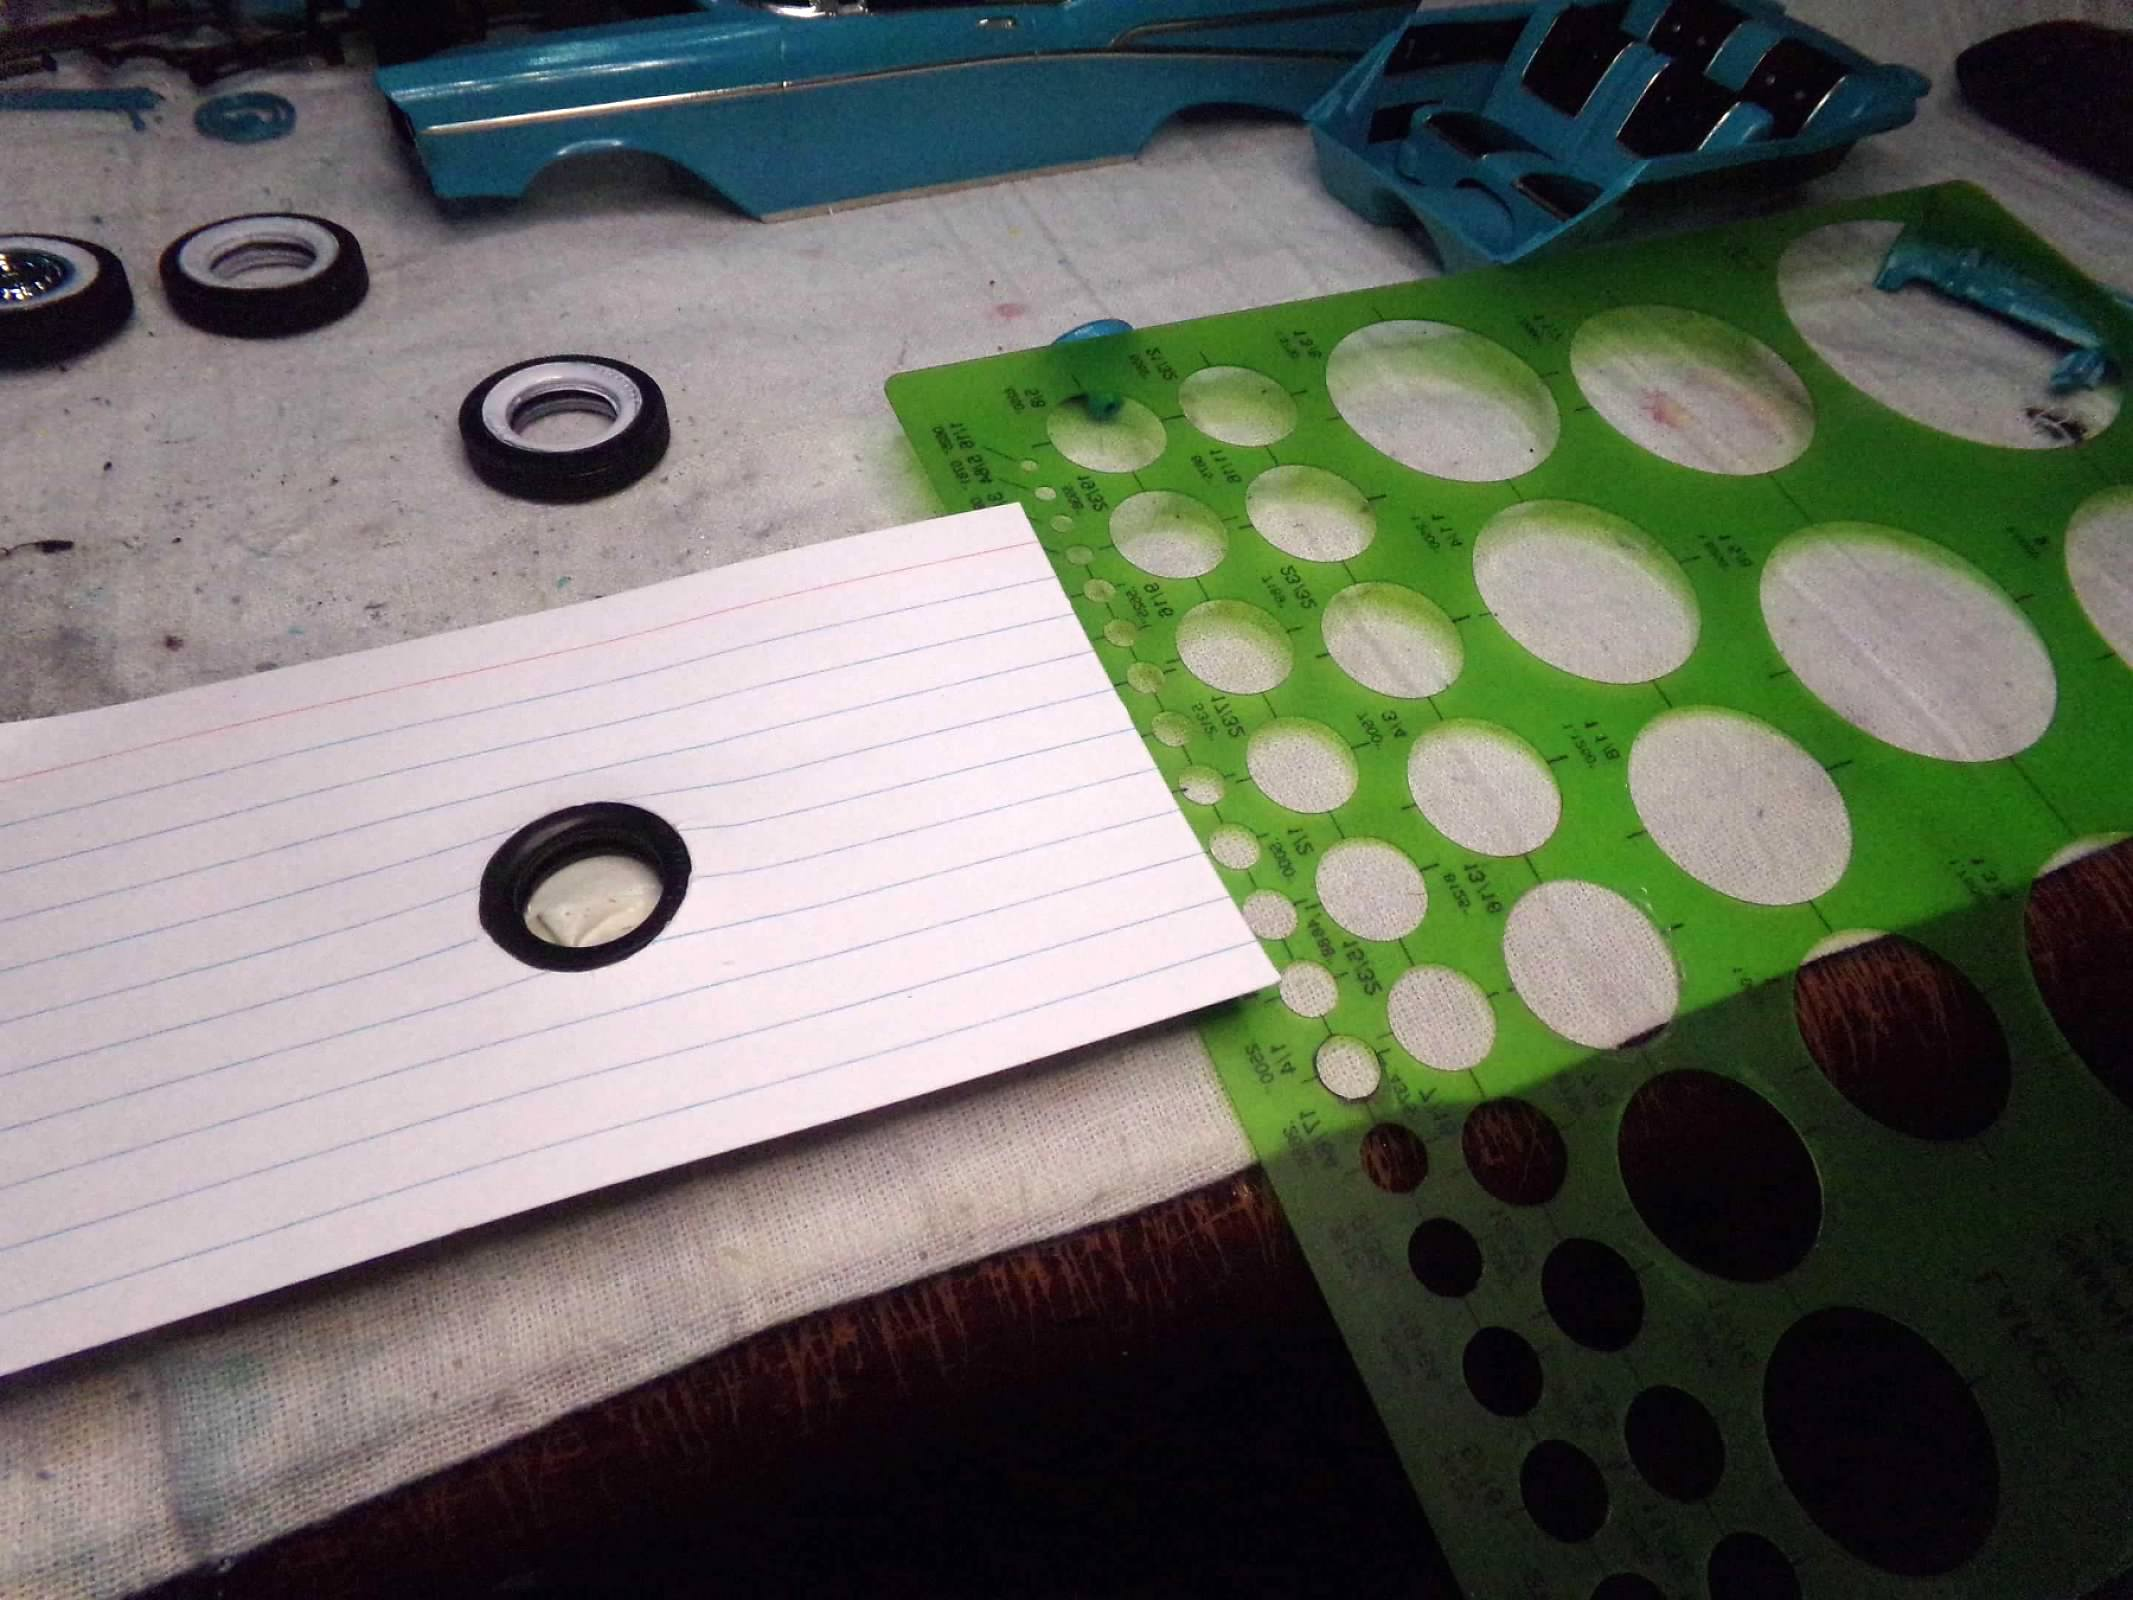
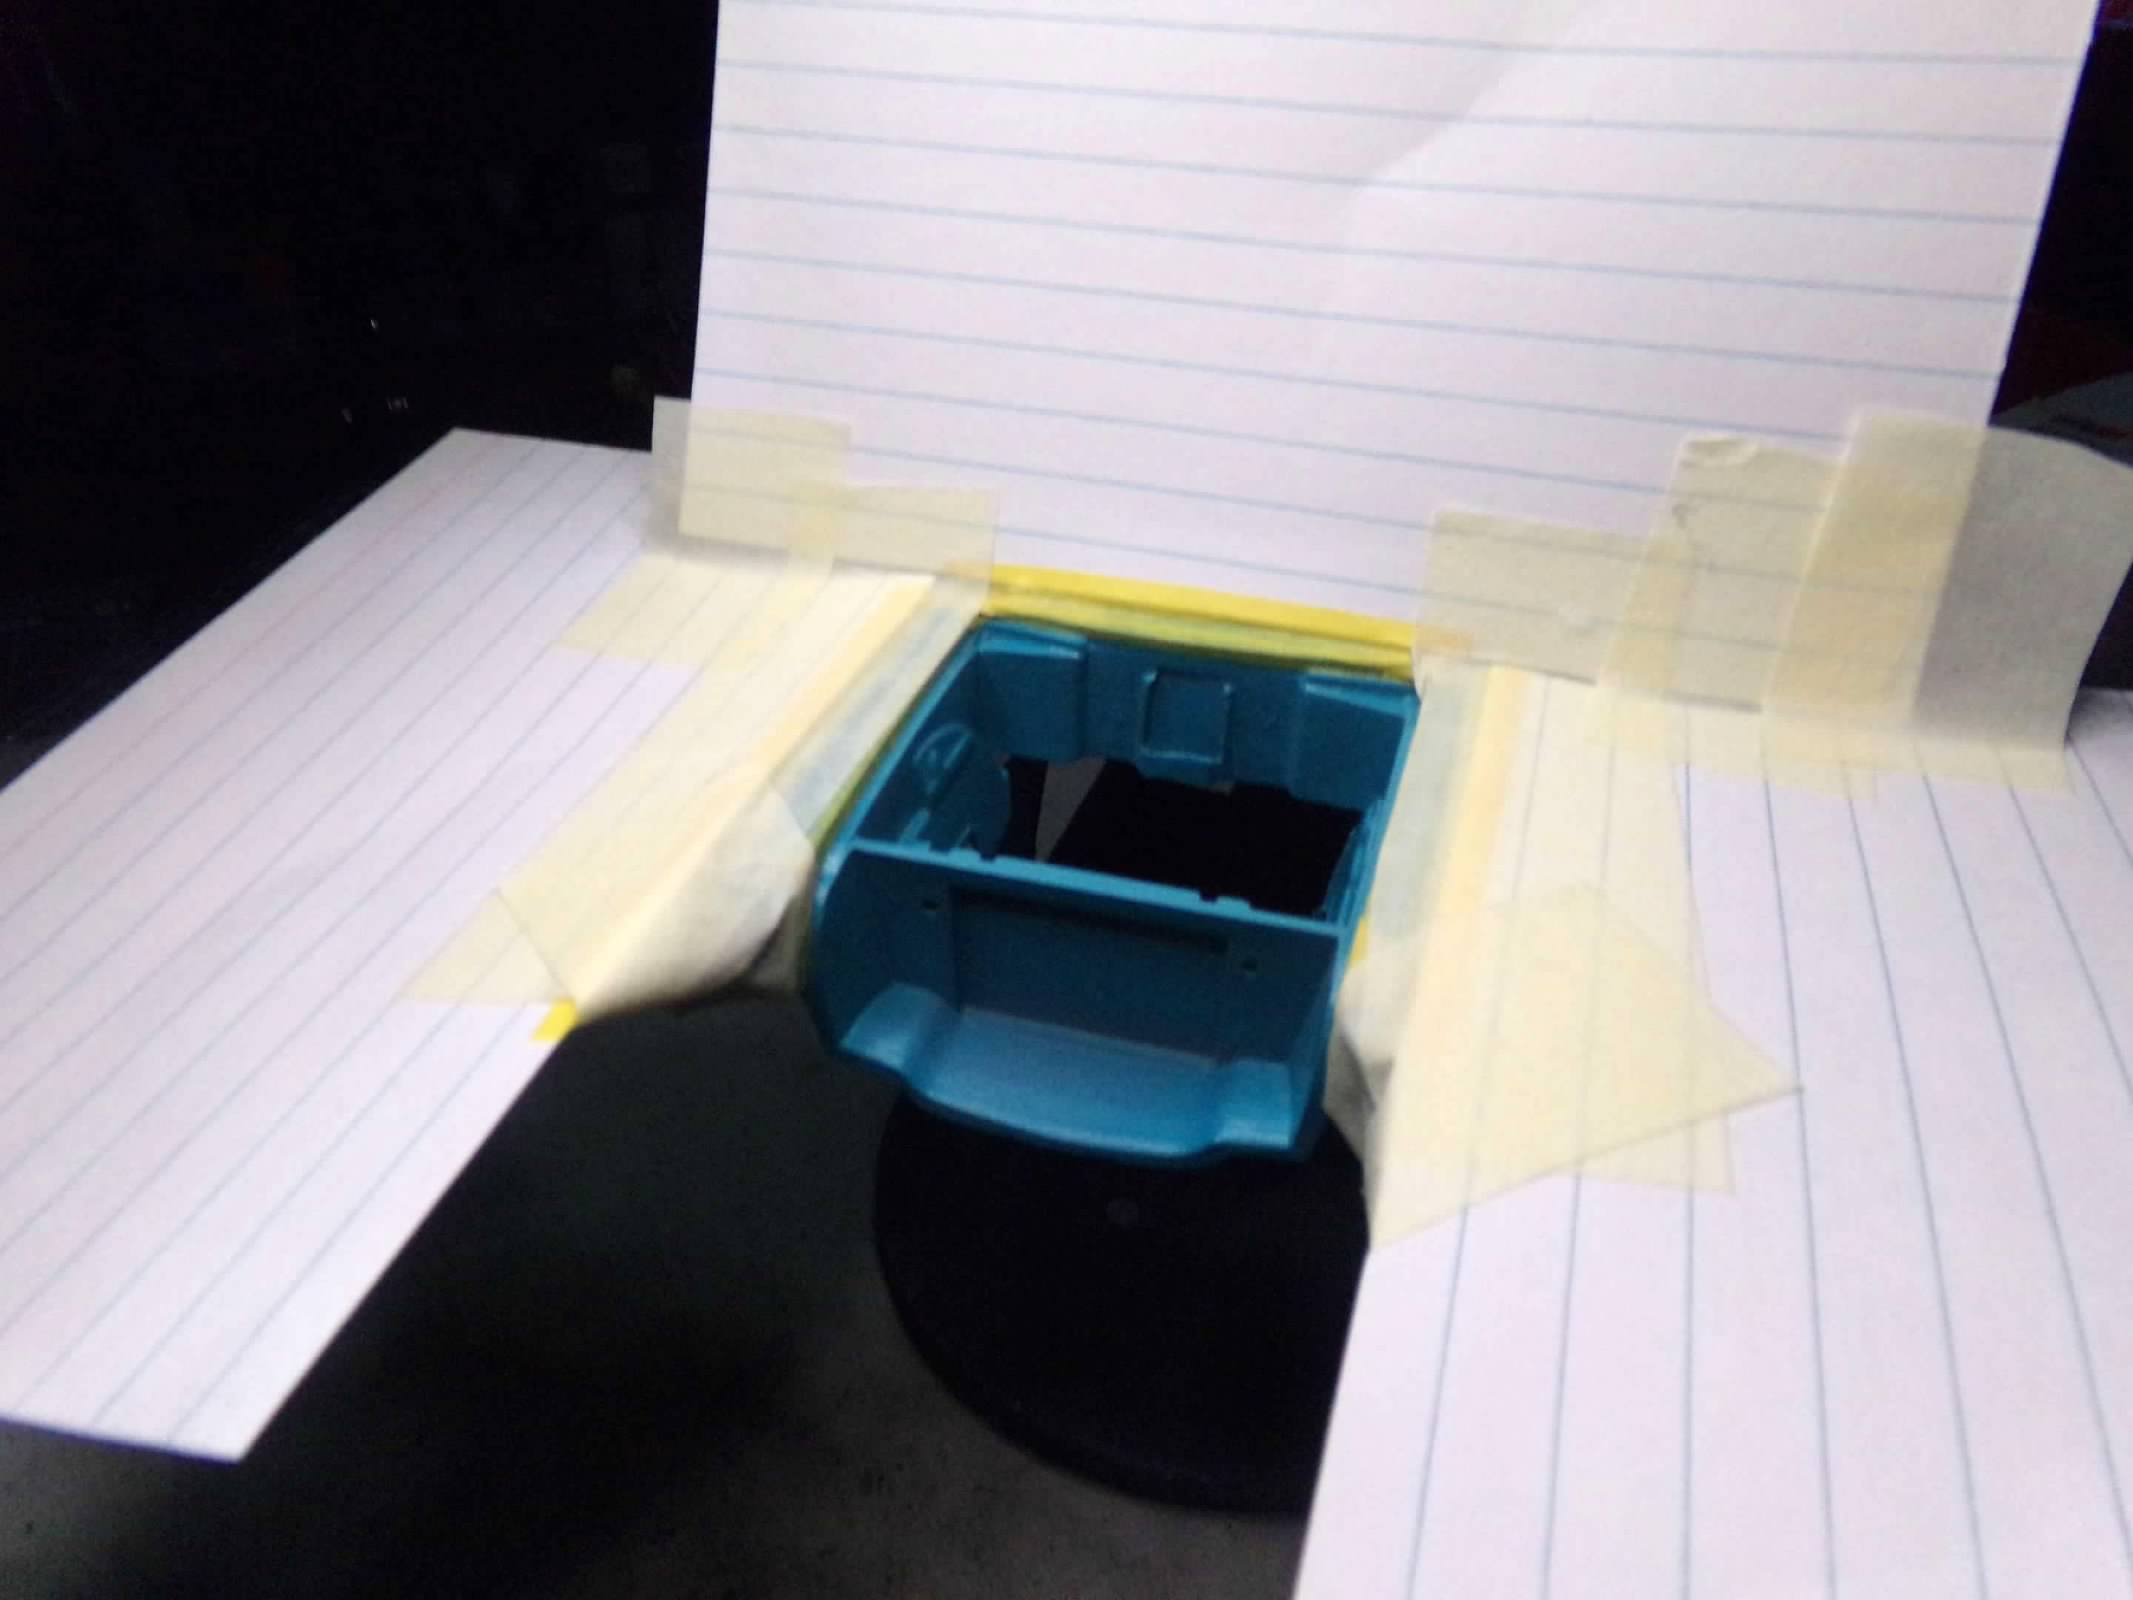
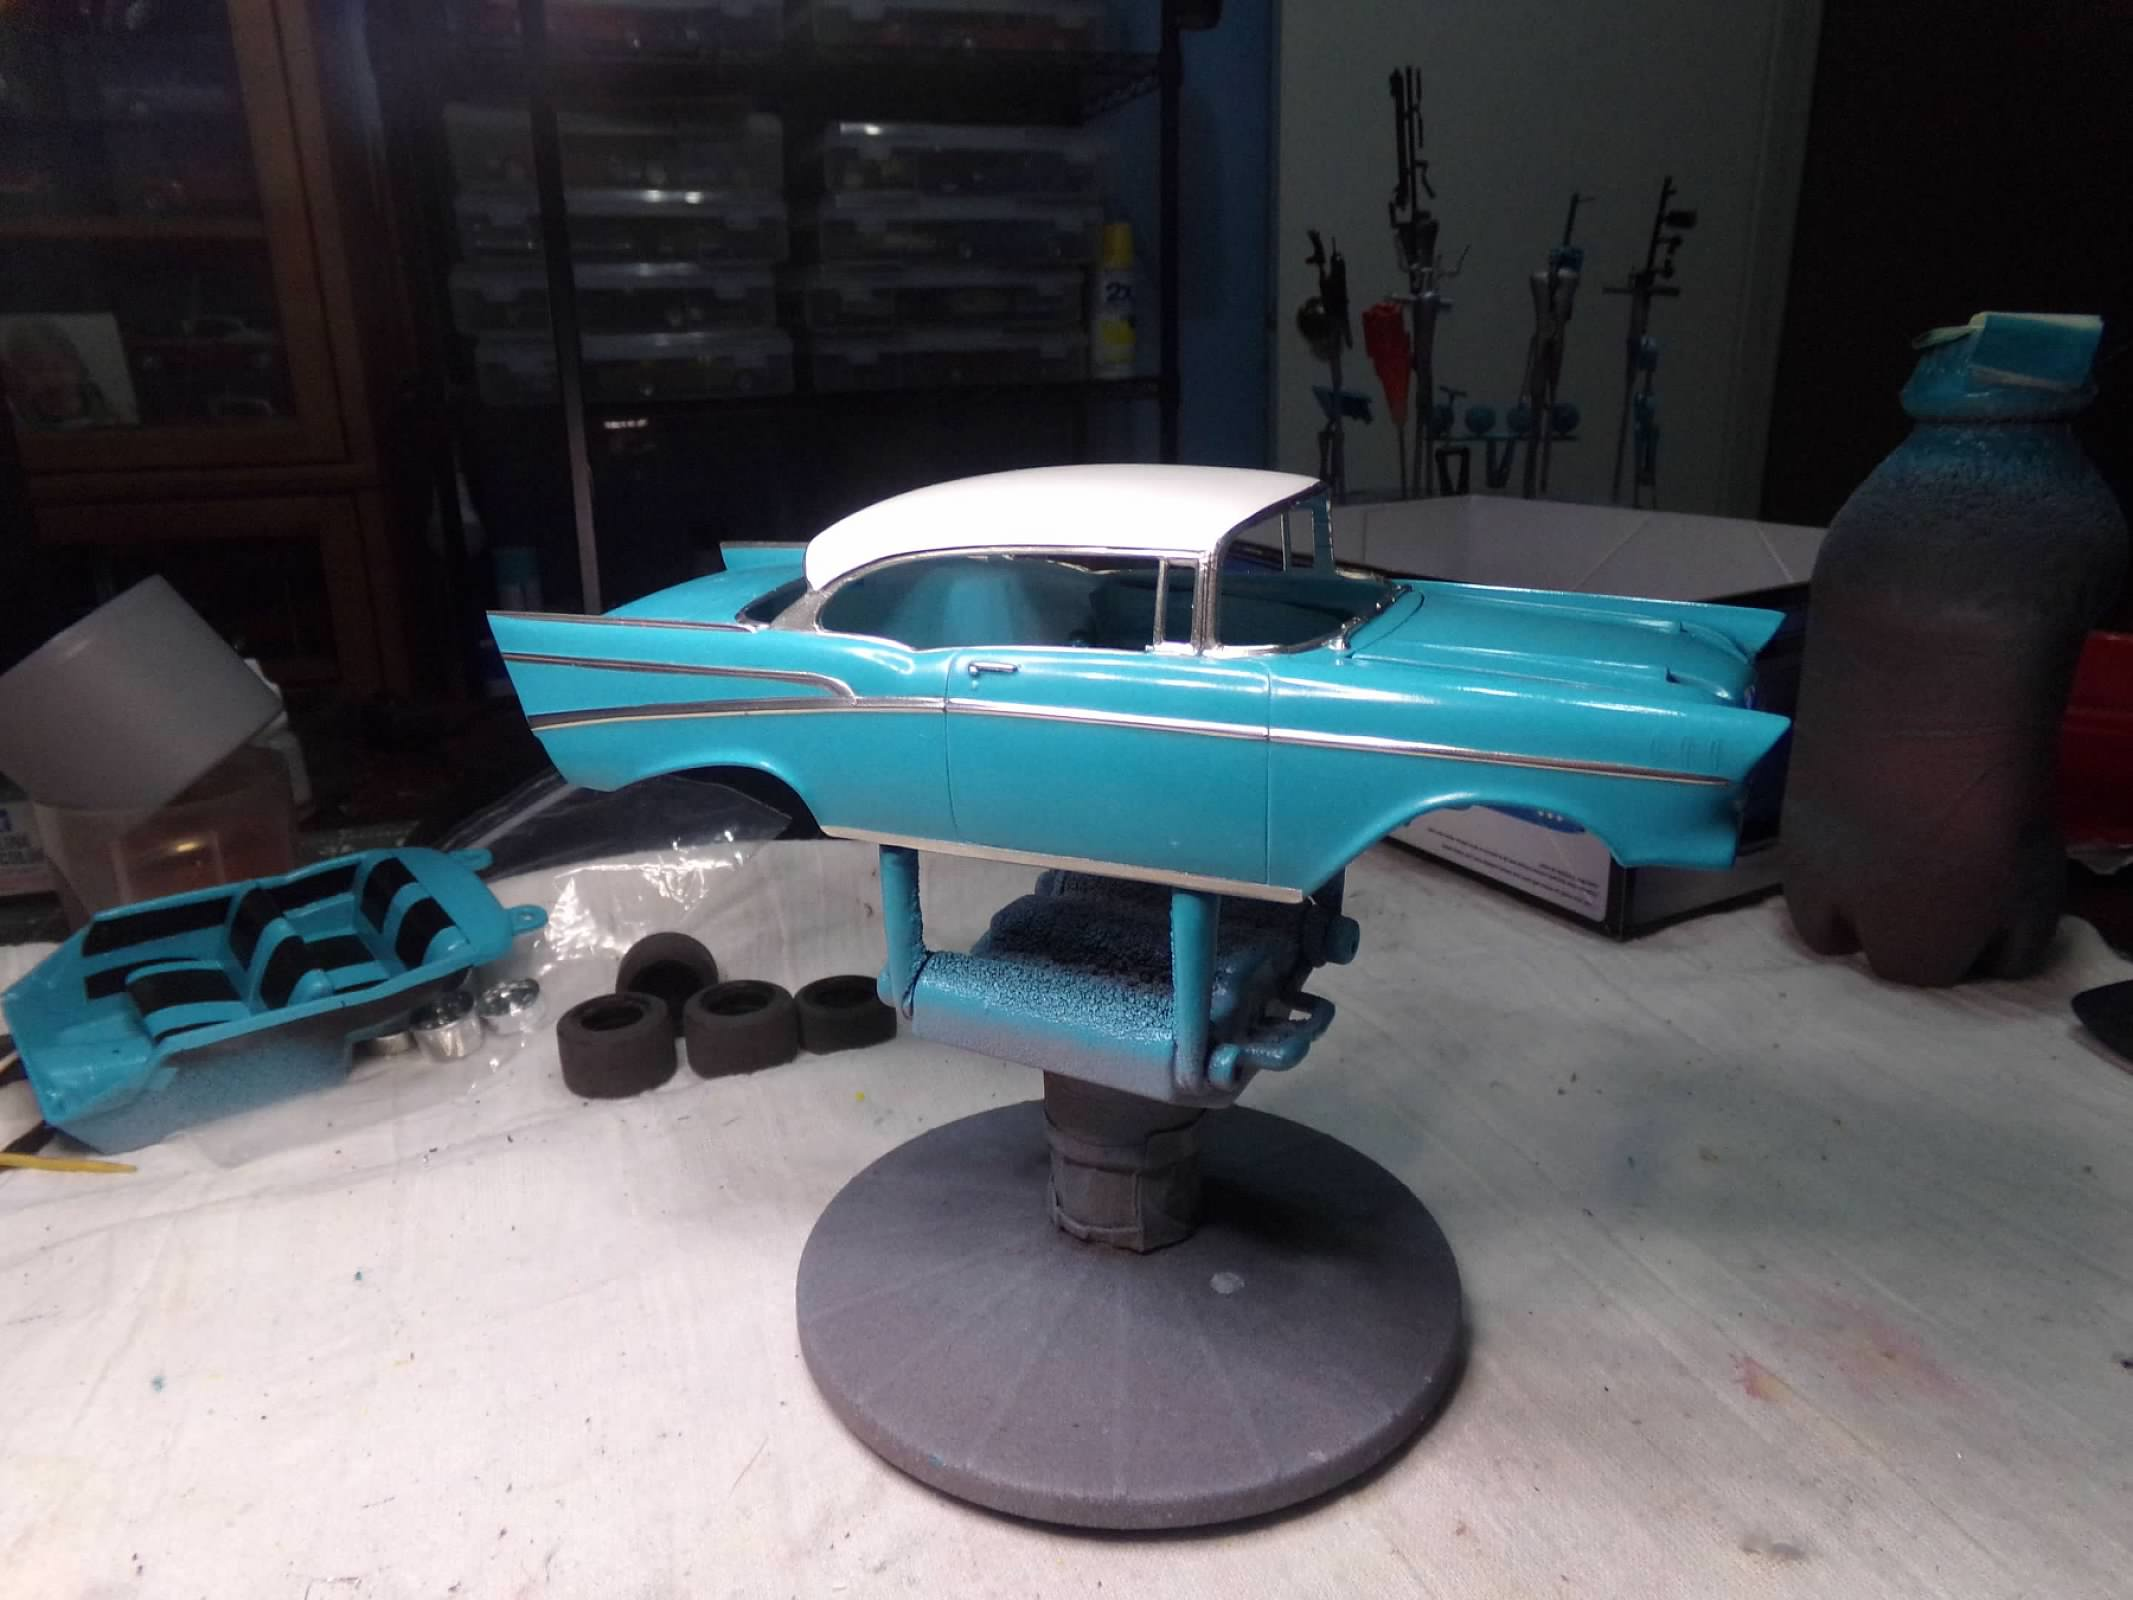
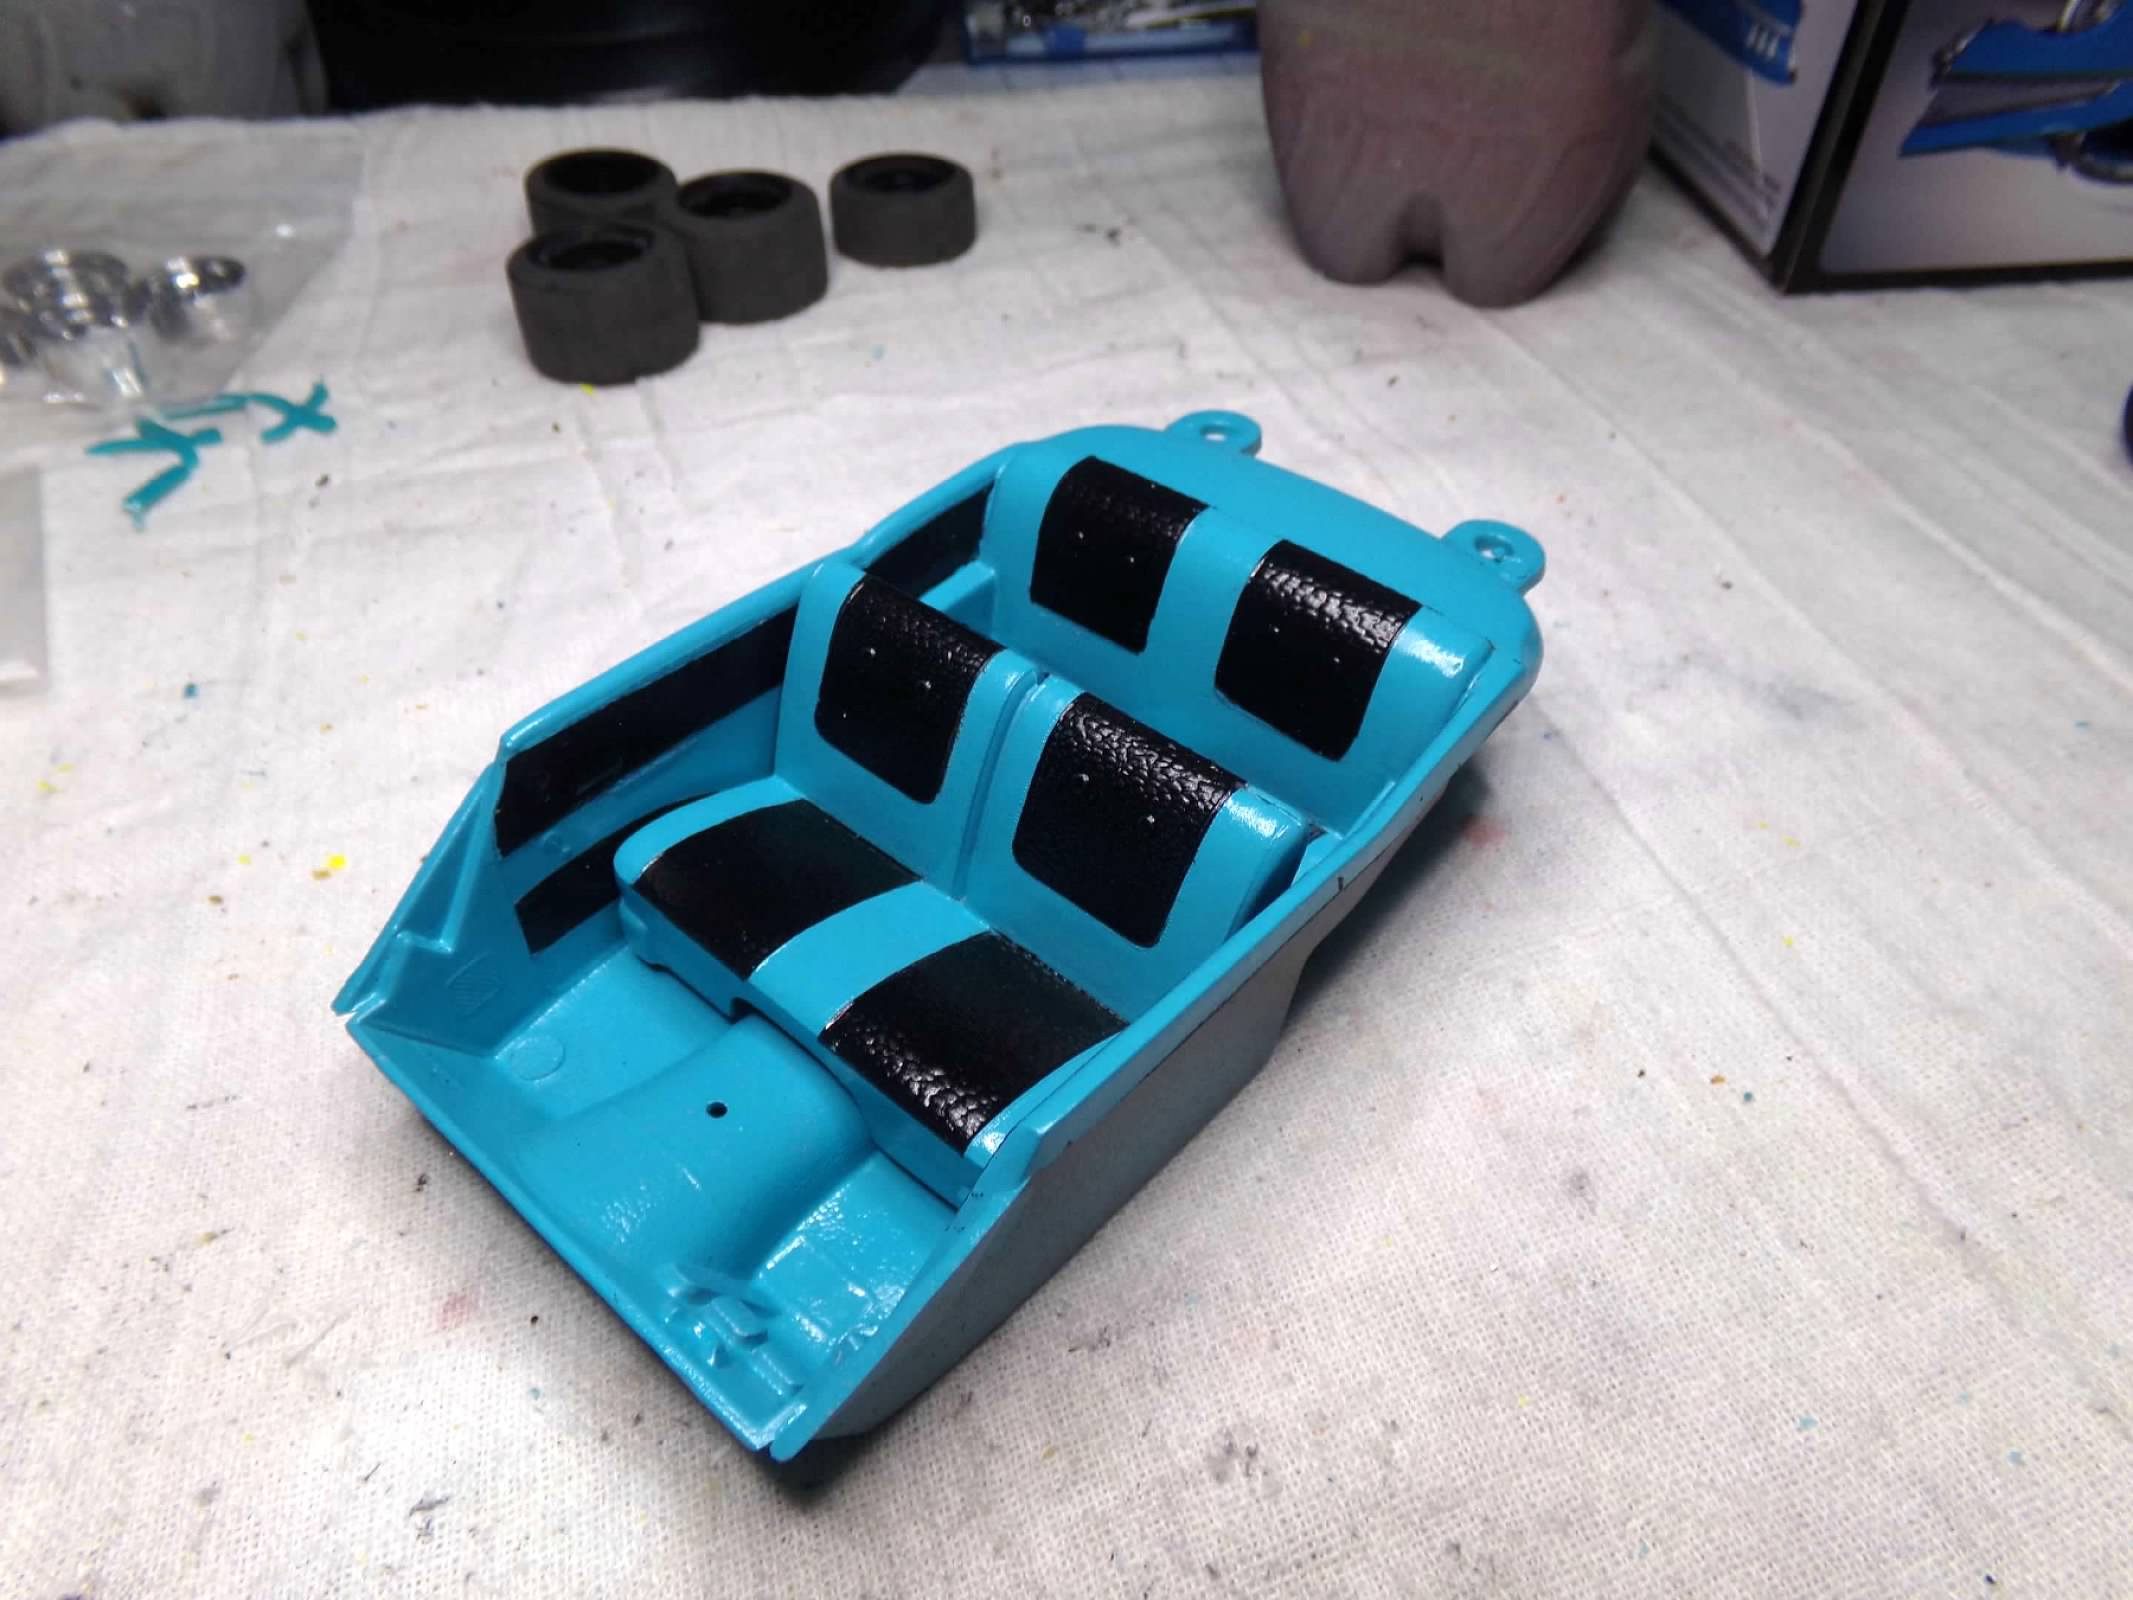
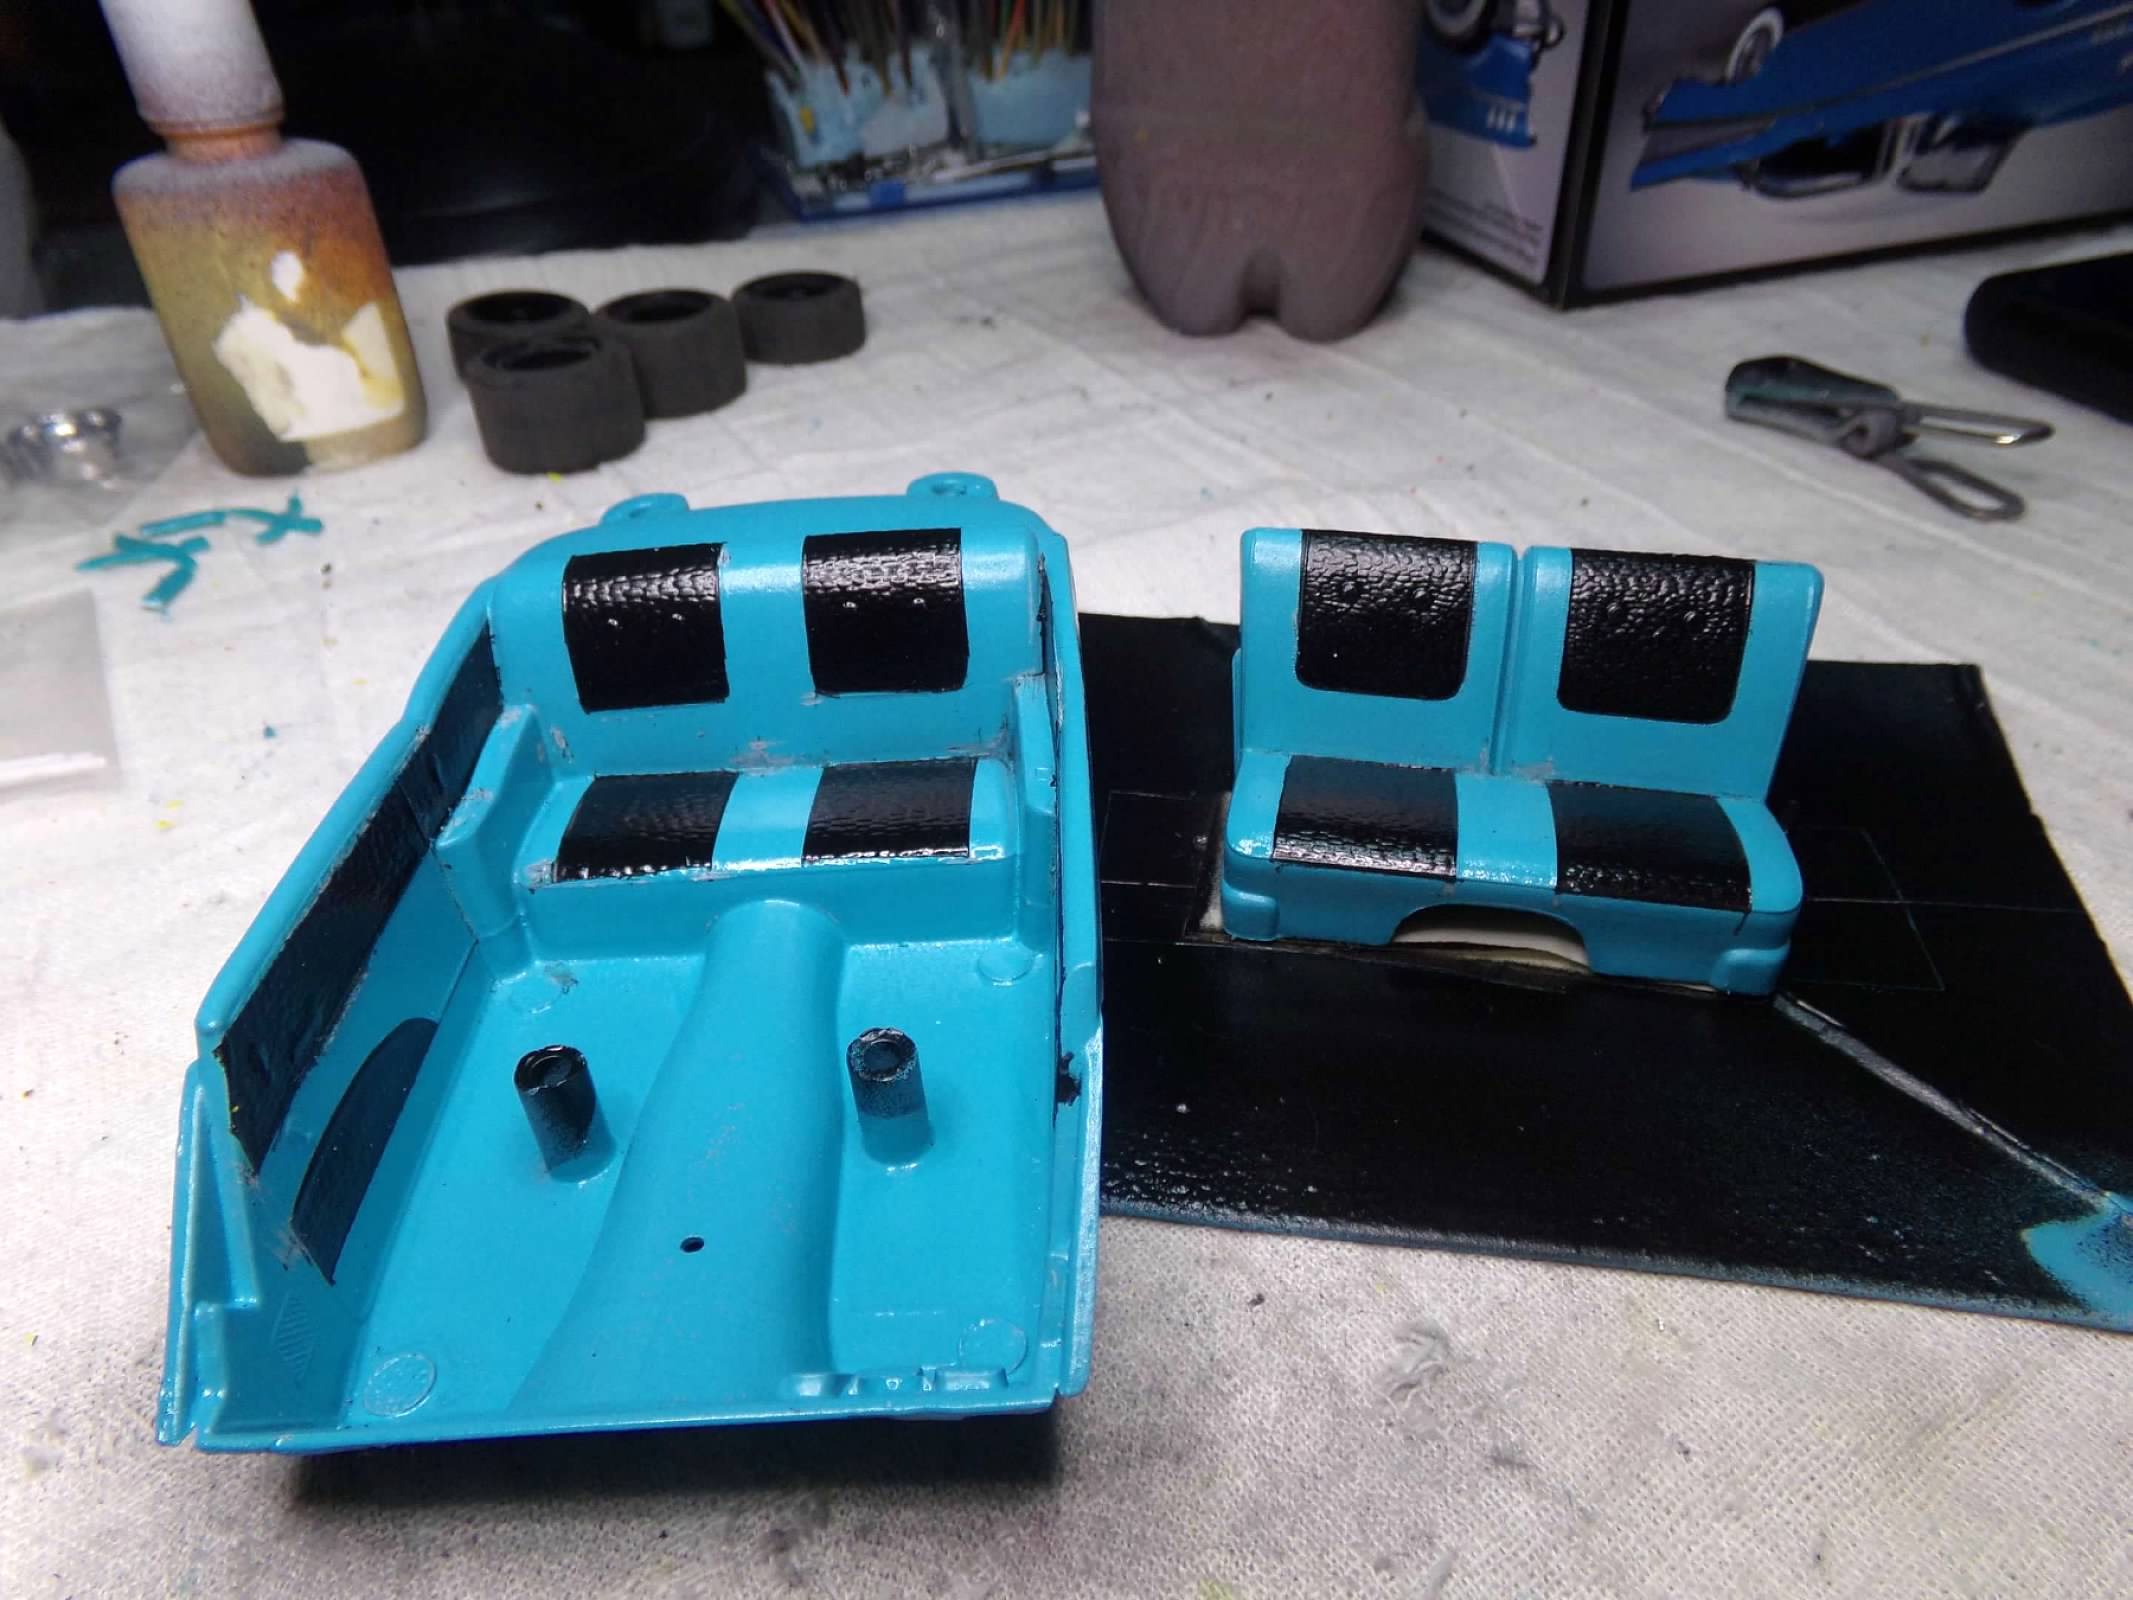
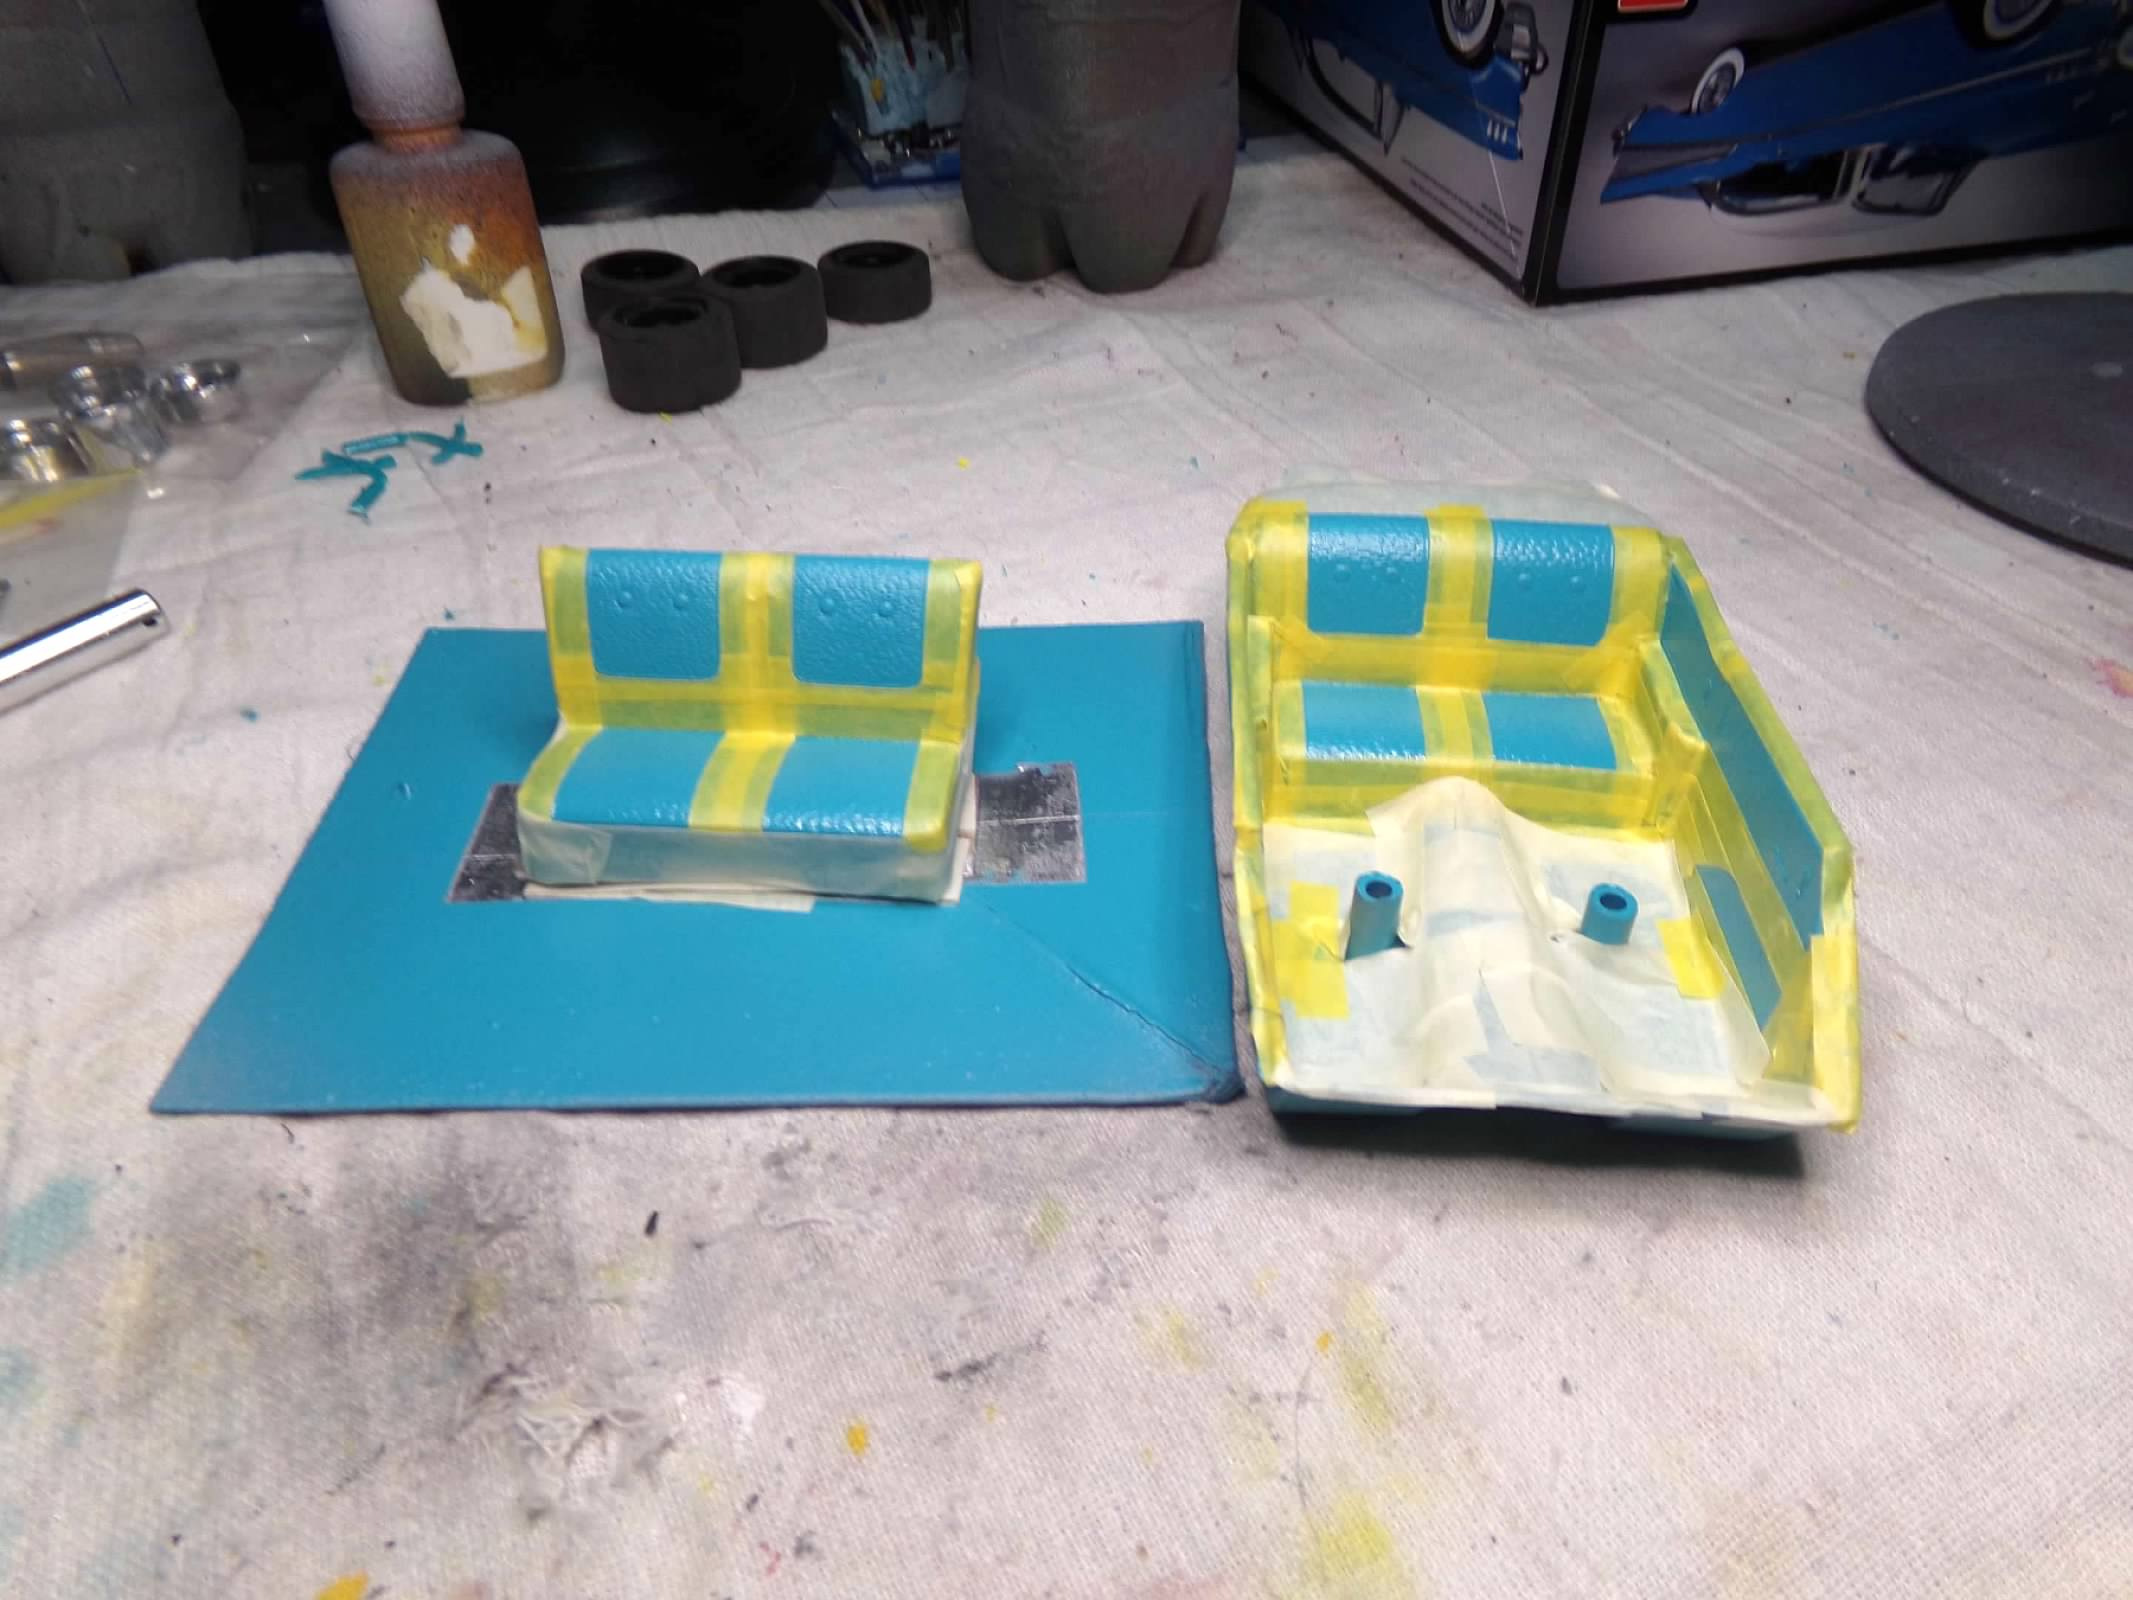
Thanks, Calvin! Your 1/16 scale looks good. You must have posted at the same time I was posting so I didn't see it until now. Thanks, Ricky, Carl, and Mike! I appreciate your comments! Mike, there isn't any detail on the insert panel. No Bel Air script or Chevy emblem. Its on the decal on this kit in black. This is a very basic kit. I've been busy and now have everything painted, I think. The doghouse came out well, with only two little smudges on the right fender and cowl, plus some touch-up to do on the inside edges. I rubbed out the two smudges and touched up both and trimmed the edges with a brush. I also finished the trim in the interior bucket. he chrome piping on the seats may be a little big but its pretty uniform and its as small as I could get and still get it on straight. The buttons on the back seat, door handles and window cranks were done with chrome pen and I'll do the front seat buttons once the seat is glued in and the dash is in. Still have the dash to do. I dechromed the eight chassis and engine pieces and have painted them black (no photo). I wanted to try to use the tires since they fit the wheels and the wheels are built for metal axles and I don't want to re-design the kit and use different wheels and tires and try to figure out how to attach the wheels to the chassis. So I wanted to paint wide whites on the tires but brush painting won't work. So I wracked my brain (very painful) and finally came up with an idea. I used a circle template to cut a whole in an index card. Then I taped the index card to the tire from the back. I sprayed it with Tamiya white primer and it worked. I removed any stray paint with a cotton swab in some lacquer thinner and touched up any white paint with some acrylic. They look pretty good to me! Thanks for looking! ?
-
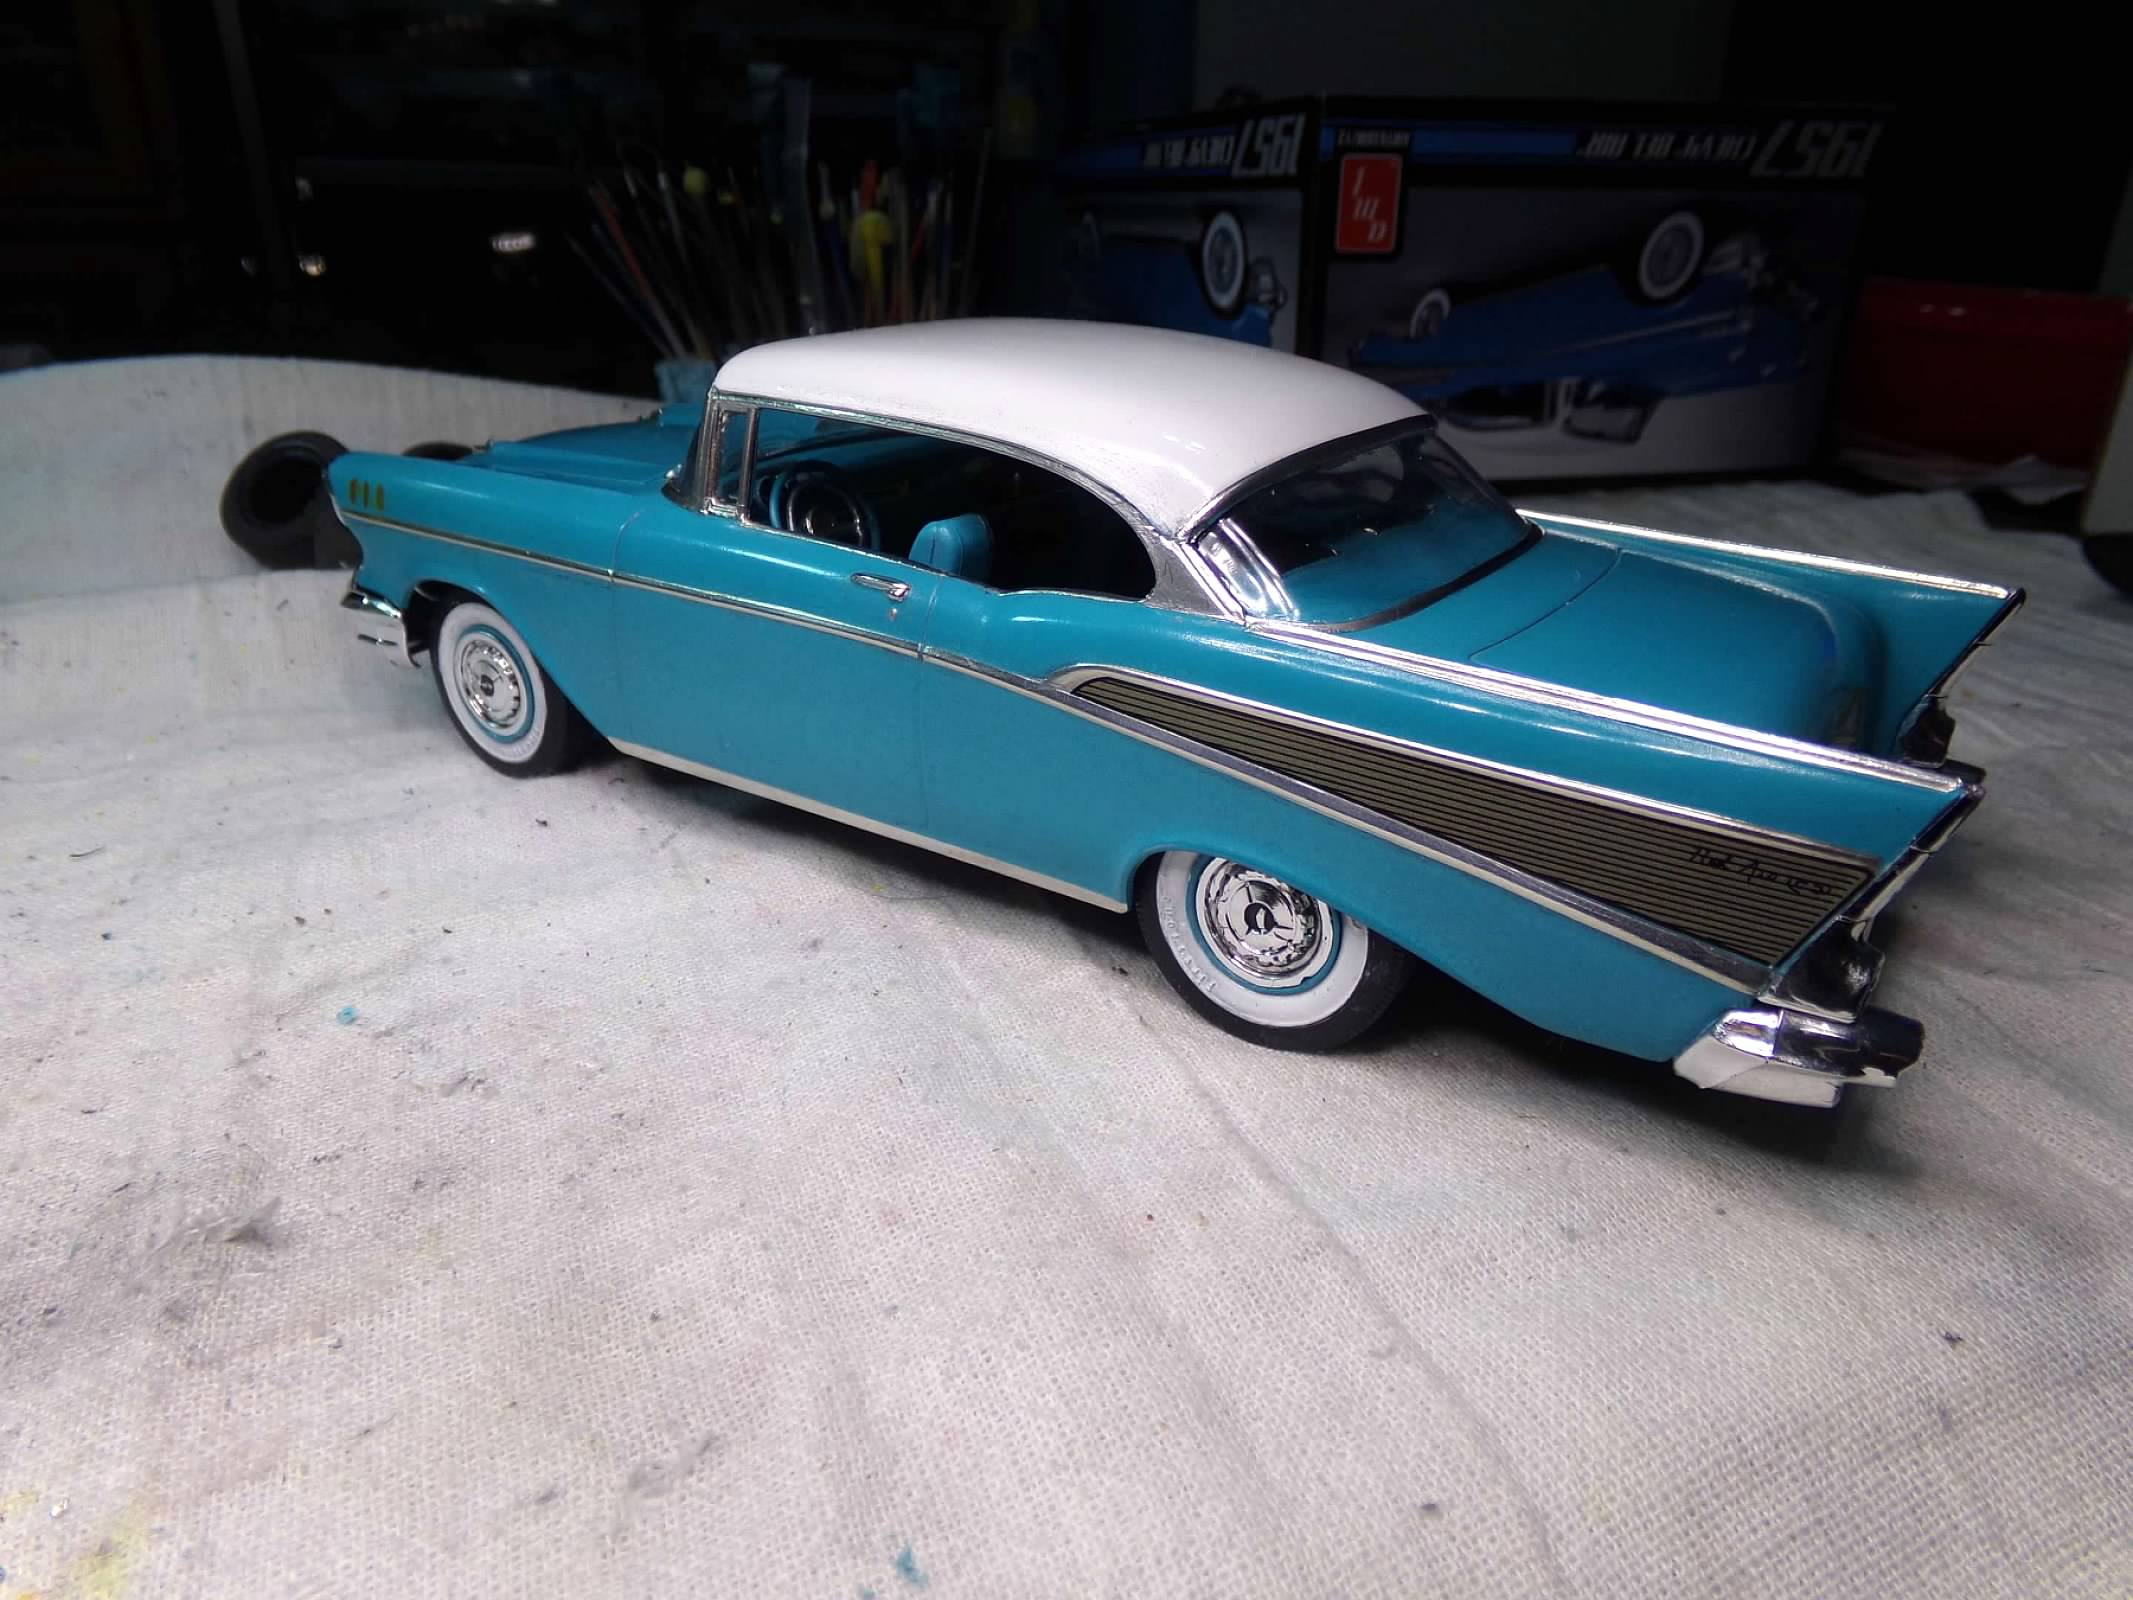
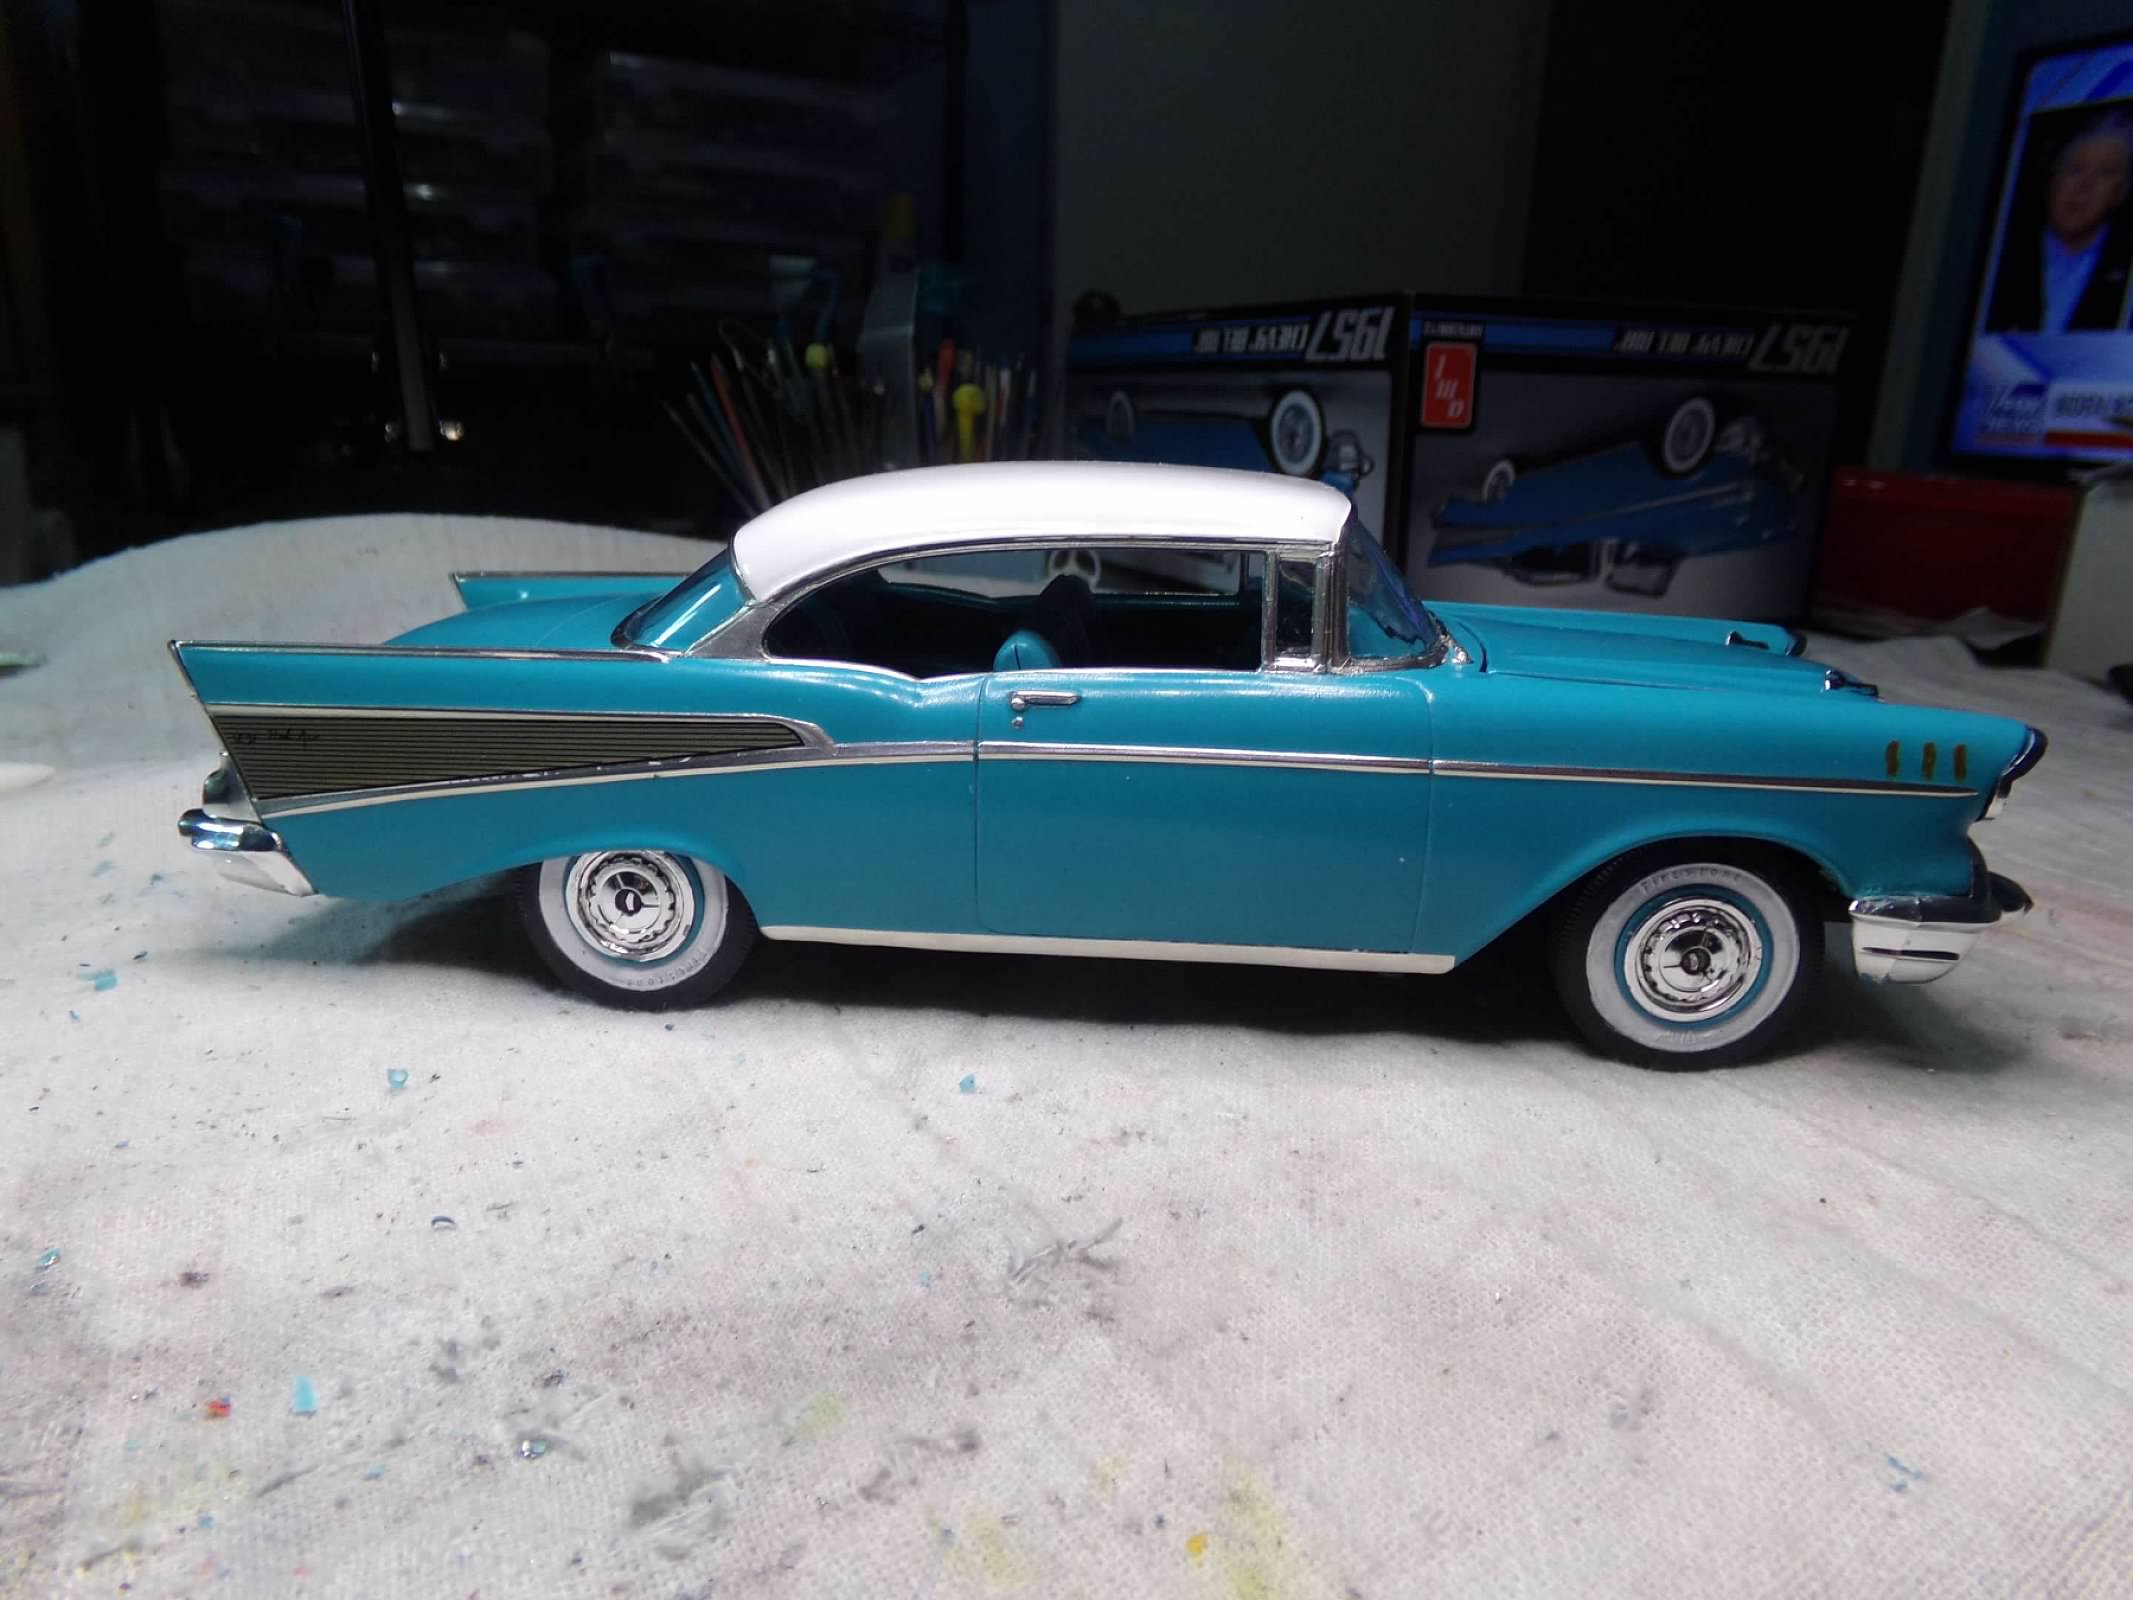
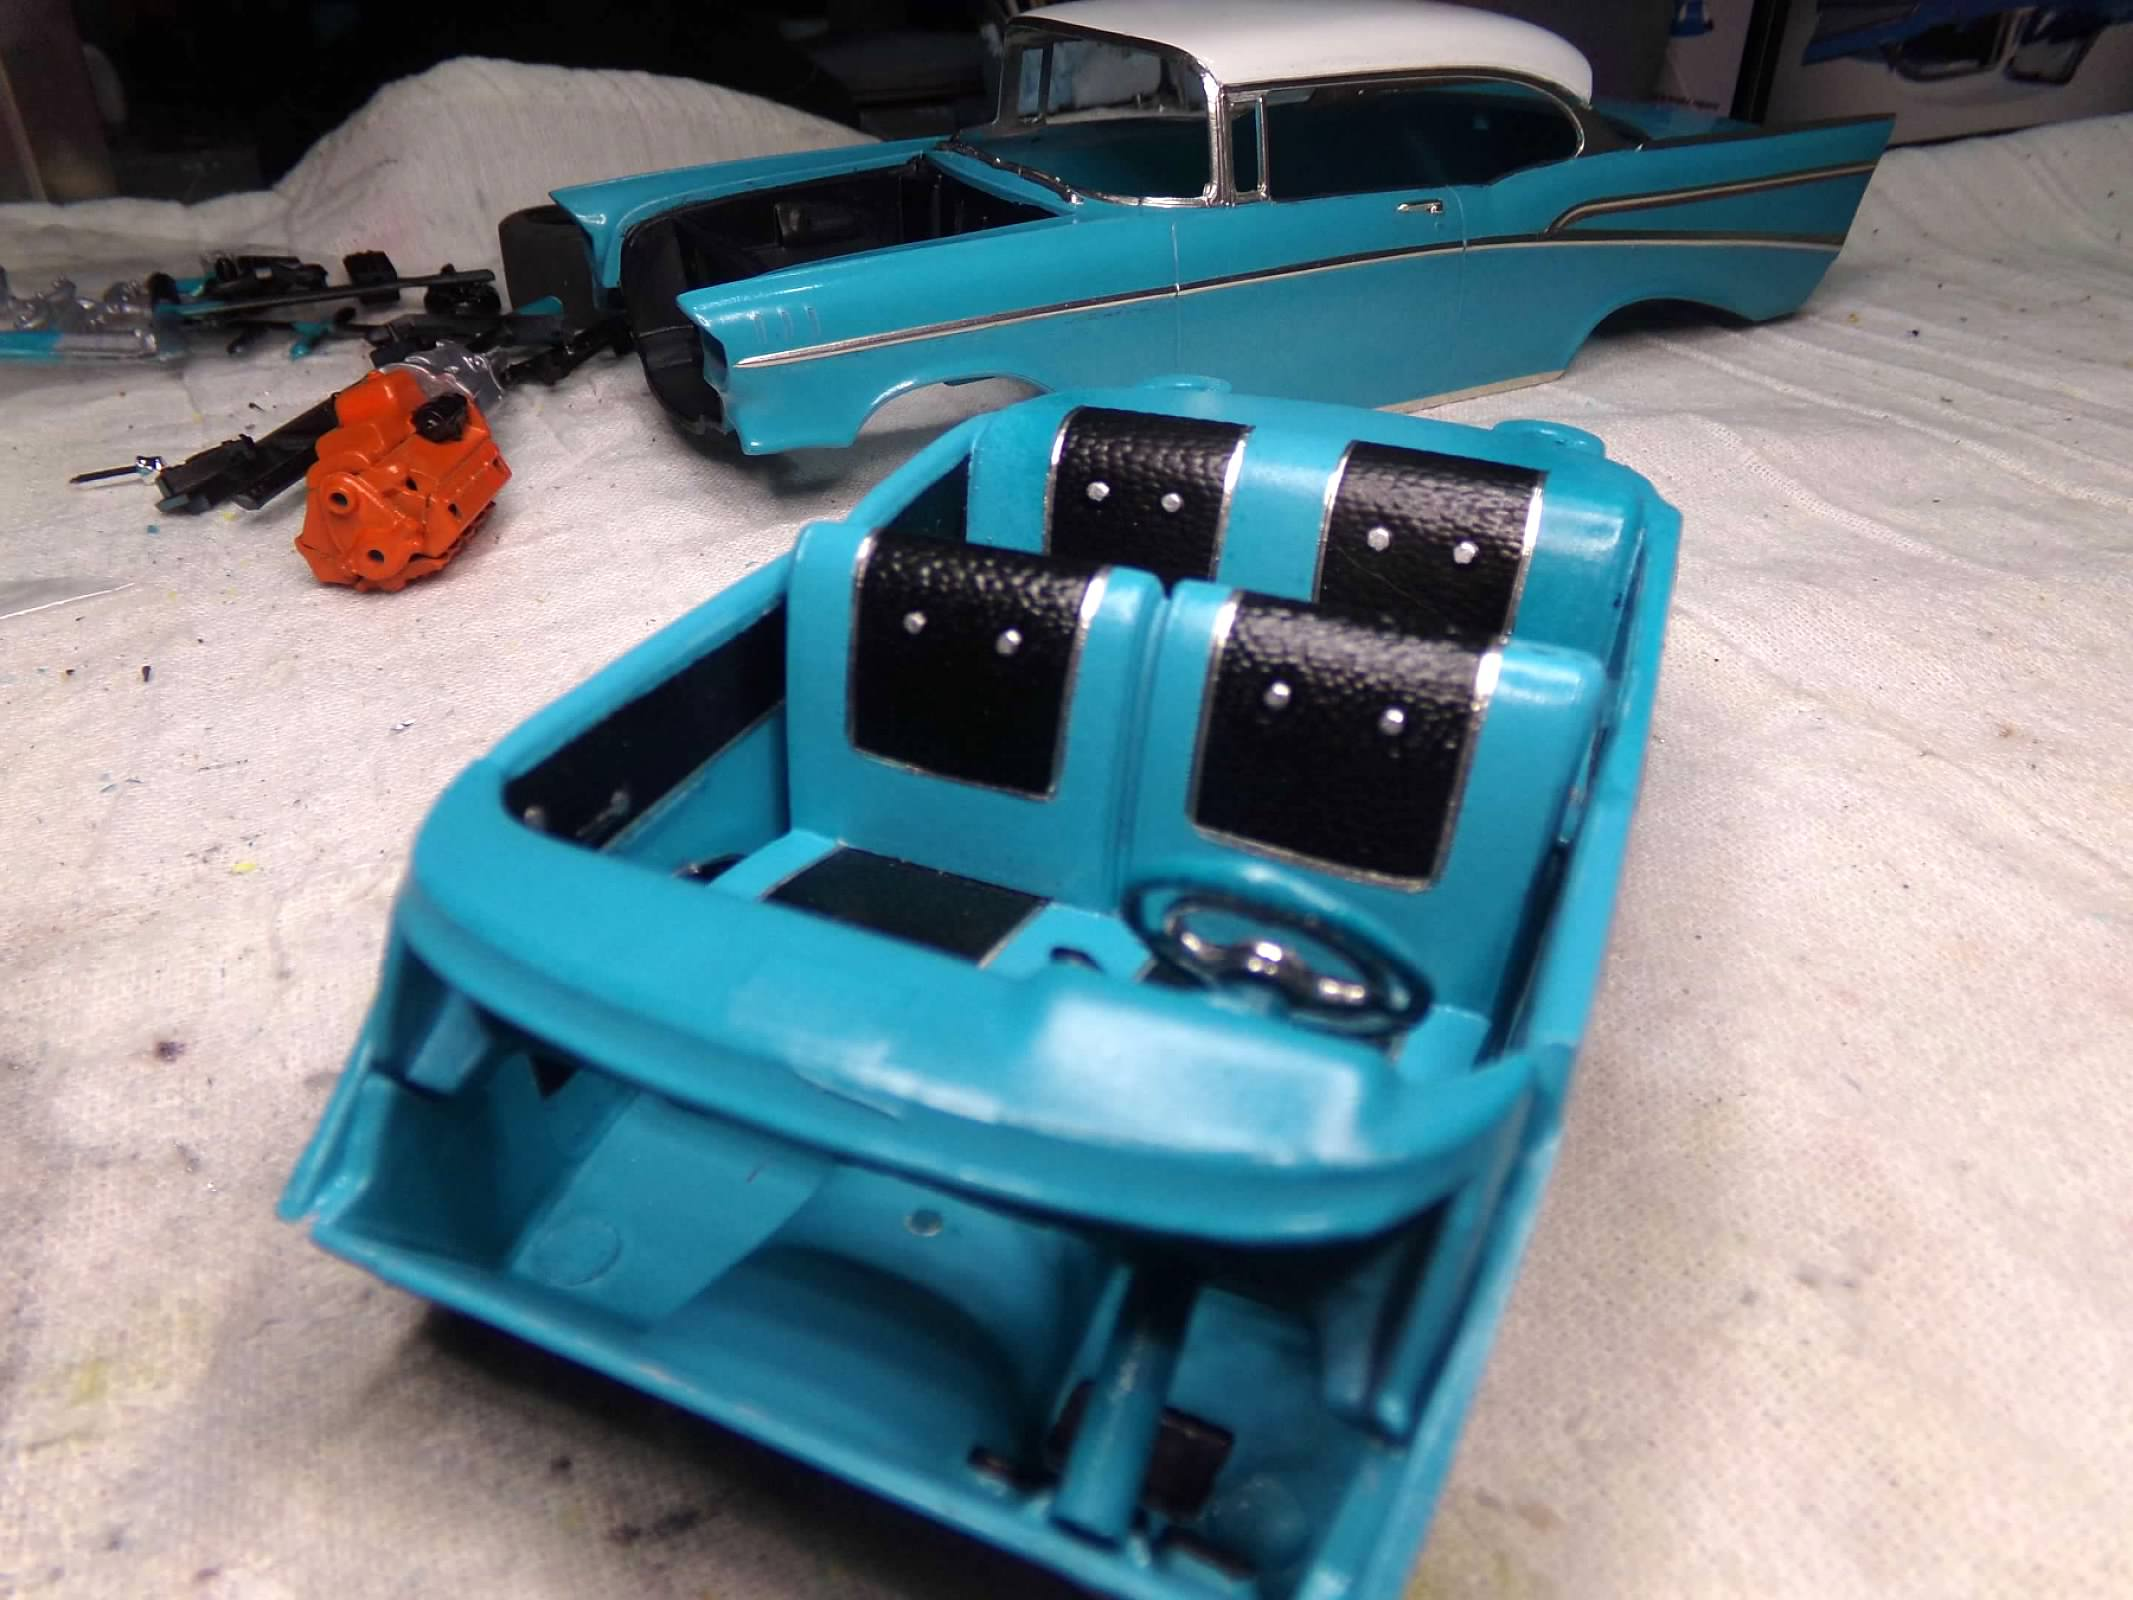
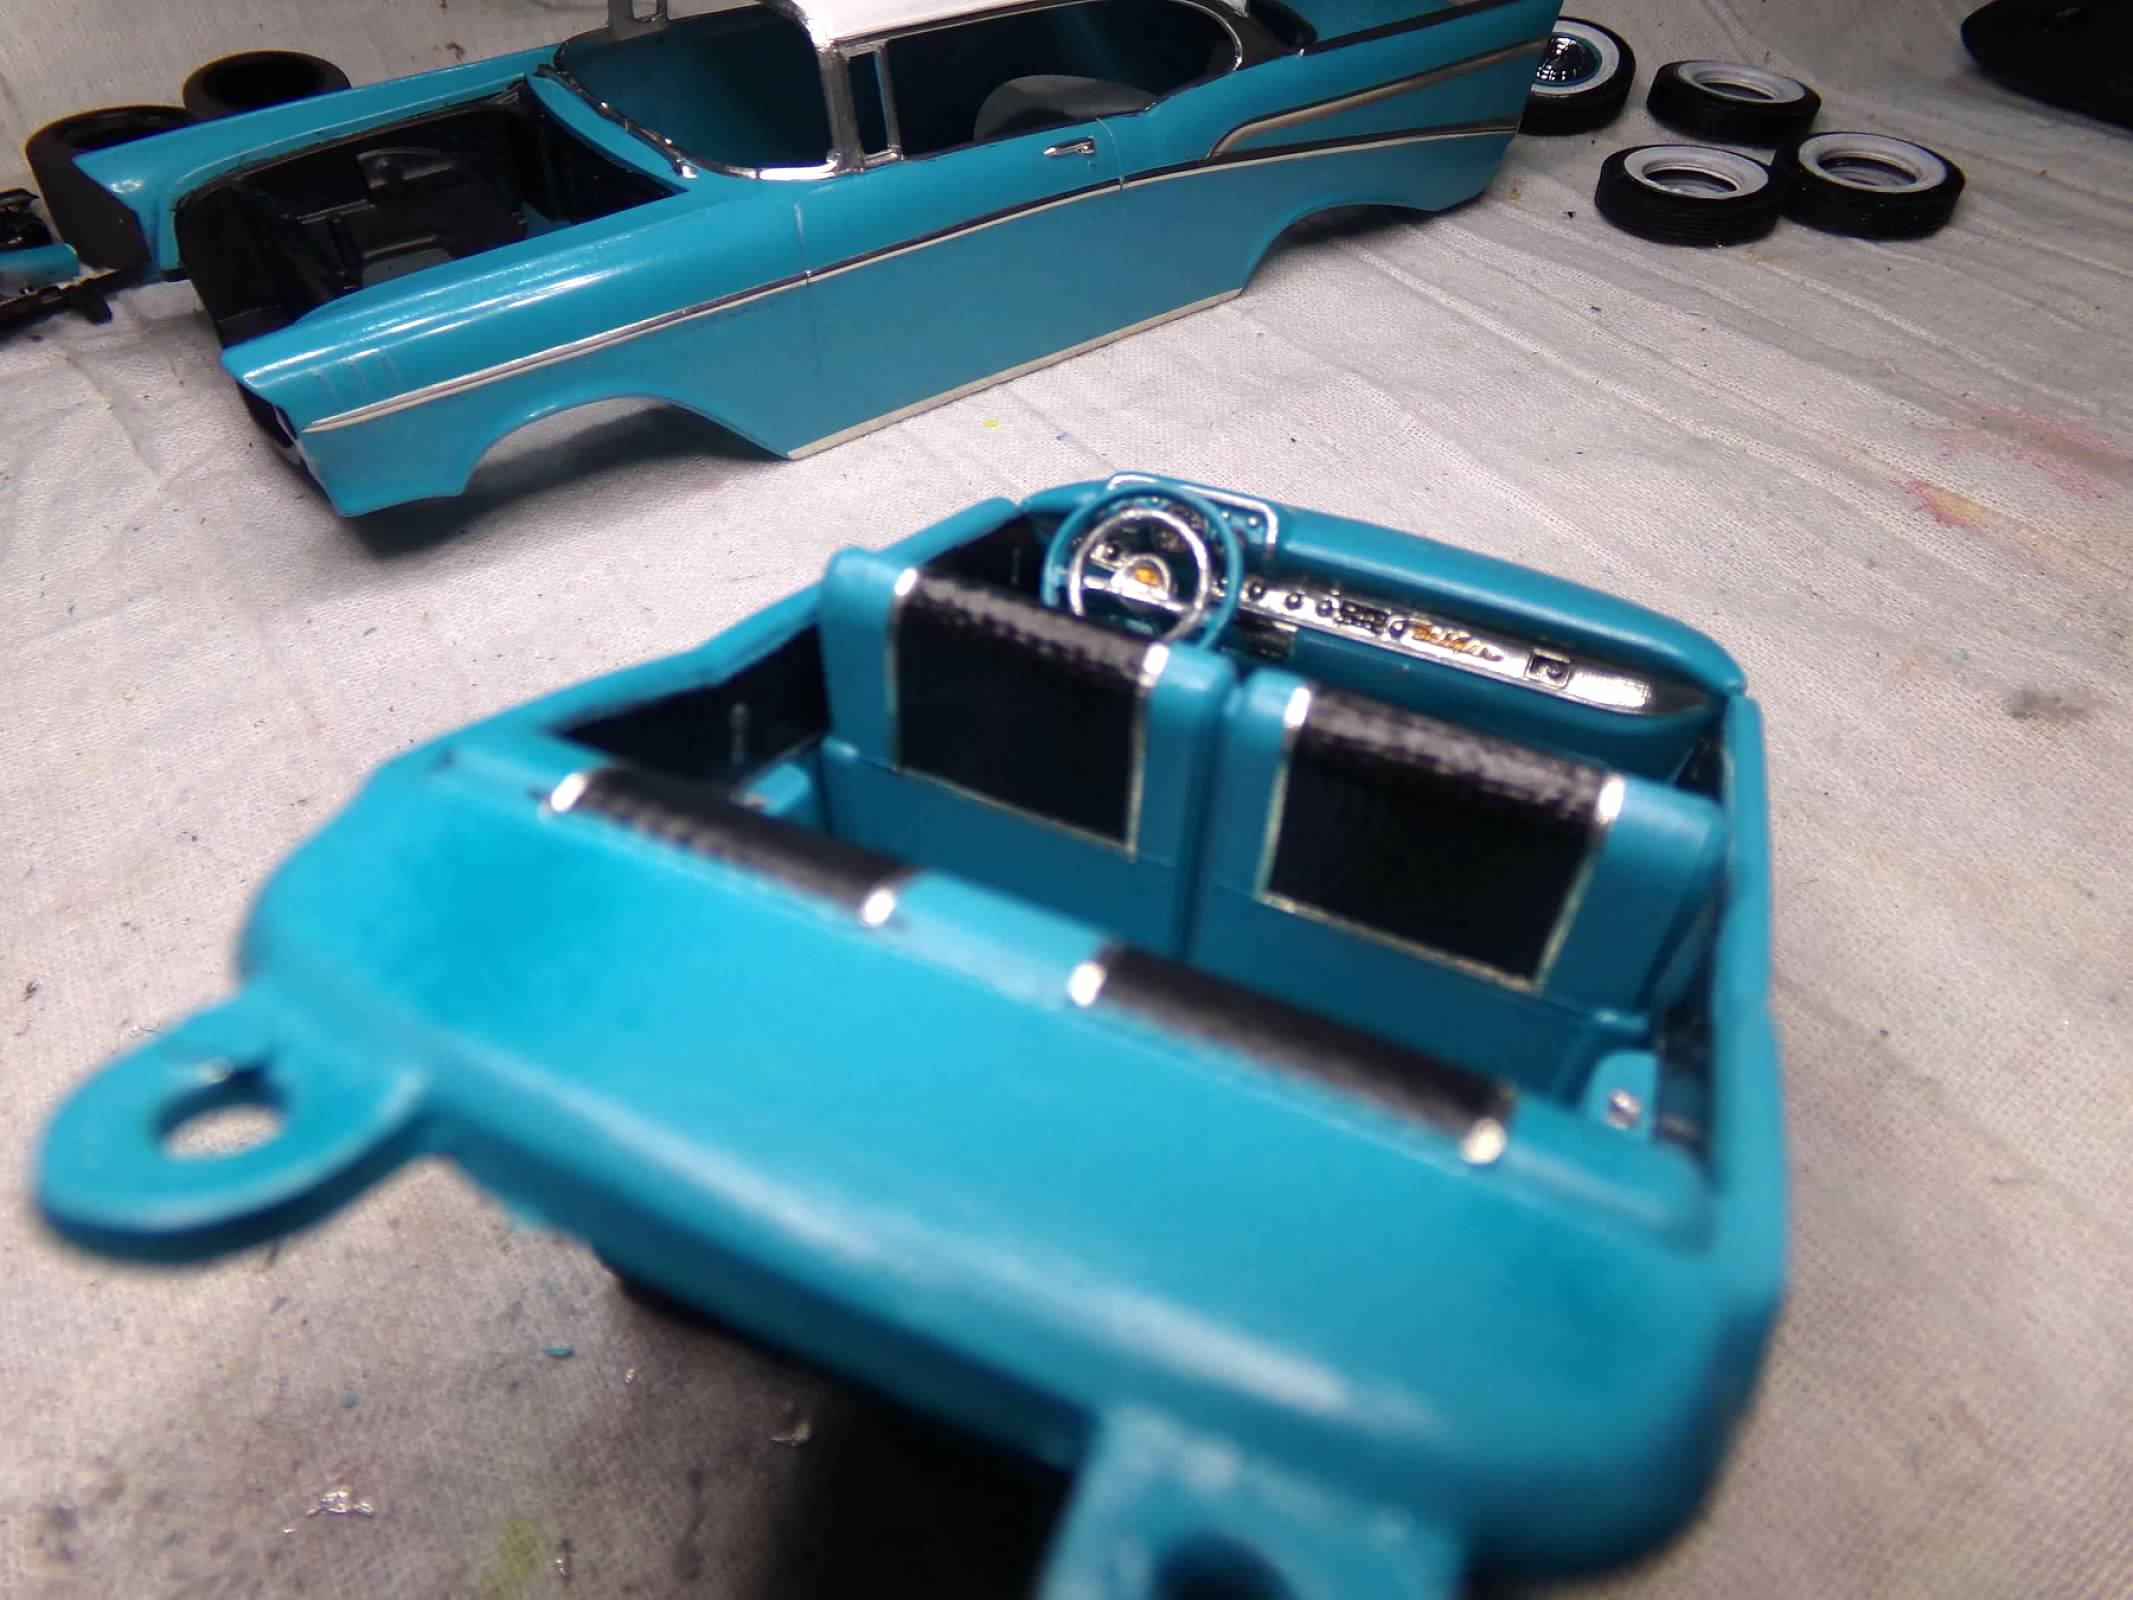
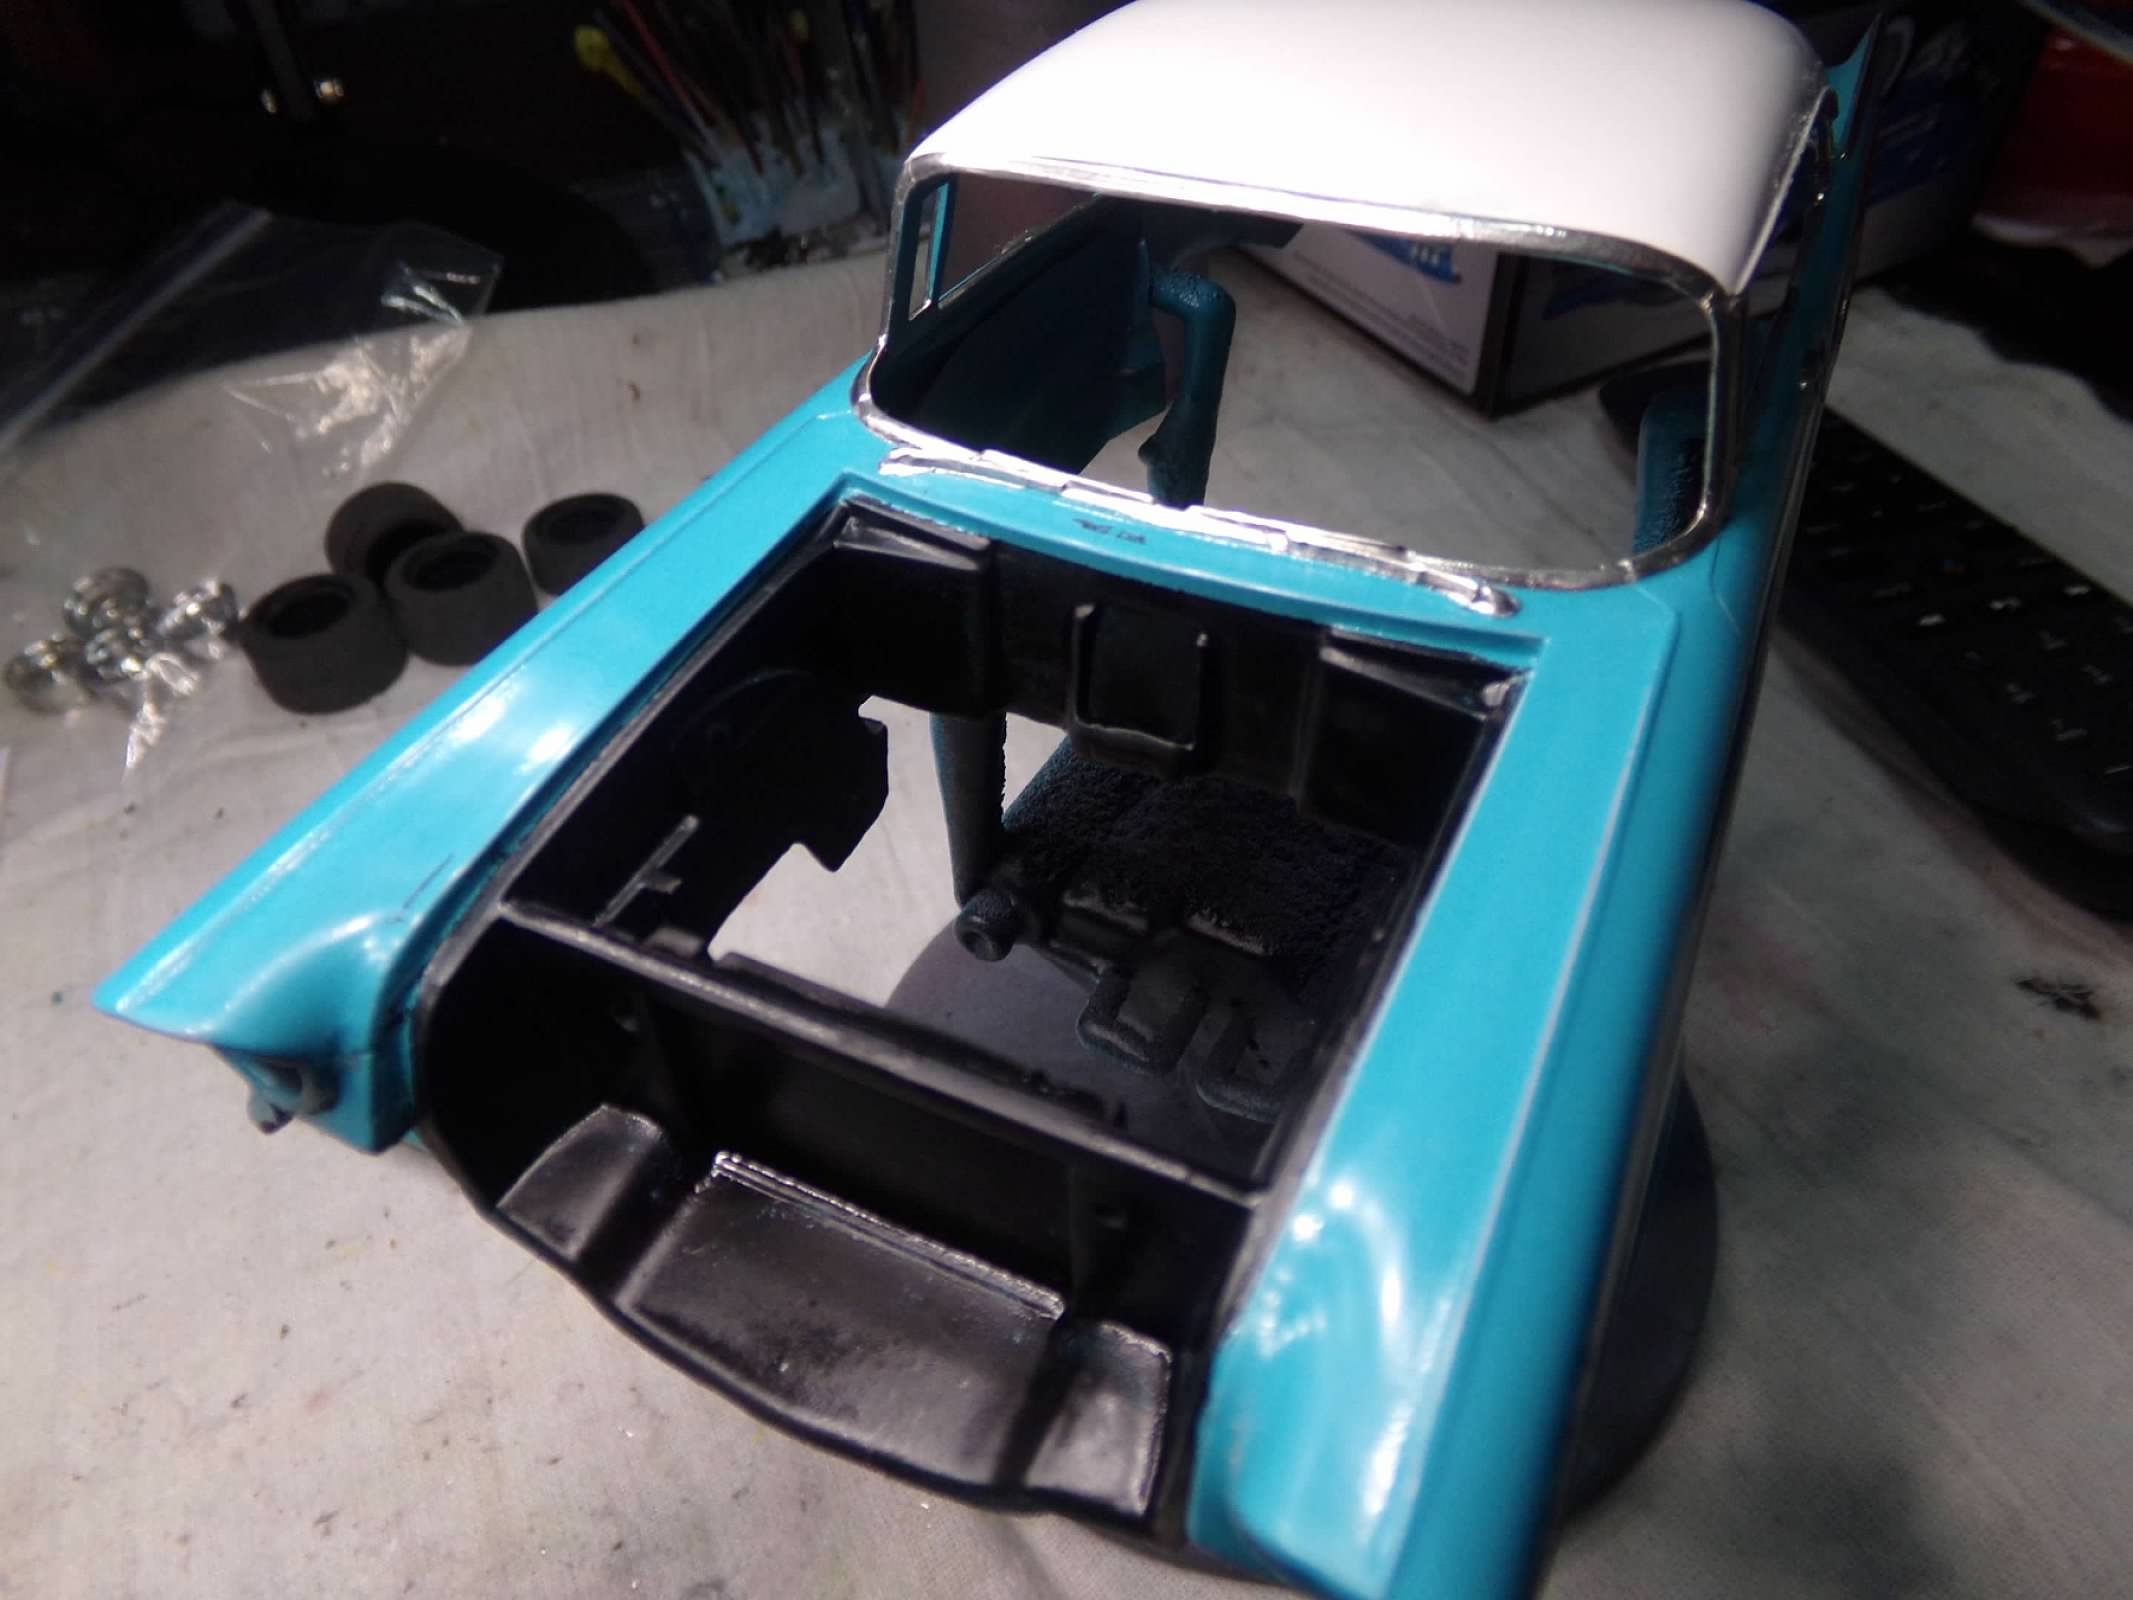
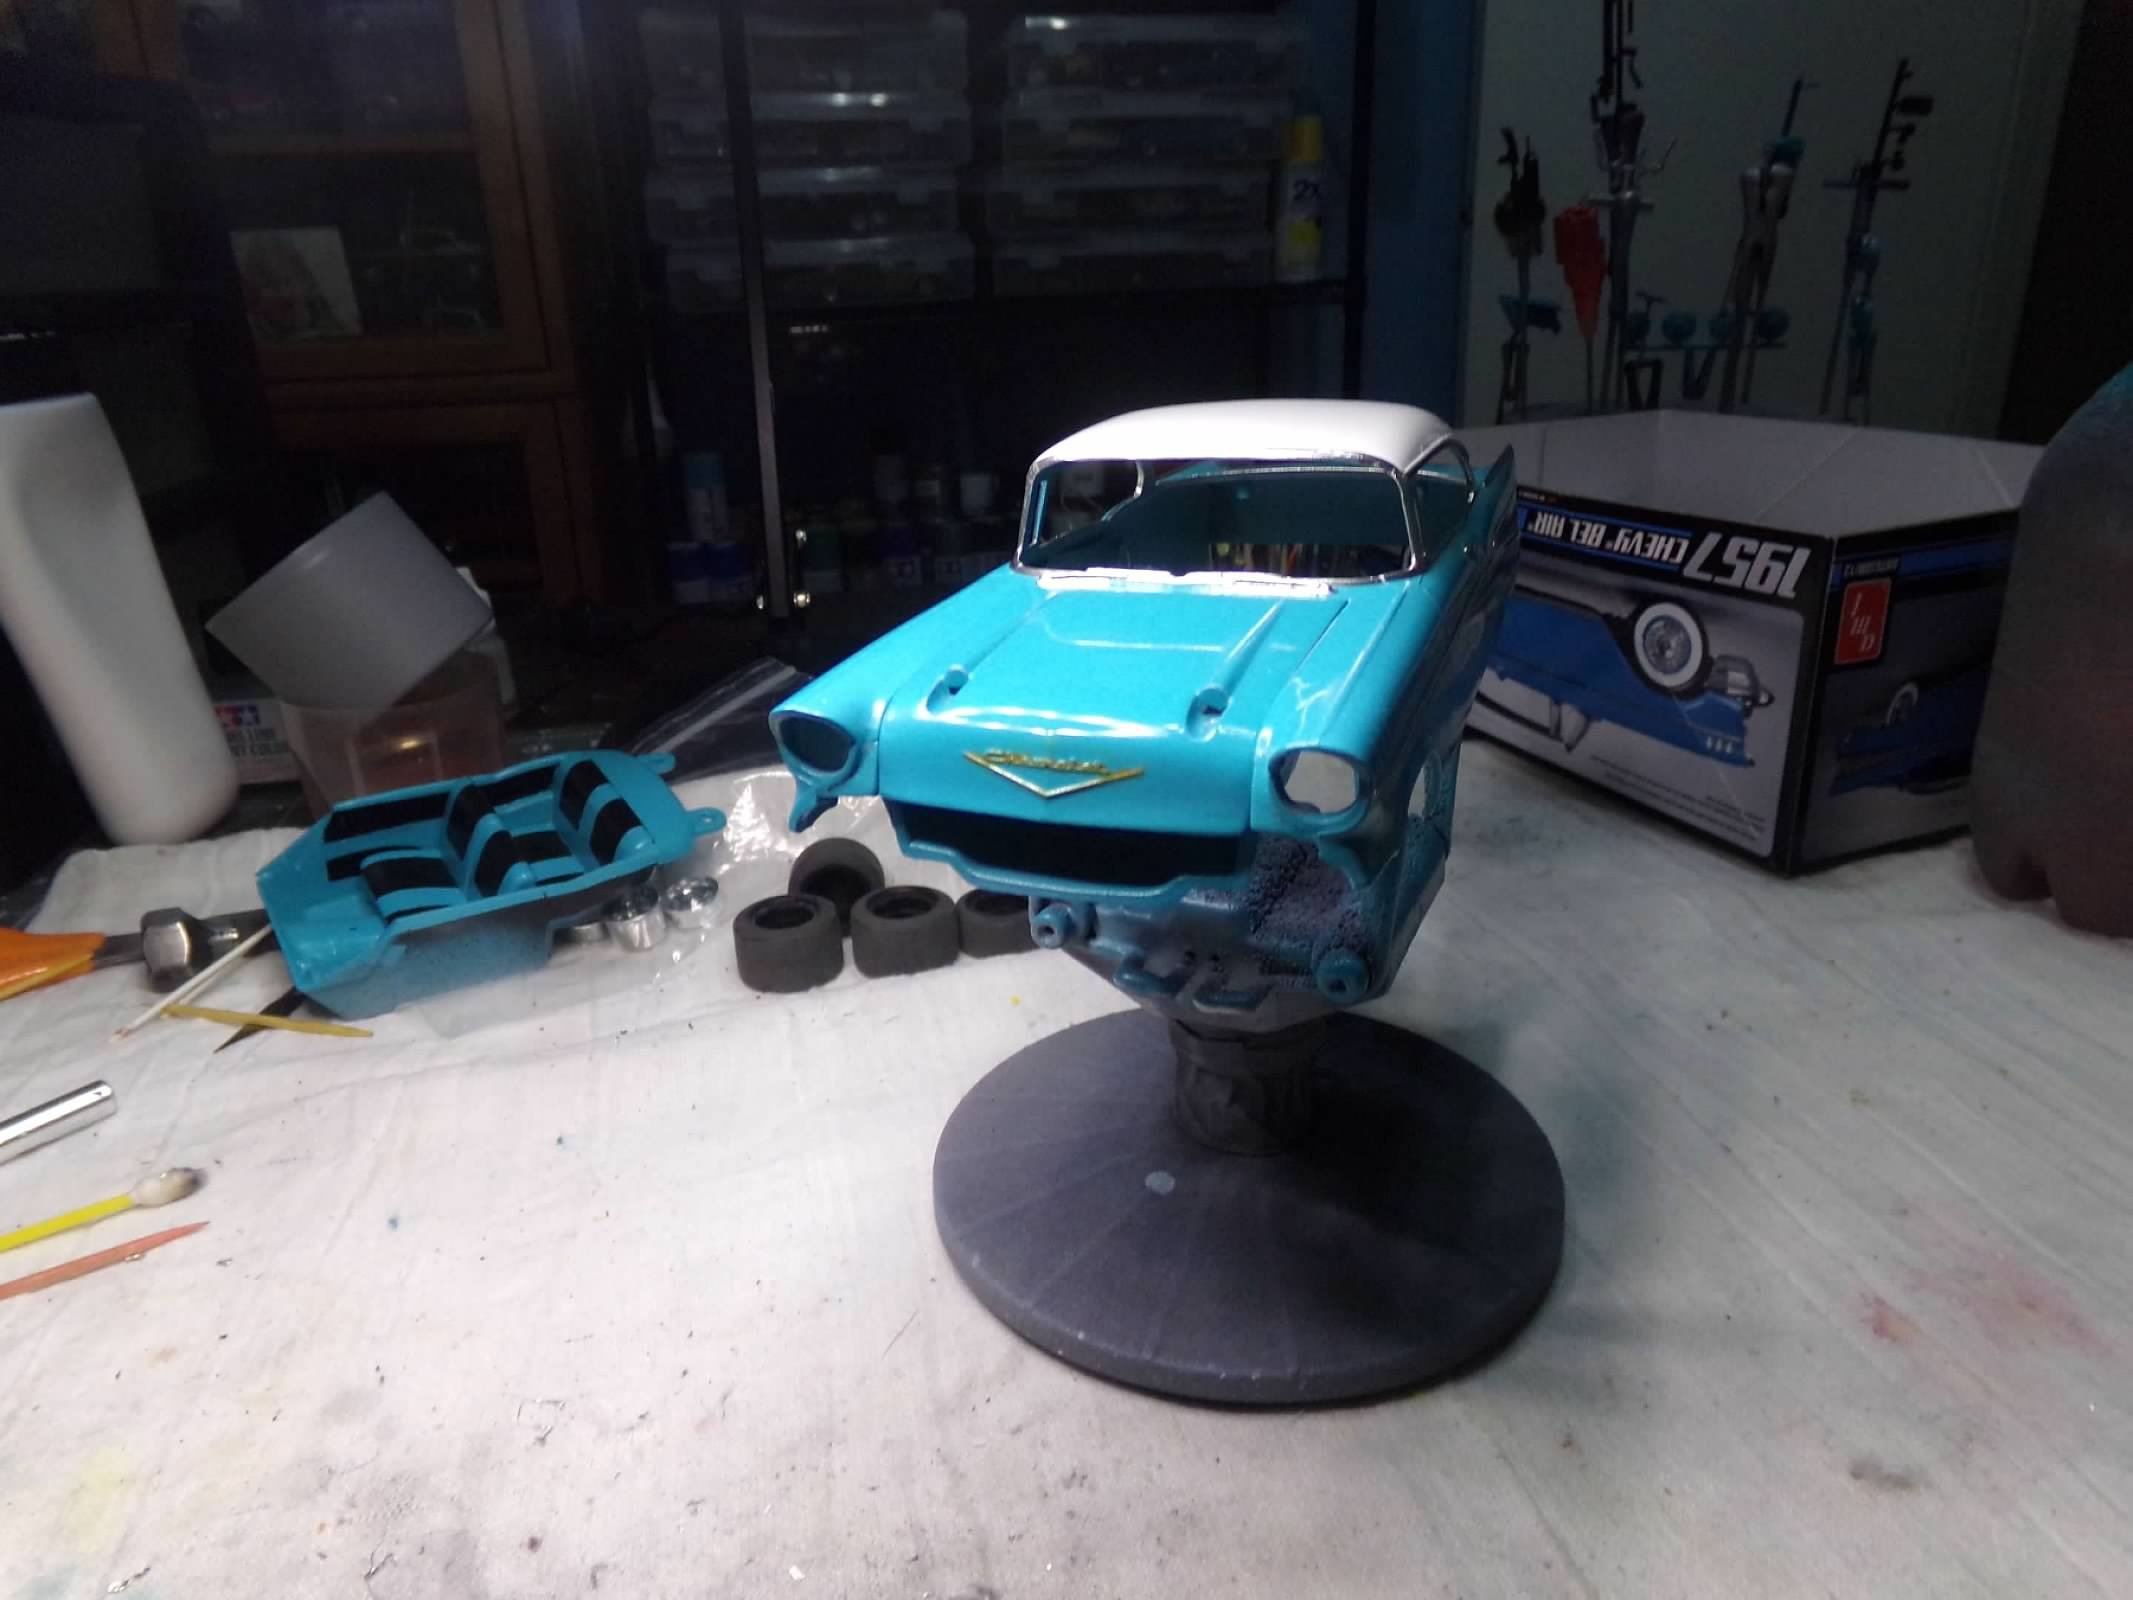
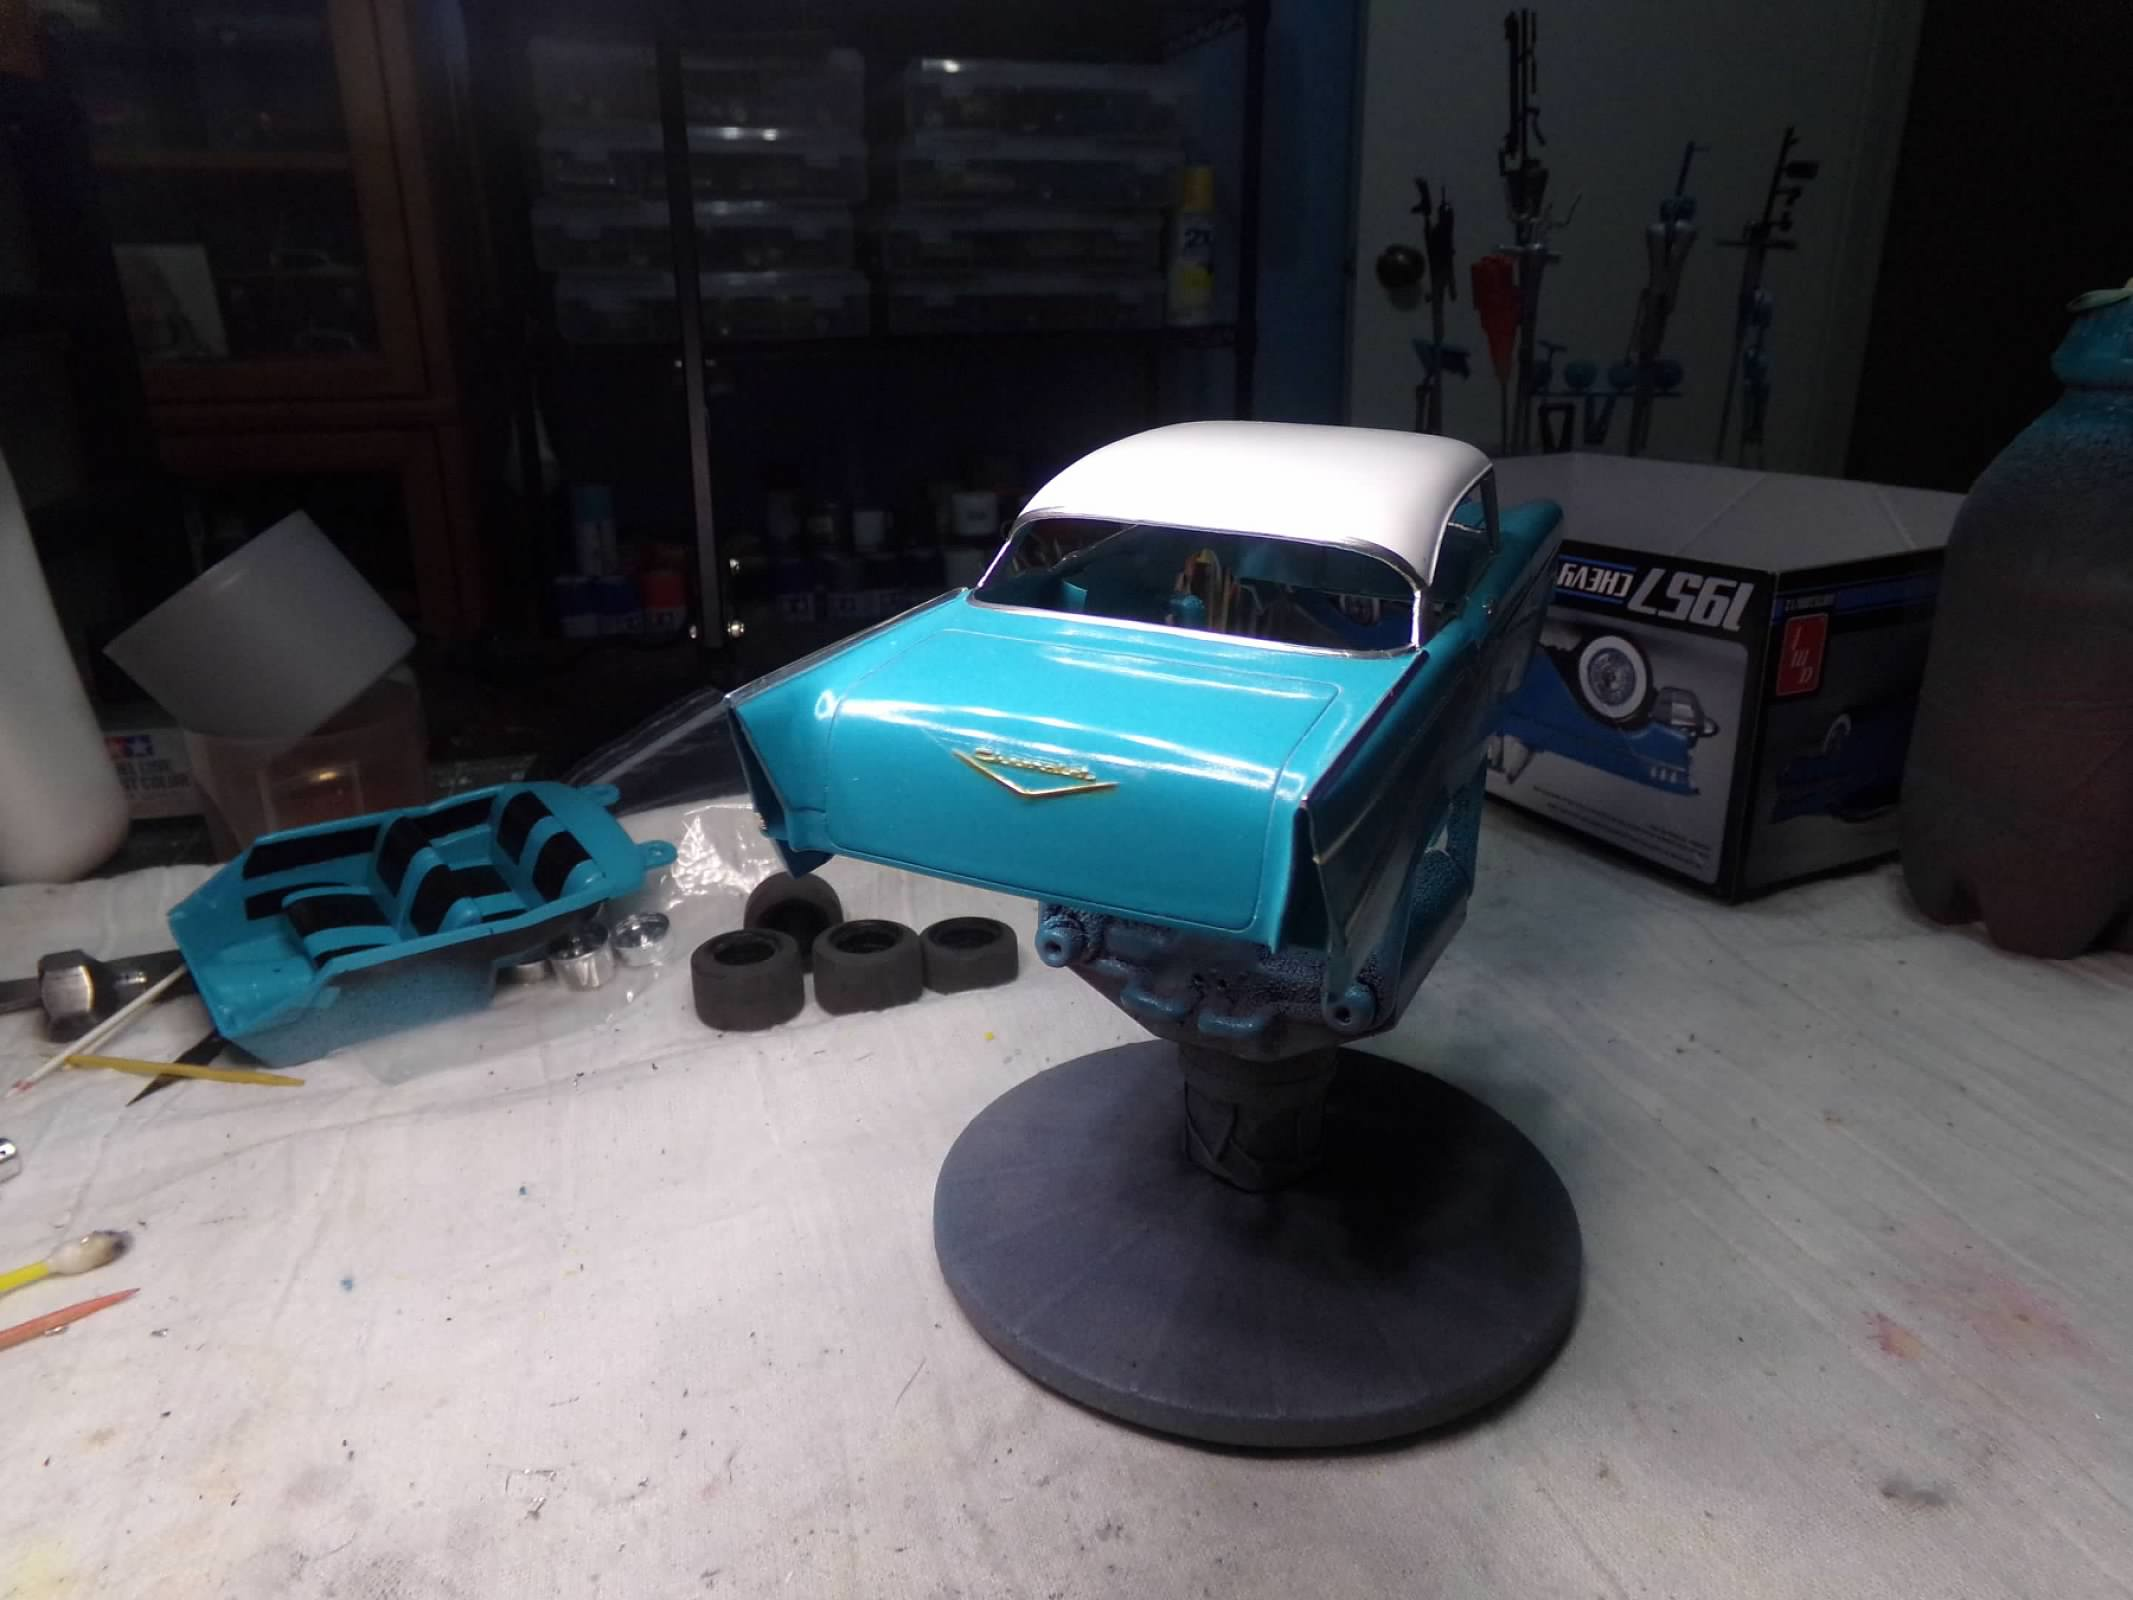
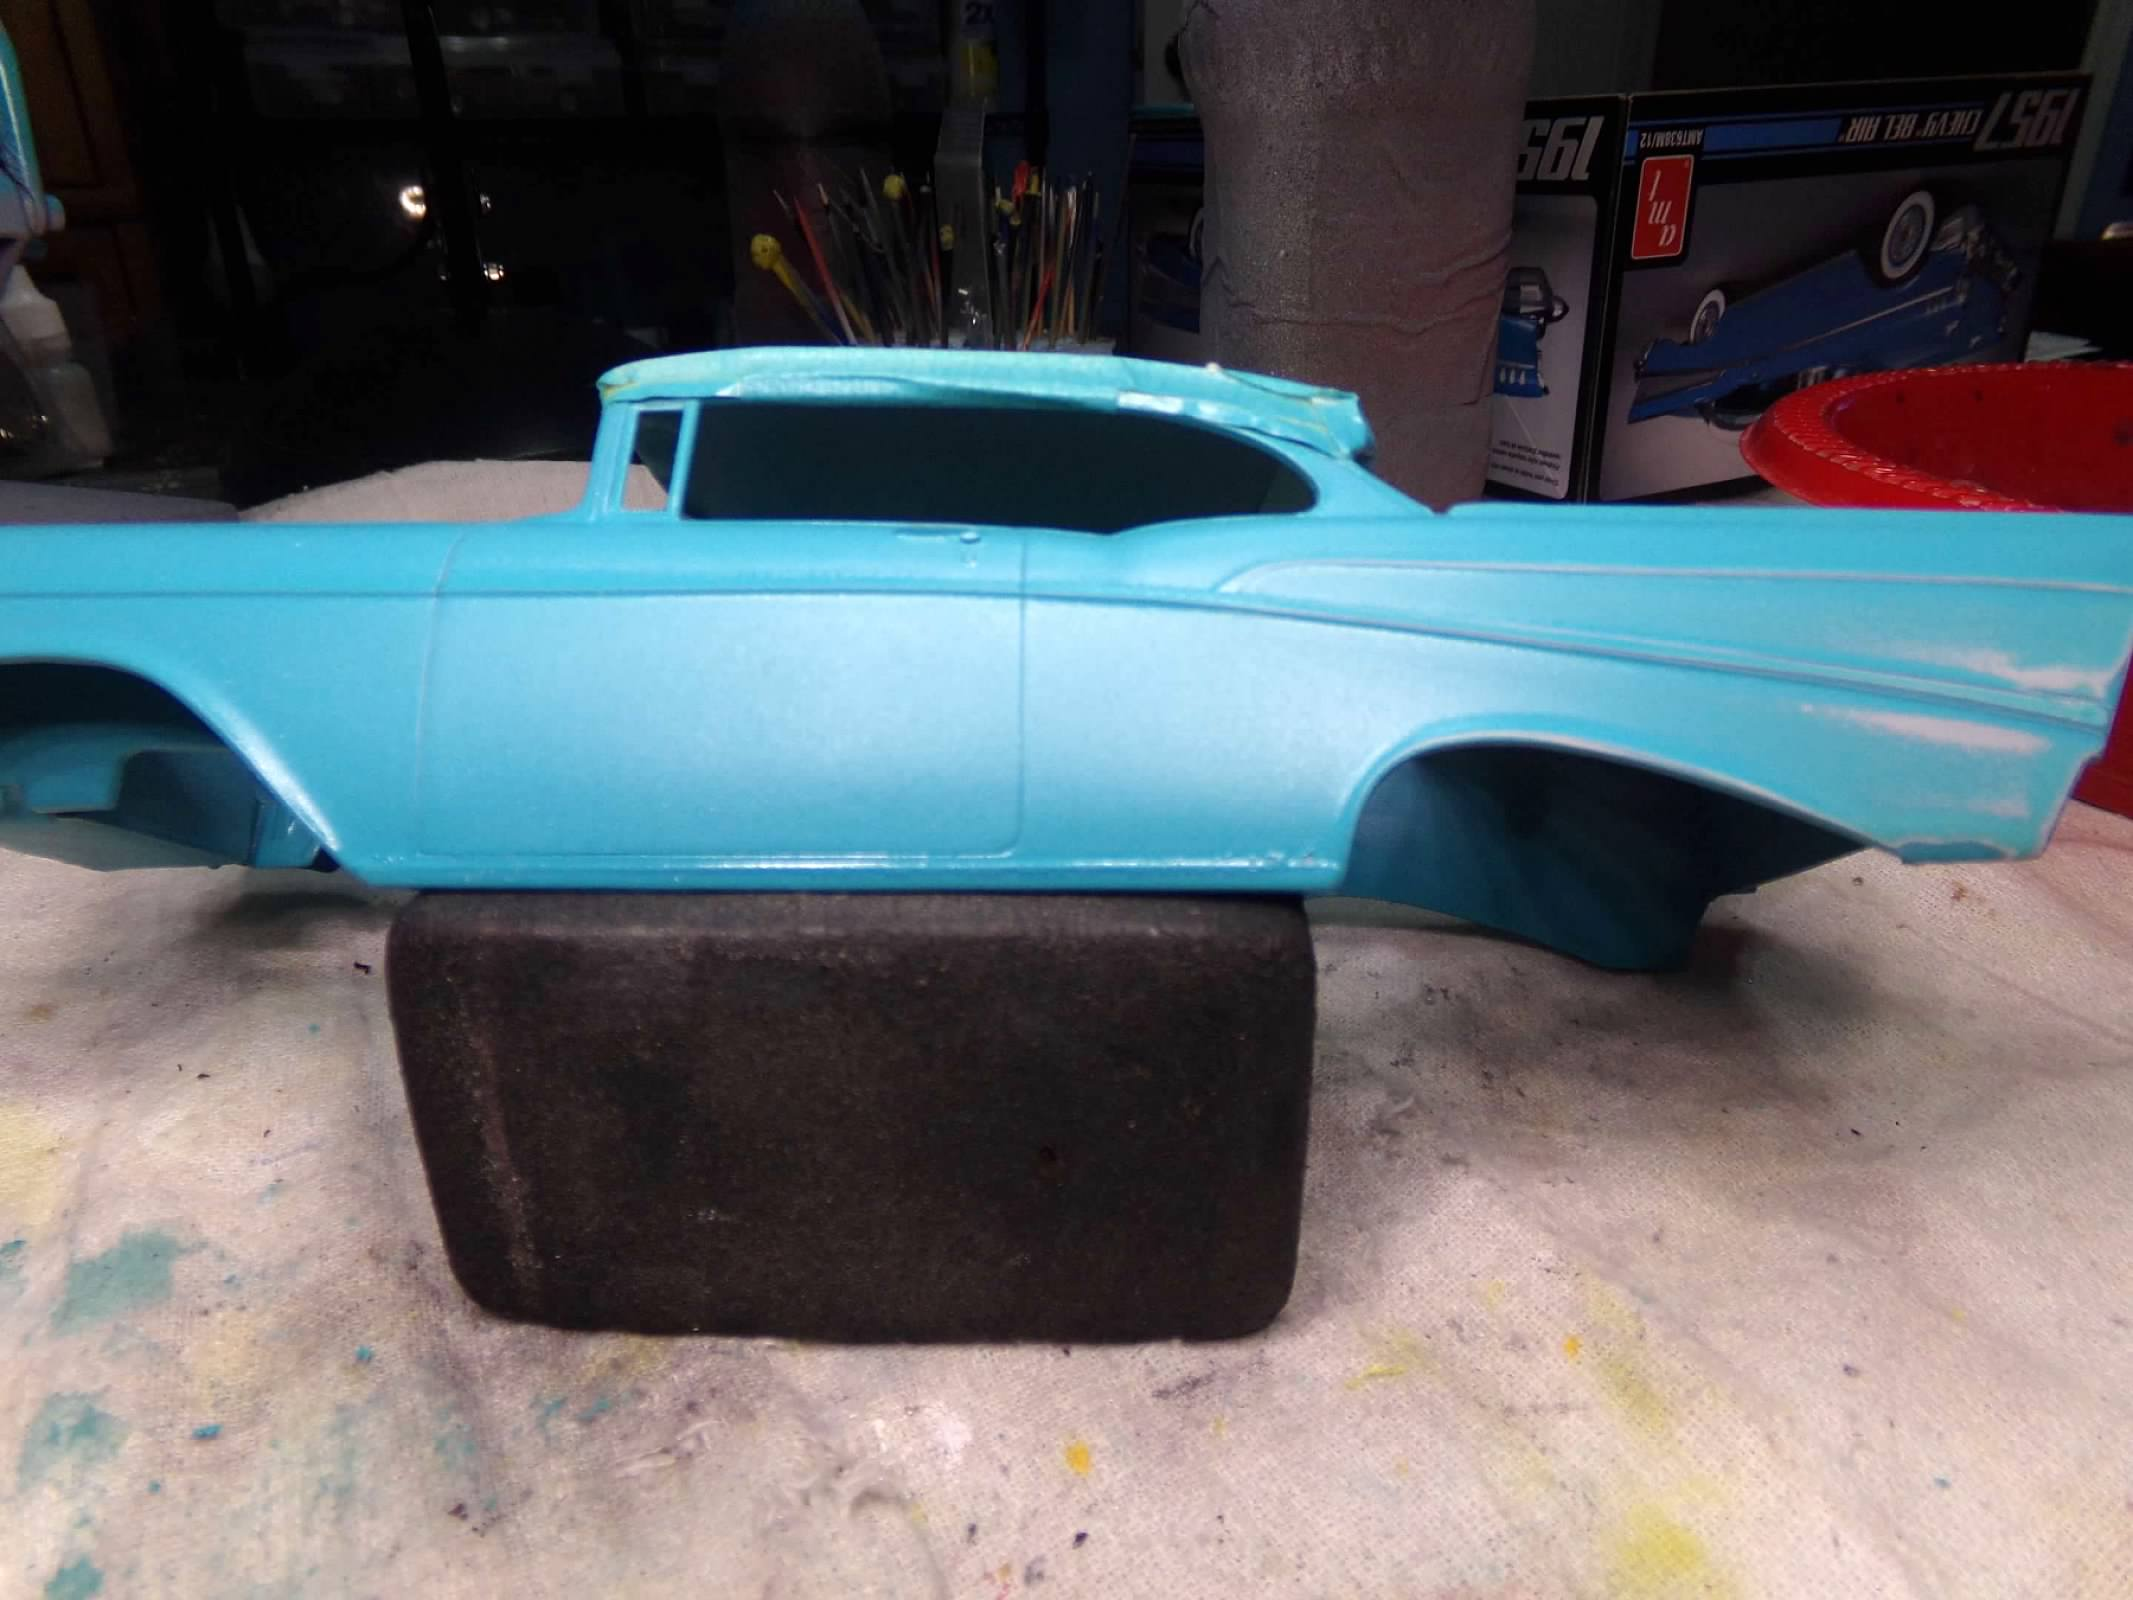
Thanks, Mike! I appreciate your comments! Finished rubbing out the body and have it foiled. I left a little extra foil around the rear fender insert at the top because as I remember the decal is a bit small so I don't want any blue peeking out. I used a Galaxie marker for the gold on the V and Chevrolet lettering on the trunk and hood which worked out pretty well. Now, I have double-taped off the doghouse because I don't want any bleed-throughs here. I would brush paint it but its hard to cover the light blue which would take two coats and then it would look like a matted mess. Thanks for looking! ?
-
The body looks great, Joe! Doesn't look like you need much rubbing on that one! Wheels look good, too! you would think they could get better fit than that out of the box. Geez! ??
-
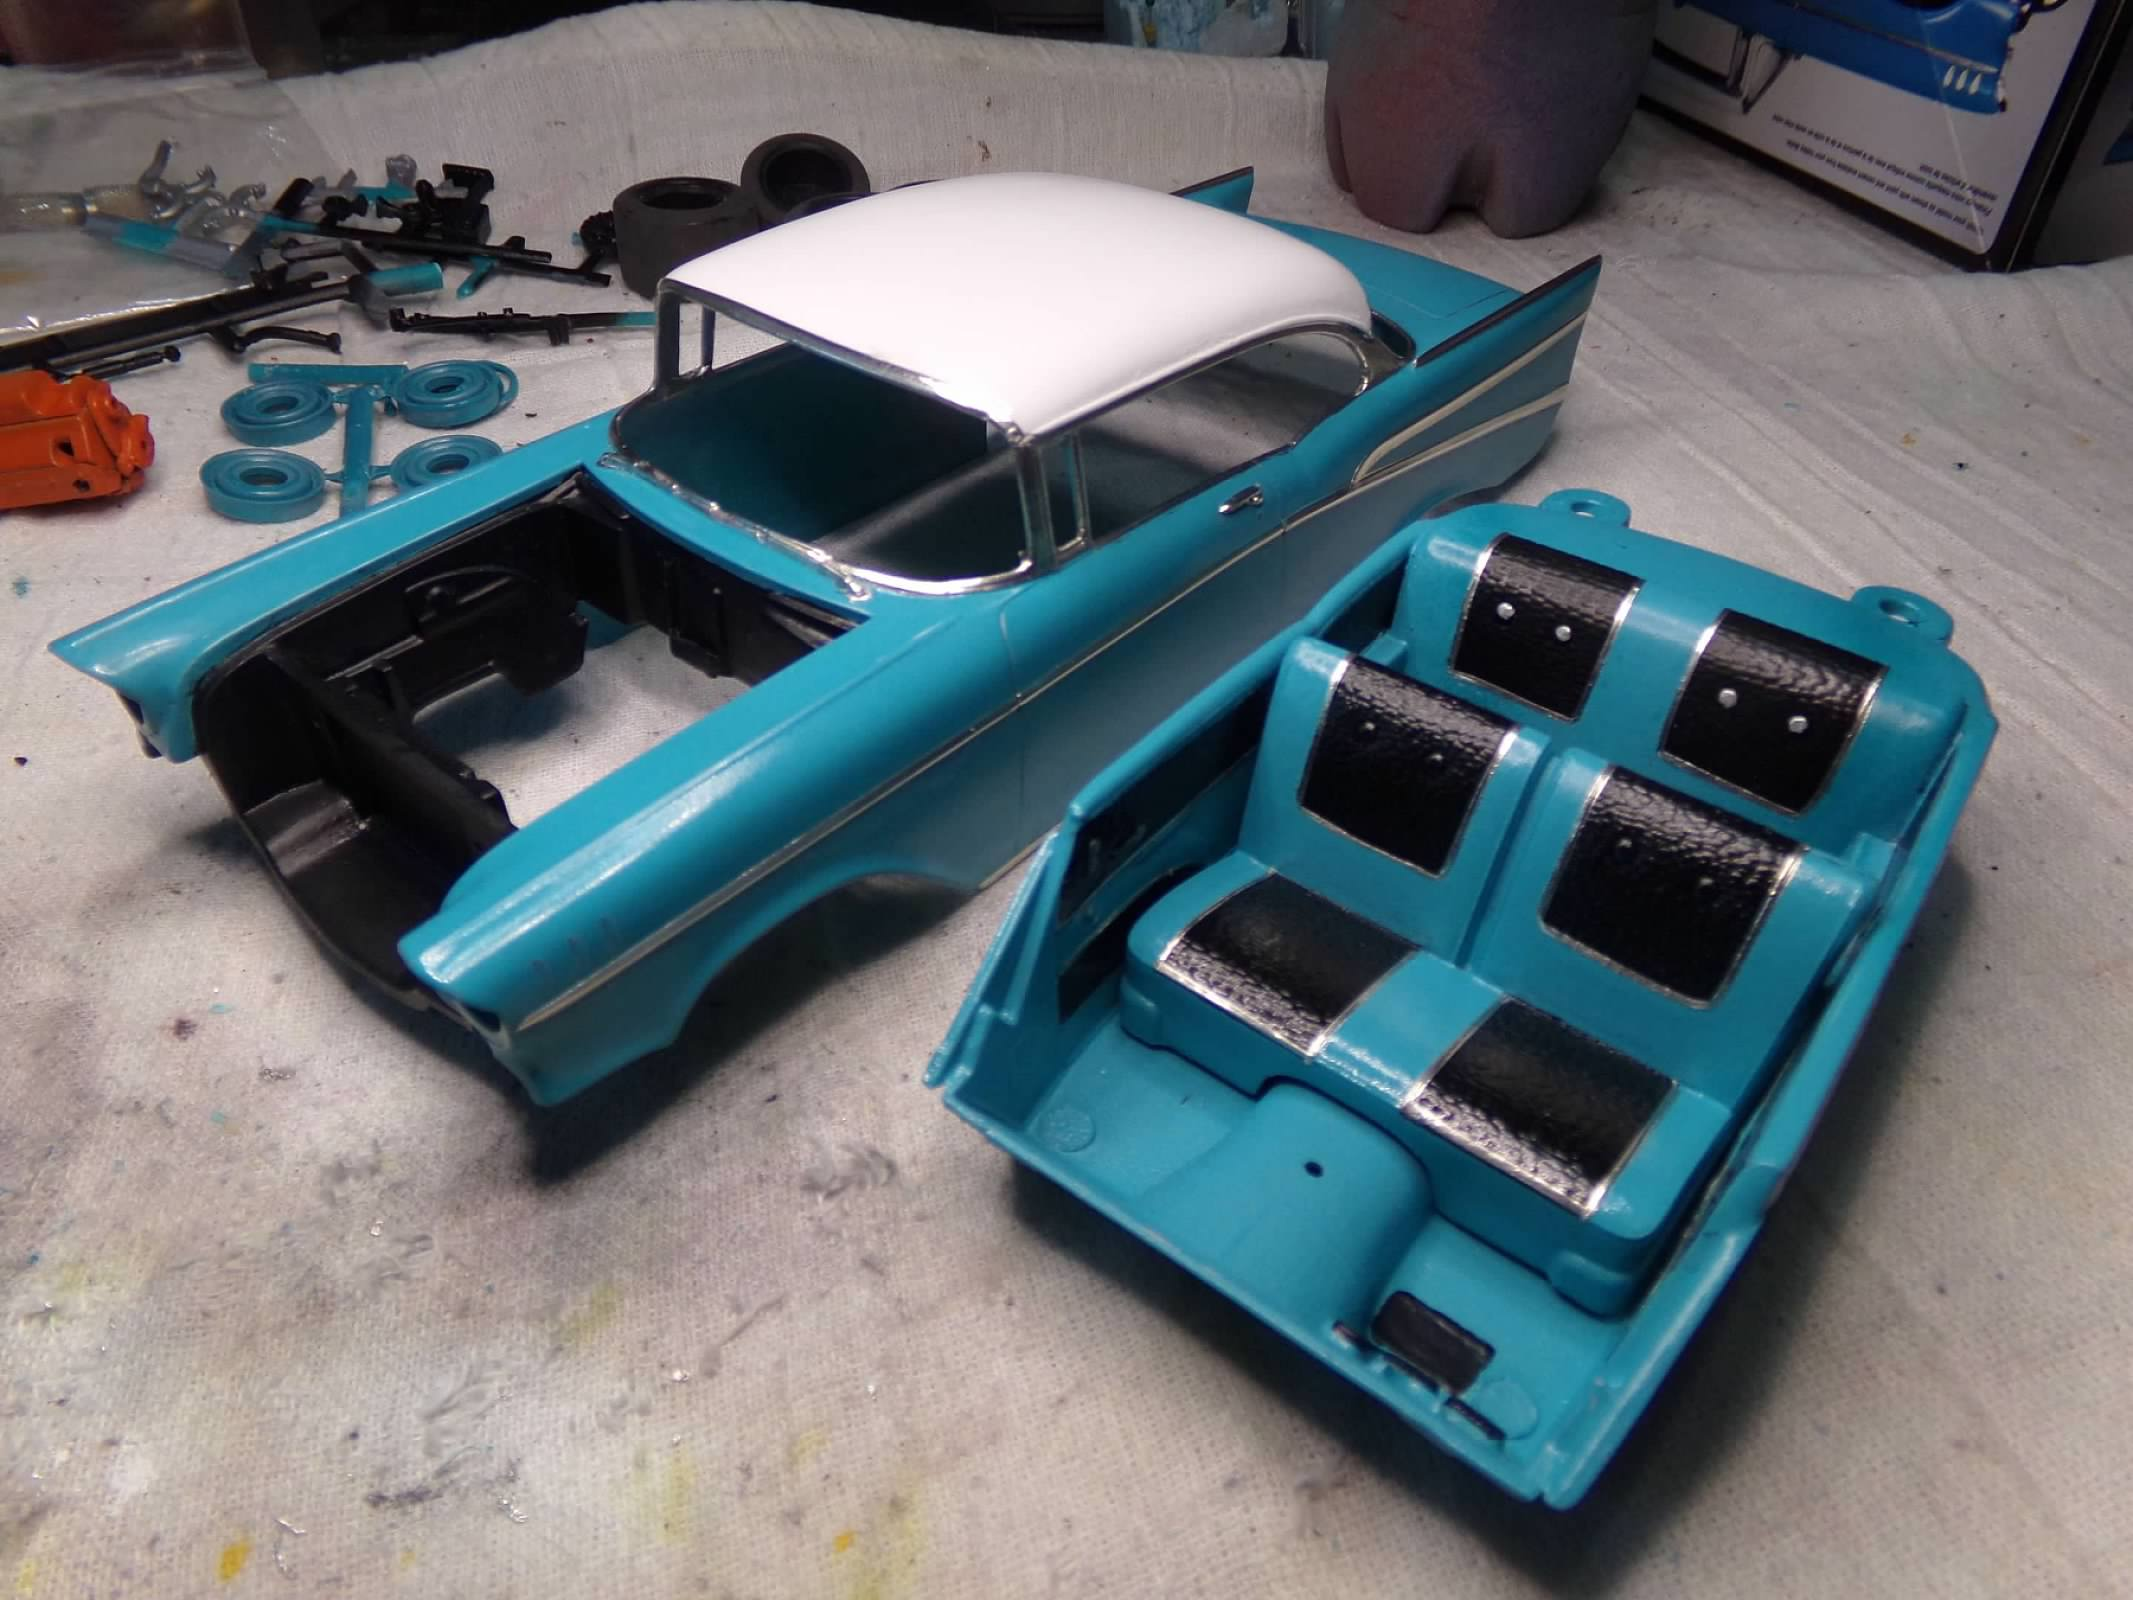
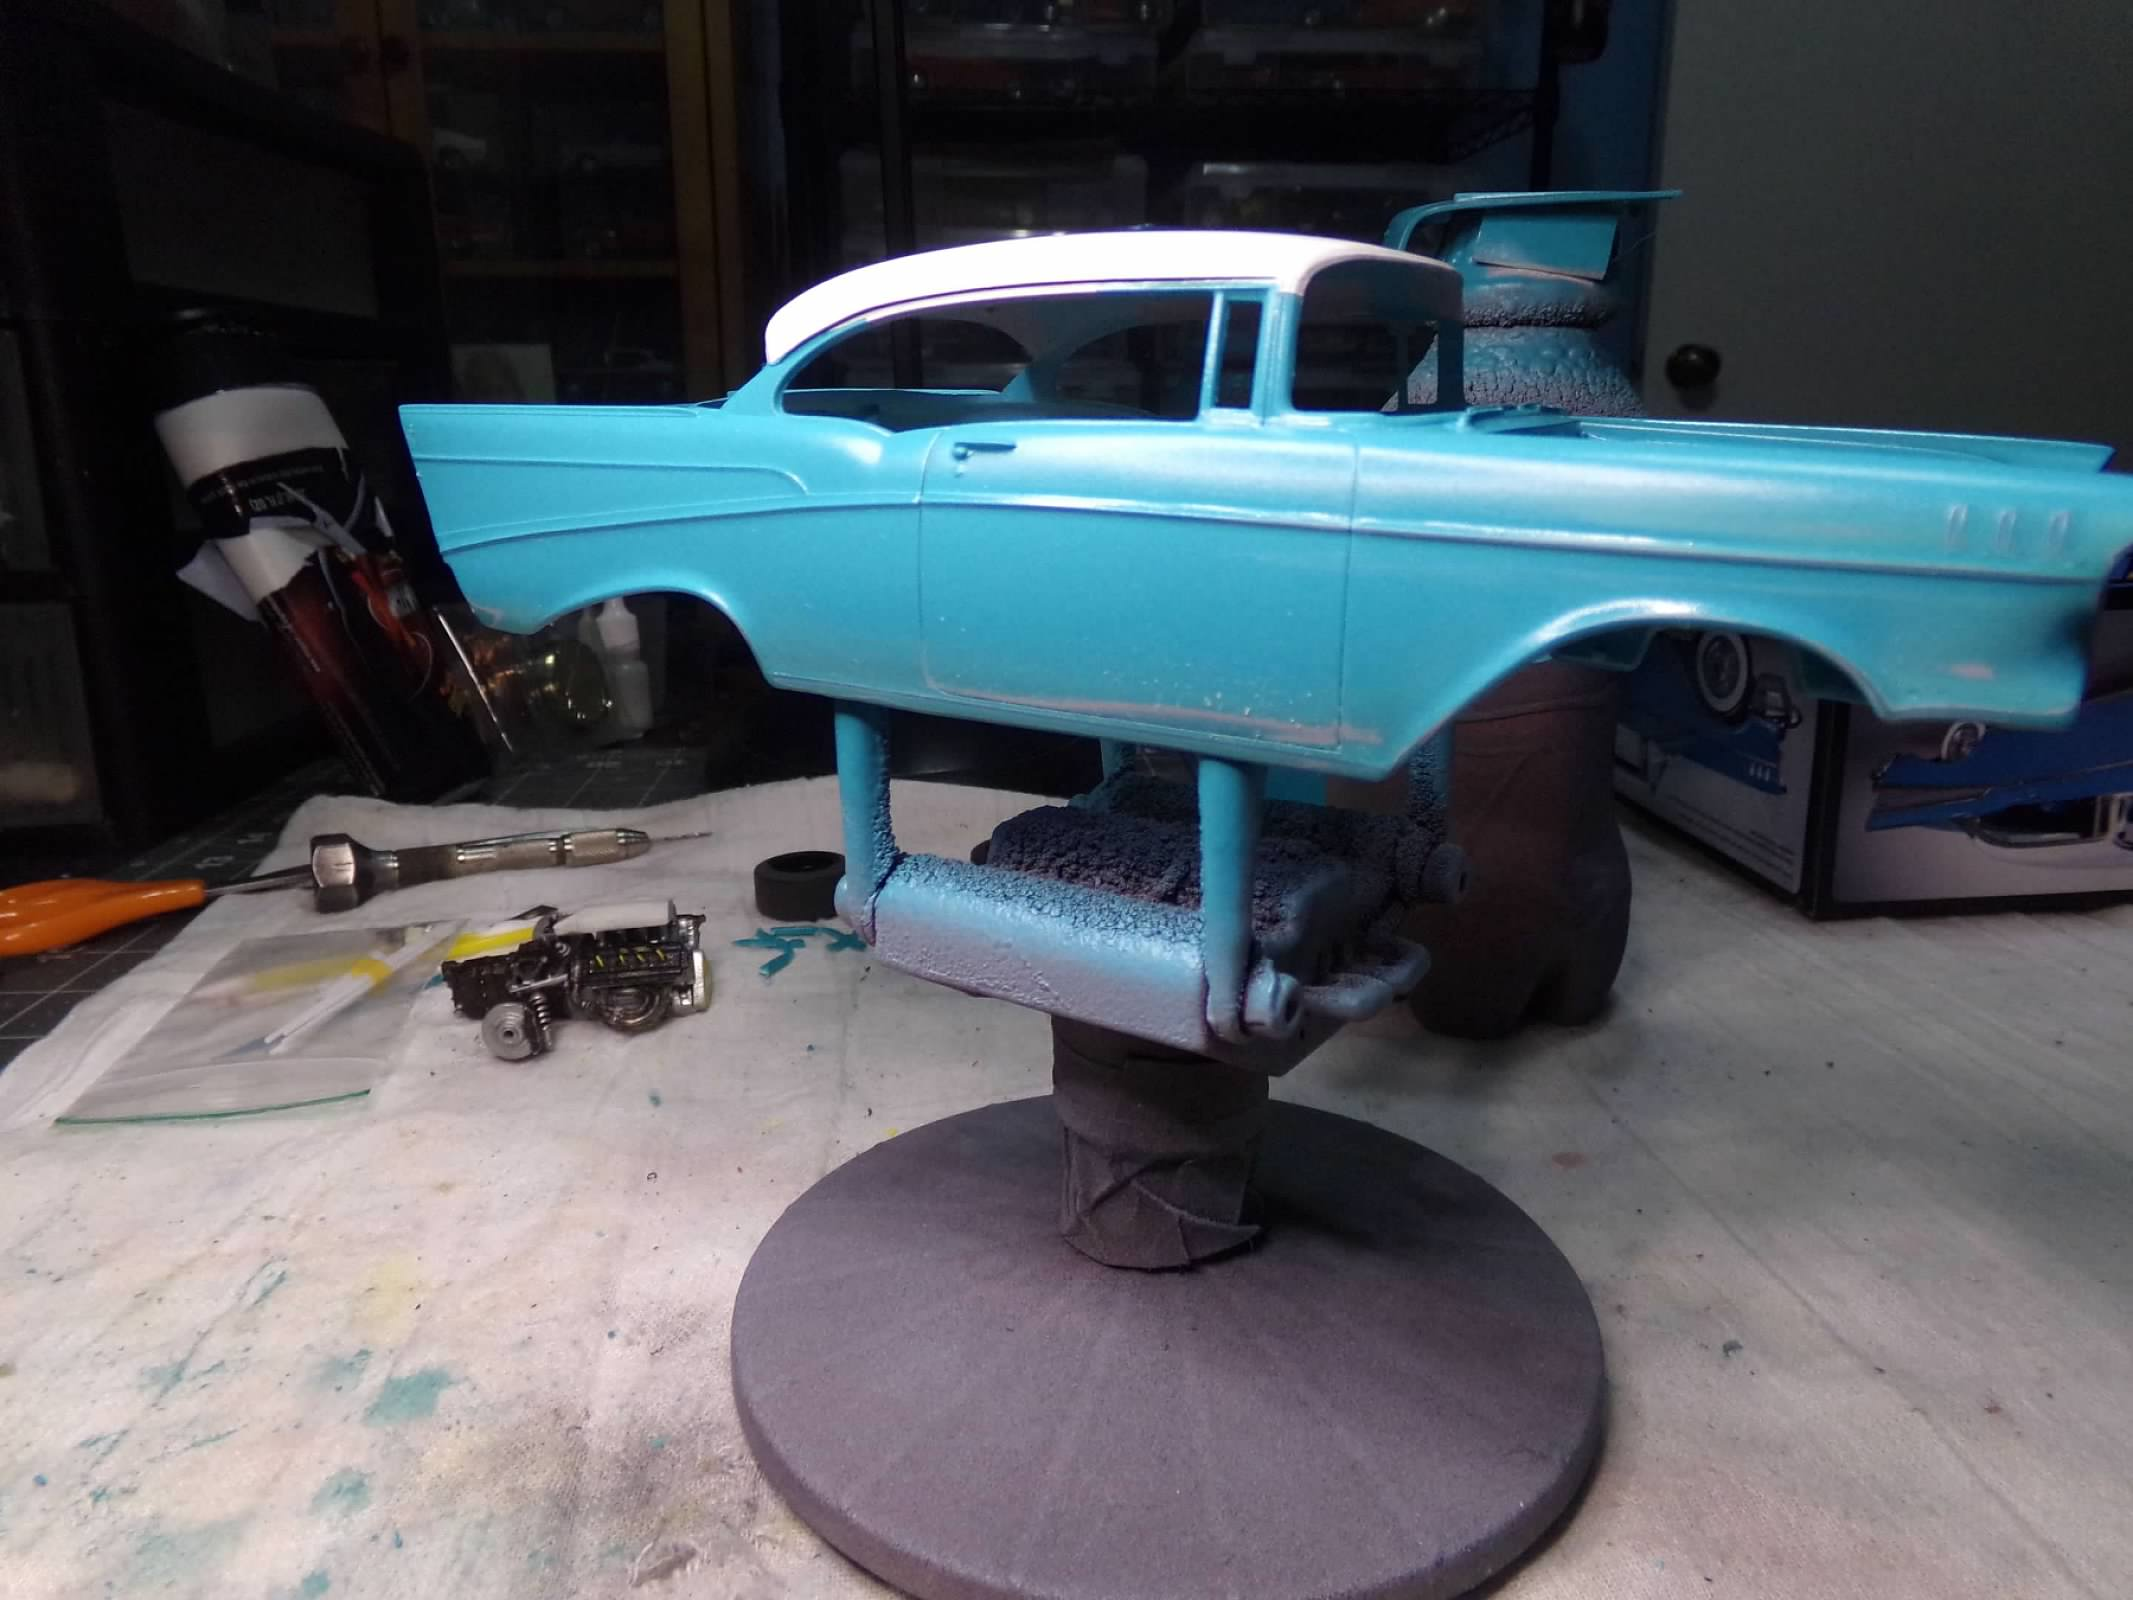
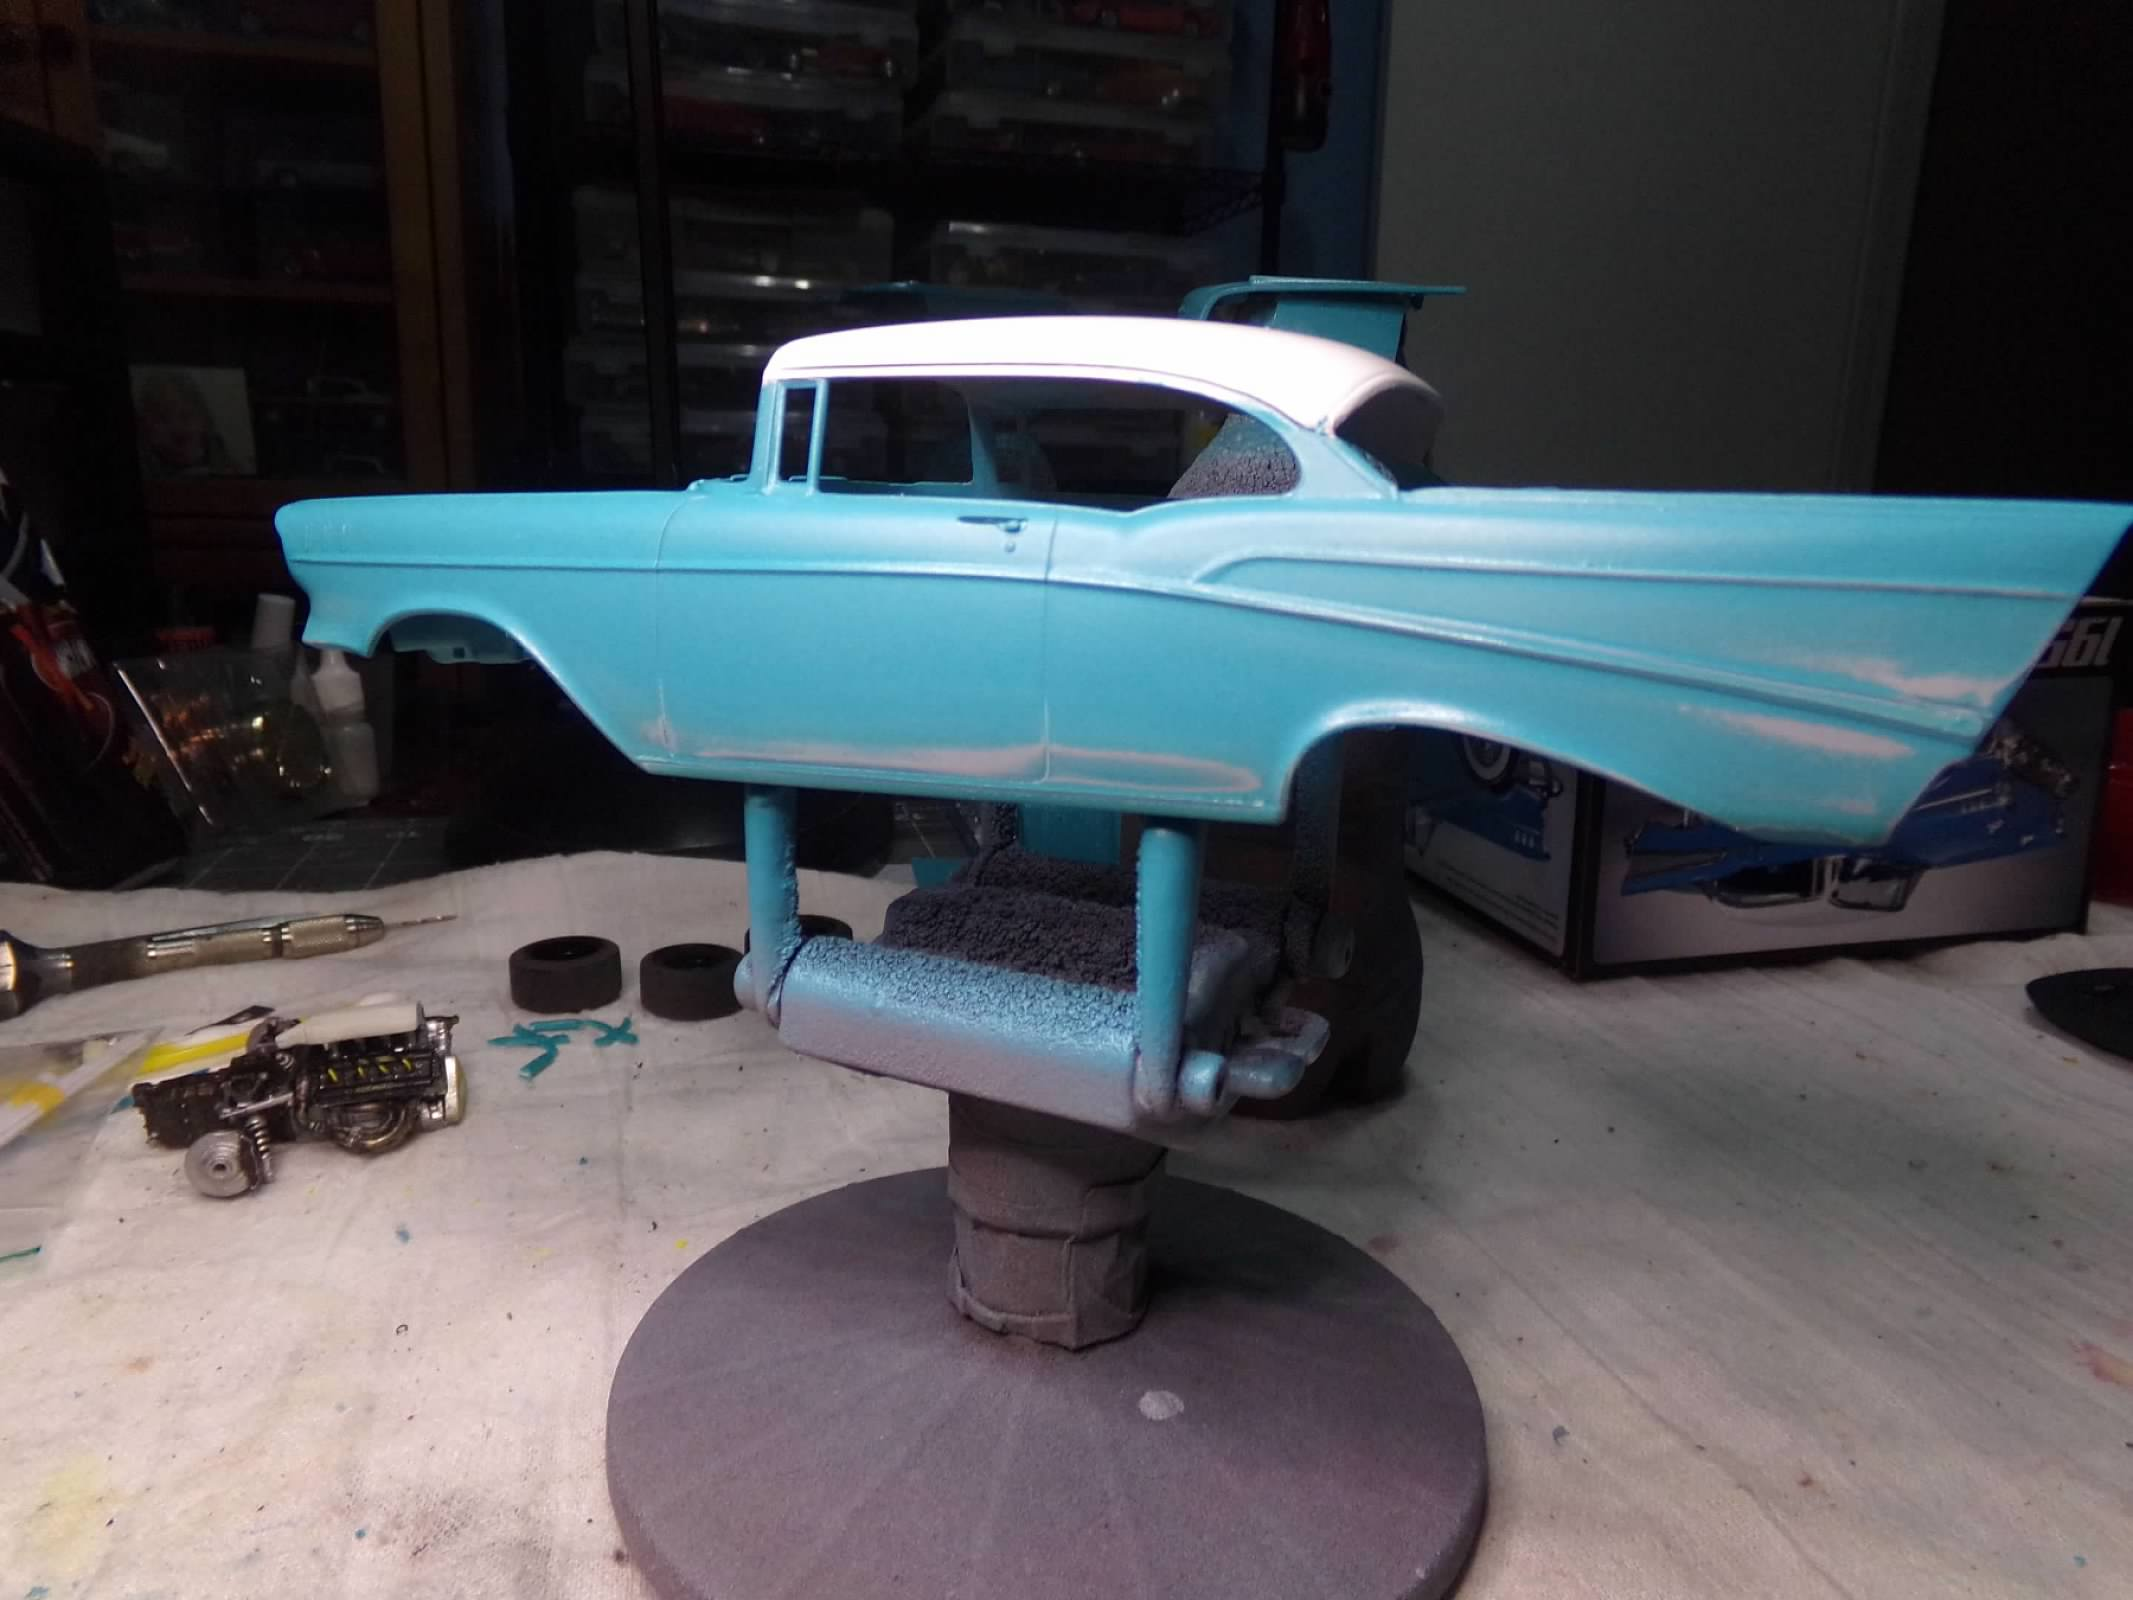
Thanks, Mike and Bob! I appreciate your comments! Yesterday was a good painting day! Temp about 65 degrees with 40 percent humidity. So I taped off the interior in the morning and painted the inserts. As usual, there were some bleed-throughs. So I scratched out the black paint with a toothpick and cotton swab so that it wouldn't bleed into the blue paint that I touched up with a brush. So everything looks good in the interior and I will add a light sprits of Dullcote before foil and chrome pen in the interior. I also touched up the body for the bubbles that I sanded out and then added another coat of paint to the entire body and two coats of clear. Looks good, and today as it is raining, I am rubbing out the body and starting the foil. I should have this one knocked out pretty quick, a nice little box stock to start the new year! Thanks for looking! ?
-
1977 McLaren M24 - Tom Sneva
ModelcarJR replied to ModelcarJR's topic in WIP: Other Racing: Road Racing, Land Speed Racers
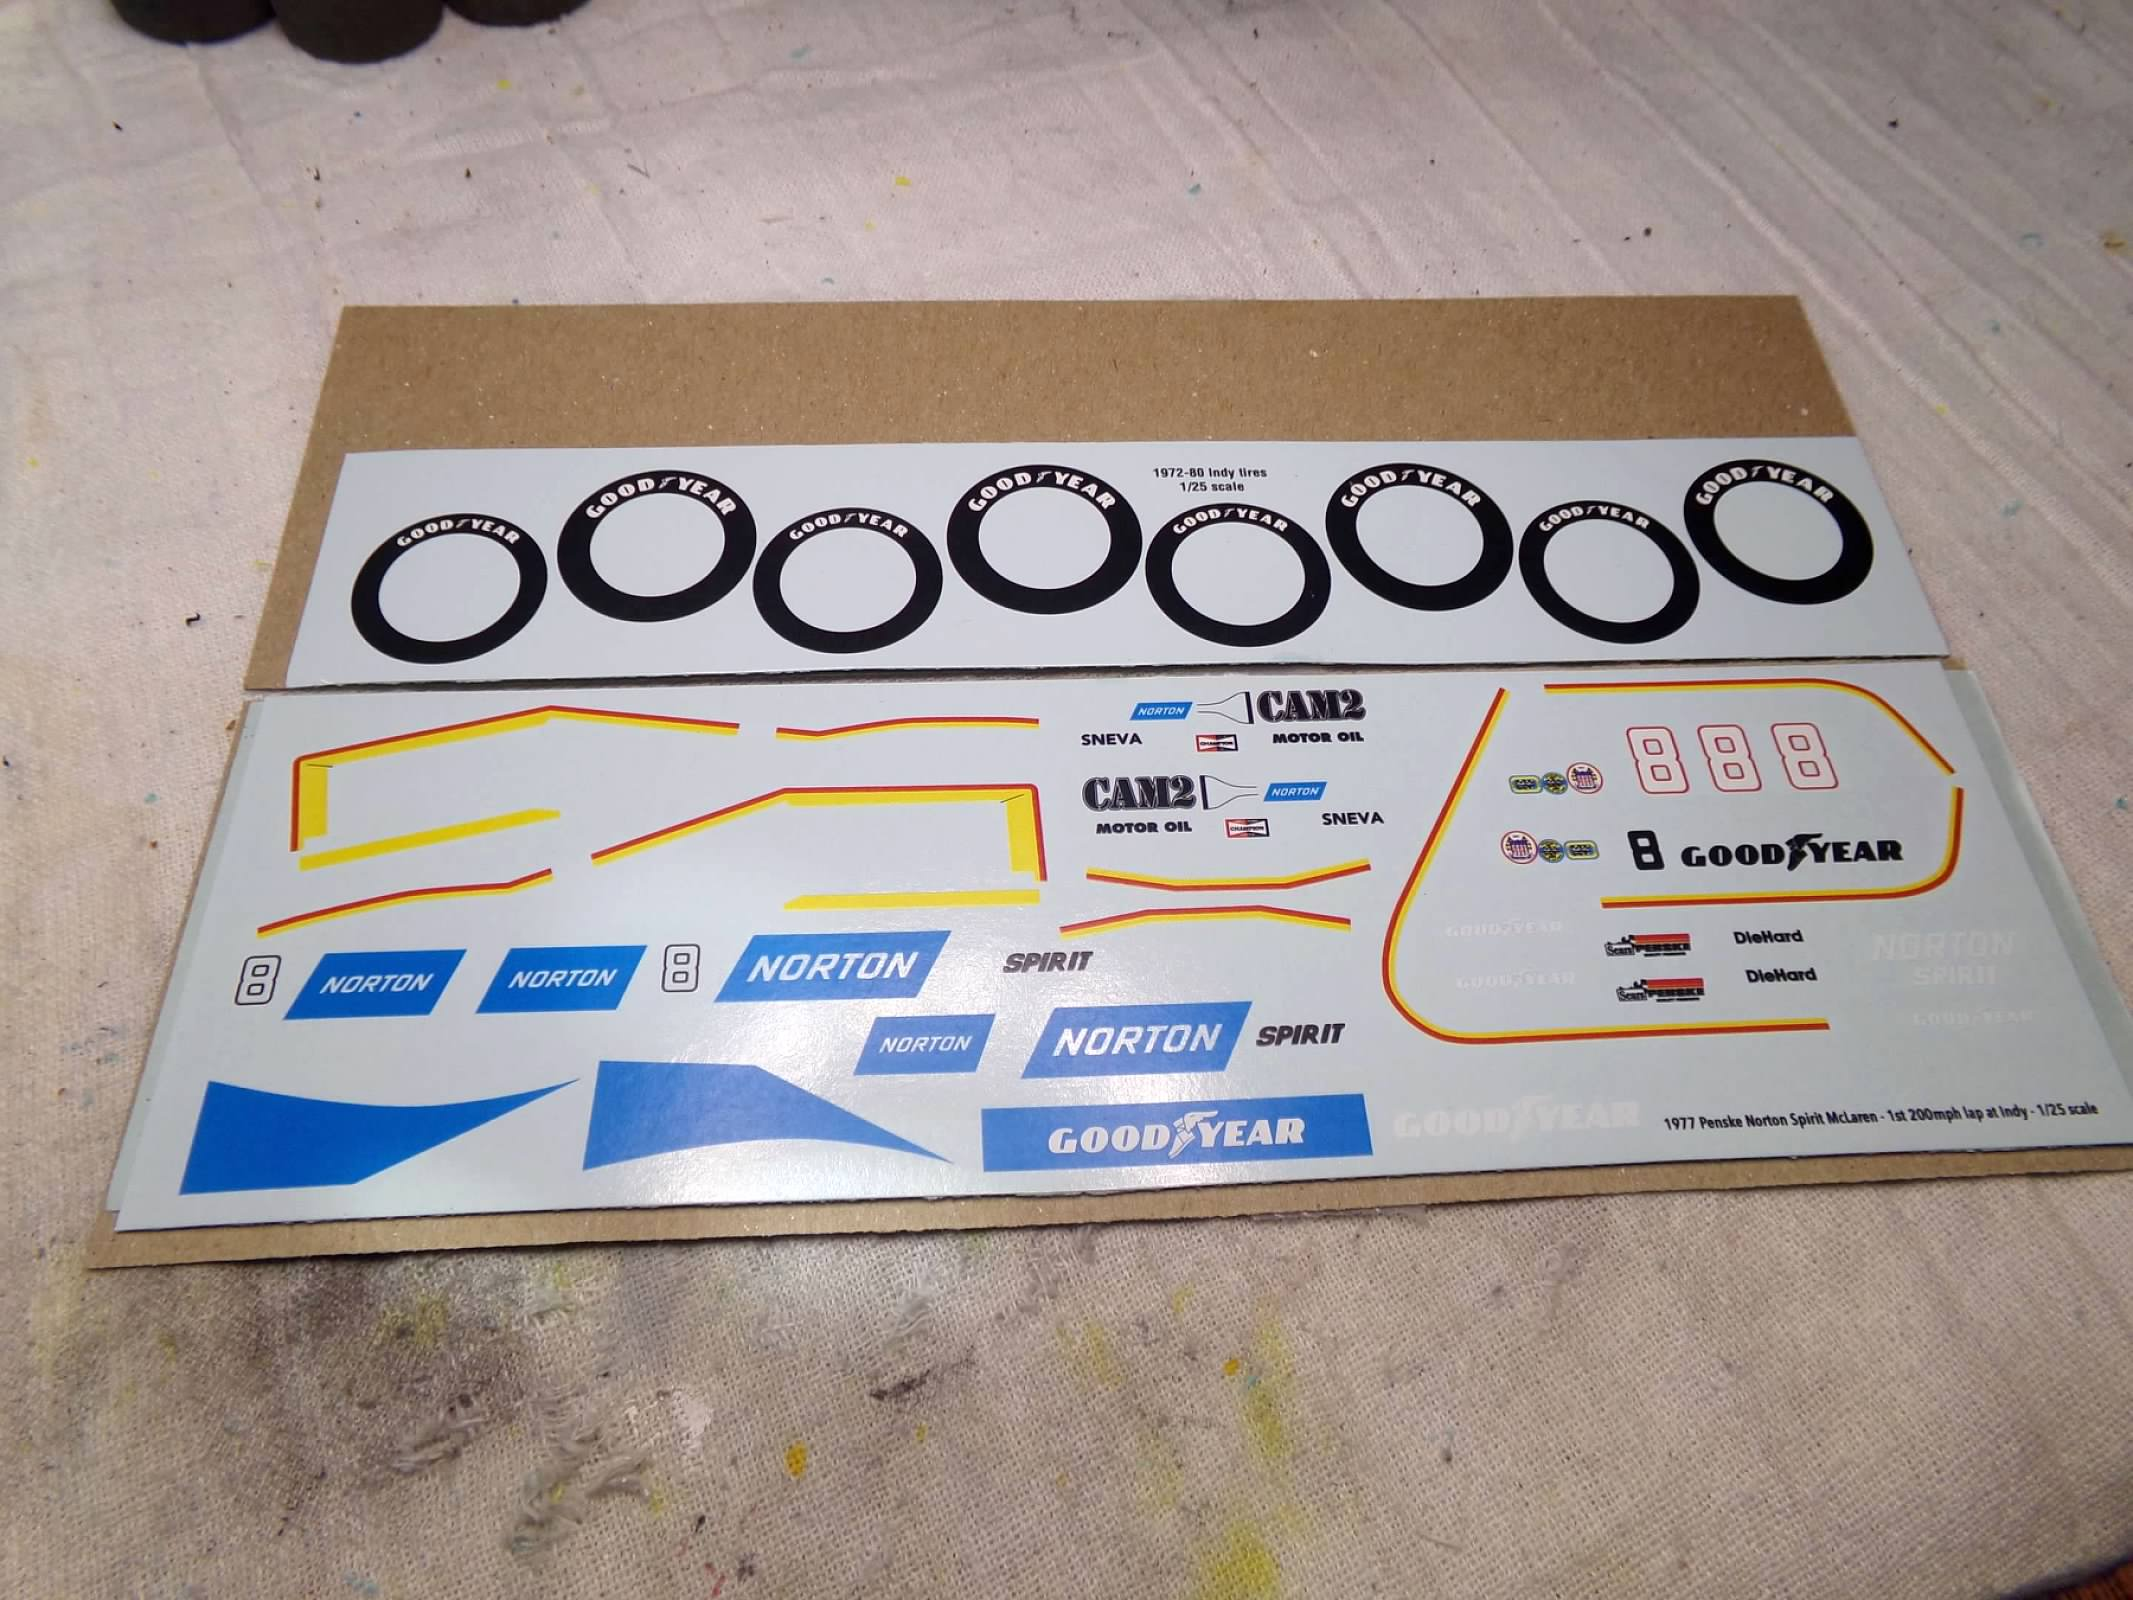
I was wrong, I received the decals from Michael at IndyCals on Tuesday. They look great, as usual, and I also bought the tire decals because I can't use the extra set that I bought for the Kraco special because before 1980 the tire didn't include Eagle. But the blue does look like its the grabber blue similar to Tamiya #23 Light Blue. It looks a lot lighteron camera. So I order some paint and it will be here next week. Its either that or drive 30 miles downtown to buy it in the only hobby shop that carries it in Houston. Today, I also received the plenum and some other parts from Kevin at Silver City that had been left out of the orignial shipment. So I am almost set to complete this one and I can work on the engine and tires but will have to wait until next week for paint. thanks for looking!
-
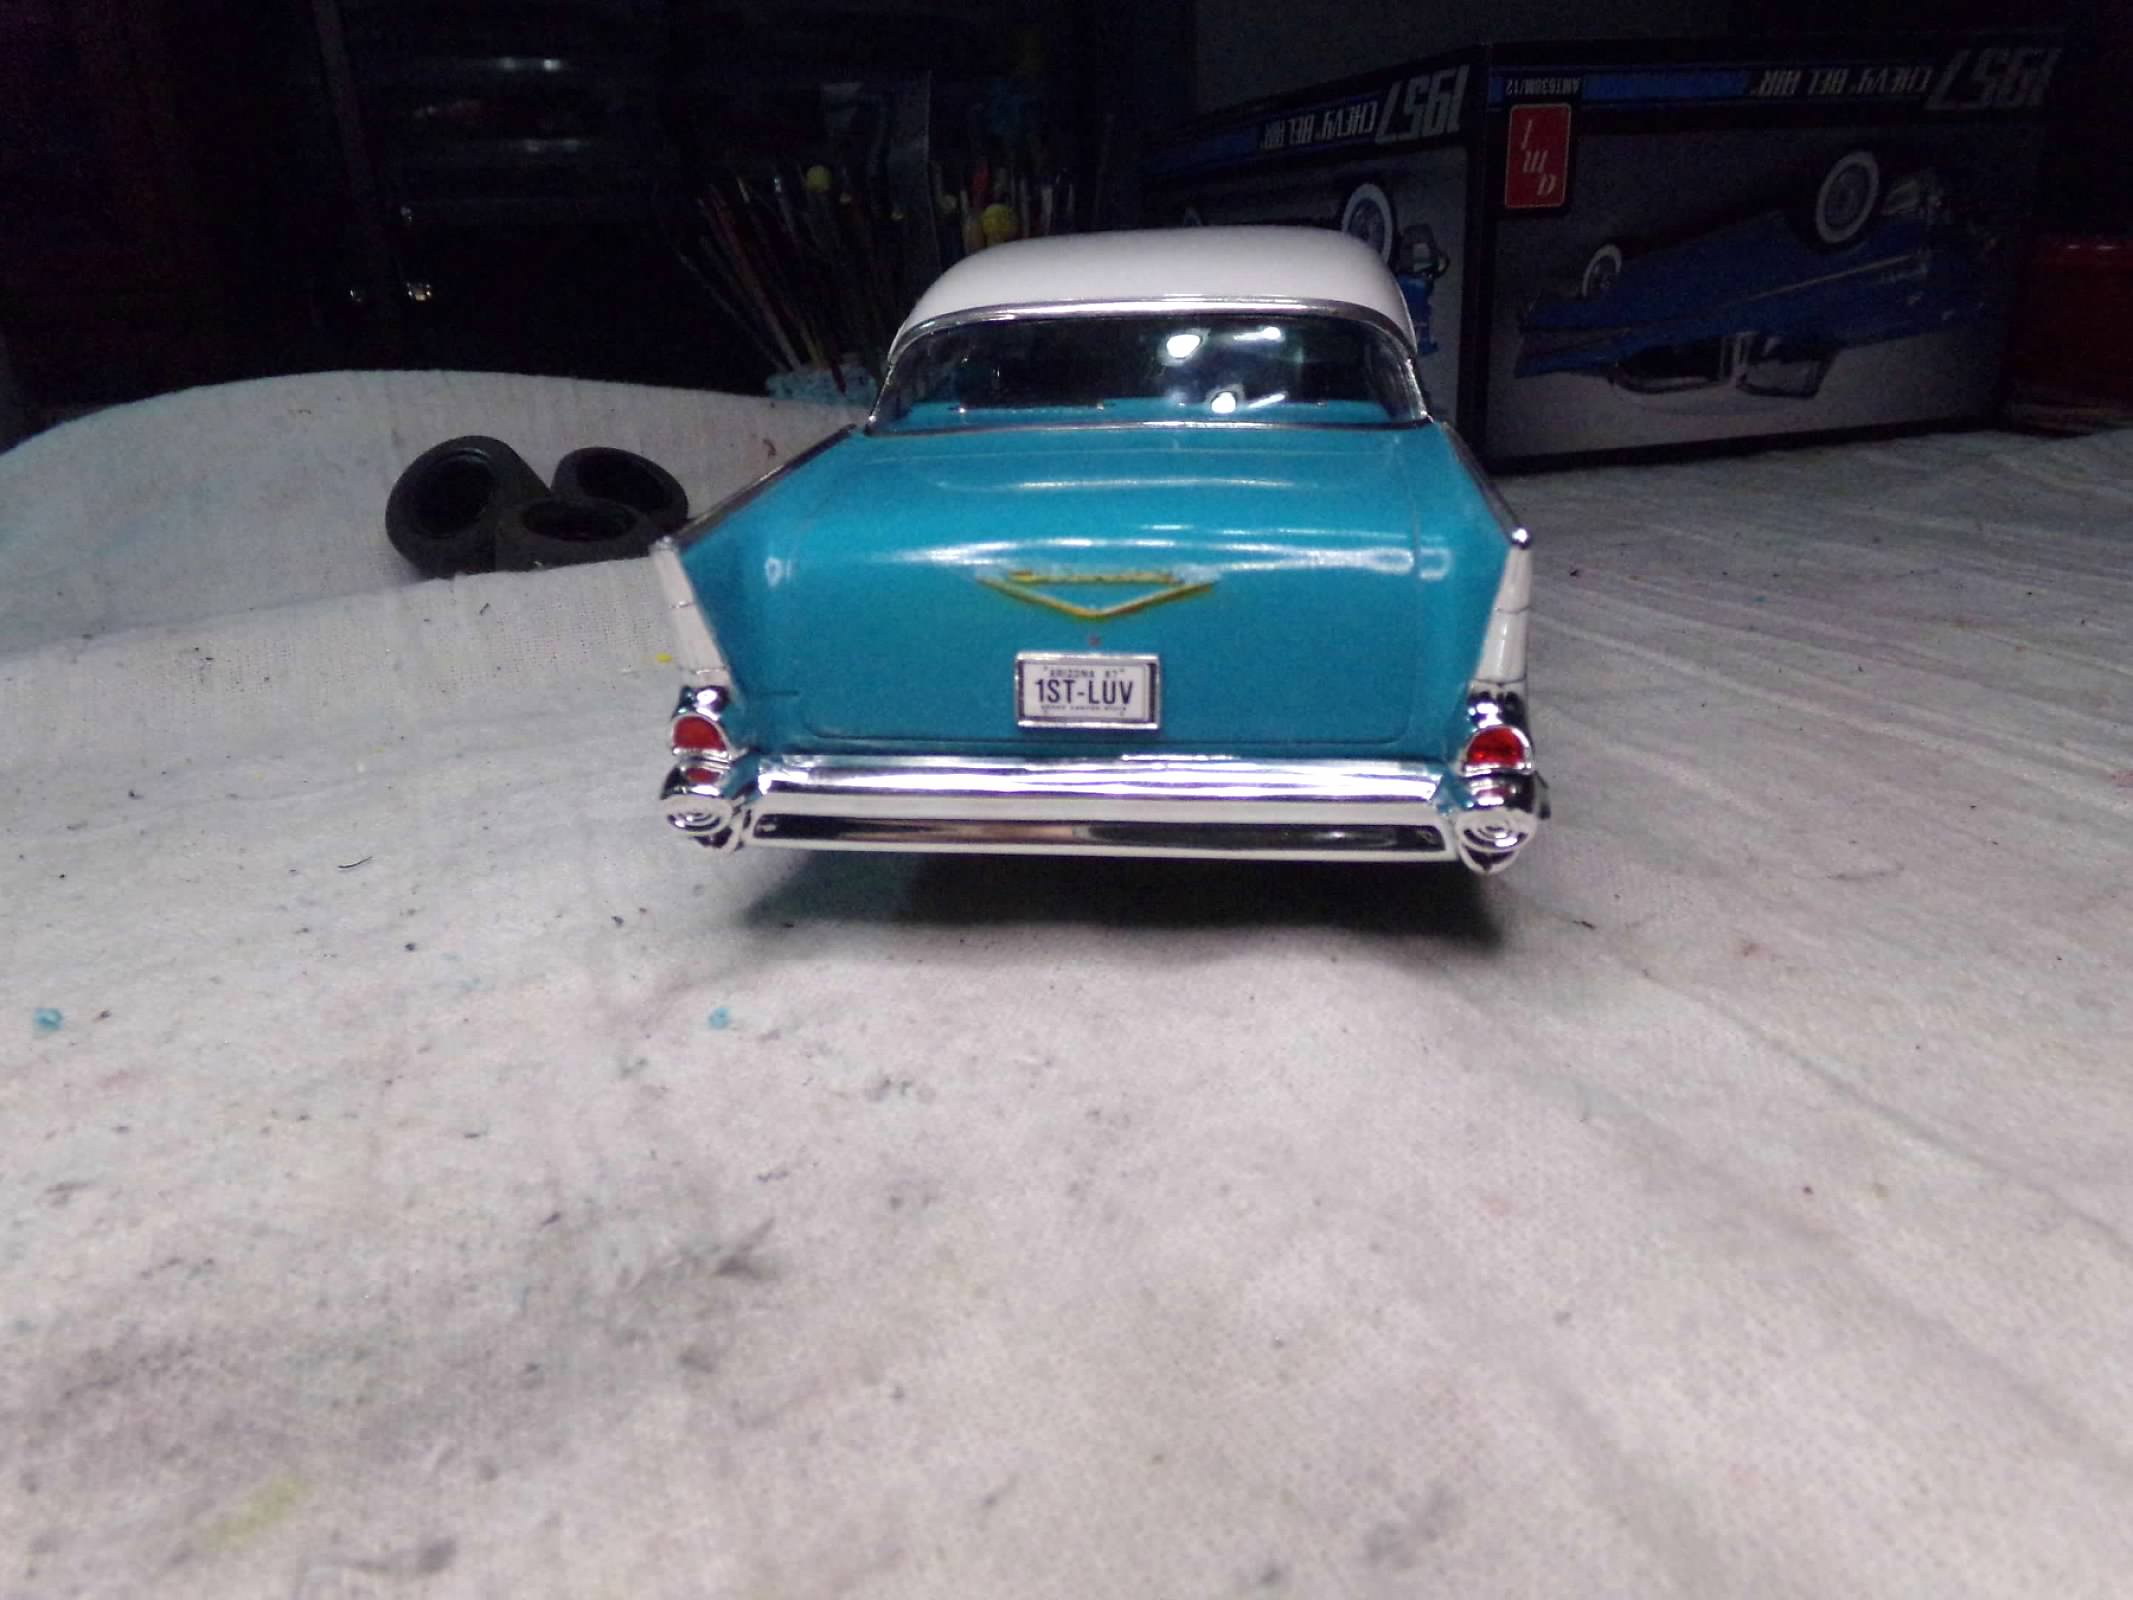
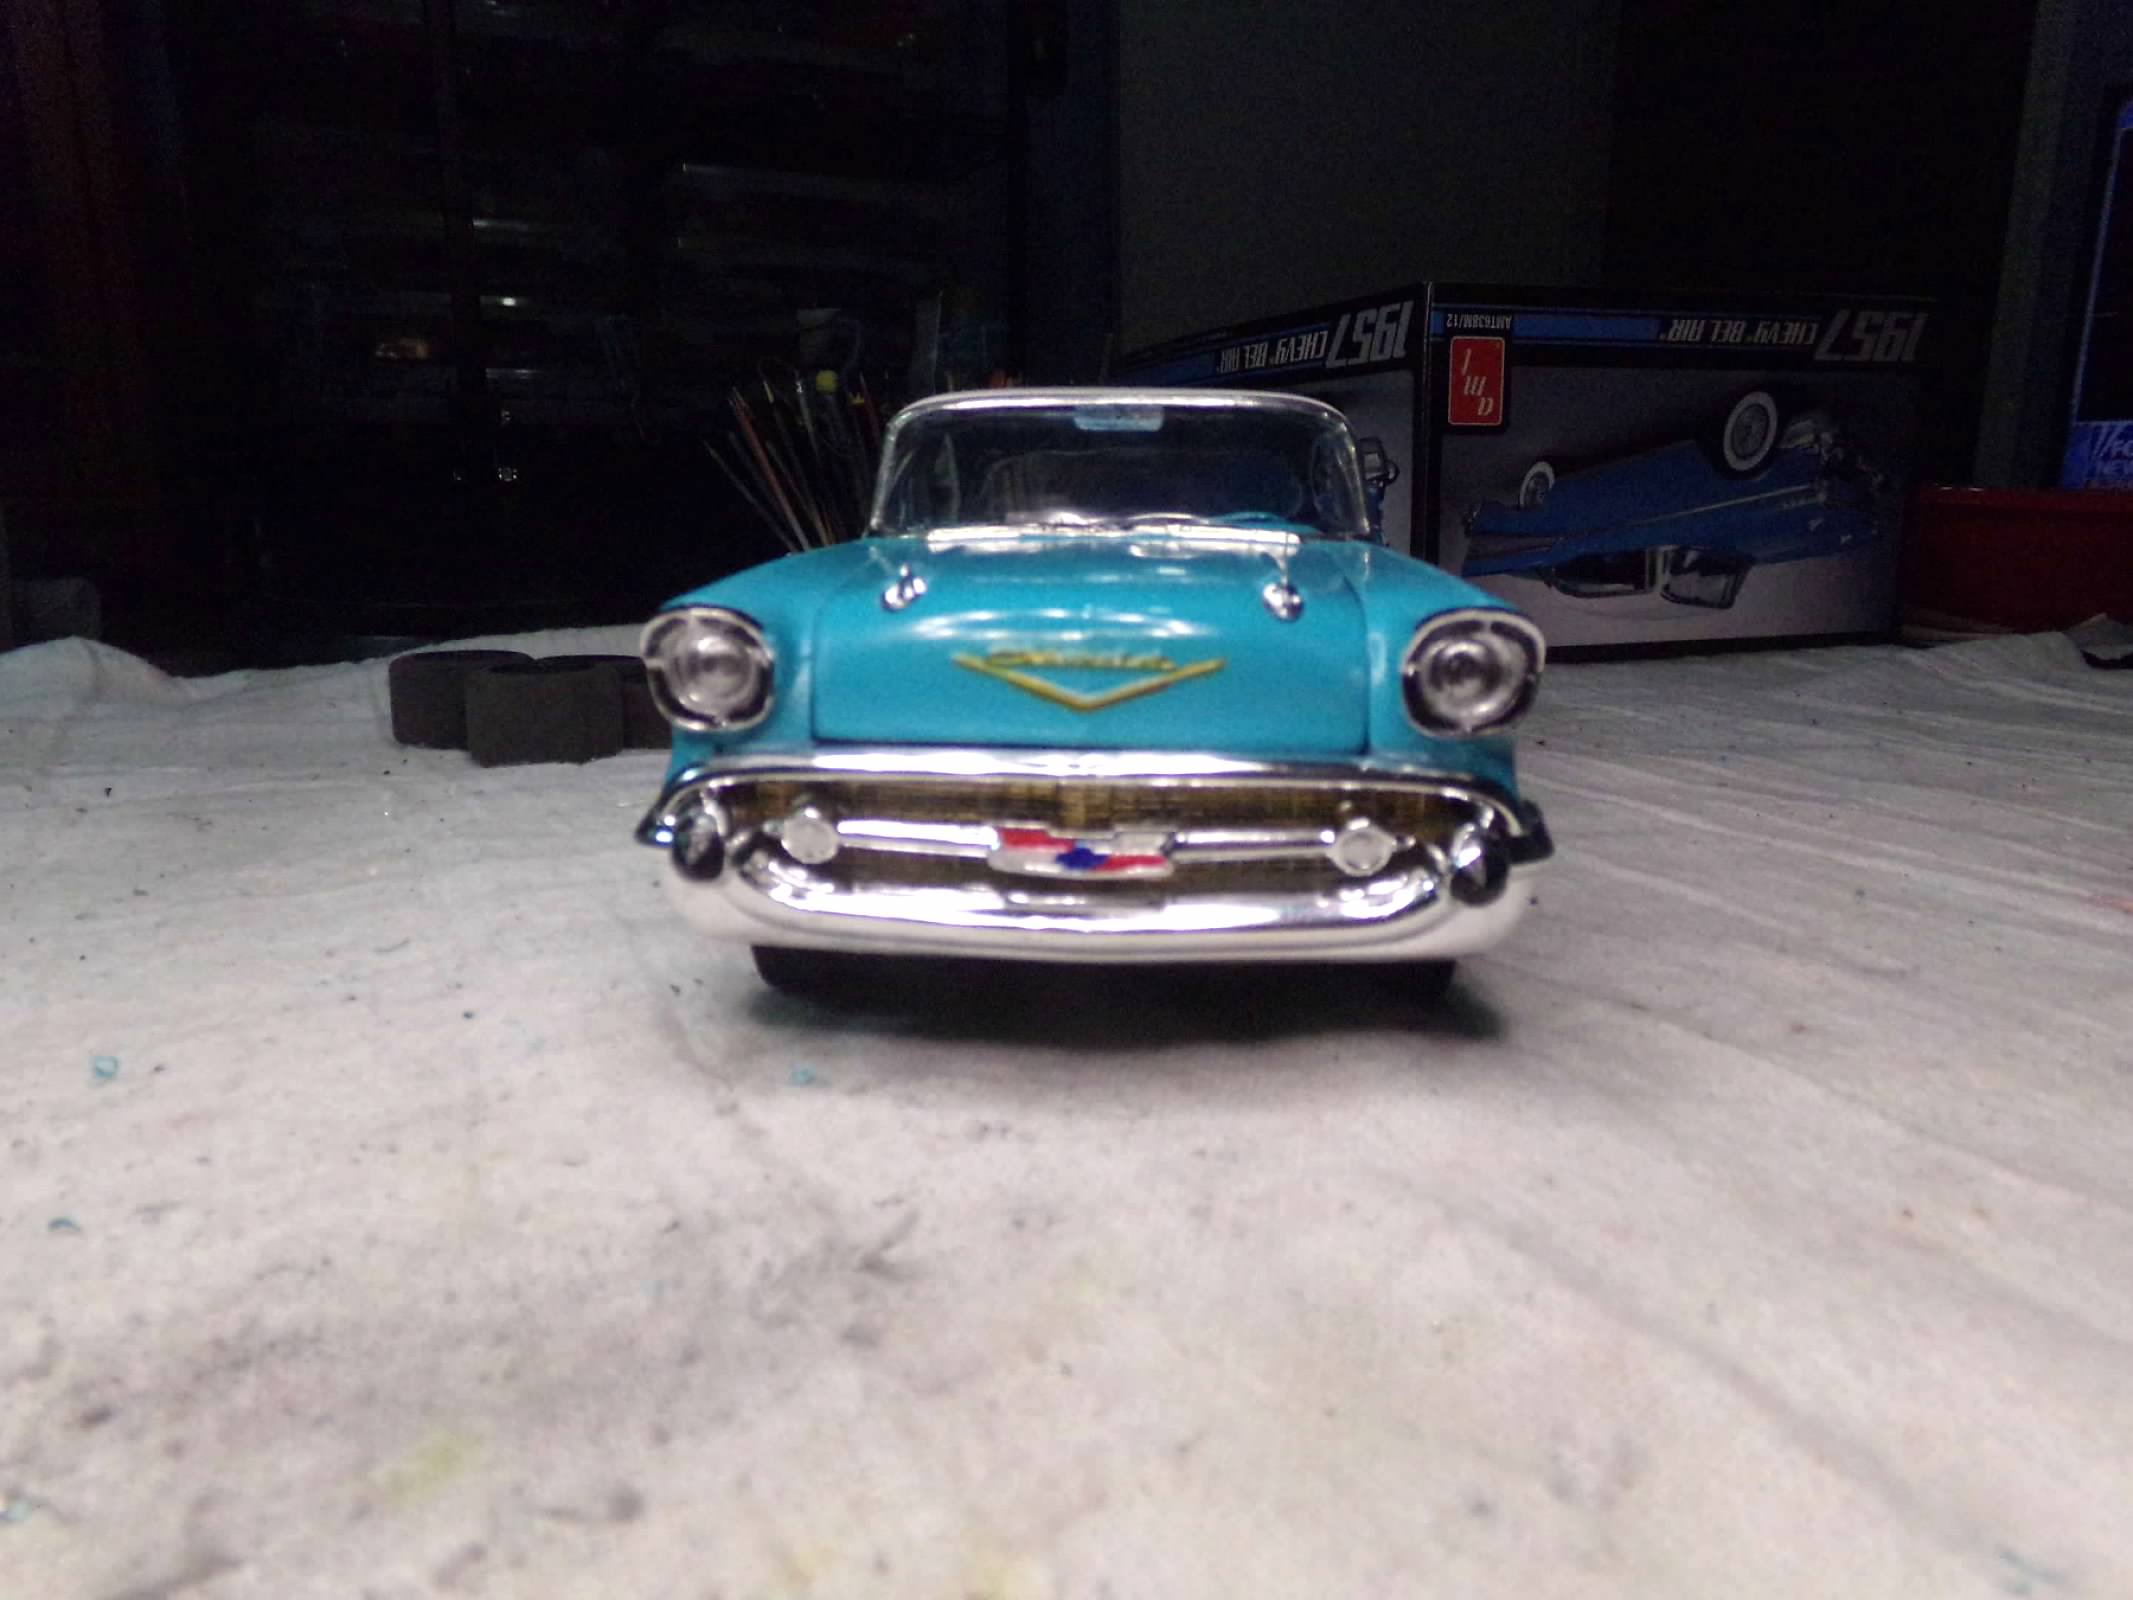
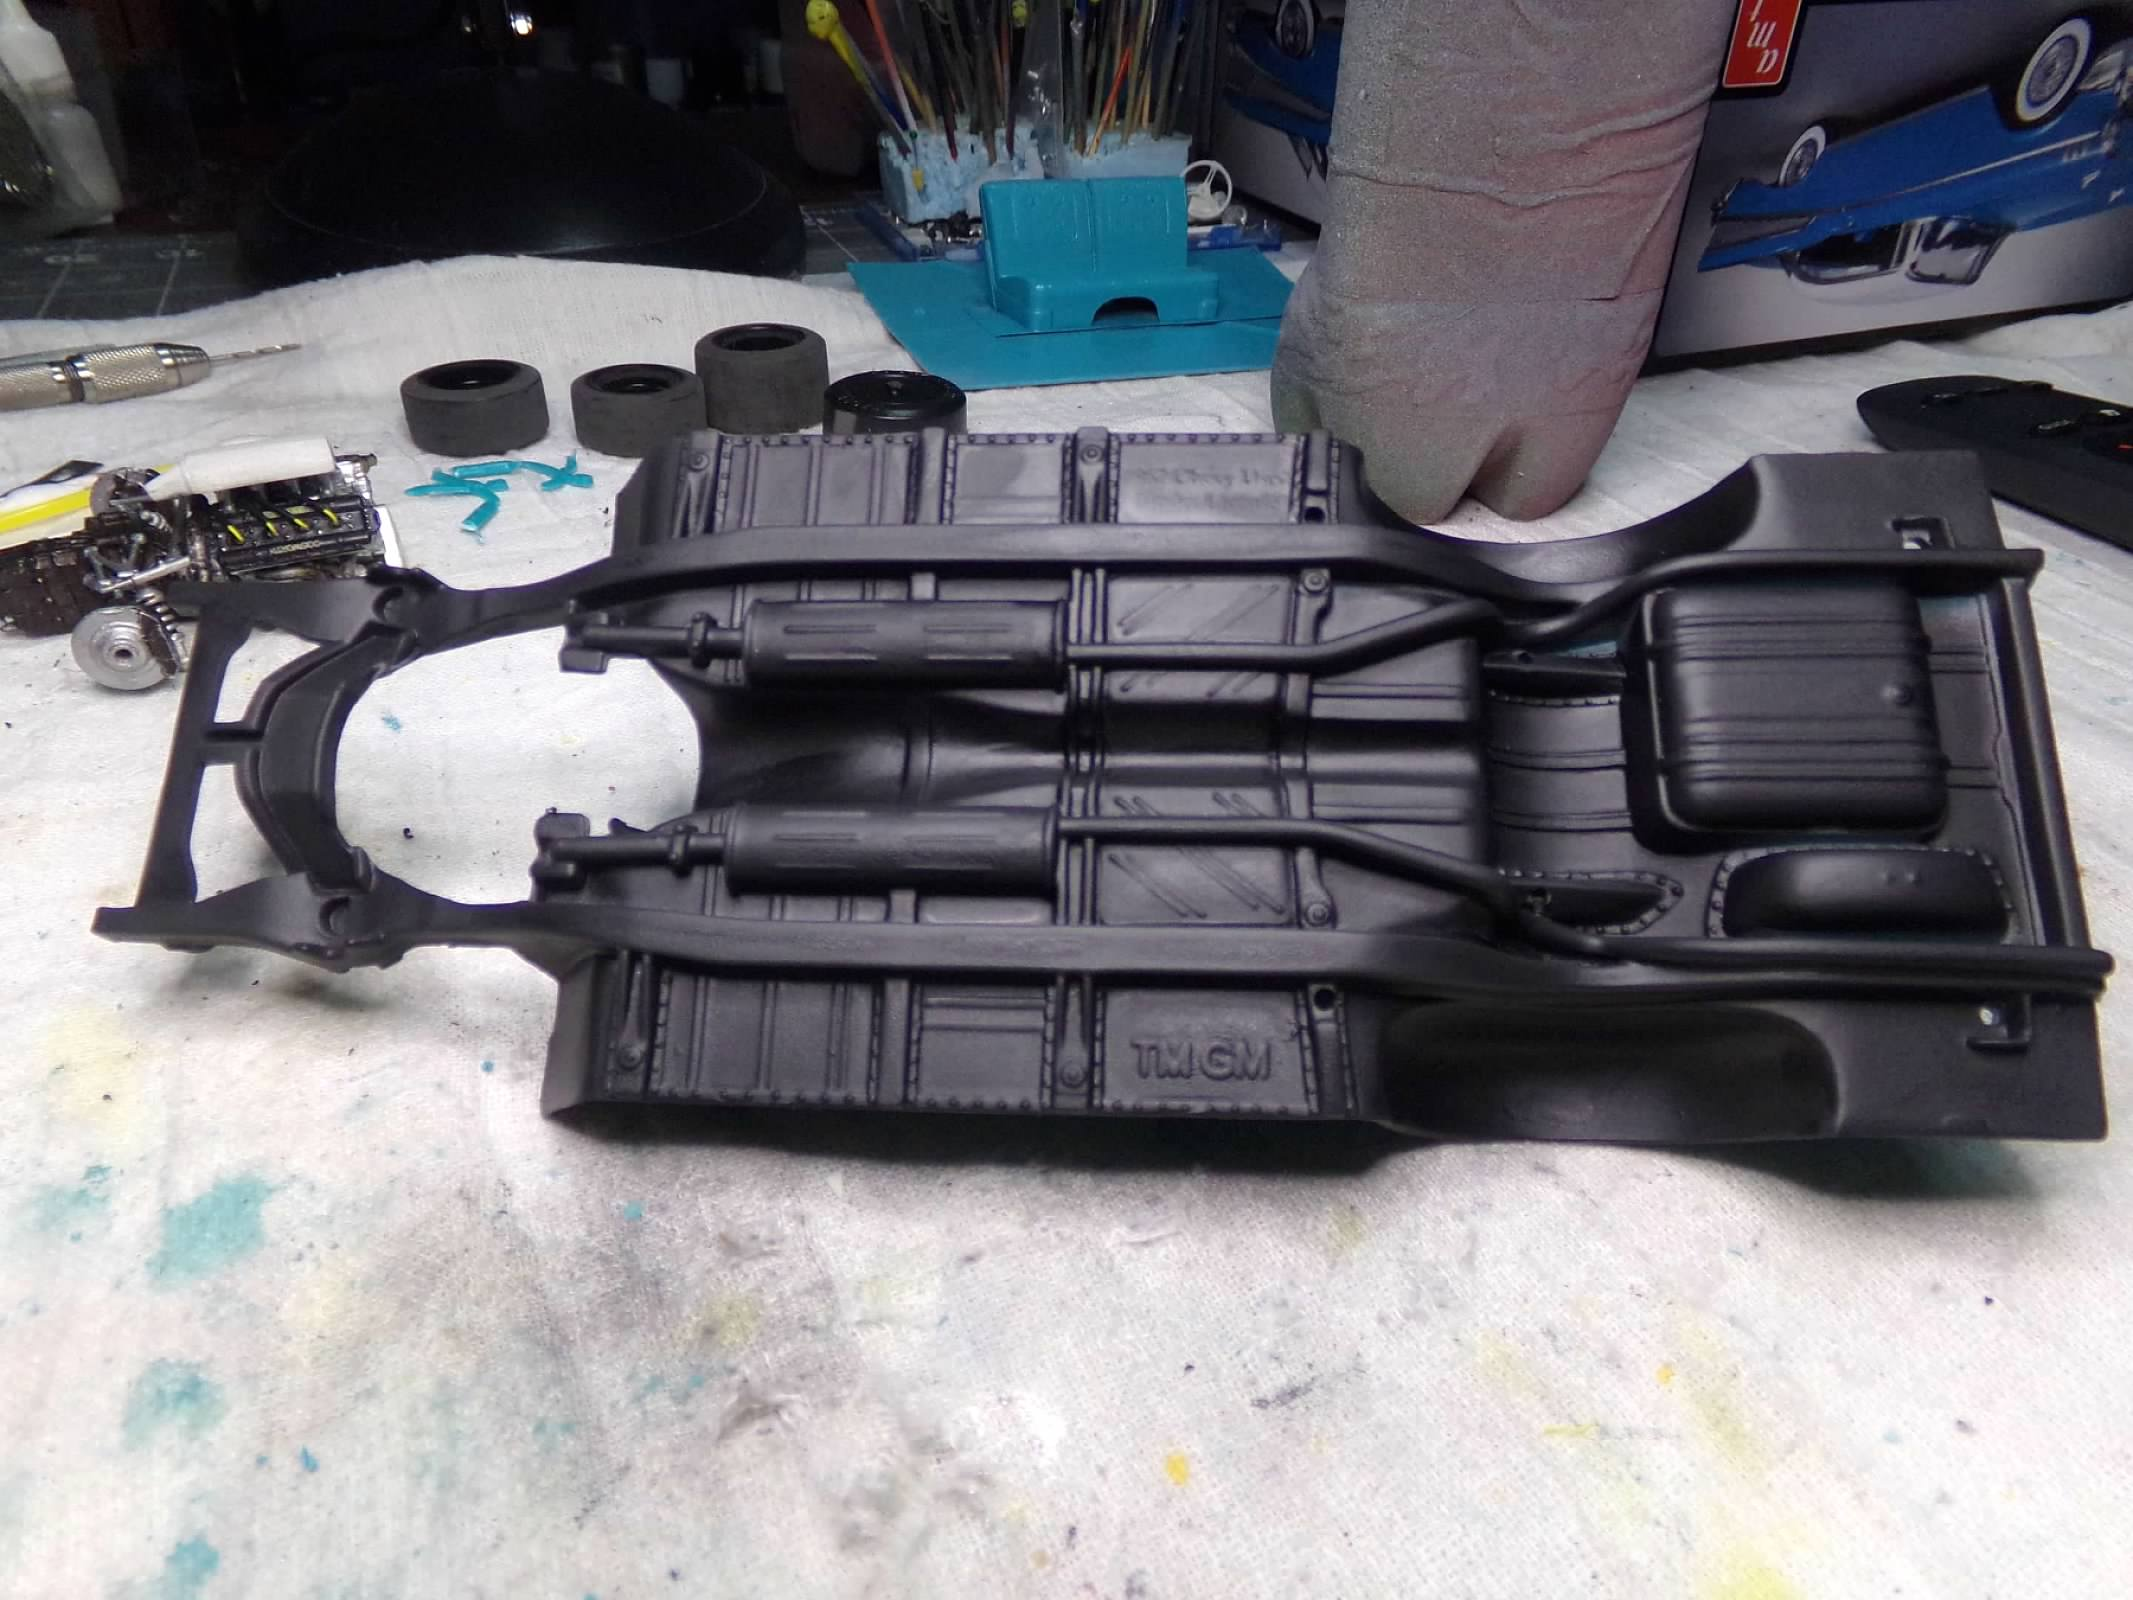
I've built this kit at least a dozen times. I've also built the Revell kits, the AMT Pro Shop kit, and the Monogram kit. I probably have a couple dozen 57 Chevys. I also own a 1:1 57 Chevy Bel Air Sports Coupe so I have a fondness for this car and all the work that went into them to build them (It was a lot of work to rebuild one too!). I saw this on the shelves at HL during 40% off so a $22 kit became about $14 after tax. Couldn't pass it up! It is bare bones, only can be built stock and no extra custom parts, so I thought I would start the year quickly knocking this out. Weather is an issue day to day so I'm hoping I can get it painted before rain Friday and this weekend. I thought about not painting it since the blue plastic looks pretty nice but I've opted to paint it. Tamiya coral Blue, which looks close to Larkspur Blue, with a white top. Same color interior with black seat and door panel inserts. I ran into a problem today with paint. The bottom of the body bubbled up a bit. Maybe too heavy on paint but I did it the same way I always do. Maybe the 65 degree temp had something to do with it. Humidity was OK at about 50%. So I have sanded out the bottom of the body and I'll touch up tomorrow and hope it all turns out OK. All other parts are painted OK. The finish on the frame looks great. Its Brite Touch black primer which I really liked. I say liked because Sherwin Williams has quite producing it and they were getting $9.95 for a 10 oz can ($5 before Biden) which is comparable to Dupli-Color primer at $12 for a 12 oz can. Paint is really getting expensive. Anyway, here are some photos. Thanks for looking!
-
Looks like a fun conversion, Tom! Keep up the good work! ??
-
Thanks, All! I appreciate your comments! ?
-
Thanks, All! I appreciate your comments! ?