carl63_99
-
Posts
211 -
Joined
-
Last visited
Content Type
Profiles
Forums
Events
Gallery
Everything posted by carl63_99
-
chassis looks perfect now!
-
Looks really nice. I sure hope you remove the "TM GM" on the bottom of the chassis.
-
For the life of me, I don't remember. I think they were in an old MPC kits but no way to know for sure.
-
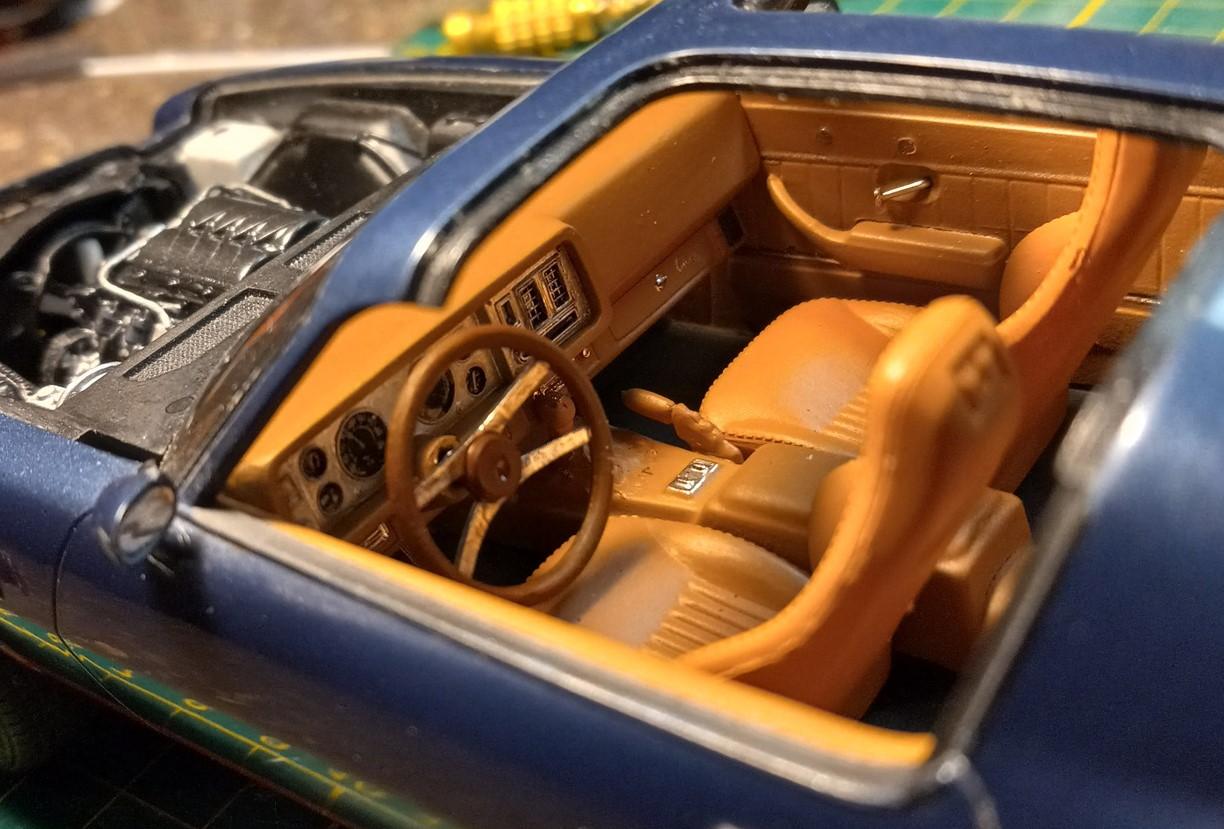
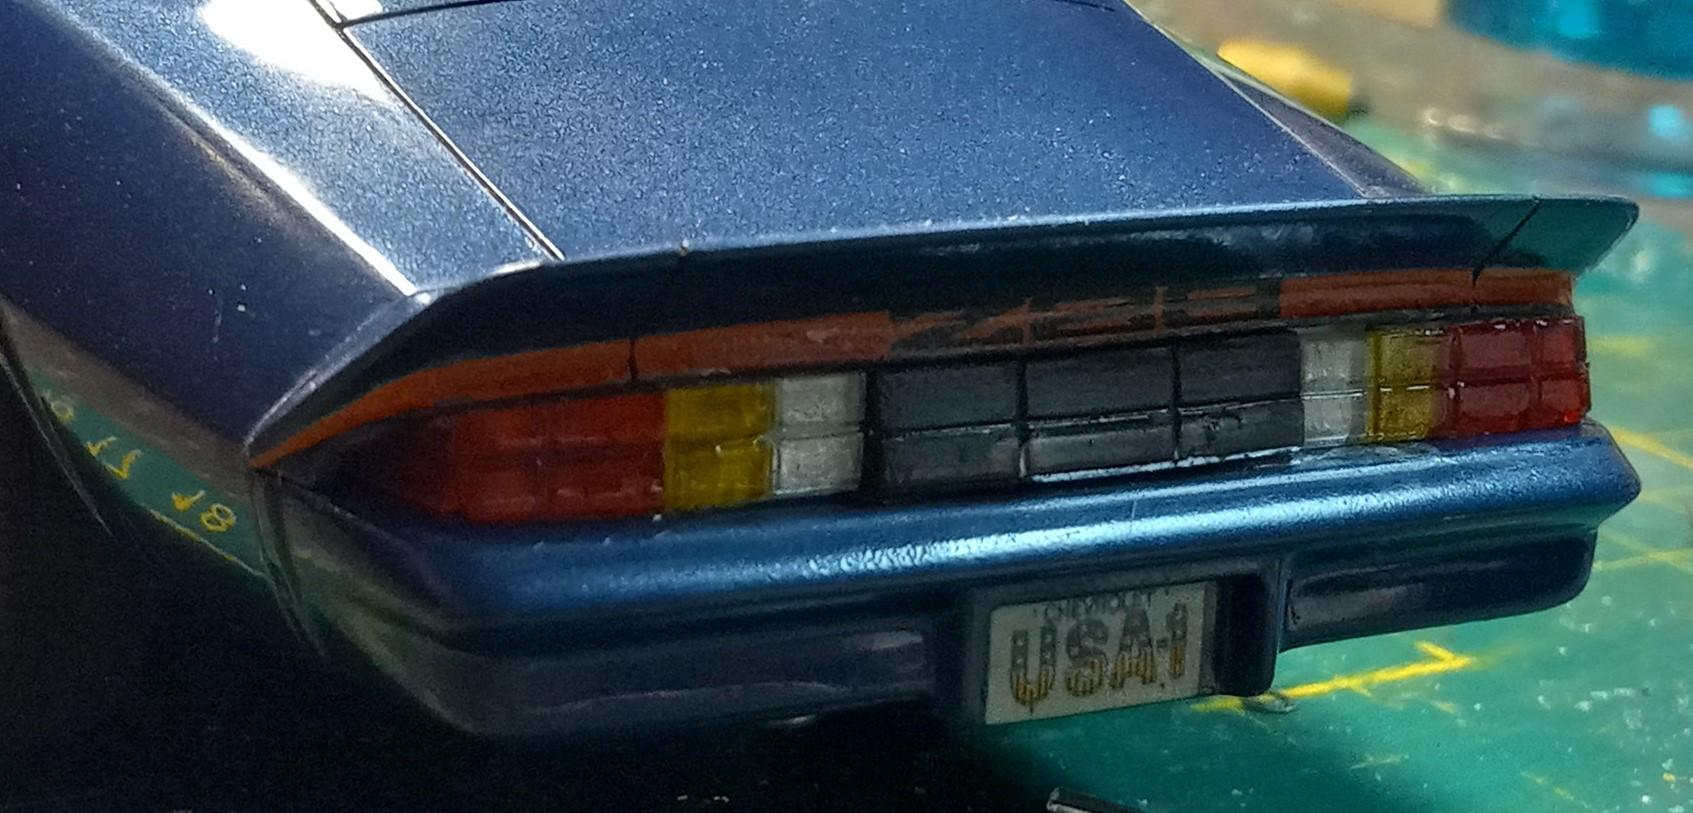
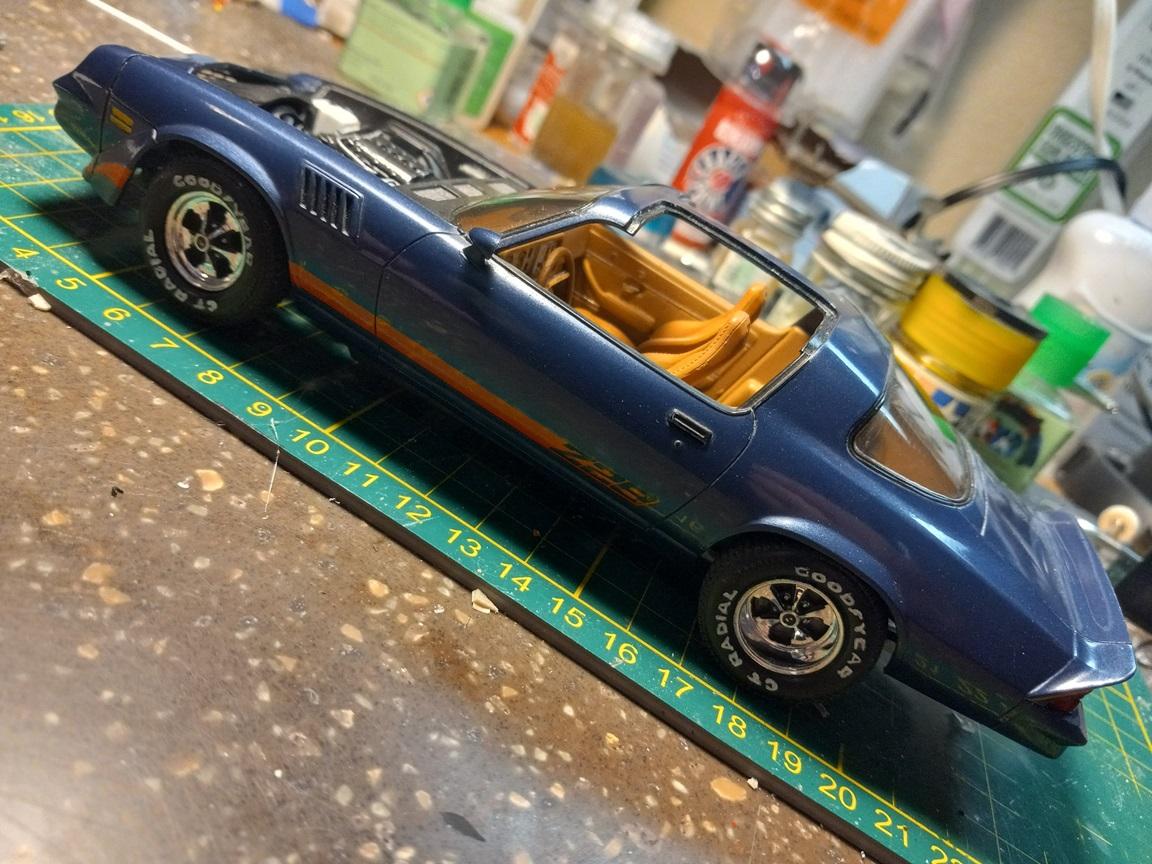
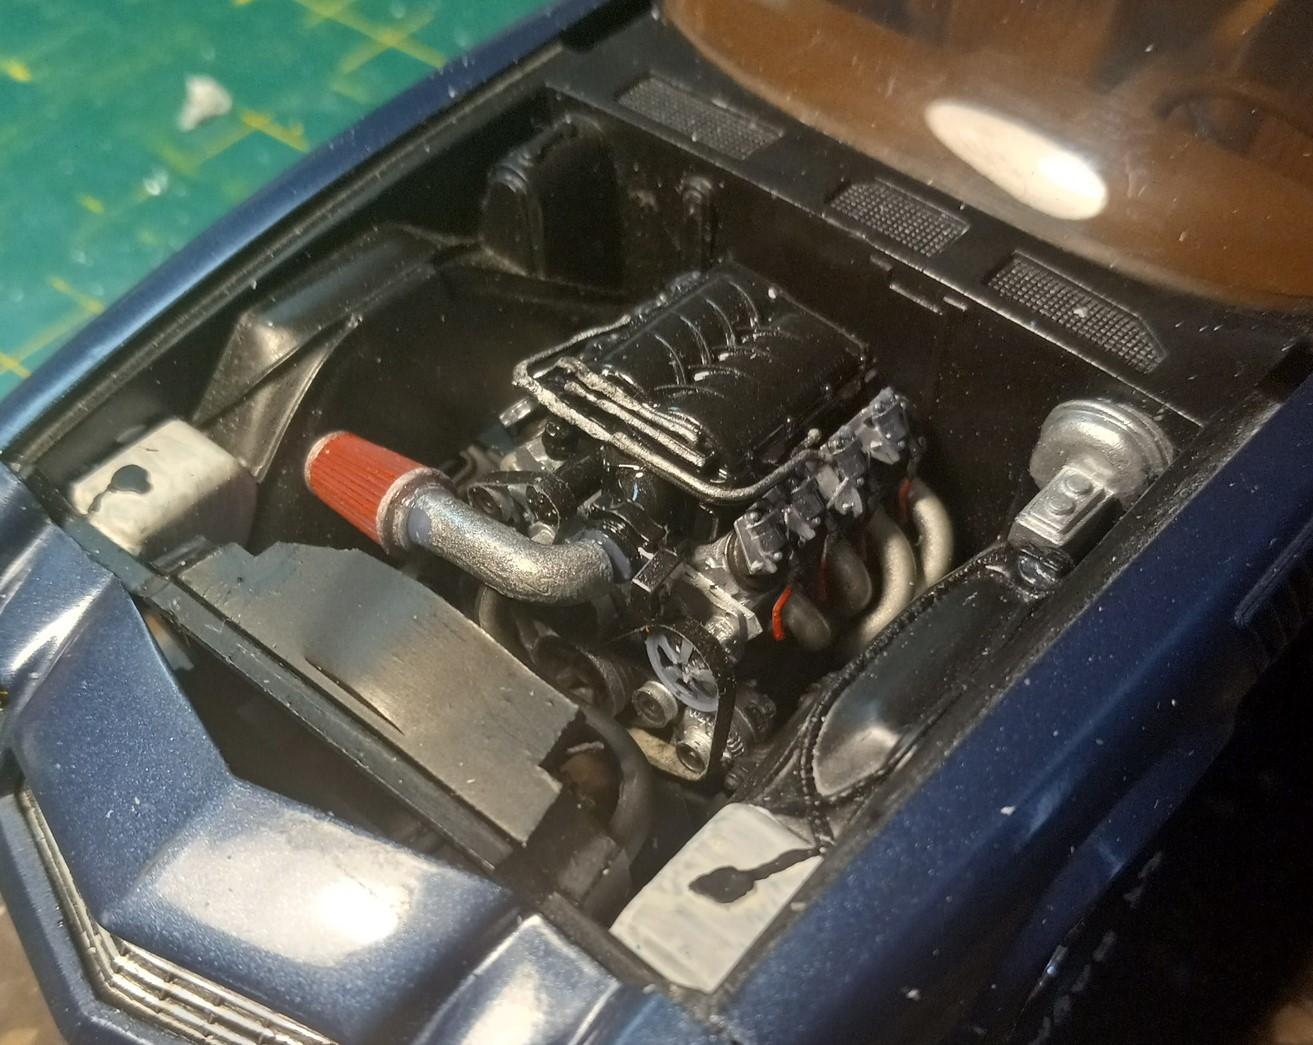
A few months back I did a tutorial where I opened the grill on this Z28 that I had built about 25 years ago. After finishing the grill I decided the car really needed some updates. I got a 3D printed supercharged LSX engine for it, redid the interior from gray to this tan mix. I opted for Corvette seats. The tail lights were done in a dark smoke color which I never liked. I found clear 1985 Camaro tail lights in my parts supply and cut them down to fit. I do have to mount an exhaust, but need to hit the store for materials for that. Done for now!

-
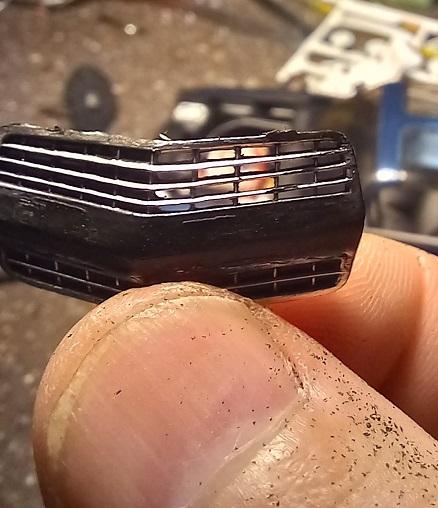
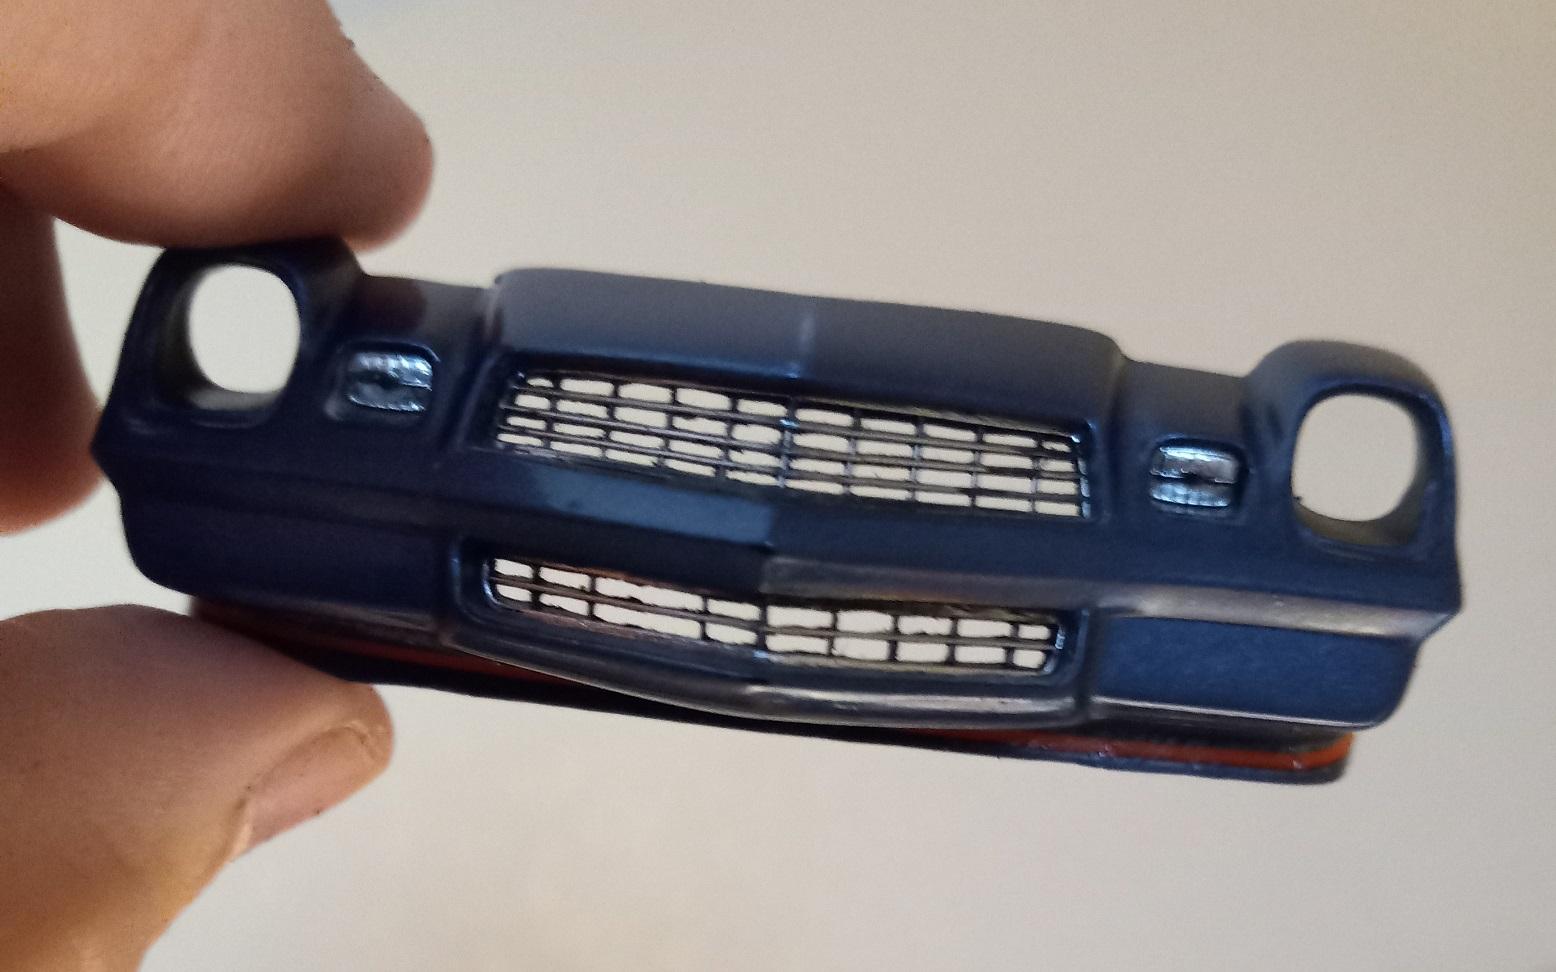
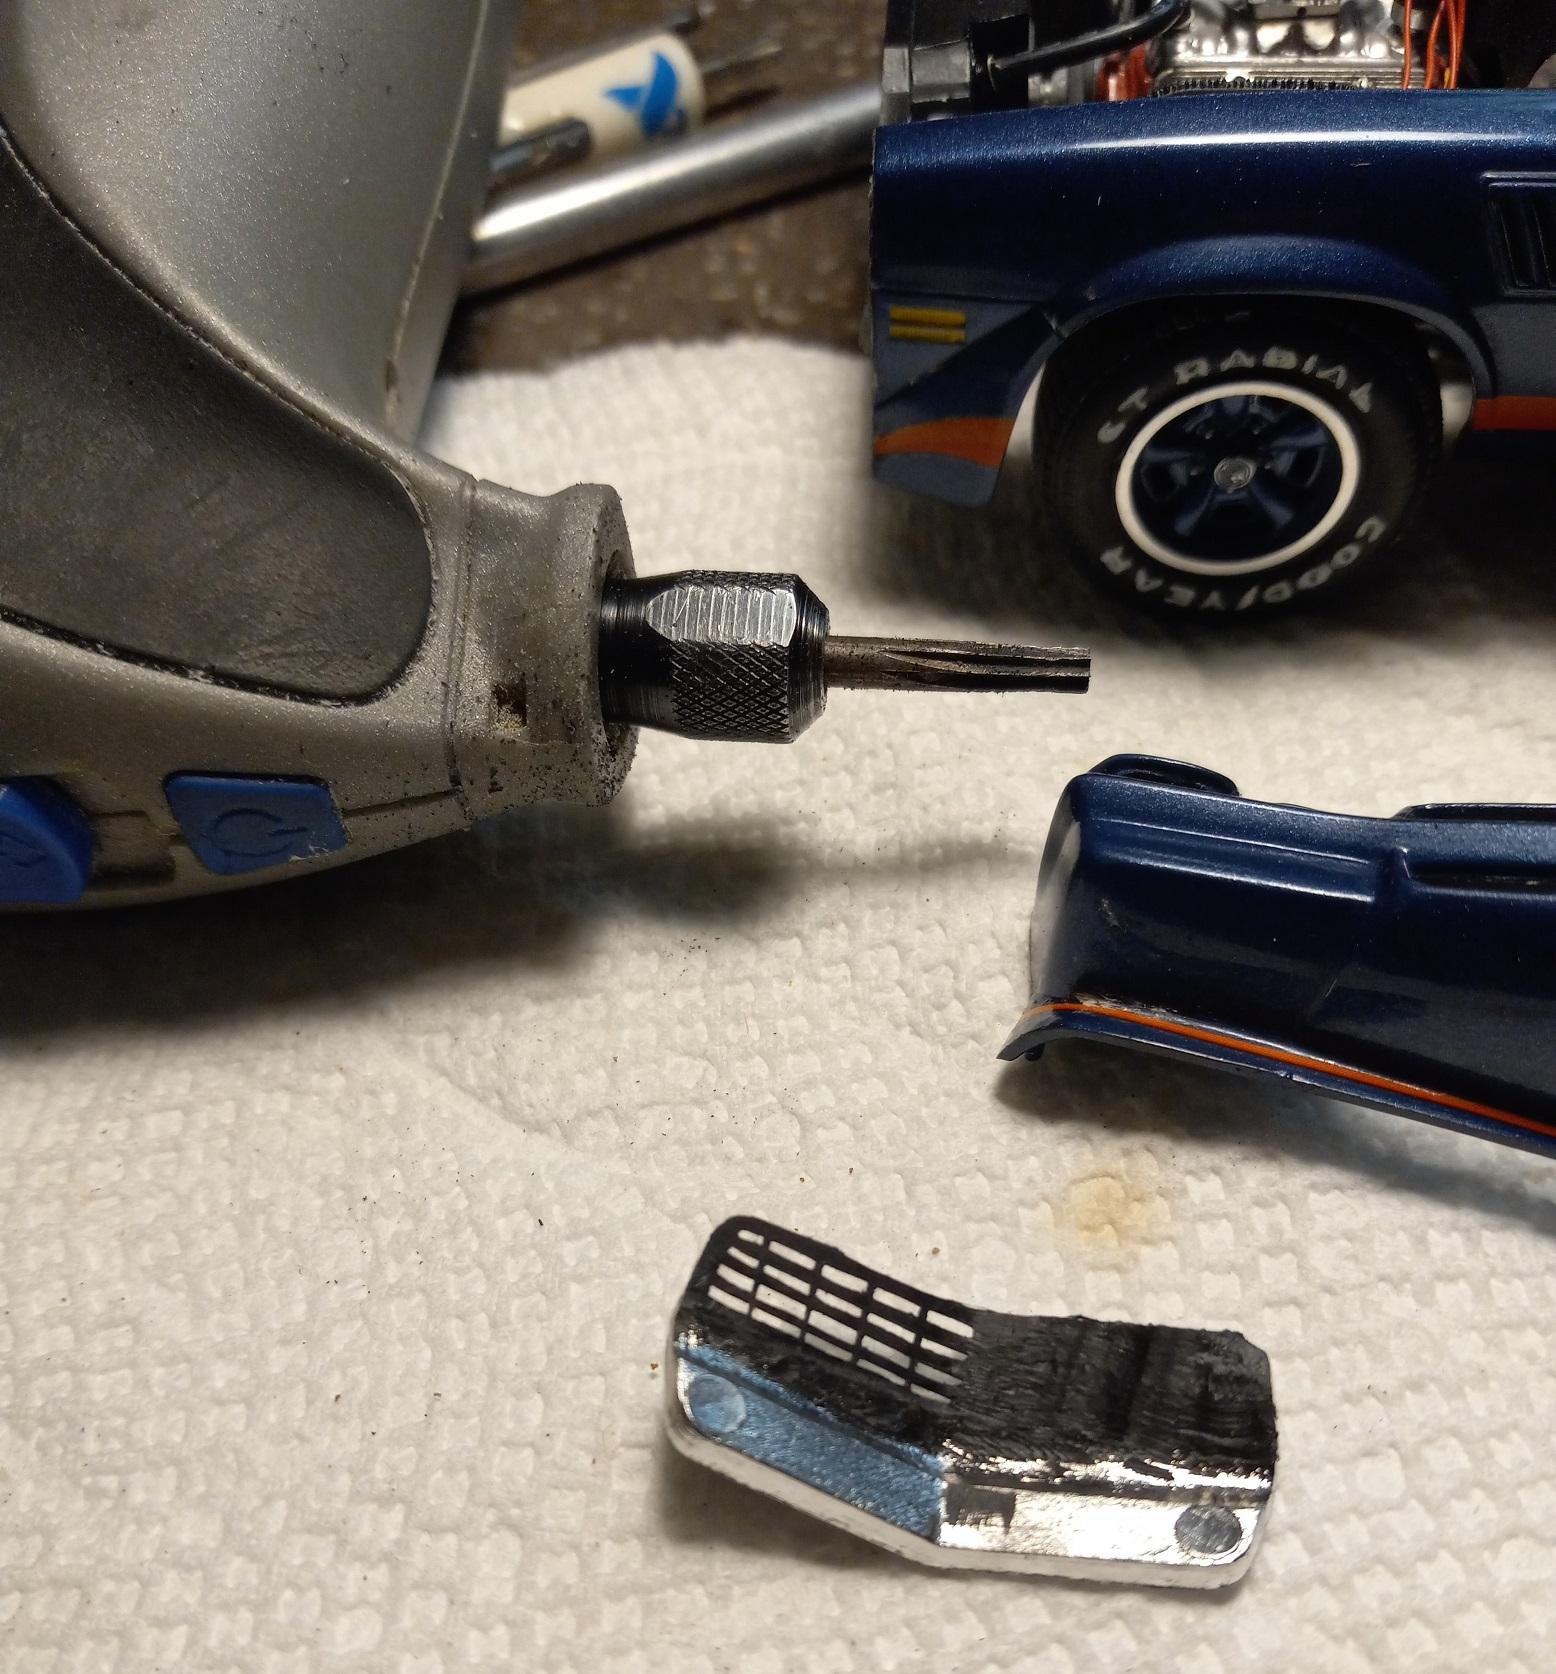
 Opening up grills and other openings really enhances the look of model cars. I use a Dremel on low speed and slowly grind away the backside of the grill until you start to see the chrome. Then, using a fresh-bladed X-Acto gently cut away until all the openings are clean and free of any stray plastic. You can paint the grill afterwards. This allows for you to see through the grill, unlike how the model came from the box.
-
Who doesn't love a mock-up? Let's see yours!
carl63_99 replied to Belairconvertable's topic in WIP: Model Cars
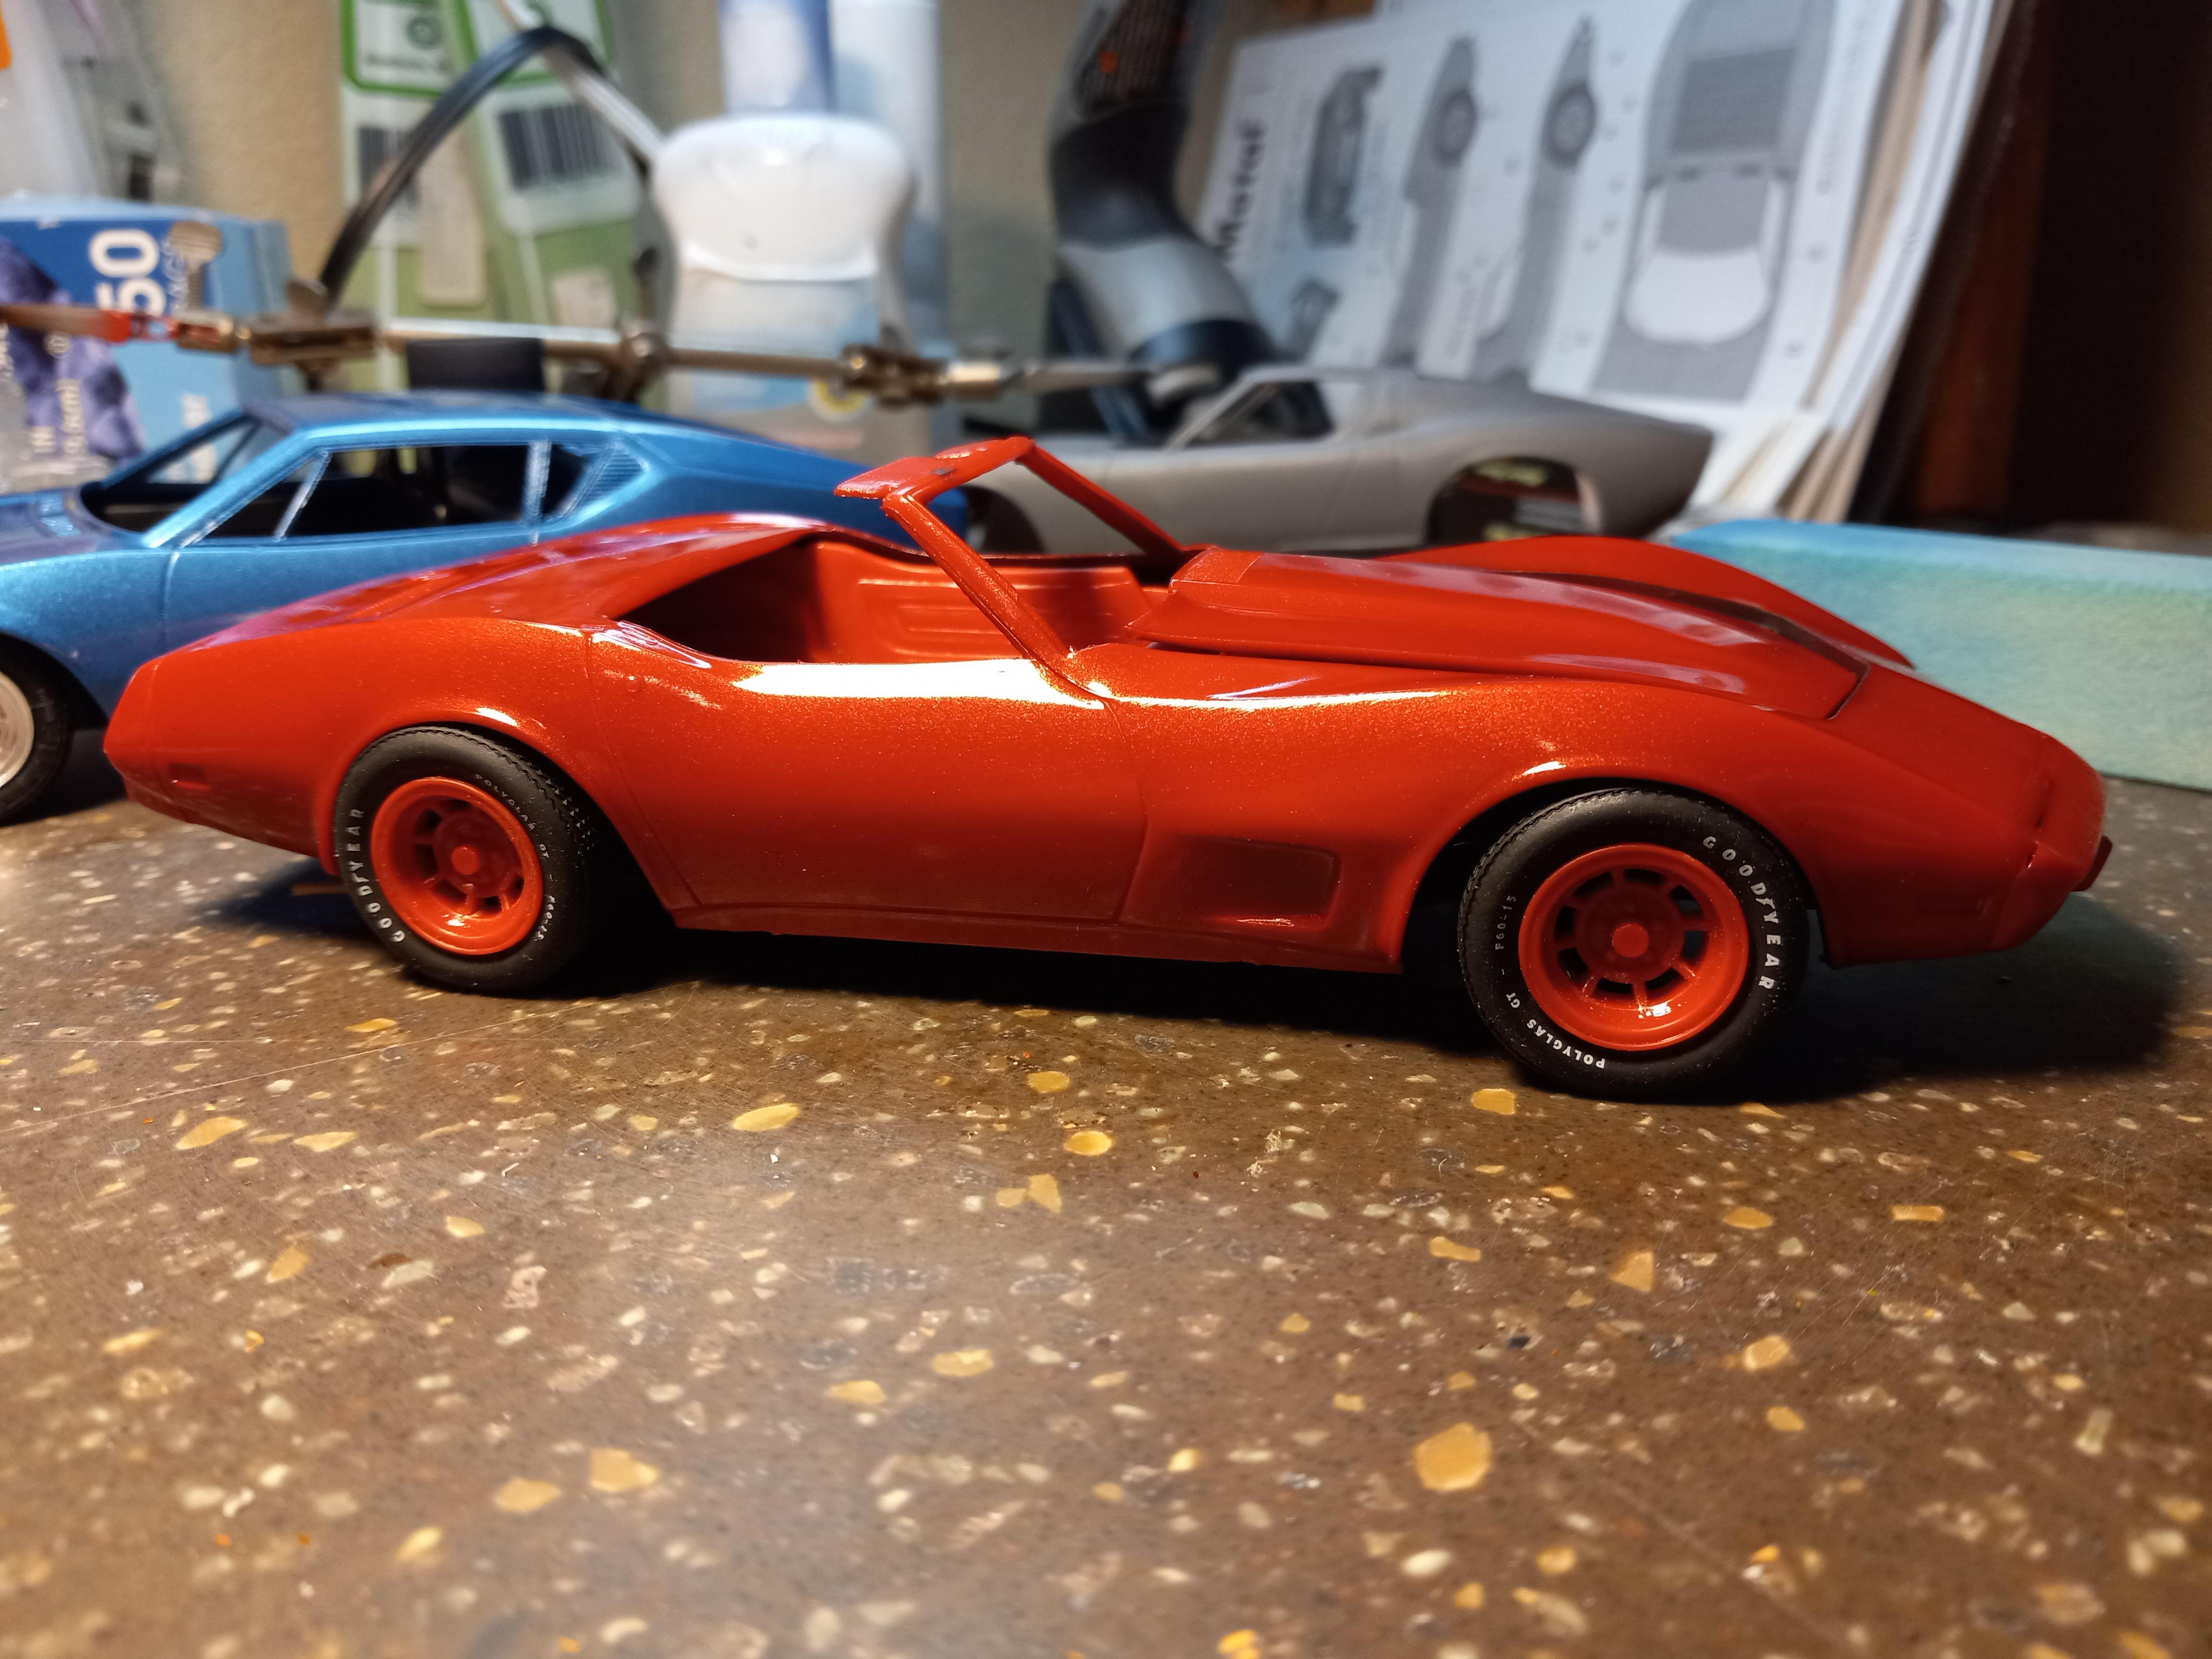
75 MPC Vette. Tires came from I dunno where, but going bias-ply for the white lettering. Dechromed the wheels to repaint flat aluminum.
-
No, it's the screen that comes with many Tamiya kits. I have a few pieces of it, been using it for many projects over the years.
-
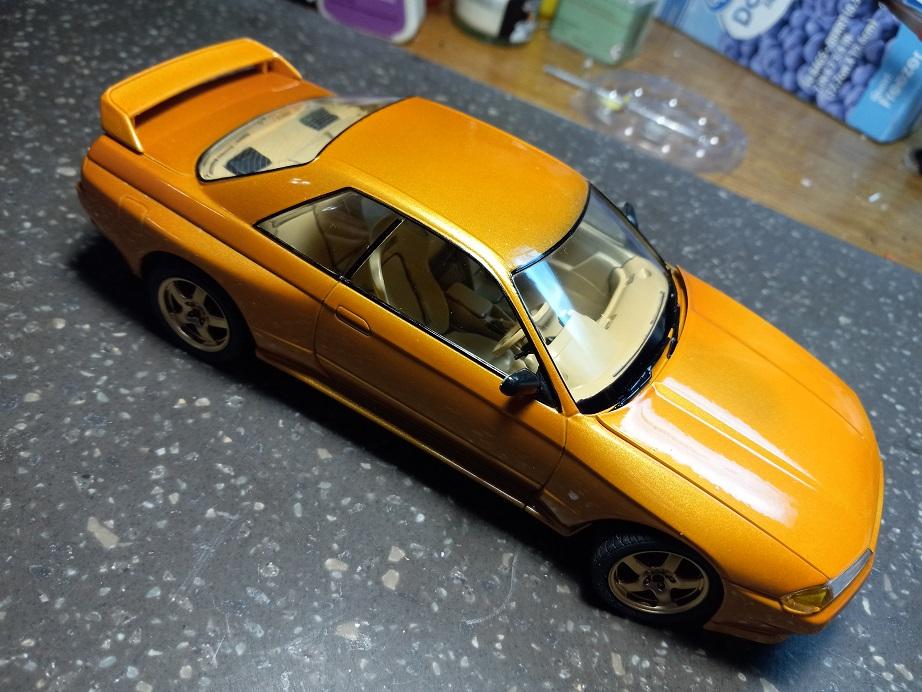
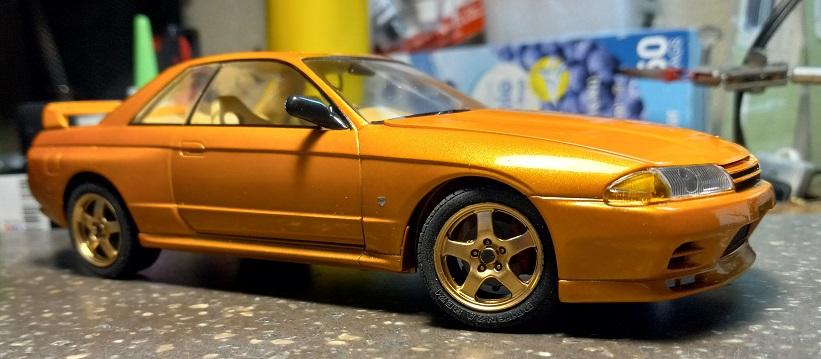
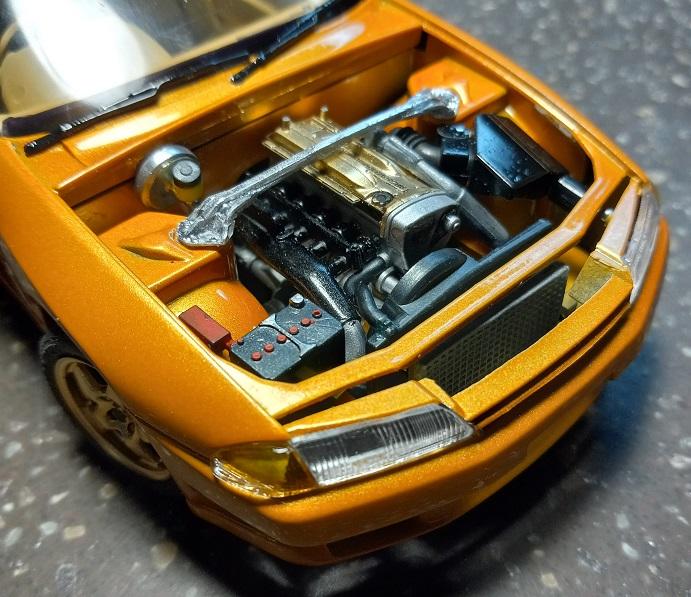
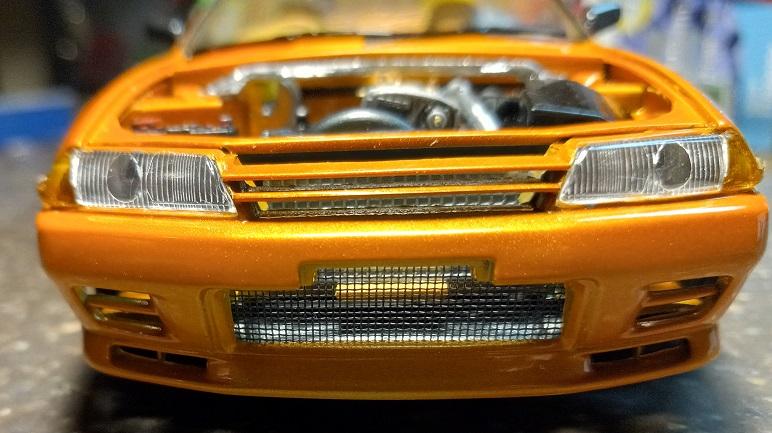
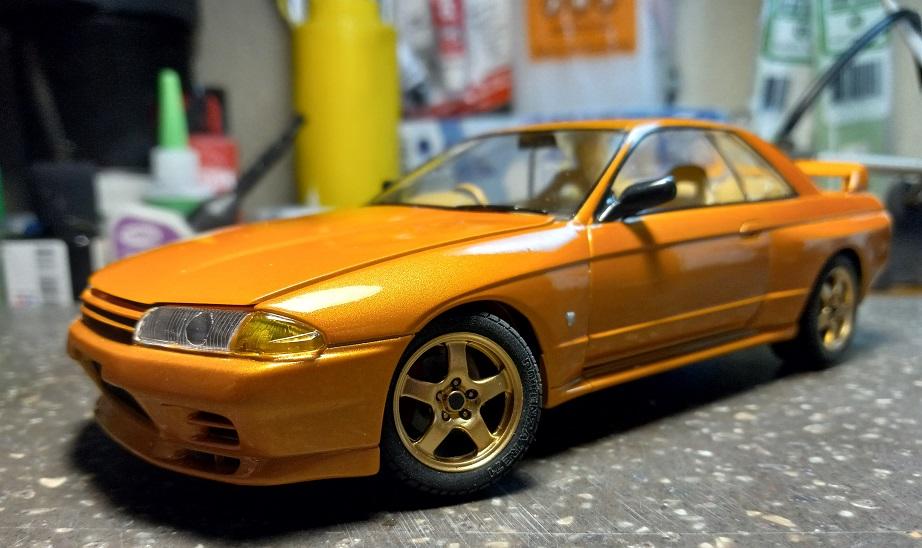
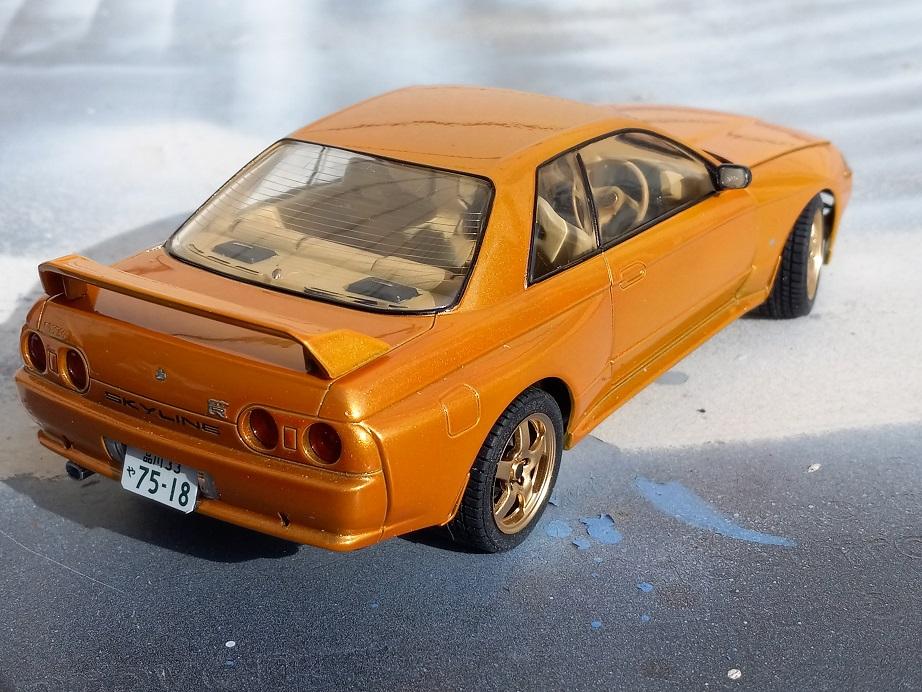
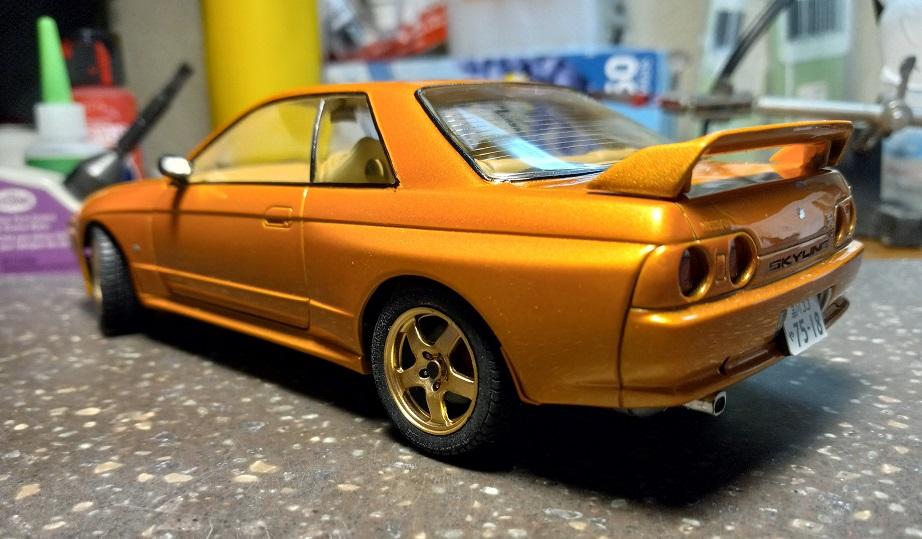
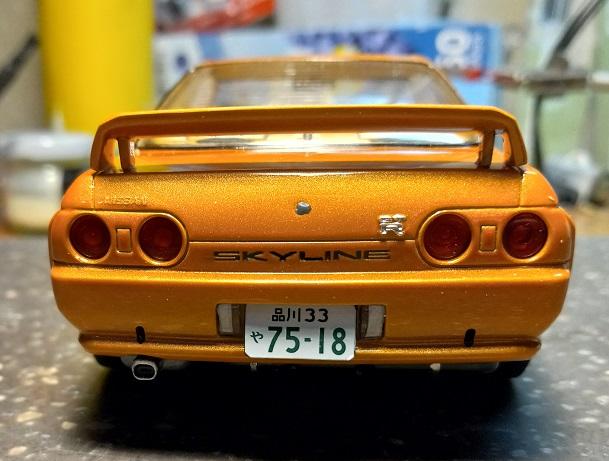
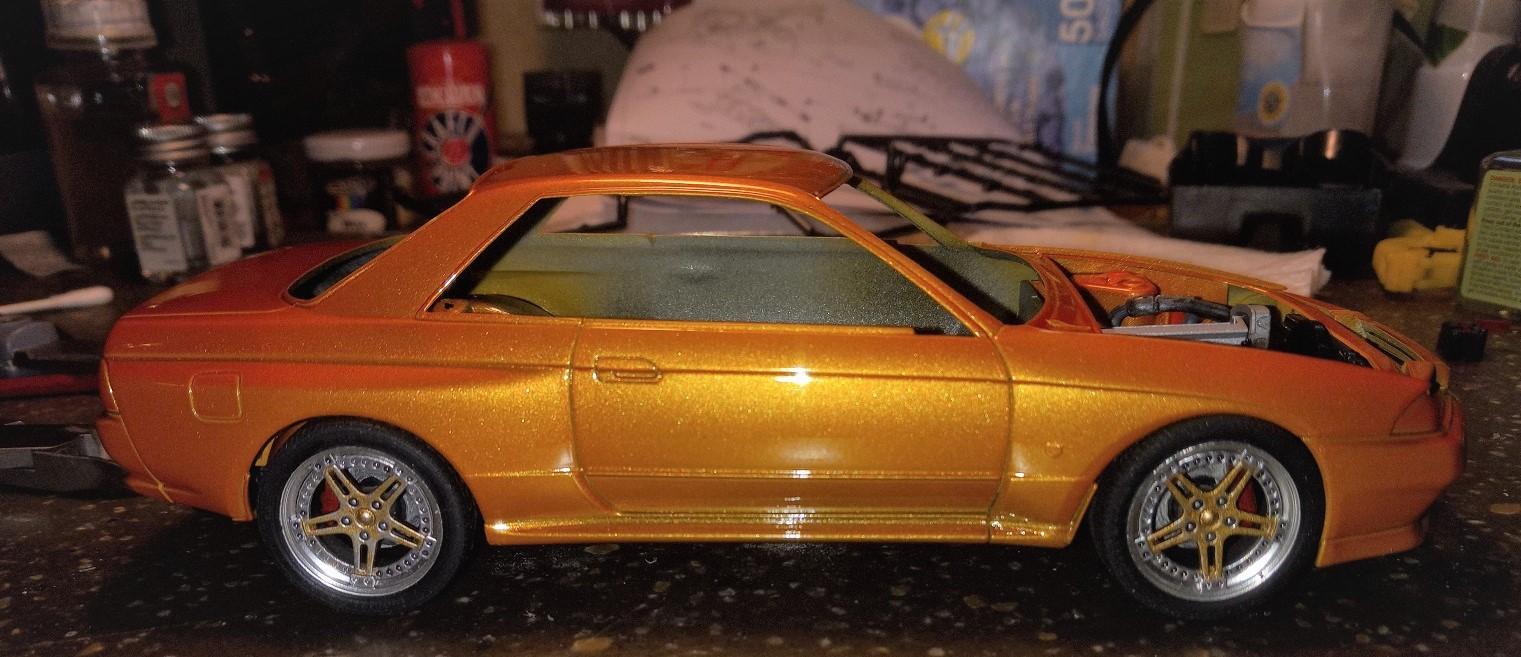
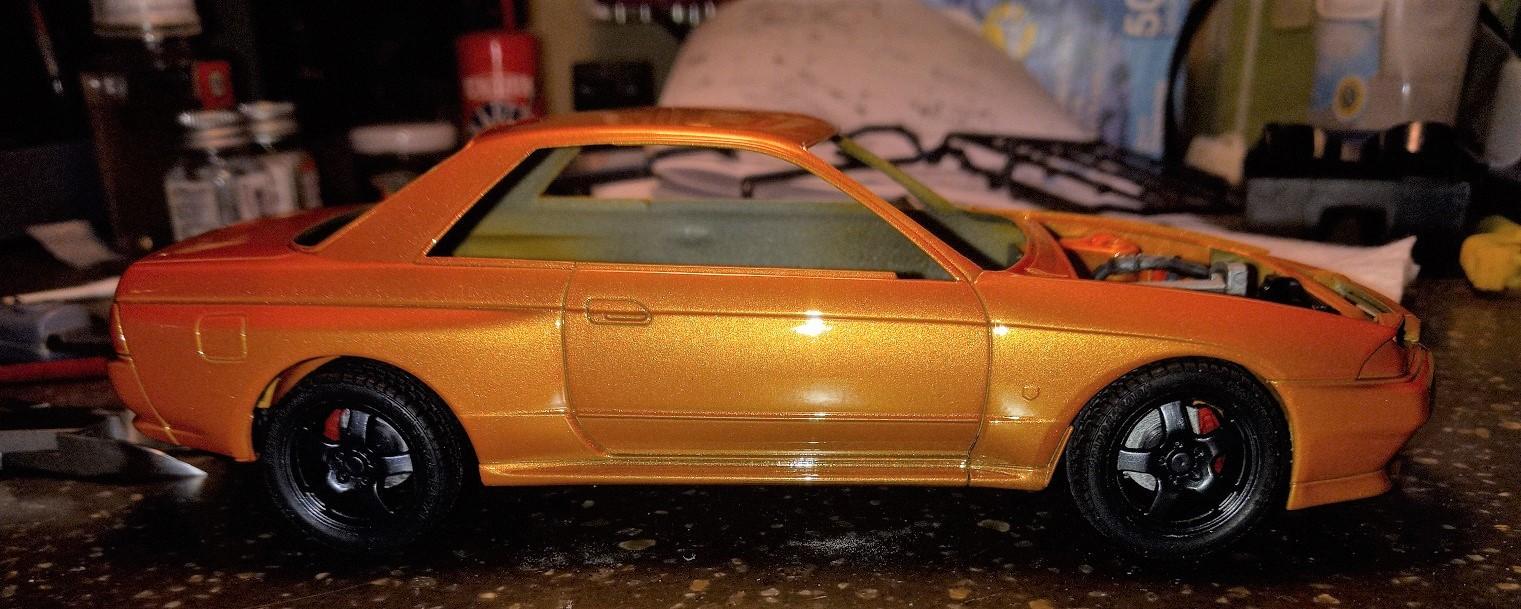
Just finished the Tamiya Nissan GT-R. What a lovely kit, everything goes together so nice, alignment was perfect, zero problems. Color is a custom mix of Testors turn signal amber metallic with stoplight red metallic and a pinch of white pearl. Pics don't do the color justice, it pops in sunlight. Only mods I did were heat shield on the catalytic converter and screen and intercooler in front.
-
Who doesn't love a mock-up? Let's see yours!
carl63_99 replied to Belairconvertable's topic in WIP: Model Cars
Tire testing. I did most of the build of the chassis already, didn't take enough pics. Going with stock tires painted gold.
-
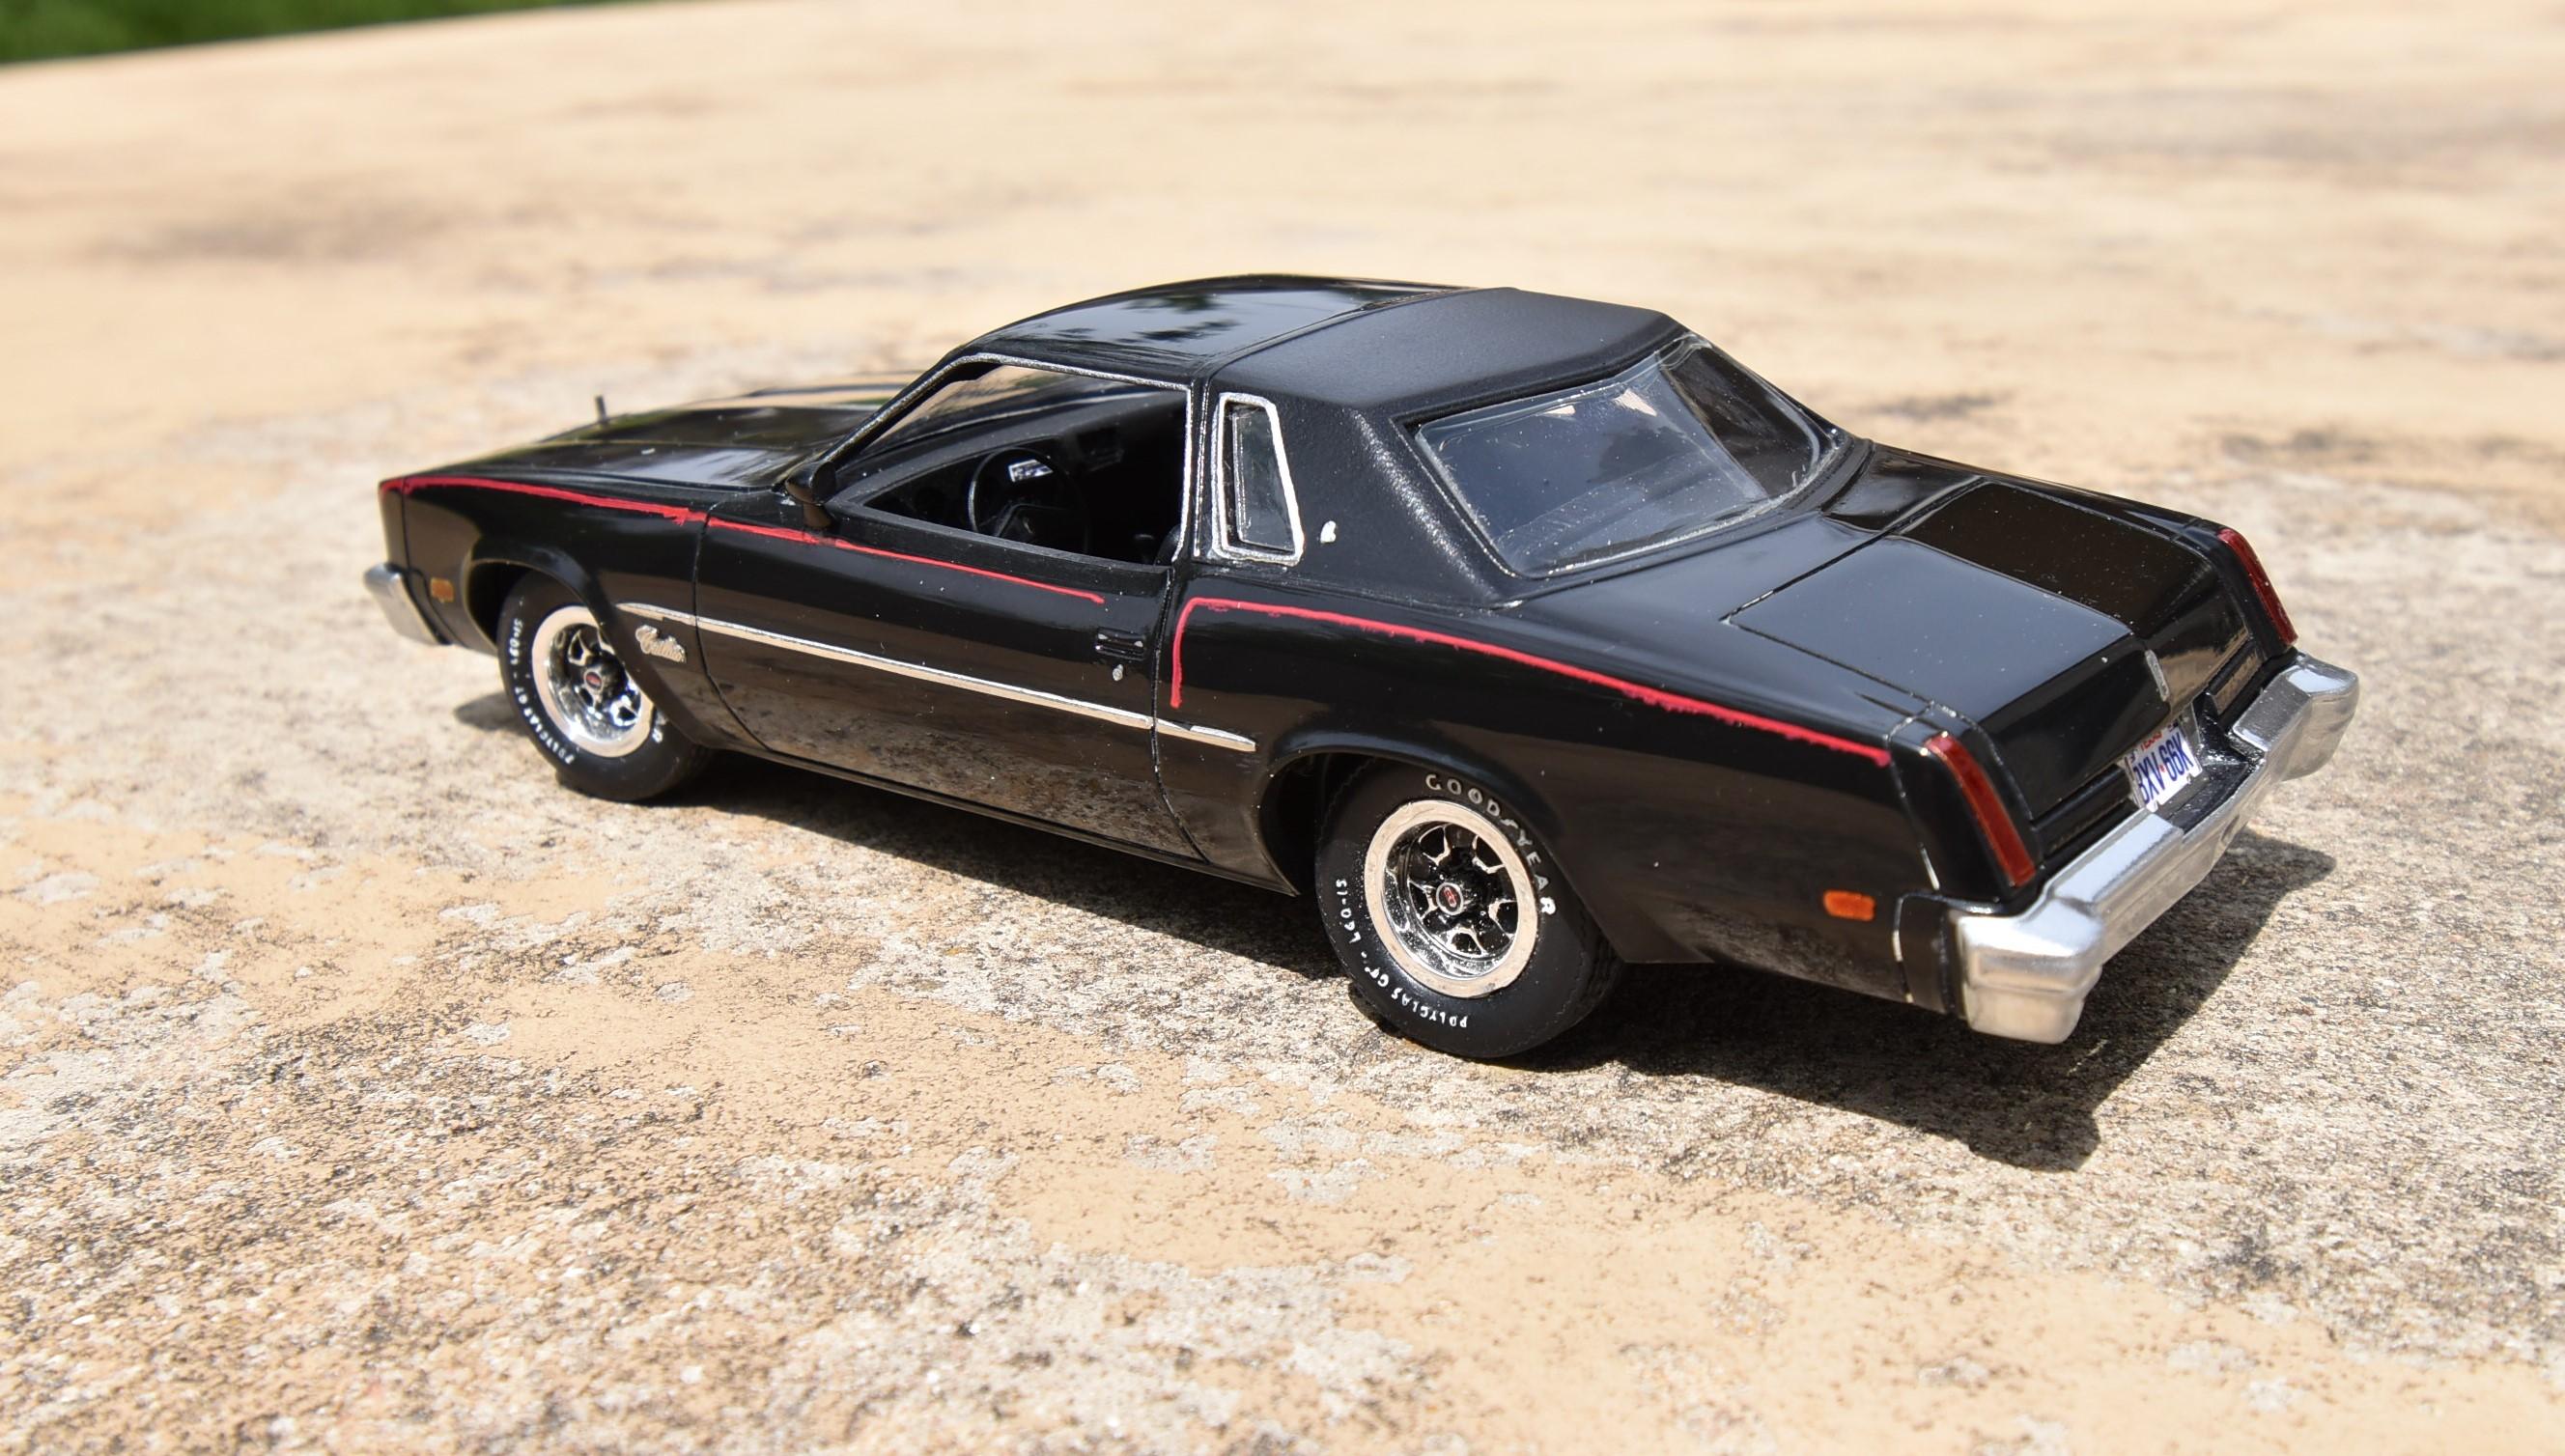
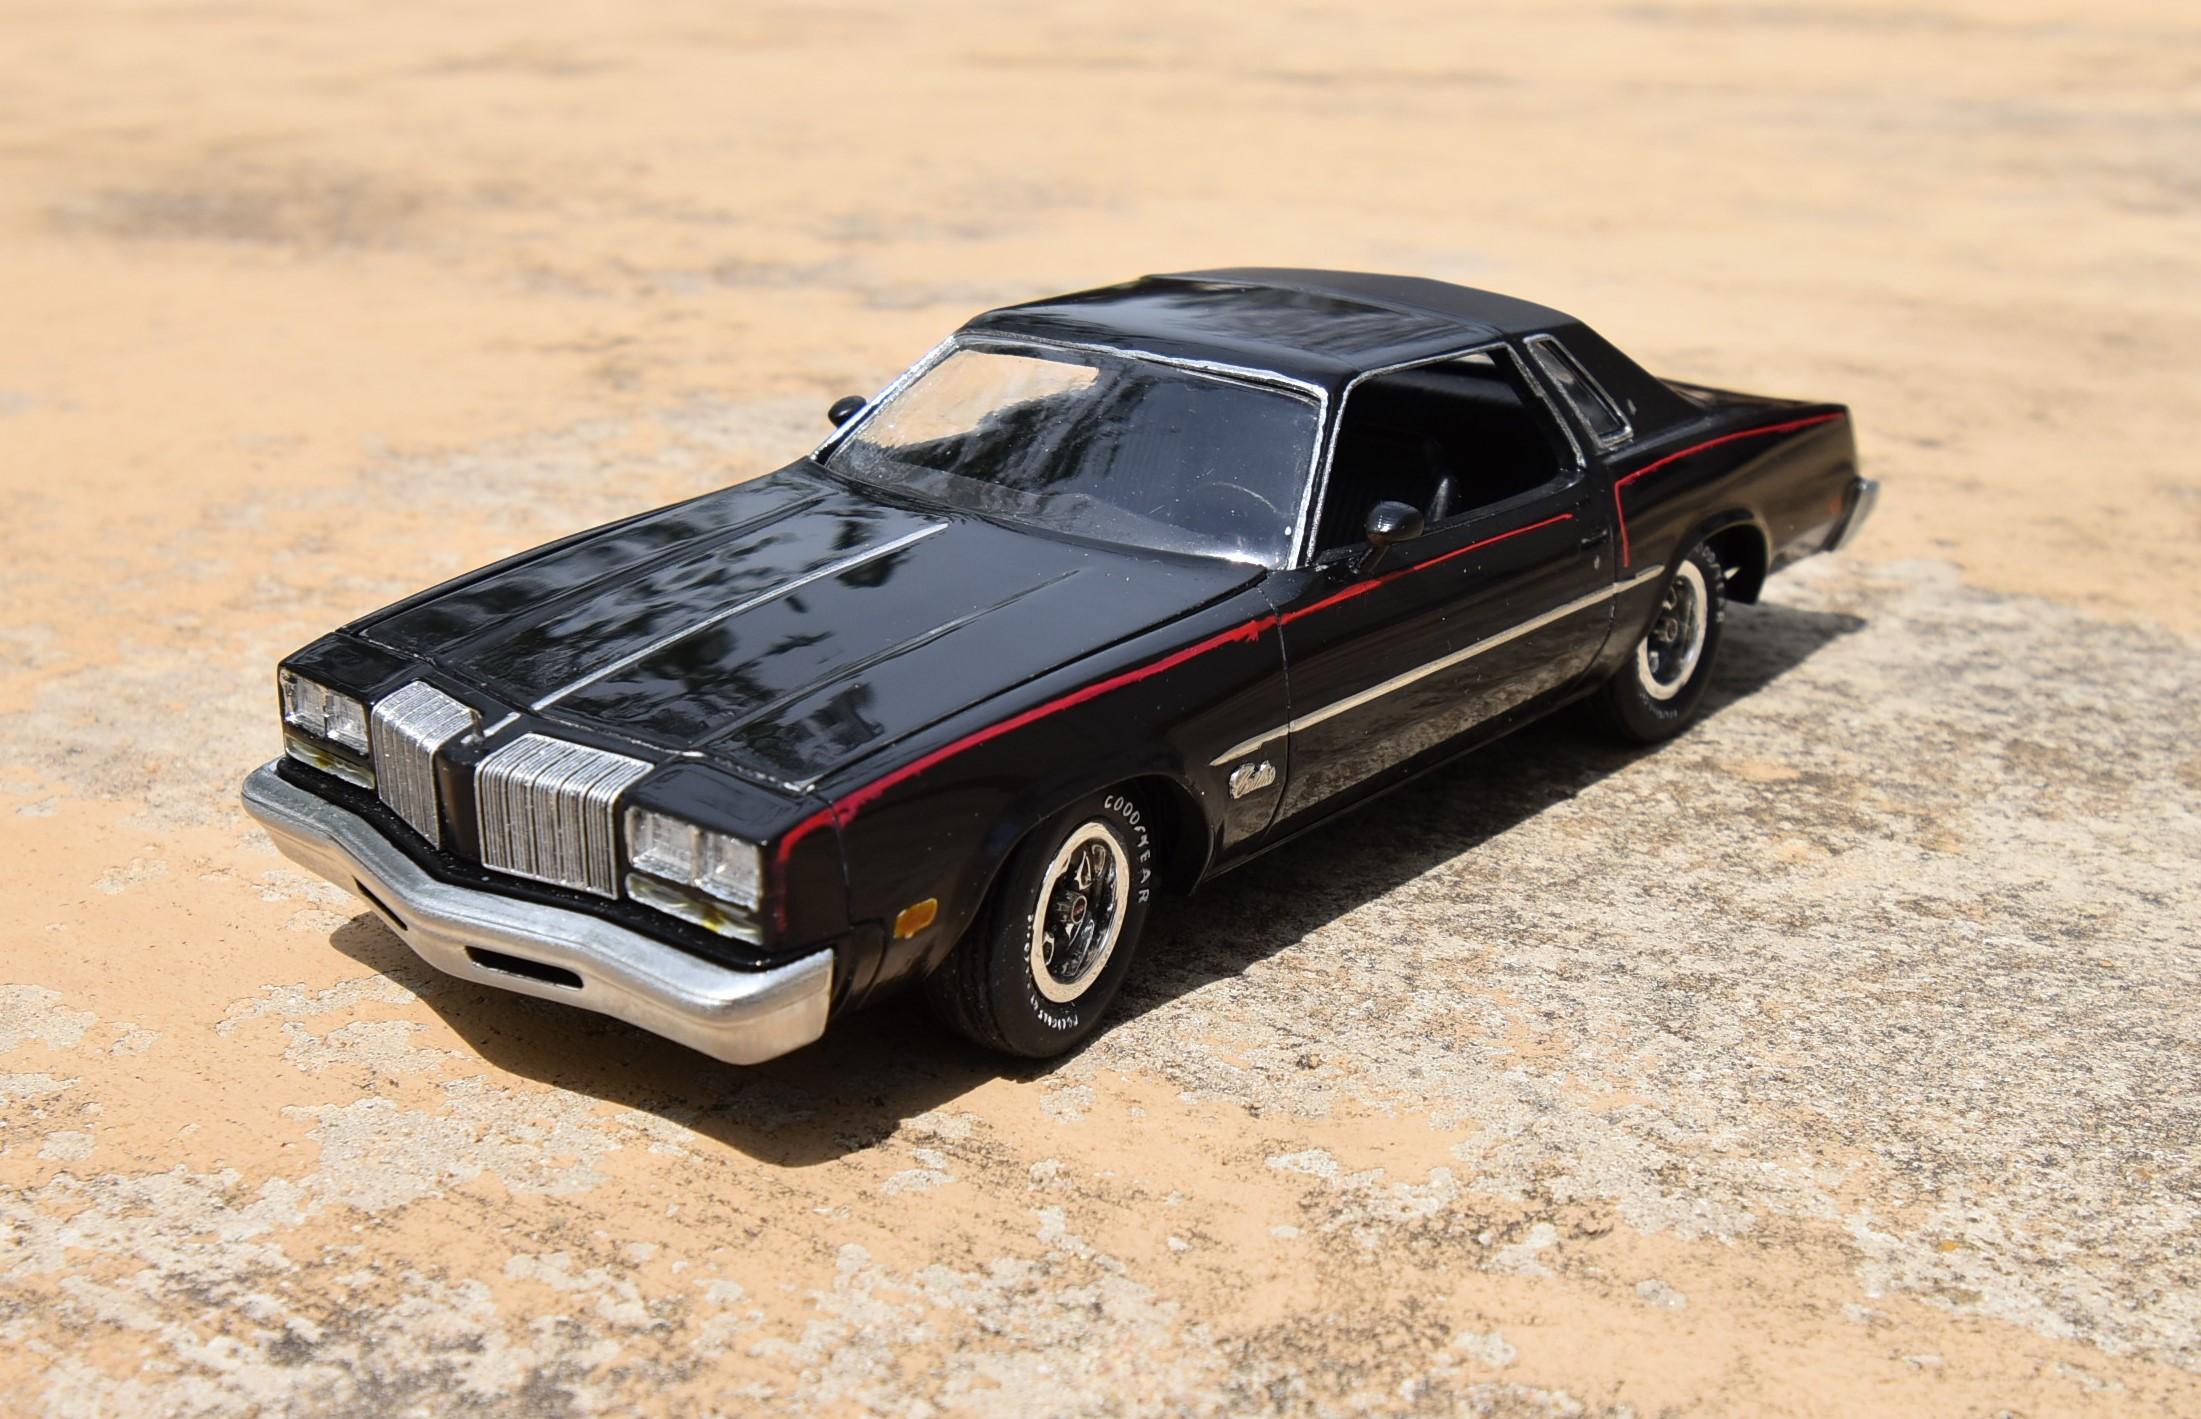
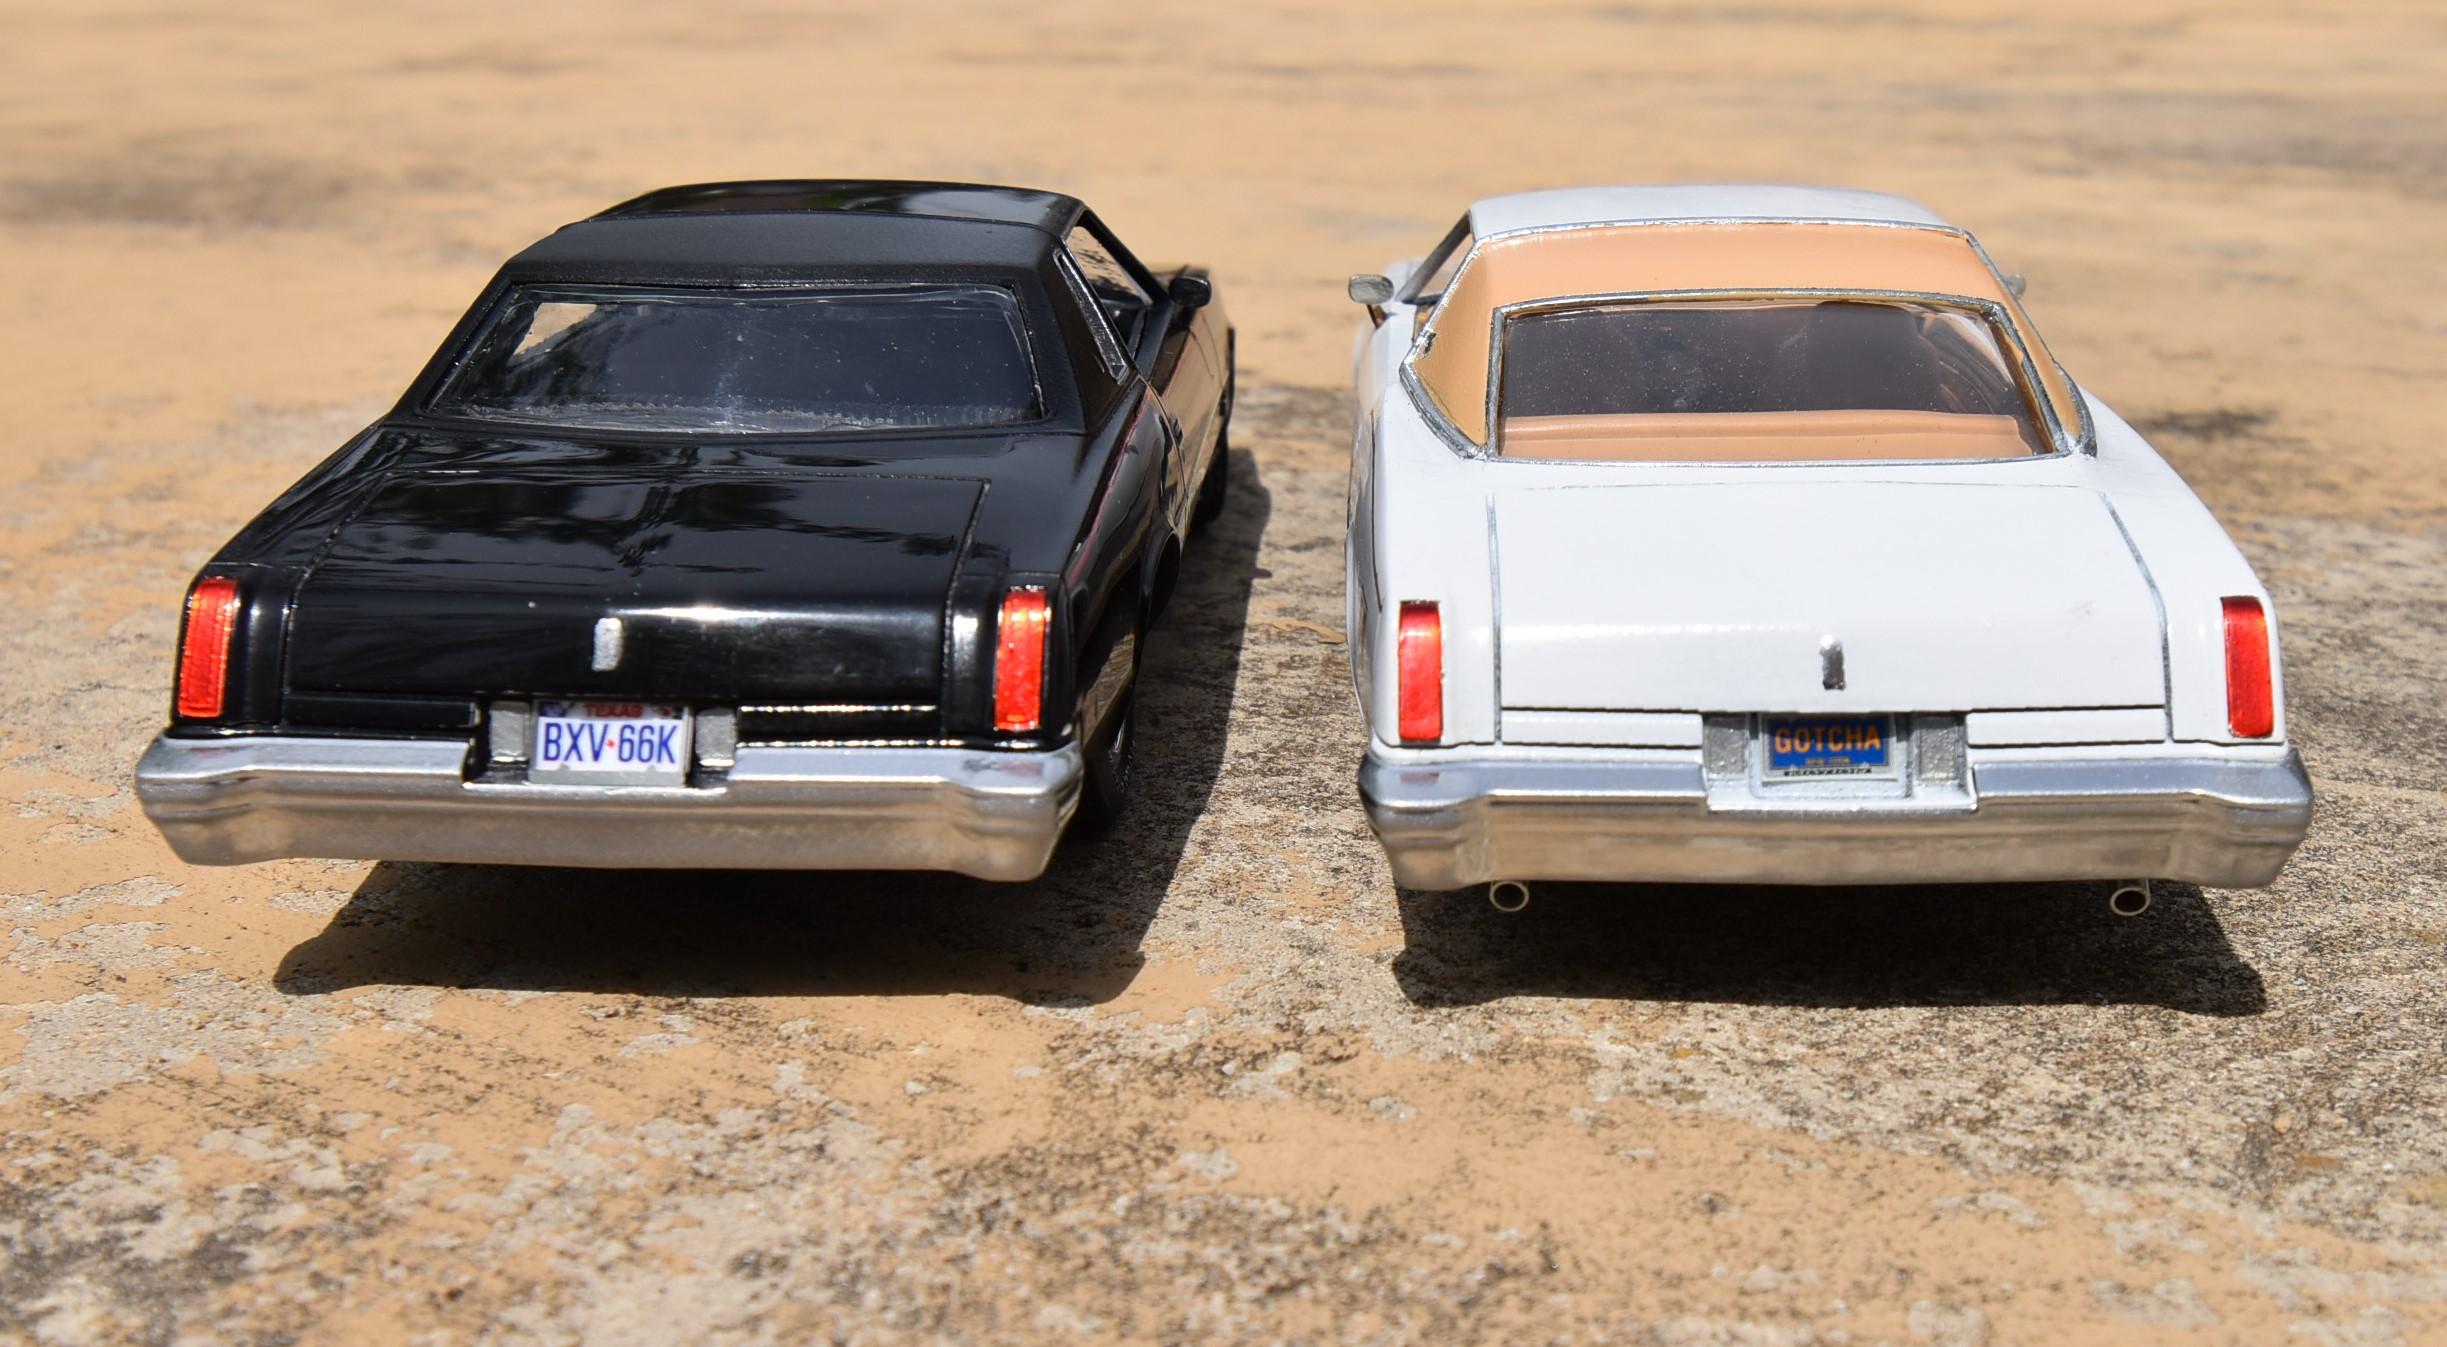
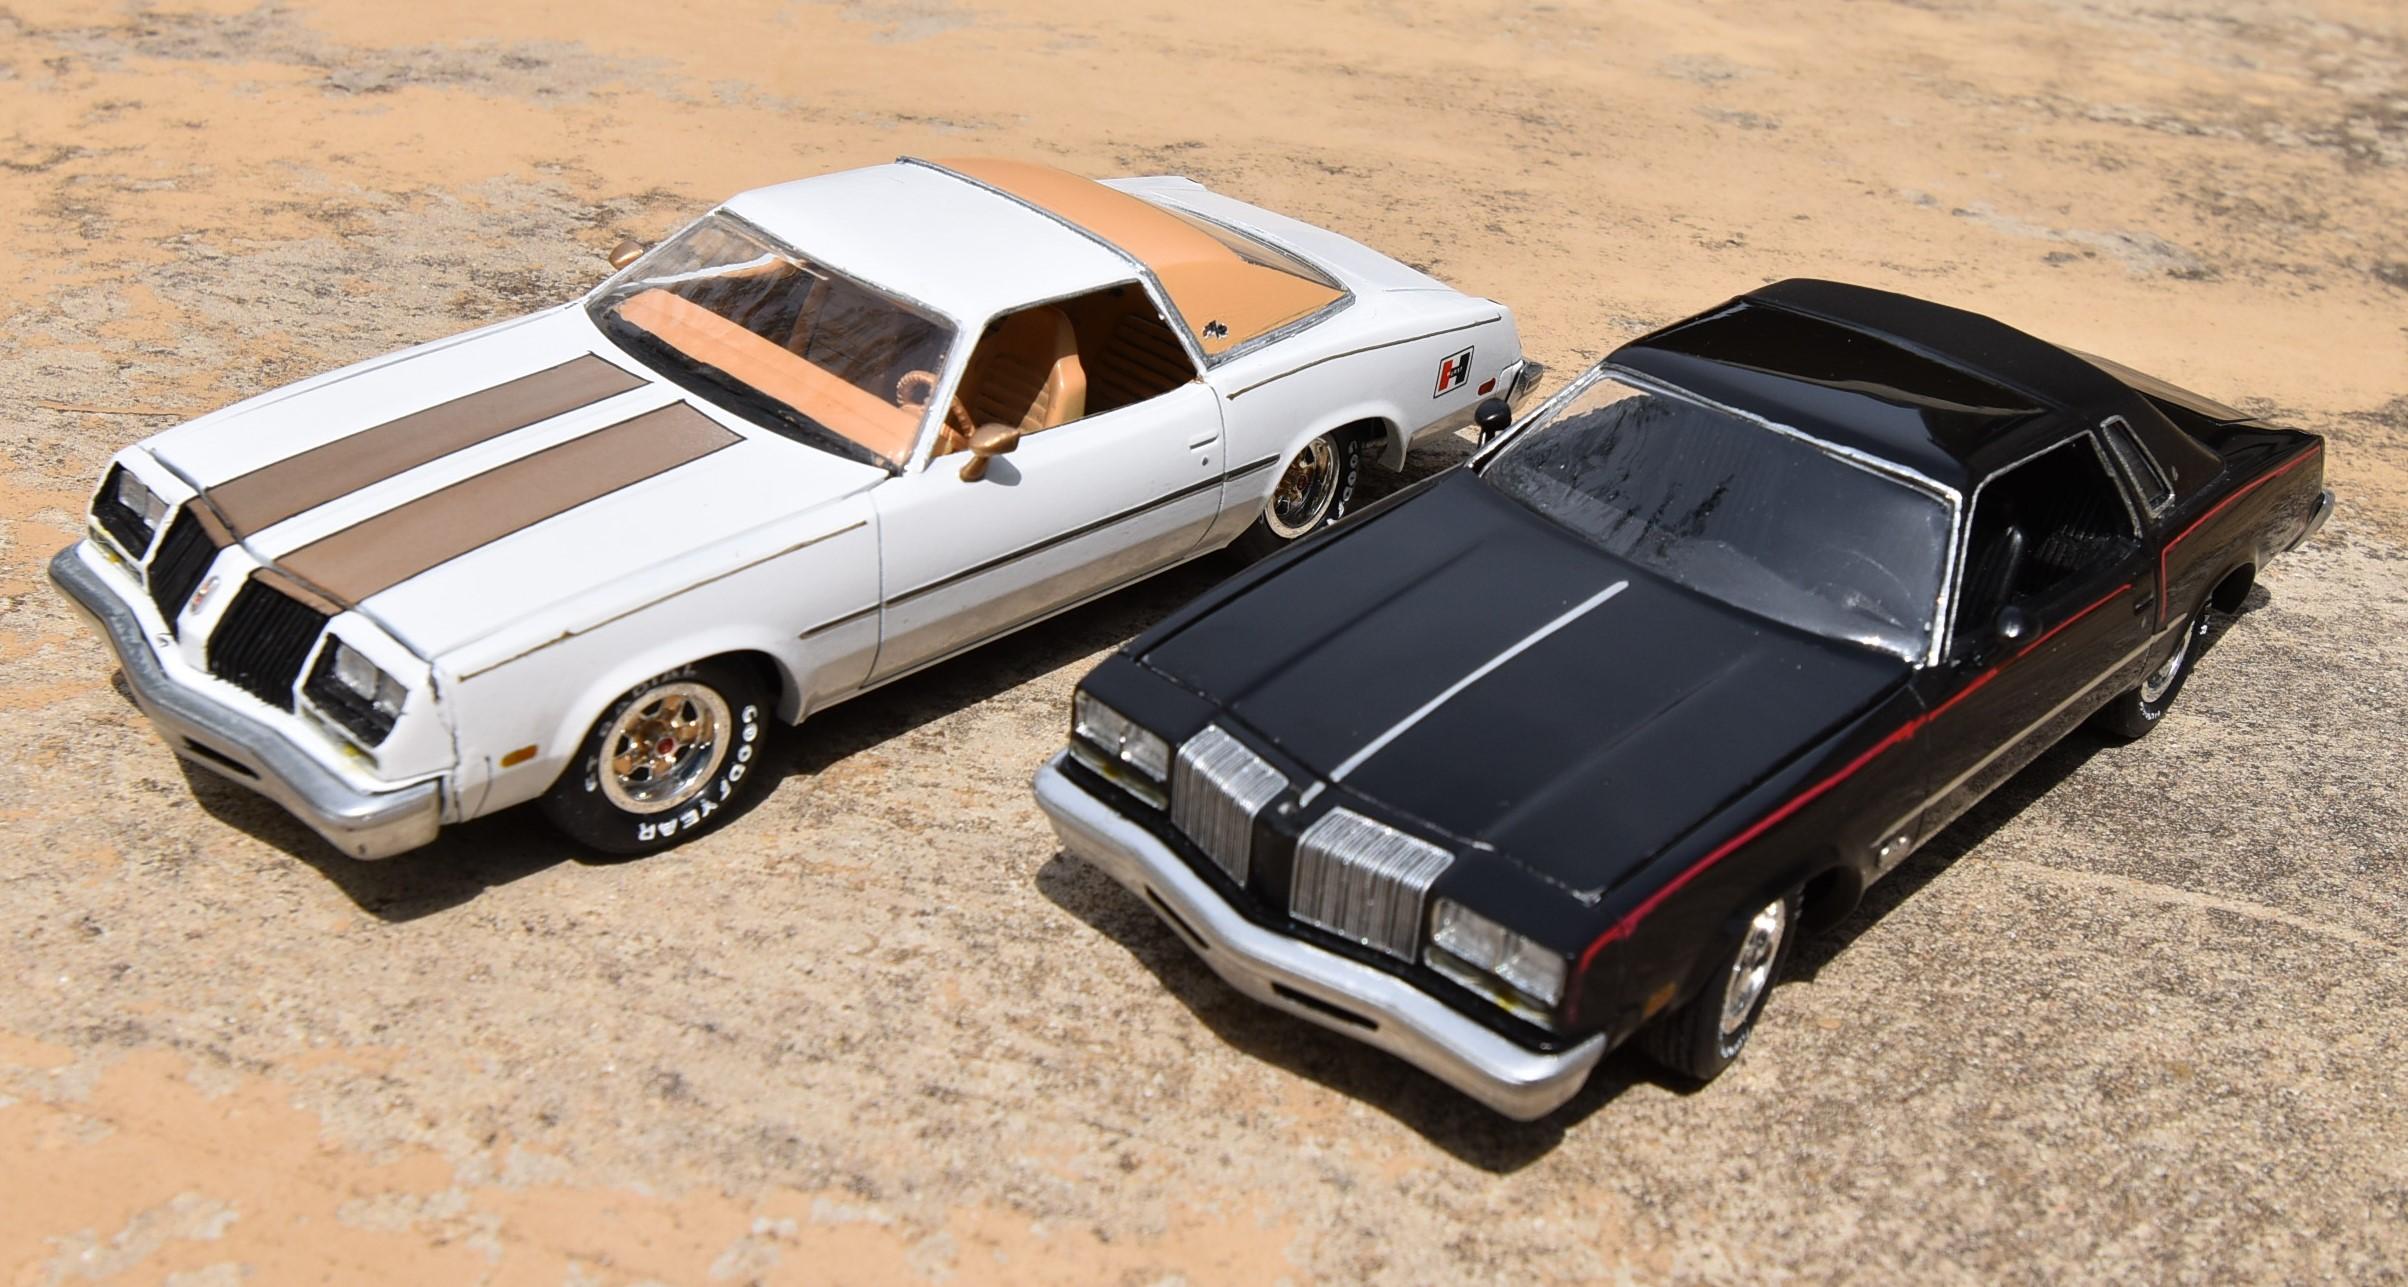
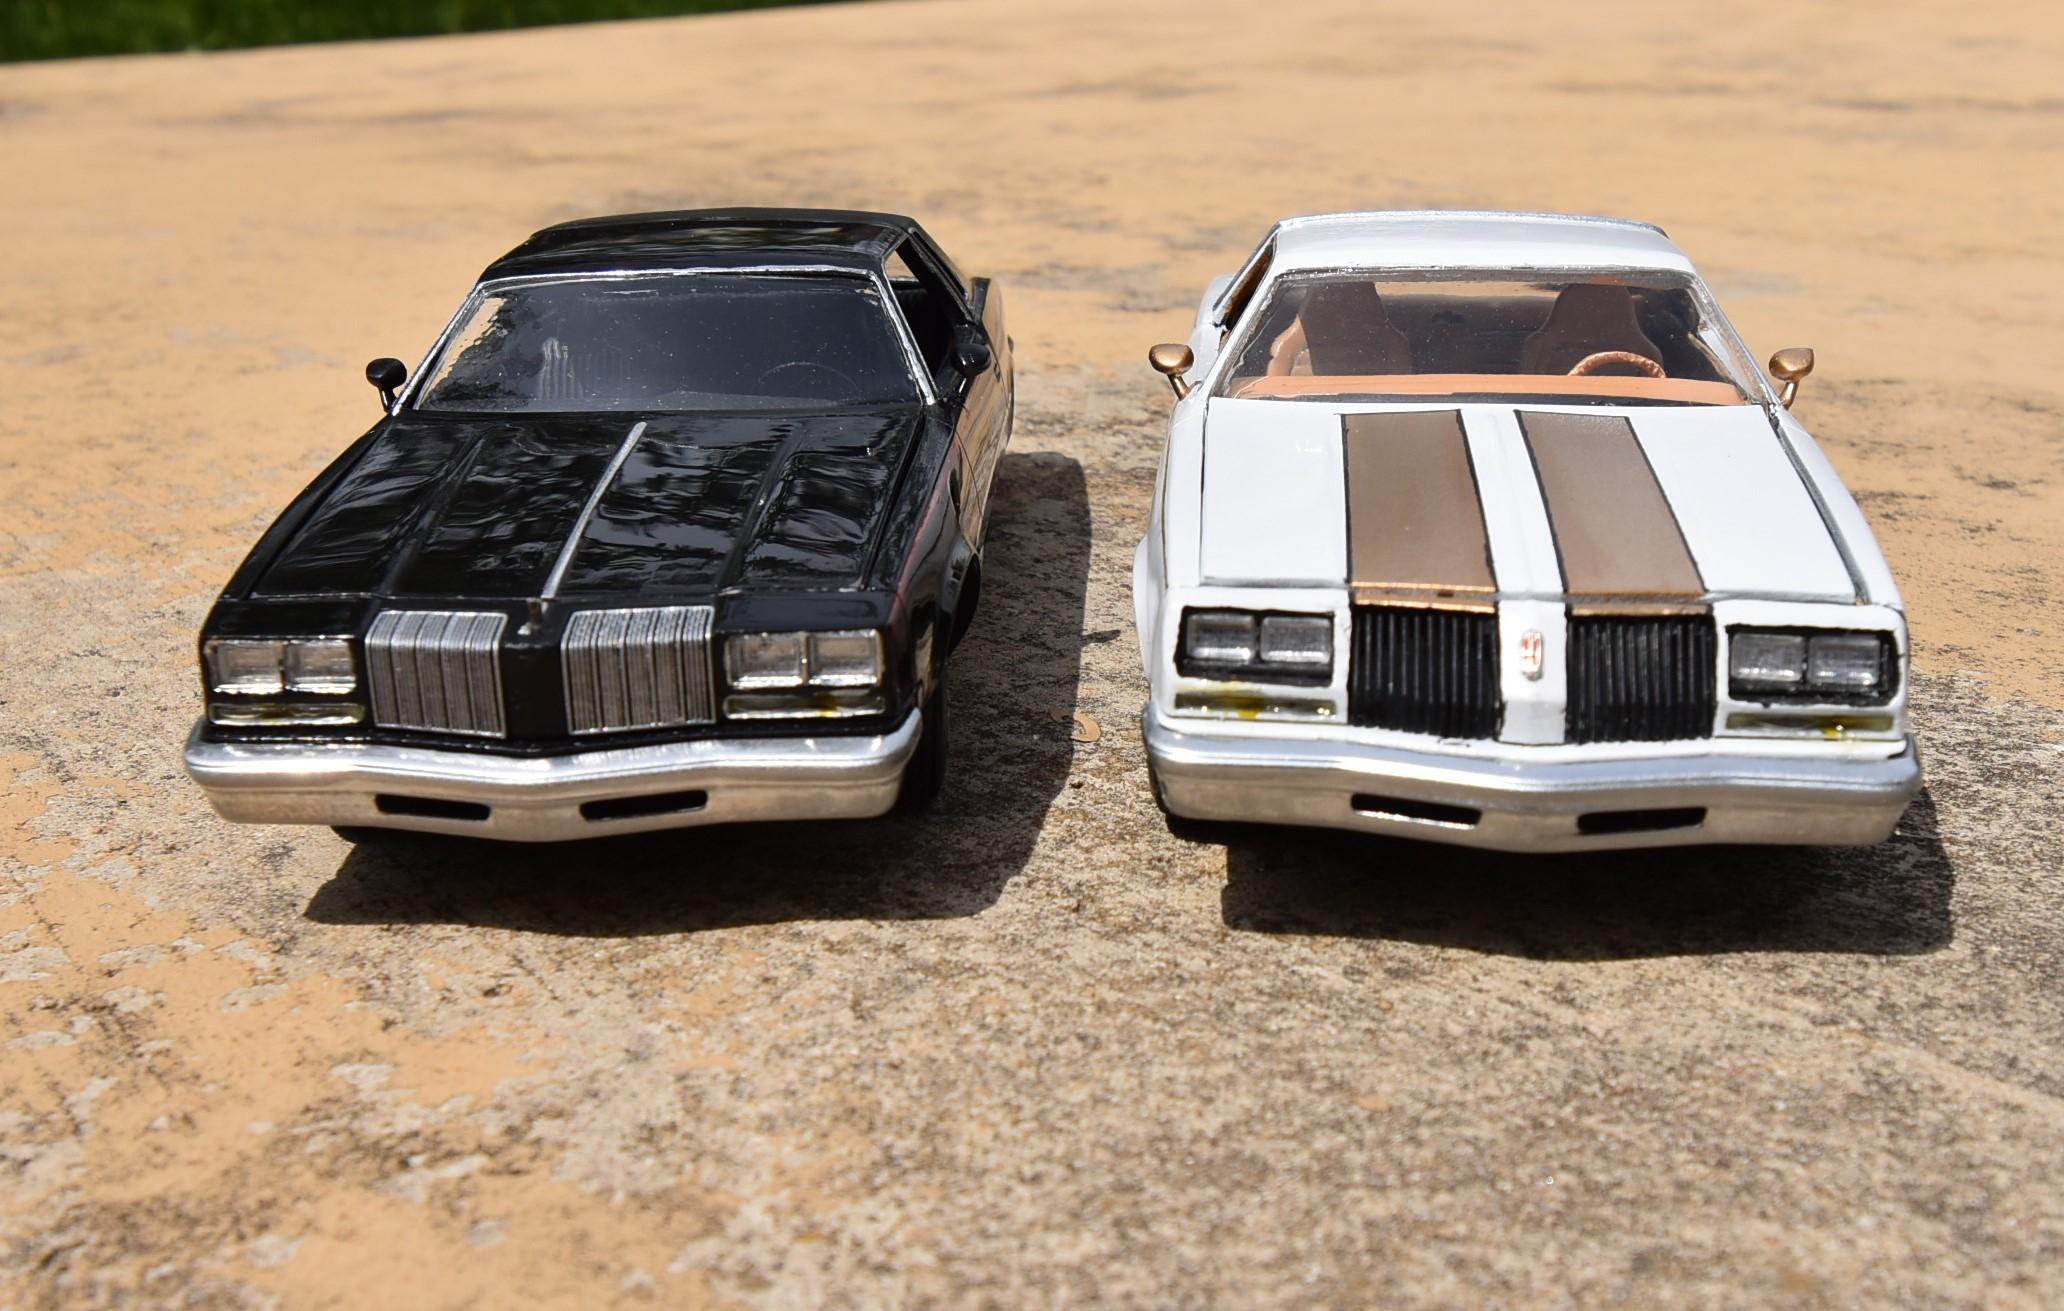
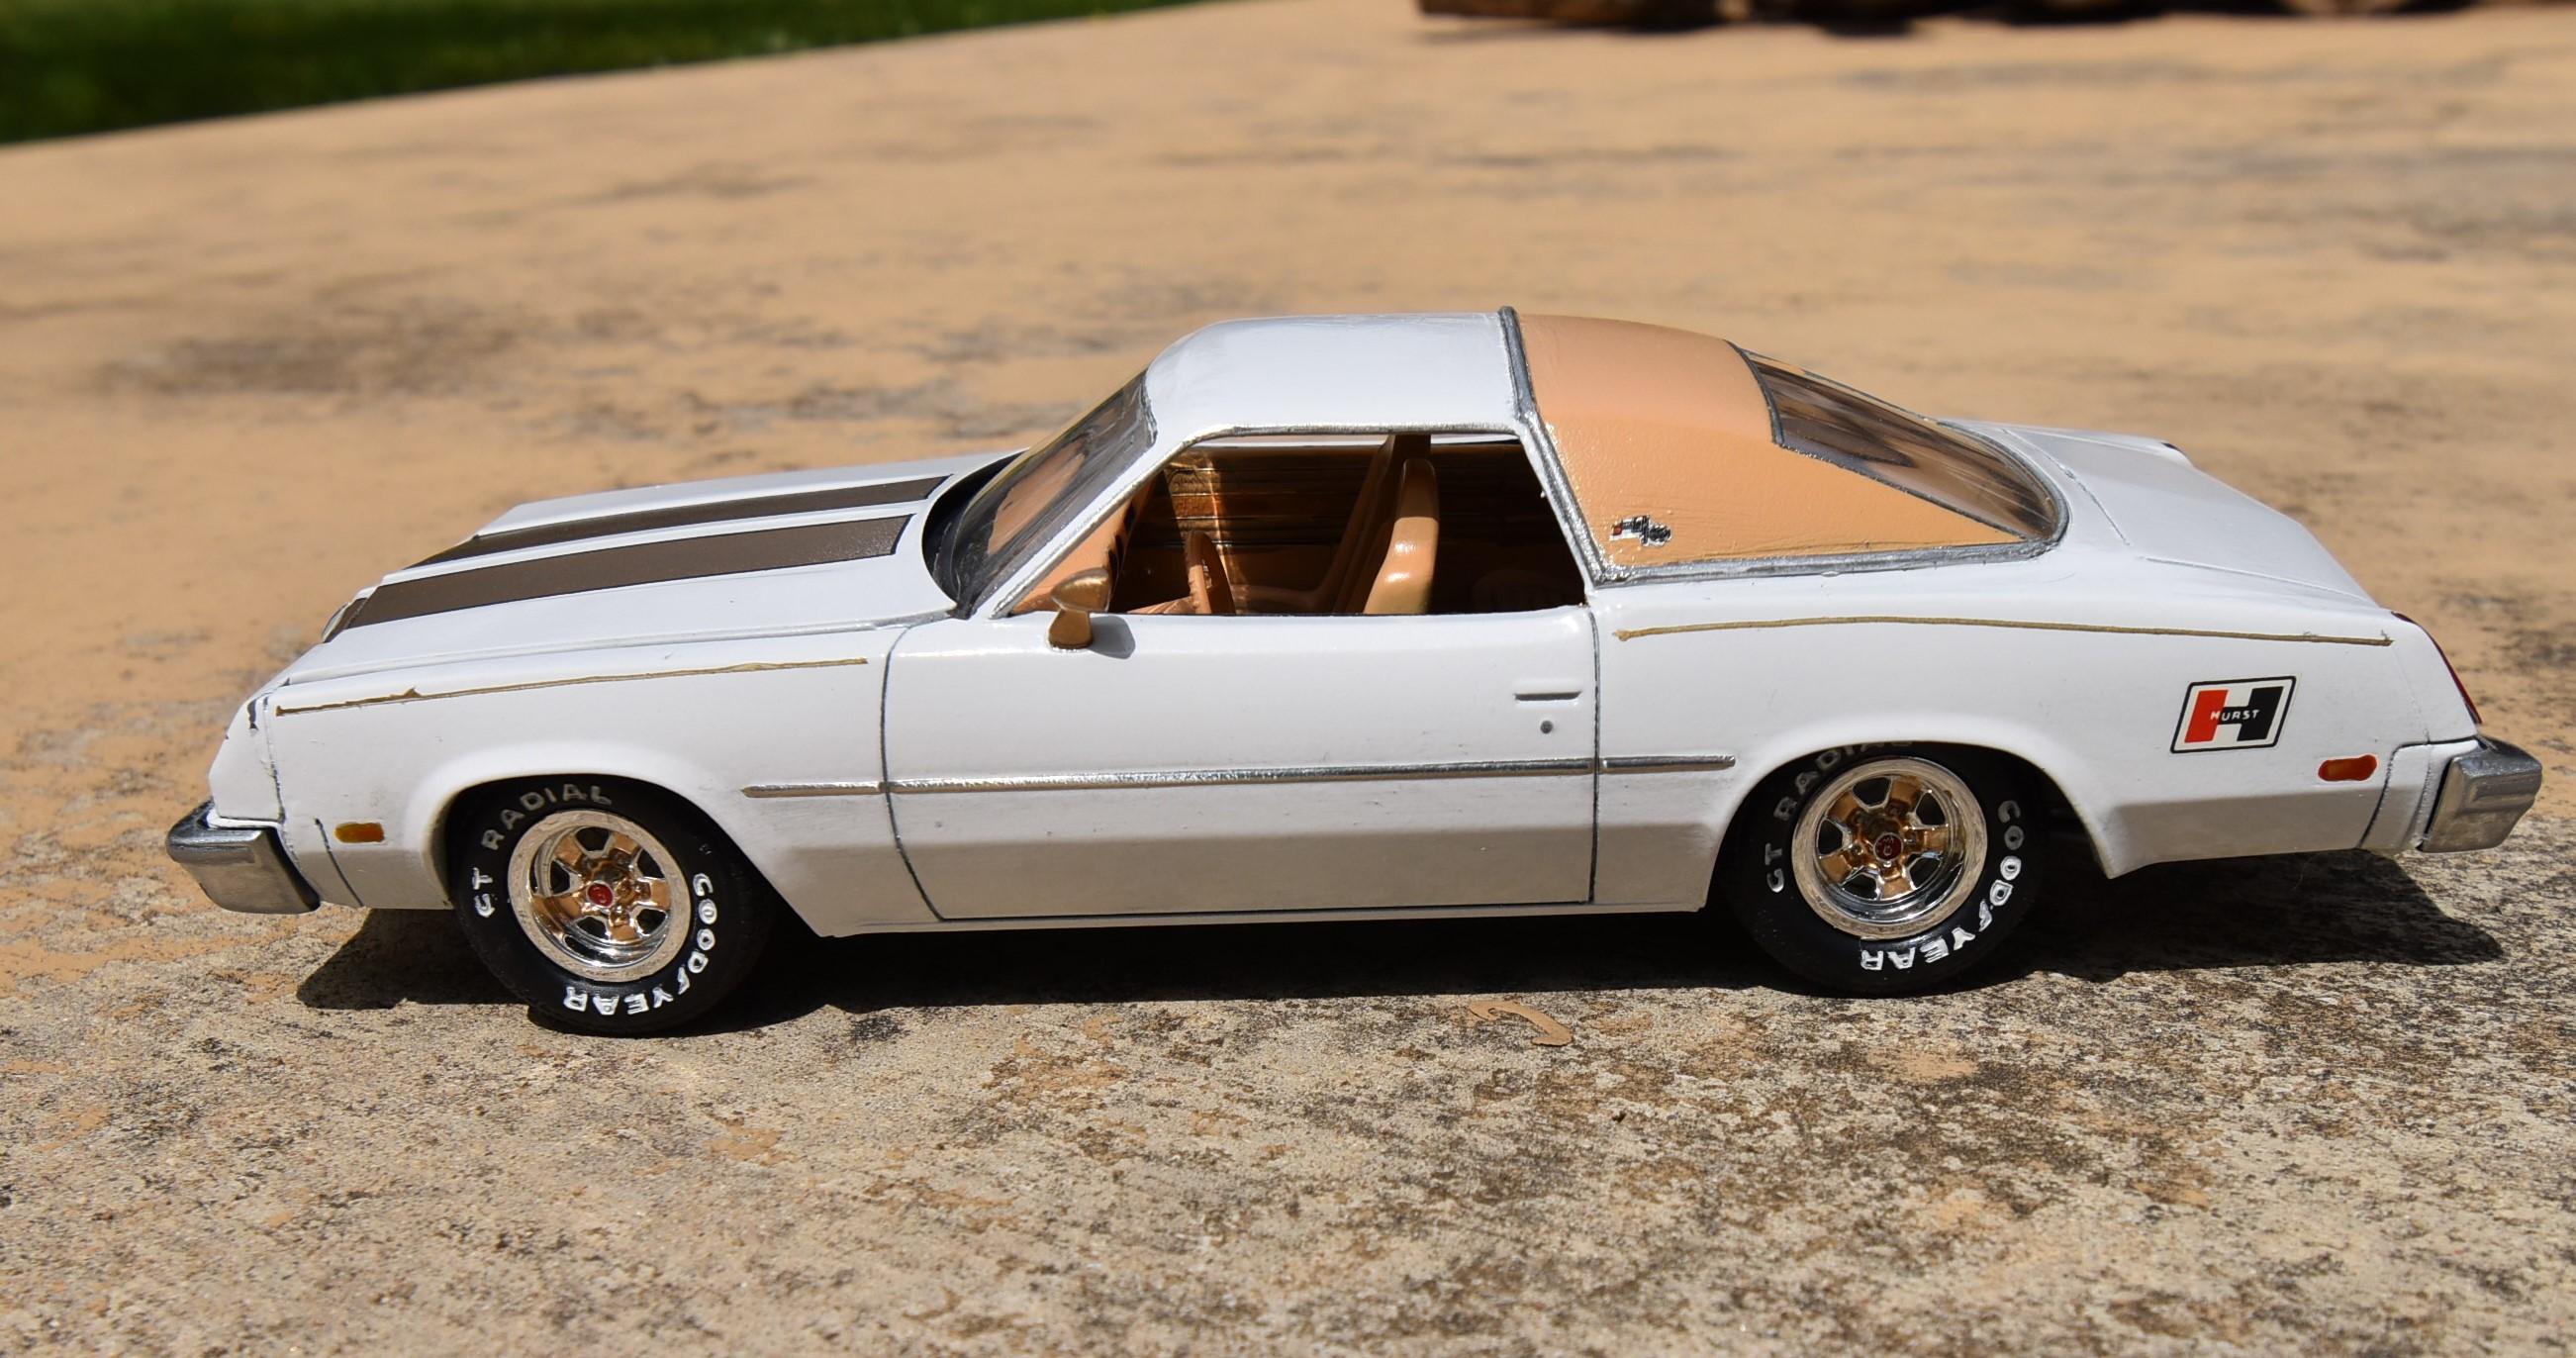
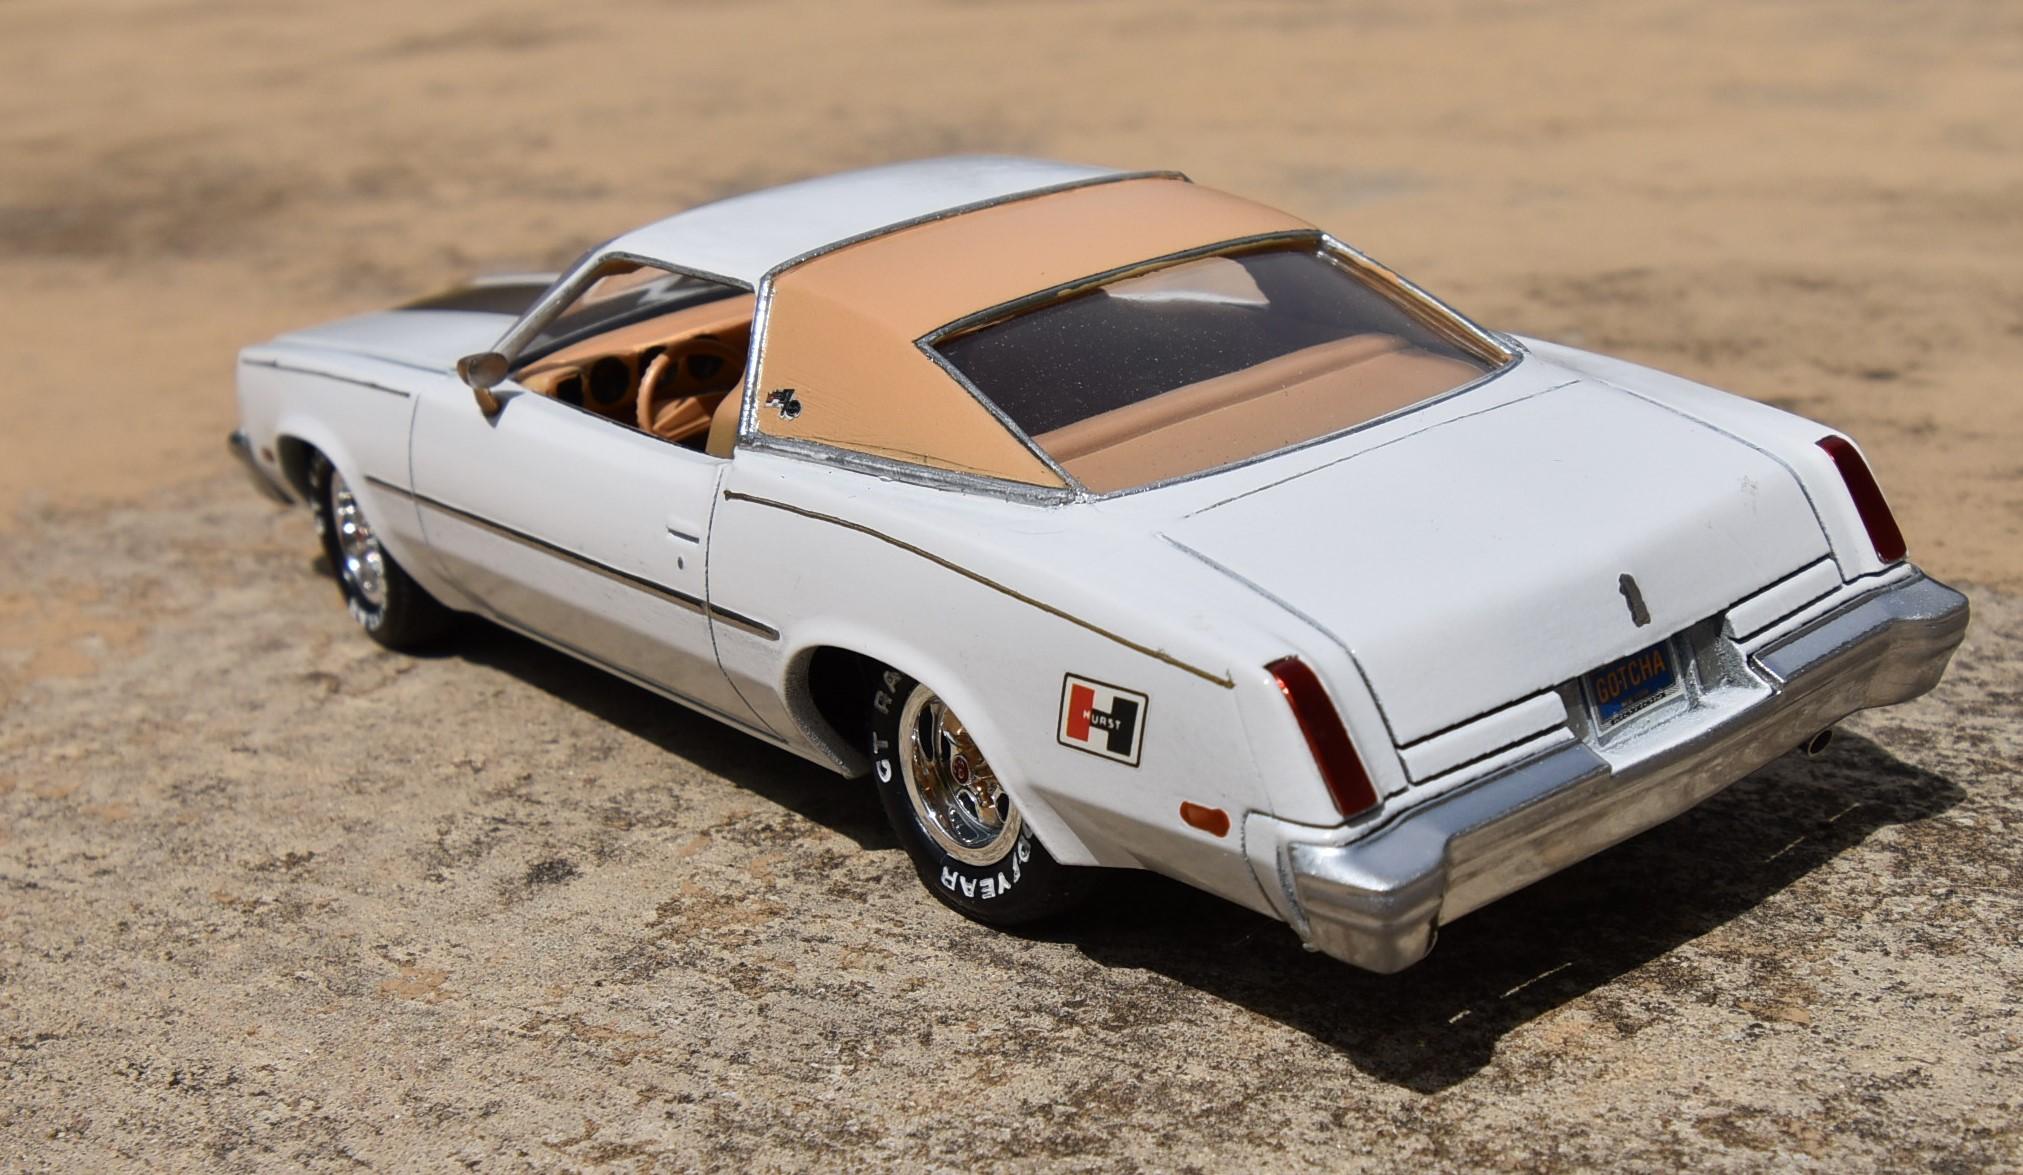
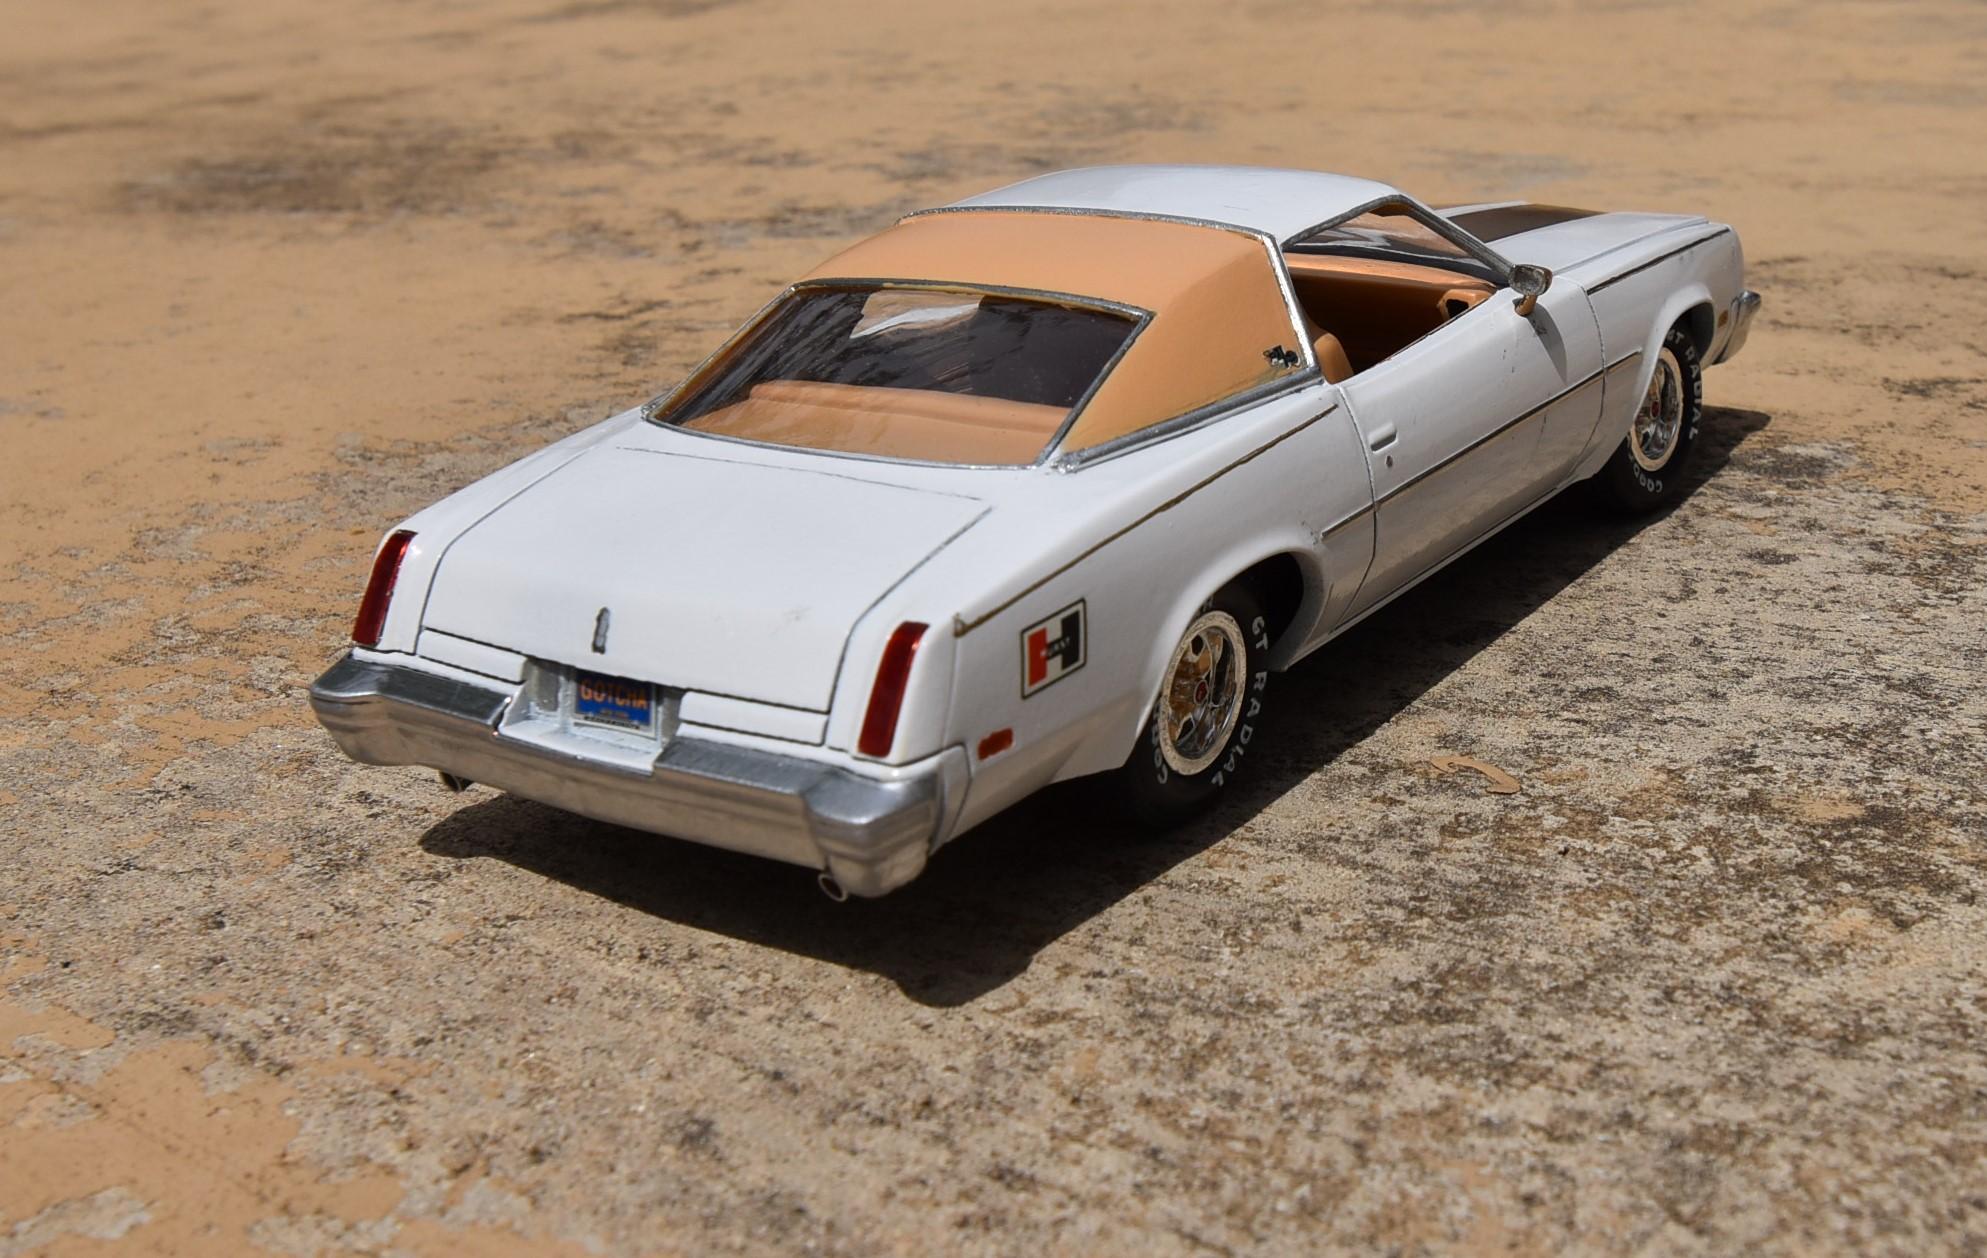
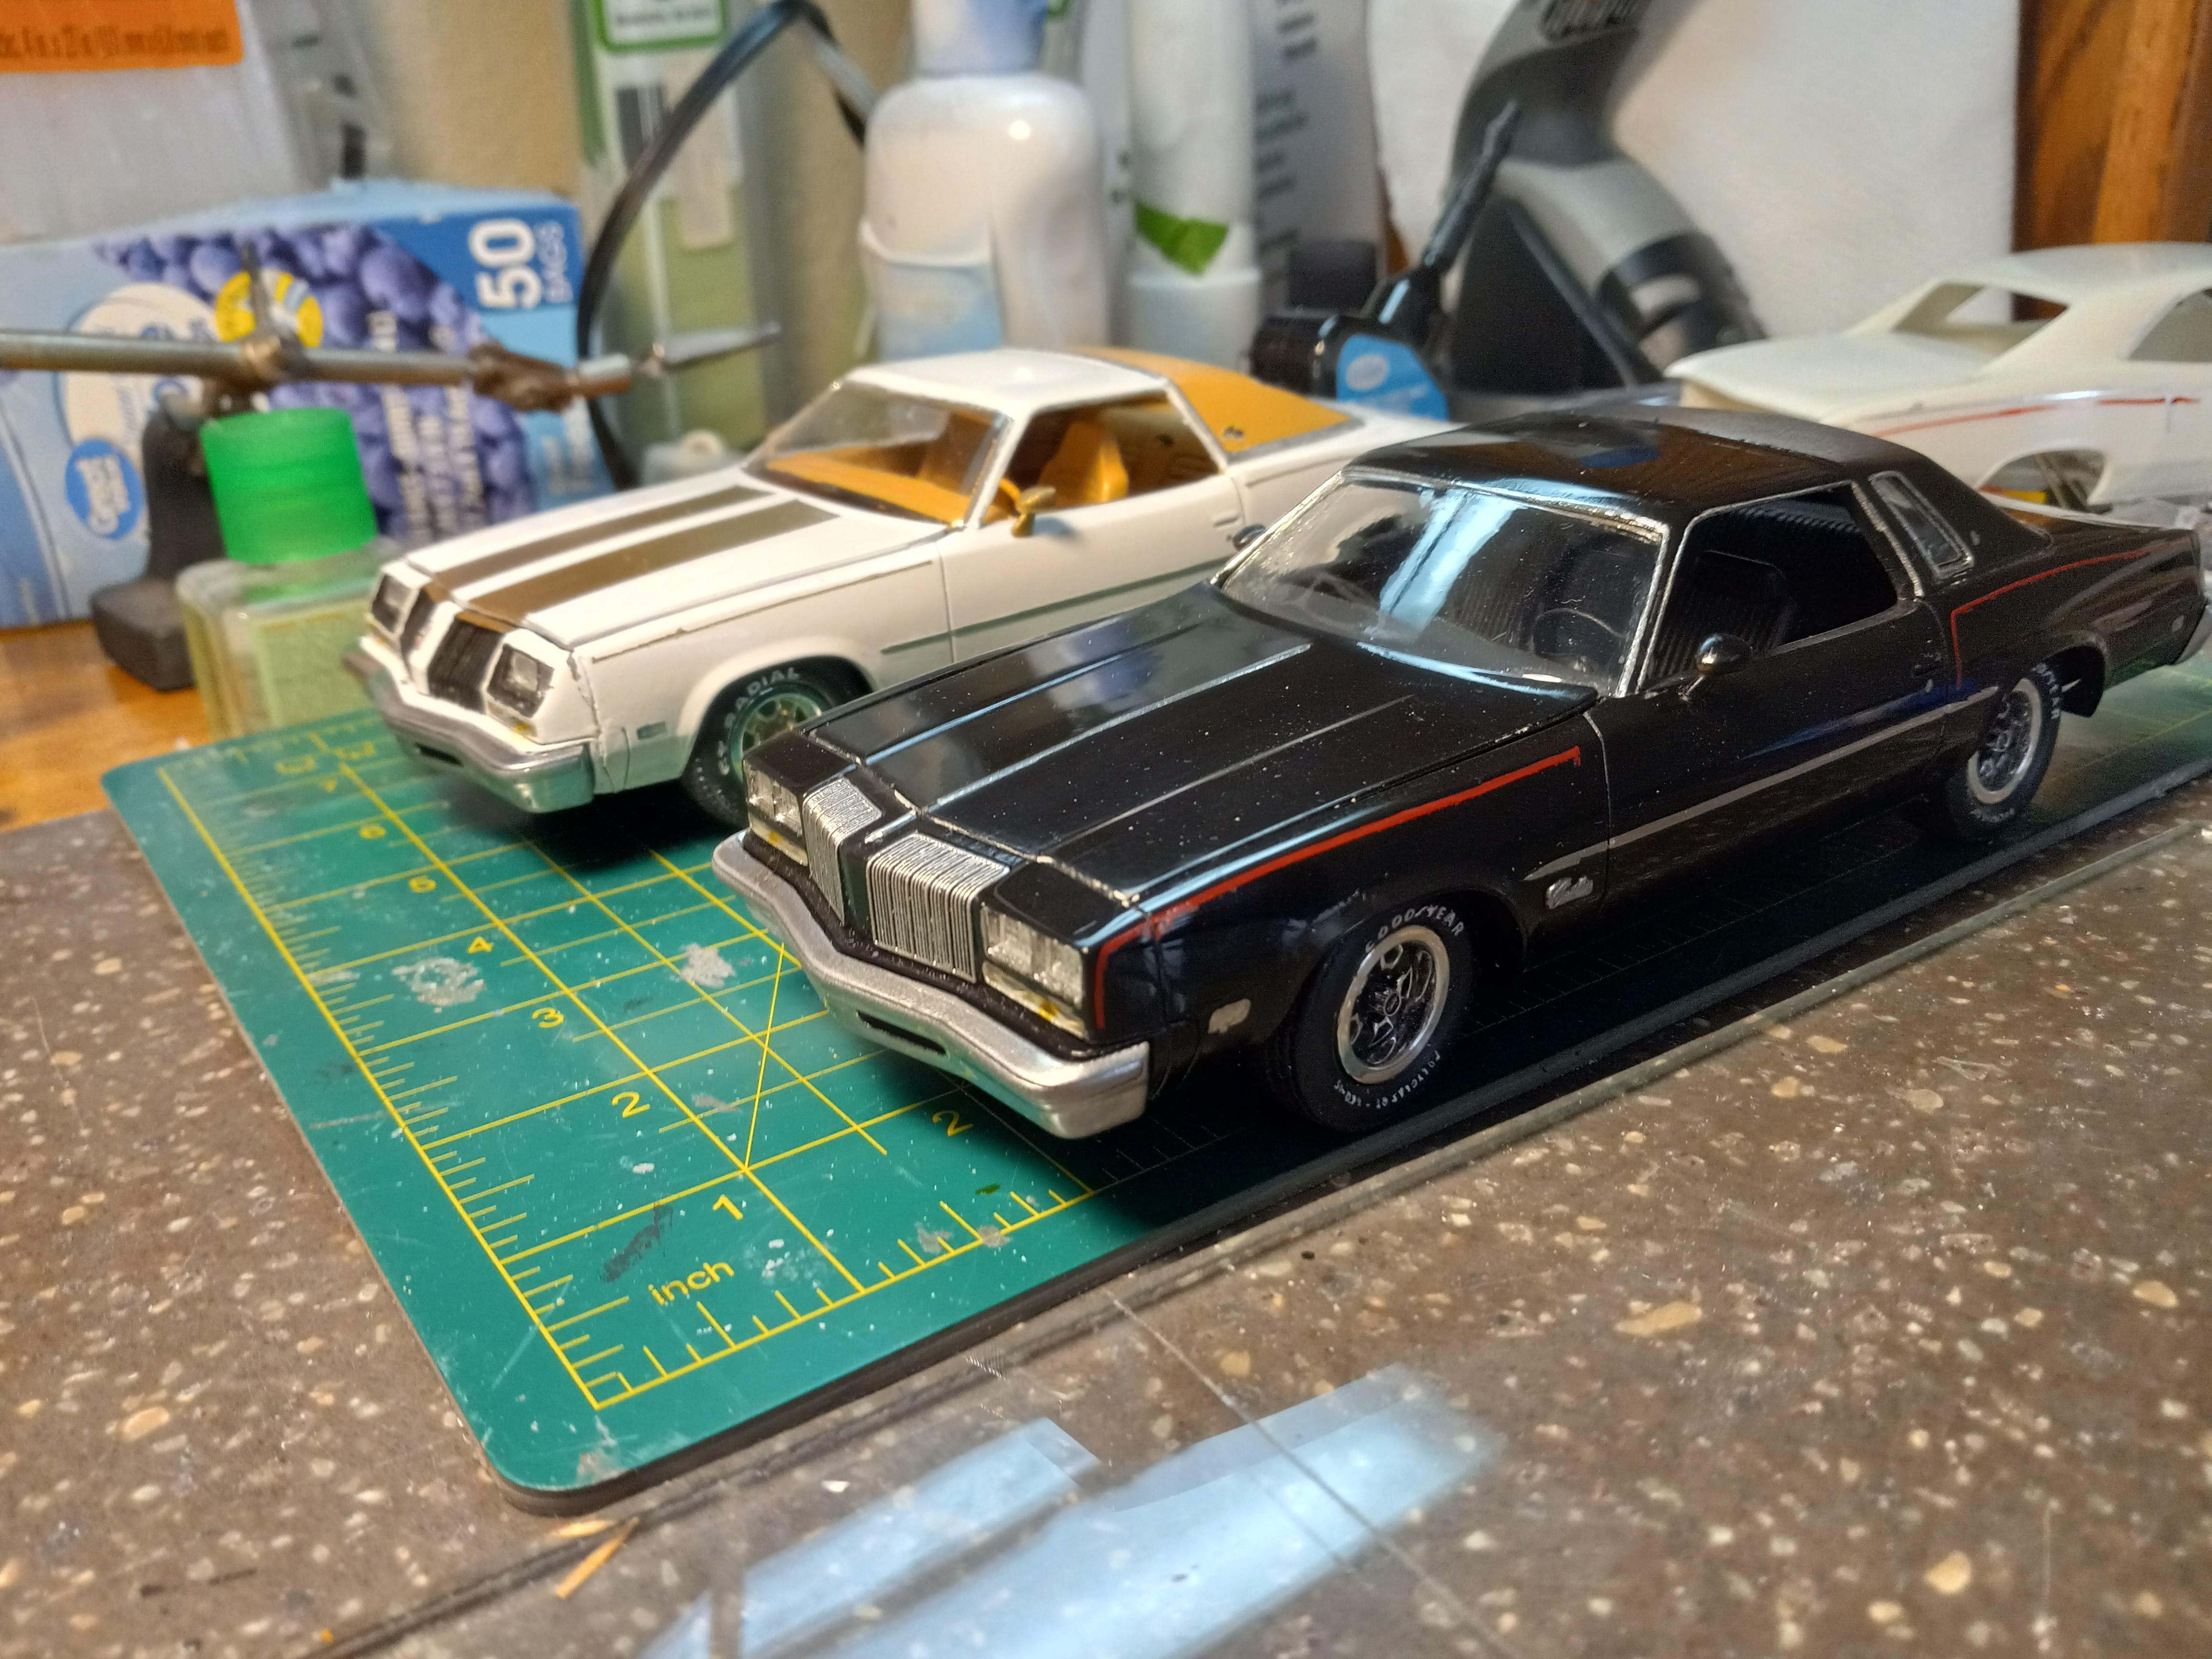
Salt is based on a 1976 Hurst/Olds Proposal car that Hurst did, never went to production. Pepper is a rendition of the 1977 Cutlass that I owned. Pros) Excellent 3D printed kits. No other way to get this subject, accurate body proportions and details. Cons) Plastic can be on the brittle side. Have to buy other kits to get all the parts to finish them. LOTS of sanding to get the 3D printer mold lines off. Challenges) Window glass, steep learning curve working on making window glass that fits and looks good. I used the interior from a 1969 HO for Salt, so the interior was more musclecar. It has more gauges as well as more bucket to the bucket seats. Done to represent a 455/4 speed. The interior on Pepper is from a 1975 Promo car, with a few small changes to update. Done to represent the 350/350 auto that I drove many years ago. I highly recommend doing 3D printed kits. They can be challenging, but very rewarding. Builders need to take their time with them. LOTS of fine sanding to get every aspect of the rendering smooth. I could have spent a lot more time on these, but I'm still happy with what I have.
-
1977 Olds Cutlass from 3D print from Too Many Projects
carl63_99 replied to carl63_99's topic in WIP: Model Cars
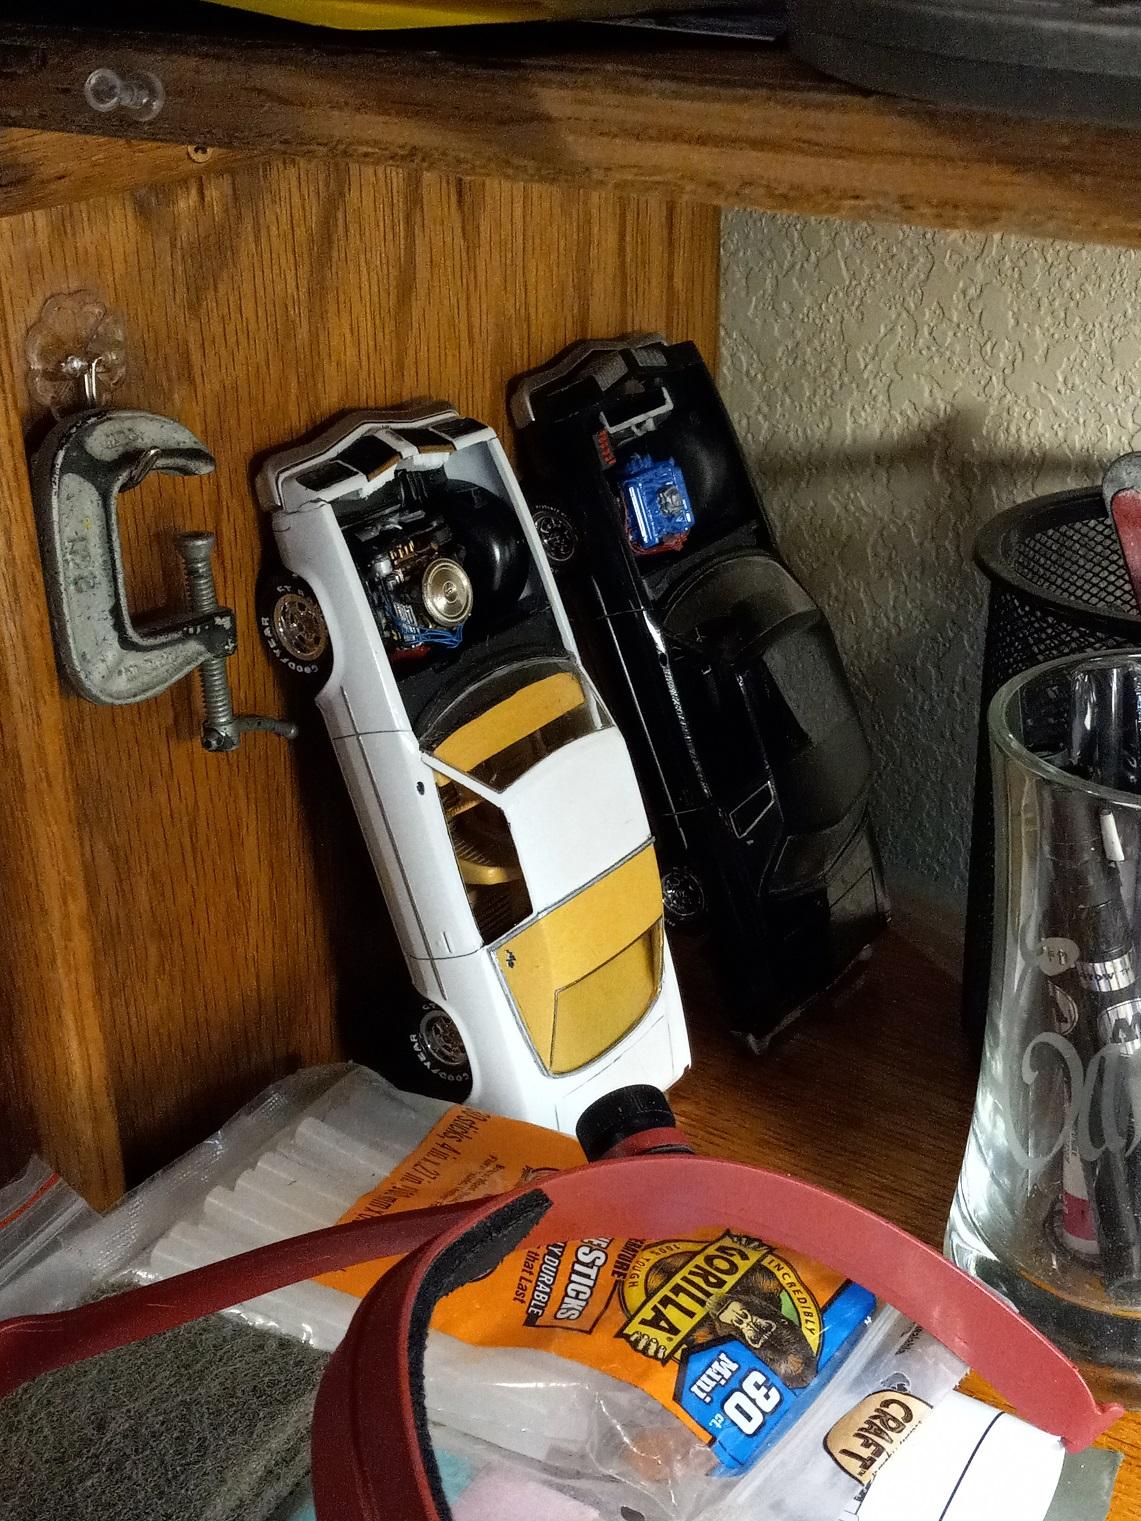
LAST PIC I post in the WIP for Salt and Pepper! When I finish models I take a couple days off, come back and polish/wax, final cleanup. Early next week, Under glass pics and commentary. Enjoy! And thanks for al the kind words.
-
1977 Olds Cutlass from 3D print from Too Many Projects
carl63_99 replied to carl63_99's topic in WIP: Model Cars
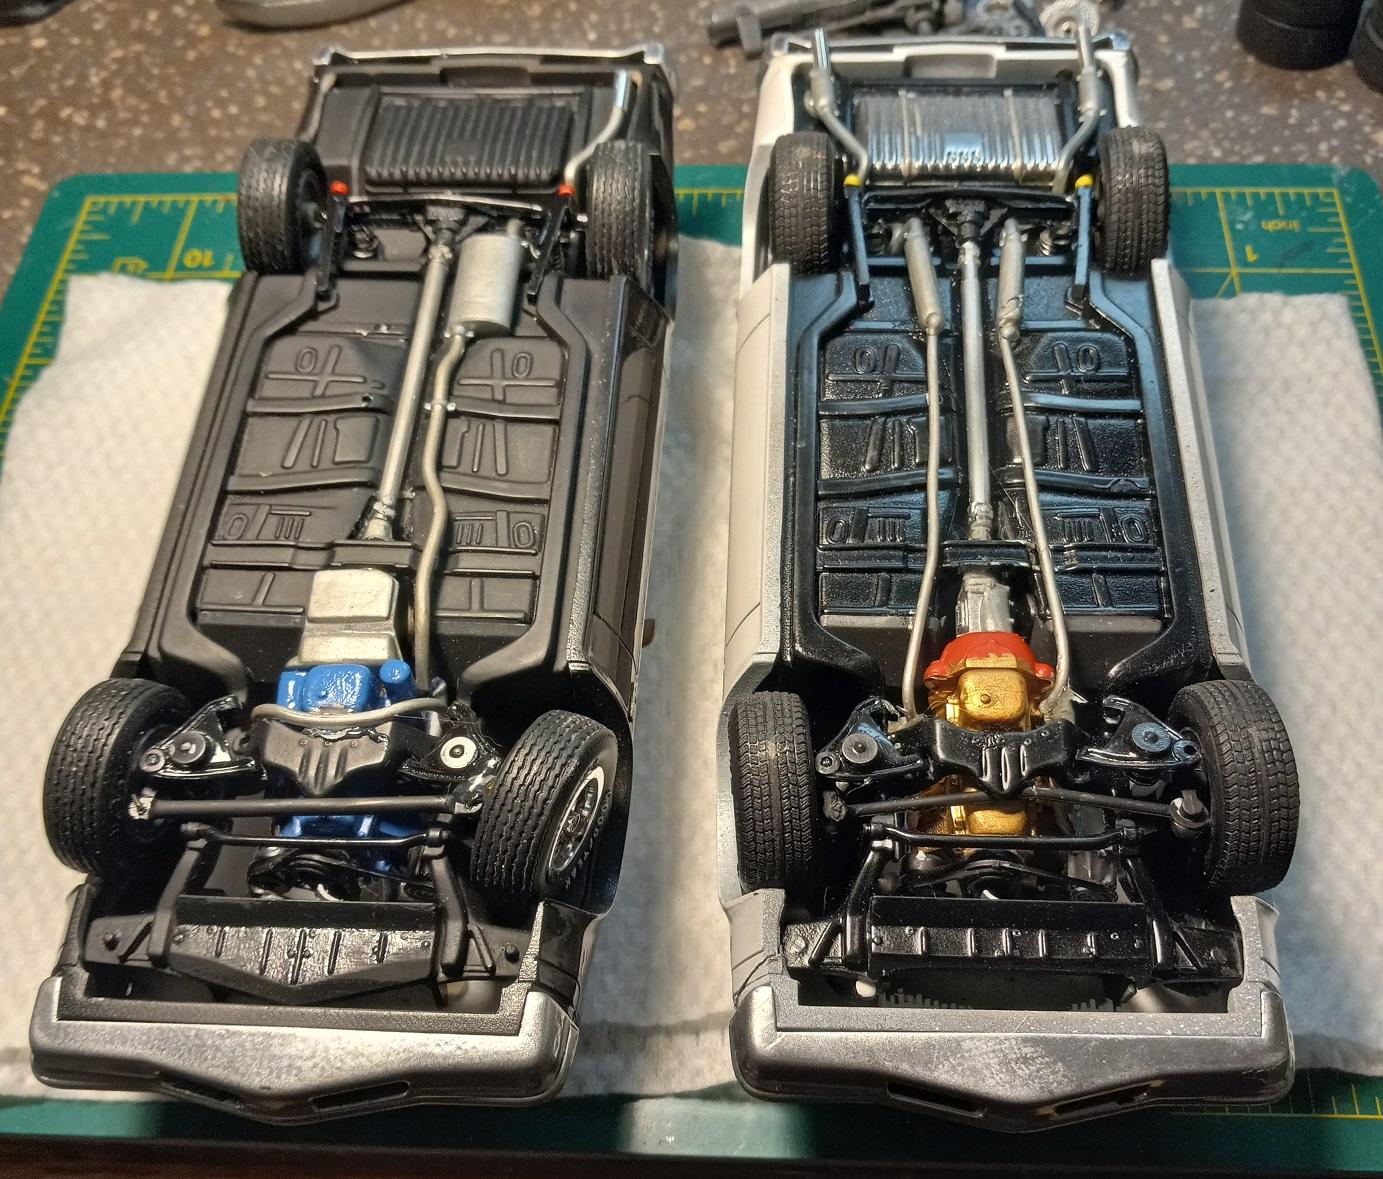
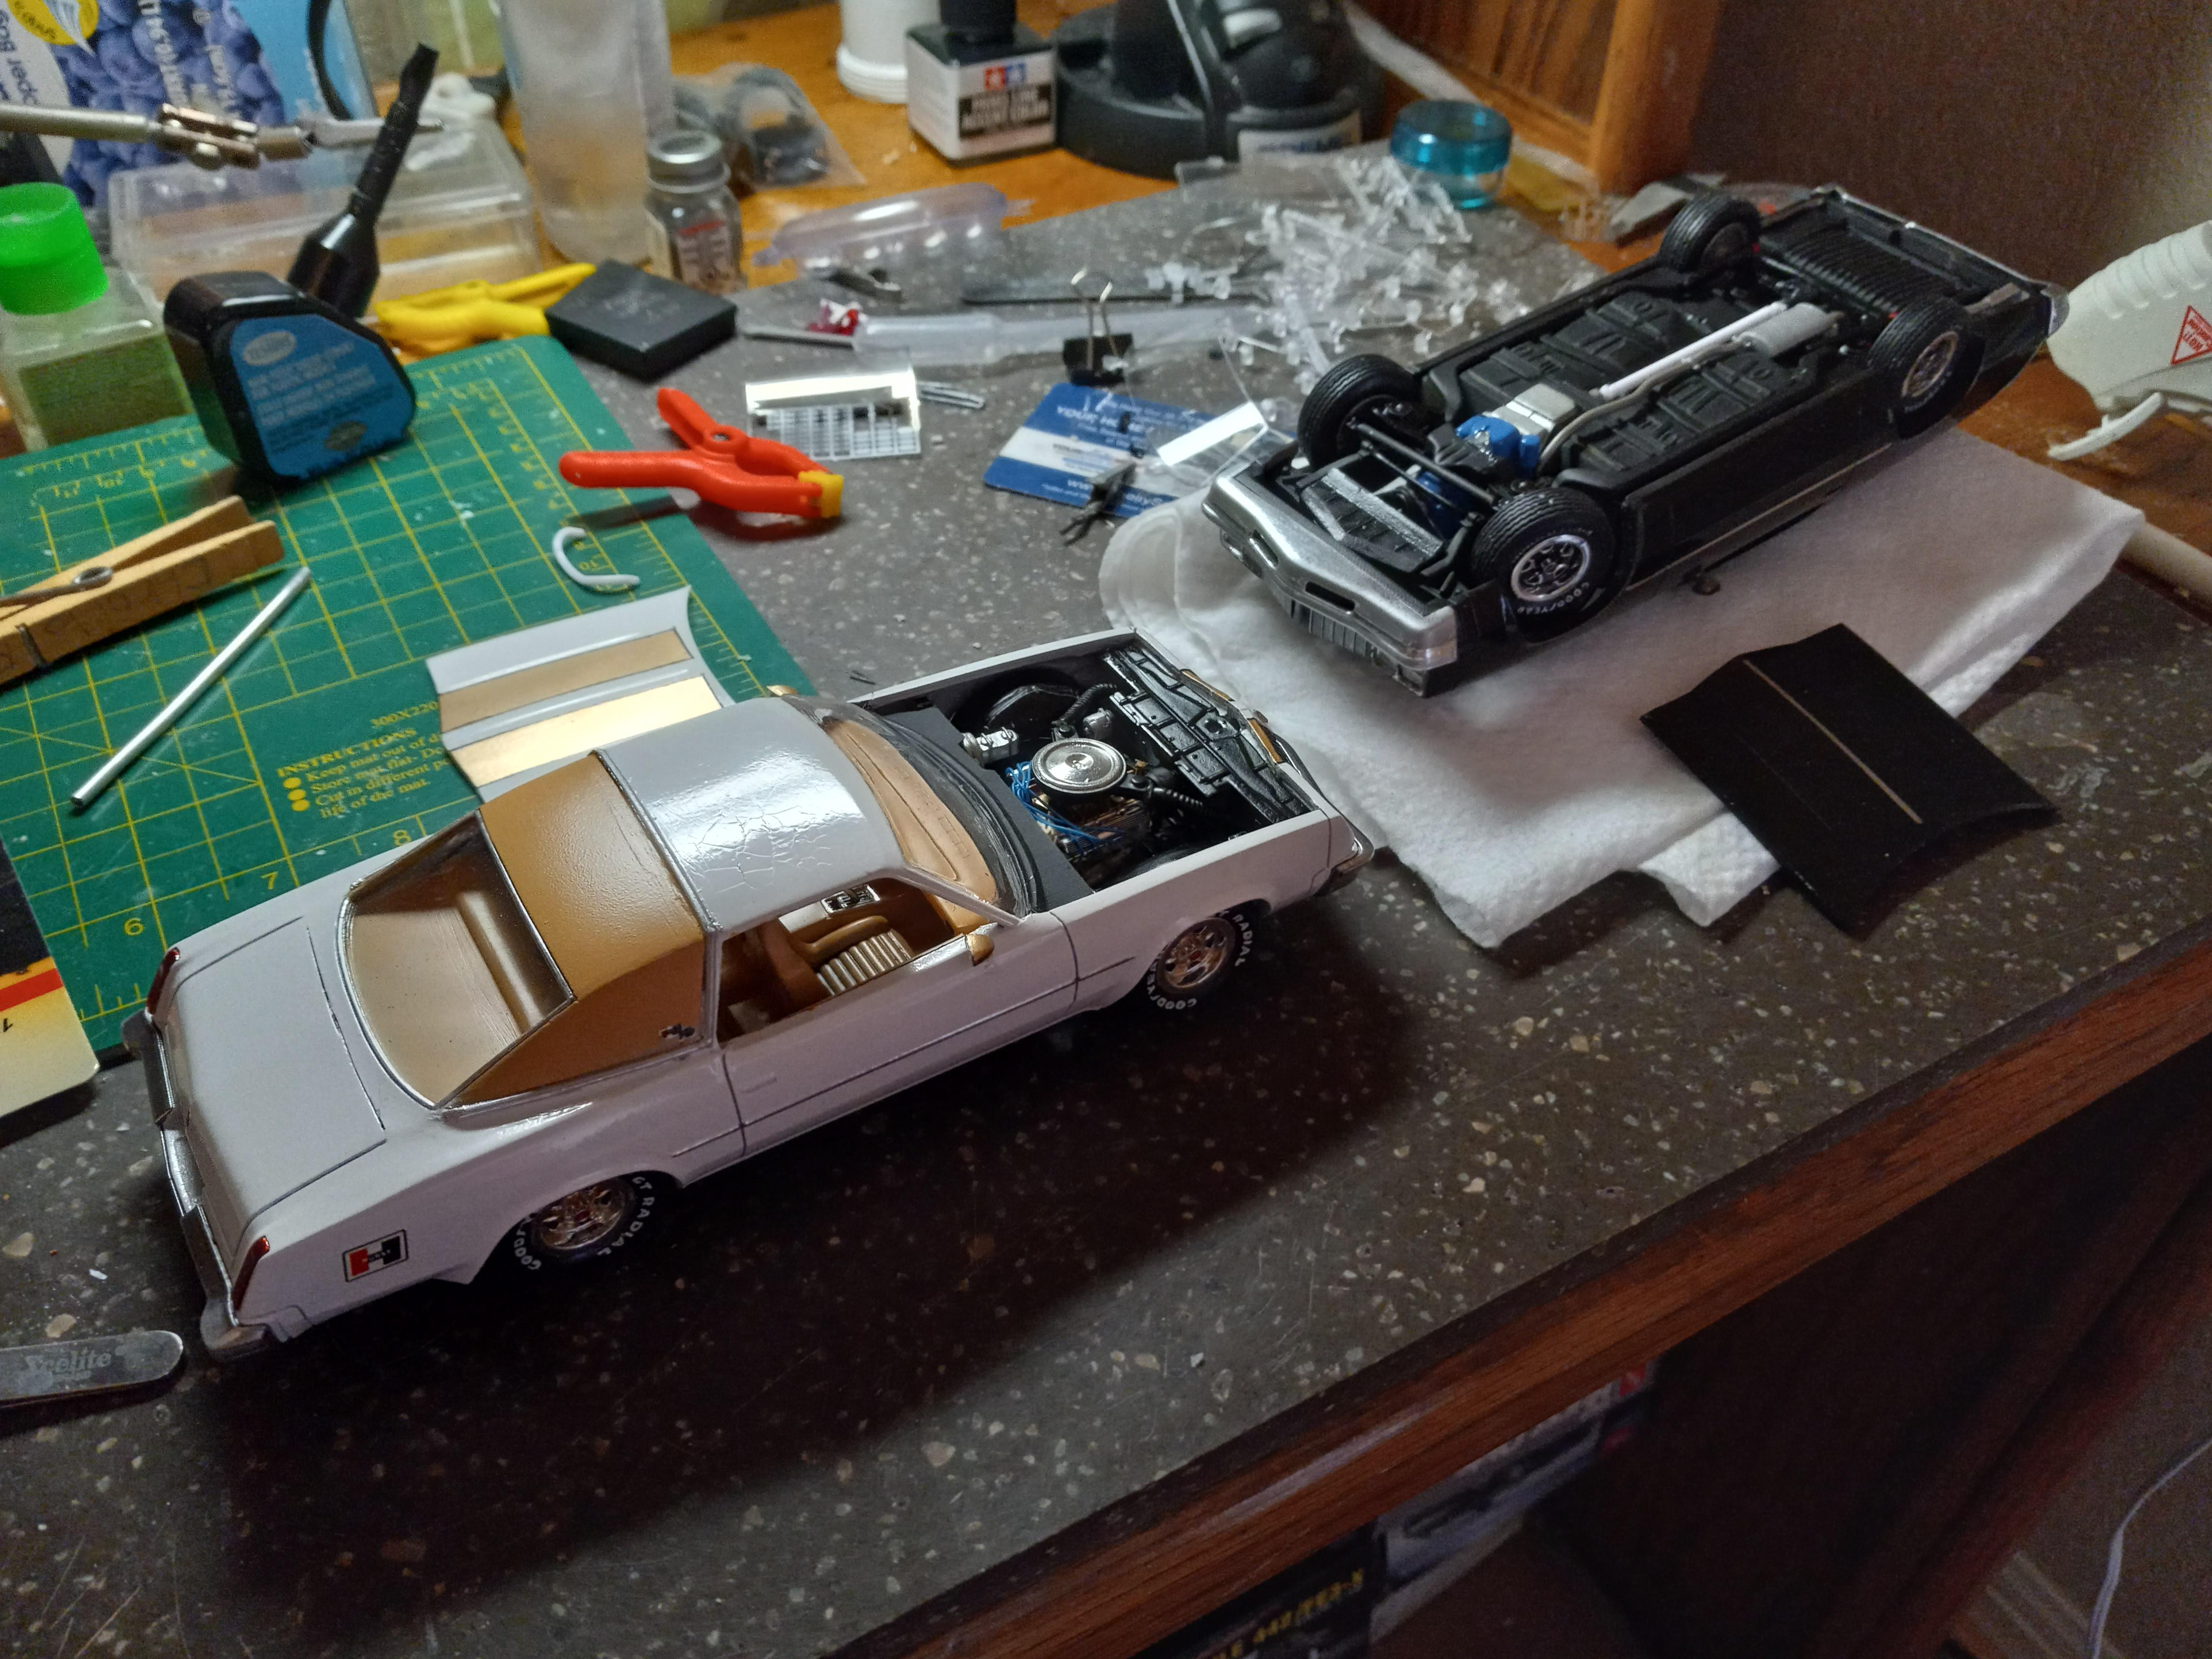
As I finish up the final assembly, problems start showing up. Can't find the other exhaust for the HO, had to make a new driveshaft for the Salon. Couple broken front suspension parts. I need to practice pin striping, both cars need some of that. Another week and they should be complete.
-
1977 Olds Cutlass from 3D print from Too Many Projects
carl63_99 replied to carl63_99's topic in WIP: Model Cars
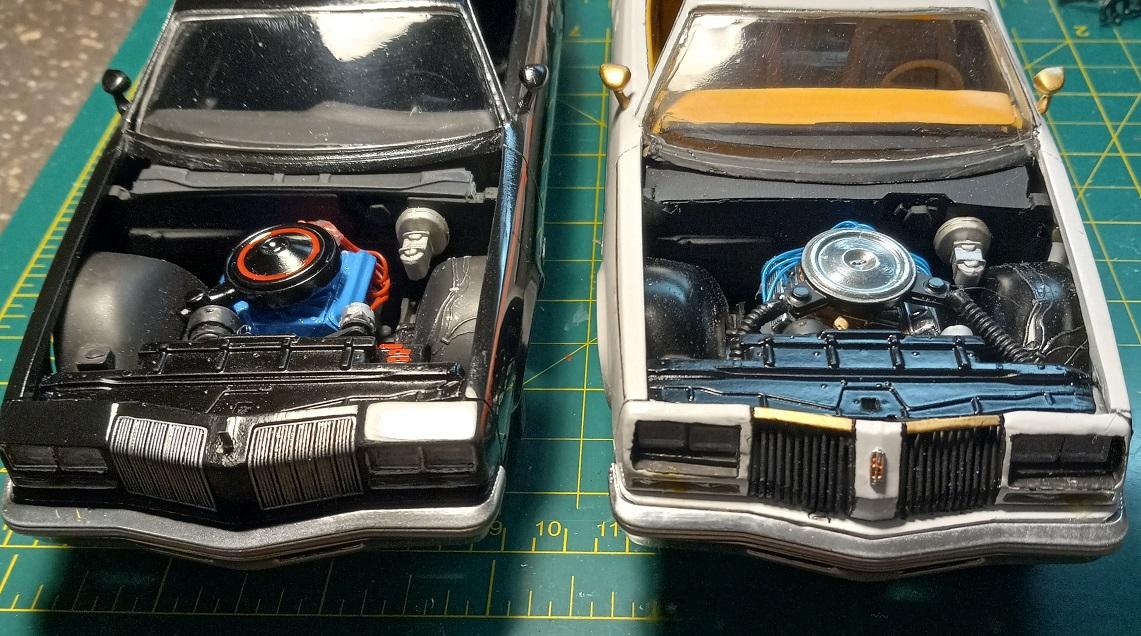
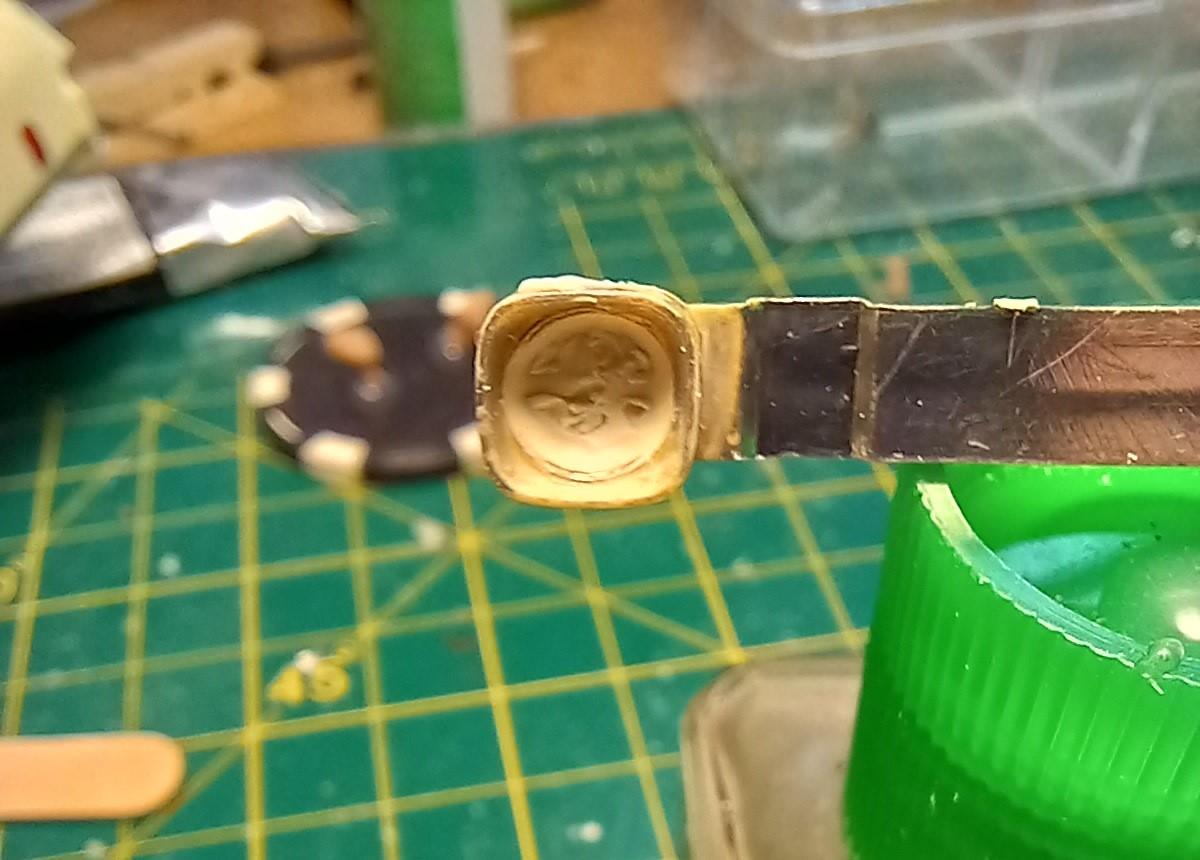
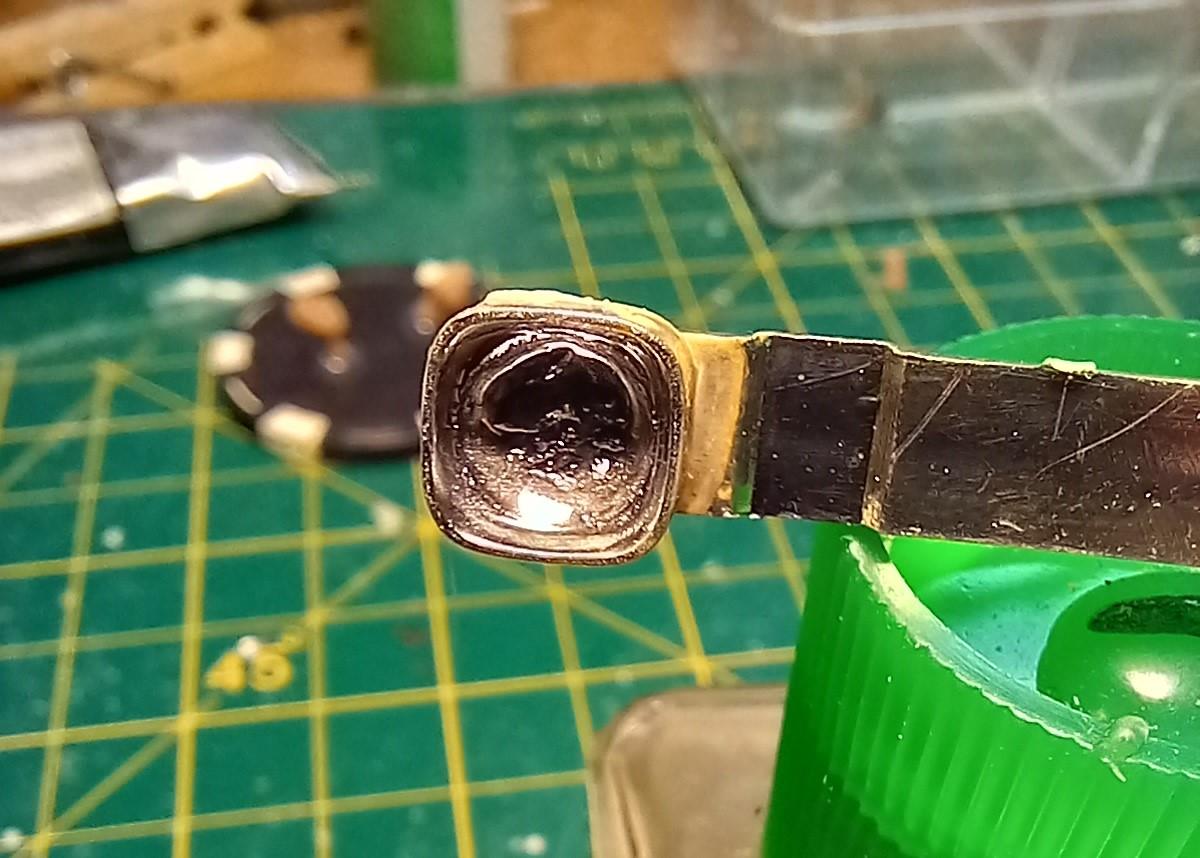
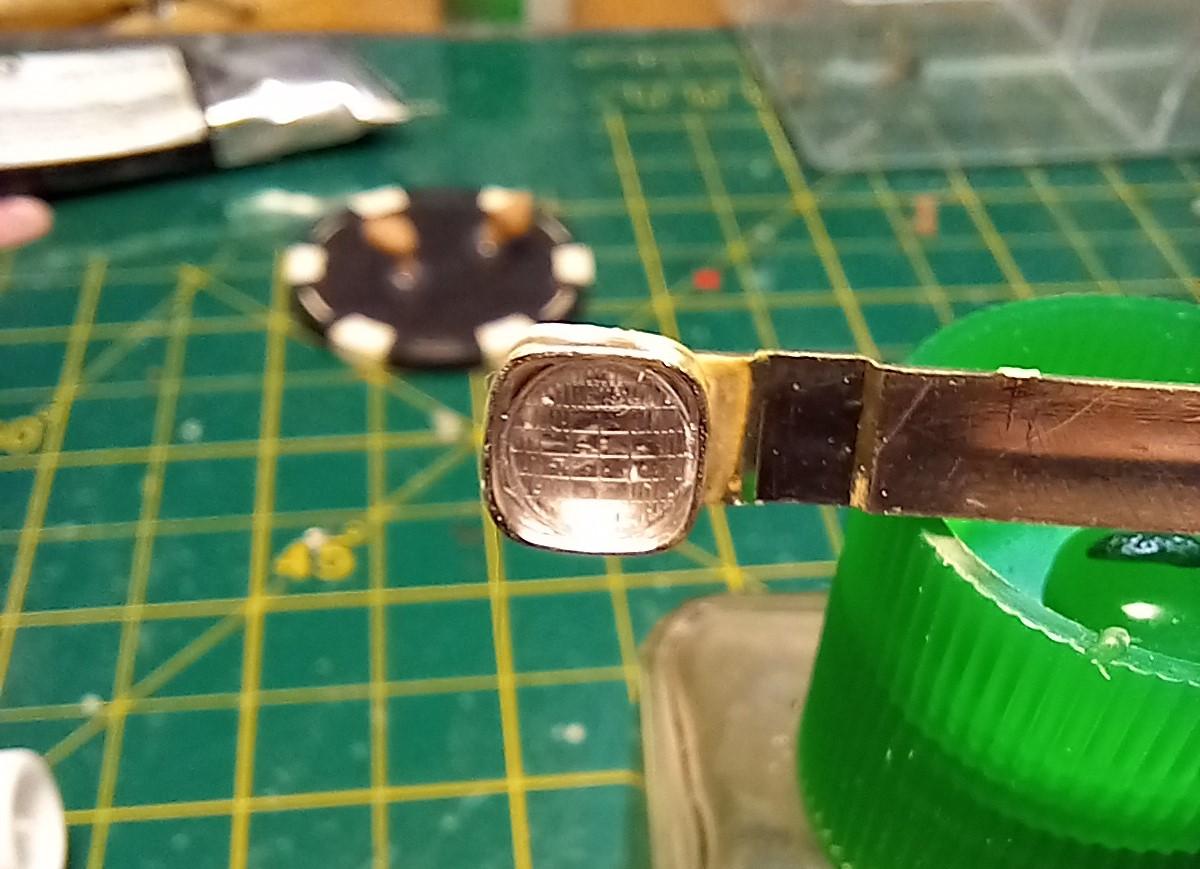
Doing wheelies! Seriously, filled in the front turn signals with white glue, have them sitting like this overnight so the glue dries level. I like how you can see the difference between the two cars, particularly the engines in this pic.
-
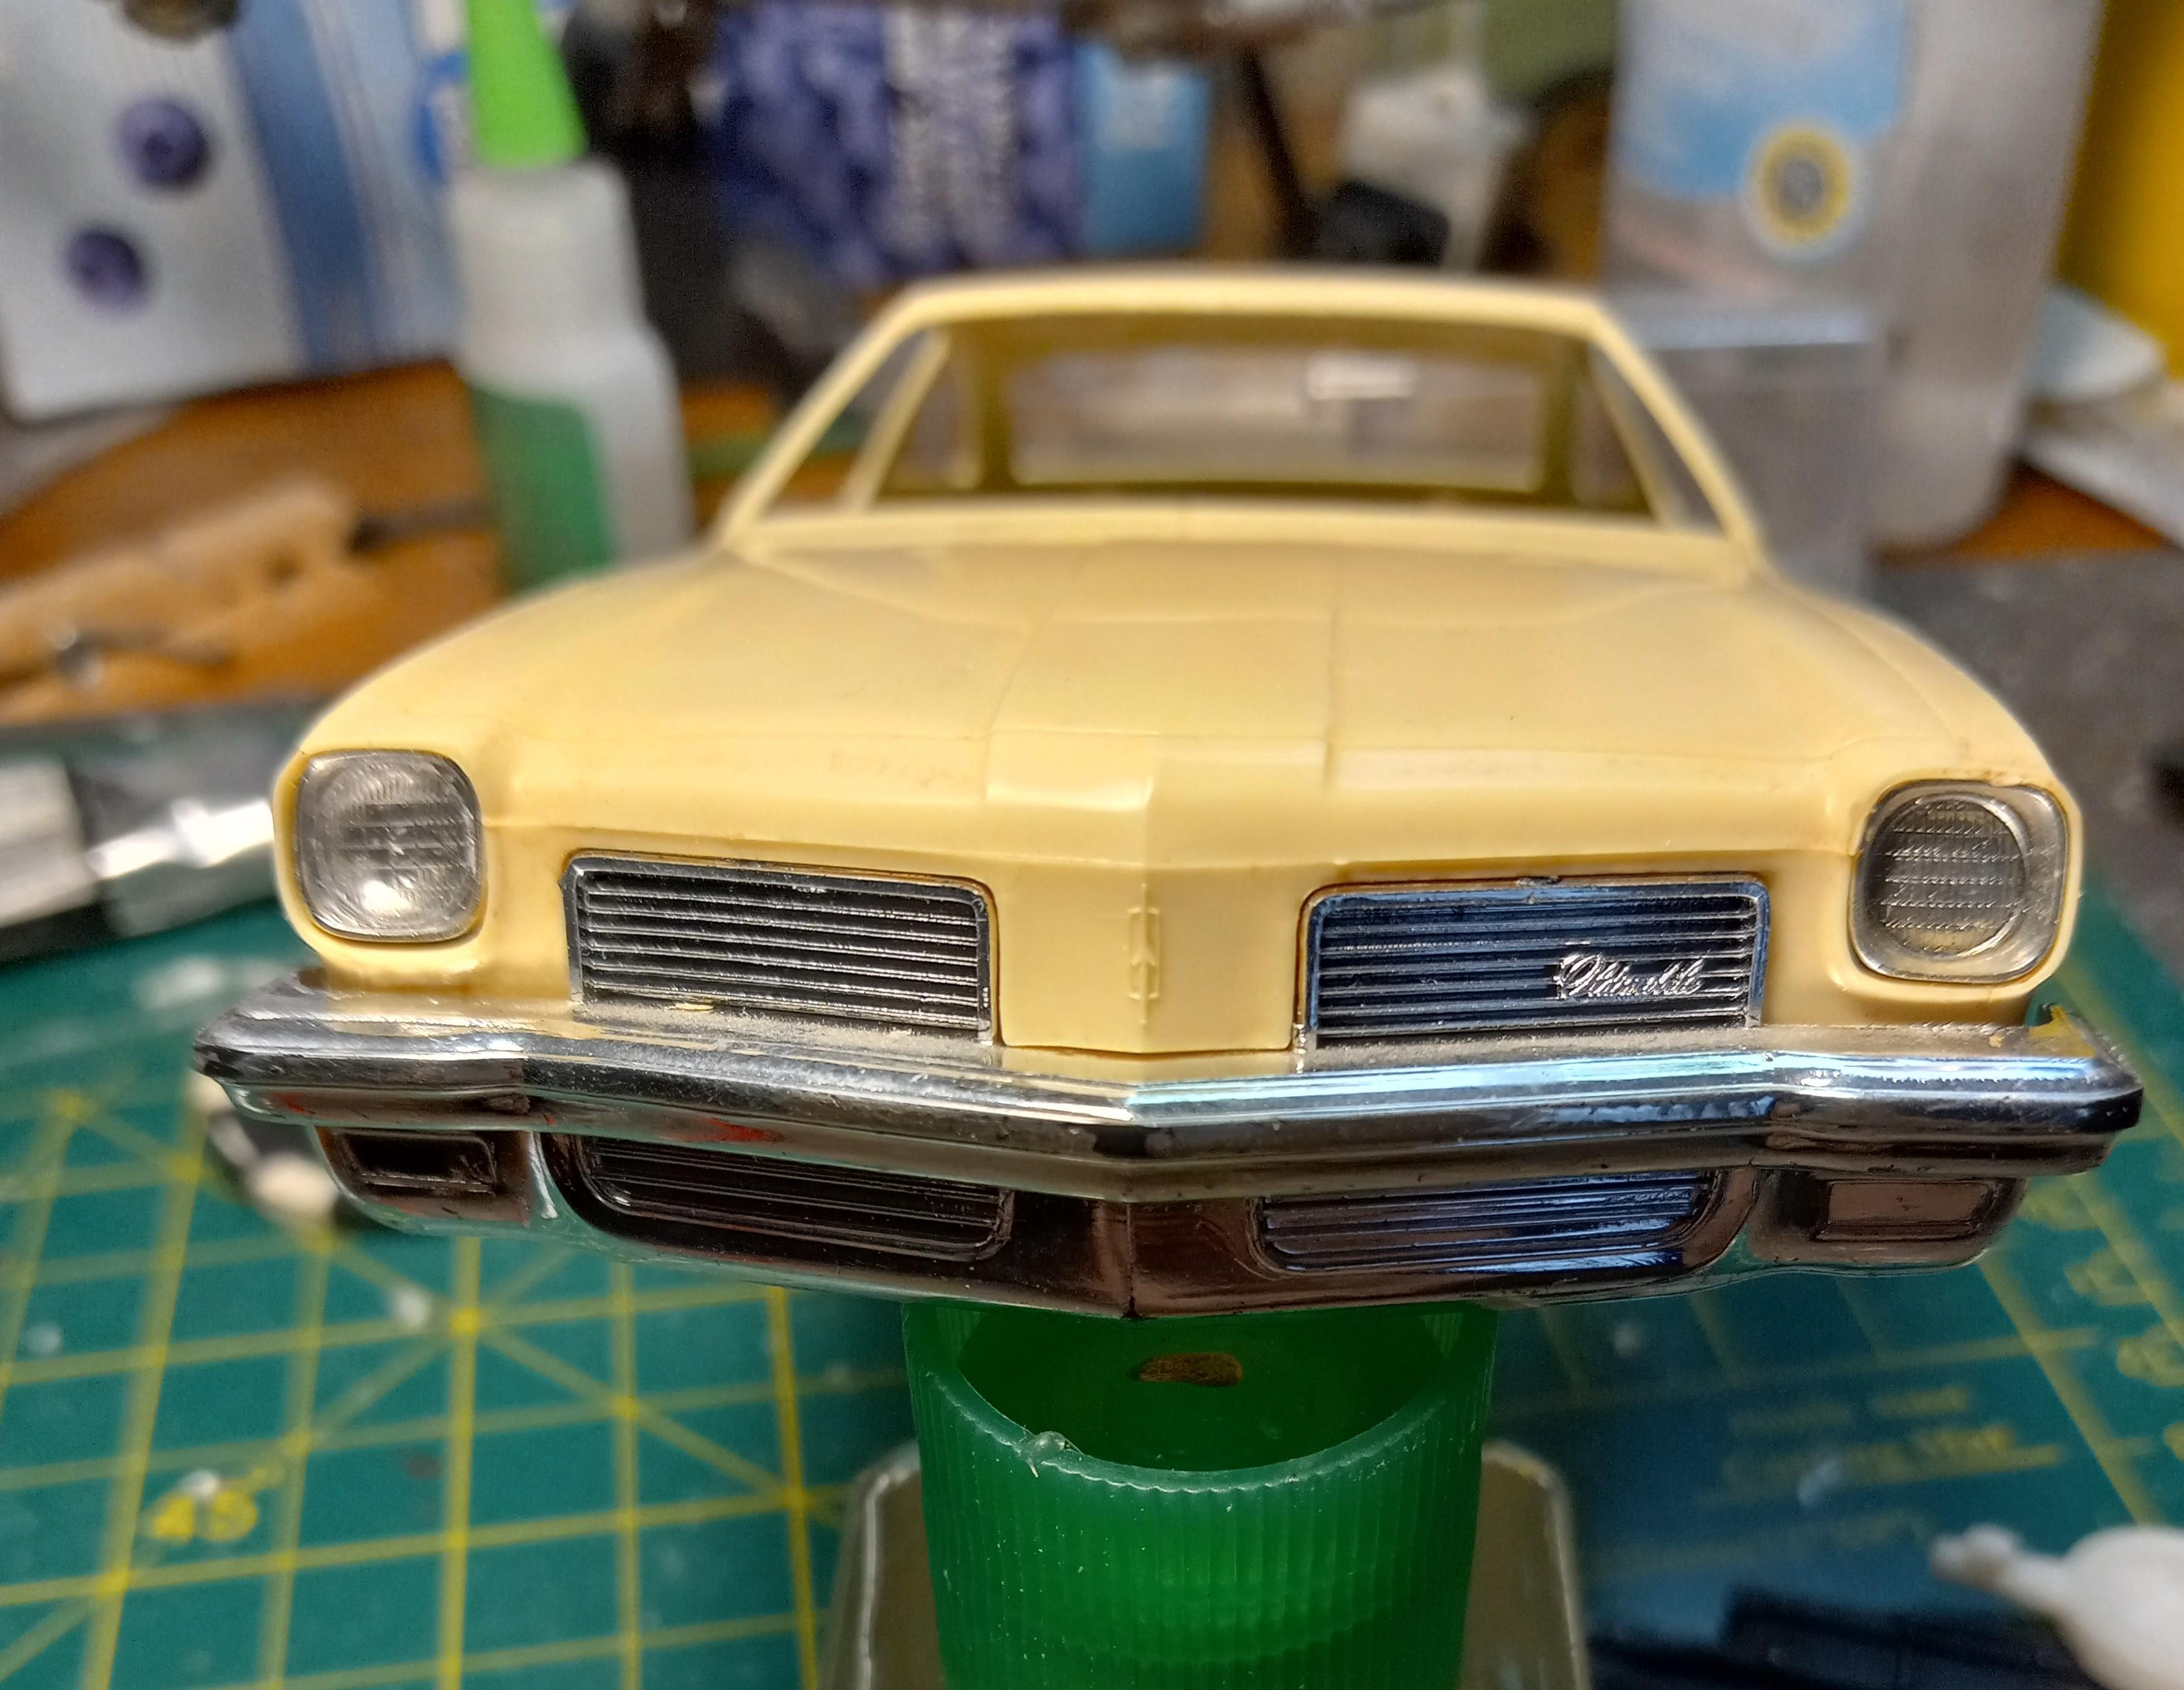
I've seen too many very nice models that the builder did nothing to address the chromed headlights. This oversight takes away from the presented model and kills the realistic look modelers go for. The following how-to shows just how easy it is to make more realistic headlights than the ones presented in old kits and promos. You will need a drill bit or Dremel round head, BMF or chrome paint, white glue and clear lenses from your parts bin. For this demo, which took me all of 15 minutes start to finish, I used the headlights from the AMT 1971 Camaro. 1) Using an appropriately sized drill bit or dremel grinder tool, smooth off the light so it is concave. 2) Bare metal foil or chrome paint the inside of the newly-created headlight bucket. 3) Insert the new lens, be sure to line it up correctly. Apply white glue to secure lense.
-
1977 Olds Cutlass from 3D print from Too Many Projects
carl63_99 replied to carl63_99's topic in WIP: Model Cars
No vacuform machine, so I did the squish method. I had the molds at the ready, heated the clear plastic over a heat gun and when it was really flimsy, pressed it down over the mold. I made between 3-5 versions of each window until I got one that was good enough to use. One problem is that the plastic got hot enough to melt the 3D printed window mold, so I had to work fast. If I do this again, I will make a clay mold of the 3D printed one and mold over that. As I am not going for contest winning, just building for my own fun, I am happy enough with the results. Building one of these perfect would cost a lot more time and money. -
1977 Olds Cutlass from 3D print from Too Many Projects
carl63_99 replied to carl63_99's topic in WIP: Model Cars
I think I see a problem. As I've done 5 windshields now, each one getting better than the last, I have to draw the line somewhere or I'll never get done. Best windshield so far is glued into the H/O and now it can go on to the next step. I also though about tail lights. I could mold them or cut down toothbrush handle or something to make nice 3D ones, or BMF the one included and put a couple coats of clear red over that. Second option shown, and they look pretty nice.
-
1977 Olds Cutlass from 3D print from Too Many Projects
carl63_99 replied to carl63_99's topic in WIP: Model Cars
Using air-dry clay and the tenplates that came with the kit, I've been experimenting with a few different kinds of plastic for the windows. Replacement photo frame glass from Hobby Lobby seems to provide the best clarity when heat molding the windows. I may make several more to get them perfect, but as far as proof of concept, I know I can make them.
-
1977 Olds Cutlass from 3D print from Too Many Projects
carl63_99 replied to carl63_99's topic in WIP: Model Cars
I'm Baaack! Been so busy with business, holidays, severe storms and taxes. But I did get some time to start working on molding windshield and back window. I found some picture frame inserts made of plastic at Hobby Lobby and will be seeing how that heats and molds over the templates included in the 3D kit.
-
1st for the year. Detailed 1974 Hurst Olds from a Johan promo.
carl63_99 replied to Bills72sj's topic in Model Cars
Nice work! Kind of a different subject we've picked to work on. Mine is stalled at the moment, been too busy with life and other things. -
Looks like an interesting build. It should be in the WIP thread though.
-
GREAT project. But this should be in WIP, not Under Glass.
-
Soooo, this is like a LEGO-ish toy built up?
-
1977 Olds Cutlass from 3D print from Too Many Projects
carl63_99 replied to carl63_99's topic in WIP: Model Cars
The holiday season is a hard time for me to work on models. Too much family, fun and food. Also had to deal with an burst waterpipe in a rental that took out dining room ceiling and one wall. Monday is the final paint on that maintenance issue. Just very little time for modeling when other stuff is going on. I had been wanting to try airbrushing Molotow paint and was going to order some refill. Then I though, not a big fan of the 4mm pen, why not drain it? So, I did. A short time later I have the following results. Enjoy!
-
`55 Ford F 100
carl63_99 replied to Andy Oldenburg's topic in Model Trucks: Pickups, Vans, SUVs, Light Commercial
That's REALLY nice. But it should be in the Trucks forum. -
Interesting choice of color and sticking with the kit decals. Nice work. However, the correct naming is "Hurst Olds".