carl63_99
-
Posts
305 -
Joined
-
Last visited
Content Type
Profiles
Forums
Events
Gallery
Everything posted by carl63_99
-
Who doesn't love a mock-up? Let's see yours!
carl63_99 replied to Belairconvertable's topic in WIP: Model Cars
Mock-up after first round of Polishing Grill and bumpers not mounted down as I'll need to trim some edges to get everything to fit nicely.
-
1977 Olds Cutlass from 3D print from Too Many Projects
carl63_99 replied to carl63_99's topic in WIP: Model Cars
First round of polishing. Lots more to do, but I like the direction she's going.
-
1977 Olds Cutlass from 3D print from Too Many Projects
carl63_99 replied to carl63_99's topic in WIP: Model Cars
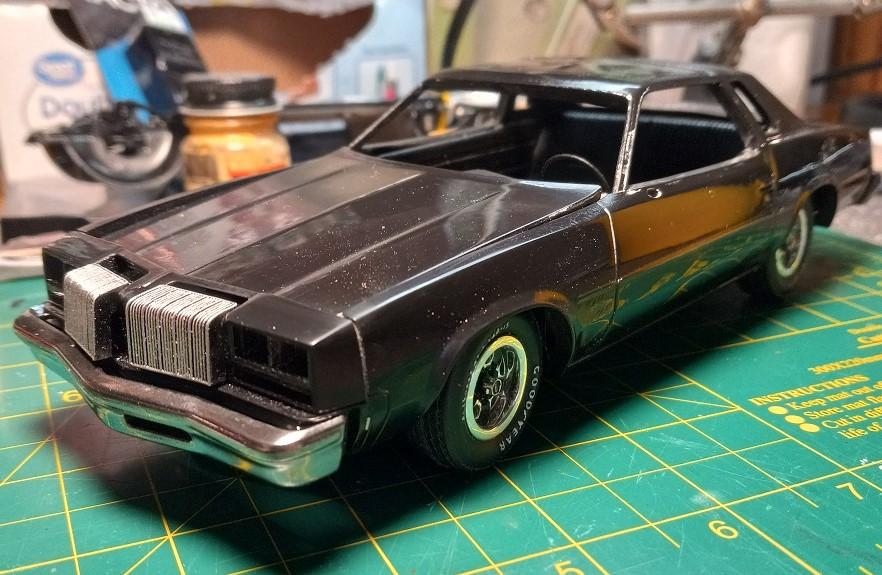
As we all know, black is the most challenging color for a painters skills. For my Cutlass, I went flat black base with 2K clear, 4 coats. I've let it sit for a week and started wet sanding with 600 grit. The goal of the sanding is to get the surface as flat and smooth as possible without burning through. I stand over the sink with a trickle of water as I turn and flip and maneuver the model to get to every possible part. large flat areas like the hood are easy. Tight spaces like the nose area take a long time. After this, wash and polish.
-
1977 Olds Cutlass from 3D print from Too Many Projects
carl63_99 replied to carl63_99's topic in WIP: Model Cars
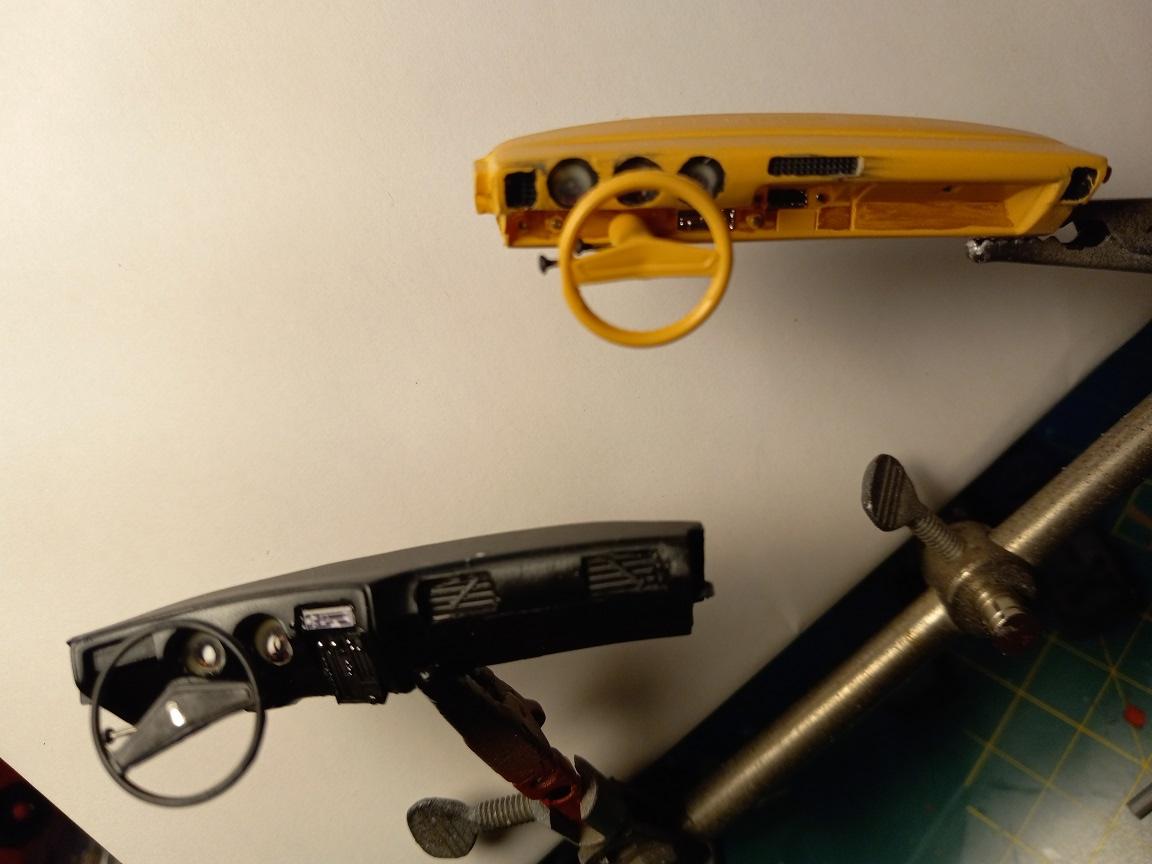
I have the dashboards 90% done. Need a little touchup and for the white glue to dry in the gauges. That usually takes a few days. Also did the chrome. Testers gloss black with Aclad II Chrome over the top. They look better than these pics, and I haven't decided about the rub strip or not.
-
1977 Olds Cutlass from 3D print from Too Many Projects
carl63_99 replied to carl63_99's topic in WIP: Model Cars
Started the next step, paint. First up, the Hurst Olds, which I decided needed the vinyl roof. You can see the dual exhaust on the chassis and the engine will be gold. The Cutlass Supreme got a little wet sanding on the roof, will be working on that for the next few days. That chassis has single exhaust and the 350 will be in blue.
-
1977 Olds Cutlass from 3D print from Too Many Projects
carl63_99 replied to carl63_99's topic in WIP: Model Cars
Painting is always the best part. I did a flat black base coat followed by a few coats of 2k clear. I'll let it dry for a while (BTW, WARNING this plastic gets SOFT in the food dehydrator) sand it and see if I need more clear coats. This 3D printed body is super smooth and straight.
-
1977 Olds Cutlass from 3D print from Too Many Projects
carl63_99 replied to carl63_99's topic in WIP: Model Cars
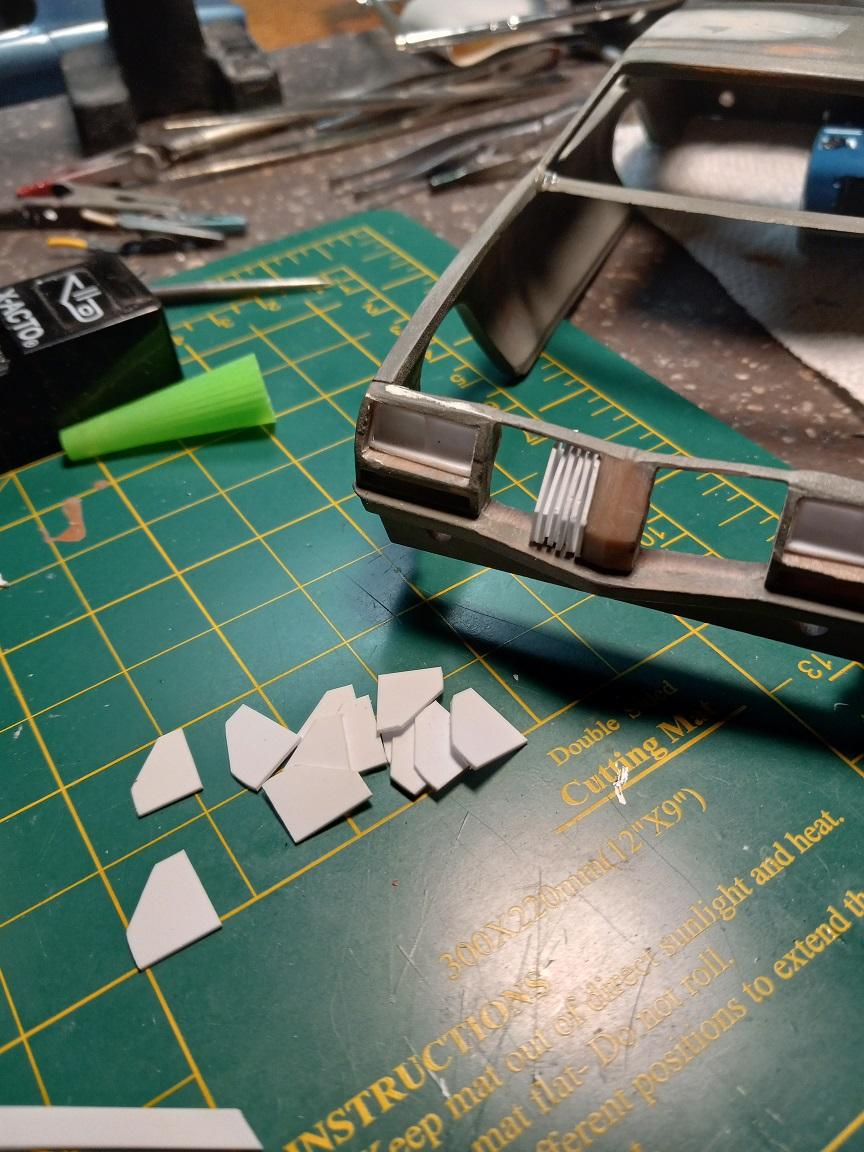
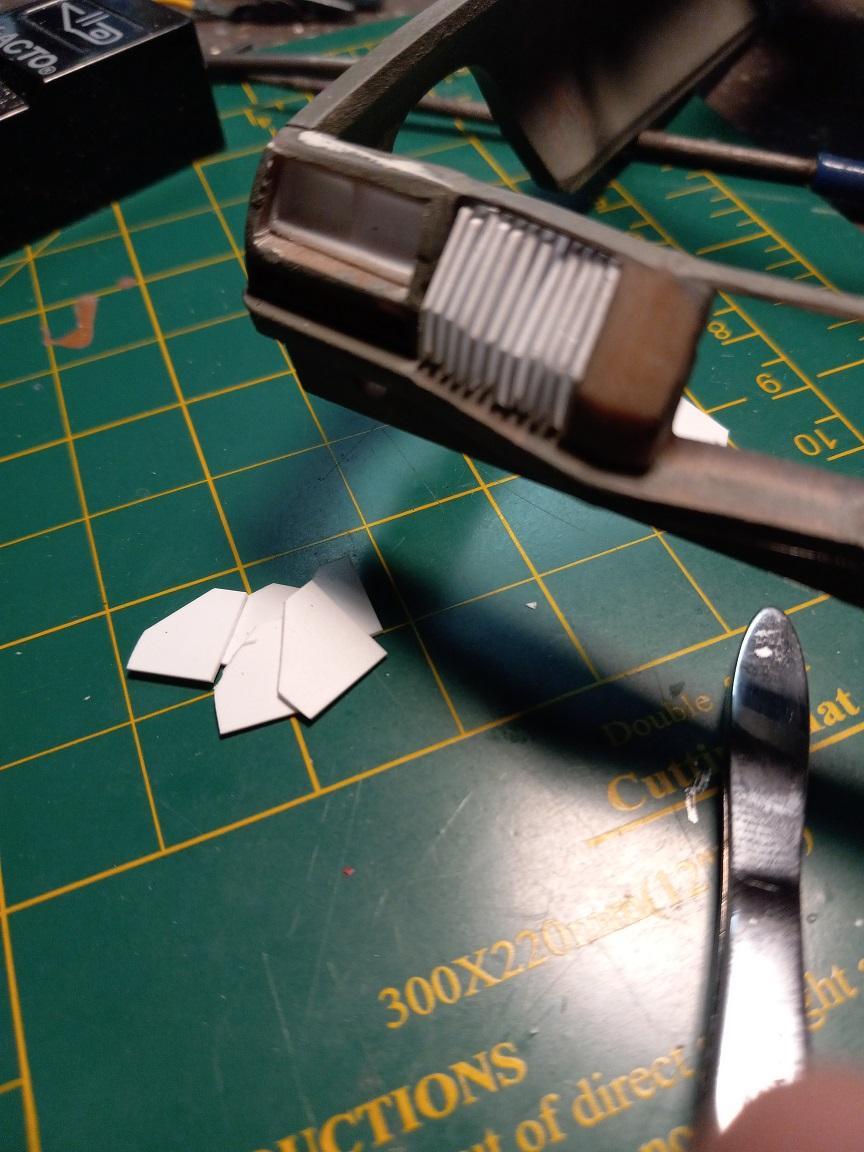
After some time away from the project, and having re-evaluated, I redid the grill. I cut a whole pile of new slats from 0.020 Evergreen and got them as even as I could. I used an aluminum square tube as my guide to get them lined up. same Evergreen between them to create the spacing and super-glued it down. Now I have a spot on the hood to grind down so it sits flush again. 2.5 hours bent over my bench, my neck hurts.
-
1977 Olds Cutlass from 3D print from Too Many Projects
carl63_99 replied to carl63_99's topic in WIP: Model Cars
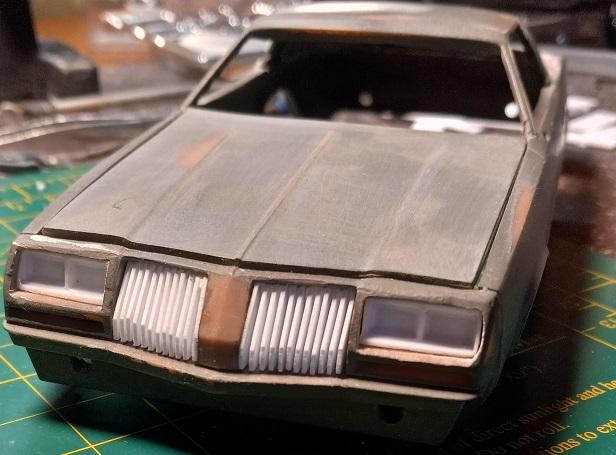
I didn't really like the screen for the front grill. Working with sheet plastic, I came up with this. Looks more like the real thing, I may redo it as I have some ideas to make it more uniform. But, this is better than before.
-
As a fan of Ferraris in non-traditional colors I'd say you picked a great look there. That paint job looks nice. Really nice!
-
1977 Olds Cutlass from 3D print from Too Many Projects
carl63_99 replied to carl63_99's topic in WIP: Model Cars
Made it to the Austin Scale Model show on Saturday and found 1 (like the only one in the entire show) '83 Hurst Olds, and no '69 Hurst Olds. Otherwise, it was a great show. Lots of stuff in the vendor area, and the models in the contest area looked pretty damn good. On to my Hurst Olds. As you see, I cut the headlight buckets from the '83 kit and installed them. I'll paint them gloss black then Alclad chrome to make them nice and reflective.
-
1977 Olds Cutlass from 3D print from Too Many Projects
carl63_99 replied to carl63_99's topic in WIP: Model Cars
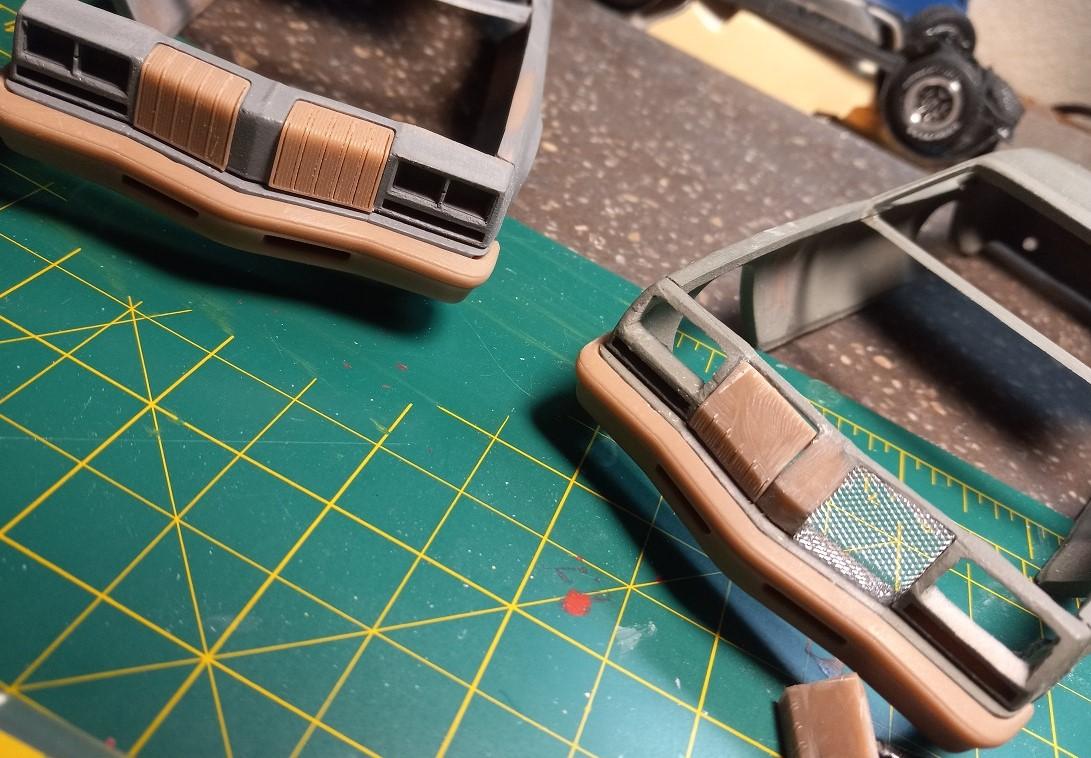
Every time I say I'm going to set this project aside, I find something that I just have to do on it. I found my railroad screen, which is one of my favorite materials to work with, and worked on cutting down the grills and shaping the screen over them to determine how it will look. Not exactly what the 1:1 scale had, but it's my model and I like it!
-
Really nice build.
-
Congrats! Was a great build to watch. Retirement isn't such a bad thing, really!
-
I had gotten two 3D printed blowers, planning to use the second one someday. That day came this week. I also was tired of the too-small rims and tires in the original AMT kit, so I used these from a long-gone diecast. Model is looking a little rough around the edges (literally, in some spots) and I would do some things differently if I were to build this one again. Still, happy it's on the shelf.
-
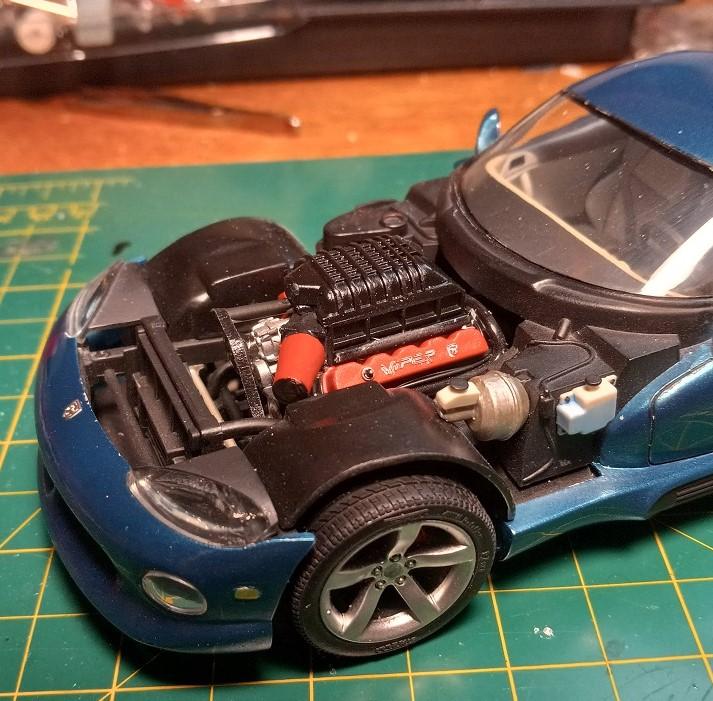
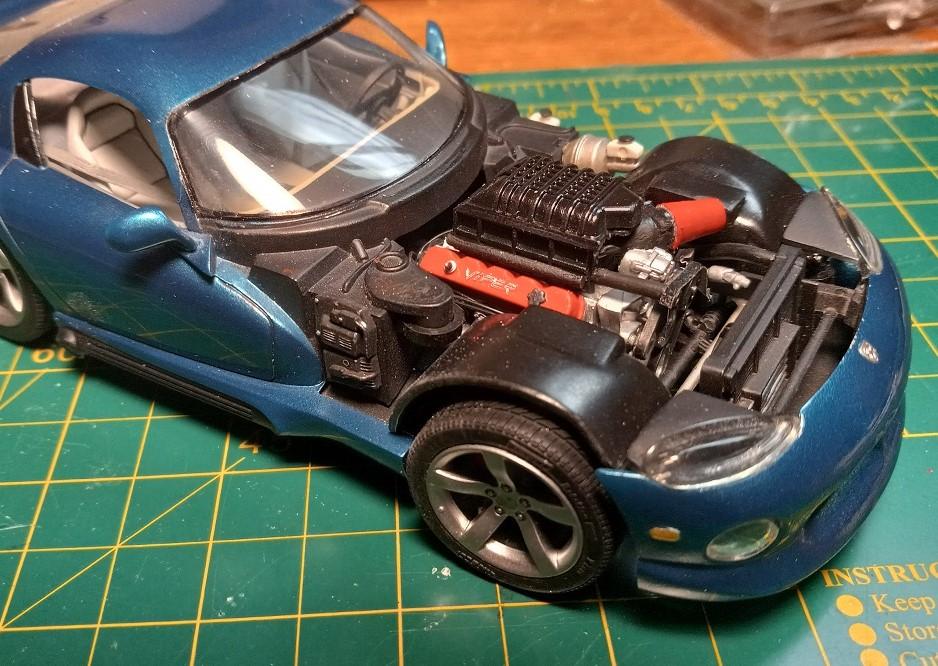
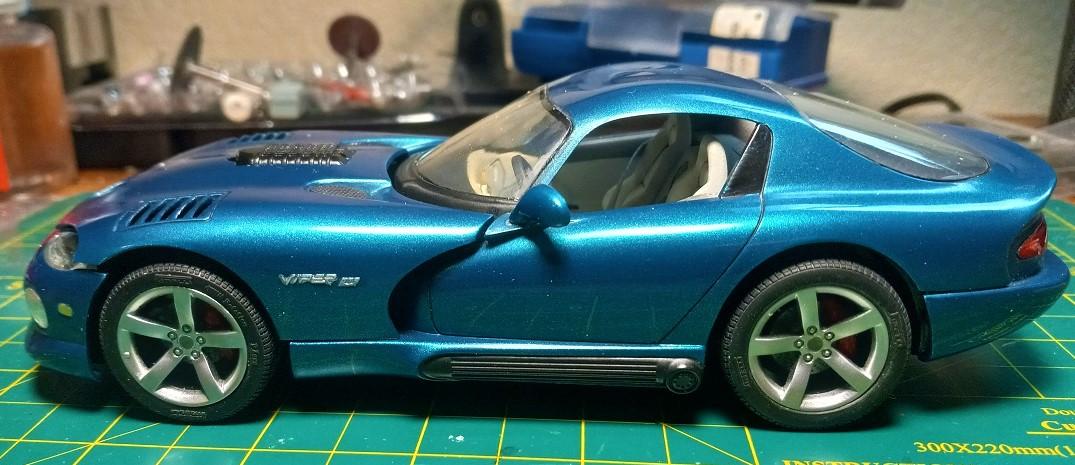
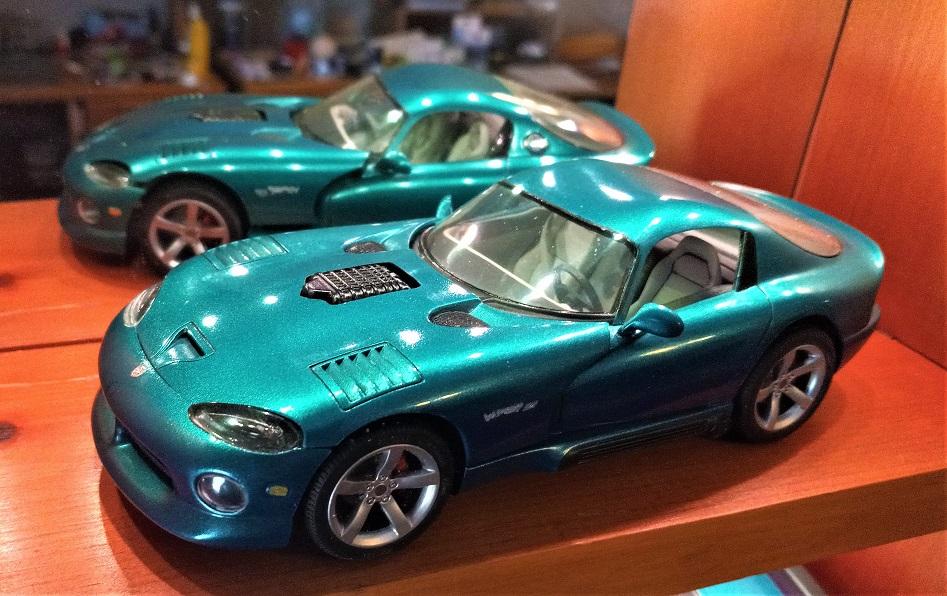
Who doesn't love a mock-up? Let's see yours!
carl63_99 replied to Belairconvertable's topic in WIP: Model Cars
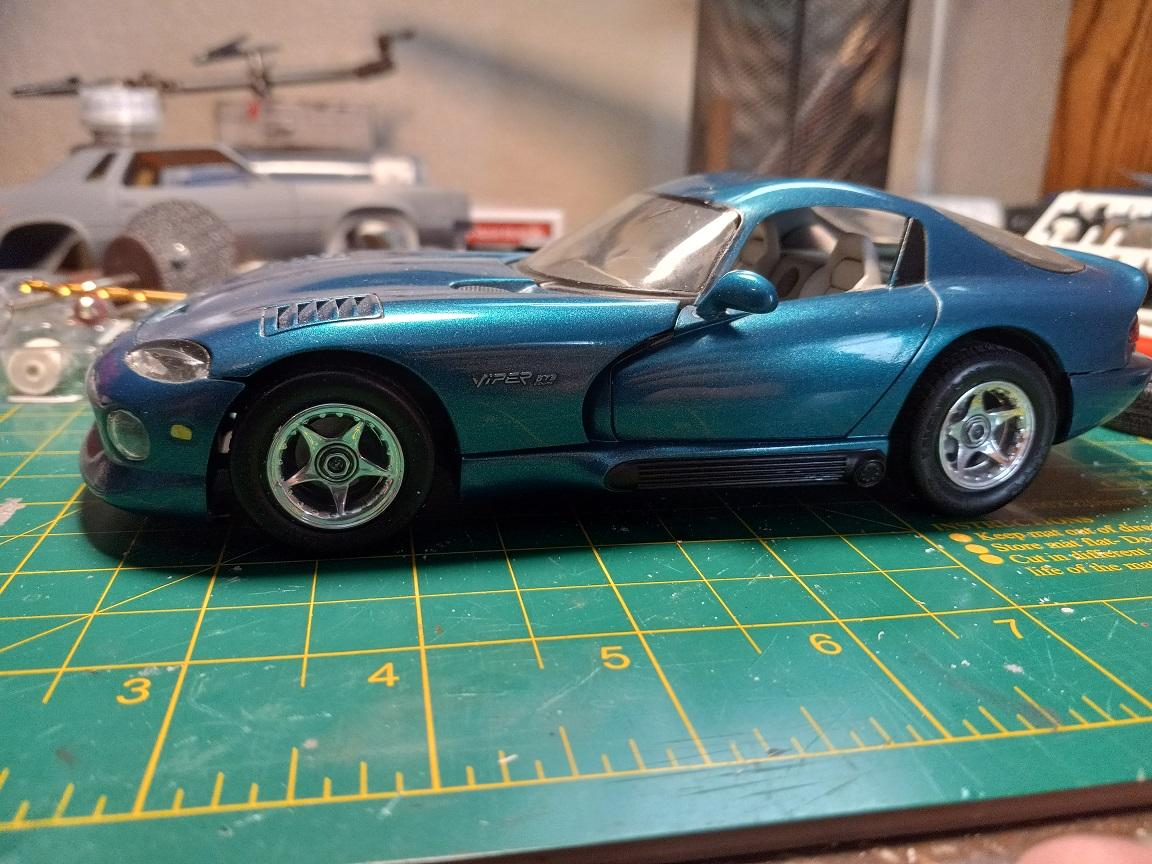
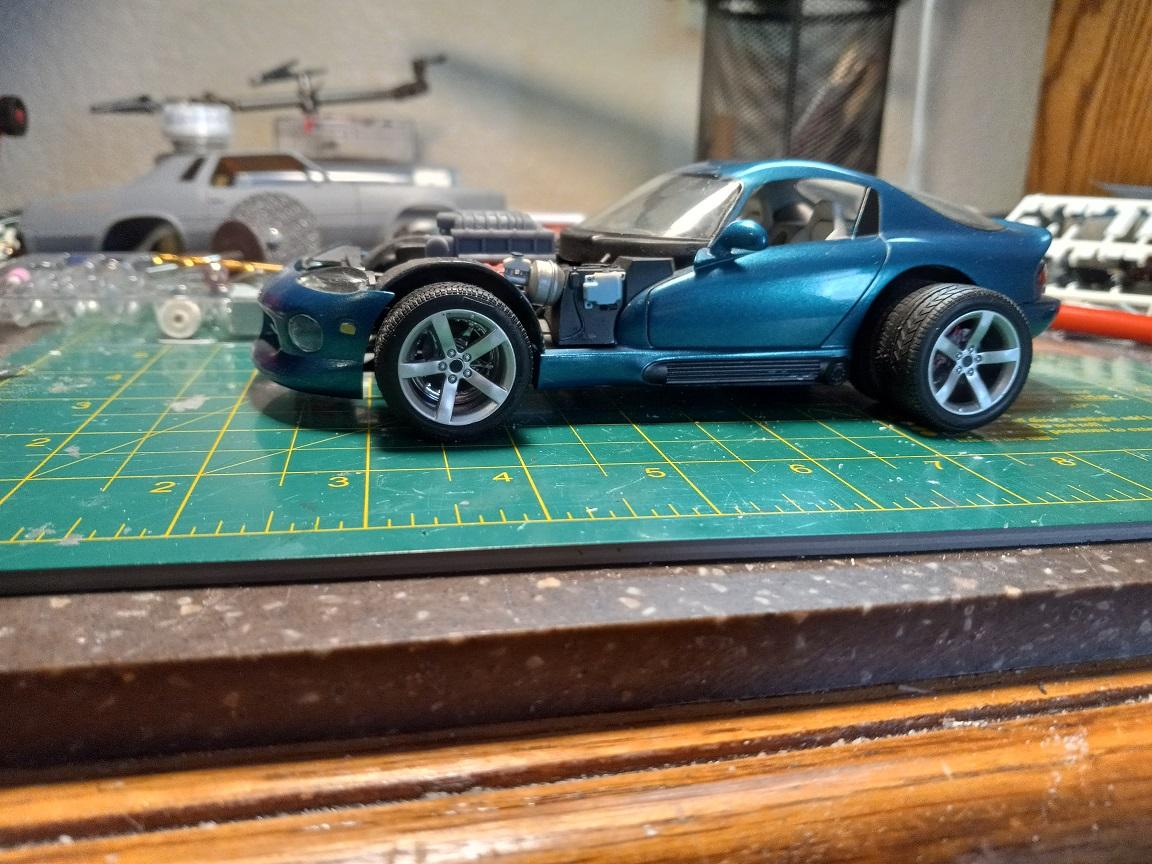
When I redid my '69 Dodge Coronet, I got a spare blower just in case. This Viper has been on my shelf since around 1997, won a number of trophies and has always been one of my favorites. I decided time to change the rims out, and whatthehell, drop the blower on. I prob won't have any in-progress, but will show it when done.
-
1977 Olds Cutlass from 3D print from Too Many Projects
carl63_99 replied to carl63_99's topic in WIP: Model Cars
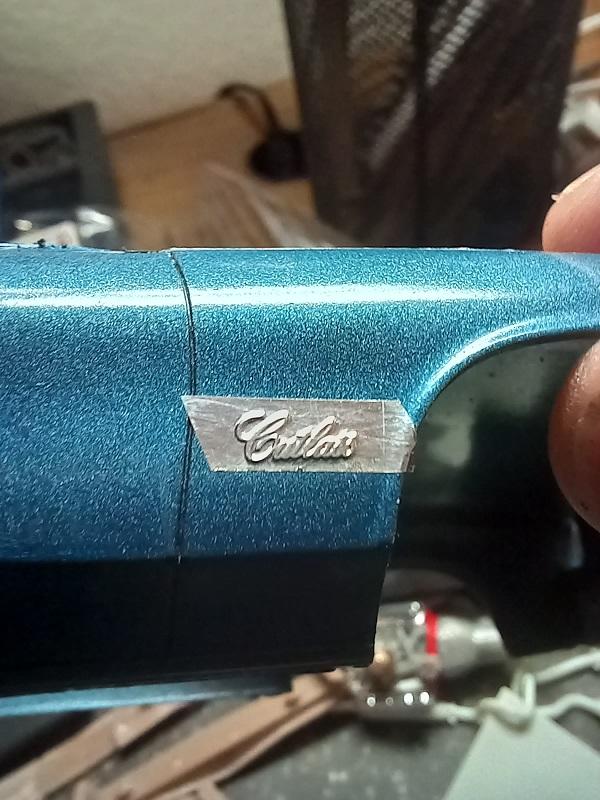
October 1st is the Austin Scale Model Show, and I've been making out my shopping list. I've been sorting out fine details, i.e. firewall area and interior. I need a few kits and some supplies to finish things up. In the meantime, I've gone and foiled the badges on the '74 body. I'm going to cut them off and sand them down from the back side to install on the stock '77 Cutlass, on the right in pic 2. Engines are ready for repaint, 350 with turbo 350 for the stock and 455/4 speed on the Hurst Olds. I'm considering sending the bumpers out for chrome, but may go Alclad chrome over gloss black which yields the same results. See yall at the show!
-
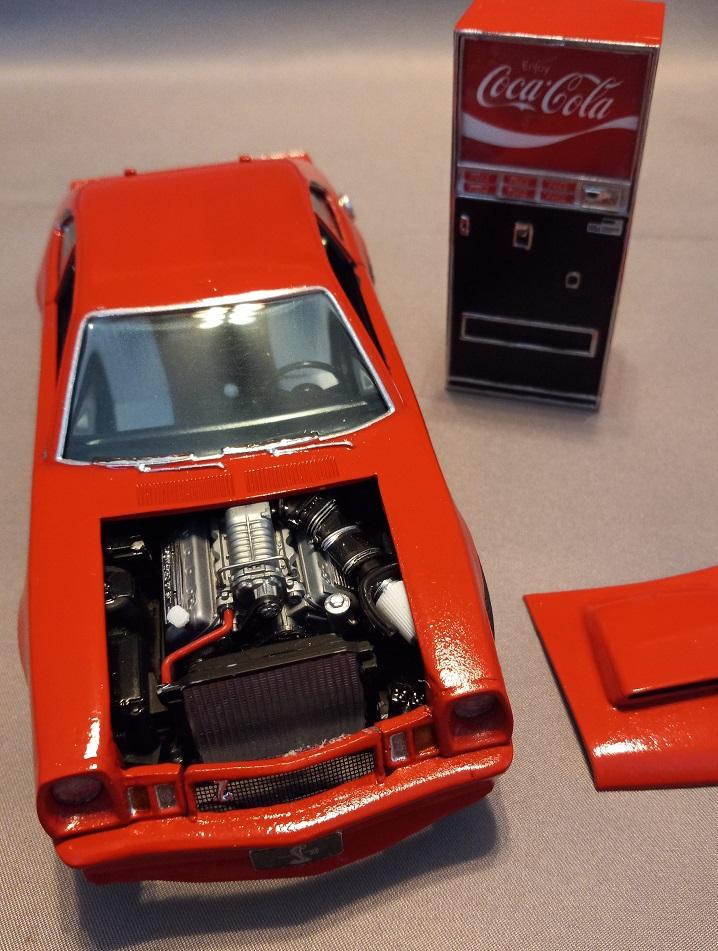
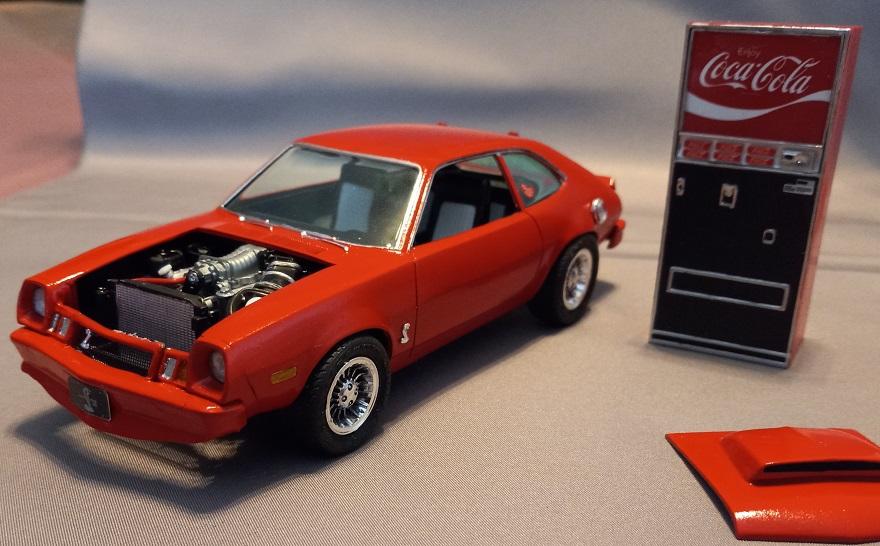
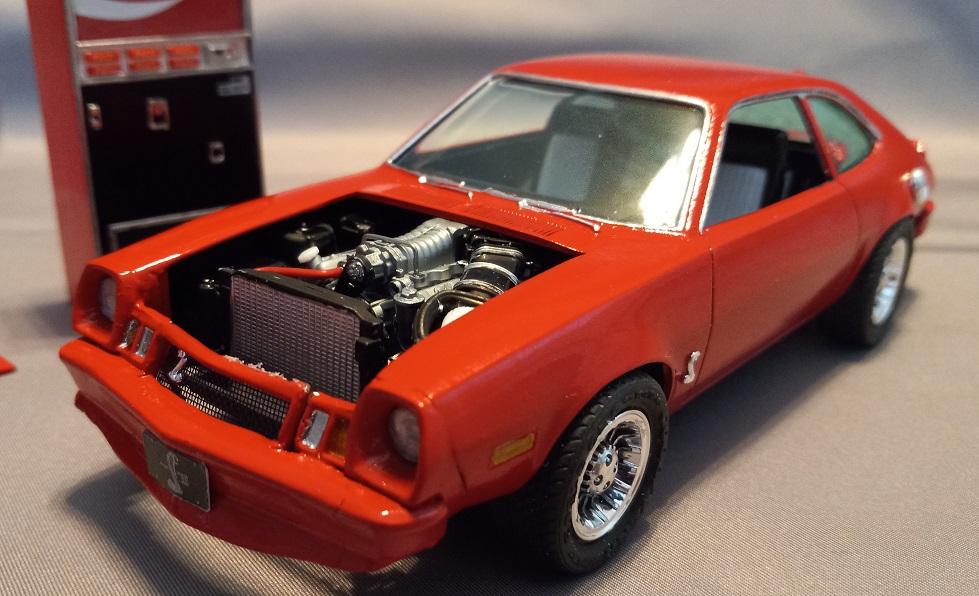
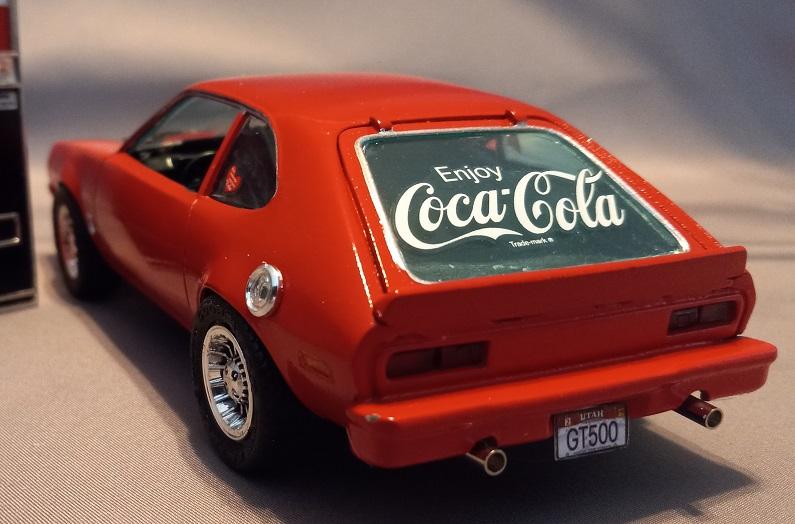
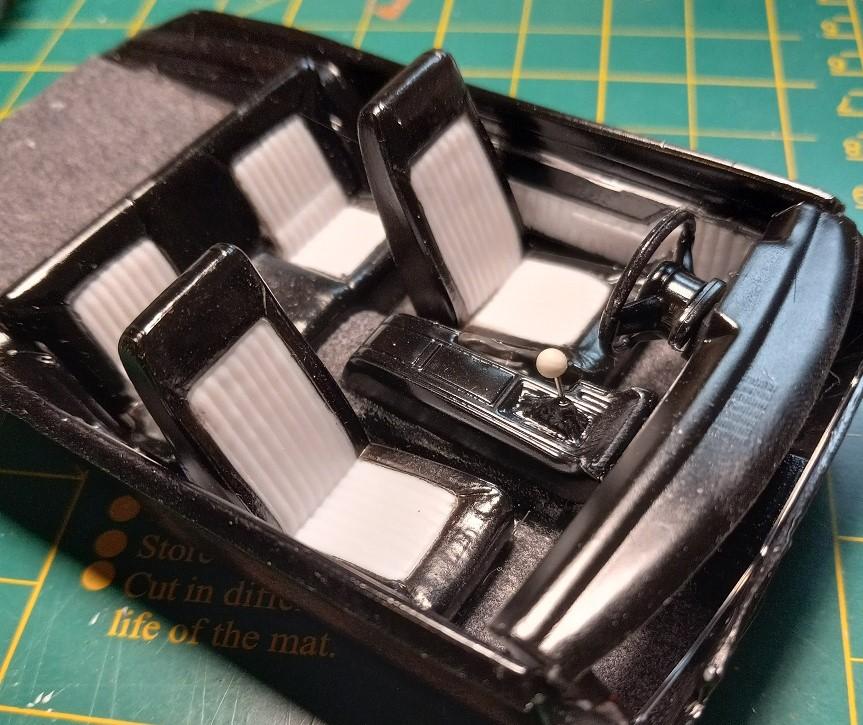
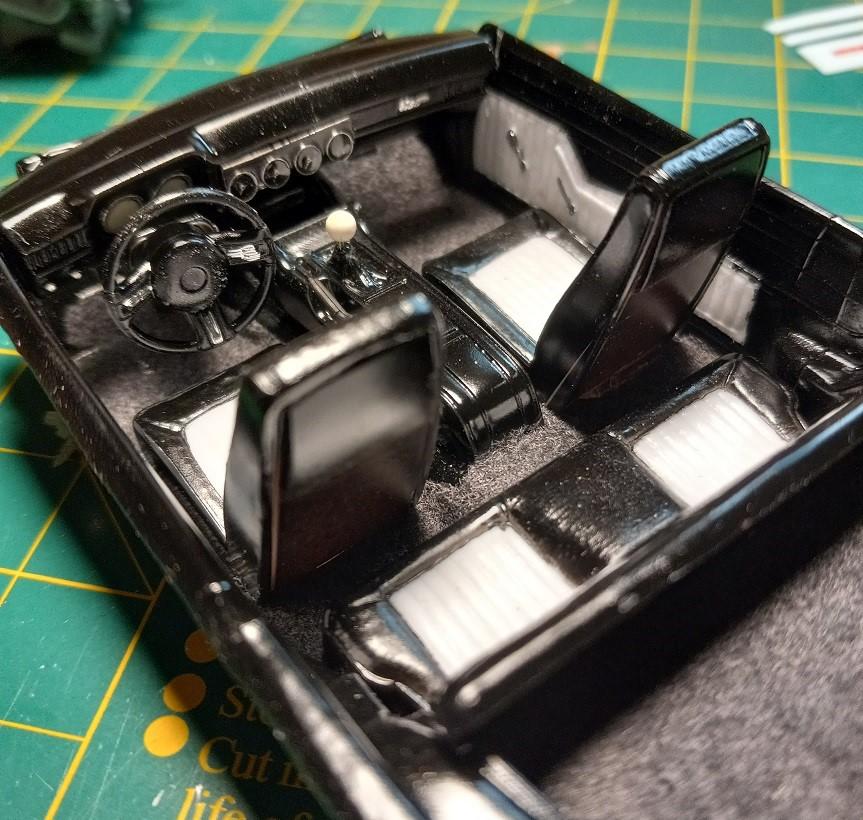
If it came from a Mustang, It was OK to use. I cut the chassis and interior of a 2010 GT500 to fit under the Pinto Body. Not my best work, but I had fun. Wheel/tire change at the last moment, lost 1 five-spoke and can't find it. Enjoy.
-
Done. Pics in Under glass.
-
1977 Olds Cutlass from 3D print from Too Many Projects
carl63_99 replied to carl63_99's topic in WIP: Model Cars
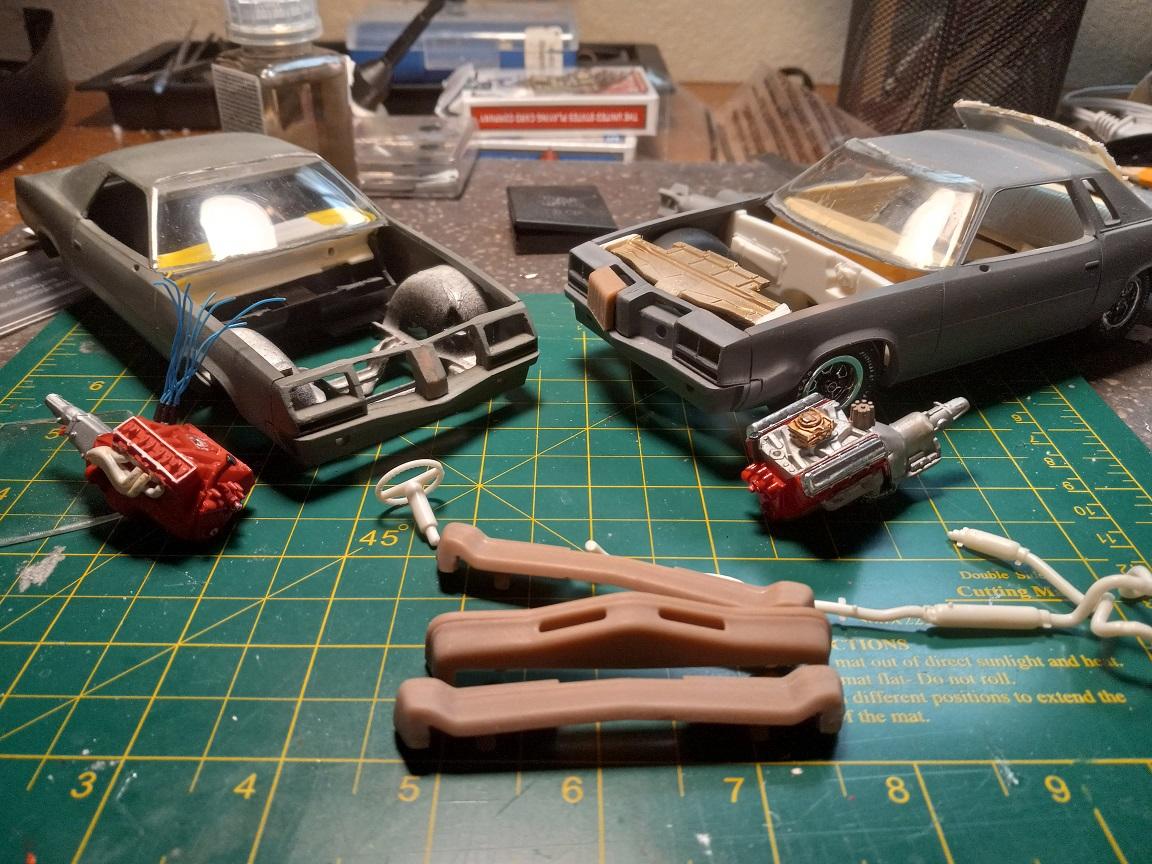
Been doing interior work. Themes: for the Hurst/Olds (current black interior), as it was a pre 1976 proposal from Hurst, I want to keep the 1974-1975 look of the interior, while showing performance upgrades. Thus, 1969 dash for the added gauges, it will have a Hurst shifter for the 4 speed. Color will be light tans and browns. For the 1977 Supreme (current tan interior), I've changed the seats, added better arm rests, and changed the vents to more closely match the 1:1 scale '77. I know it seems odd to do the tan interior black and black interior tan, but the parts mix and other factors just made it work that way.
-
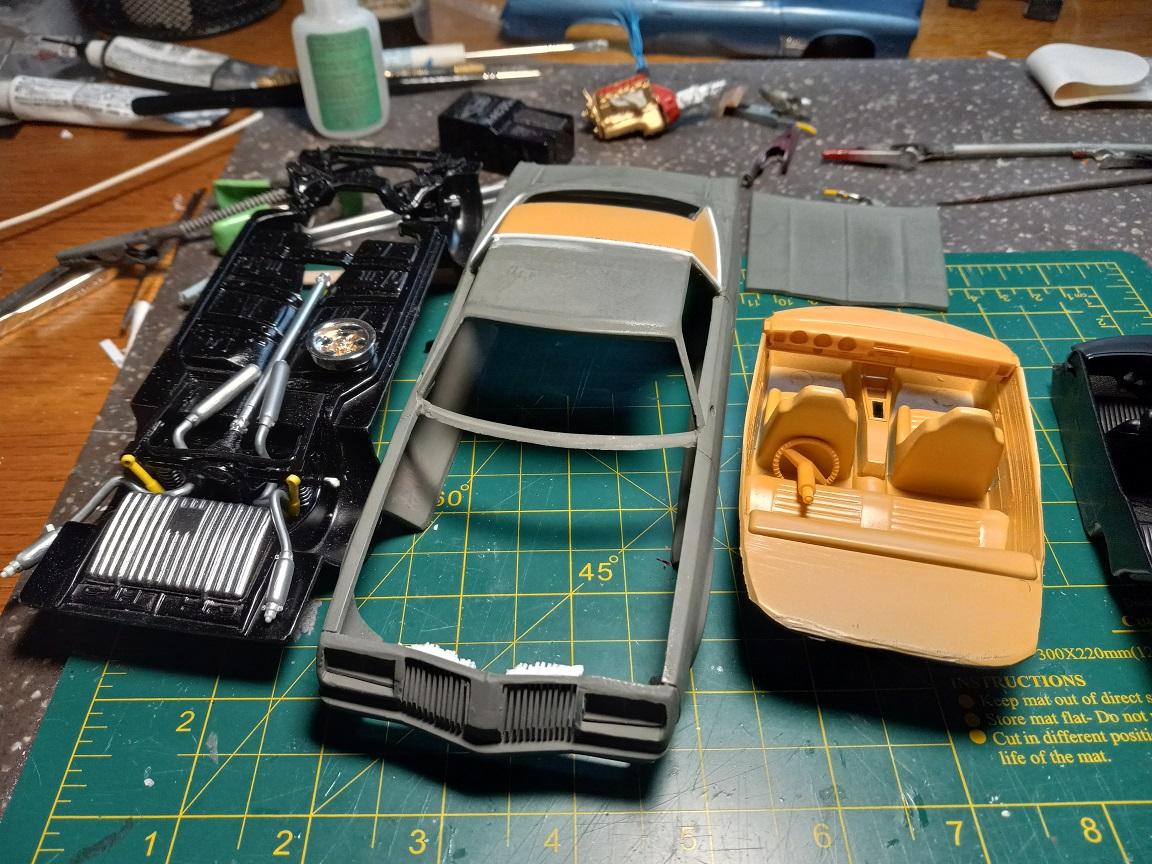
While the body sits I can get to the interior work. Just about ready to go in.
-
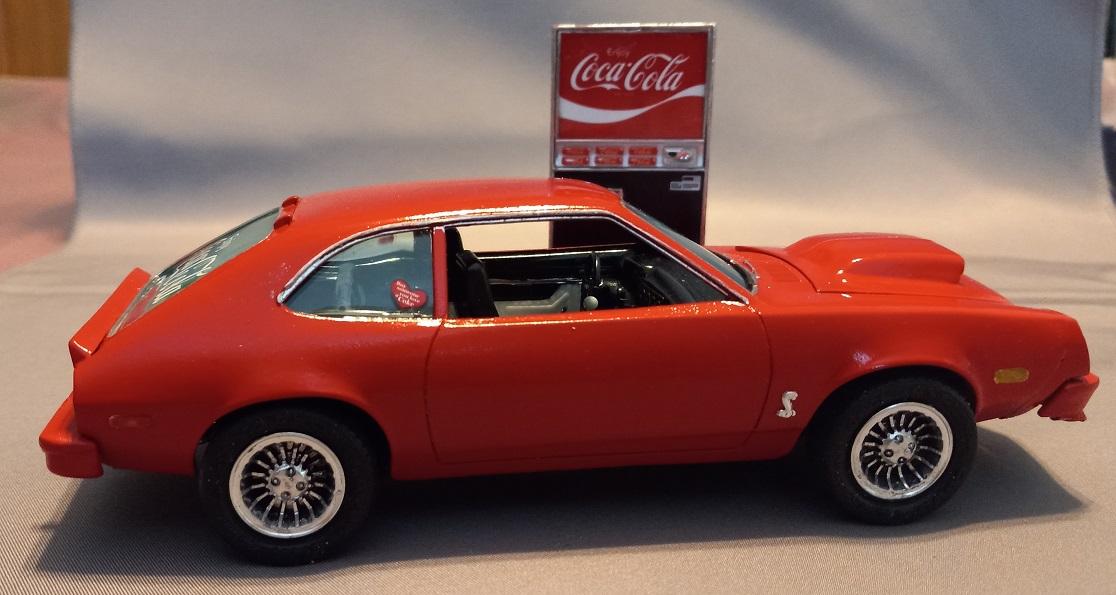
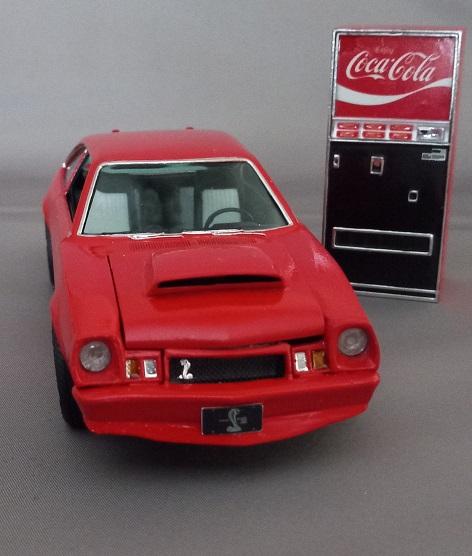
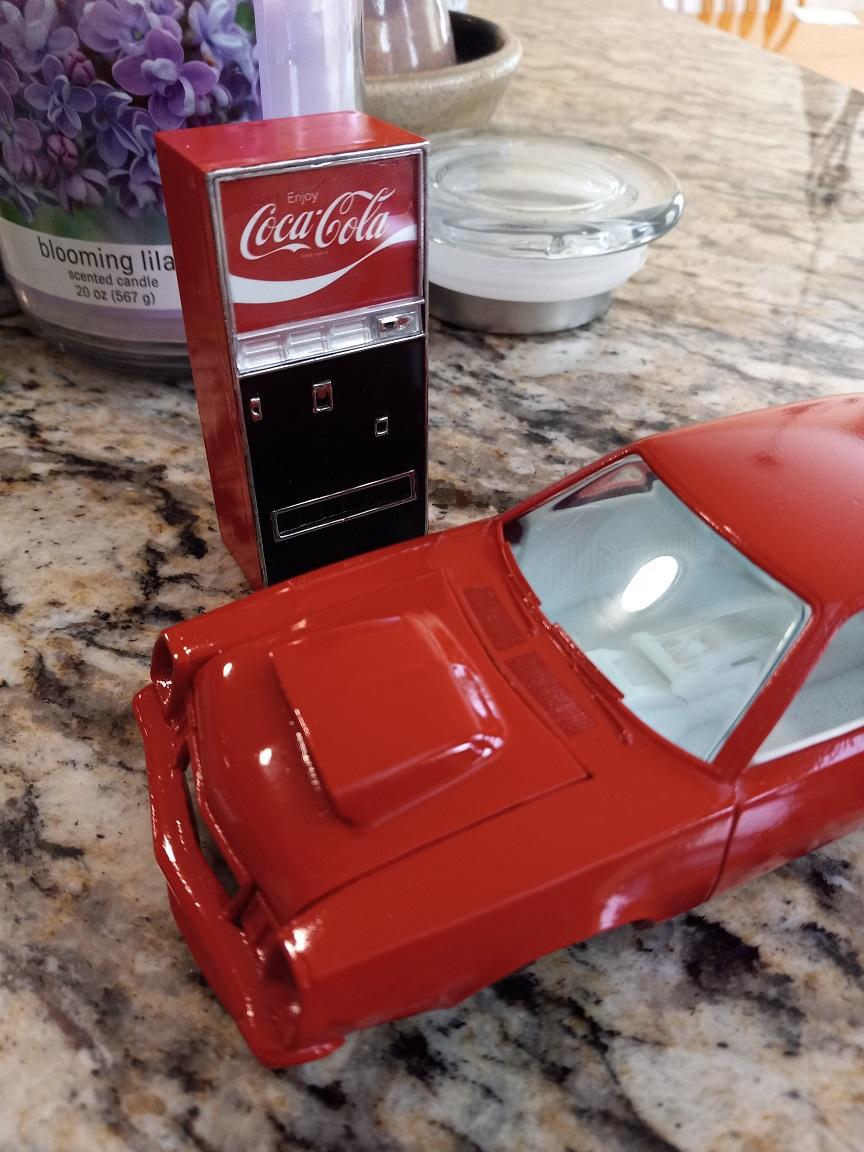
The Pinto came with a coke machine, which I decided to build. Fun diversion and it will look good in pics.
-
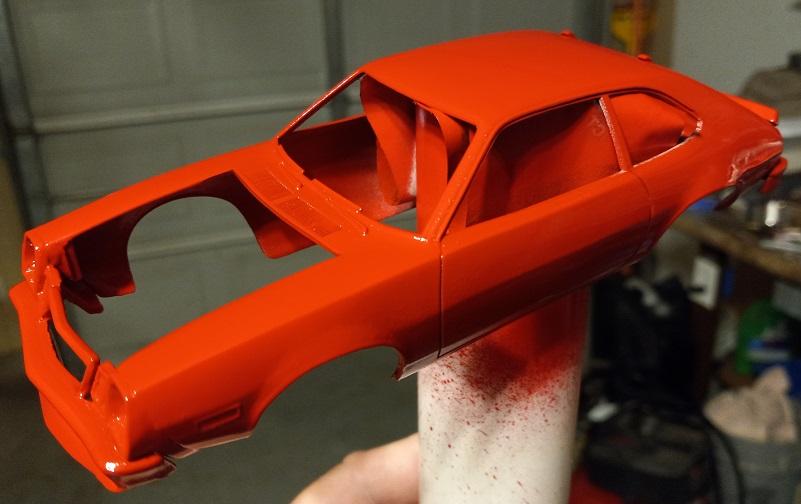
Ixney on the verde. Yea, changed my mind. I was going to go lime green. But, when I shot the coke machine, I opted to do the Pinto GT in that color too. Went on nice and smooth, comes out more red than these pics indicate. White racing stripes to continue the Coke theme... Onward!
-
Who doesn't love a mock-up? Let's see yours!
carl63_99 replied to Belairconvertable's topic in WIP: Model Cars
Looks like I've got my stance and interior/chassis fitting in the body just right. Making changes to the engines so all the hi performance bits are on the HO and standard stuff on the standard Cutlass.
-
Nope, nobody is seeing things, no deja vue. Nailpolish green didn't go on so well. So I had to strip and repaint. Silver base looks nice. When I get a chance, shopping trip for some good green to do that again.
-
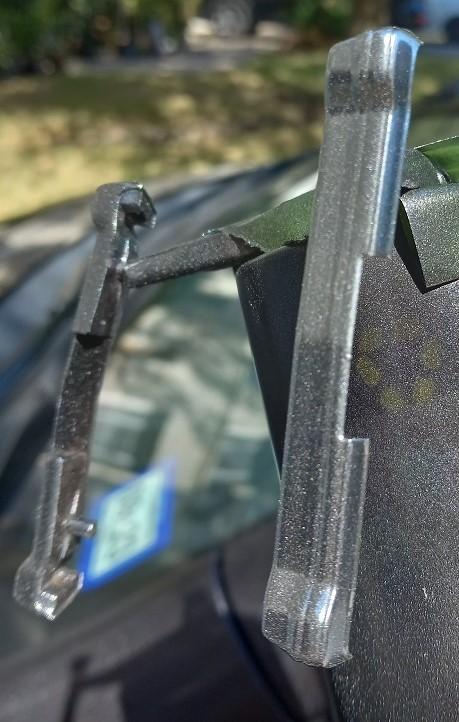
1977 Olds Cutlass from 3D print from Too Many Projects
carl63_99 replied to carl63_99's topic in WIP: Model Cars
I use a NEW blade in an X-Acto knife, dragging it backwards over the panel line. Going slow, using masking tape on the ends to keep from scratching the body past the line. Cutting the dash area took the longest because of space. I had to run the knife through the interior and scrap about 1/3rd of the dash part at a time. That took some time. But, afterwards, you can sand down the backside of the hood as much as needed for it to mount flush.