carl63_99
-
Posts
305 -
Joined
-
Last visited
Content Type
Profiles
Forums
Events
Gallery
Everything posted by carl63_99
-
Finished. Check out Under Glass.
-
Lamborghini Silhouette by (Gunze - Sangyo) Testors
carl63_99 replied to 89AKurt's topic in Model Cars
It was a crappy kit. I tried to build it back in the 80's. You did a great job on it. -
I may consider it someday. This is a quarter of my collection, all the rest are boxed up. Having to modify this one, I found the mirrors hard to find in an acceptable size, thus, two door mirrors on their sides. The plexiglass was $60 at Home Depot. I could probably do a slightly smaller one (20 cars) for around $100.
-
I got Govee lights, two 16 foot lengths on one controller, sticky back tape, $30 on Amazon. Lots of LED options out there!
-
About 35 years ago I built this shelf with my Dad. Pictures are probably up there somewhere. I've thought for years about updating it, wanting to add a mirror and a glass cover on the front to keep dust off my cars. A few months ago I decided to take the plunge and do it. I got a string of LED lights, plus the already mentioned stuff and updated it. Empty space is for my '69 R/T when I get the engine/upgrades done.

-
1969 Super Bee - Time for updates and more POWER
carl63_99 replied to carl63_99's topic in WIP: Model Cars
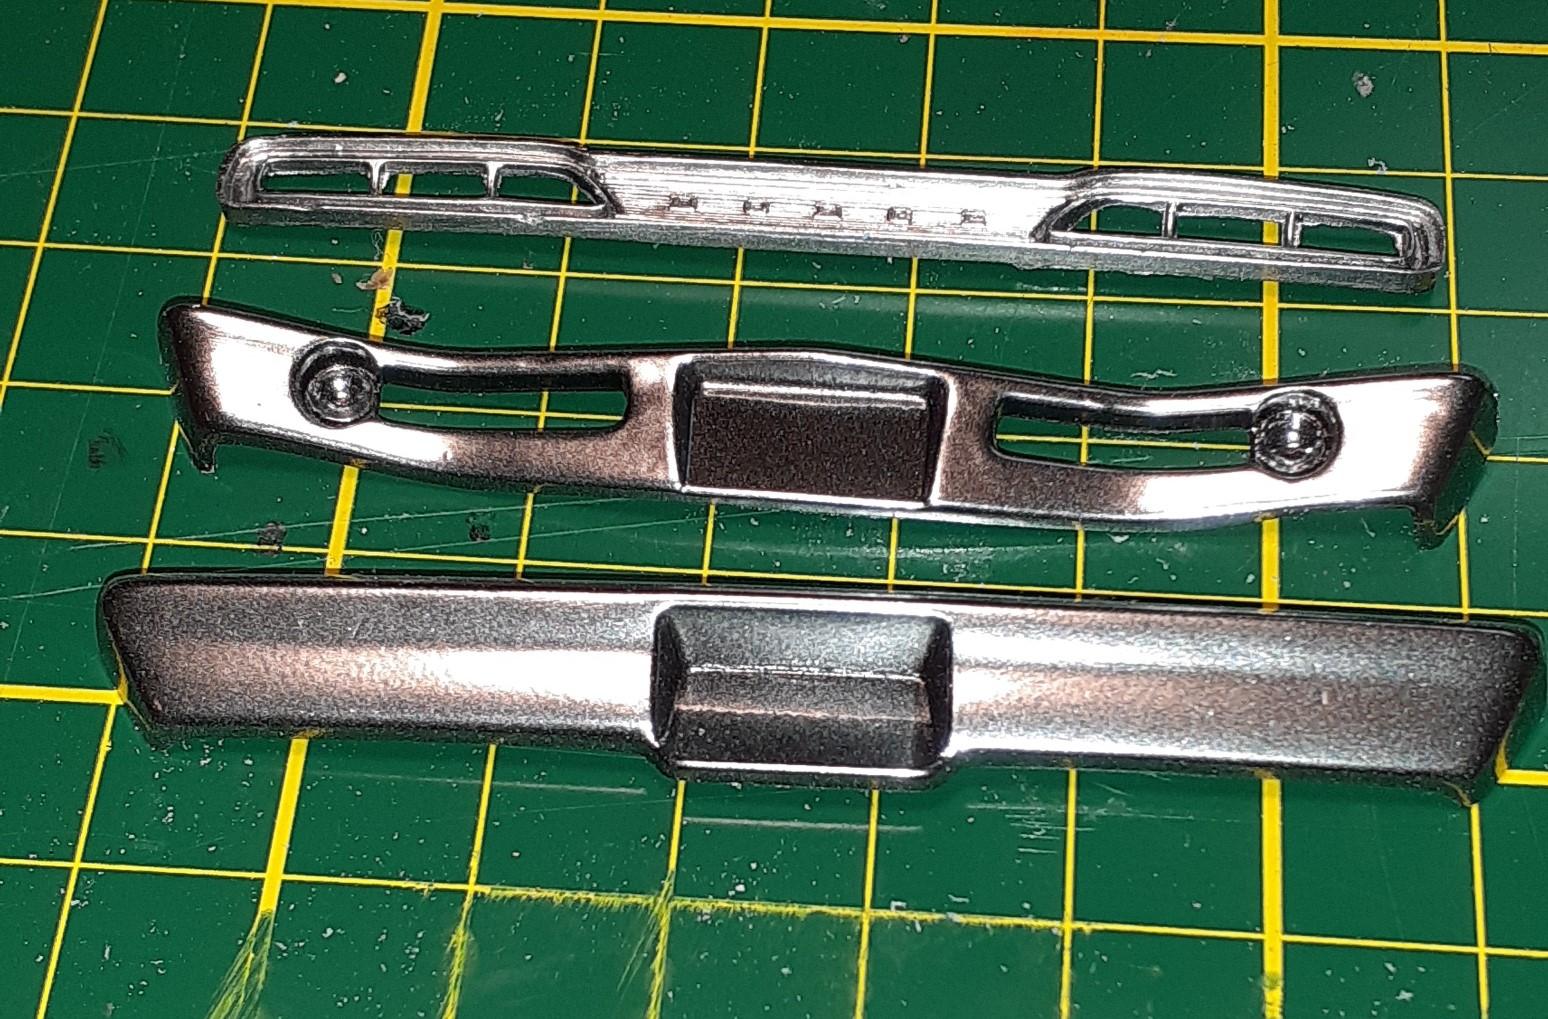
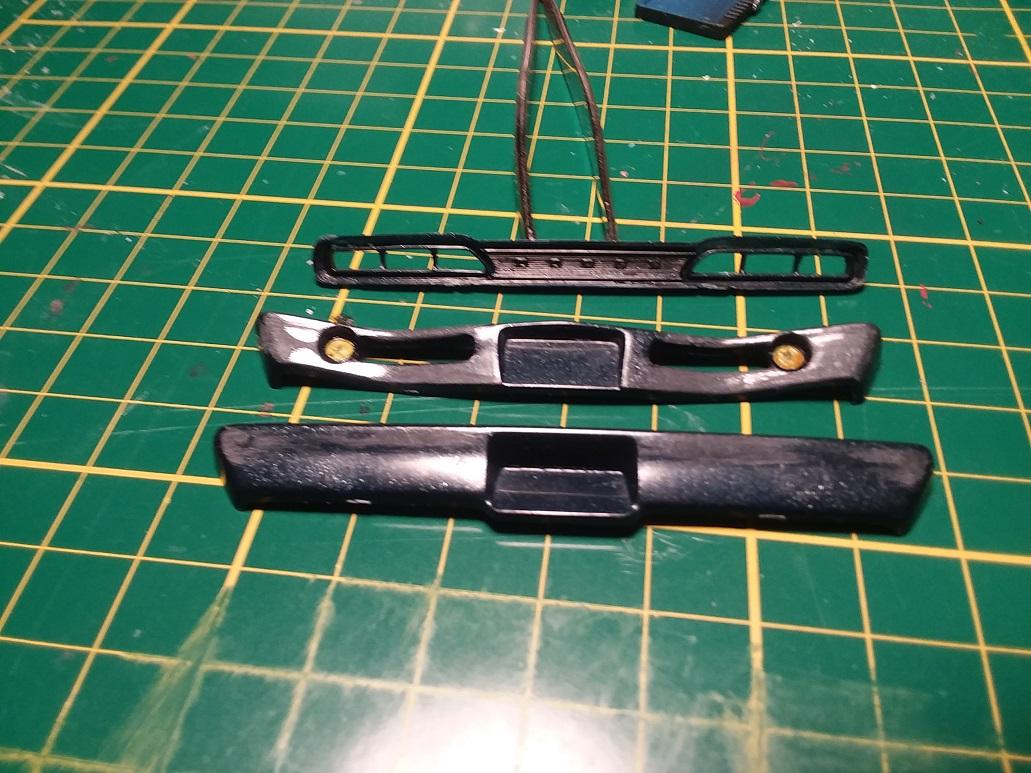
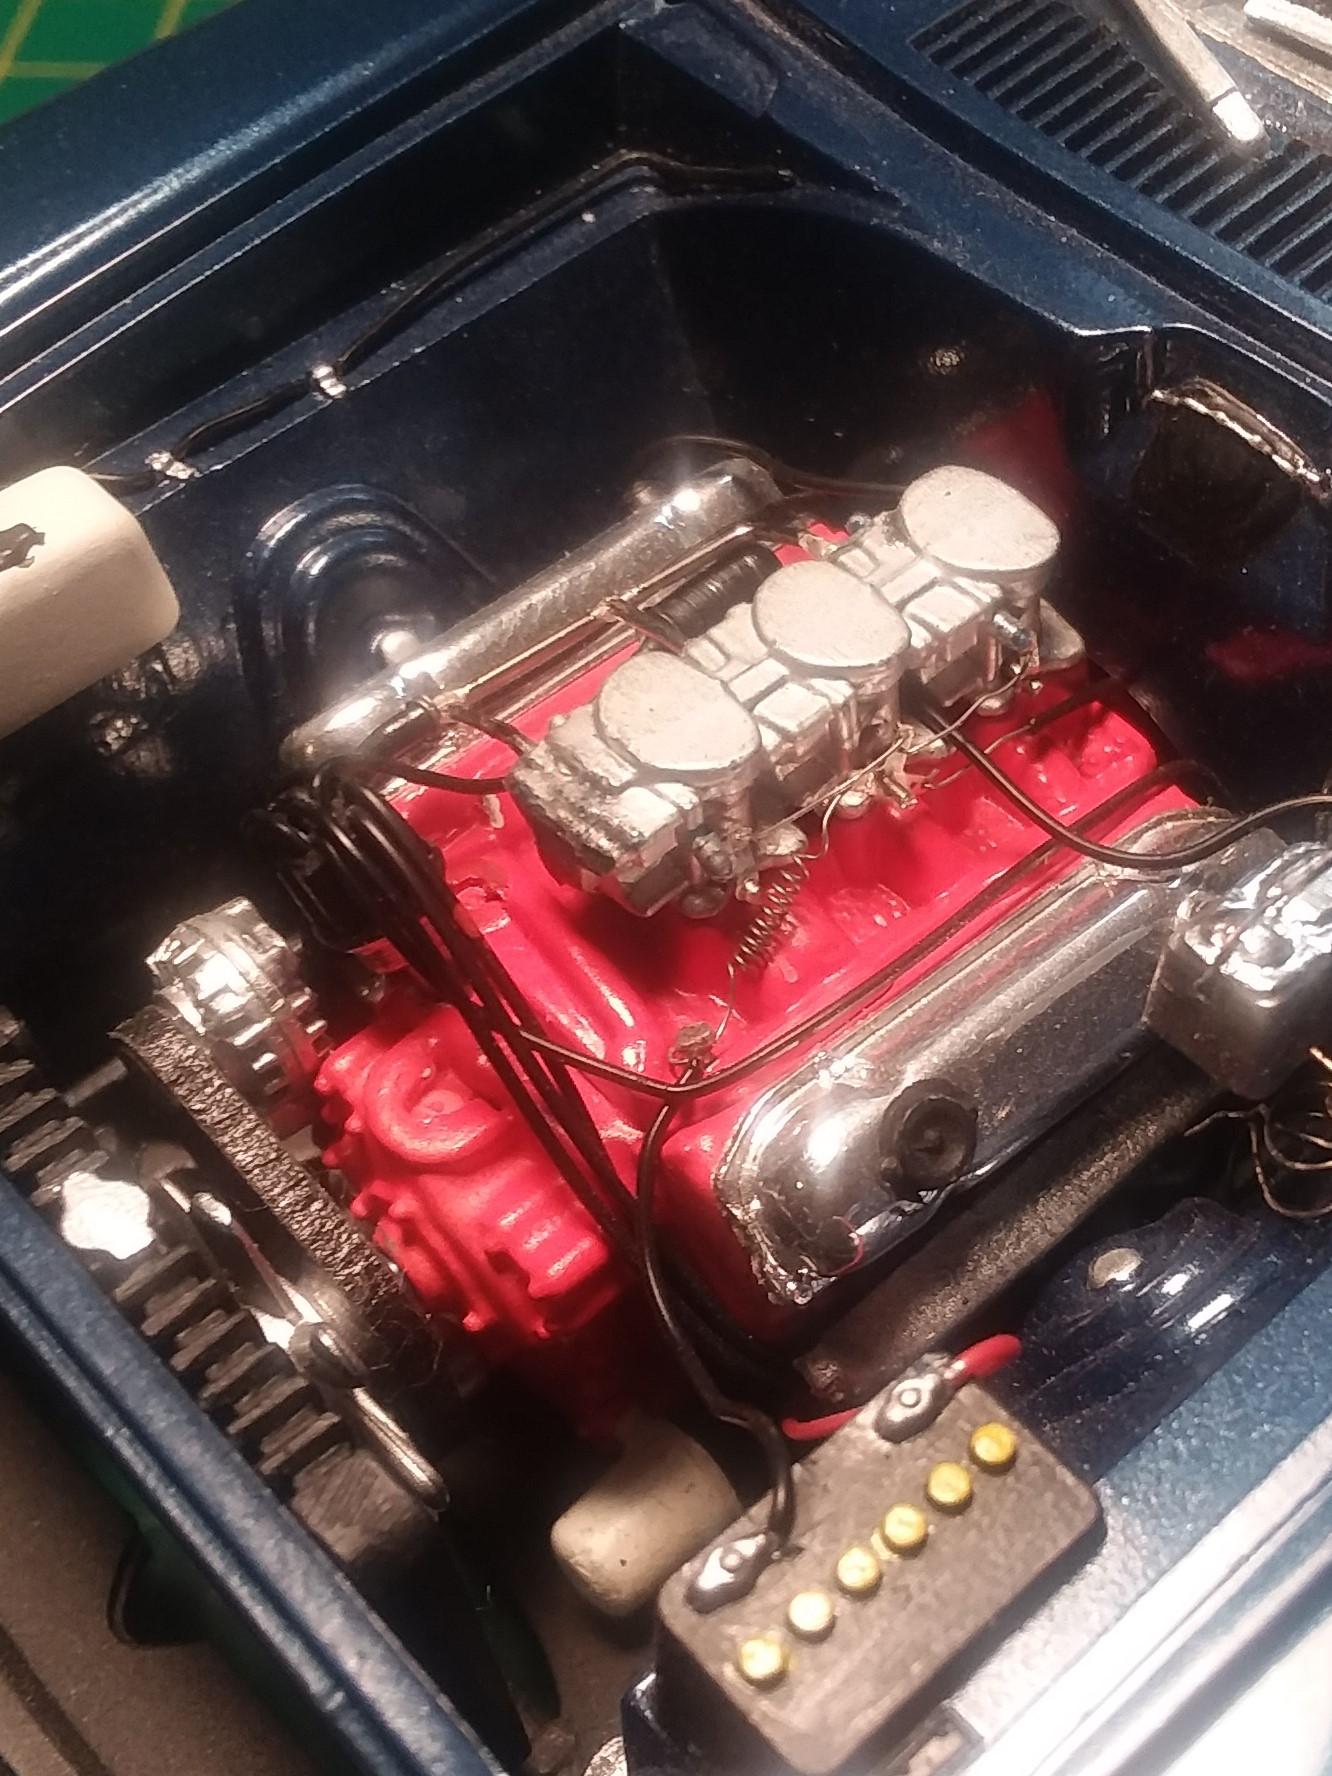
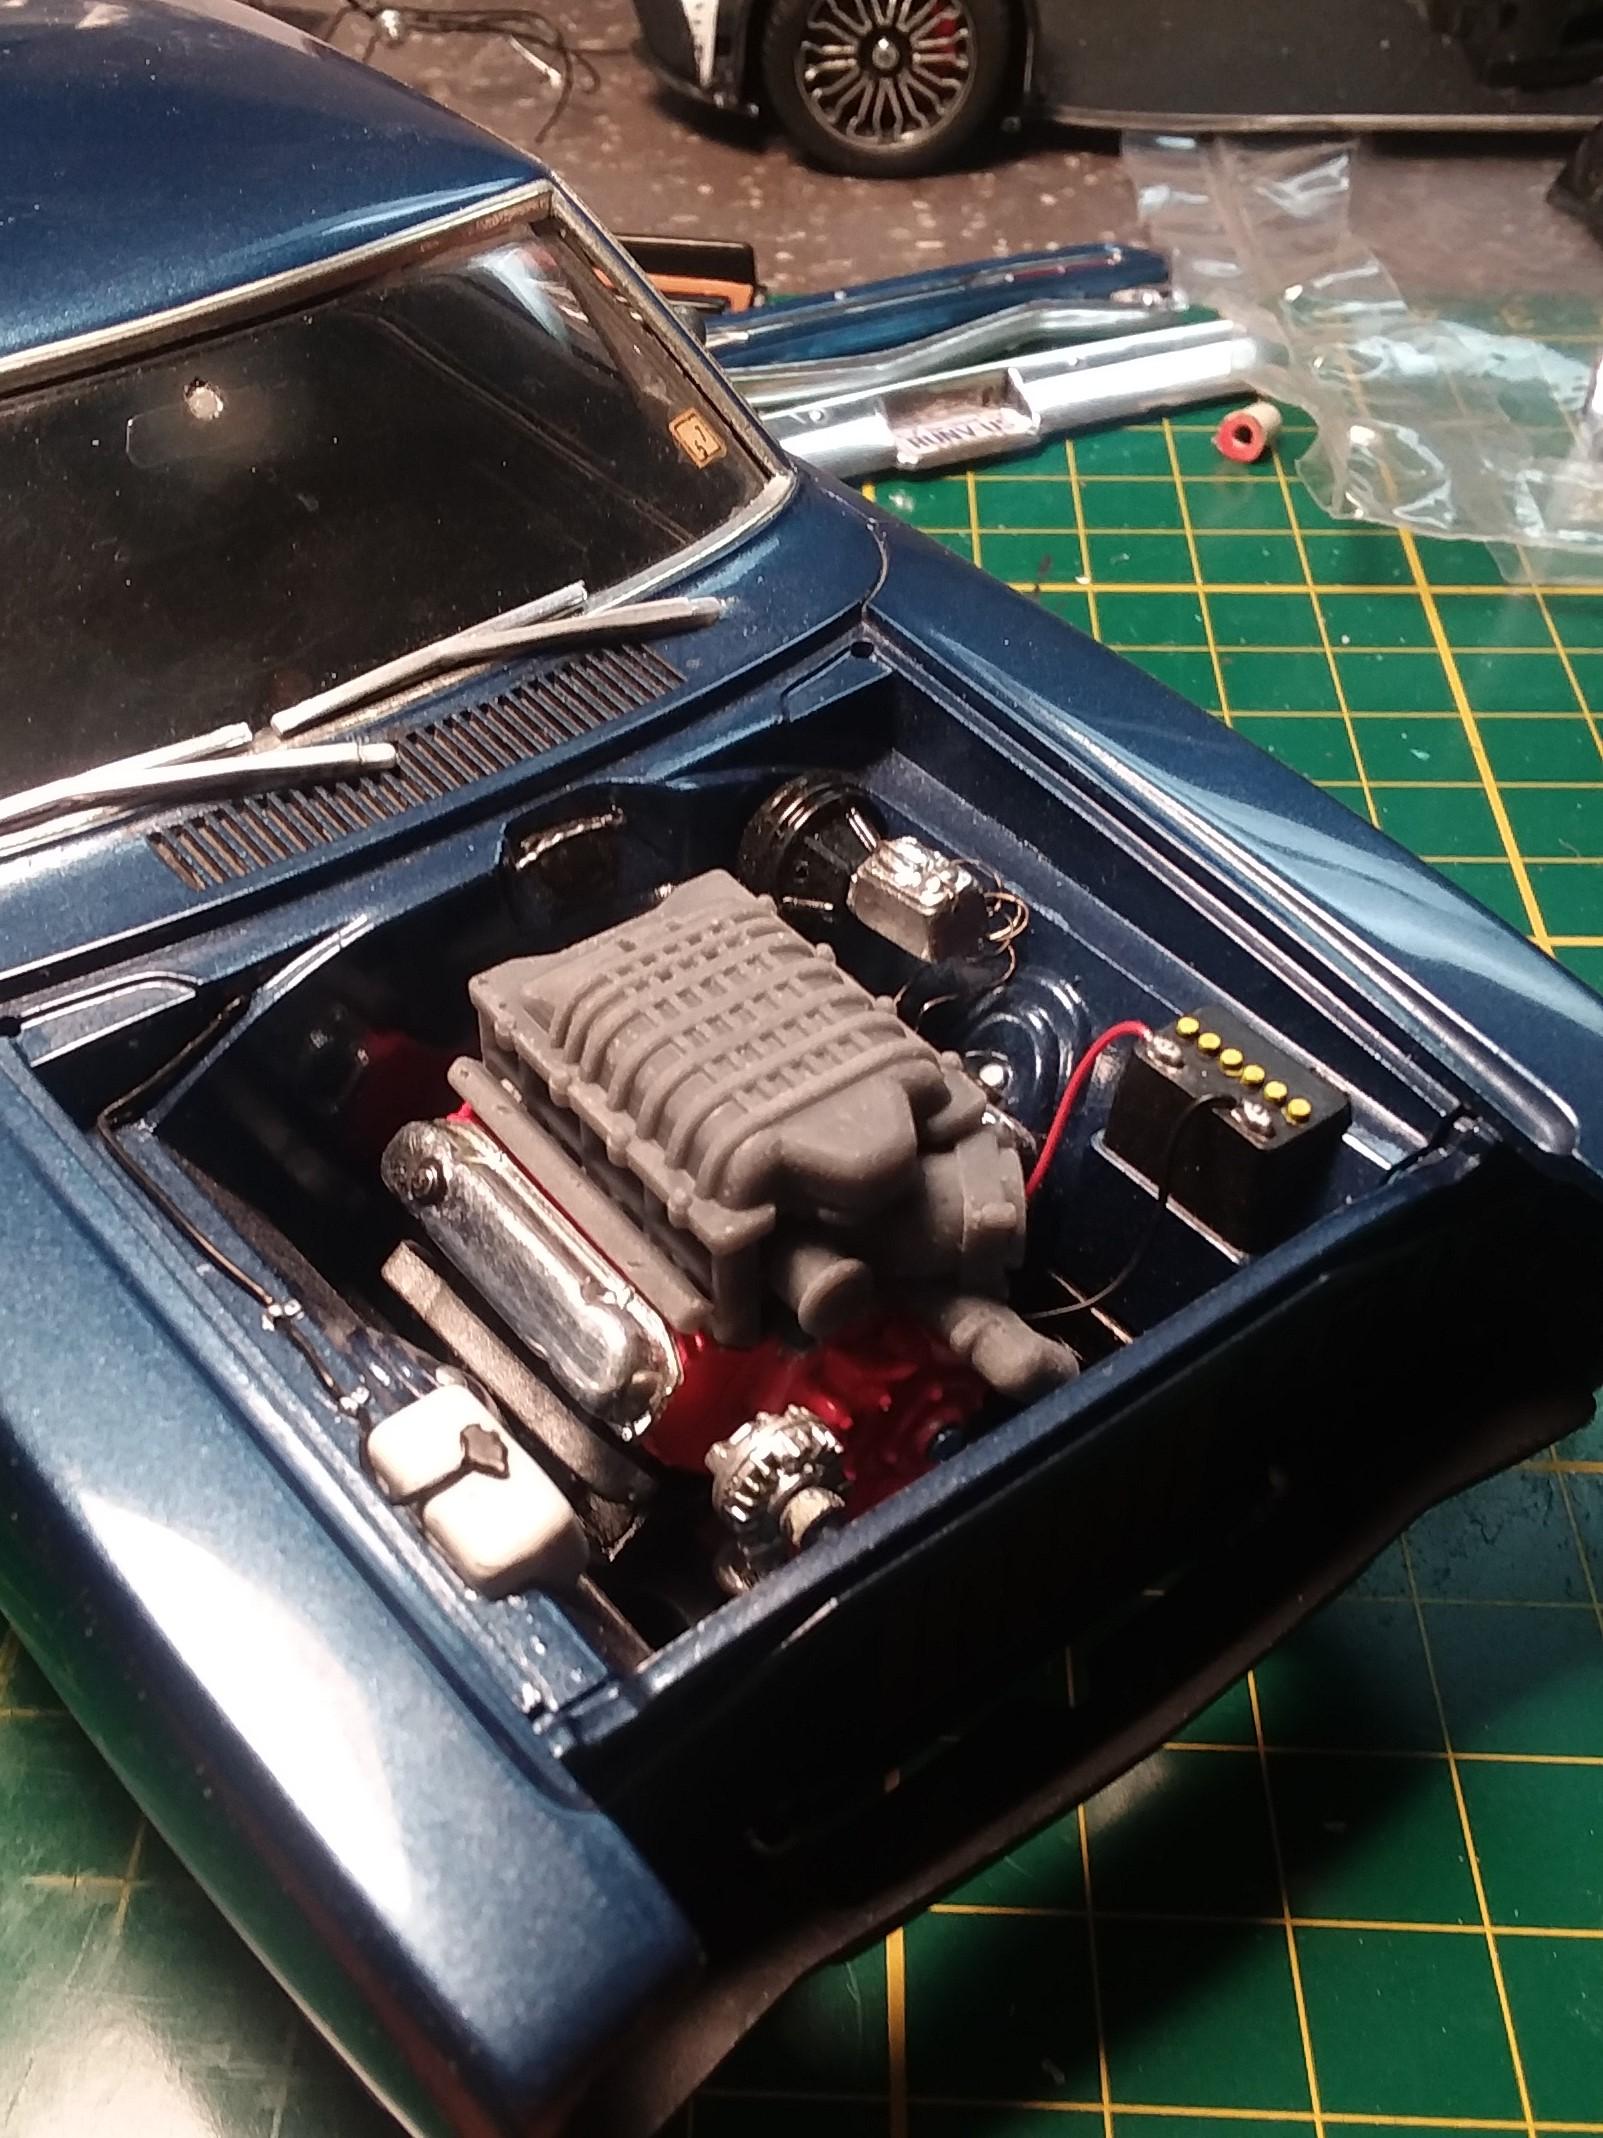
Got the chrome redone. Alclad II Chrome over gloss black for the bumpers and straight over the dark blue plastic for the rear valance panel. I also shot the blower system in flat black, will do the ribs in silver to make it stand out.
-
1969 Super Bee - Time for updates and more POWER
carl63_99 replied to carl63_99's topic in WIP: Model Cars
I may be changing other things in the interior, seat and door color, for example. But, the dash is going to be unchanged. Looks good enough considering it's work from 24+ years ago!
-
1969 Super Bee - Time for updates and more POWER
carl63_99 replied to carl63_99's topic in WIP: Model Cars
I ground down the tail lights and smoothed off the bumper bolts. Front turn signals will be redone also. Into the Easy-Off for stripping and now lots and lots of sanding to get them ready for Aclad chrome system.
-
1969 Super Bee - Time for updates and more POWER
carl63_99 replied to carl63_99's topic in WIP: Model Cars
Thought about it, but the numbers match! Seriously, trying to keep as much of the original kit as possible. And, being a Coronet-based car, it's not the fan favorite Charger, so I have to be different. -
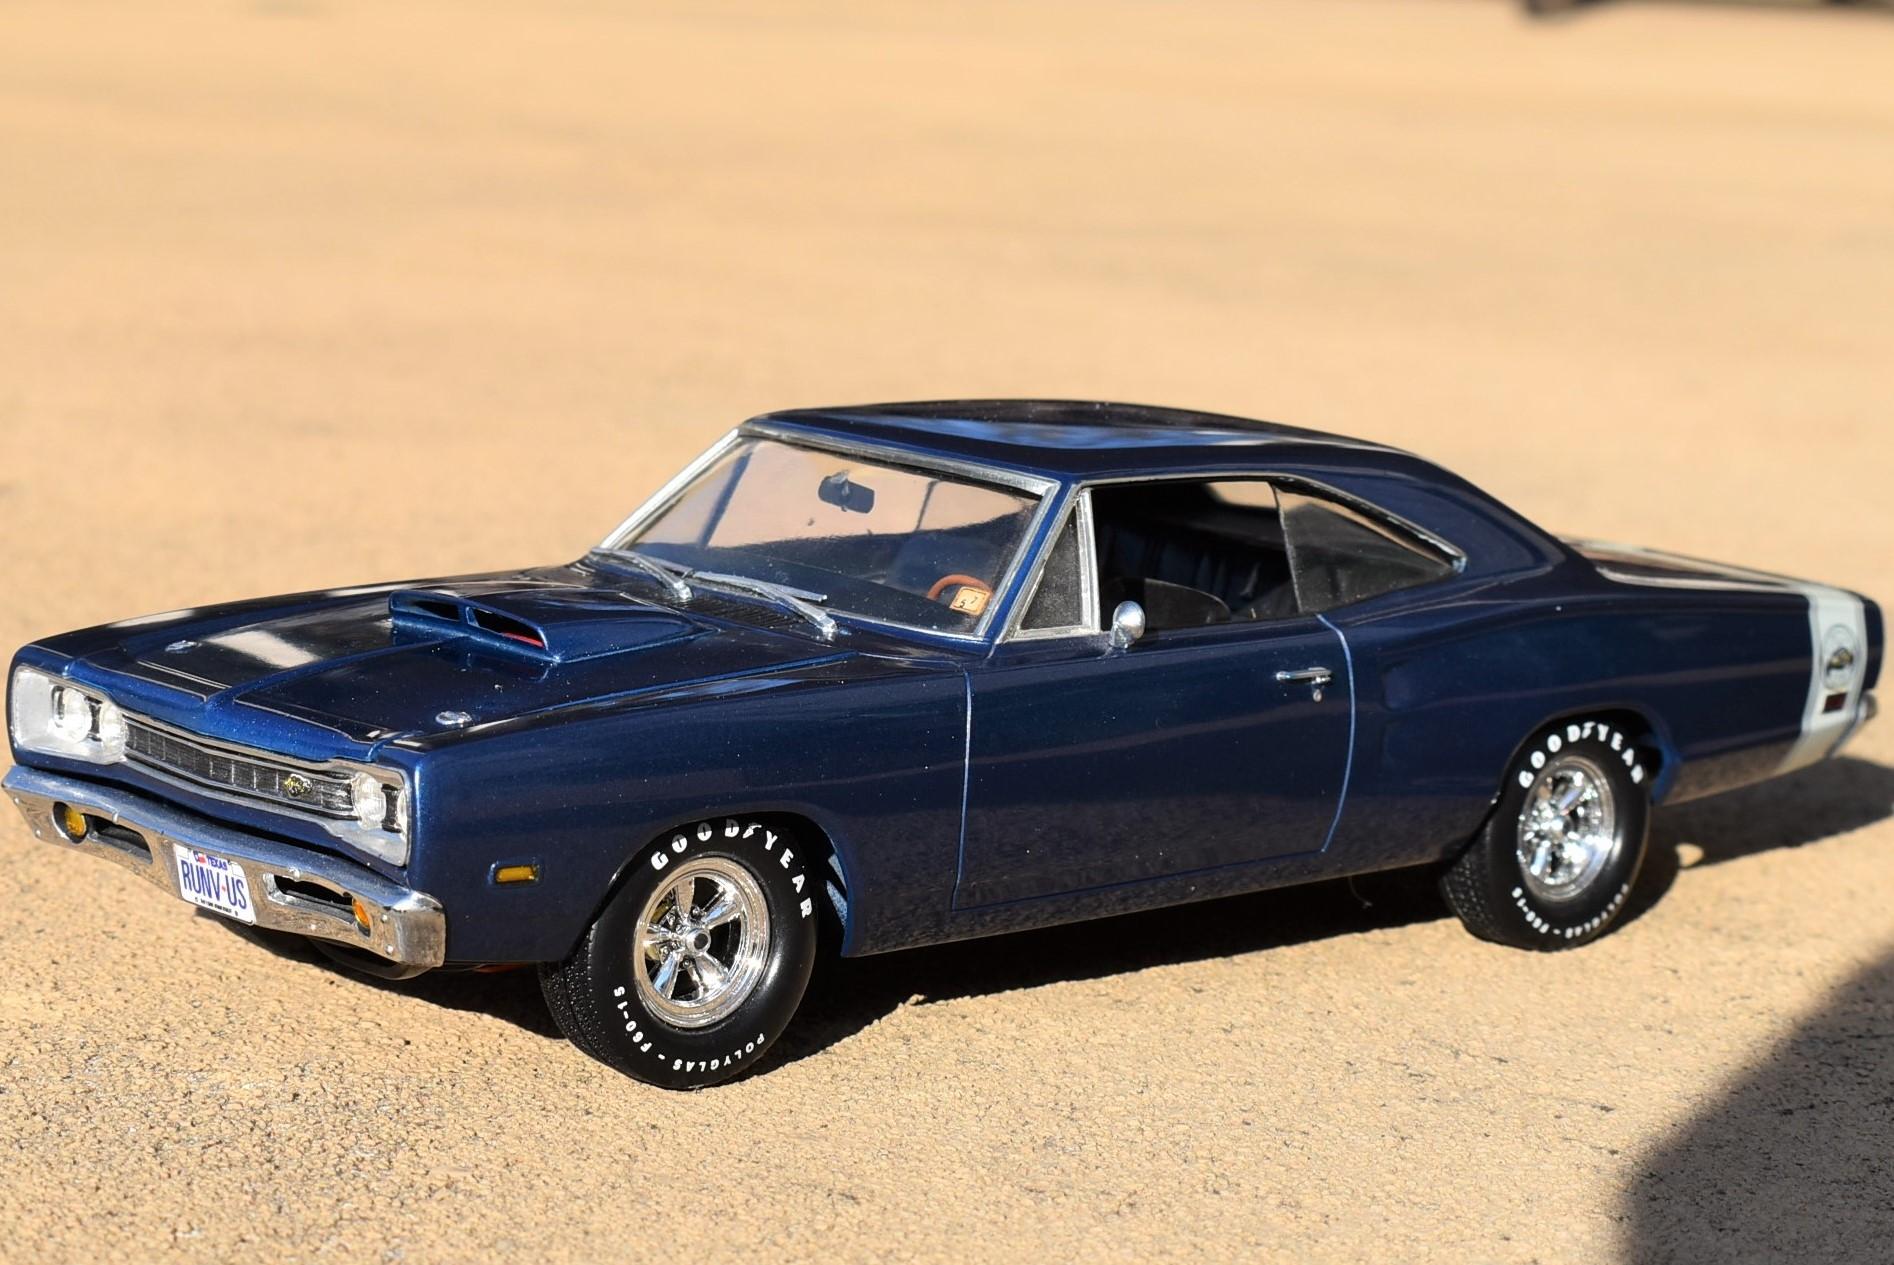
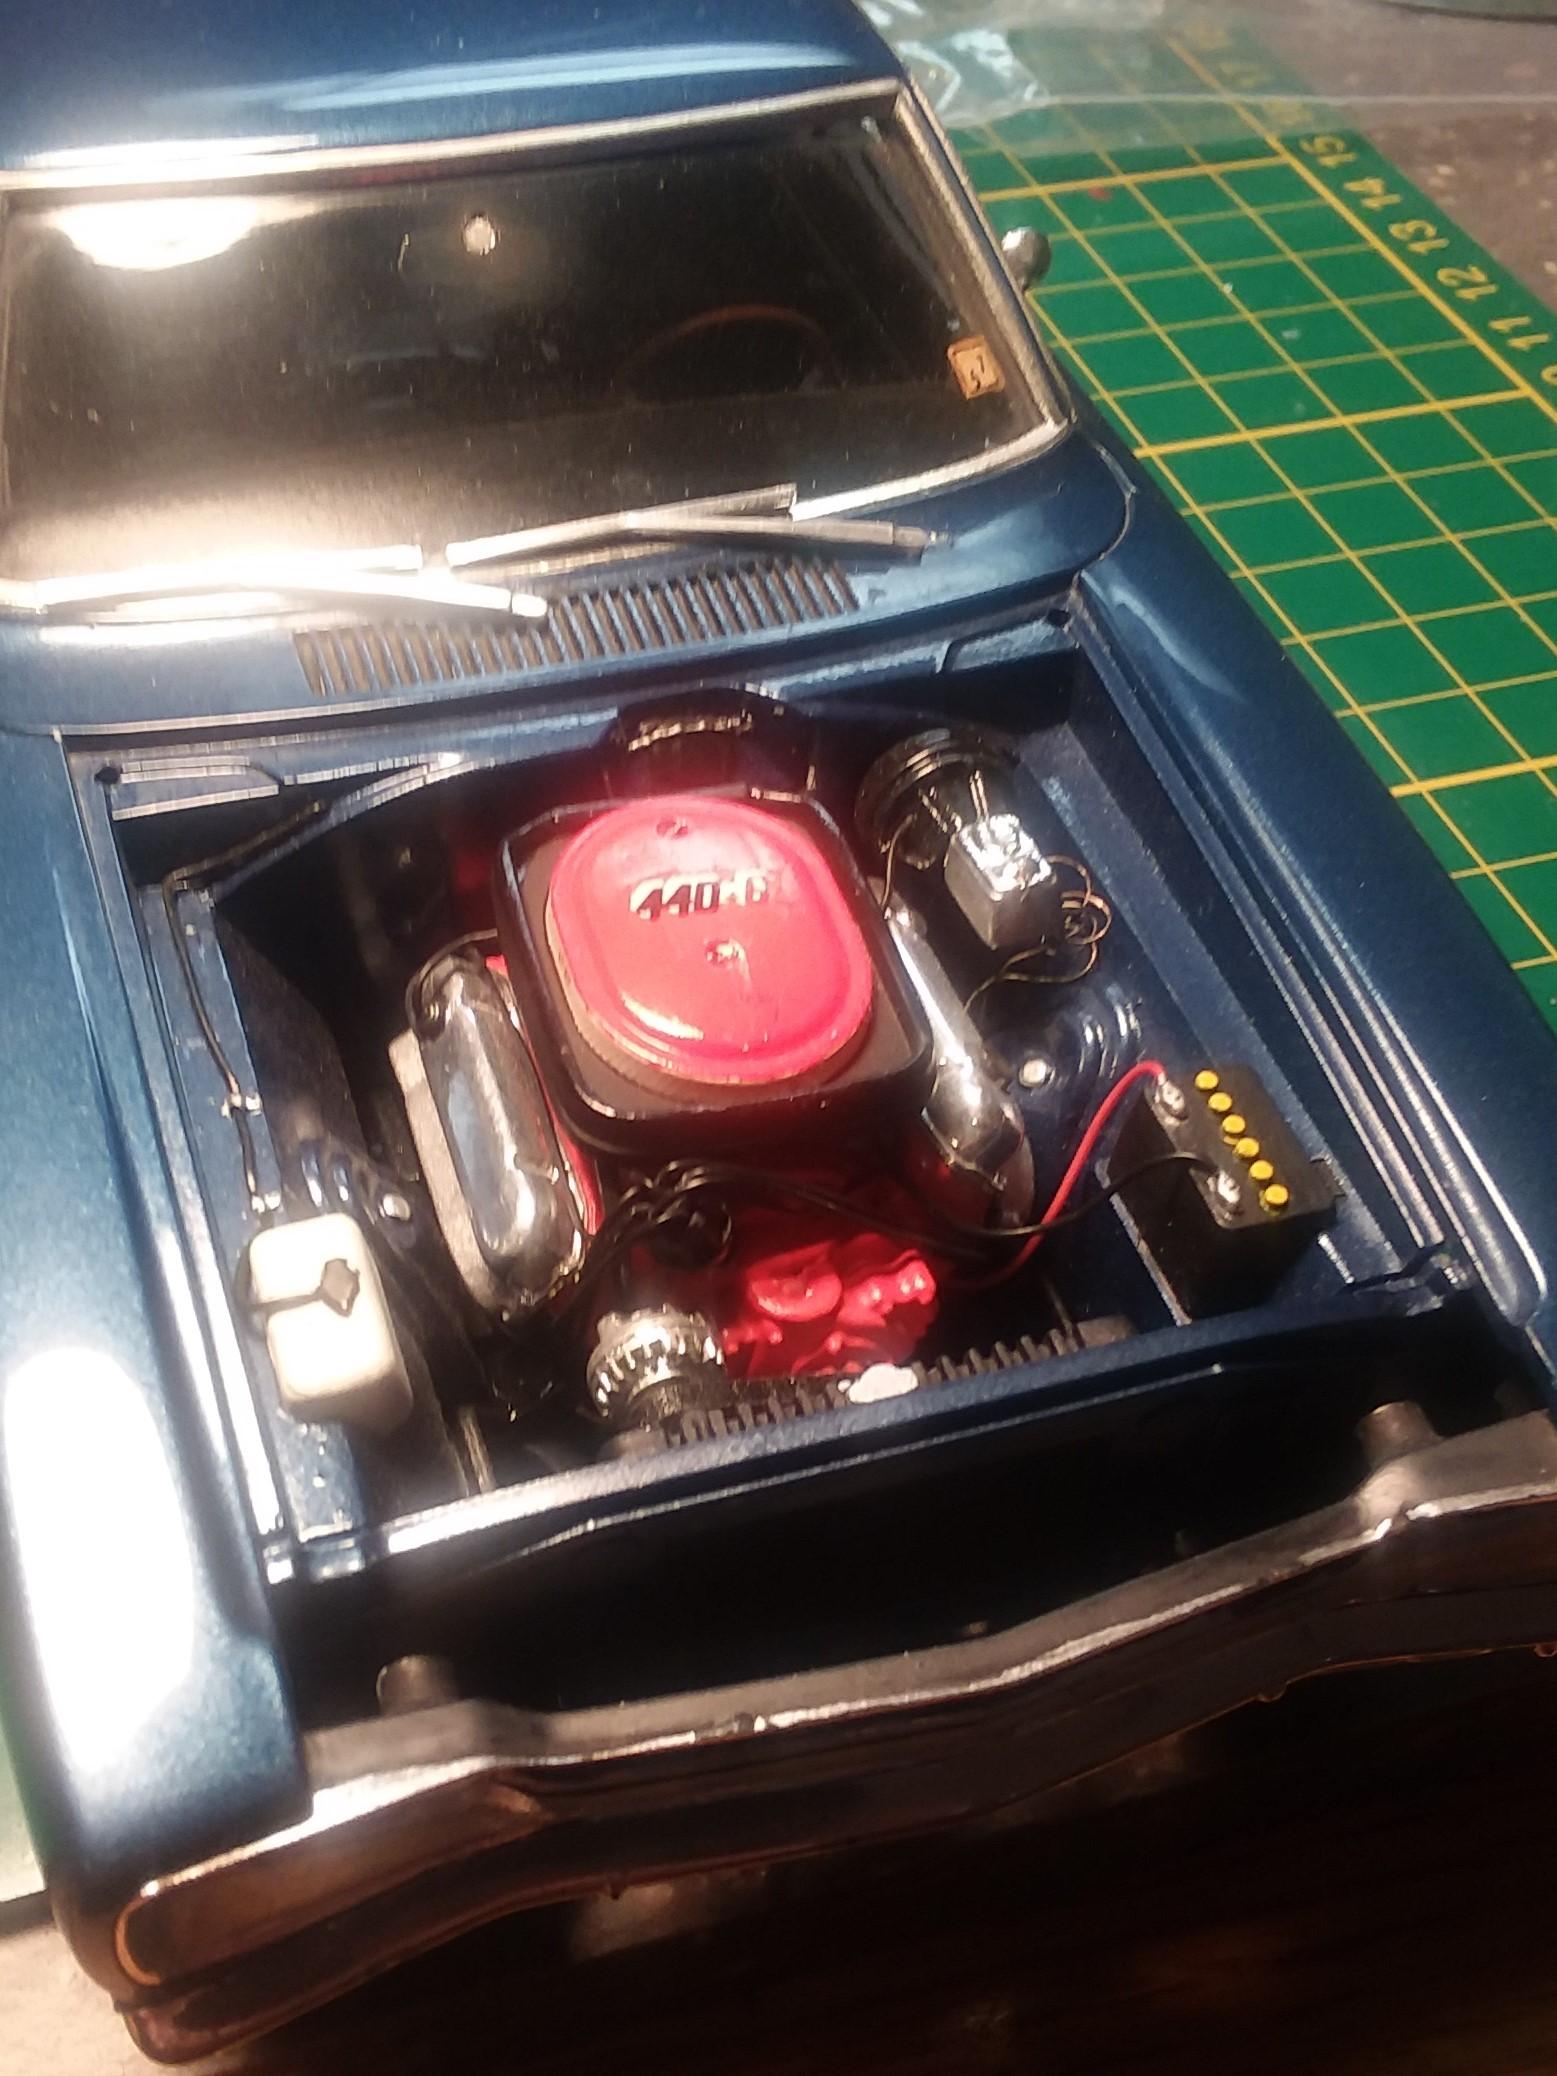
Originally completed in the spring of 1997, my Monogram Super Bee went to all the shows in Texas around that time and then retired. I've done a few tweaks here and there over the years, finally got happy with the tires and rims from the Testors Daytona diecast. The interior had gotten pretty dusty, so I was thinking about cleaning it out someday. Then, I saw the 3D-printed Hellcat blower and decided my car needs that! Since I have to get the interior/chassis off to get the engine out, I'm going to rework several things. Update interior colors, smooth and rechrome bumpers, redo the tail light panel and whatever else comes to mind.
-
Nice work! I built mine 20 years ago. Love seeing other builds of a unique car!
-
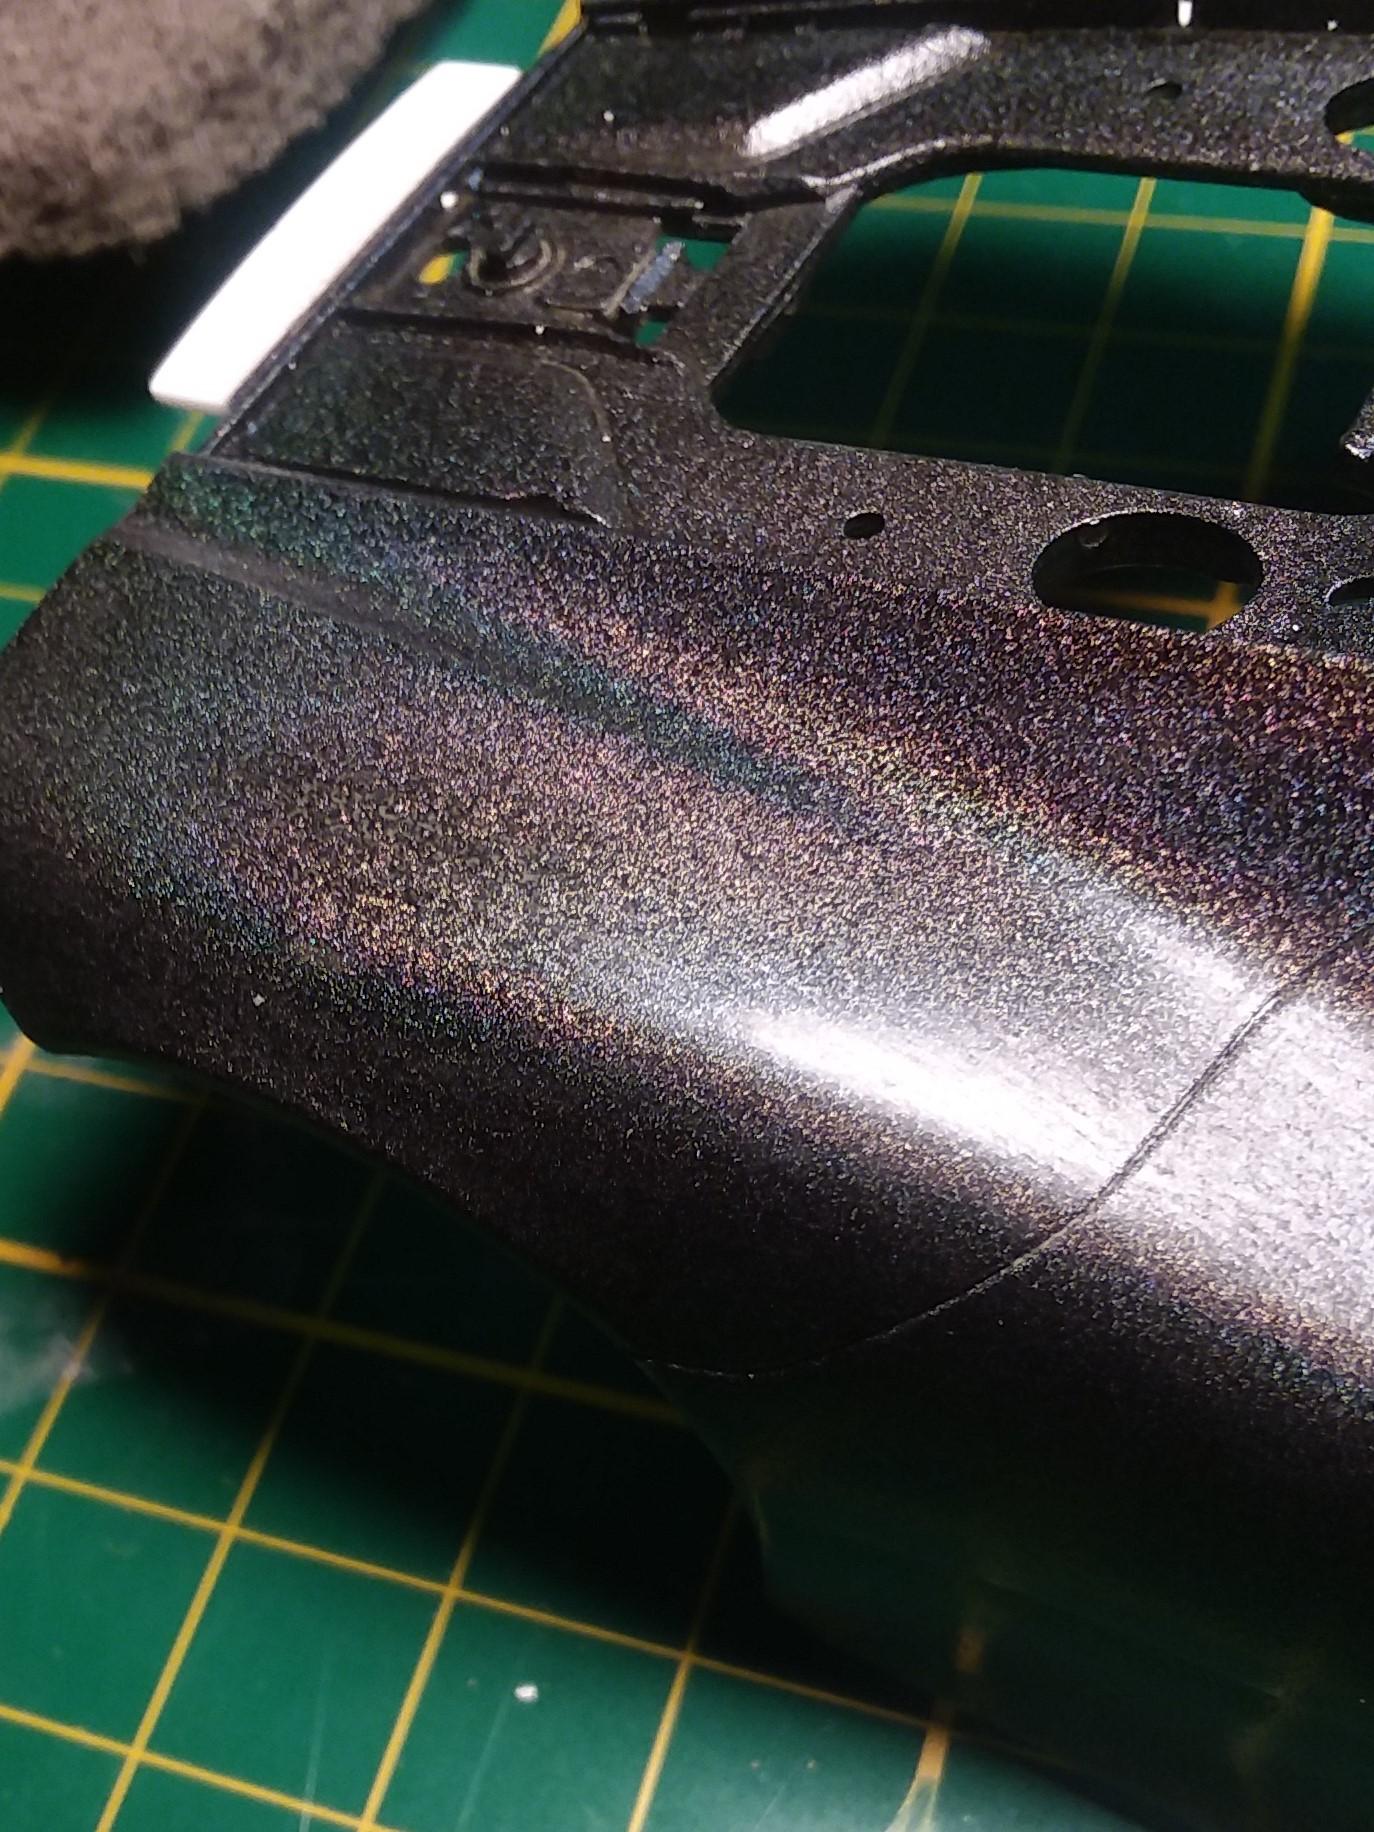
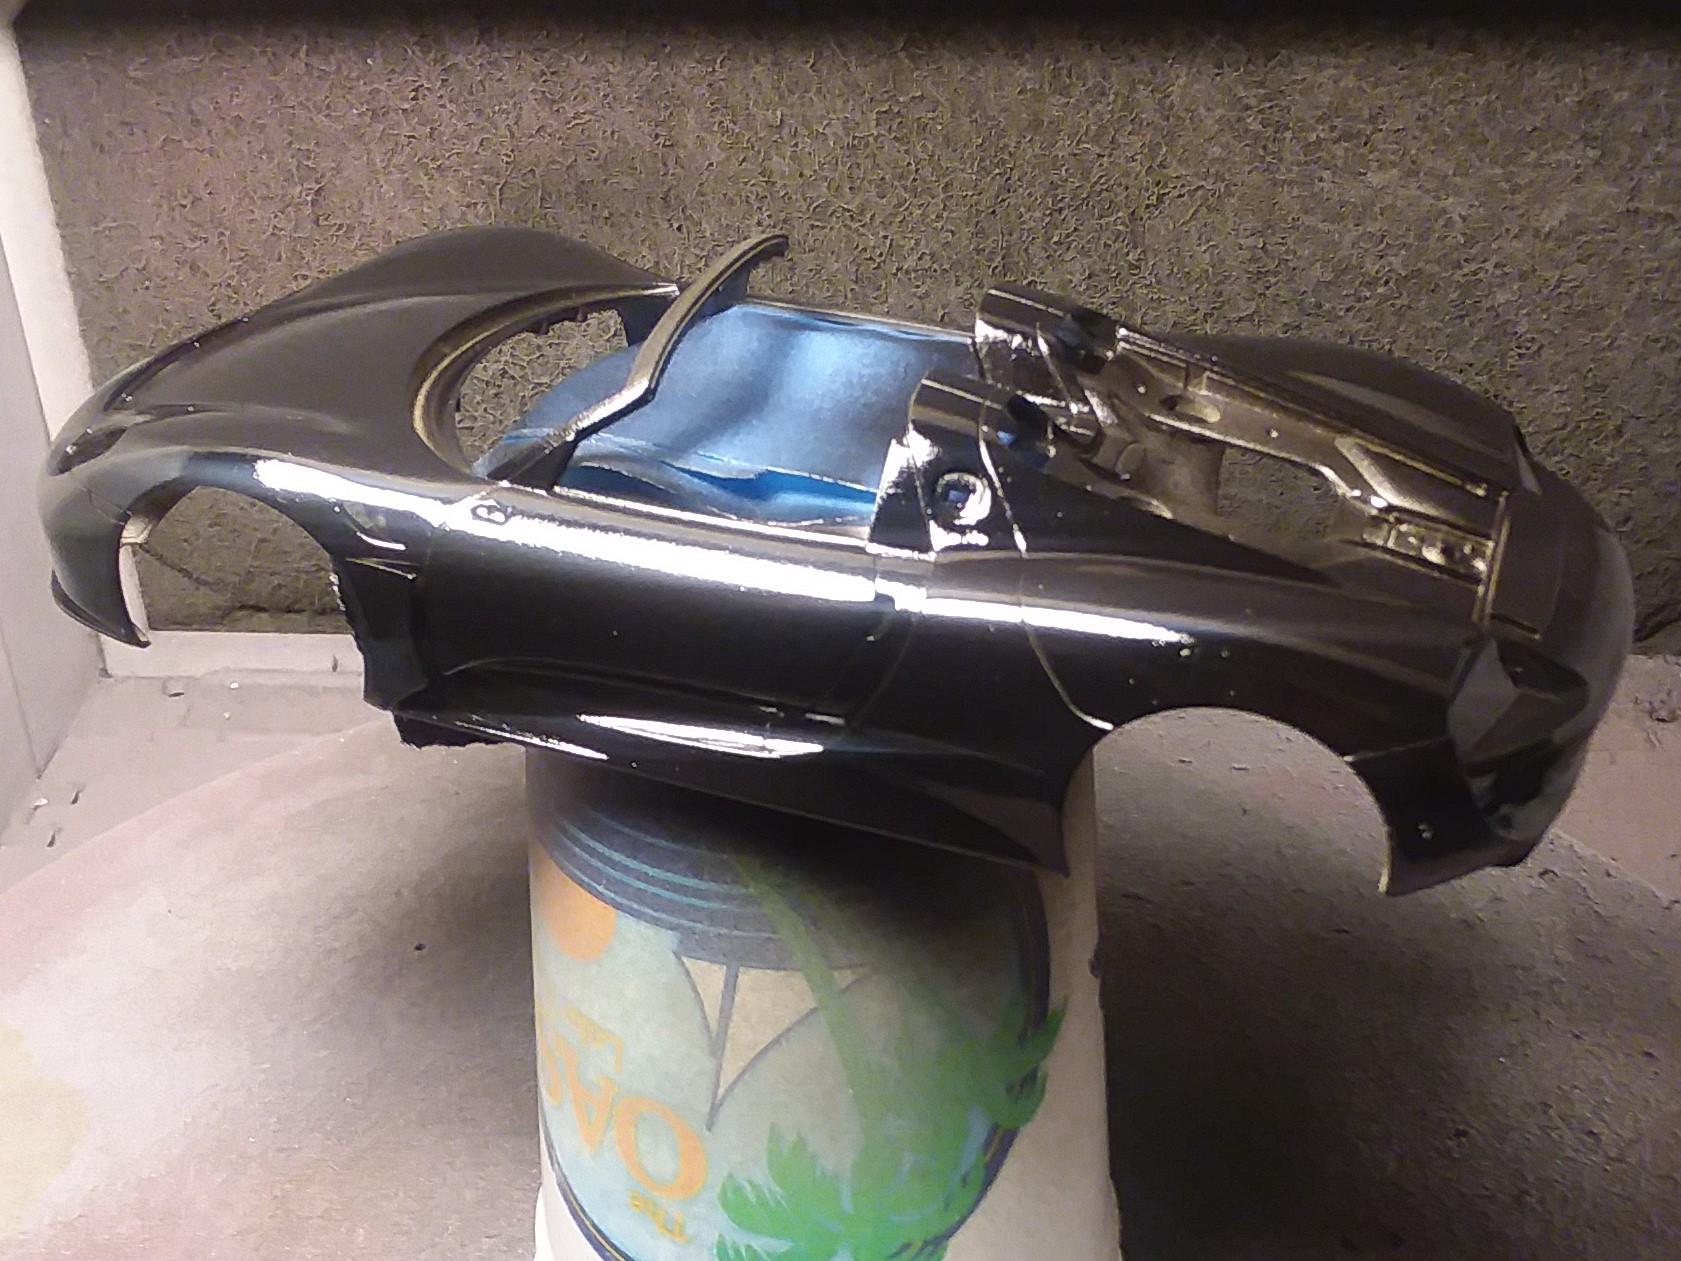
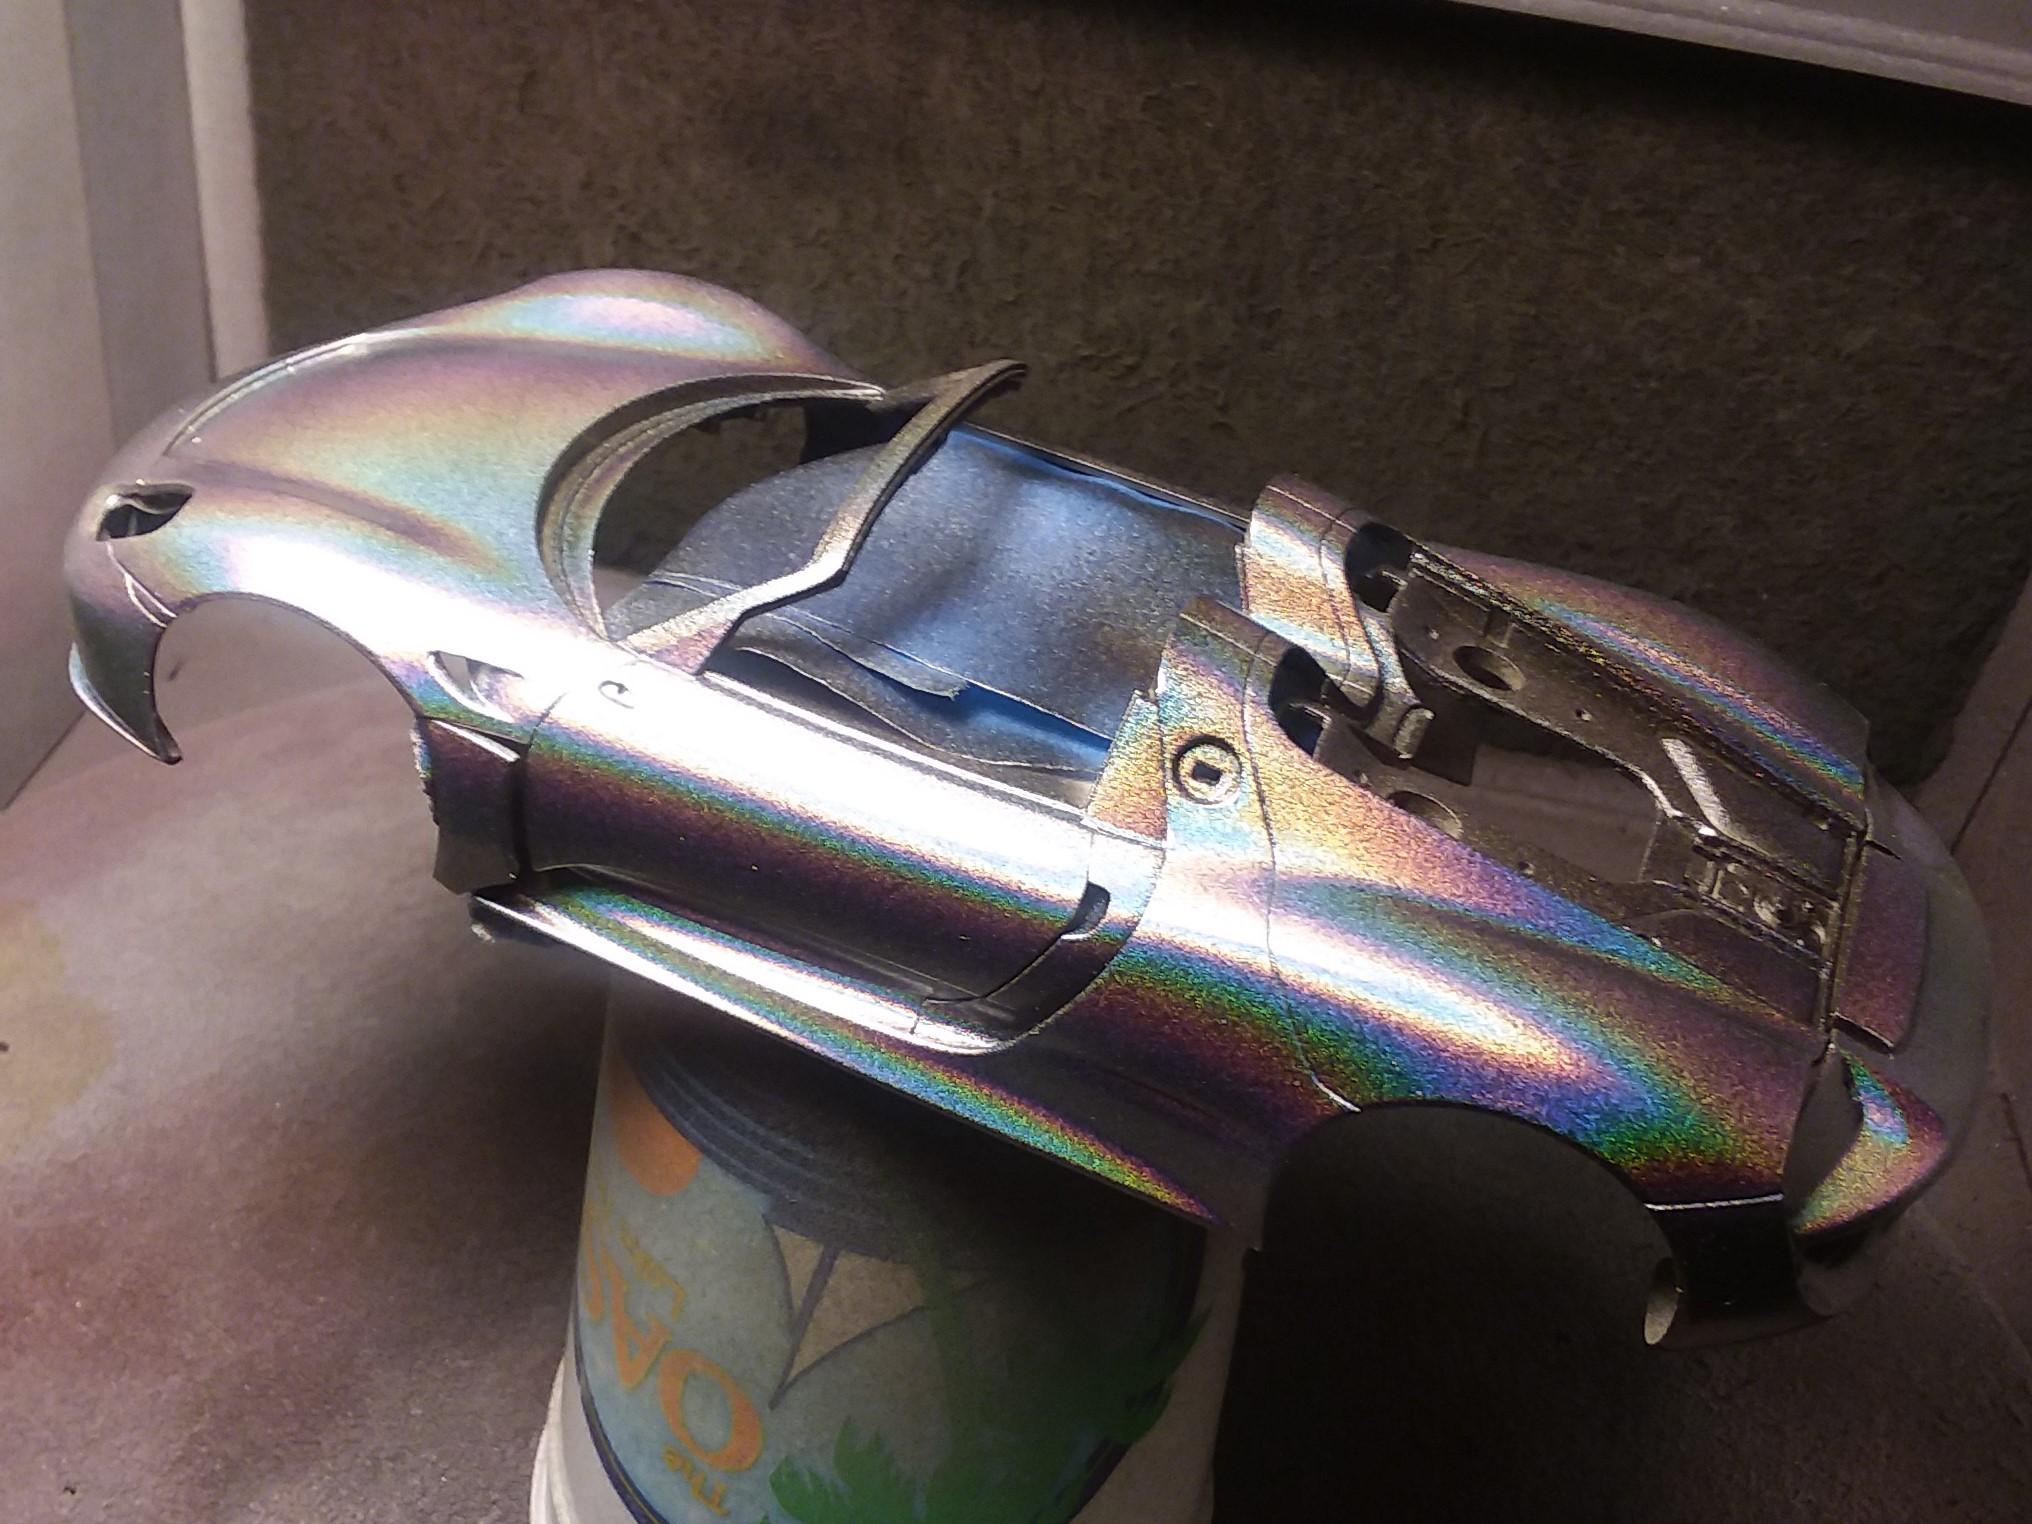
Well that didn't go well! Taking a break from tax forms and Real Estate stuff to work on the 918. I GENTLY polished the rear fender as shown and it pulled the little prismy things right off. So I think what happens is when you hit it with clearcoat, the prisms mix into the new coat. I'm not going to polish this one like I usually do. I might touch up this spot (pic actually looks better than reality). If it doesn't work well, gonna just head to assembly. I don't build for contests anymore, so I'm OK with it not being perfect.
-
Different and very cool looking. I like where it's going!
-
I did test shot and found that the prism did run ever so slightly. Next time, lighter clearcoat. Another thing that stood out is that after clearcoat the rainbow colors don't look quite as vibrant. I haven't polished it out yet. but I do think this stuff is delicate to work with.
-
Rich, I'm going to shoot it on the rear wing, see how it does there first. Will show you the results. LOVE this effect!
-
Search for Rich Chernosky's Supra for color inspiration.
-
So, finally got some time to work on the 918. Saw someone's Supra on the forum and decided that was the color. Alclad recommends silver base, the the Supra was done dark, and I much prefer this effect. Going in the dryer and Alclad clear tomorrow.
-
Nice work! I got mine as a mint, in-the-box, kit.
-
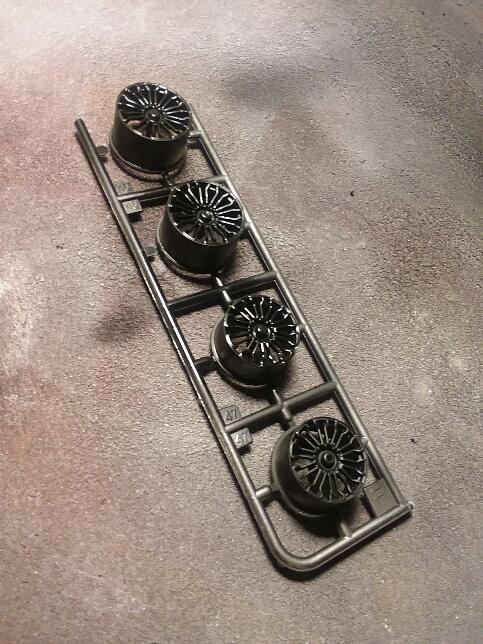
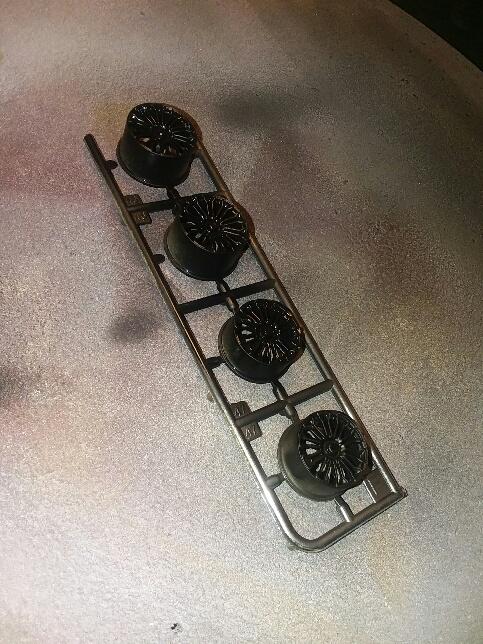
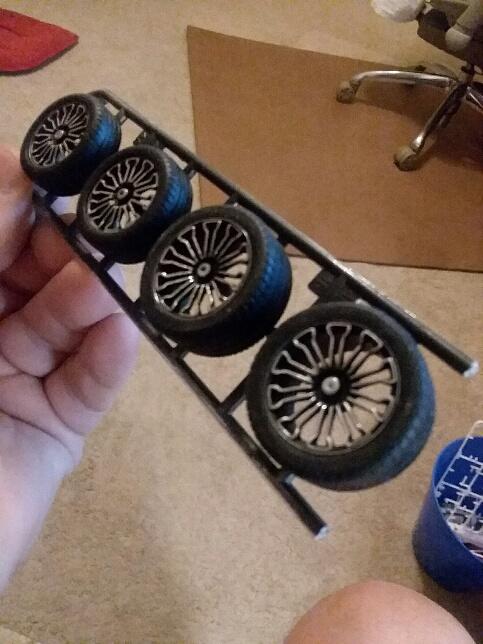
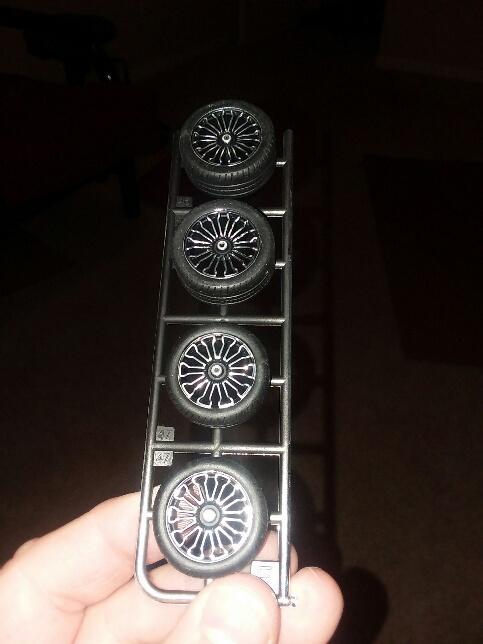
On to the tires! My technique is to airbrush them flat black, let it sit in the food dehydrator for a while, then wipe with a cloth dabbed in thinner. first two pics show after airbrushing, last two are finished result.
-
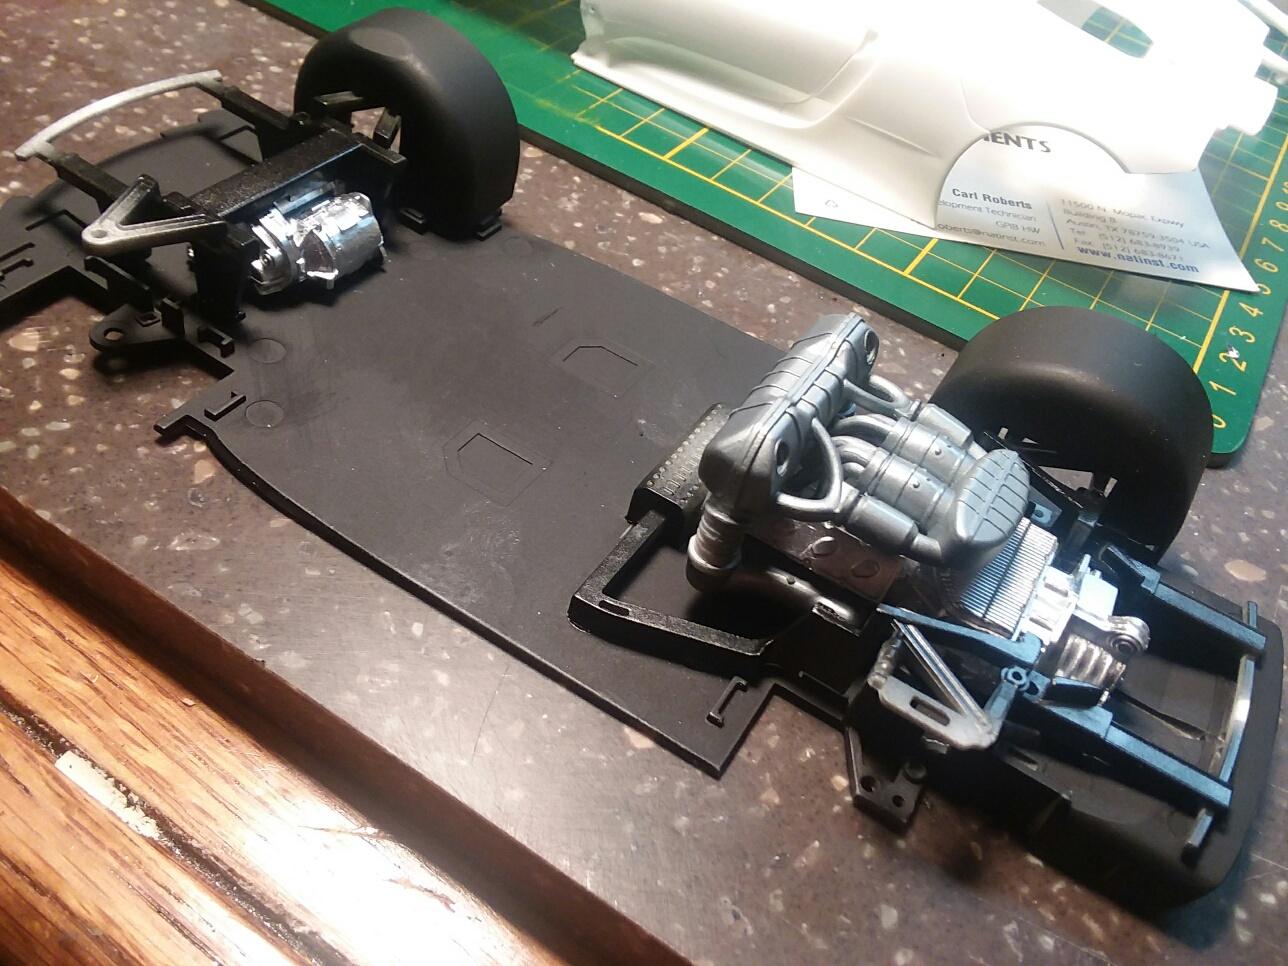
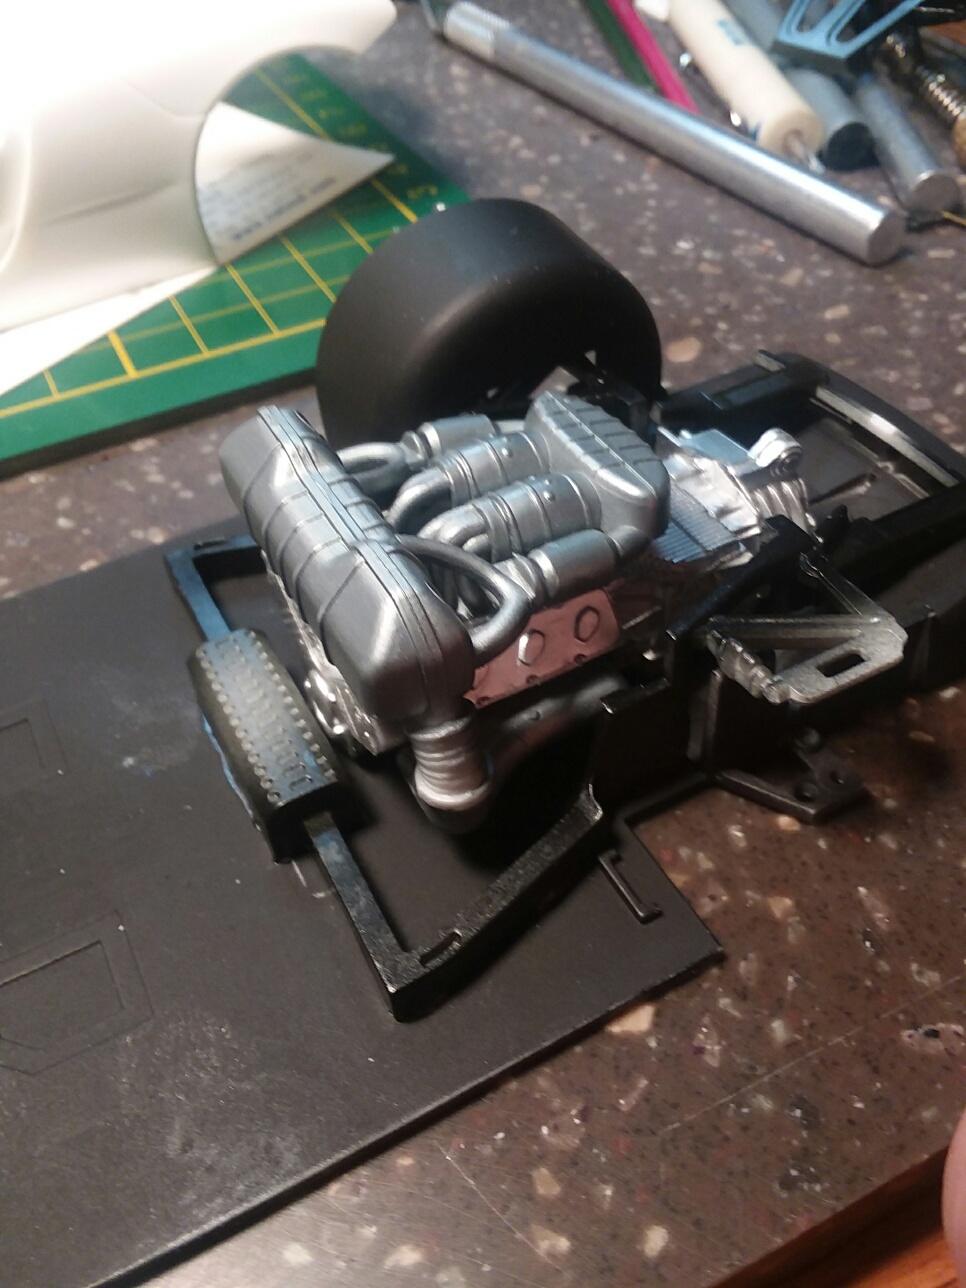
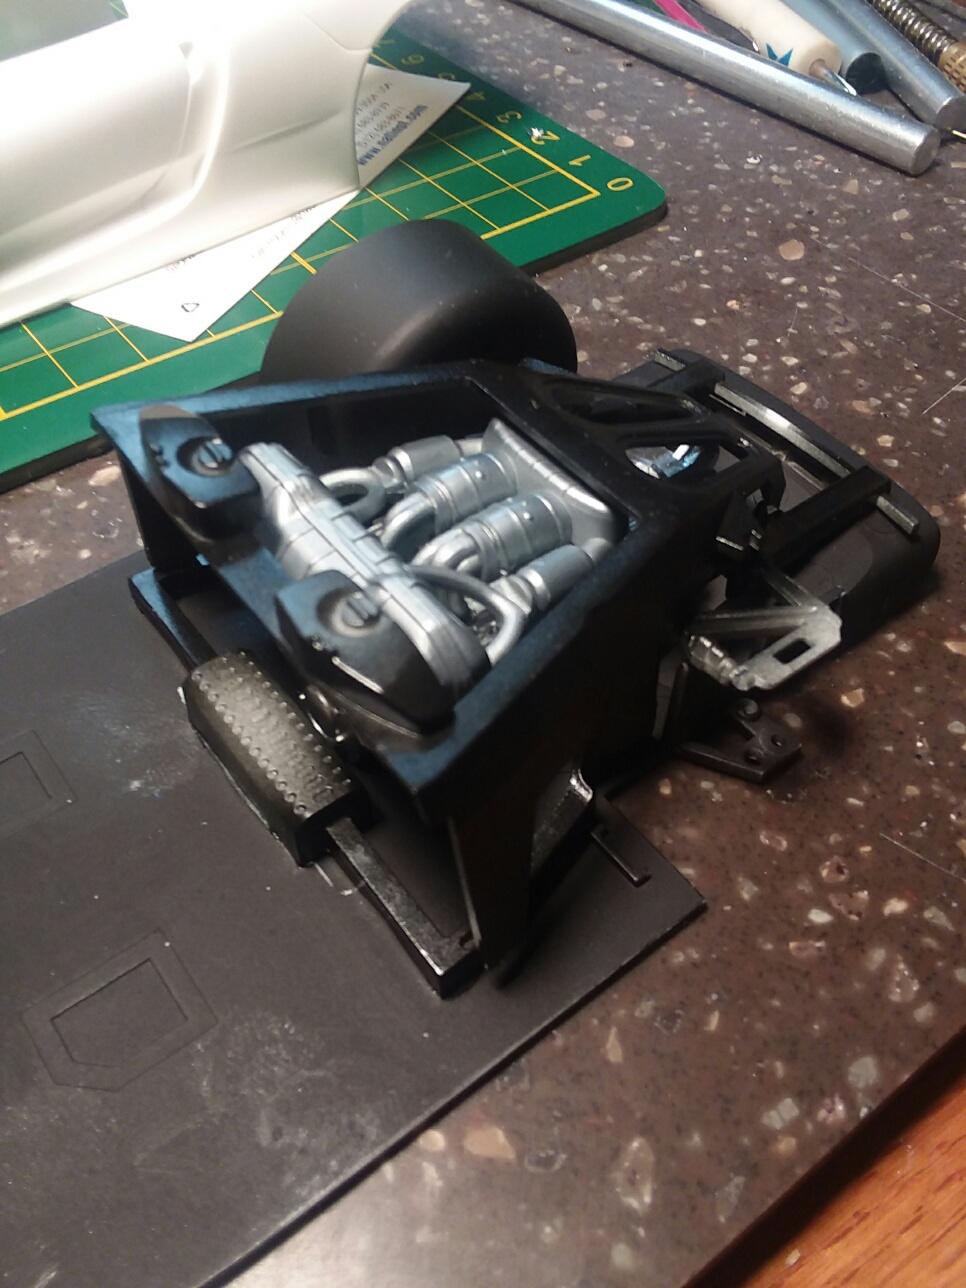
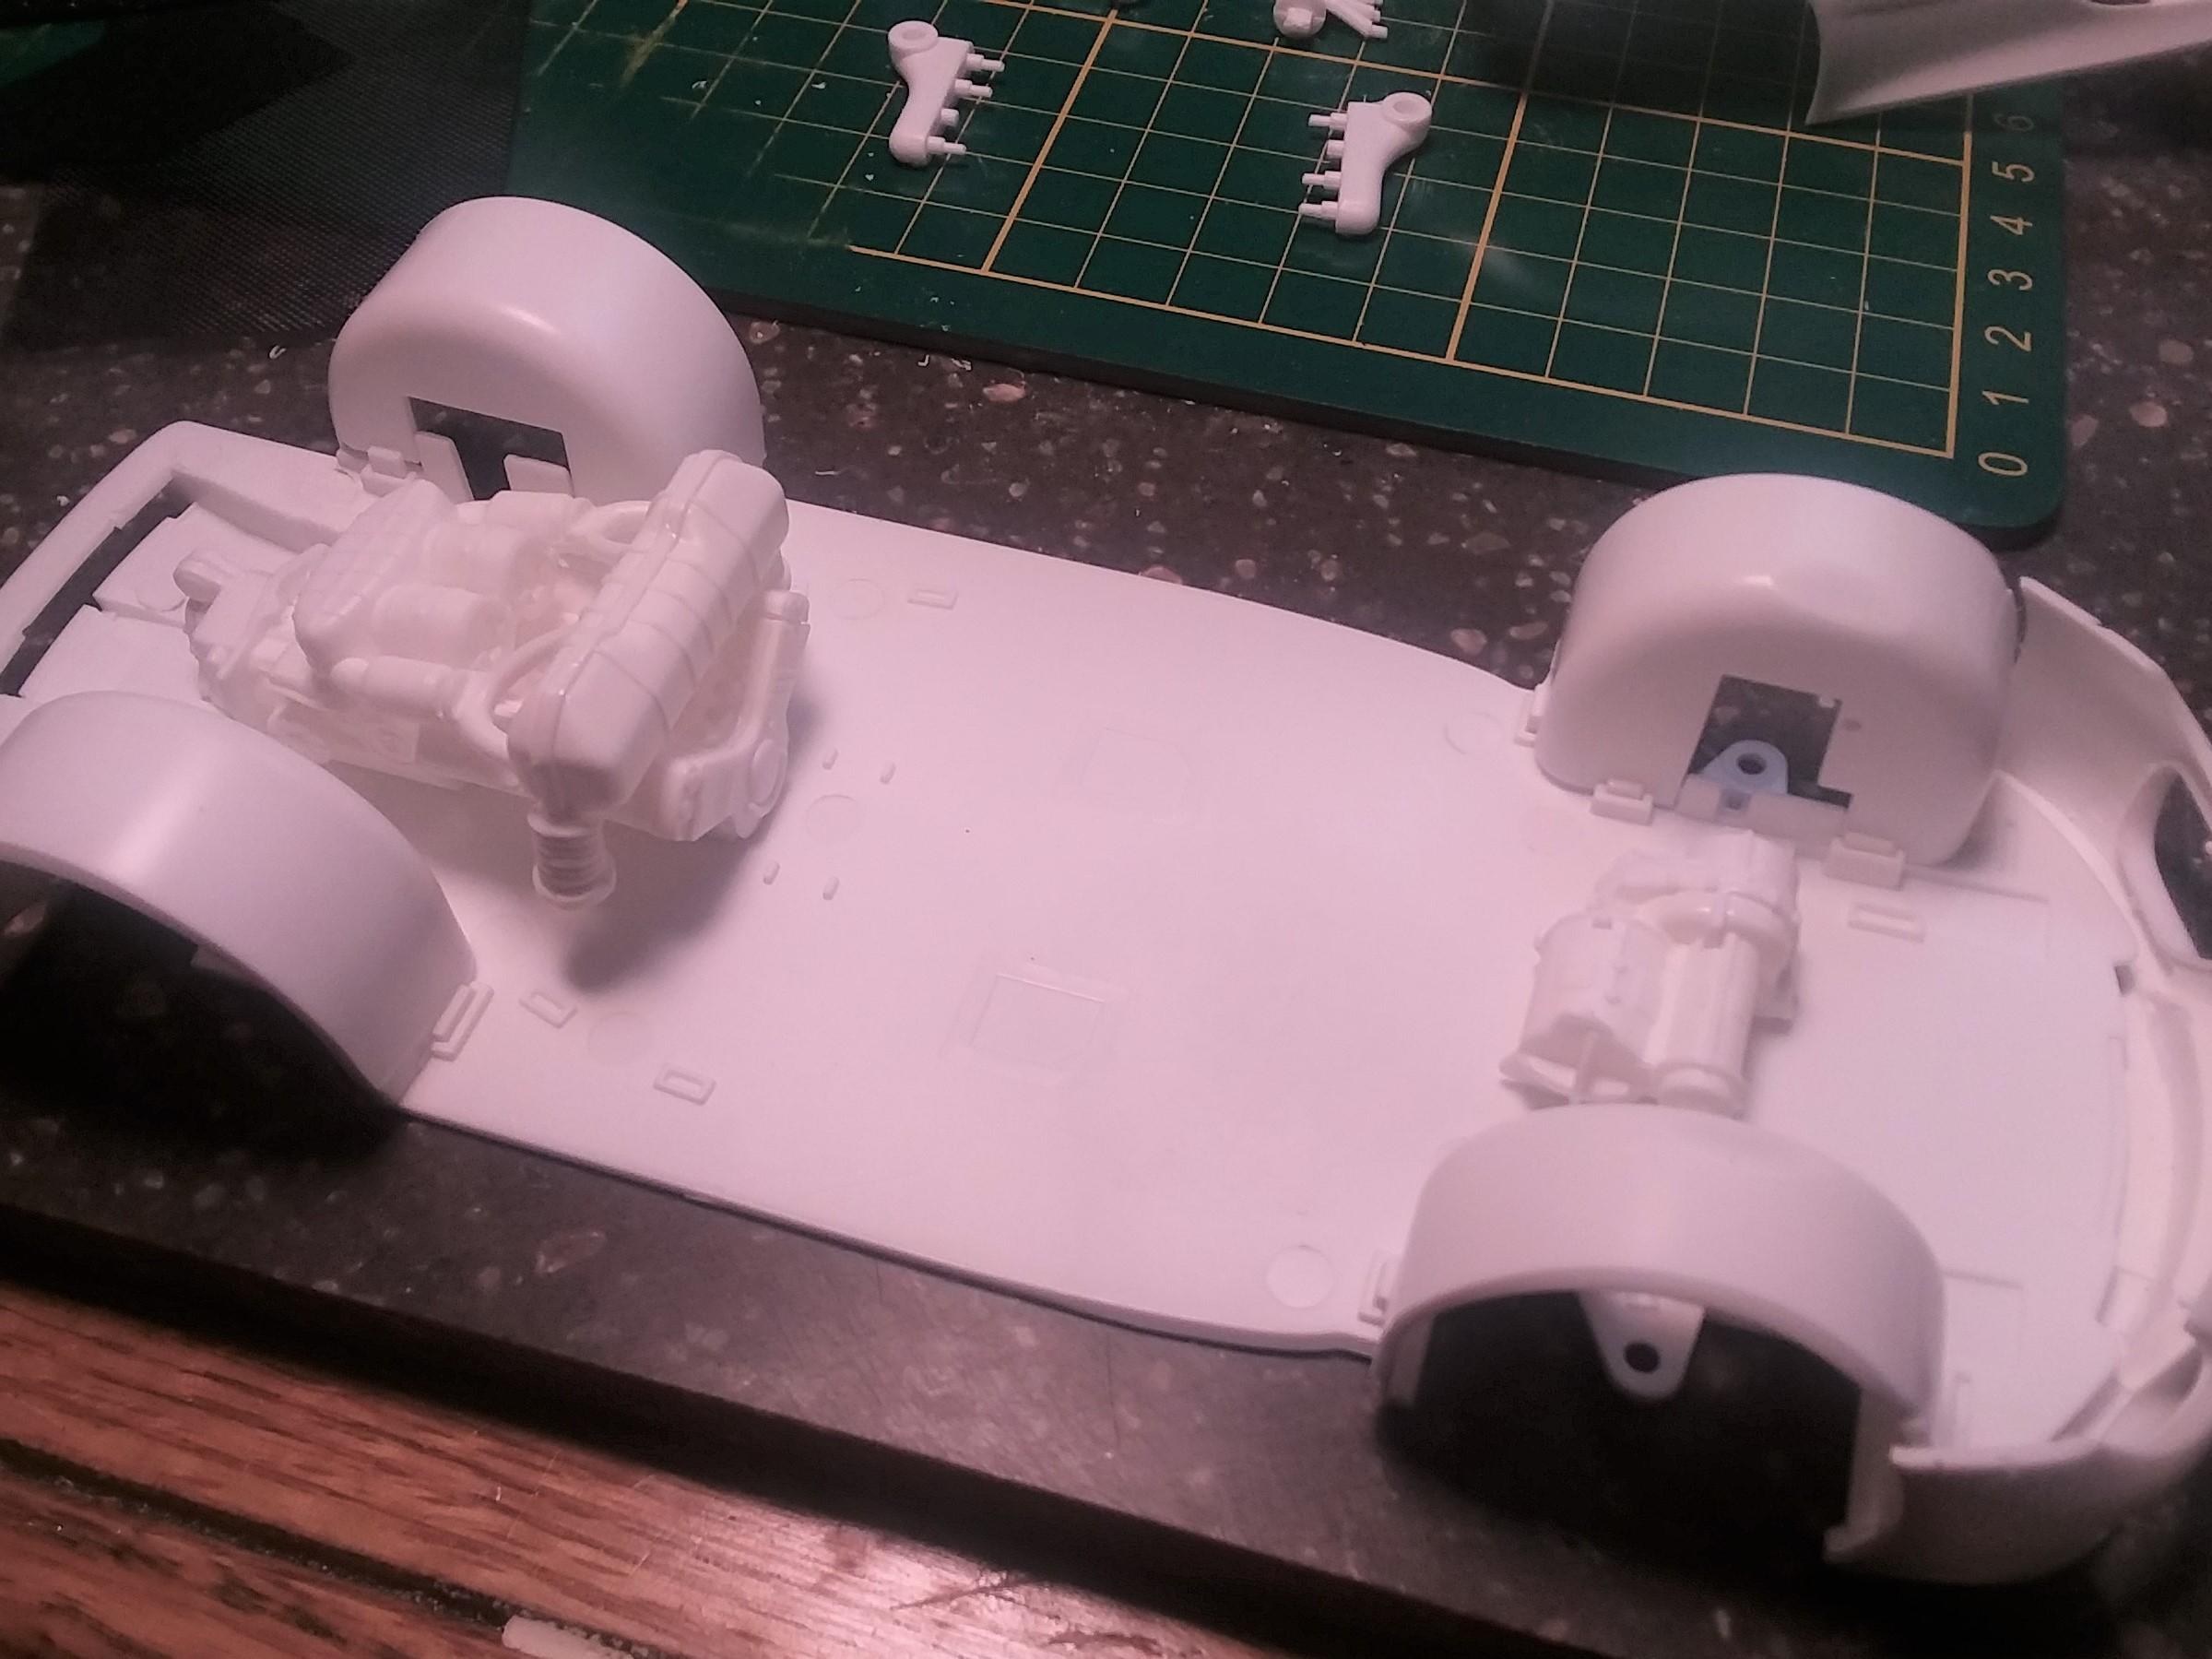
After some construction and review, this is what I see. The engine is covered by the framework, the air inlets have no representation of any filters and they also go straight into the muffler! As you see in the pics, I have the engine in, as well as the front electric motor. Any work to make the chassis separate from the body (ala NASCAR kit or Pagani Huayra) isn't going to yield good results. Even though the engine is cool, it's barely visible any way you try to display it, aside from removed from the car. Therefore, I'm going curbside.
-
As I assemble the engine and that bazaar intake/exhaust, it's clear I have two choices. 1, don't do any detail and cover most of the engine and motor up and never see it, or 2, build it body and chassis separate and be able to lift off the body for display. Think I'll go #2 (no pun intended) and build up the engine detail some. Of course, AFTER I Google how the whole thing works so I understand it.
-
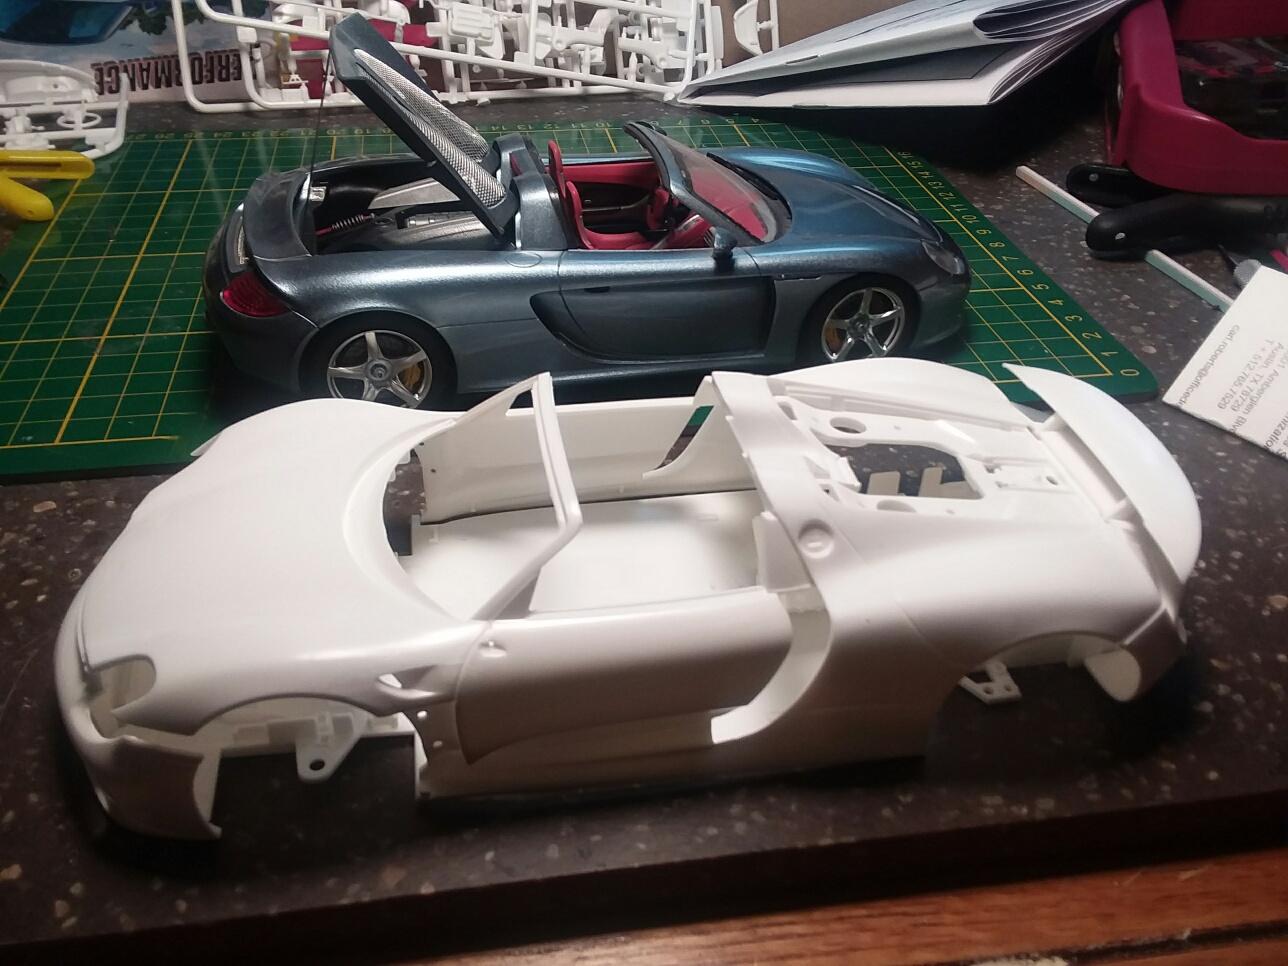
Next up is this one that I was gifted last Christmas. I thought the car looked chubby, but compared to the Carrera GT, it's actually about the same size. Not sure how the electric motor in the front is going to be seen with the body on, but I will have to see what I can do. Right now, color: some bright blue, interior undecided.
-
Finished! Under glass.
-
I loved the way this kit went together. really clean build!
-
Nice!