
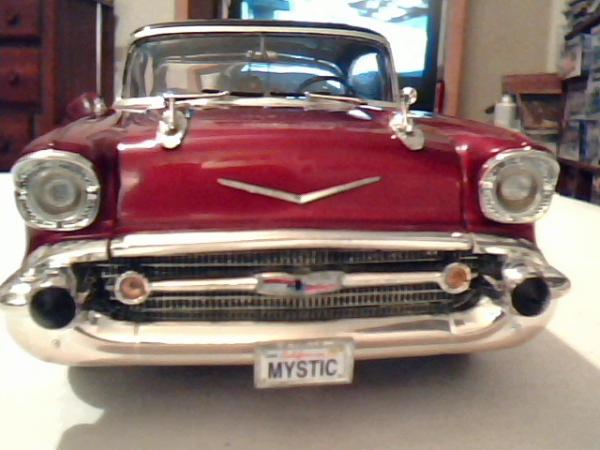
montecarlo1980
-
Posts
78 -
Joined
-
Last visited
Content Type
Profiles
Forums
Events
Gallery
Everything posted by montecarlo1980
-
Thank you Dave! Had some great trades with ewetwo as well. Always a safe and easy trade! Dave is a trusted trader!
-
Attaching resin parts without super glue?
montecarlo1980 replied to pharoah's topic in Model Building Questions and Answers
Years back I had bought some front resin front headlight/bezel's for a 78 Monte Carlo from a resin supplier. I was at the time out of super glue and had no epoxy on hand. Impatient I wanted to get them glued on. I had on hand some Loctite GO2 Glue I picked up from walmart. It's a clear glue sort of a thick honey consistency, dries a sort of rubber like texture on some test pieces I used it on. But very solid not a cheap flexible type rubber. I used it on the two resin headlights, and it held in place perfectly! Recently I wanted to remove the headlights and use them on another project, and with a little hobby knife help, they popped off with a little pressure. The glue left behind scraped right off easily. I also used it in a pinch to glue down some seats and they solid to this day. The seats were styrene on styrene. Resin headlights were attached on direct painted enamel surface I should mention. I'm actually pretty impressed by the glue and found lots of other uses for it with model building. It doesn't have a strong odor or anything either and dries crystal clear. Something different to try out. -
Not only are the prices good, they buy kits as well built, un-built and even parts. Great way to move things to make room if need be.
-
Now that is cool as all get out!! I dig the build, that scoop came out perfect and nice touch on the windshield washer fluid.
-
They're outstanding looking!! That is great detail on these both. I really want to get into building some kit's like seeing them more and more. Awesome job William!
-
She came out great Dave!! Even with the mags it came out looking mean! Keep them coming!
-
Masking future glue spots
montecarlo1980 replied to NOBLNG's topic in Model Building Questions and Answers
In my 30+ years of experience using it.. I have never had a paint issue of any kind with it. I've used every brand you can think of throughout masking with it for odd parts and never had an issue. I also do lots of other things outside of model painting and have never had issues with it. I used it masking guitar bodies as well for certain curves where most tapes just won't work for getting a perfect curve. And I have yet to have any issues with it. But I'm also a take my time kind of guy I don't need to have painted thing done in 5 minutes and move on. So I can see how some would still want to use other methods. But I have yet to find any kind of issue of it not working well coming off out of the part for models, or affecting the paint finish. Otherwise I would stop using it if it did. So far never been an issue. -
Masking future glue spots
montecarlo1980 replied to NOBLNG's topic in Model Building Questions and Answers
Well if you're open minded nothings too much work Never been for me it actually only takes but a couple seconds and never have to worry about any knife slips on delicate parts or sections. But go with what works for you. Just another idea to try. -
Masking future glue spots
montecarlo1980 replied to NOBLNG's topic in Model Building Questions and Answers
Just read this topic and one little trick I do for situations like this I don't want a paint build up in a sensitive area is I use good old silly putty. You can take a very small amount and push it into the holes for say the distributor etc, and the putty will fill the hole and you can paint your parts. When your paint is dried, you an use a toothpick tip to pull the silly putty right out. I have never had any issues with this method using any enamels, acrylics or lacquer paints so far in the last 30 some years doing this trick. Try it out next time it might work for you. I've been using silly putty since I was a kid for masking things off. A little goes a long way too. -
That is a bummer!! Was it an issue with paint compatibility or temp issues? I've had something similar happen to me before using Pactra paint with a certain silver base. I hope the next coats turn out better for you! It's looking better already from where it first came from.
-
This is an awesome job!! I'm loving how this is turning out. I too had a 57 Nomad when I was a kid and built it straight up no paint. It was the Revell Skips Fiesta edition nomad. I loved that thing cause it was the first car I had gotten molded in the metallic blue. I built it as is and I always dug that thing! It eventually started missing pieces and got lost in the shuffle. But this is really making me want to look for a Skips Fiesta edition one and do a revisit build. Really digging this!!
-
What won't Super Glue stick to?
montecarlo1980 replied to montecarlo1980's topic in Model Building Questions and Answers
Thank you everyone for the tips! I'm currently trying out of the suggestions. I have some teflon tape as Andy suggested and trying this out. I'm also trying your method too Harry of using clear to brush on and see how it works out as well. I'm checking my plastics I have on hand too and seeing what won't stick to them, found a bondo spreader in in my old tool box. I also didn't think of using Vaseline as a release agent on the pencil as Andy and Art both suggested. Another great tip to employ. I'll come back and let you all know how they turned out. Now if I just had small enough fingers to work with these small chain links lol -
Adhesive wide white walls
montecarlo1980 replied to Lovefordgalaxie's topic in Tips, Tricks, and Tutorials
Mike very interesting about the wide whitewall vinyls there. I'm wondering if its a climate issue as well? Possibly maybe with the wide whitewalls themselves. I have a set of tires with the Pegasus thin white walls on them that are about 15 years old and they're still stuck on like the day I placed them on. I also have another set the same age and builds, that are still on, minus some deformation on the back white walls. I used that set for a few test fits on some bodies, I had pushed them down into some fenders that stretched the white walls out on one spot. They're still stuck on to this day though. I live in California I don't know if its a climate issue as to why I have never experienced that issue. Also I'm wondering if maybe the wide whitewalls may have too much surface area over time it does curl up like that? One thing I did do before I put the vinyls on, was I washed the tires and scrubbed them with some dish washing soap first. I think I'm going to try a set of the wides myself and see how they do over some years time. I have a set of the wides from Pegasus I haven't used yet. Thanks for sharing the picture Mike, I never seen that happen before, always heard of it. -
What won't Super Glue stick to?
montecarlo1980 replied to montecarlo1980's topic in Model Building Questions and Answers
Thanks Carl! I will try that a well right now. I got some tires I can cut up and see what happens with them. Brushing on the glue as well I think will help. Thats the main problem I'm using my fingers as a brush in way to roll the glue onto each link. Great tips thank you! -
What won't Super Glue stick to?
montecarlo1980 replied to montecarlo1980's topic in Model Building Questions and Answers
Thank you Mike for the tips! I think I may have some silicone rubber candy trays laying around in the kitchen I can try a small sample on. Great idea! I'll have to look into the abs plastics. If the silicone rubber works I could probably cut and shape some into forming ring and get these made easier. Thanks again Mike! -
So I've been tinkering with making my own chain link steering wheels for some projects. Its been easy taking the chain and making the main wheel piece, the only trouble I'm having is gluing them. What I do is the take the piece of chain I've assembled and place it over a pencil tips top to keep the round shape. Then drop some super glue over the links to keep it stiff and intact. Only thing is its hard to keep some of the pencil's wood and yellow paint from not sticking to the rest of the chain. I try to move fast and rotate the chain wheel around the pencil to keep it flowing and not sticking. It works doing that but well its messy still. I've also tried soldering the chain links, but with the size of the chain is so small, the links end up getting filled in and not open. Which is what I'm trying to get away from that cheap closed link look the molded chain steering wheels come in kits. I've seen people solder other chain material before to make these, but the chain link they were using was very big in scale so it soldered up easily. So my question is, do any of you know a material that super will not stick to and let the chain glue up on.. I can easily slide the chain off of when its dried? I was thinking teflon maybe but I don't have any to play with at the moment. I was thinking of taking some sticker backing and roll it into a cone shape to slide the chain over, not sure if that work either. Any suggestions I'd love to hear and will try.
-
Alternatives to toxic glues?
montecarlo1980 replied to modelcars87's topic in General Automotive Talk (Trucks and Cars)
I remember few years back at my brothers we were working on some kits, I forgot to bring any of my glues over. He had regular Krazy Glue and this other stuff called Rapid Fix. It's a two part glue, one being the actual glue like a super glue, and the other a powder hardener. Basically like using super glue and baking soda. But the stuff actually worked really well I was surprised, I had used it on a front and back suspension so I gave it a good testing. The stuff held the parts with lots of prying on it to see if it would break. Now I don't remember the stuff smelling at all like Testors or other Superglues on the market, it was very light only smelled if I was sticking my nose in to look at the bonds. I wonder if this stuff might work for you Chris? I've included a link to a pic of the glue and a MSDS link to read whats in it. Maybe it'll work for you. Also the stuff worked really well as a filler for some body work, sanded excellent. Good luck! http://www.youngautoprofessionals.com/storage/new-products/rapidfix/RapidFix-YAP-Web-Image-sm.gif?__SQUARESPACE_CACHEVERSION=1360330417372 http://www.rapidfixaustralia.com.au/wp-content/uploads/2013/01/MSDS-RapidFixAust2011.pdf -
Hey Jb thanks for the tips! I was actually thinking of trying that too, using Future in the MM blue as well. I've used it some other brands and had good results. The Model Master blue only comes in the small bottle, so it shouldn't be too hard to work with. But I'm definitely going to pick up the Tamiya clear and give it a try as well. Just from looking at the MM Clear Blue, it seems its going to be darker with the wrong clarity I'm looking for. I looked at the Tamiya online and it seems closer to the Testors Transparent Blue I've been used to. So I'll be making a trip out to RC Country and pick some up. I was going to go with Krylon's X-Metals blue, basically a candy blue, but it was still too dark for what I'm looking for. Beautiful over over other bases though! Thanks for the tip I'm going to give the Tamiya a go! Good to see another neighbor in the forum! Ruben
-
I was wondering if anyones had any experience with this the MM Clear Blue Acrylic paint? Local hobby shop sold out of Testors Transparent Blue spray paint and suggested I try this this color out. It looked a little darker and opaque in the bottle. I've used Testors Transparent Blue for years, and I've decanted it before to use for brushing. And its always looked completely clear blue in the bottles. So before I buy some to try, I was wondering if anyone has used this color before, and can you tell me if it does have that candy transparent color to it and light? Or is it a darker blue but clear? If the color is anything like the regular Transparent Blue, I'd be willing to switch over to this one and spray through my airbrush. I'm just looking for more of that candy side of the color. My hobby shop said they can't get the transparent blue right now so they said this would work. I don't know though.. the lady who suggested it was wearing a sweater with kittens on it and gluing some popsicle sticks making a house. I don't think she gets down on some candy paint jobs.
-
Candy and Transparent Paints
montecarlo1980 replied to hookedonplastics's topic in Model Building Questions and Answers
A very skilled painter named Gary Seeds once gave me the best advice with candy and transparent paints, especially for use on our model cars. He said always "Mist" your candy coats first. Not a light coat, but a very fine misting coat to where the body is still showing your base coat and hardly looks covered with paint at all. Once you get that very first fine mist coat on and you still see the base coat, stop and let it dry for a bit. Misting your candy colors on is key to get an even final coat. Especially if you're not able to shoot it through an airbrush and going the rattle can route. Misting helps to stop that receding from panel edges. I used to hate working with candy colors till I learned that trick. -
Great start off to the build Bob. I've always liked the look of the standard Impala side trim compared to the SS trim. Excellent work on those skirts those fit the best on that style Imp. This is going to be a great build!
-
Sam, this goat came out clean! I love the color combination you chose for it. I built one of these with my nephew last year, even though its a newer release, we had all kinds of issues of things not fitting properly either. Yours came out great and glad to help you complete the build.
-
Hey Allen I think the kit you're looking for is the Revell Malibu Pro Street. I was molded in the lime green with the Max Rat decals. Heres a pic i found of it. There a few on ebay with buy it now.
-
Thank you Doug I will do that, I'm always looking for different techniques on this topic.
-
There might be a few topics here on it I will have to search through. I know of one for sure using an epoxy putty in conjunction with clear plastic for making windshield replacements. I wish the other forum wasn't closed down so I could of saved the topic on file. But I'm sure these other techniques will work much better.