Stef
-
Posts
562 -
Joined
-
Last visited
Content Type
Profiles
Forums
Events
Gallery
Everything posted by Stef
-

1/24th. Vodafone McLaren Mercedes MP4-25 "L. Hamilton"
Stef replied to Luc Janssens's topic in Car Kit News & Reviews
Just saw F1 with Brad Pitt, and man, I am rather stoked to get this! Anyone know what the F1 movie APX cars were, and any chance they are, or will be, made as models? Me wants.
-
Revell (Monogram) 1/24th scale, 1985 Pontiac Fiero
Stef replied to Luc Janssens's topic in Car Kit News & Reviews
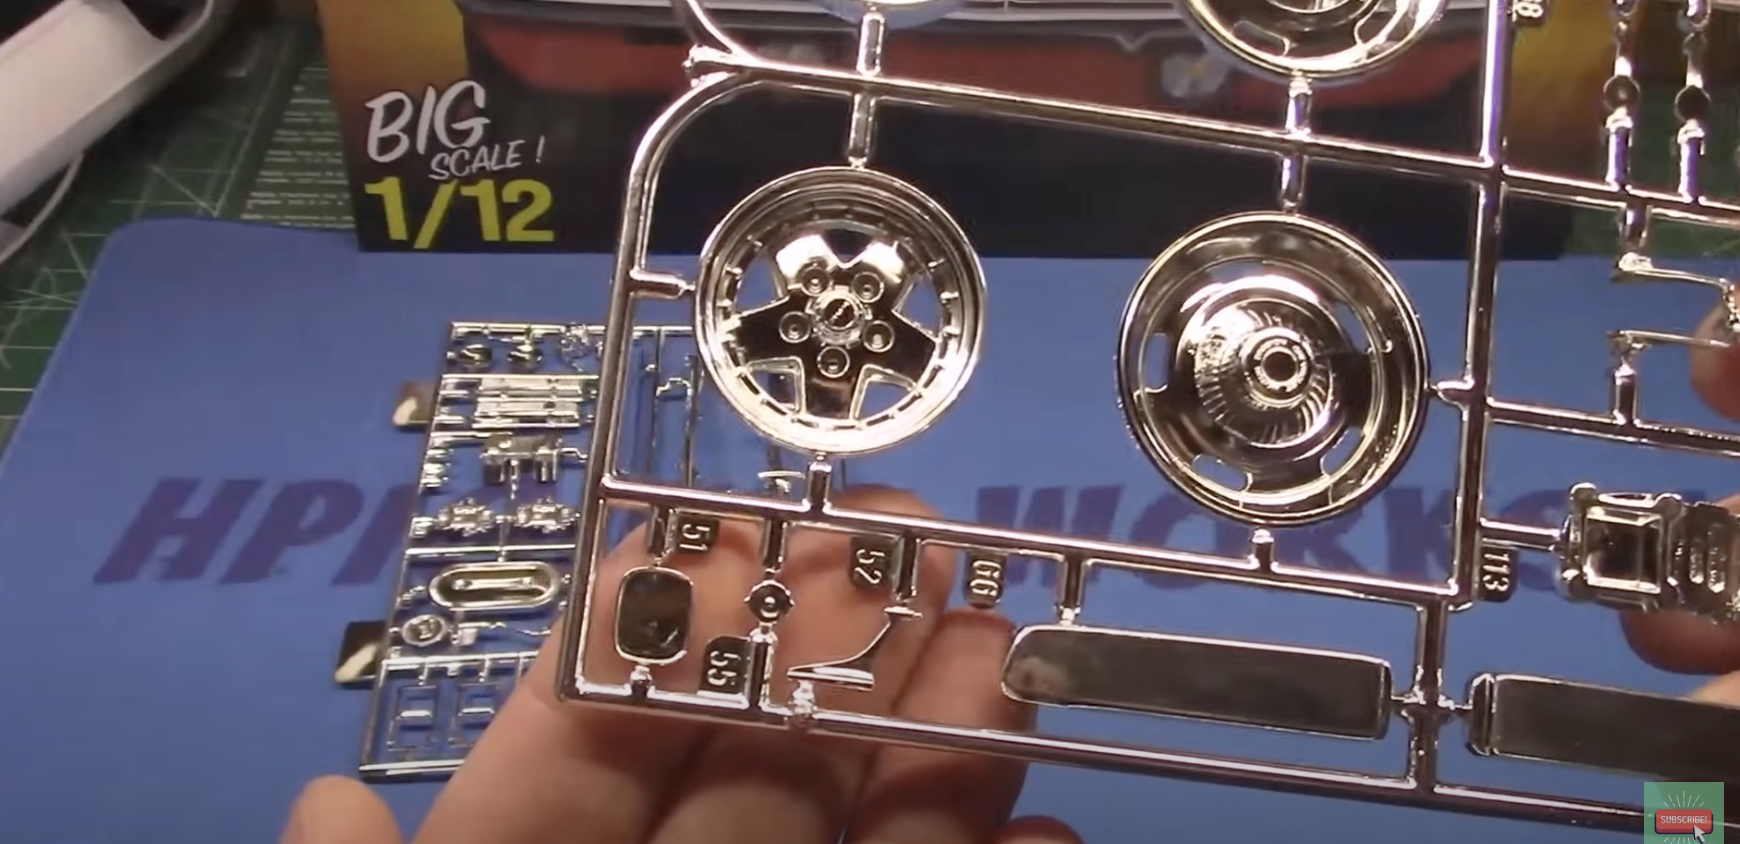
DJ mentioned above that the recent 85 Camaro did not have chrome, confirmed here with an HPI Guy screencap. 99% certain the Revell 81 Camaro snapper never came with chrome to begin with. Also just occurred that NONE of the three Stranger Things kits had chrome! And... Revell's recent 1/16 Trans Am GTA did not have chrome, either. IIRC, the late 80s version I had featured gorgeous satin-chrome plating. Good news everyone, Revell has not bailed entirely on chrome; recent reissues of the ex-Monogram 1/12 Camaro and 1/8 Trans Am DO still have plated trees.
-
Revell (Monogram) 1/24th scale, 1985 Pontiac Fiero
Stef replied to Luc Janssens's topic in Car Kit News & Reviews
You're 128% correct Peter, and I totally agree and prefer chrome-plated parts myself, too. I found an original sealed Monogram molded-in-red Fiero in the mid-90s and painted the wheel recesses flat black, then dullcoated the wheels, and they looked sick awesome realistic. It's interested how Revell of all companies has come full-circle with not plating their parts. They stopped plating in the late 70s/early 80s for awhile, and now here they are, back at it again! -
Revell (Monogram) 1/24th scale, 1985 Pontiac Fiero
Stef replied to Luc Janssens's topic in Car Kit News & Reviews
Pretty sure Revell recently did the same on their ex-Monogram Stranger Things Camaro. IIRC, that entire parts tree was plated in every pervious version I'd ever bought/seen over the years. Revell saves a few bucks, while some hardcore modelers don't need to strip plated parts. -
Moebius 1964 Mercury Comet Pro Touring
Stef replied to Justin Porter's topic in Car Kit News & Reviews
Man, that was BRUTAL to watch. My teeth flew outta my skull just from watching that impact. I'll be certain to upgrade the braking system on my kit, thanks. -
Moebius 1964 Mercury Comet Pro Touring
Stef replied to Justin Porter's topic in Car Kit News & Reviews
Agreed. Years ago, I saw a review/buildup of the Moebius 61 and I'd swear it was the same underpinnings as the AMT 62 I'd just finished. Did Moebius license/borrow/buy parts/tooling from AMT/Round 2, did they outright copy/clone, or was it something else? -
Moebius 1964 Mercury Comet Pro Touring
Stef replied to Justin Porter's topic in Car Kit News & Reviews
Awwwwww yissssssss This is wicked awesome. Wide fat lopro tires, sinister stance, all designed from the ground-up to be a modern killing machine. Will be getting this Pro Touring version, and a K-Code for an African Safari Rally version, too. May the best Merc win. -
Coming Soon from Atomic City's JoHan line of new kits
Stef replied to thatz4u's topic in Car Kit News & Reviews
Imagine selling models for a living and being angry that some don't sell as well as others. -
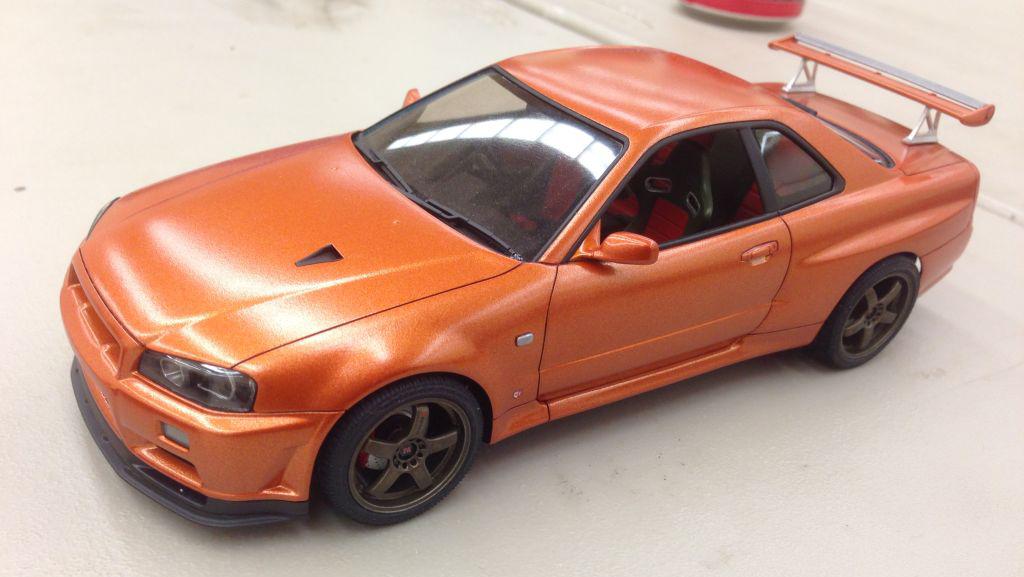
I really enjoyed this kit; finished this about a year ago, and highly recommend it. I took a few liberties with cutting out the passenger side window, increasing the track on all 4 corners by .080", deleting the rear diffuser, filling in the front license plate mount, cutting out most of the front skid plate, and a few other details. Paint is Tamiya TS-92 over Tamiya light grey primer. Wish I would've clearcoated and polished it out! Tamiya also produced a Z-Tune version which featured foil transfers, meatier wheels and tires, huge hood vents, aggressive front and rear fascias, flared front fender tops, side ground effects, subtle rear overfender arches, and a few other details. Both kits share some common parts so you can certainly mix-and-match to build your own version, whichever you get your hands on.
-
Right you are, Alan! I'll take Super Charger any way Round 2 releases it! Even if it's molded in red, with heavily-tinted glass, no pad printing, and no updated decals, ha ha. But since Round 2 is in command, they're probably going to give us much more value than we ever hoped for. They're no doubt watching this thread with great enthusiasm, and Chad is practicing his best "A LOTTA YOU GUYS HAVE BEEN ASKING FOR THIS ONE..."
-
Ha ha, right you both are! We've all acquired squillions of these over the years, and me personally, I have never, EVER used a single set of them on any project I've ever done. Until last year!
-
TRON GRIDS FOR THE WIN!
-
Coming Soon from Atomic City's JoHan line of new kits
Stef replied to thatz4u's topic in Car Kit News & Reviews
Agreed 128%. As much as I want Revellogram's new 71 Mustang, I'm strongly leaning towards getting one of MPC's craptastical 73's I butchered as a zygote. As a kid, I fought against butt joins, speculative engineering, and technical naivite. As an adult, I love kits that fight back. I love levelling surfaces, trimming, smoothing, test-fitting, filling gaps, scribing, bashing, modifying, and overcoming challenges for bespoke creations with a super-clean look. As much as I loved all the great new high-end stuff put out in the 90s and beyond, I've since developed a deep respect for and reverence of nostalgia. I now love building kits I destroyed in my youth, building vintage kits I never built before, and taking on vintage subjects I never cared for before. Dave, I do believe you and I are both onboard for snagging an Atlantis 57 Nomad and taming that beast, heh. -
Since this was brought up, I've often wondered about MPC's sudden and drastic improvement in overall quality and engineering of the late 70s/early 80s, long before ERTL took over. For example, MPC's 79 Mustang and 82 EXP kits had separate door/engine bay panels, their Omni 024/Shelby Charger/Daytona featured highly complex engines and front drivelines, their Fiero had insane detail throughout, their F-body Firebird and Camaro kits were far ahead of their time, the 80 Bronco was far more sophisticated than what Revell or Monogram had put out, and their C4 was top-notch for the day. Just curious if anyone has any insight as to how MPC got really good in the 80s!
-
Nooice. Especially McLovin' your Grand Champion-style 74 in the background!
-
Right you are, Olivier; I paid about $75 for the Moebius 72 Wrecker in person at Sunward at Christmas 2024. That was a very special one-off that I was willing to pay quite a bit extra for. I'm usually OK with $45-50, but above that, it's really gotta be a special kit! But the real problem is, EVERYTHING American has gone up, and I'm having a hard time paying $50+ for what was only $40 last year. To top it all off, the secondary market has gone bonkers, too. Used domestic kits, opened kits, old kits, would usually be $10-15 CDN, and recently, people started asking $30-40, and I ain't havin' that, unless it's a grail. Ain't no tariffs on a 25-year old 58 Impala. Even $5 glue bombs are going for $20 now, and the market is overdue for a serious correction. Having said all that, the Japanese kits have gone down in price! There's never been a better time to stock-up on Aoshimas, Tamiyas, Fujimis, and Hasegawas!
-
Fantastic work, Will. You have a very bright future ahead of you!
-
Pics please! Mine was similar, no doubt. First, built it with unpainted red body, then took it all apart and rebuilt it with brush-painted Testors 1146 Silver body!
-
Wow, Steve, so glad you're back on this one! I loved your pics you posted last year or so, and it will be a pleasure to watch you finish this beauty. So glad everyone was able to inspire you!
-
Totally agreed 128%! You guys rock! I'm just a dude who butchered my original Super Charger back in 85-86, and it remains one of my all-time fave kits that I've never had the chance to track down yet. Just knowing you cats love it as much as I do warms my cold, dead, black heart. Straight reissue, partial or total remaster, whatever, I'm confident Round 2 will bring this kit back from the grave. Thanks again everyone for your facts, stories, pics, knowledge, and deep reverence for this oft-overlooked kit. Godspeed, good sirs.
-
Thinkful Wishing about Round2 Models, future Kits.
Stef replied to stavanzer's topic in Car Kit News & Reviews
I've been wondering about the 70 Toronado; most of it seems to have ended up the MPC Californian. Any chance that Round 2 could create a new Olds body and bada-boom bada-bing? -
Right you are, Bill! Round 2 continues to surprise, excite, and impress with so many old kits and subjects being restored, updated, backdated, fixed, improved, optioned, resurrected, and given new life. These guys really know and love cars, they listen to us, and they deliver so many incredible kits to bankrupt us. And I could not be happier about it. Again, great sleuthing, thank you, and here's looking forward to more Round 2 awesomeness!
-
Bill, you have done the Lord's work here; thank you so much! This is a fantastic bit of kit history many of us will appreciate! Now, Round 2 is faced with quite the Mopar dilemma: Will drksd4848 get his 71-72 Road Runner first? Or will we get our 73-74 Charger first? Heh.
-
Thinkful Wishing about Round2 Models, future Kits.
Stef replied to stavanzer's topic in Car Kit News & Reviews
I built the 74 Super Charger in the mid-80s, and that kit remains one of my holy grails to this day. IIRC, awhile back when the remastered 68 Coronets materialized, there was talk about the original 68 Coronet chassis/running gear being derived from the MPC 66 Monaco, which survived all the way into the 74 Super Charger. Looking closely at the new 68 Coronet kit, I'd swear the Super Charger had the same basic 440, factory air cleaner, driveshaft loop, traction bars, and chrome headers. Would it be within the realm of possibility for Round2 to simply clone/remaster a 74 Charger body/interior and drop it onto the remastered 68 Coronet running gear? -
Thinkful Wishing about Round2 Models, future Kits.
Stef replied to stavanzer's topic in Car Kit News & Reviews
So many awesome kits! A few personal grails I don't yet have: MPC Super Charger (74 Charger) MPC Stunt Van (70s Econoline 4x4) MPC Night Prowler (70s Camaro) MPC Rising Sun (Datsun pickup) MPC Custom Corvette "Enforcer" (Mako Shark II) MPC 82 Cavalier Revell Mustang II (Monroe Handler tool)