MitchP
-
Posts
301 -
Joined
-
Last visited
Content Type
Profiles
Forums
Events
Gallery
Everything posted by MitchP
-
Chuck - if you say the chassis of choice for this build would be similar to the "Mustang", do you mean one of the Revell 1/25 scale Mustangs like the recently released (6 months maybe) HOT ROD or Kalitta car? I almost owned the real Road Runner version of this body style when I was still in H.S. The car was either a 383/440 and had been modded in places. It was primered and sitting on a big Chevy used car lot in Fairfax Va. I think it even had a 6pt roll bar installed if I remember. My folks took one look and said forget it. I had previously owned a '68 RR I got from a cousin for $250. It needed engine work and the Cragars were rusted. I sanded the wheels and shot the spokes with heat wrinkle black used for valve covers. Everyone wanted those wheels! It was a 440 4bbl, Hurst 4sp and 4:11 gears that made it a light to light demon. Man it burned oil from the valve seals lol. Sweet looking mockup. If you're not going for that totally 1:1 look, try the Pegasus front funny car rims/tires. They're drop dead knock-offs from today's F/C front rims. If you don't already have decals, try SLIXX or Firebird Designs for custom work.
-
As a builder and guitarist, +1 for fuel line work!
-
Dang, BK, I've suffered through this several times with a '66 Nova I worked on. I'd recommed the usual pre-paint preparations: full wash and dry of both body and hands/or gloves; washing hands and body with rubbing alcohol followed by drying with lint proof product and air dry. I've gone from being overwhelmed by detailing to overwhelmed by painting!
-
Well, every body part except the body/major wing is complete and looking pretty good. I had the body taped and shot the underside nicely.using Model Master Burgundy Red. Waited 72 hours and the double checked it before setting up the top shoot using a coat hanger taped to the underside. I had the paint warmed in a cup of water, shaken and ready for the first mist coat. Funny thing though - better to place the body shell much further away when shaking the can. I held the body and shot the first coat before realizing some water drops from preparation had landed on the mist coats Time to let it dry for a while and wet sand the trouble spots. Dang, so close. Well, re-painting is only week or so away....
-

'86 Iaconio Motorcraft/Budweiser P/S build
MitchP replied to MitchP's topic in WIP: Drag Racing Models
Yeah man, jumpin Coke cans and twisting those traction bars! I had a single 4bbl and everything else was stock (except the shifter). I had the same orange paint job, Twin flat black stripes and those wedge hood bumps. Also had the little turn signal indicators on the fender ends. One of the DRU tapes had a couple of promods that toured together, out of Canada I believe. One was a early Beratta and the other was rumored to be an old Glidden prostock T-bird. Very nice paint on that T-bird up above but my paint are skills are still in the learning stage. I know I'm getting old and my memory is losing it, but Walter Frey rings a serious bell. Anything to do with E-Town or Brett Kepner? -
Freakshow: GEETEE66: I too go overboard sometimes, well pretty much all the time with my builds. I need to stop and really study the art of 1:1 instead of buying throttle P/E for instance and guessing and barrel valve connections. I've walked through the Dobbertin parts and the instructions; I'm realizing with the addition of an M.A.D. distributor & wires, some wiring for the battery and maybe a little braided steel fuel line (heck, there's barely any room for the stock parts) the model will be just fine for my expectations, The Hays has too much bling for me - pink paint, white interior and flocking, P/E touches inside and the sound system just aren't my thing. The B&M shifter and tach, perhaps some guages, a NOS setup and fire system will help fix that. As for under the hood, I'm not sure yet. Shaun: you hit the nail on the head (sort-of) LOL. The Dobbertin has so much already with twin blowers and turbos; along with some fuel lines to the carbs and what I mentioned above would put that build in a nice upperclass category. Thanks everyone!
-
'86 Iaconio Motorcraft/Budweiser P/S build
MitchP replied to MitchP's topic in WIP: Drag Racing Models
6bblbird: is that as in the six-pack option on the 'Cuda's, Challengers and perhaps some Road Runners? I had a '68 440 4sp R/R back in my H.S. days. Got it for $250 from my brother in law in the mid-70's era 'cause he'd yanked off the A/C unit and ran it off the battery for grins in his back yard. Pretty ignorant, huh? I cleaned it up, put 4:11 gears in the rear, sanded out the rusted Cragars and reshot the spokes with wrinkle hot valve cover paint. Everybody wanted to buy the wheels & tires off of it! It needed new valve seals bad as it smoked like a pig. I'm new to modeling (about a year total) and I've just gotten real lucky learning the detailing from folks like Brett, Clay, Scott from Futurattractions. I'll attach some pics I took last night as the painting is done and I'm trying to decide whether to clear or not. I tried to clear it once already with Testors spray clear and it splotched up on the roof and driver's side door. I don't want to fix that kind of mess again. I did a test fit once already when the first coat was dry and it looked awesome. There's a small fitment problem with the hood due to the carb line detailing and I need to do a little sanding and reshoot the underside in flat black, which is no big deal. I chickened out on the split color paint job as I've tried it with junk bodies and can't get a clean color split, no matter how carefully I tape it with the thin Tamiya tape. You'll see from the attached pics it turned out almost strawberry red metalflake. I've got custom decals from Firebird Designs which say Billy "The Kid" Glidden for each side of the car and a crew sticker for the back with myself, my wife and son as crew. Since the kit was so old and the original decals not sealed, I suspect they won't be in the best of shape so I'm prepared with a lot of extra SLIXX decals to replicate what I can. Pls comment and critique. If you can recommend a decal solvent and/or setting solution, please do and if you've had good luck with any particular clear coat, let me know otherwise it's gonna stay as it is. Thanks.
-
+1 - DrGlueblob. I also warm the spray can up in a small tupperware container a little bit before shooting. I also leave the fan running for a while so the house doesn't fume up. Stuntman Mike - Awesome idea! Now that the weather is better here in VA, I've been painting outside in the garage, sitting the body on a 2x4 propped between a couple of buckets. That leaves a lot of risk for dust to circulate. I've got my last body, the Shoebox Ford, ready to paint the exterior and I'm going to try your suggestion. Does anyone have a recommended clear coat BTW? I've tried Testors and it must have been hot or bad as it reacted with the Testors "One Coat" Revvin' Red metallic base coat and I had to wet sand some areas with 3600 and re-mist the areas, then add another wet coat for good measure. I've tried the floor clean & shine tip on my first model last year, a '66 Nova and it turned out very shiny, but I don't know what will happen to decals in the long run.
-
Boban: This is a great example of a clean, proper stock drag kit build IMO. I managed to get ahold of the older LAPD funny car/pro stock/whatever Camaro which has the engine mounted a bit forward ahead of the windshield. I like the fact that Monogram made such little details like wrinkle wall slicks, a big HEMI and nice tinwork available right out of the box. Your paint on the steering wheel looks just like wood and the assembly is really clean, I mean really. I used to own the same year Duster in H.S.; my first car, in lime "grabber" green with a 318 and a 3sp manual on the tree LOL. One question though - what black paint did you shoot with, shaker can or pump sprayer and did you use any clearcoat or polishing kit? I've only painted one kit before and used the vinyl floor wash & protect product to provide a clear protective shine. Quite a few others here have tried it, and it worked o.k., but now I've had professional decals made for my last two completed builds and need to pick a clearcoat to put on over the paints. Both were shot with shaker can Testors "One Coat" and when I tried to apply my first mist coat of Testors clear, there was some kind of reaction. Not only did a couple of bubbles come out on top, the the entire driver's side door had spots of irregular clear. I let it dry, wet sanded the problem areas with 3600 and after a couple hours I reshot the original base coat color with several mist coats and another two wet coats for evenness. Can you recommend any shaker clear coats which are predictable and not hot, or do you use the Novus polishing system or something else? Sorry for so many q's but your work is great like others here and the only way to learn is by asking!
-
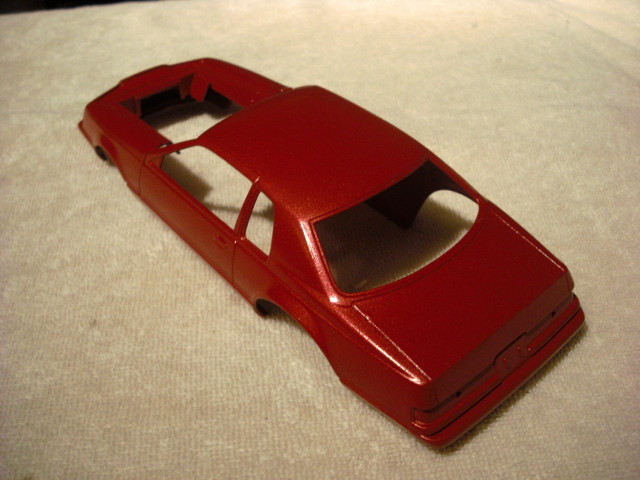
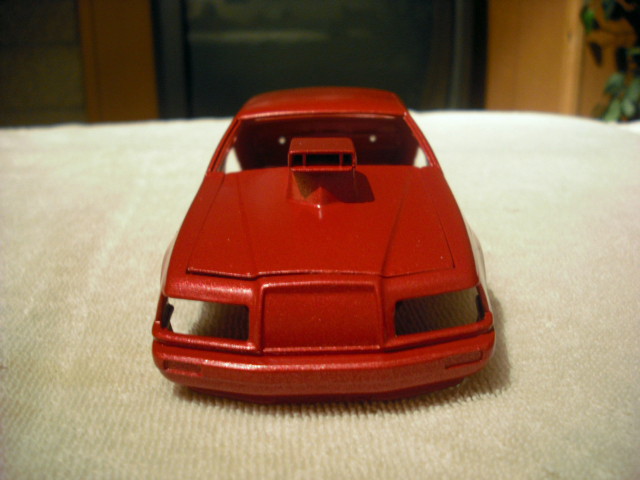
Alright - I can't wait to get some feedback. The body has to slide on and off from the front because I haven't modified the tinwork on the inside to accommodate the blower & hat, as well as the fuel distribution block & fuel lines And a couple of shots looking down the throat of the beast: I hope this helps with the curiosity. I was tinkering with the possibility of cutting off the front clip so the engine would be more easily visible without removing the entire body. Other than the usual small cluster of guages and the cockpit with a few controls and the SLIXX harness decals, there's not much to stand out like there is on pro stocks, pro mods or NOS cars. If I did this, I could try using some embedded tiny magnets like Clay did on Blackbeard's Revenge to secure it. I'm not ready for the opening/closing doors yet though! I have seen where a little more research would have helped here, but it will in the future. Clay's blower had a nice safety blanket attached which would help with 1:1 as well as blower straps and a better understanding of how P/E blower linkage should look for both the barrel valve and throttle control sides. I know it's just primered, but any feedback is welcome! It won't be painted red like the original kit; I'm thinking either a bright Corvette yellow or perhaps something as extreme as Testors "One Coat" metallic lime. I've promised myself after just getting done shooting a Budweiser T-bird prostock and a Kalitta Mustang with Testors products I'd never do it again, but some of the Model Masters paint isn't so metallic looking. I only use shaker cans and I use both primer/sander and primer/sealer before basecoats. If anyone knows a better paint that comes in shaker cans (Tamiya?), goes on smooth, safe and has little risk of running when sprayed, please let me know! Thanks all! p.s. I'll update my Mustang and Iaconia prostock build threads with some pics I took last night of the finished paint jobs.
-
Old thread, new feedback. Yes to a simple 19.95 to Donn Yost and his DVD. He gives tips for both shaker cans and spray systems. Big thumbs up to Cruz, whom I got good step by step instruction from, but never mastered it on my 1st model. I'm proud to say that after building and detailing 3 additional models, I finally got the courage to try again. It gets tough getting motivated to try more builds when your bench is filled with 3-4 finished chassis! Anyway, I finally got one of those $80 paint booths that vents to a window. Despite following all steps and getting a great finishing primer on and getting 3 great misting coats, somewhere during the 4 base coats the lovely fibrous filter included in the booth shed about 4 nits. Let's just say you get what you pay for. Anyway, despite my concerns of having to strip the body, I followed Cruz's instructions and used some 3600 to gradually remove the nits by rubbing a circular motion. After a wash and then drying with a modelling (lint) cloth, I resprayed a light misting layer. Right now it in the booth drying and will remain covered for the needed drying time until I'm ready to clear. My point? Have no fear. Search here. Someone has the answer and there are many good suggestions!
-
Now I'll have to search my pics to find some old ones of mine to judge the body lines! It was originally red and all stock. Then came the usual inexpensive upgrades: 24lb injectors, a Powerdyne blower (remember those?), a 190lph in the tank, an Edelbrock chinese rip-off intake 65mm MAS and a clutch. Next stage was 36lb injectors, a different spring rate to work the fuel diaphram harder, a 240 in the tank, a Vortech T-trim (fit the P-dyne brackets perfectly), 70mm MAF and a Rick Anderson programming unit that read off a real header mounted A/F sensor. It would pass VA smog every year at 14:7 and then open up to 11.5 under full boost. I ran the X cam in it with Ford Y heads and the programming unit would let me adjust every parameter from start to idle to each 100 rpm block of A/F. Those were the days... I finally used the last of my money at Maaco having the entire car repainted 1993 Prowler Yellow (yeah, waste of money), but I got tired of looking at the 3.5" cowl hood in faded 'glass. I also had the sheetmetal prostock style spoiler riveted to the rear deck and Welds all around. It was a bit scary running 3.5" up front and 9" in the rear. However, Hoosier had just come out with a drag radial front to go with my M/T rears so it wasn't like Chris (lime green coupe) and some of the other NMRA racers running 325x10x15 radials on the rear and non radials on the front!
-
I believe artist's chalk is kinkda like a regular chalk; perhaps thinner than sidewalk chalk and more like a crayon. Along with that, watercolors allow you a broad ability to mix & match colors; the only issue is that when the headers are installed, you need to have your ducks in a row before you start!
-
Again, sorry to make everyone wait to see the body, but there will be a special surprise there too. I just decided on a new direction sitting here chatting and I think it will be crazy! Rich: I love seeing Melanie in that In-And-Out burger car and wish she'd had a lot more success with it. Only so many cubic dollars to go around and a lot of good, experienced drivers (T.J. for instance) just practicing the light and waiting for an opening. Scott: Someday, I look forward to the opportunity to actually build a promod frame like Tyrone, Scott or Brett and use some of your fine products on it! The entire front end of this kit (rear too) could have been prolly been replaced with your components!
-
While these two kits may not be taken seriously by skilled builders, I picked them up because I love promods and kits that also promote that "over the top" build. The first is the Matt & Debbie Hays Pro Street T-Bird and the second is the Dobbertin J-2000 Pontiac. I examined them both and while the yellow molding of the J-2000 is passable for refinishing, the pink of the Hayes requires extra work and forces me to wonder why manufacturers can't stick with white, black or even grey! Anyway, with the exception of a replacement distributor w/boots, perhaps some blue paint for the silicone collars between the all the chrome piping and maybe some wiring if there's any NOS involved. Despite the minimal room under the hood, both engines might accommodate a set of 3 aftermarket cogs & one of those new resizeable cogged blower belts from Teds. So, how would you build 'em? Straight up? Mildly modified? Or not at all ? Well, I like 'em anyway! Thanks!
-
BTW, seeing the passion and content of the pages on this topic, I want to make sure I haven't insulted anyone or their opinions. I guess at 57 my memory is really going off the deep end. Yes, the resin body is fantastic and yes, I'd want it before any other options. However, money isn't as available as it was in the past and if the stock kit went on sale for $10, I'd buy one or two for a primary "Frankenstein II" and keep the other for emergency parts or my junkyard. Peace all.
-
Wow, interesting I dropped in on this! I've seen a recently released and suddenly rare Revell '57 Chevy shown under the "StreetBurner" series. I happen to own the unopened sea foam green '55 Chevy under the same series and have yet to open it. However, it appears to be structured on the same platform and mold as the Shoebox Ford, various releases of Glidden/Iaconia cars, the '57 Soff Seal Chevy pro mod, etc. My point is: the '57 Chevy I first mentioned was red with yellow flames and a smaller wing on the box, as well as less "ferocious" drag wheels. However, an everyday builder assembled one with no detailing and it was just as bad-a$$ as the rest of the kits mentioned. I owned, street drove and raced a Vortech S-trimmed 342 (too much volume and not enough blower) '93 Mustang Hatch that regularly ran in the high 10's @ high 120's on 15x9 M/T slicks with a stock T-5 trans. Frankly, I don't see any glaring differences between the picture above and mine except for the hatch vs. the coupe and perhaps the kit manufacturer toning down the intent of the car. I could cobble a twin or a single turbo setup to a cool box in the passenger front seat area and into a breadbox intake. Look up the National Mustang Racing Association website or NMRA (even NSCA for "street car") and you should find a zillion of these. Some models like McEwens '57 flopper went as far as to include a twin filter dry sump piece and a twin mag for the molded 16 plug holes. Most of the first kits I mentioned include Lenco shifters and the top sportsman/pro mods on NOS had the bottles in the back. I don't know if this kit has come out, but I'd throw my hat in the ring and build a single turbo version with a cool box. I've got more than enough spare wheels, tires and shortened 9" Ford rear setups to make it look like the real deal.
-
'86 Iaconio Motorcraft/Budweiser P/S build
MitchP replied to MitchP's topic in WIP: Drag Racing Models
Sorry I didn't get back to you on this. You're right about the wires at the mag. I figured out another way too. RB Motion sells for a modest price, both the insulators for the mag and the spark plug end, with the plug end having straight or 90 deg angles. The mag/distributor on this T-Bird came from M.A.D., which has a nice collection of various detailing items from wheels to electrical components. Their mag kits even include a twin kit and mounting plate for dual plug per cylinder Hemi's. I used this on my new "Frankenstein" build in WIP. M.A.D. includes alum cored hard rubber wire so when you peel back a small portion of the shield and pull the core out, you have a hollow sheath you can cut to any length. I used those for the Frankenstein build (imagine eyeballing tiny insulation pieces on both ends of 16 plug wires). It was nuts. Then I had to bend the plug ends of each wire in a crimp so the insulation wouldn't slide off while doing another. Not to mention getting the firing order right for 2 mags and drilling 16 plug holes with a dremel! Like I said, never again with the M.A.D. insulation. It's RB or Protech from now on! Good hearing from you! -
Thanks for the feedback folks! Yeah Gene, think I may have overdone it with the Ed Roth blower. Remember those "Rat Fink" t-shirts of the '70 Chevelles, early Mustangs, GTOs and Hemi 'Cuda's pulling enormous wheelstands with huge smoking burnouts and the headers hanging out from underneath? I used to draw those for kids in H.S. at .50 cents a shot. It was my lunch money back in the '70s! Before she got married and switched to T/F, Leah Pruett ran an early silver 'Vette pro mod turbo setup. That would be a fun build too, but waaay over my head!
-
John's definitely on the right track IMO if you want to stay with a white header base. I wonder if you should blend the heated effect gradually from the top down to the tip? There seems no logical reason why the first 6-12" of a header pipe should be cleaner than the open end since the flange etc. is much closer to the cylinder valve and the exhaust source; however, looking this build: http://images12.fotki.com/v531/photos/8/174078/8783900/PB090855Z-vi.jpg you can see on these metal headers the top appear to be a more natural chrome than the section where the pipe is about 6" from the header flange. You could also take some leftover parts tree and prep it to the same paint color as your headers, then test a couple of different tanning techniques. However, it looks great as is Gene!
-
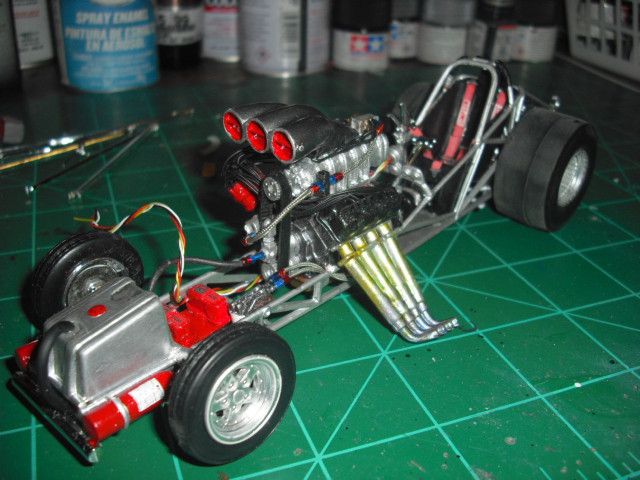
Hey gang: I decided to sneak this build in while I build up courage to do more paint jobs on finished builds and because I wanted so badly to see if I was over my head attacking this skill level or if I should back off. I could have put the primed body on the finished chassis/engine, but that would spoil the surprise. Some of you may recognize the kit from familiar things and I'd ask that you not let on so I can do some much needed tinwork before painting and revealing the finished project. Here are the first few pics of the stages putting the engine together. The twin mag is courtesy of M.A.D. and the cogs//belt are Pro Tech. The blower/hat are from Teds and are resin. Here the frame, minor details like fire system, dry sump and MSD come together. Now it's starting to look like something! And now, here is is. I'm sorry I couldn't get a better pic of the fuel dist. block on the rear of the 'charger or the tiny Pro Tech nuts used for the .025 black injector wire. Perhaps it's for the best! Once the body is done, I'll add the barrel valve linkage and some throttle linkage on the other side as well. These last pics are all relative within a 4-5 day time frame, but except for the fuel system, they weren't back breaking. CA and accelerator can be dangerous partners at times. I've found that using the accelerator as a spray pump causes the surrounding paint to dissolve, so I use the little .049 cent plastic bulb syringes to apply it in drops (another amatuer breakthrough!) I hope you enjoy. Please point out mistakes or improvements I can use in the future. I plan to implant a Ross Gibson/Sonny'sSuper Max into a 1/25 well known pro mod model later this year as a 3-6 month project! Thanks!
-
Billy: if you love big pro mod motors, check in on my thread "Frankenstein's Ghost" in this topic. I'm not revealing the total build yet; however, savvy builders may recognize the chassis despite how I've mangled it. I'm no pro, only an amatuer at best. This is my 4th build where I've used fittings and braided lines, and the 1st build I've ever tried to mate a pro mod blower with a standard Hemi (albeit 2 plugs per hole!). Please forgive the mistakes, it's just part of the learning curve! Thanks!
-
Nice job! This is one of my "gotta build" on my long list of models, although the one I've seen that most close resembles my desire for a slightly stretched hood, skinnier front skins and spoke wheels and a feature packed packed 392 is offered by specialty magazine we sometimes get; it might be Hot Rod Collectibles or something like that although it has no relation to the "other" periodical. One way I've worked on to weather styrene headers really doesn't come close to hand-built metal or chrome rods which have been heat treated with fire source. I use Alclad or a similar paint and once dry, I start with light areas of Tamiya clear yellow, wiped down with paper towel. Next, I use my own judgement of fading small sections of Tamiya clear red, clear blue and Pactra clear purple which is normally used on the inside of R/C cars. It's a lot of work, but I've used it once and it's turned out pretty well.
-
Phil: I love the turbo cutlass and I've often thought of a turbo build myself. I once owned several turbo'd cars: a Subaru STI modified with front mount intercooler, fuel and intake upgrades to put out 370hp at the wheels (awd), and a Mazda Speed3 with no mods and a six speed with 265hp and enough torque steer to cause carpel tunnel! I would, however take the time to research the recommendation here and change the turbo plumbing as I've spent quite a bit of time as an NMRA Mustang fan and have seen both single and twin turbos routed from the units to a cooler inside the car and back out to the intake. The path should go exhaust to turbo (there also needs to be a controllable wastegate to control pressure, either pre or post turbo) with the spent exhaust gases out (most modern turbos exit near the front wheelwell). The exhaust gases turn the rotor vanes on one side of the turbo while an intake operates off the other set of separate vanes on the turbo, routes the air to the cool box, and then to the intake. I wouldn't want to see you miss a show, but I'd hate to see you lose a competition because of accuracy. Ted's Marketing Market Place sells a twin turbo setup for 37.00. Here is a pic (hope it turns out) of the unit mounted on an engine. You can see the exhaust from both sides snaking back to the turbos, the blow-off (or waste gate) valve sticking to the sides of the unit. Hopefully age hasn't ruined my memory, but the front of each turbo is where you would connect your tubing to the intercooler and then to the intake. The two smaller pipes from the turbos pointing down combine to form the exhaust plumbing. In your case, (I believe your Cutty is a V-6), all you'd need is to find a pair of 6 cyl headers, mount them on their opposite sides and backwards so that it resembles the attached picture, then fashion a curved tubing piece from the passenger side to the meet the driver's side header and turbo exhaust side connection. It's up to you if you want to design a wastegate. Then, the tubing from the front of the turbo (clocked however you need) would lead back to the cooler and return to the intake. I hope this helps, whether you decide to use it now or in future builds. Turbos are fun, extra work, and definitely a different step from the average blower or NOS. Good luck and great build!
-
Love it Brett. Any kit that goes so far as to include those kinds of details is fine by me. The Revell McEwen '57 flopper I'm toying with in between paint jobs is decent enough to include a simulated fuel system from cell to pump to engine, a dual dry sump oil filter and what I believe are supposed to be twin "puke" tubes from the blower to the top of the frame. I'm so OCD about having some detailing on the engine and ignition it gets repetitive in 1/25 scale builds 'cause they're so bland out of the box.