MitchP
-
Posts
301 -
Joined
-
Last visited
Content Type
Profiles
Forums
Events
Gallery
Everything posted by MitchP
-
Wow, wish I'd held onto the original!
-
Thanks Andy!
-
Thanks! I've got a Revell in the wings too, the same '55!
-
Bill - the safety harnesses are A-1. I won't say where, but I got a sheet of "fabric" full harnesses that don't look anything like the real thing. May ask where you got yours and how much? Thanks!
-
Andy - I used to race NMRA a long time ago when the NOVI 2K and the Vortech XXX still had a chance. I could swear that's a more properly turbo position than a Procharger, since the Pro's a centrifugal. Nice work on the 'cooler, although I don't think NOS and a blower would pass tech at Orllando's World Street Nat's LOL. Can you clarify?
-
Is this the 40 year old Tarantula dragster? I build a T.V. Tommy Ivo and a Tarantula as a kid. T.V.'s had orange molding and the Tarantula had puke green.
-
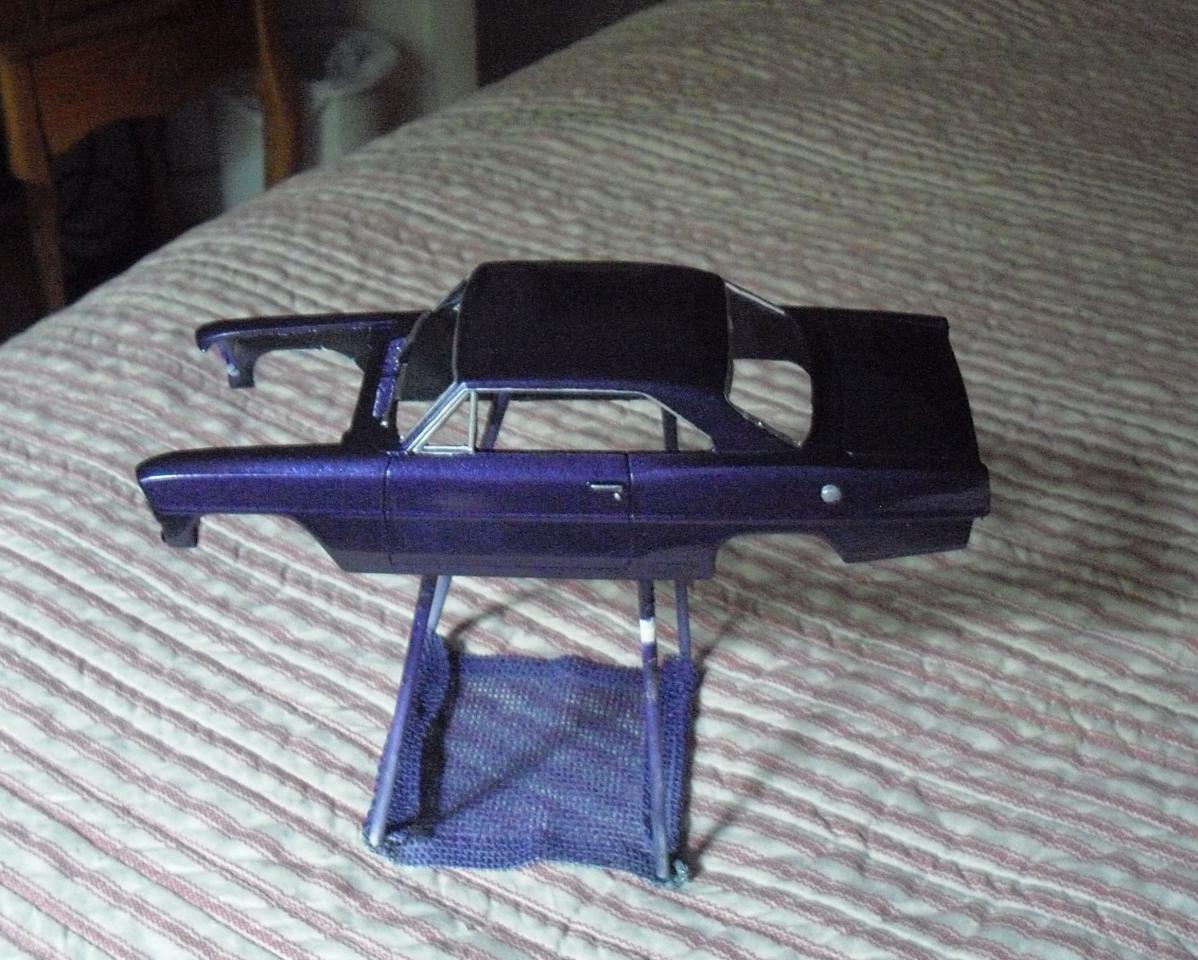
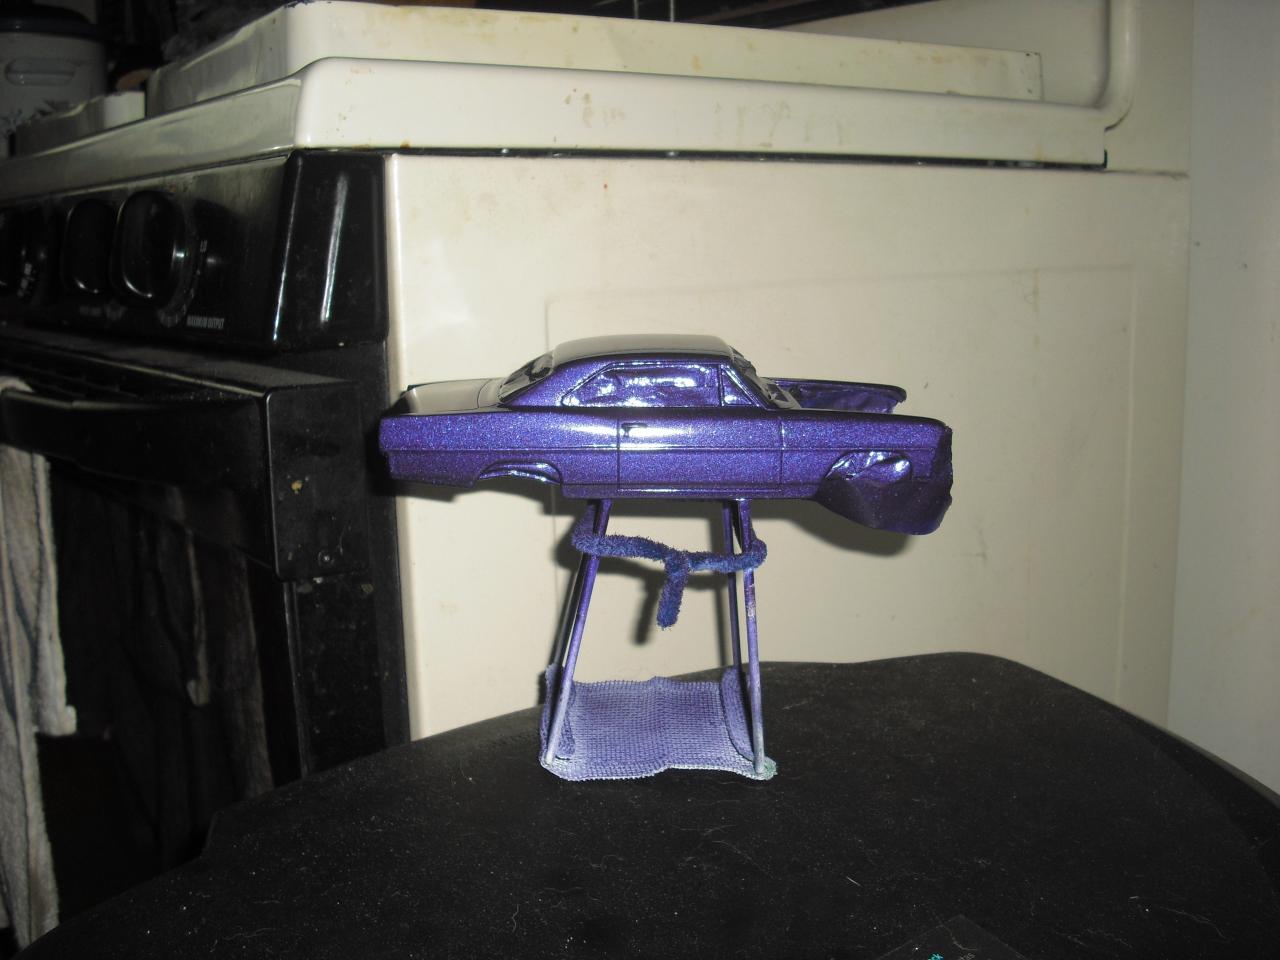
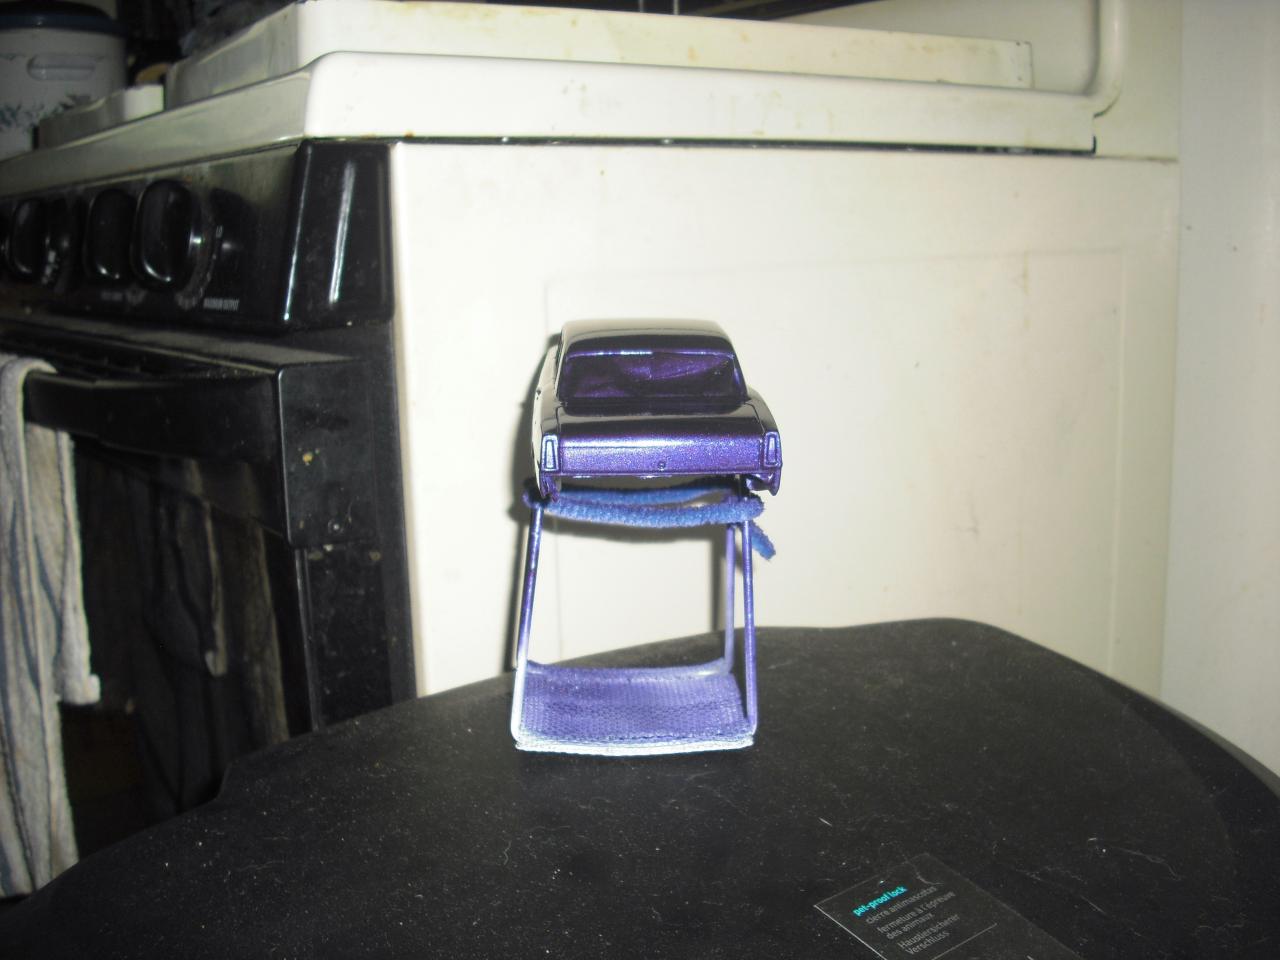
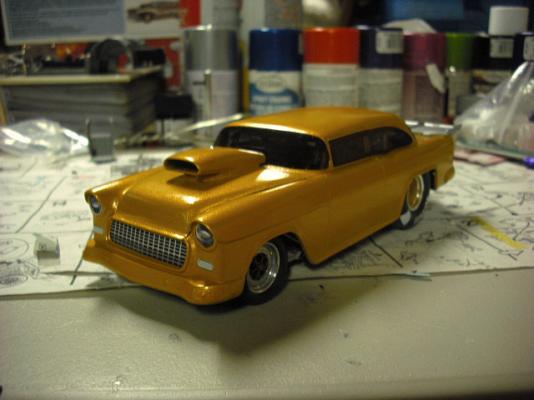
Wow, this has been forever. I now know that most here post seriously often when "on the workbenck"; rather, I have pics of coming to a close after a long and enjoyable build and much amatuer detailing followed by a horribly tedious learning experience at painting. However, all has ended well with a decent paint job, much learned about different paints and the discovery of Pledge and Holloway household vinyl clearing products. So here it is, readying for some additional decals and final assembly. I tried to get the headlights too, but my camera is really cheap. I picked up some decals from a Revell pro mod '55 chevy and trimmed them to fit the headlight buckets, then used clear windshield glue to fasten the round, clear plastic headlights. Comments are welcome! Chassis with tubs, interior and engine. Sorry for the poor focus. Bottom and shaved slicks More detail on chassis and engine. Choice of hoods Body with BMF and silver Sharpie detail Hopefully this angle shows the paint and clear better Criticism is welcome, but please be a little kind LOL. It's my 1st real model in 45 years and the fuel system, cage and NOS/battery pack in the backseat area are all home made. Hopefull I'll be able to afford to use RB Motion fittings and Teds fuel lines soon!

-
 Sorry to be late coming into this topic, but having just finished painting a satisfactory job on the 4th body of my 1st official kit after almost 50 years in between (there were circumstances), I was tired of rattle cans in general and when I knew I had to clear my finally perfected paint, I was hesitant to use Testors One Coat clear. After 2 days searching locally, I could not find the lable with the atomic symbol on it on any Pledge product, much less the phrase "with Future Shine". I did find the one with the booties on the lable; in addition the store pulled up their stock number and it did show the "atomic symbol". However, I'd also been to Food Lion and picked up a bottle of Holloway House Shine product, all green labeling, self-leveling, biodegradable, etc. I had two bodies which were scrapped pain jobs so I proceeded to brush the product on both, including a section which had been hand sanded down to a 2nd coat of base coat and was dull and scratched with about 1000 grit. Results - BOTH products produced a fantastic shine. Holloway house too a little longer to dry, but leveled better. I'm choosing Holloway House for my current kit. Neither one worked well as a decal cover/protectant on sanded slicks with Goodyear decals, or on flat black racing hoods with Dzus fasterners (duh). However, a quick shot of dull clearcoat on the hoods reduced the minor glare of the product covering the fasteners. Testor's makes a great decal product for this in a little paint sized bottle. Jut my .02 on this VERY interesting subject (think old Artie Johnson). I think all amatuer modelers who've had bad results with spray rattle can clear coats will benefit from testing these products on a couple of painted, junked bodies and make up your own mind!
 -
Aaron: ditto with the other comments. Especially the sometimes overlooked details like the cleanliness, surface and paint color of the sheetmetal fabrication under the body. I have a question: on the 1st three pics, the altered and both floppers have a slightly metallic or pearl sheen/finish to them, yet they aren't gaudy like my current build is turning out (I'm 56 and only starting up with the hobby now). I'm using Testor's Purple-licious shaker lacquer and the flakes are HUGE! I was really looking for a smaller flake; more like a pearlescense. I can't afford anything but shaker right now. I've been using Tamiya fine white primer with the Testors; however, due to some recommendations here and cost I'm going to try my next build using Dupli-color products. The car is the Glidden T-bird pro stock and I might even vary from the red on the box and shoot it in yellow as it's my favorite color. It all depends on how the decals would look and if I decide to go 1:1. Do you use and air sprayer or cans? Judging by the class of your work, I'm supposing spraying which makes the paint brand irrelevant. I was just hoping I could find something that still caught the light without being as gaudy as Testors. Thanks and again, great work!
-
Current status of paint work on my car: cleaned, prepped and primered 5 days ago. Shot 3 mist coats of base coat color 20 mins. apart. Shot 1st wetcoat 30 mins. later and discovered several dust specs and some minor fisheye (I'm very new to painting and to Testors "One Coat". Cured paint for 4 days, then braved 1st attempt at 3600 wet sanding. Worked well. Shot a mist coat of color to cover up dulled areas from sanding and a few spots where primer got through. Waited 20 mins. then shot a close 2nd wetcoat which went on pretty thick but stuck well and actually filled in remaining remnants of the fisheye "craters" on the bottom rear 1/4. It's been around 24 hours since then. Is it too late to shoot clear now that the body is finally done or must I wait 2-3 weeks like I've been told by some others? I've been advised that a polishing system or Future will only fade after time and that I must clear before attempting to polish. I don't want to screw up a 4th body!!! Thanks all!
-
Testor's One Coat post mortem
MitchP replied to MitchP's topic in Model Building Questions and Answers
Hi Charlie & Marc: I'm printing this thread to add to a 3 ring binder of material for whom folks (Marcos Cruz, Donn Yost, etc) have conversed with me to help forge forward in the right direction. I've got about 8 kits stored up to hone my efforts on right now. My desires were so creatively expressed when I started looking at other folk's detailing. My 1st actual model was a JJ Vega flopper that I quickly added a homemade fuel system and a mag/ignition wire setup to win a blue ribbon at our local fair (yea, we're really rural). The paint was actually not bad as it was summer and I started with Tamiya fine white and one of those Testors "hot" metalflake One Shot colors. I was able to shoot everything outside as it was summer. As the weather has gotten sporadically rainy and cooler over the past 2 months, I've struggled with this Nova. Due to disabilities, I only get about a quarter of my salary from 5 years ago when I was a systems analyst. As you can imagine, that leaves little for a sprayer setup, much less the necessary paint booth for safetie's sake. So sadly, for now I must use rattle cans and yes I have been using those large flaked, custom colors. I'm more than happy to switch to any stable primer resembling Tamiya's properties since it's a bit expensive. As for the base paint, again whatever either of you could recommend which would be an easy rattle can product. It doesn't even have to be metallic as long as I can either clear or polish it to a nice shine. Marc - you say you shot your Cjhevelle with a Testor's metallic laquer? Did you also spray an extra coat of dull to cut some of the flakes down? Mine are HUGE compared to yours! I'[m going to try to insert 3 pics of my body in this post. P.S. - I was able to take the plunge this afternoon and wet sand the dust specs and the fisheye areas after some advice from a fellow hobbyist. After washing and drying, I shot a light coat, just enough to cover the few areas of primer that were revealed and prepare for the 2nd and final wetcoat. The mistcoat went on fine, I waited 20 mins. and then shot the final wetcoat. I actually got brave and shot it a little closer and heavier than the 1st wetcoat as I saw it appeared to be covering the fisheye areas which I didn't think it would. It's now drying for the next 5-6 days and after that, I intend to use a polishing system on it. I don't believe at this point I can safely shoot any clear because of how long it's been between coats. TMI!!! Thanks to everyone who helped me get this far. I'd really like a basic, fairly predictable system for a few kits so I can concentrate on my true passion in this hobby which is detailing!
-
Nice James! You realize you've given all your carbureutor advice to another rookie, namely me? I picked up my AN fittings from Rob at RB Motion and they are slick. I added a purchase of the matching fuel lines from Ted's. I have no doubt I'll need a few more as I progress into my build to match the diagrams. No contests or anything, I just love to detail for fun. I had a t-brake on my '93 Mustang; I can't remember for the life of me what it looked like! For my current Nova, I just did the coiled wire thing and attached one end to the B&M shifter casing. The other end kinda tucks around one of the steering wheel spokes. Have you gone to anyplace like Hobby Lobby or JoAnns? Look in their minature "doll house" section. Never can tell what you might turn up; maybe a TV remote you could cut in half. Have you thought about cutting a piece of your parts tree off and painting it silver? If the diameter is small enough to make it look right 1:1, you could use a dremel to drill into one end and insert another smaller piece of round plastic in. Paint that piece red and you're done!
-
Testor's One Coat post mortem
MitchP replied to MitchP's topic in Model Building Questions and Answers
Thank you all for your help. I've isolated one or two things right away - I have never worn cheap rubber gloves and most likely gotten oils from my skin on the body which caused problems with adhering. I also stopped by our local body shop and was recommended a rattle can clear I can obtain nearby. Advice from a professional painter is pretty cool. Especially if they build models from time to time I'm also laying off Testors for a kit or two and using only Duplicolor for the base. I still find the Tamiya fine white great for primer. I didn't take the time to document my build correctly with pictures; however, once the body is completely painted I will start my "finished" thread with pictures of the chassis, interior and body with choice of 2 hoods, wing, chutes, chrome and some BMF waiting to be done. This project has been on hold for months while I've fought over the body mess! -
Testor's One Coat post mortem
MitchP replied to MitchP's topic in Model Building Questions and Answers
Mike: you may be right. I washed and dried the body right out of the kit. Then I sprayed Tamiya mist coats of primer, a total of 3, and let them dry. At that point I worked on mold issues, etc. and shot a final mist coat of primer. After that, I used 2000 grit to slightly roughen the body and give the 1st mist coat of base color a grip. I shot a total of 3 mist coats of base, 20 mins. in between each. All was well at this point. After 20 minutes, I shot my 1st wet coat, doing everything possible to keep an even distance and sweep. Everything looked great until I took the model up to show my wife, who noticed the fisheyes. I'll try Tamiya next since I use their primers. I hope they have a good selection of colors! -
Testor's One Coat post mortem
MitchP replied to MitchP's topic in Model Building Questions and Answers
935k3 - Seriously, I've already thought about that route. I can't afford an airbrush kit and a badly needed paint booth. I've seen E-bay auctions for self-contained little units; nothing like the ones with full-sized HVAC filters, decent air movers and a nice paint area. But auctions ones are only $50 or so and at least have some air venting from behind the paint stand and above using a piece of cheap dryer venting. Not sure where the fumes go or if I have to find another dryer hose and run it out the back door. However, on the subject of airbrushing... I've seen little starter kits containing some acrylic basic paint bottles, an aerosol can, a clear paint feed bottle (some kits have 2) and several types of sprayer tops. The acrylic colors have a good selection, I think there is a "cut" or mixer to thin the paint too; however, I've also been led to understand it's a hard learn as far as mixing to get the right thickness and tackiness, etc. -
I've received LOTS of good and interesting advice here on the most difficult part of taking up building models again after 45 years - painting bodies. However, my first kit has taken 4 bodies (bought from Ebay and given by modeling friends) . The chassis and interior are done and detailed with more fun than I could have ever imagined; as for the current body, I'm happy enough with the results that hopefully only a couple of things need addressing. After initial prep and priming (3 mist coats), I have to this point, applied 3 mist coats (20 mins. drying in between) and one wet coat (after 20 mins.) of color. It's now drying. Here are my questions to finish the deal: 1) The paint used was Testors One Coat metallic. During painting, I've tried several different different colors from different shops. There has always been an issue with either the paint or the clear coat of the same brand. I'd like some suggestions on a replacement laquer (even pearlescence), just not METALLIC! 2) At this time, the body is drying after only 1 wetcoat. The reason is because of the fisheye condition on a few hard to see spots and I'm afraid to push my luck without know how to resolve this. In addition, there are a few dust particles on the roof and trunk lid which would be nice fix. Should I attempt to wetsand the dust spots and maybe the fisheyes too before another basecoat? Should I shoot a clear coat or two and then sand down lightly to remove the basecoat imperfections? Or, shoot another wetcoat of the base color so the body has some substance before proceeding? I've come to the conclusion that besides many more years of experience, I will NEVER use metallic, glittery paints anymore. There are simply too many variables involved with solvent, the flakes in the can, etc. I just want a good recommendation for a laquer (even a pearlescent finish) that doesn't have the issues of "one coat metallics" and a set number of time between coats, both primer, base and clear. I know this was long winded, but I appreciate any help.
-
Nova Pro Sportsman WIP 9/08/13 Working on new hood
MitchP replied to outragis's topic in WIP: Drag Racing Models
Nice job Eric! Surprised you decided to modify the outlaw hoodscoop though. I got one off Ebay for my '66 kit and after some fiddling it fit pretty nice. My kit came with a wimpy 327 dual carb and shortly after I was 3/4 done, I found the same Revell '55 Chevy donor engine with some extras on Ebay. I was so tempted to swap it in but I'd already detailed the stock engine ($$). I'm painting now and I hope to have pictures in about a week. -
1/25...Vinny Budano 68' Camaro Pro Mod build....
MitchP replied to Dirt Demon's topic in WIP: Drag Racing Models
Wow, really nice! I hope to have this same result when I upgrade my '55 Chevy NOS Sportsman to a Pro-mod blown motor setup. Vinnie used NOS engines I believe, and was one of the Jersey/NY City Boyz from E-town. -
Fnlally ready for another attempt at my '66 Nova paint job. This time, different color and a resin outlaw hood. All prep work done and primed for both peices. Should the hood be shot separately and just kept in sync by counting coats? The car will have interchangeable hoods with a flat black one with pro stock scoop. Thanks!!!
-
BTW, that launch pic reminds me of 1/8th mile tracks in the south years ago. Some would roll up with a tree, set up the beams at the start/finish lines and let 'er rip. You were lucky if there were any jersey barriers or metal barriers for fan protection.
-
Hmmm.... I'm on the verge of a completed upgrade of the AMT '66 Nova to include a totally maxed out interior with homemade rollcage, coiled wire detail for a transbrake to the upgraded B&M shifter, Kirkey sets, NOS & fire bottles, detailed original 327, open headers, pro mod wing and wheelie bars. I have the stock hood/pro stock scoop painted flat black and just got an outlaw hood. I was going to seal the hood and mount twin turbos I got off Ebay, but they are only clocked one way. I don't want to got to all the trouble of reworking the engine just for a single turbo behind the grill. The car will be painted purple metalflake, as will the cowl hood. I'll then be able to swap hoods for grins. I really like the attitude of this "murder" Nova. Any idea the mm of the turbo? They were all the rage in Mustang racing, pretty much putting Vortech out of business, but Procharger has kept pace. It's been so long since I raced my Vortech 'charged '93 Hatch that the Novi 2000 was the monster of the day, along with the Vortech X-trim.
-
Futurattraction - New product announcement
MitchP replied to futurattraction's topic in Car Aftermarket / Resin / 3D Printed
Scott - these are fantastic! Question: do you intend to mold some with that wrinkle wall effect? I love that; the only problem is I've just recently learned the trick to shaving slicks to create that low pressure meaty look and trying to do that with a wrinkle wall would be very hard. I hope these will work with my newer Revell kits like Shoebox Ford and '55 Chevy Streetburner pro mod as I don't like two piece slicks they include for shaving. Also, for those not having to be period correct with wheels, I'll bet these look sweet with SLIXX convo pro as well. -
I found these searching the 'net. I hope they are in stock; the front set are really thin like they are meant for dragsters. I don't think they'd look very well on a pro street car though. Eh, I guess you could get a good measurement in millimeters and fit your wider tire.
-
Those are beautiful. You said '57 Pro Sportsman kit; I don't recall one from Revell. I'll have to shop around and pray it's not rare or expensive or the wife will kill me. BTW, being an old owner of one with a 318/3 spd column shift, I'd swear the car lines in those pics belong to a early 70's Plymouth Duster in that lime green color. Am I right?
-
In my search for Convo Pro and Magnum Drags wheels (front & rear) for a pro mod build, I found a link to a gentleman who had a tremendous inventory; even drag radial combinations of wheels/tires. I can't find the thread it was in, but it had a fiery skull I believe. I went on his site and he definitely had EXACTLY what I wanted in 1/25. However, due to PayPal issues, he threw in the towel, sold his stock I think and moved his business to another site. When I went there, his full inventory wasn't available. I've been to Hobbyline in my search and they have front/rear Magnum Drags paint gold inside and having beadlock rims. The rears are unavailable with no other info, although the fronts are in stock. I believe I saw a post that Pegasus rears are made in China and poor quality. Does anyone have info on this as fact? Is there another source for 1/25 Convo Pros (without the swirled pattern in the back like the Revell '55 Chevy Streetburner) or Magnum Drags (the kind with the splined sides)? I prefer chromed styrene but resin would do fine also. Thank you!!!!