MitchP
-
Posts
301 -
Joined
-
Last visited
Content Type
Profiles
Forums
Events
Gallery
Everything posted by MitchP
-
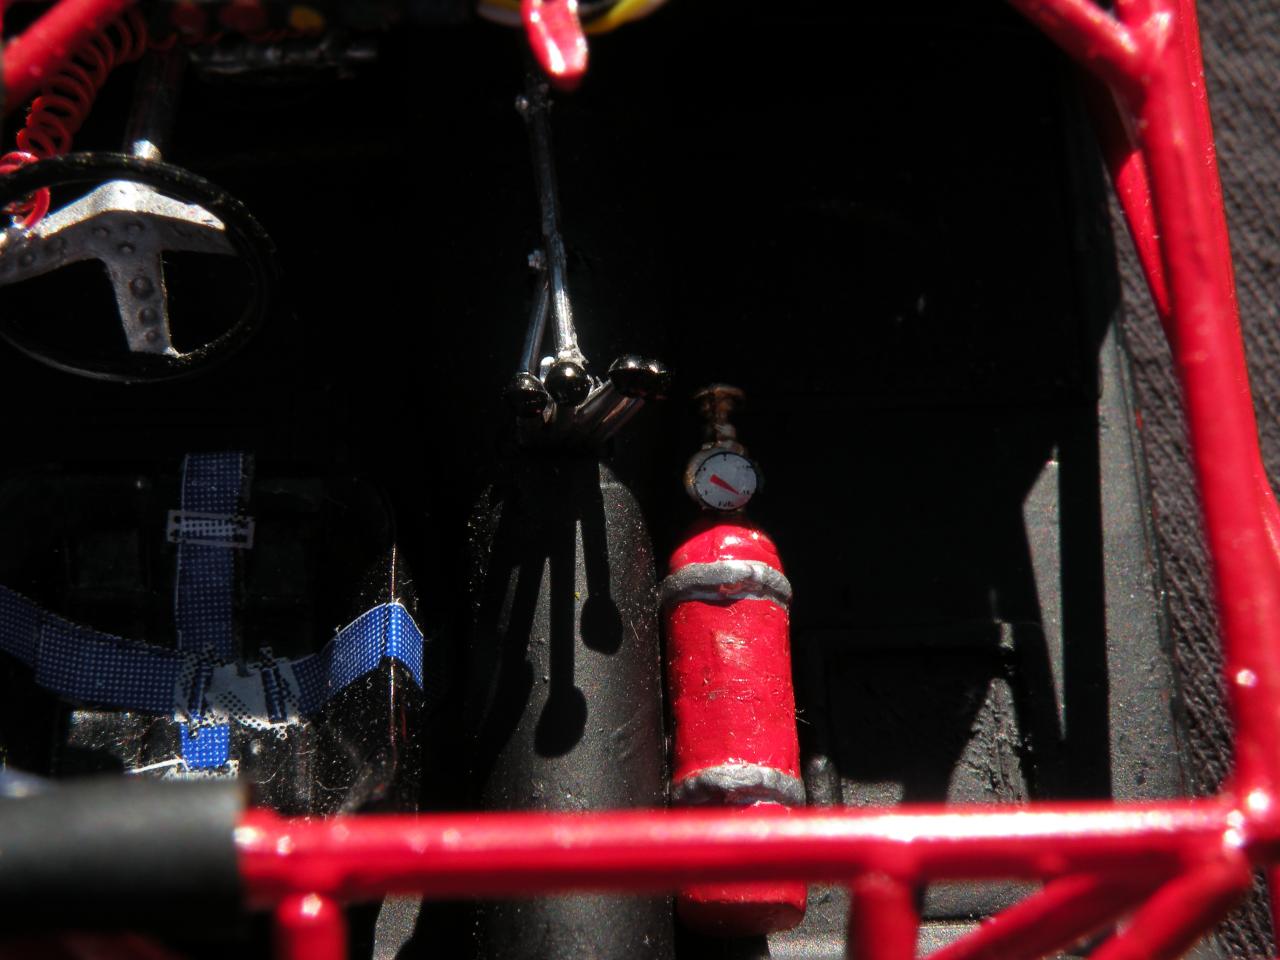
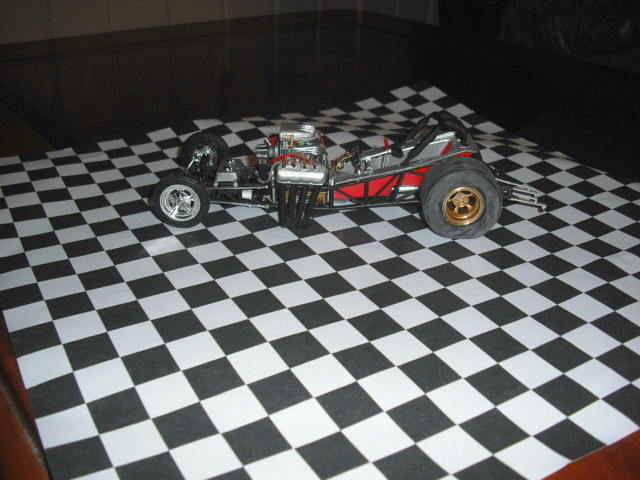
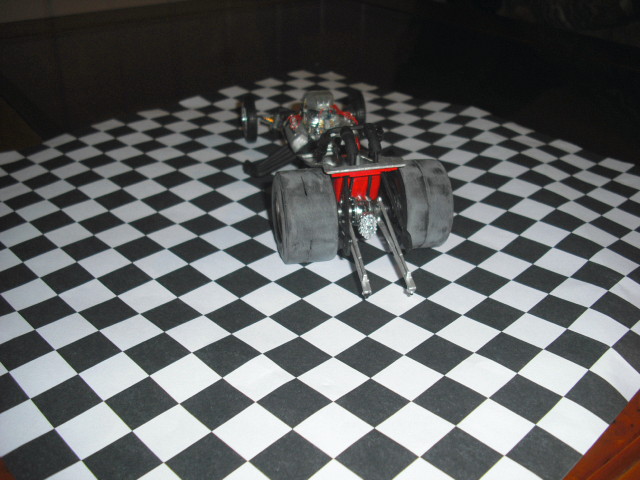
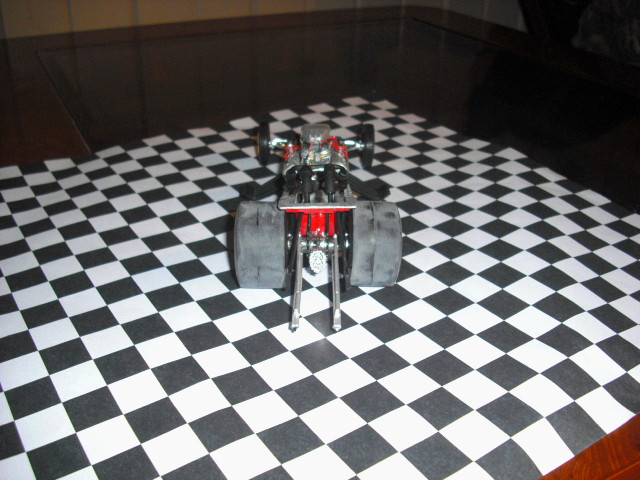
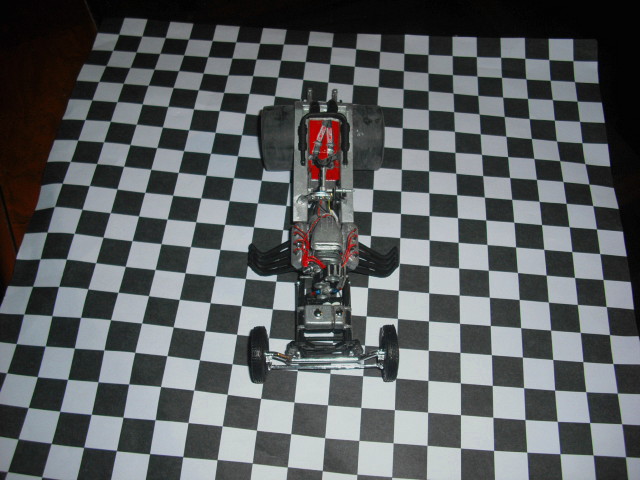
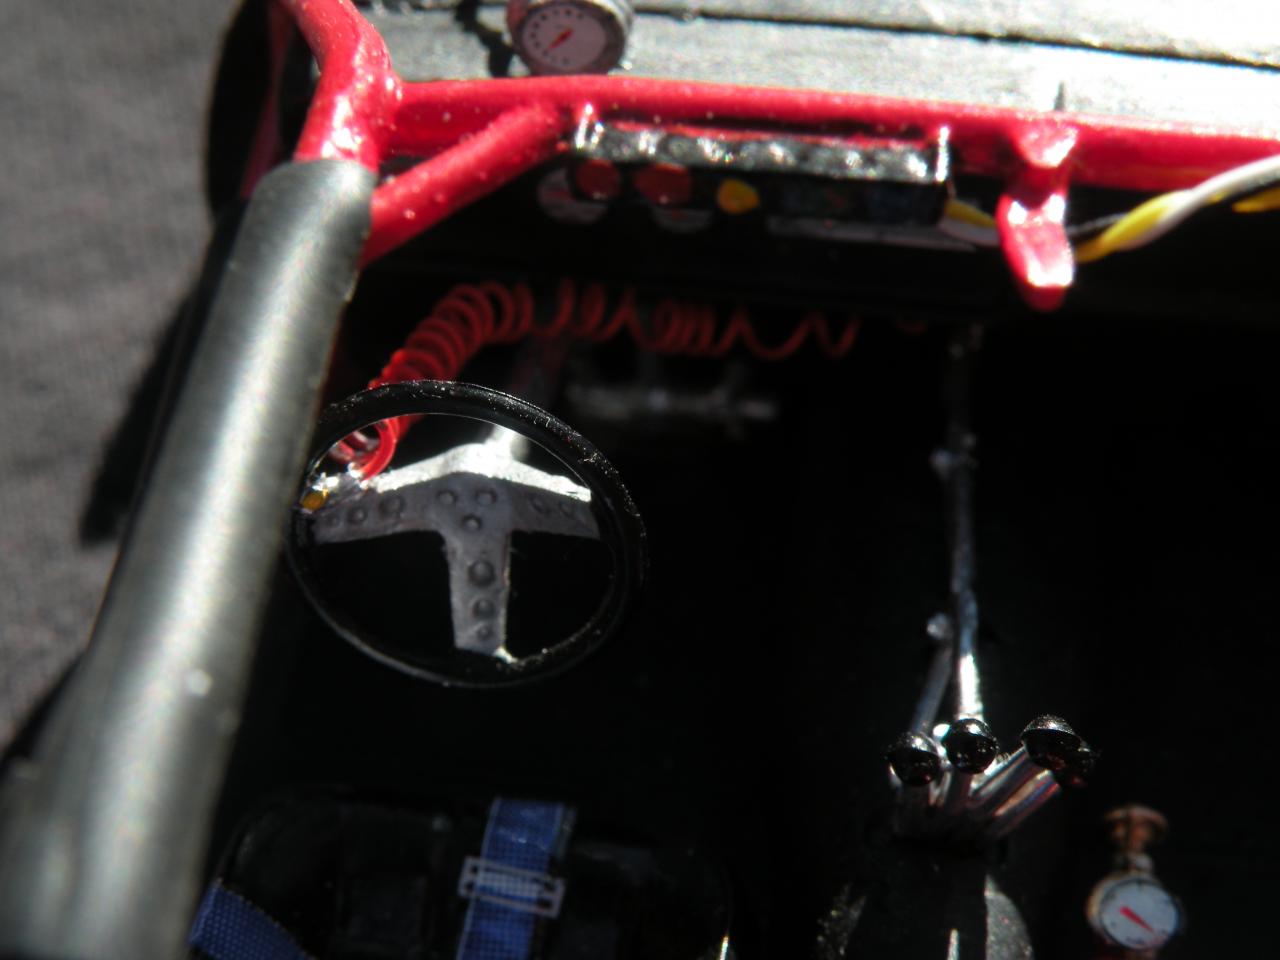
Sorry Mike: I duped a couple pics. Let me pick one from inside the cockpit:

-
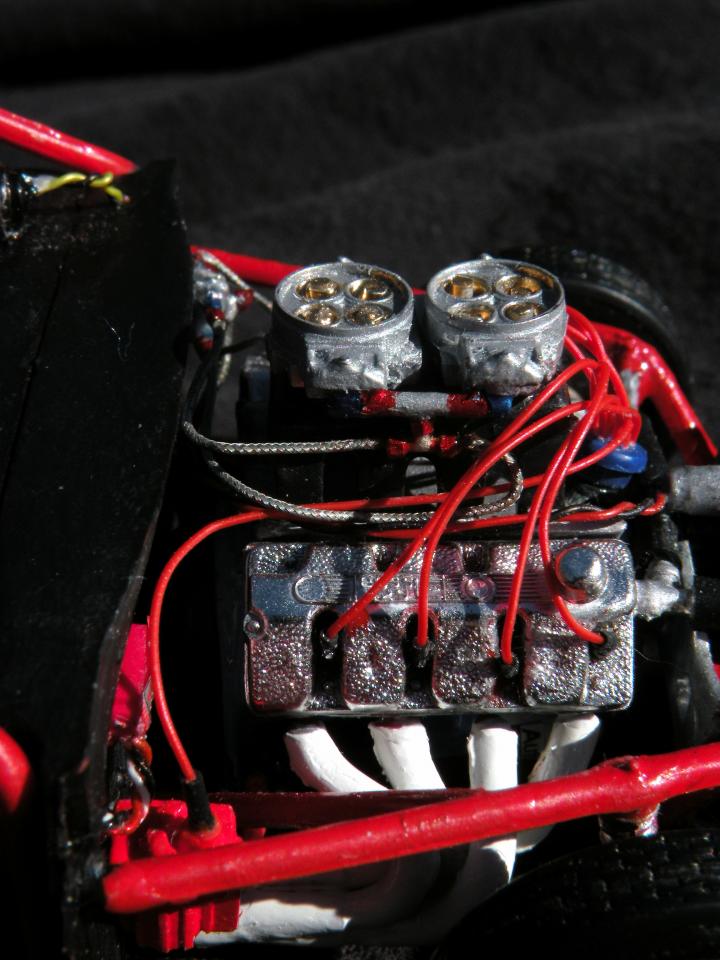
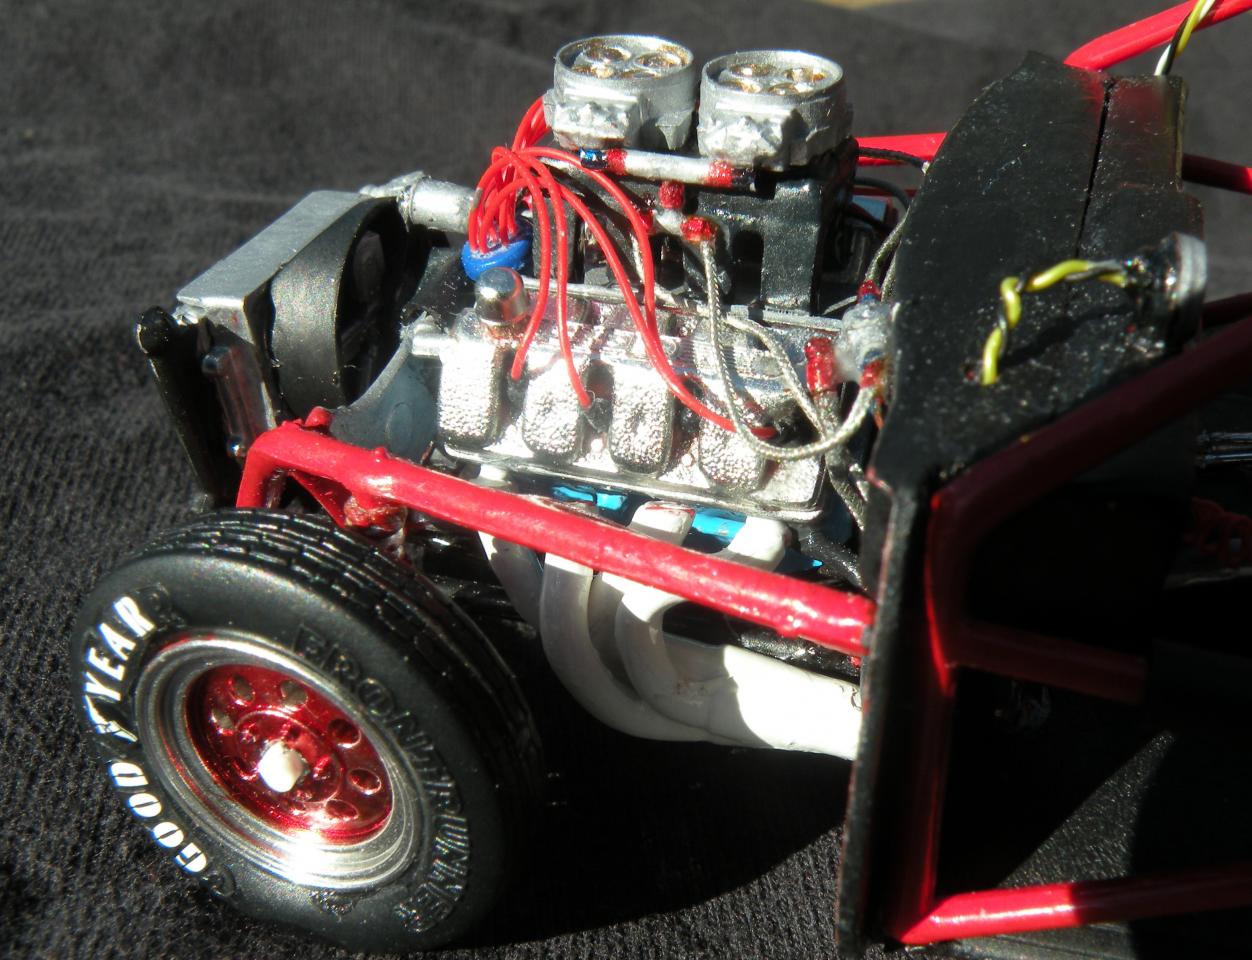
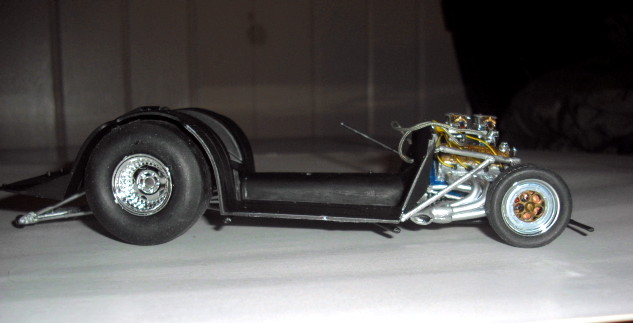
Mike: I'm a huge Mustang fan too. I had a '93 hatch that went 10.80 @ 128 with a Pdyne supercharger, SVO Y heads, X cam, shorties and an Edelbrock intake. Stock 5 speed too! Anyway, I have a really junk camera and that's the best I can get right now. All my builds are waiting for me to practice on the new paint booth I just got, then I'll try to stay as close to 1:1 on the paint as possible. I have a friend who shot really good pics of my 1st build in 45 years, the Frank Iaconia t-bird pro stock. Let me see if I can load a couple here:
-
John used SLIXX decals for this. I've bought "mini sheets" of them myself. If you buy 3 mini sheets, you get one free. Other examples of their decals on these sheets are oil filters, ignition parts (MSD, etc), nitrous oxide, safety certifications, turbo fins, warning stickers for use on electrical items and hot radiators, etc. If you can't find something useful on their decals....
-
Larry: I am not a scratch builder myself, but have observed folks like Tyrone for one create incredible projects. Also, if I read it right, you've had machine shop experience at Weiand manifolds and superchargers? Here is a link to one of the most incredible hand-built and tooled pro mod I've ever seen. The links provided by the thread started by HAKKFAN will hopefully give you an idea of some techniques the builder used. I look forward to your progress based on the pics of your prior builds. My breakout step is coming this spring when I'll be building a Ross Gibson Sonny Leonard resin pro mod big block and stuffing it into a Revell '57 Chevy Soff Seal 1:25. I'll be using Pro Tech's gallery pages to correctly fashion the barrel valve, distribution blocks and braided/rubber fuel line plumbing.
-
Nice real life build going on here from the Precision folks; it doesn't look like the driver's area cage is as protective as Tyrone's builds though. It's gotta meet SFI specs after this much work, I'm sure. I wonder if it's true pro mod or maybe crazy 10.5 tire?
-
Thanks for replying Tyrone! It motivates me to get info and tips from a pro! My 1st attempt at innovation in 1:25 scale will be placing a newly purchased RGE/Sonny Leonard pro mod motor in between the frame rails of a Revell Soff Seal kit I just got at a really good price. I've built one Glidden based T-Bird prostock and a Shoebox Ford kit, so I want that blown pro mod feeling. I also got a resin 1:25 Kobelco blower & 3 hole hat that resembles your build.. I hope to fashion a thin styrene lower intake/valley cover and then CA the blower/hat on top. I'll be using a BB blown engine off Ebay and some pics off Pro-Tech's site to get the plumbing close as possible. What vehicle to use is a choice between the Revell '55 Top Sportsman and a newly acquired (discontinued) Revell '87 Bob Glidden Championship kit, the one with the crew standing along with Bob and the car on the front. The kit was re-issued last October from what I hear, with a different cover picture and possibly different wheels. I bet a lot of purists would love to wring my neck messing with Glidden kit! Thanks Tyrone and keep 'em coming! BTW, Leah Pruett's turbocharged early Vette would be a challenging pro mod build from an engine standpoint!
-
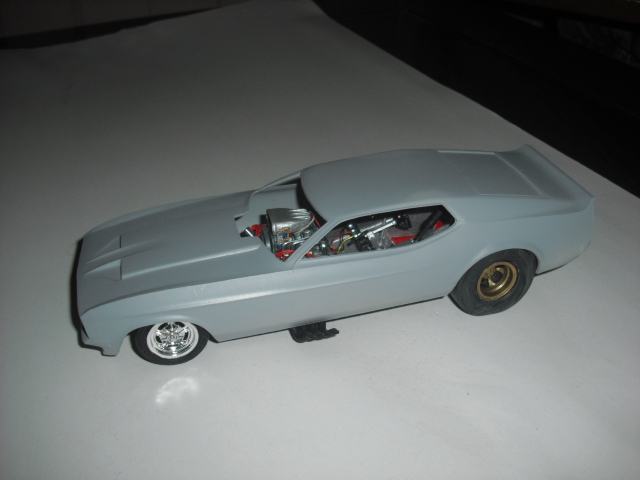
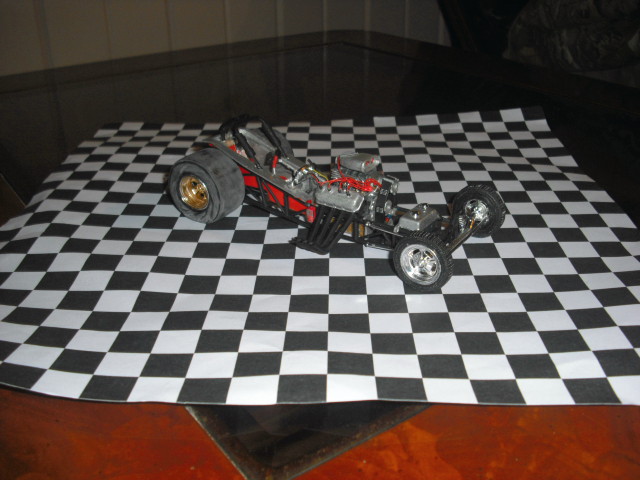
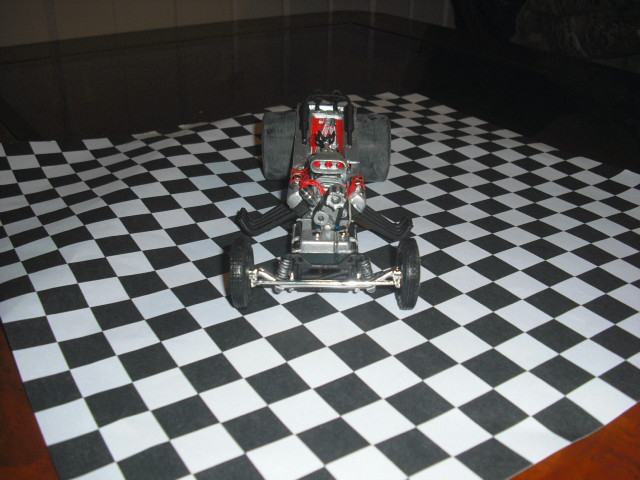
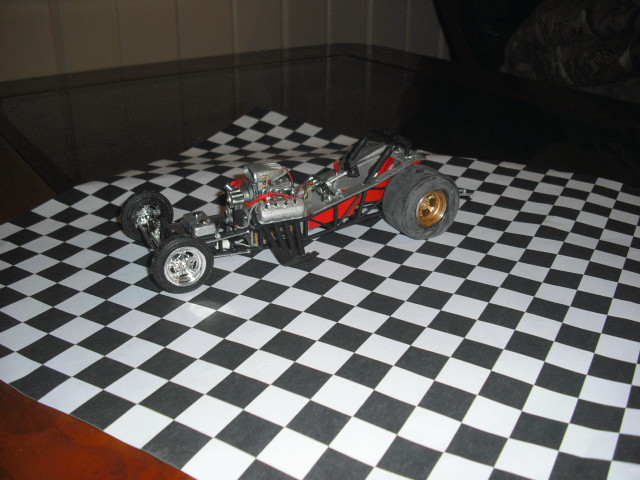
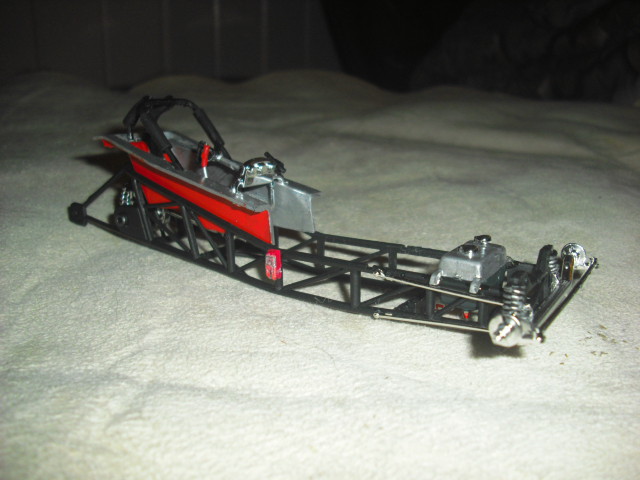
Tucked in between the HOT ROD/Kalitta reissue builds is a ShoeBox Ford, now completed and as usual, waiting for either a paint booth or a break in the weather. #1 just happend a few days ago because #2 isn't doing well in Vegas. I hope I can encapsulate everything major up to the final touch-ups. The battery cables, NOS lines and solenoids aren't show here but they're in place.
-

HOT ROD Mag Kalitta reissue with Hot Rod branding
MitchP replied to MitchP's topic in WIP: Drag Racing Models
Sorry for the old news, but I invested in another set of wrinkle wall slicks and tore everything apart to put them on. Had to get some new rear wheels too, which didn't turn out too bad. It's also got it's primer coats on and is ready for some base coat. I've been waiting for an unseasonal warm spell, but all we got was snow after snow, a foot at a time and record low temps in the single digits. I just dropped the dimes for one of those Ebay mini-paint booths, and it's working adequate on primering a contest build. Once that's finished, it's back to this car, the Iaconai pro stock and a Shoebox ford I stuffed in between!
-
Yeah, that is steep! But I think of how much I've blown at the LHS down the street and now I just wait for coupons at Hobby Lobby or buy a lot from Teds/Pro Tech/SLIXX. Nice flopper in your avatar AZ! After almost 14" of weather (snow) and another 1-3 on the way, I just want some sunshine! But Alclad looks great!
-
Rambunctious - Funny Car - FINISHED PICS!
MitchP replied to geetee66's topic in WIP: Drag Racing Models
Beautiful job guy! I have the same questions on the paint for the day I build my Chi-Town Hustler. What brand of canned paint did you use? When you shot red over gold, exactly how is that done? Do you shoot about 3 mist coats until the gold is filled in, let it dry a specified time and then do the same for the red color? How do you ensure the gold will have it's proper effect showing underneath the red topcoat? Is it just time and practice? I really like the colors used on the engine and suspension (Alclad?) although the valve covers look like box stock chrome. Thanks for any help or answers! -
So this is the Brutus, eh Brett? Absolutely fantastic!!! Man, if that's what Alclad looks like, I love it! Right now I'm a rattle can guy and I hope they decide to put it in cans for us who are a little put off by spraying. The body & decals are what really sets it off. Great job man!
-
Tyrone: You said you were open to comments and q's, so I hope you can/will respond. I've seen a lot of your work here, along with Brent and been really amazed. I'm still at the "build from the box" and "detail with Teds" stage. Do you ever intend to make and sell blueprints or step by step instructions on how to measure length/width/heigth/wheelbase required for the styrene chassis build? On a related note, I intend to use one of the RGE pro mod engines in an alteration to the original Revell Soff Seal '57 Chevy as I'm a little burnt out on twin carb pro street/pro sportsman builds right now. What's your opinion on the craftsmanship of the engine kits? I kinda talked Ted (or reassured him) that the upper end pro mod types would sell. I intend on using that shrink wrap type carbon fibre on my blower hat, at least if I don't screw it up and as much detailing as I can muster. Thanks for your time, Mitch
-
Good point Ray. I tell you I'll never spend over a Benjamin just 'cause a kit is orange plastic instead of black! I just love way wacked out pro mod/street machines and these fit the bill for all reasonable prices!
-
I'm already working on the '50's Ford p/u with the flathead; ain't my cup 'o tea but it's for a contest. Yesterday I got a mint, sealed Dobbertin J-2000 Pontiac Pro Street kit, last week got a Matt & Debby Hays Pro Street T-Bird (sealed) and I'm waiting on a '57 Chevy Soff Seal top sportsman mint in wrap. Can you tell I'm into pro-street, pro-mod, top sportsman? Thanks to the 14" of snow we just got, I'm still waiting on braided line, fittings and rubber tubing from Teds and some resin items from SMBC. I'd like to know for reals what the collector's value of an unopened Dobbertin kit is. I got it for under $40 from a reputable 100% Ebayer and I've seen them listed in the $70 range. There's a Chevy Beretta '88 twin turbo I think that someone who will remain anonymous is try to get over $100 for just because it's molded in orange and not the traditional black. To me, that don't make it collectible. Just like the Hays Pro Street which is molded in pink, there's gonna be a lot of priming and sanding to get paint coverage!
-
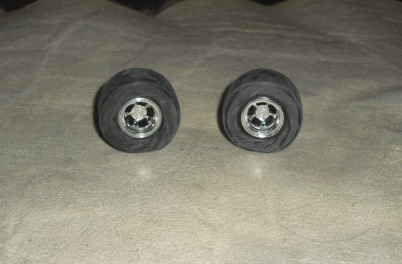
I peeked at my kit and I believe the slicks are 2 piece (?) Maybe I'm thinking about Revell's version of Charles Carpenter's '55.. I'll never use this kind again. If fitment is no issue, I'll go with the huge 1/25 Pegasus promod style one-piece although they are a little rubbery. John turned me on to Comp Detail's one piece version which are still large, one piece as well, but are a stiffer rubber which should help the wheels fit more predictably. Another fun choice are the SMBC wrinkle wall resin slicks; just be sure to get the rotation in the right order!
-
HOT ROD Mag Kalitta reissue with Hot Rod branding
MitchP replied to MitchP's topic in WIP: Drag Racing Models
All right, last set of pics until I can locate/afford a small paint booth. Hope these turn out! Yes, the first pic has the passenger side rear tire CA'd to the wheel rotating backwards from correct wrinkling, but I'm not ready for competition yet!
-
Oh no, Johnny's at it here! Way to go, JP! I've been following this elsewhere and it's my next build in line. I intend to use stock colors and decals; not sure about the interior yet and I've got a wide choice of rear slicks. I'm going all out on the engine build with Ted's lines and braided steel, fittings and ignition parts I've stocked up. A beautiful job. Being a fan of DRU's Pro Mods Gone Wild, I would never cannabilize this beauty for parts!
-
Same here Brett. This is the 1/25 version, right? My only issue(s) were missing metal rear axle and the need for replacement windshields. It was technically my 1st build in 40+ years and the windshield glue (which was supposed to be clear, wasn't. Any leakage from inside the body was pushed out into the windshield and the instructions to wipe off immediately only smeared it. Revell did patiently replace according to all my requests with no charge. I can't remember the roll cage, but I'll go with you. I have to check my latest 2 builds to see if the pics are all up to date for any criticism or praise LOL!
-
HOT ROD Mag Kalitta reissue with Hot Rod branding
MitchP replied to MitchP's topic in WIP: Drag Racing Models
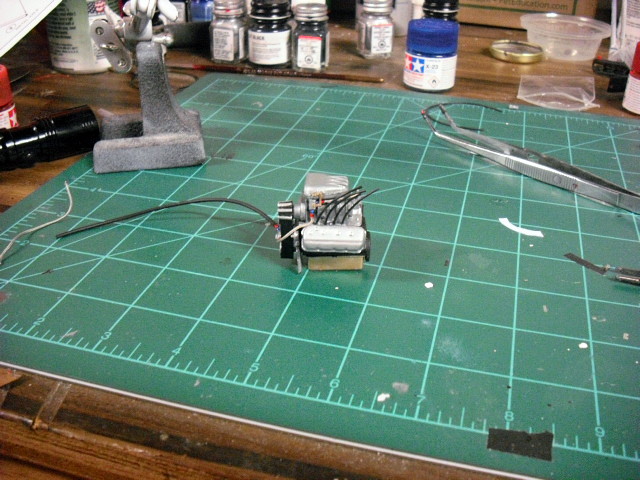
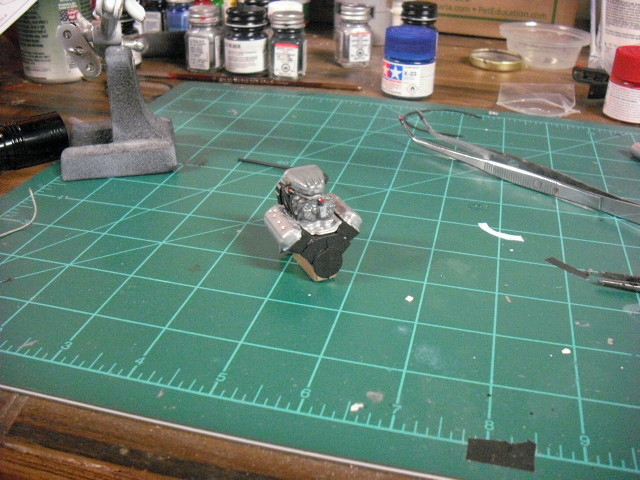
Thanks guys. I don't know how these will turn out, but progress has continued well and I've gotten brave enough to fashion a twin oil filter unit, some blower alum lines for the injectors I copied off a scale Hemi model I have and some decals to the stock blower belt. I love the detailing, I just need to keep practicing on it. I'm substituting resin wrinkle wall slicks I've sanded for the build as well. It will be done in bright 'Vette yellow with the red driver cockpit and aluminum tin work. Hope they turned out!
-
Thanks for the tip! I've got this build coming up next year, along with the '55 Revell Streetburner top sportsman, which shows up on Ebay as a donor kit all the time since people either use the body/engine for slot racer builds or other combinations. I got the donor chassis, wheels, tires, decals and glass for it; a day later I got the engine from the same seller! So he must have had a use for the body/wing only.
-
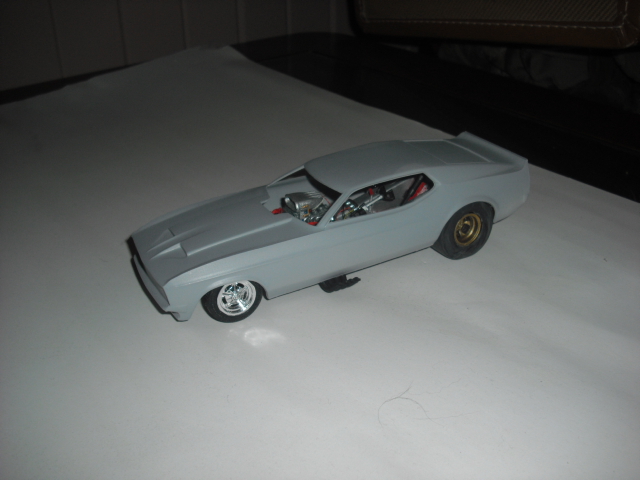
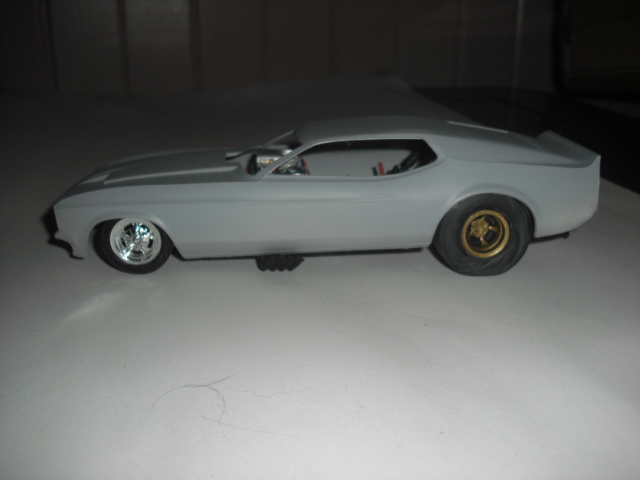
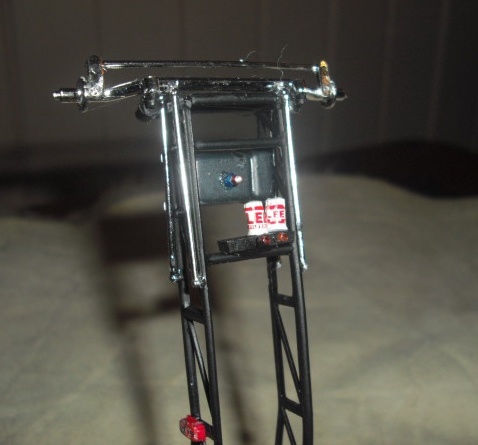
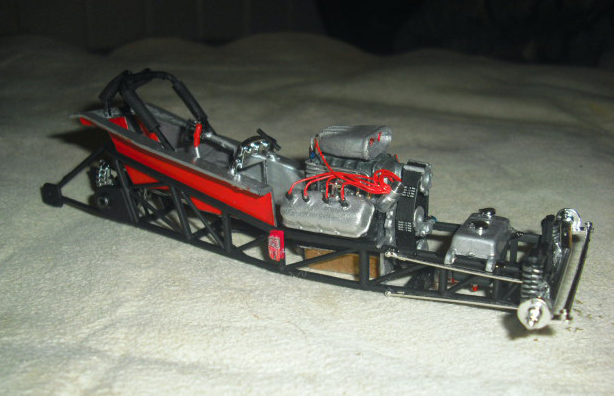
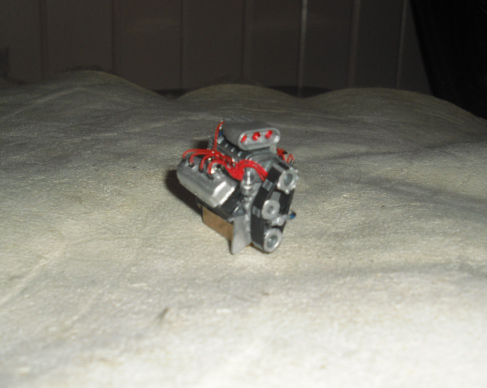
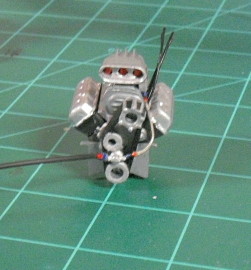
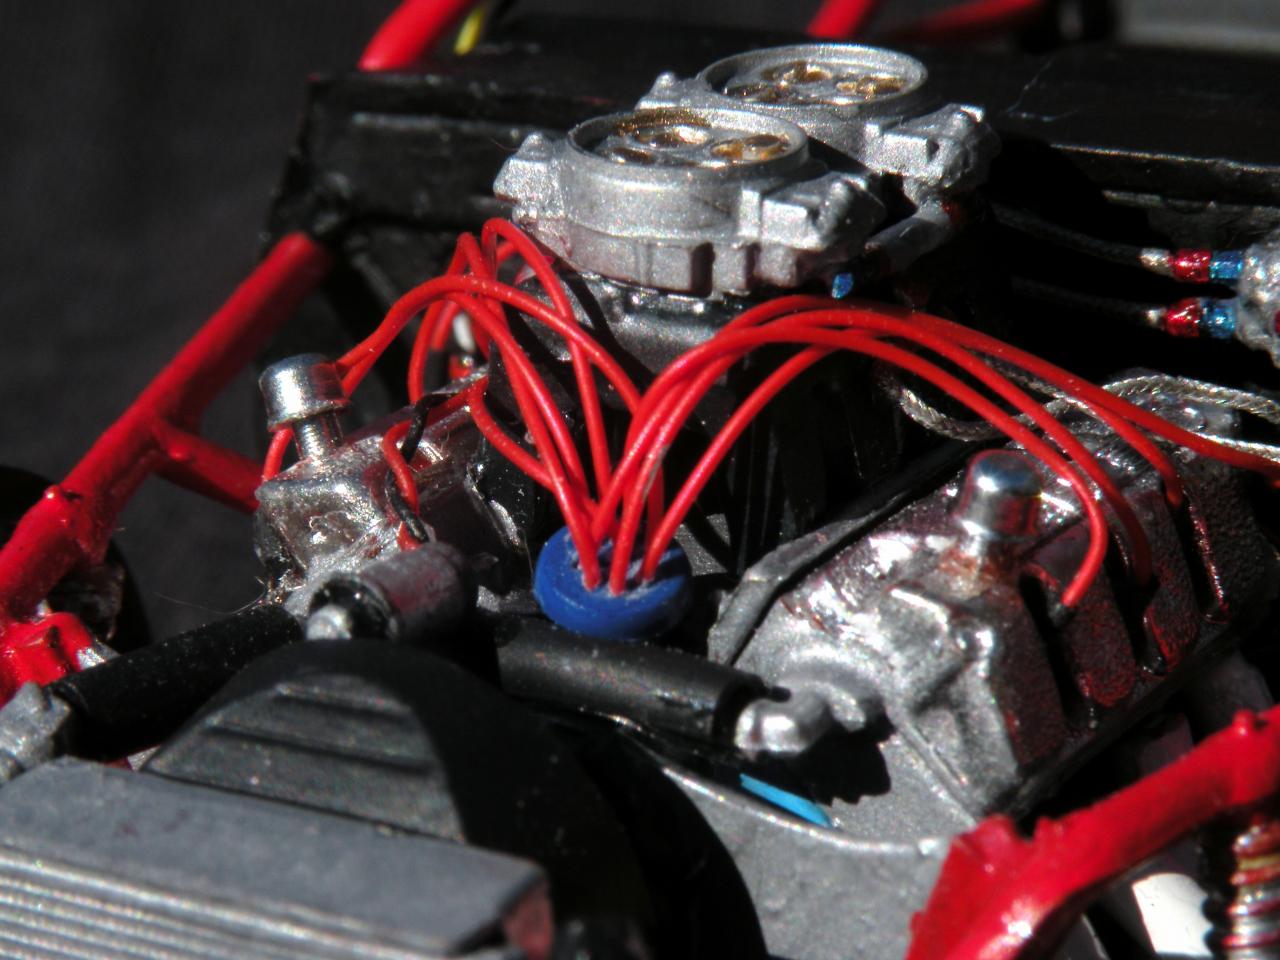
Not sure of the original setup, but I picked up a Hot Rod mag branded long nosed Mustang flopper about a month ago from Hobby Lobby during a sale. It's either MPC or Monogram, but I've heard it's basically the same underneath as the Kallita reissue.White molded body and black molded parts to allow beginner to glue & go if desired, but I pulled the major pieces from the kit and sprayed primer for easier re-painting. Swore I wouldn't go detail crazy, but this 1/8th collector's hemi in it's display box changed my mind in a hurry. So what in the world can I fabricate cheaply for a 1/25 flopper that still looks good? Well, here's a start: ditch all the chrome dipped engine parts and come up with color schemes that represent real colored castings, a little braided wire and fittings, rubber lines, homemade injector butterflies and fuel blocks. I wished I coulda afforded real blower cogs and belts I could afford right now, but I'll make due with SLIXX decals. Here are a couple of pics of the engine work so far: Back to the crummy camera, but I'm not giving up! Enjoy and please pass along any building tips you might have!
-
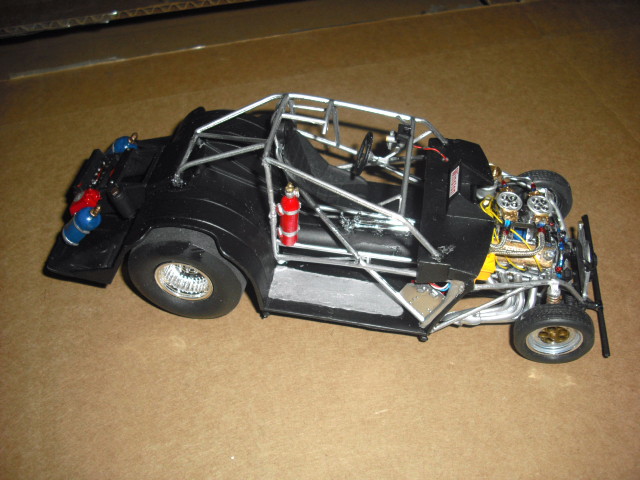
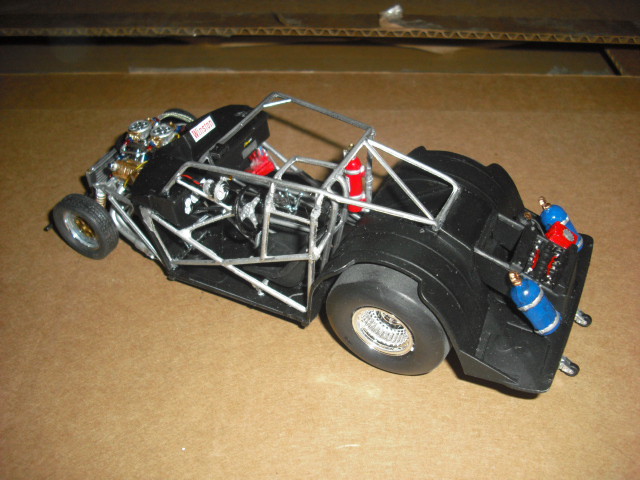
'86 Iaconio Motorcraft/Budweiser P/S build
MitchP replied to MitchP's topic in WIP: Drag Racing Models
Sorry - had to add a couple more pics from my friend's much improved camera - I'll keep it short:
-
James: FWIW, take it from one who's gotten OCD on only 2 builds over detail (check out WIP on my HOT ROD flopper & my friend's ultra hi-res pics of my WIP pro stock); I just finished using P/E wire loom parts to fashion butterfly linkage for the fuel line block on the driver's side of the blower LOL. Some of the critiques may come off a little rough but everyone is trying to help. I commend you for getting those decals to work, which I've heard are a bear on the hood. Keep up the good work and learn as much as you can. Again FWIW, I've done those 1:1 dual inlet carb initially and they're tough. Hope you have a dremel with a really tiny bit for those. Research for opinions on the most popular CA glue as well. Good Luck!
-
'86 Iaconio Motorcraft/Budweiser P/S build
MitchP replied to MitchP's topic in WIP: Drag Racing Models
Very nice Bret. I really like the wheels/tires in that kit, as well as the decals supplied. It's going to be a fun build! -
'86 Iaconio Motorcraft/Budweiser P/S build
MitchP replied to MitchP's topic in WIP: Drag Racing Models
Brett: Yep, I checked out (well, stumbled upon) the gallery on Pro Tech's site and amongst the other builds, Christine totally blew me away! Although historically, it was a NOS car (I'm a pro mod/top sportsman freak), I really like the blown version. I'm thinking that might be a Ross Gibson resin engine although I'm not sure. Chi Town is certainly beautiful from the promo pics and I've seen articles on the original real car, a rebuild and the model build itself. What a unique design with offset engine and escape hatch! This Hot Rod flopper is so simple from the instructions and the pre-fitting I've done. I'm going to scale down the detailing, leaving it to consist of a rubber line from the fuel cell to the pump, a little braided line up to a handmade fuel block by the injector butterfly linkage area and another braided line to the rear blower hat block. I have some Pro Tech .031 hard line which I'll form and run four on each side of where the hat meets the supercharger. The cost of the cogs and a belt won't be spent here, the moldings have a cogged belt and decent cogs. I'll just try to cut some really small pieces of my styrene rod(s) until I can come up with a bolt head design that I can glue to the cogs. I'm trying to find a way to fashion an MSD mag with the molded top on it and the wires coming out underneath. The only thing I was worried about was a Logghe style chassis which as to be glued together. Luckily this one is one piece and very compact. If I decide to detail the blower, I've been told I'll have to adjust the cutouts in the body for the top of the engine. Should be a chance to test either my dremel or a heated xacto blade. BTW, I just went back and showed my wife the thread of your Camaro build with the soldered brass chassis and the awesome hand constructed front A-arm and coilover suspension. She can "appreciate" the effort, but isn't as jazzed as me over the expertise! Have a blessed day Brett!