Markalister
-
Posts
38 -
Joined
-
Last visited
Content Type
Profiles
Forums
Events
Gallery
Everything posted by Markalister
-
Hey Bill, I realize you're building more that just the gas station for your diorama, but I was wondering if you have an idea yet on how big the base will be for just the gas station portion of it? Mark.
-
That's just outright impressive. I cant say I've seen 1:24 scale minions before. Awesome, Well Done.
-
Painting The Inside of A Car Body
Markalister posted a topic in Model Building Questions and Answers
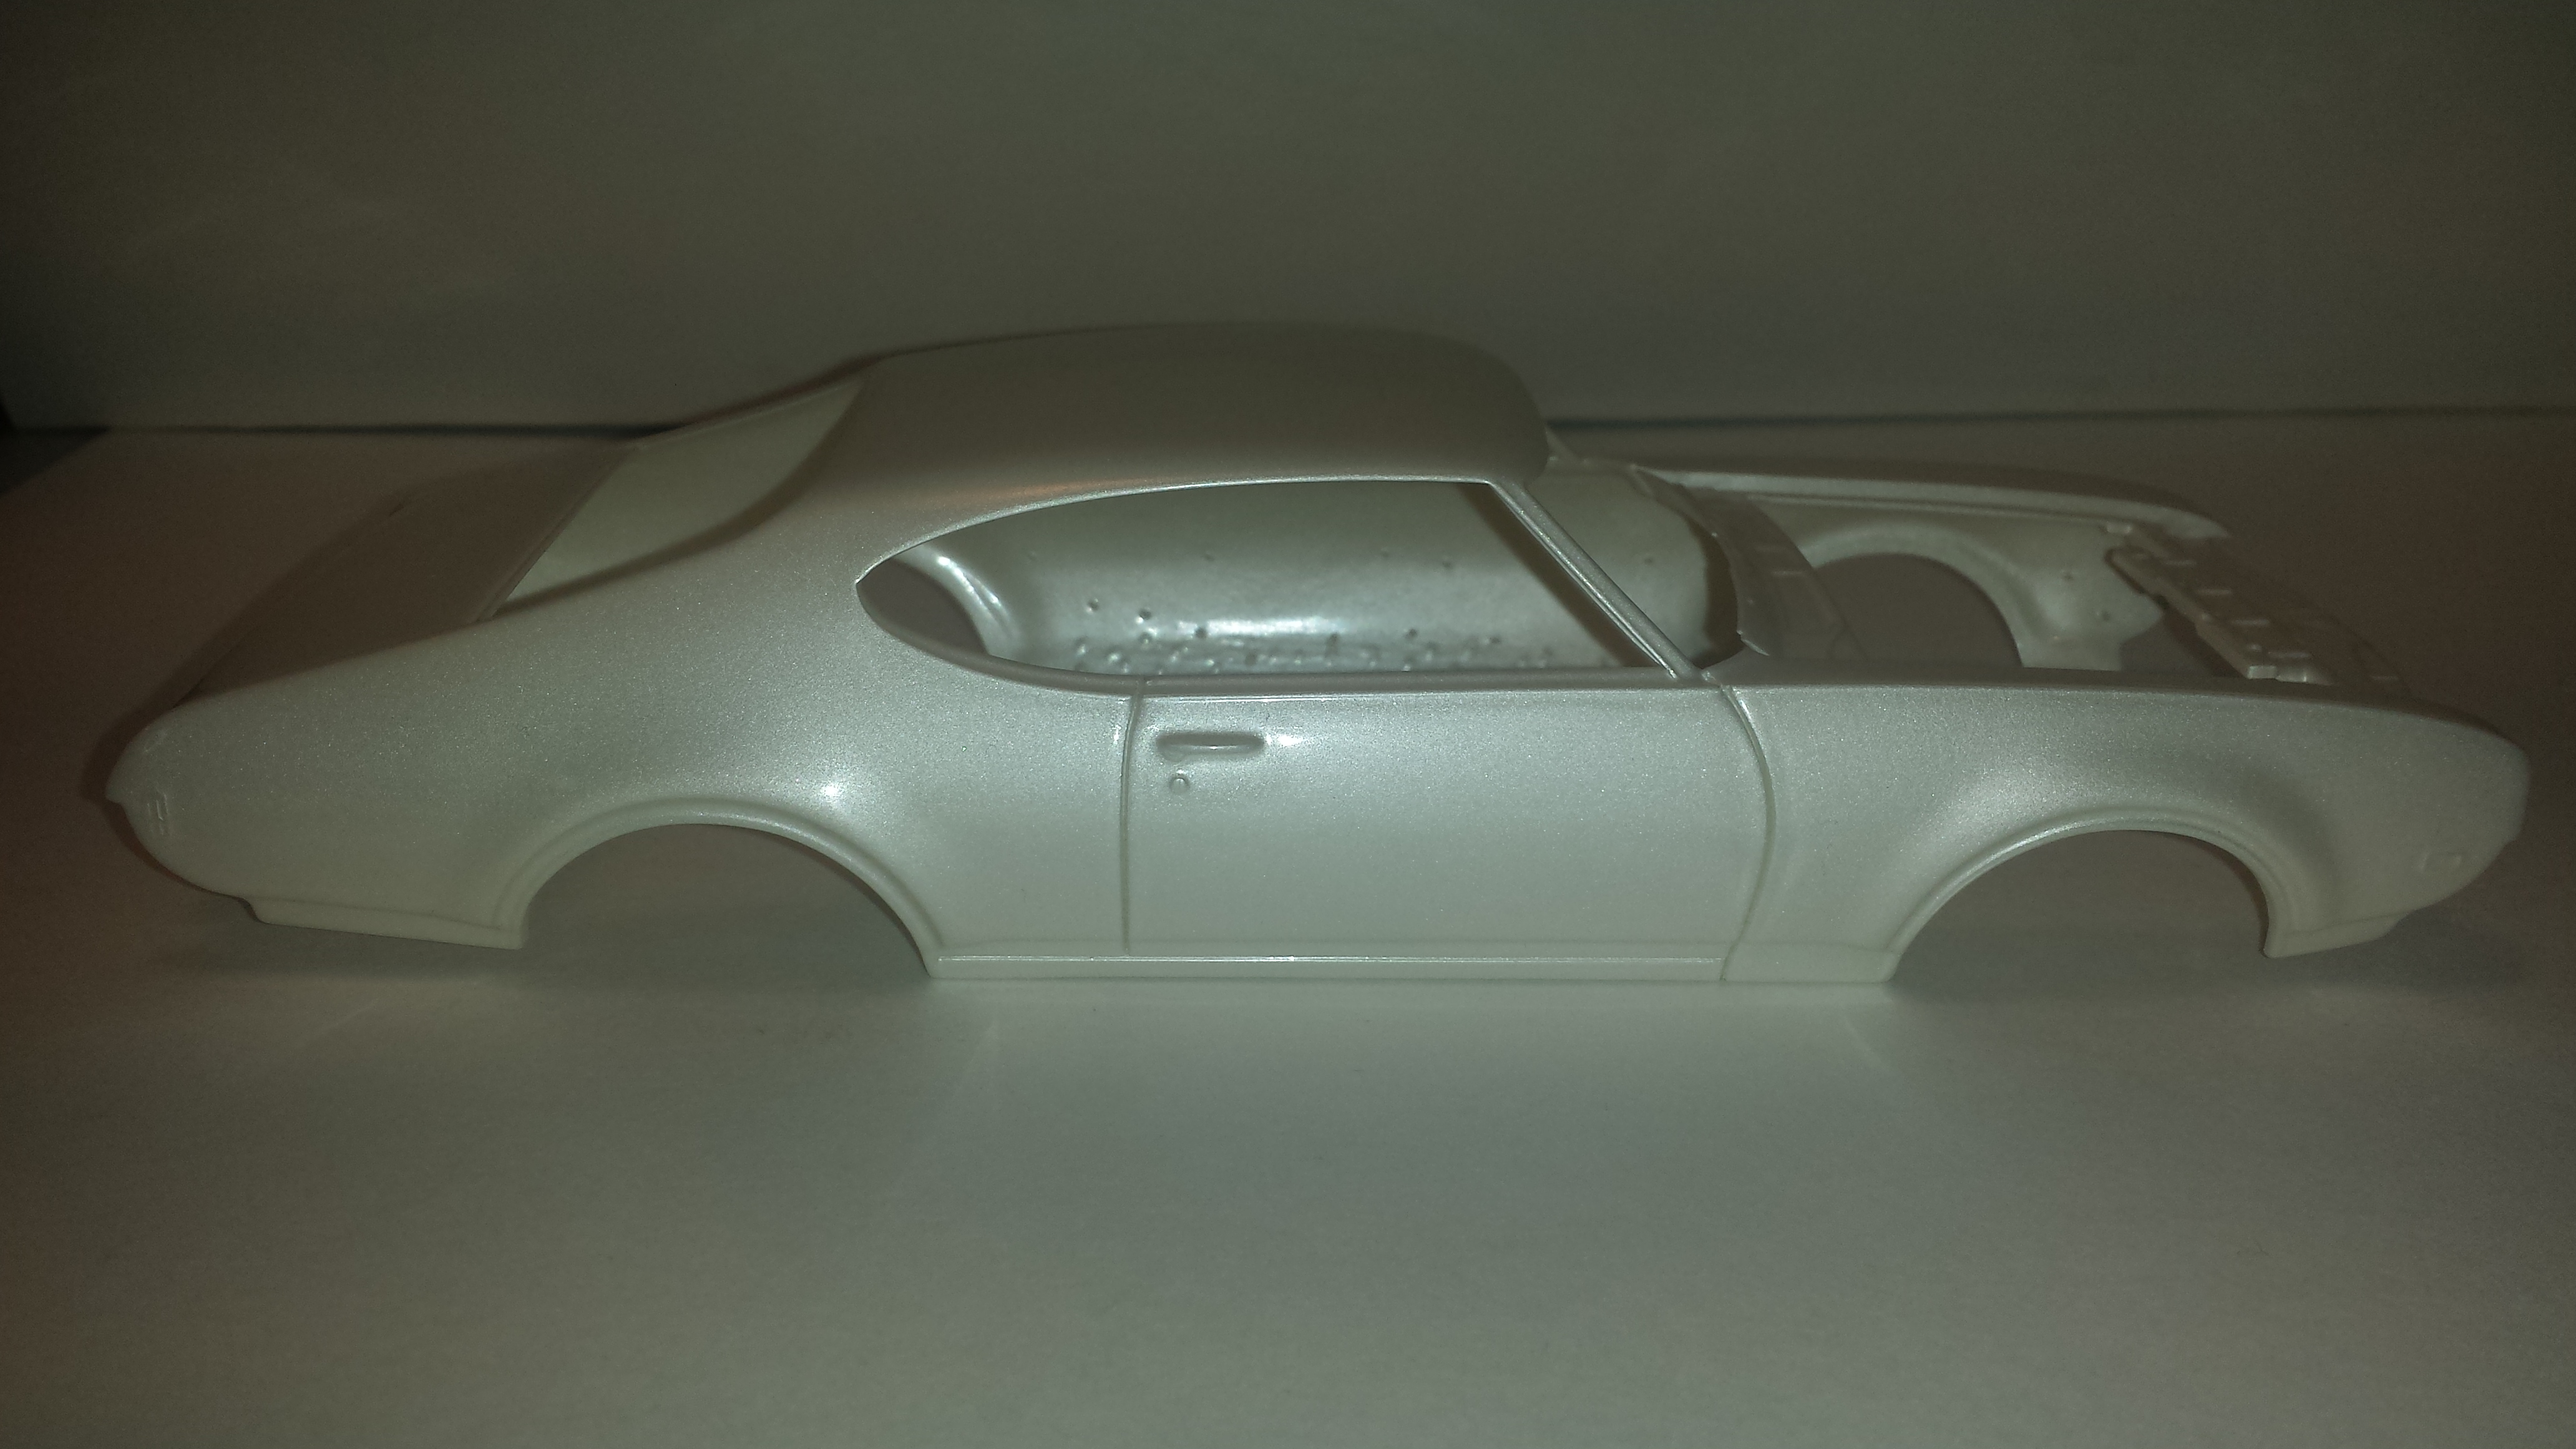
I have a question for those of you experienced in light/white paint jobs. I have a '69 Hurst Olds which I have painted with Testors One Coat Lacquer - White Lightning. My apologies to all the purists out there - I am aware that the 1:1 was pure white and not a pearl white. I have just always liked the color and thought it would look stunning with the gold decals and IMHO I'm not wrong. I did not use primer under the paint, and after getting a near perfect paint job that I am totally happy with (and wet sanded to 12000 with no burns), I am NOT willing to strip it and redo it (unless somehow I completely ruin something in an unforeseen way). That said, I am going to be painting the roof liner in flat black. I am a bit worried about the black "shining through" the roof and dont want the roof to be mismatched to the rest of the car. I have read if you want to avoid shine through to paint the inside of light (white in this case) car bodies with grey primer and dark bodies with black. I'm not sure that I want to paint the rest of the inside black (to match the roof) as I feel this may darken the whole car up too much. If I paint the roof liner (and the rest of the inside of the car body) with grey primer before painting the flat black, will this keep everything color wise looking even or matched from the outside (will the grey primer keep the black from shining through)?? I dont have any more of the paint or a spare body/parts to experiment on at the moment to figure it out for myself so I am asking the question instead. Thanks in advance. Mark.
-
Hey Tommy, I'm just thinking out loud here. The pictures of the 1:1 van in the ads you posted show a side "barn door" style setup similar to that on the back of the model kit van. Not sure how easy or hard it would be to modify the side sliding door into a barn door setup (cut the door in half, change the door handle, make another set of hinges the same as you're making for the back doors - I know that sounds easy when in reality there may be a bit more to it than that) but a barn door setup would eliminate the tricky sliding track and clearance for the fender flare would also be a non-issue. Just a different option to consider. Just my 5 cents worth (had to round up - we don't have pennies in Canada anymore) You're off to a great start though - it's looking good.
-
Bill, those gas pumps look awesome as does your ice machine. I have been noodling about doing a couple of gas station dioramas myself - a Texaco station (the bigger and more ambitious of the 2 dio's) and a Union 76 station (bought an Academy Joe's as a base kit to modify). Currently I'm just collecting bits and pieces to put in it, but soon. I have been thinking of scratching an ice machine myself (found a few "kits" online but they are pricey). Doing the plastic part of the buildup of it should be easy enough, my hang up comes at doing the decals. I have everything I need to print my own (decal paper etc.), I just haven't been able to find any good quality images online to print. Where did you find yours??? I too am following this. You're off to a fantastic start - I cant wait to see more.
-
Wow, that is some impressive work. I have seen in person the odd burnt out vehicle and the only thing I could say that is missing is the melting/dripping of the plastic that makes up such a huge portion of todays cars and trucks. Mind you if the fire were hot enough and no one put it out it is conceivable that all the plastic was completely consumed in the blaze. Either way, you did an outstanding job. Mark.
-
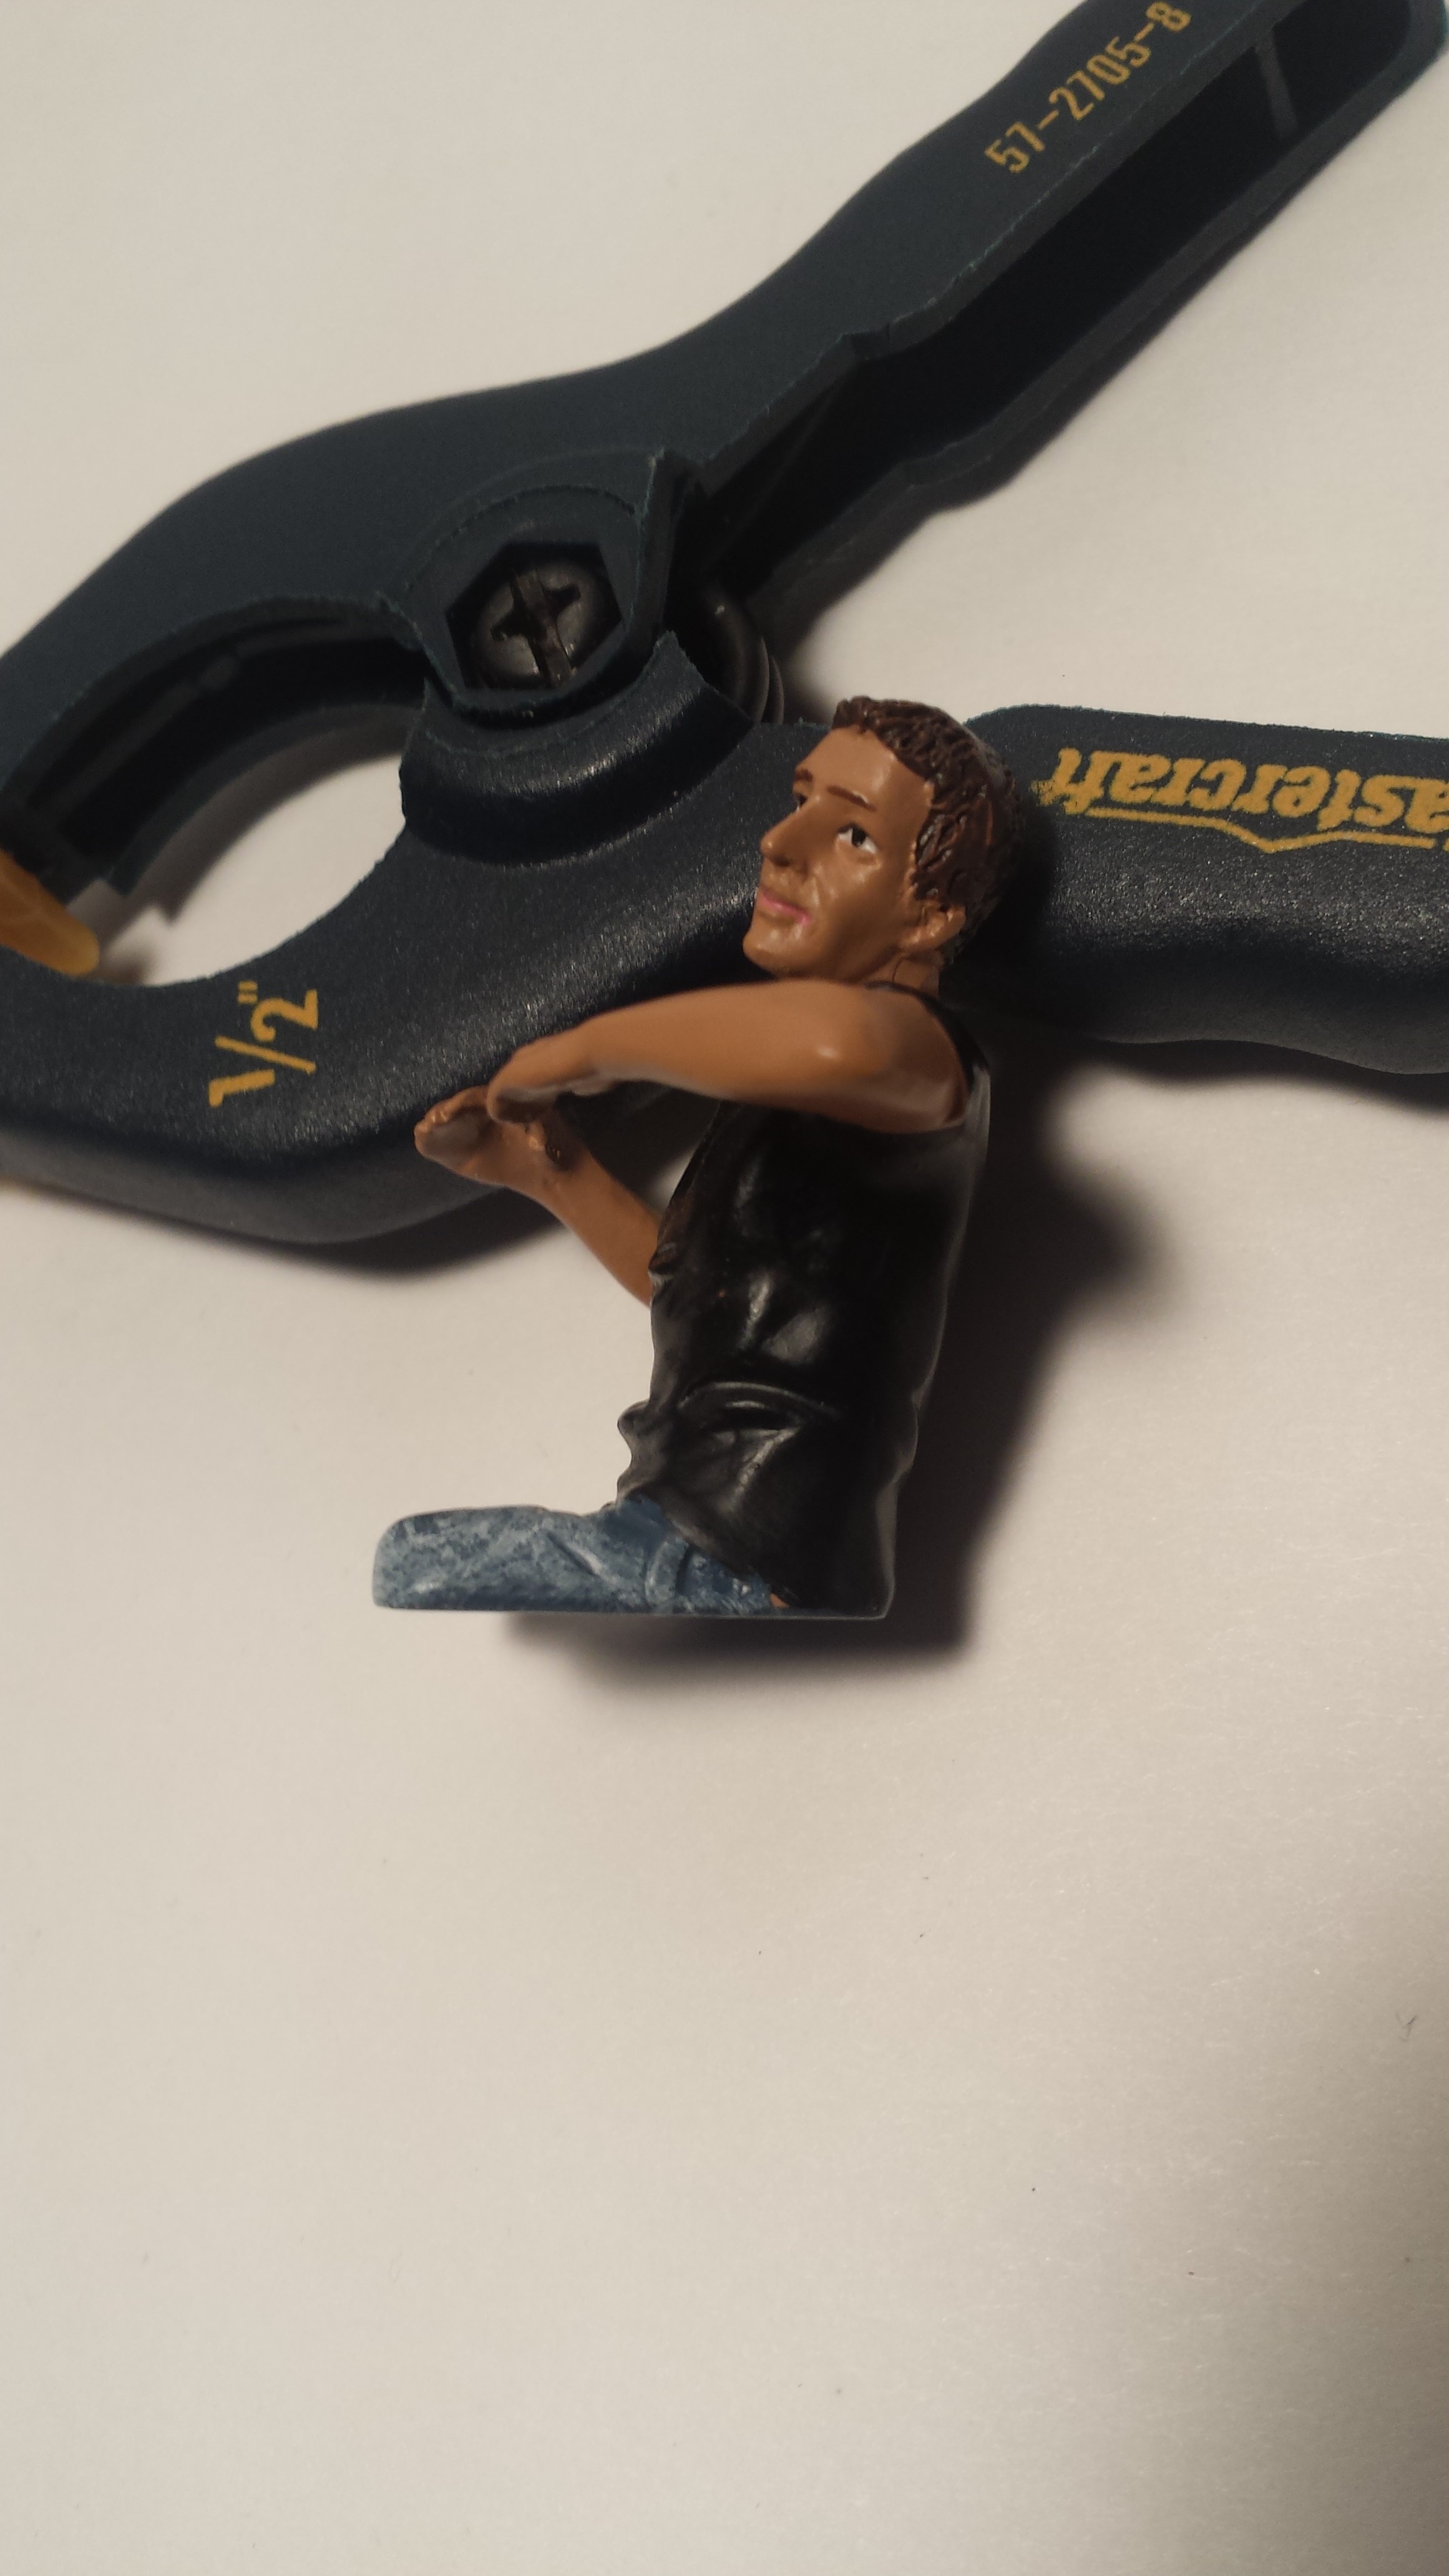
I don't know if this helps at all, but I also had problems getting seated figures to sit in a car seat properly. Not only did I have problems with arm and leg length, I also had problems with the figures height/head room in the car and the figure not fitting between the seat and the steering wheel . After pondering over the problem for way too long I discovered 2 things: First off, the figures "rear-end" was too round/full and not flattened/squashed from his/her weight sitting on it and sinking down into it. Second was the seat of the car was not depressed where the person would be sitting. The same issue presents itself for the figures back and the back of the seat, thus pushing the figure too far forward in the car, hence the arms and legs seem too long when in actuality they are not. Filing/removing material off of the figure where they contact the seat (you could also hollow out the seat where the person sits, but it is easier to alter the figure than the car seat) will sit them into the seat more naturally and realistically and hopefully give the necessary room to get them into the car. If you take a close look at the pic of the American Diorama driver figure there is a lot of material missing from his butt and the back of his legs and as David mentioned he is missing everything below the knees, which once in the vehicle, even with close up pictures, is barely noticeable, if at all (might be more noticeable if the car was a convertible). Even doing this you may still need to alter the bends of the figures joints (knees, elbows, shoulders) so that his hands will grab the steering wheel where you want them to. IMHO 99% of figures need to be modified/altered in some way or another so that they will do what you have pictured in your head. Mark.
-
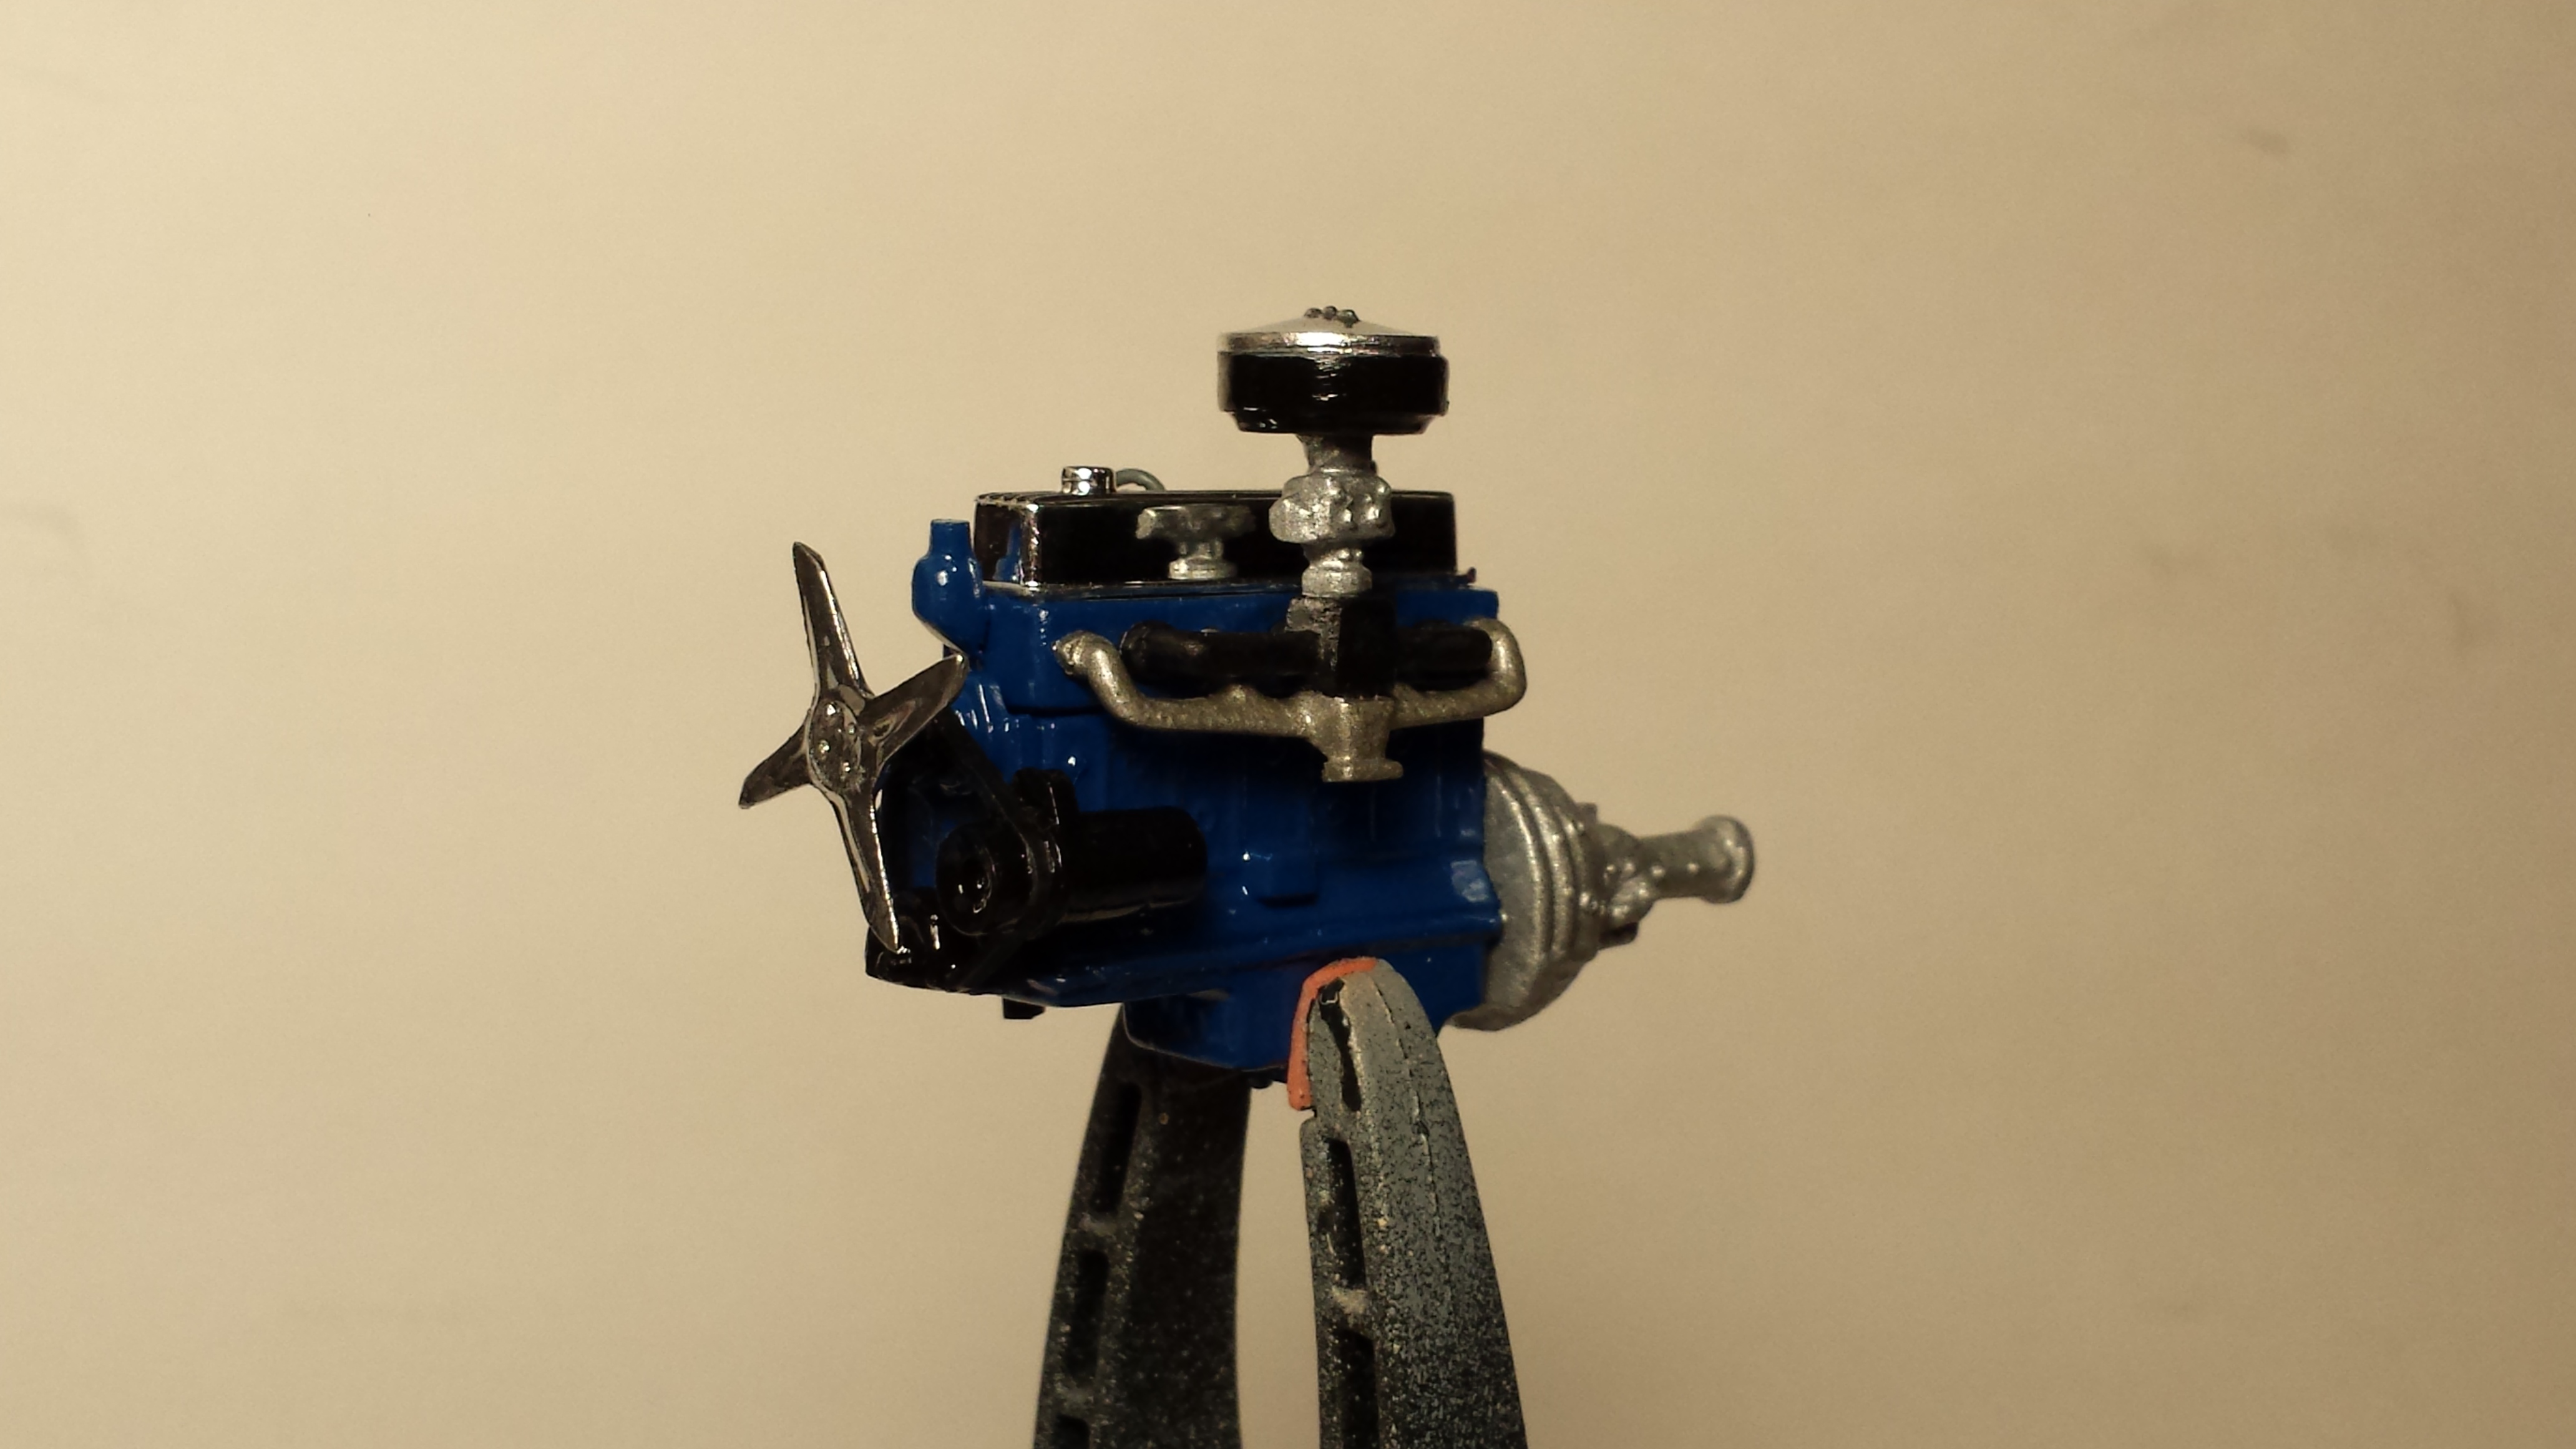
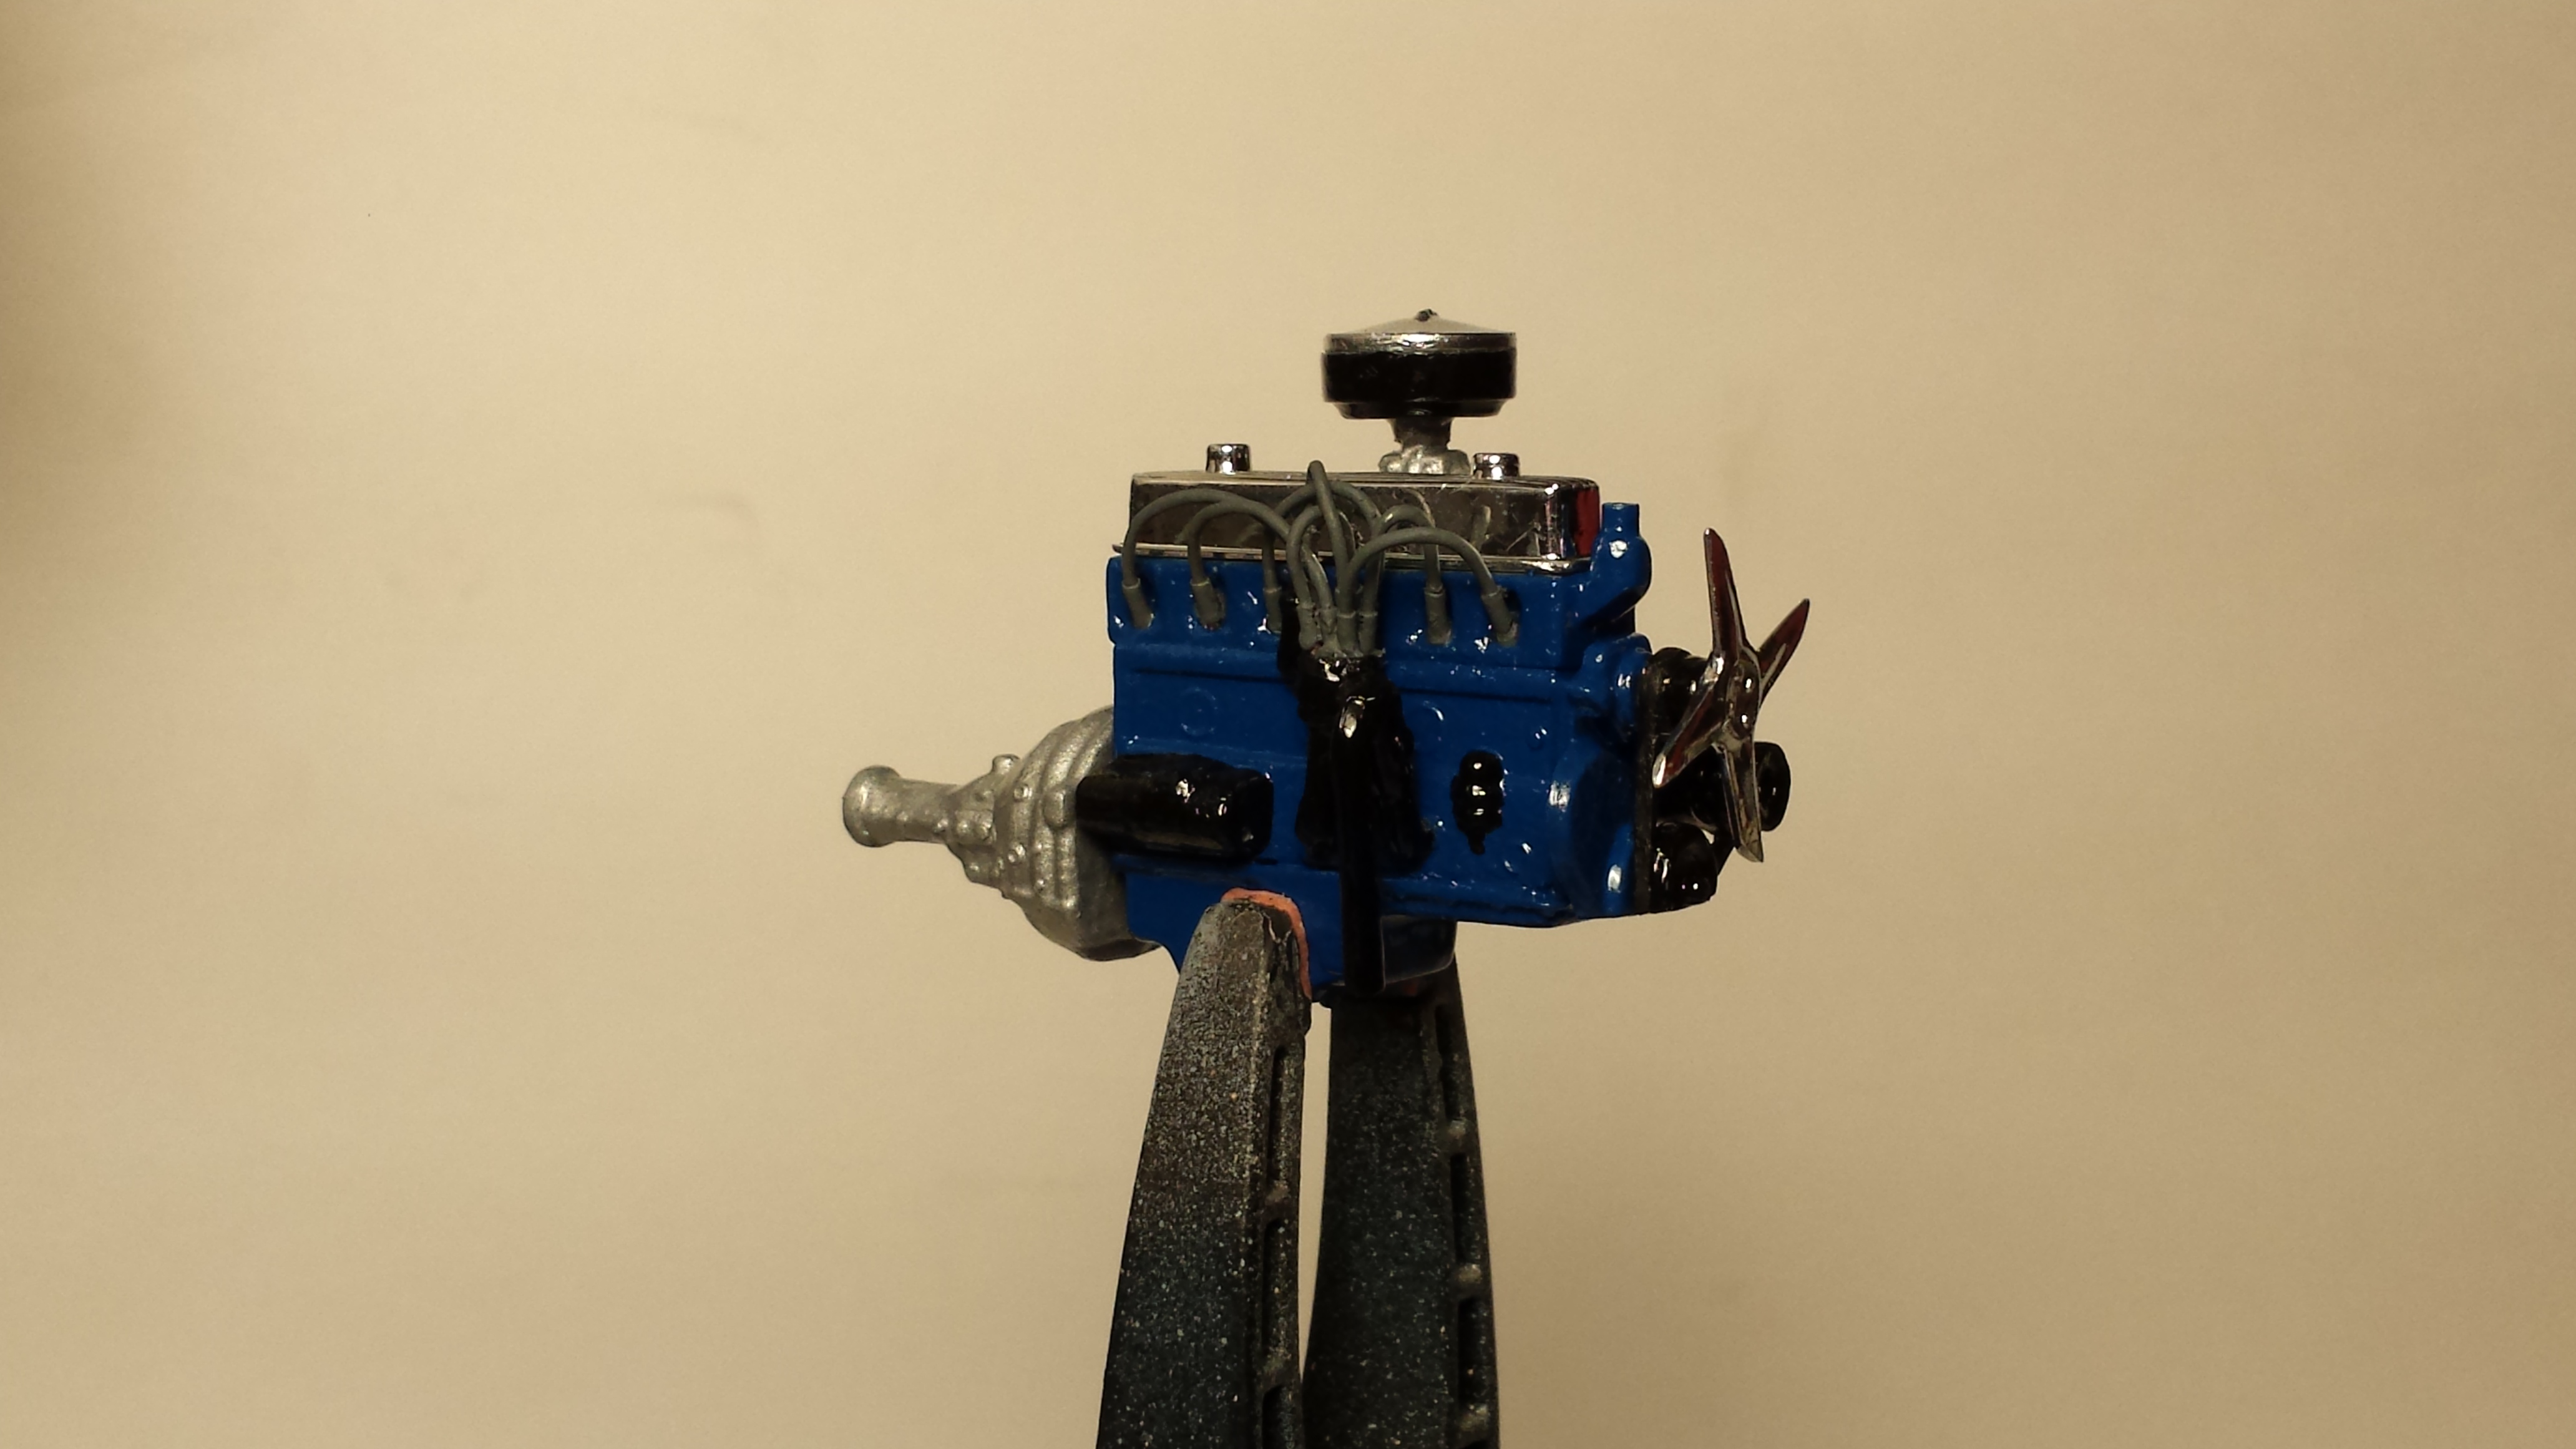
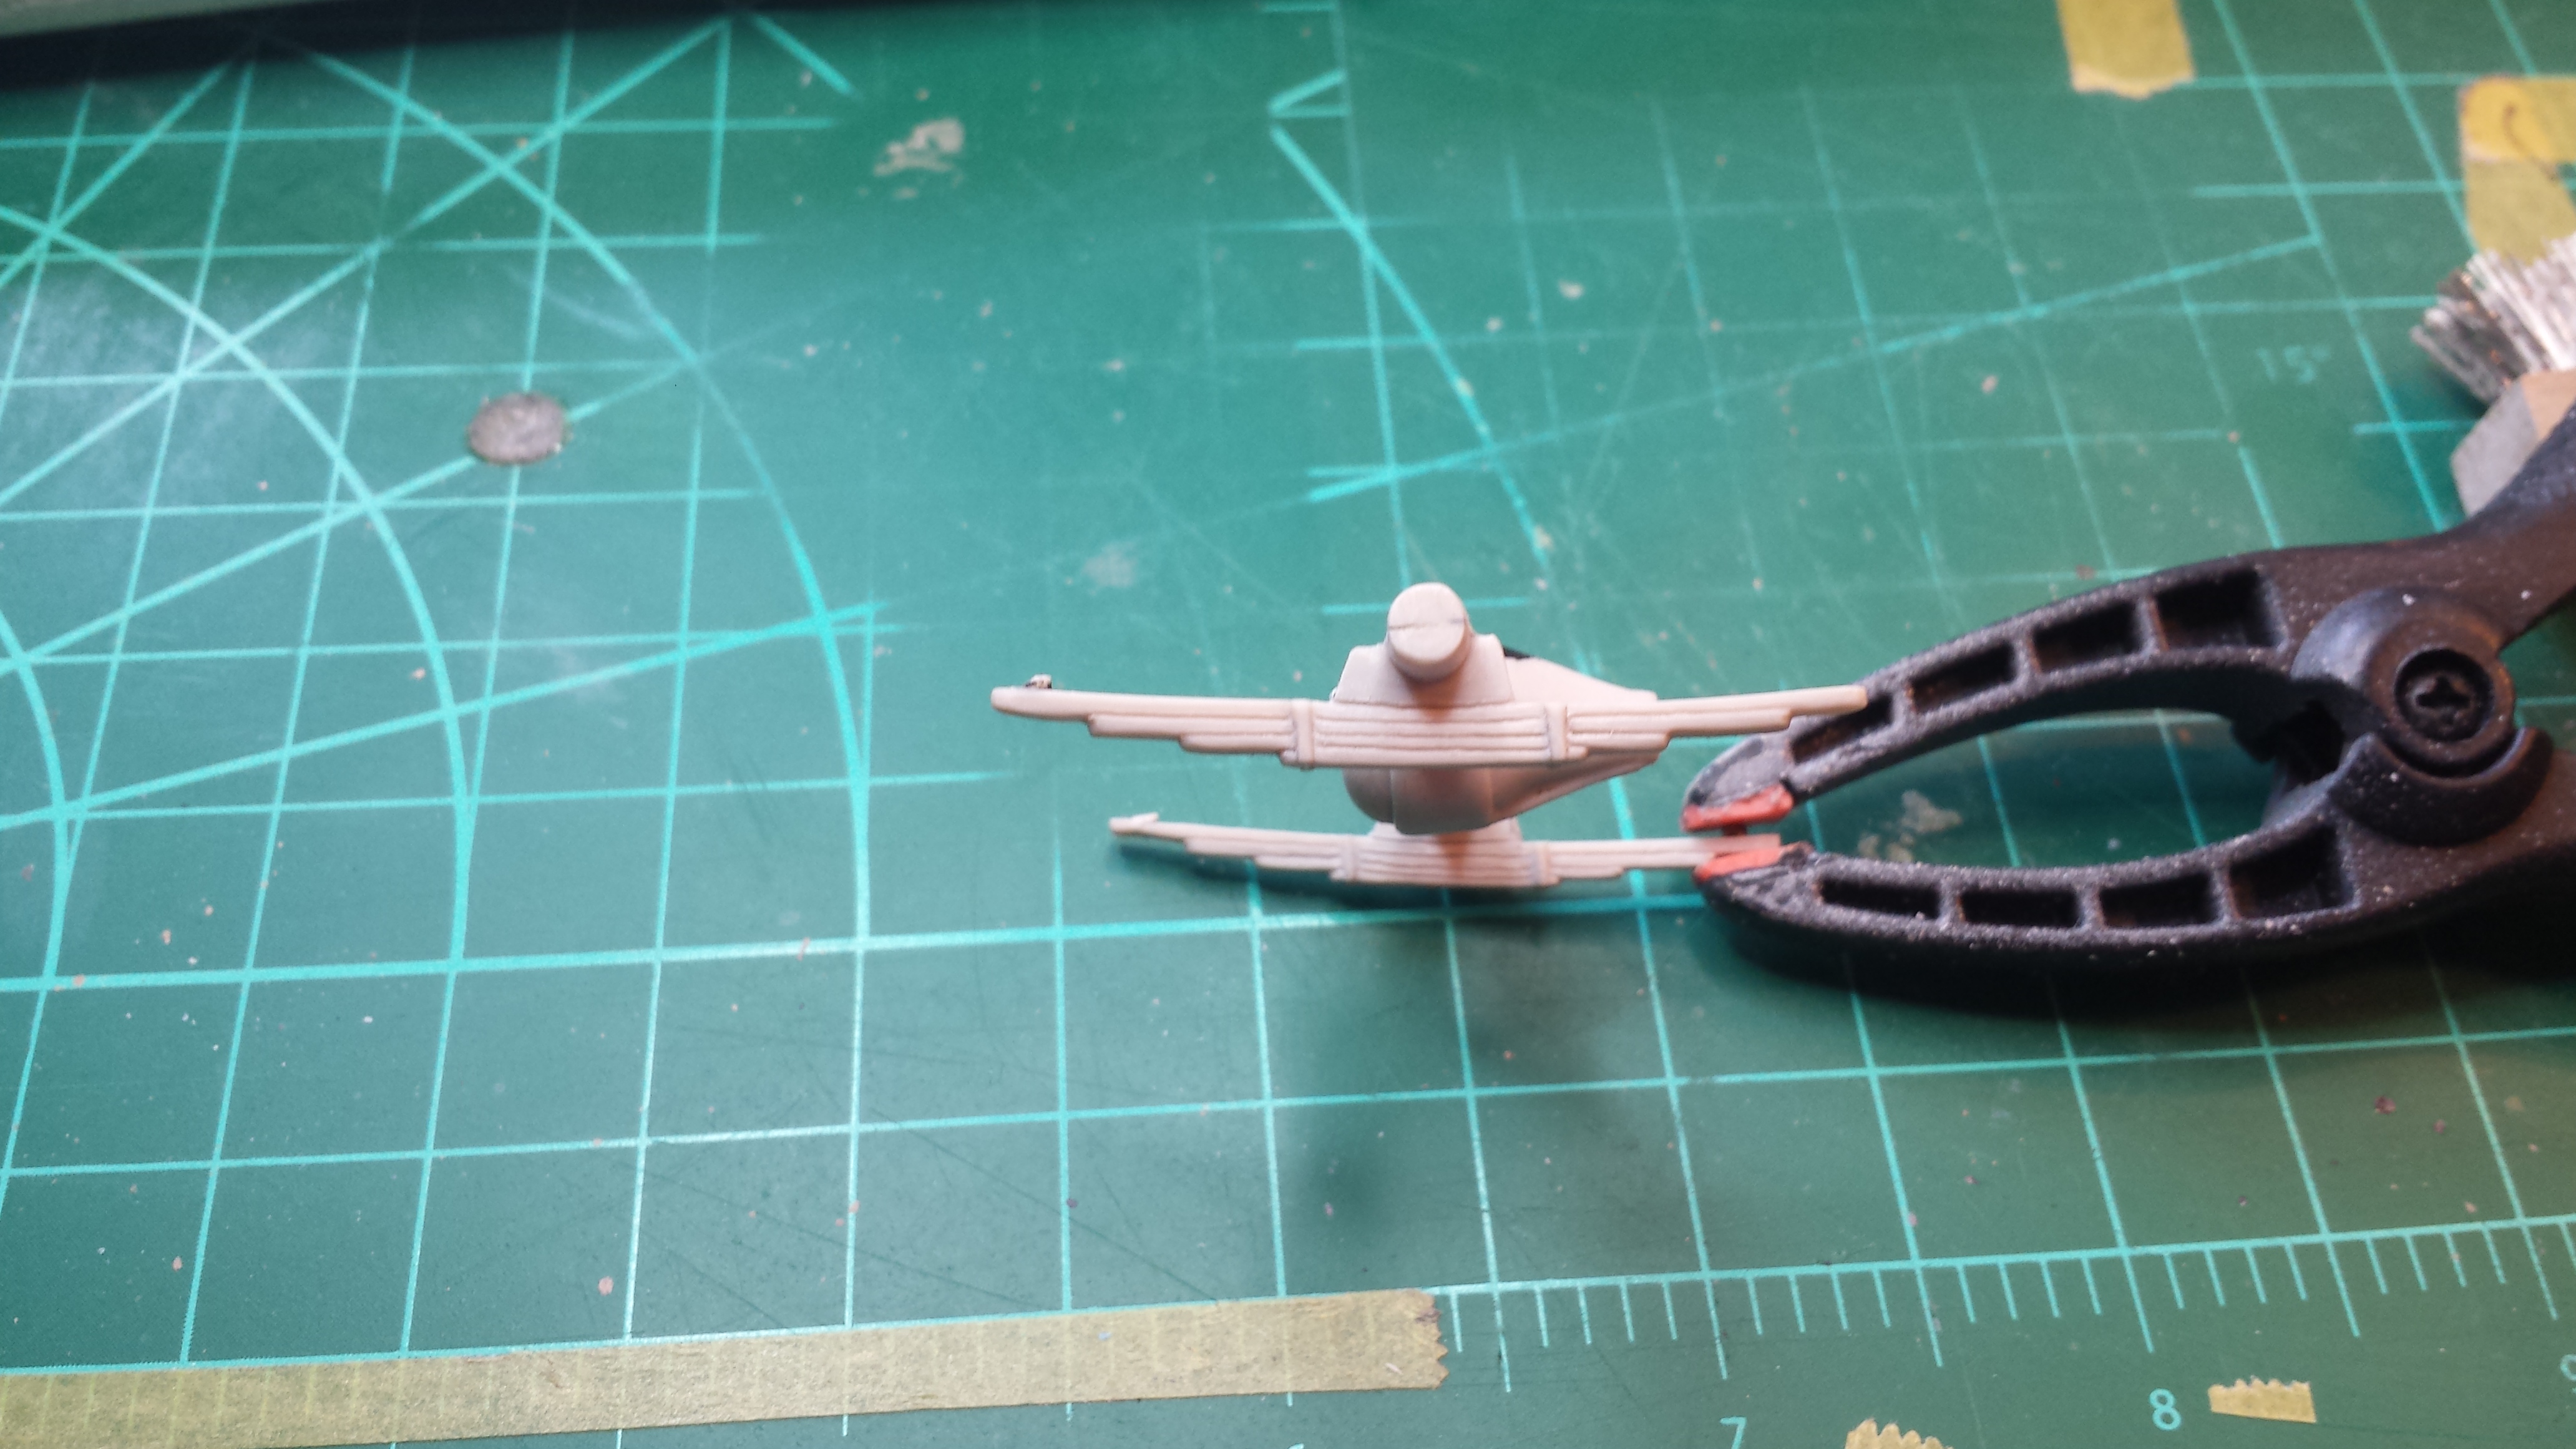
After a winter hiatus I'm back to making some progress. I know winter is the time when stuck indoors lots of hobby work (usually) happens. But with being laid off from work, getting a new job and adjusting to new work schedules etc. I couldn't get my mind on task. The dust is settling and I have blown the dust off the Chevy. I got the front suspension finished and is now a roller. Test fitting went great but after getting it all glued and assembled the drivers side wheel has a bit of a camber to it. It is glued and pinned together so I am not going to disassemble it to try and fix it. It will just have to be that way. It also isn't nearly as obvious with the body on it so I think it will be ok. I got the engine all finished as well. Somewhere along the way I lost the coil so I scratched one out of a piece of sprue (turned in a drill with a jeweler's file). Plug wires are made from stripped cat-5 wire and painted. I'm 98% sure I got the firing order right. The belts were shaved down as in scale they would have been well over and inch thick. The fan and top of the air filter were painted with a Molotow pen. I'll let the paint dry for a bit and hopefully this evening I'll get the engine in, the exhaust hooked up and maybe if I really get on a roll I'll get the inner fenders and radiator all assembled. Now if I could just get some decent lighting for my pics I'd be stylin' (the background is actually white). Thanks for looking and feel free to comment.
-
71 f100 beater
Markalister replied to JUNK-MAN's topic in Model Trucks: Pickups, Vans, SUVs, Light Commercial
I'm loving how the rearview mirror has come unglued and now takes its place on the seat. Had that happen to me more than once in real life - and more than once in the same car! -
Greg, I've lived up here now for the past 6 years and I really like it up here - really beautiful, peaceful, and quiet. A slower pace of life for sure. You come up here to the end of the road to go fishing?
-
Thank you. I checked out your facebook page - that is a beautiful collection of cars you have. I really liked the black/red '67 Chevelle SS - not sure what it is about '67 Chevelles, but they really speak to me. Mark.
-
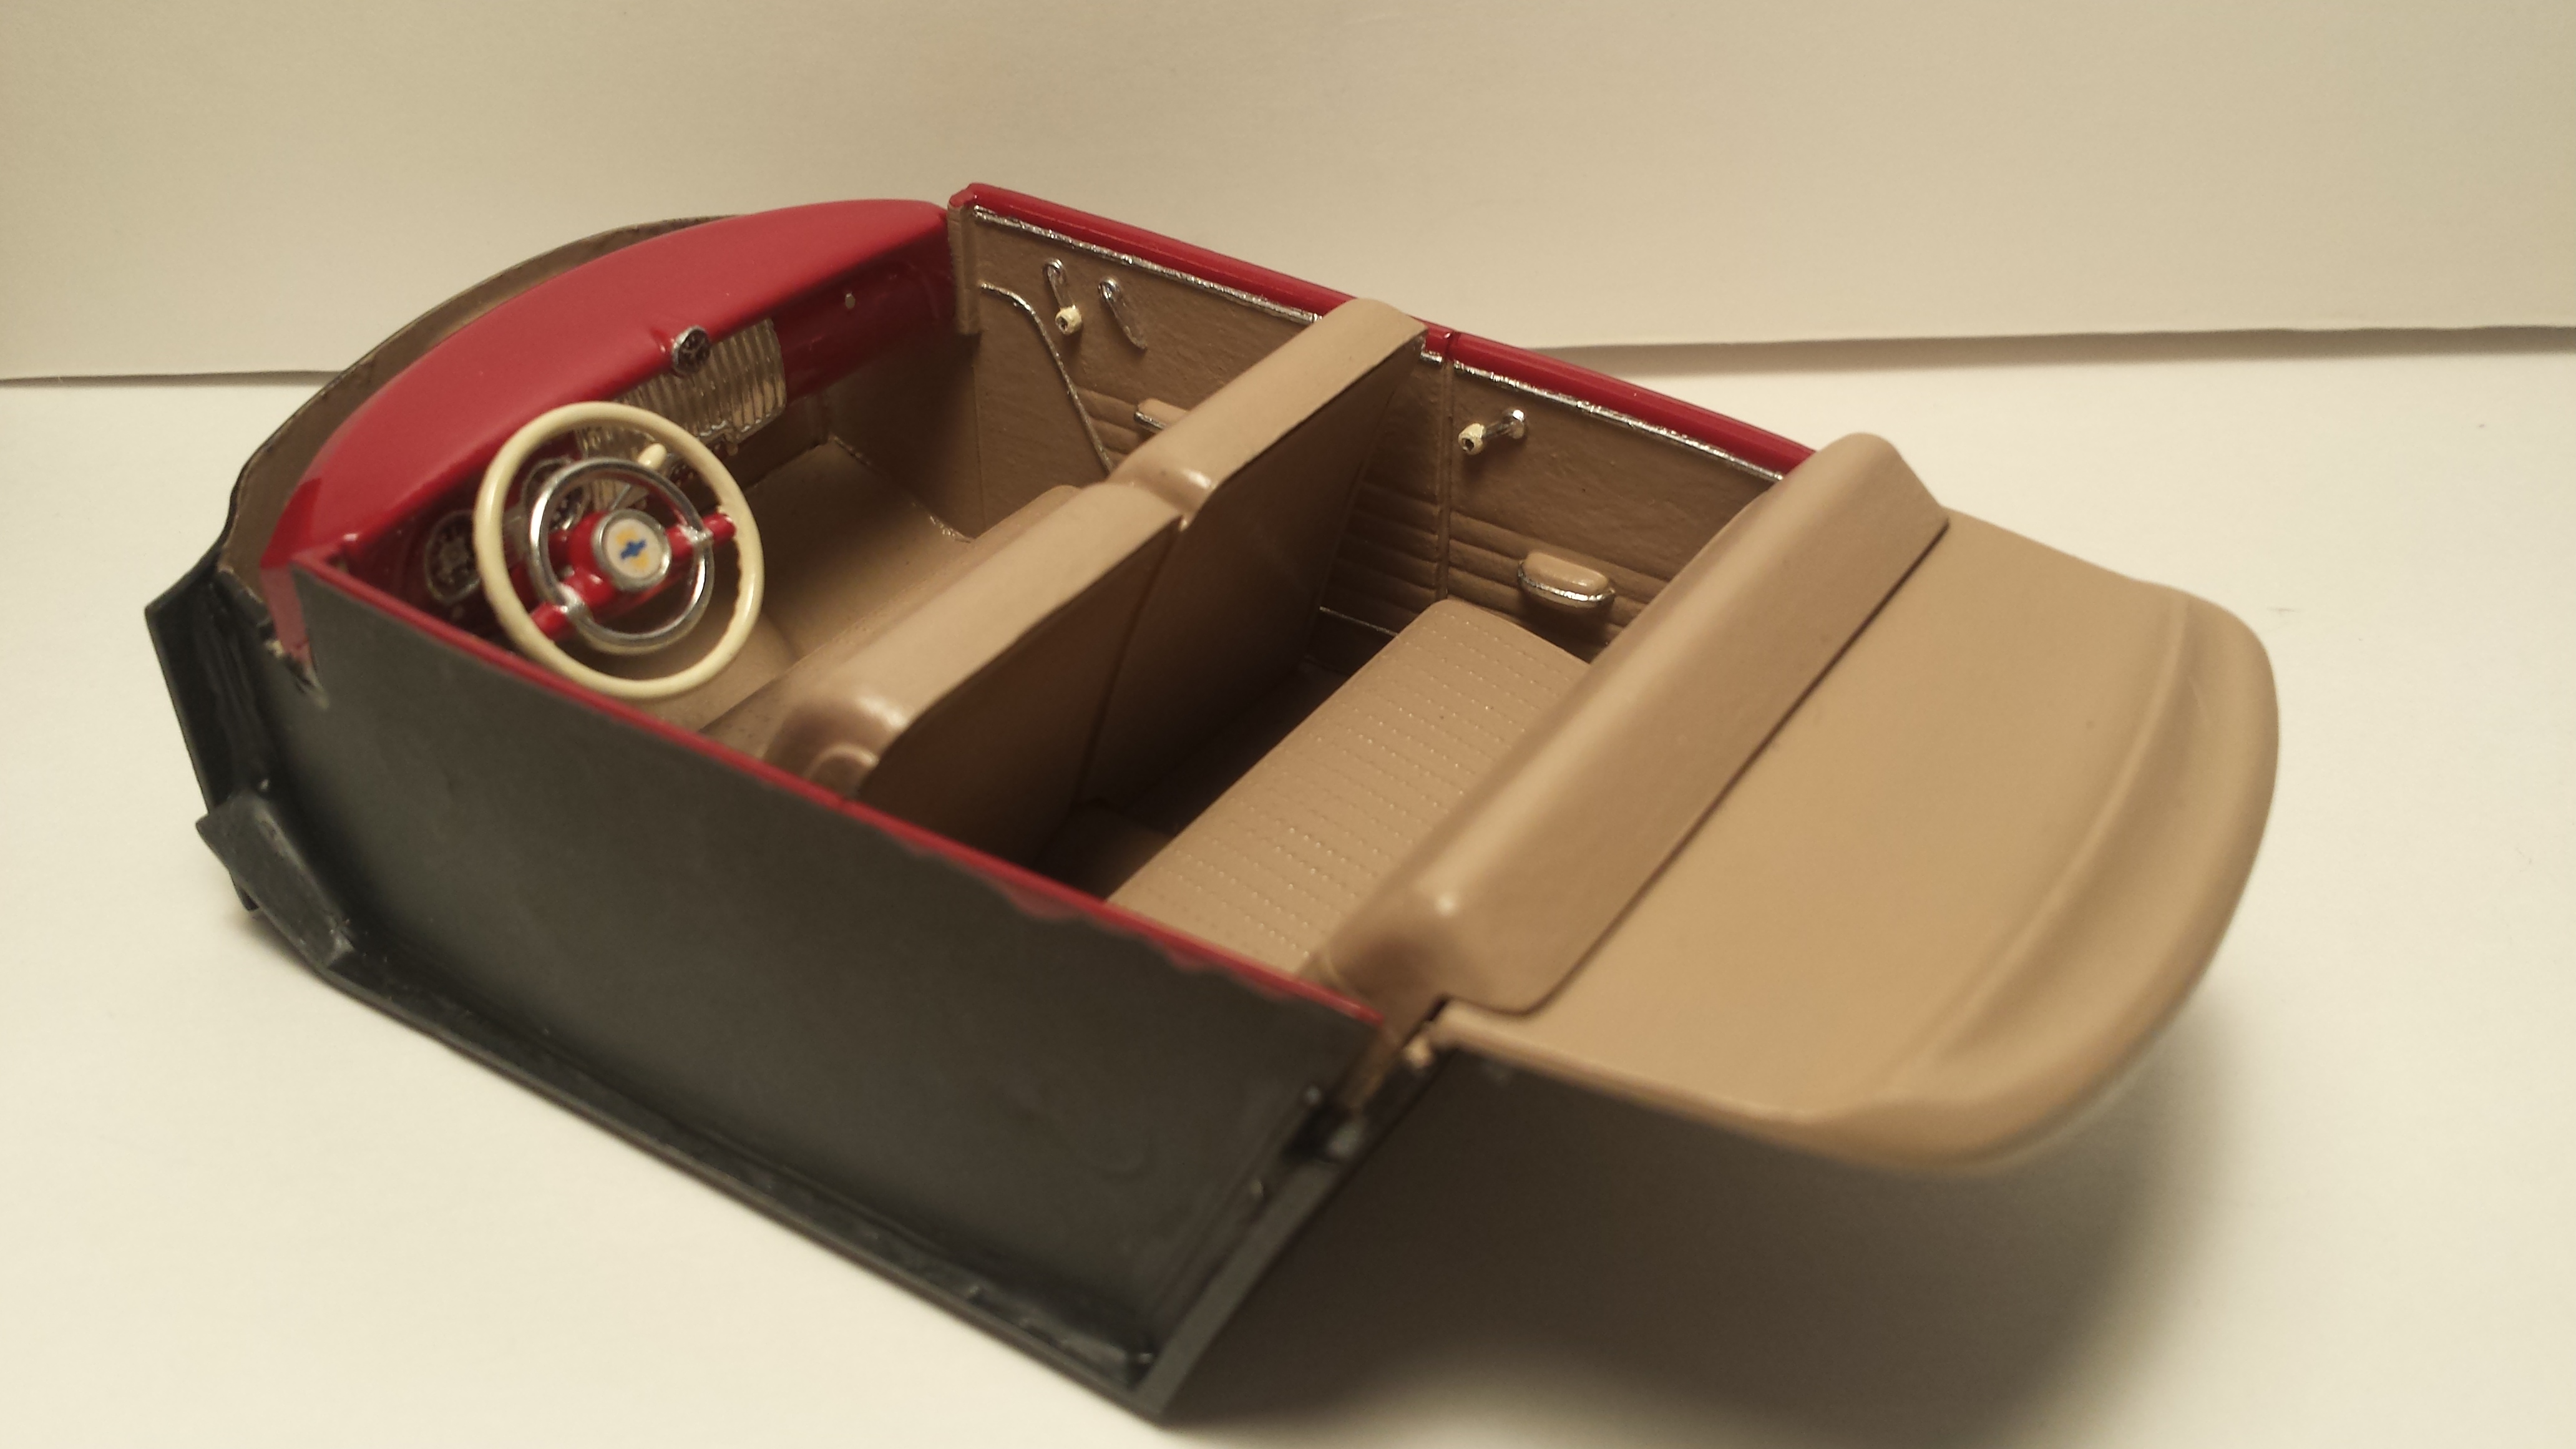
My model building got sidelined for a bit as some events in my life left me unable to focus on any of my builds. But I think things may be returning to normal and have I felt motivated to put in a bit of bench time. Progress is slow, but any progress is good progress. I managed to finish up the interior this week and am really happy with the end results. All of the brightwork in the interior is done with a Molotow pen. Here are a few pics... Next step will be figuring out the ride height in the front and getting the chassis into a roller. Thanks for looking. Mark.
-
First off I'd like to say your doing an incredible job for your first build. Keep up the good work. I have a soft spot for the old VW's. Of all the vehicles I've owned in my life, my '86 Scirocco is the only car I wish I still had (it was a silver 1.8l 8v Karmann edition with snow flake rims, lowered 2" with bilstien shocks/eibach springs - that was a fun car). I had the exact same problem with the vallejo paint. I laid down a perfect paint job on a '67 Chevelle in the same Gun Metal color you are using and even after letting it sit for over a month, the paint rubbed off with the lightest touch (ended up stripping it and repainting it with Model Master Graphite Metallic, which is just slightly darker, but otherwise it's very close). I think the vallejo paints may be better suited to the Lexan RC bodies as opposed to the Styrene that model kits are made from. Got rid of all my vallejo paints after that. Mark.
-
Sorry it's been so long, I haven't been getting much bench time in, but I got a few things done (or mostly done). Passenger side door panel is finished and installed. The driver's side is getting touchups and not having it installed makes for a better pic. Just don't zoom in too far - these high res. pics make details not visible to the naked eye look horrible. The dash is almost finished. I just have to figure out how I'm going to do a trim ring around the clock. The gauges are from Best Model Car Parts (I have the clock face too). Once the interior is all assembled I can do a quick mock up to check the front ride height (choice of front axel spindles in the kit - can't remember which I used previously as I pulled the others out of the parts box and got them mixed up) and then get the chassis all buttoned up. Mark.
-
Quick update... Haven't been getting as much bench time in as I would like as real life has been getting in the way, but I have been getting a few things done. I scratch-built the first piece of glass (rear passenger side) out of a blister pack. I got the engine cleaned up, trimmed down the insanely thick belts (the belts would probably have worked out to be close to 1-1/2 scale inches thick before I thinned them up a bit to look more realistic). I started on wiring the engine (this process always fights back for some reason). I got the first bit of red color on some of the small bits (dash, top of door panels and front & rear splash pans) - the results I couldn't be happier with. Once I get the interior trim painted I will post some pics. Mark.
-
Snow on the ground! In August?!? How for north in Ontario do you live?? Seriously though, that is a great looking bunch of Chevelles. I have always loved the '67 SS396.
-
That's a nice looking Impala. I really like it in that color. It gets me thinking about mine... Never painted the body so the blue plastic discolored, and looking at all the broken/missing tiny chrome bits has me question whether or not I'll fix mine up or use it for parts. The front fender chrome yours is missing - 1 of mine seems to have disappeared and the other is broken in half. I understand completely about leaving the chrome around the windows, if it were me and the car was all apart I'd be all over it, but without taking it all apart and risking breakage in the process I can't say I'd be too eager to do it either. I have a few cars on the shelf I would make a minor change or two to, but force myself not to just so that things don't go sideways in the process. I use those cars to remind me of how my knowledge and skills have progressed over the years and to keep that momentum in future builds.
-
Well preserved under 1/8" of paint!
-
Terry, yes - that's pretty much what I had in mind. It looks era correct, like it would have come on the car. If your interested in parting with it let me know, I'll pm you my address. Mirrors, I believe, were an option in '51. All of the scans of brochures, etc I have found online for the '51 Chevy lineup shows them all with no mirror. All of the useable ones I have look like a generic mirror you would find today on the rack in an auto parts store for $5 - that's not what I in mind.
-
So I know I said I was going to get cranking on the engine today, but I took a slight detour. I set out into the stash looking for a suitable mirror for the car, something simple, with a round head on it. Well I didn't find one that could be stolen so to speak. However, I came across a treasure I didn't know I had, the exact wheels that she had been asking for. The wheels are off of the Revell California Wheels '59 Impala, a kit in the stash that I had done nothing more than open it and put it in the closet. The tires I had picked out, unfortunately, were too small and the wheels wouldn't fit in them. Back to the stash I go, open up the most unlikely candidate, a '64 Chevy pickup (Revell California Wheels edition) pictured with a gorgeous set of mags and low profile tires. Low and behold there's a perfect set of Firestone tires with white wall inserts in there!! The wheels and backs were both slightly loose in the tires so they had to be glued together with the tire sandwiched in between. Thanks again to those who offered their wares, while I won't need them for this build I do still appreciate the offers. After a week of fighting the paint in the purple puddle, I switched to Easy-Off late last night. Checked it this afternoon - Done. I couple of little spots where the silver paint was a bit stubborn, but nothing that won't get taken care of when I sand all the mold lines out of it - and there are a lot on this car. I will try and get the engine worked on tomorrow. Mark.
-
Rusty, funny you should say that as I was thinking the same thing. The paint on it was small bottle Testors enamel. I got tired of waiting (although the lower half of the car looks great). Just before coming back to the computer I switched it out to Easy-Off (I've had good luck with it in the past) in a Ziplock bag (don't have enough Easy-Off to submerge it in a container either). Part of the problem was I didn't have enough purple stuff to completely submerge the body as to do it all at once. The hood and most of the other parts cleaned up beautifully after a 2 day soak in the purple pond, but the body... Anyways, I did manage to get a bunch of other stuff done. The rear end is in, the exhaust is in but loose as I need to wait for the engine for final placement (I think in the cleanup I lost the rear mounting location on the chassis, not a big deal). I got the seats and the interior tub painted and assembled (color is MM Sand Beige with dull coat on the floor and seat inserts and semi-gloss on the door panels and the rest of the seats). Just waiting for my Molotow pen to show up so I can finish up the window cranks and such on the door panels. I found a shock that was a pretty close match to replace the one that went down the drain, just had to scratch build a bottom for it. Now I just need the body so I can do a dry fit to see which front axel spindle (lowered or not) gives it the best stance. Here's a pic of all the finished up parts... I'll pick up some flat white acrylic paint for the white walls and see what they have for dark red paint next weekend when I "go to the city" (the next town over is 45 minutes away and there is a hobby shop there). Tomorrow I'll hopefully get the engine cleaned up, wired and ready to go in, and maybe get the front suspension finished so I can get it sitting on all fours. Well, that's all for tonight.
-
Sorry for the lack of updates to the Fleetline. I have been working on it. Mostly cleanup and repainting. I should be able to get some assembly done this afternoon. The thick old paint is still hanging on, but I have managed to get the lower third stripped good enough that the last bits will come off when I sand it. I ordered a Molotow pen online for some of the finer chrome trim. It was supposed to be here last Tuesday (just in time for my week off work) - today is Friday, no pen in the mailbox and holiday's are over. Not happy. Oh well, the joy of living in a remote northern town in Canada - nothing arrives on time. I still have the weekend and still hope to make some good progress on it and I will try and post some pics by the end of the day. Mark.
-
After a bit of investigating/digging through the de-shelved built up stash - those, I believe, are the custom wheels that came in the AMT '58 Impala kit. I have a set as well (I knew I had seen them before). I had put a set of 2 spoke spinners in the center of mine, all of which have fallen off now, and only seem to see 3 (spinners). Can't say I ever had them on a car though. Terry's are in better shape than mine are. Mark.
-
I was almost sold till I blew up the pic and read the "FORD" on them. There are rules you know.
-
MMMMMMM, peanut butter cookies!!! Sorry, I couldn't resist. In your first pic, far right side, is that a set of 4 or is the top one different and what kit are those from? I am overwhelmed by everyone's generosity, thank you. I am going to wait to decide what wheels I want to go with until I get the body stripped and can hold it next to the computer monitor to get a better idea. The one's in the '56 Ford kit look really nice too, kinda makes me wish I liked the old Ford pickups. The '56 Ford is better than the '51 and '53 though. I'm a GMC pickup guy. Well, the old thick paint on the car is proving to be a formidable foe! After 4 days in the purple pond (well, blue now), soaking the lower half, it's starting to come off, but very slowly even after a hardy scrub with a stiff bristle brush. I spent entirely way too much time cleaning up AMT's laziness on the rear end, but it had to be done. I scribed in the leaf springs with my #11 and cleaned up the mold lines. I wouldn't have been able to live with myself if I left it. I just have to figure out the attachment to the wheel backs now as the inner plugs didn't survive. If I remember right, the original wheel fit was really sloppy and they ended up with a saggy stance so I glued the snot out of them to make them sit right. I think I have some metal axels and wheel backs in the parts box that might work well. If all goes to plan I should have that painted up by the end of the day.