carcrazy19
-
Posts
308 -
Joined
-
Last visited
Content Type
Profiles
Forums
Events
Gallery
Everything posted by carcrazy19
-
Nicely done. I always enjoy seeing this kit when its complete. One of my favorite 50's style cars. Good job.
-
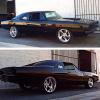
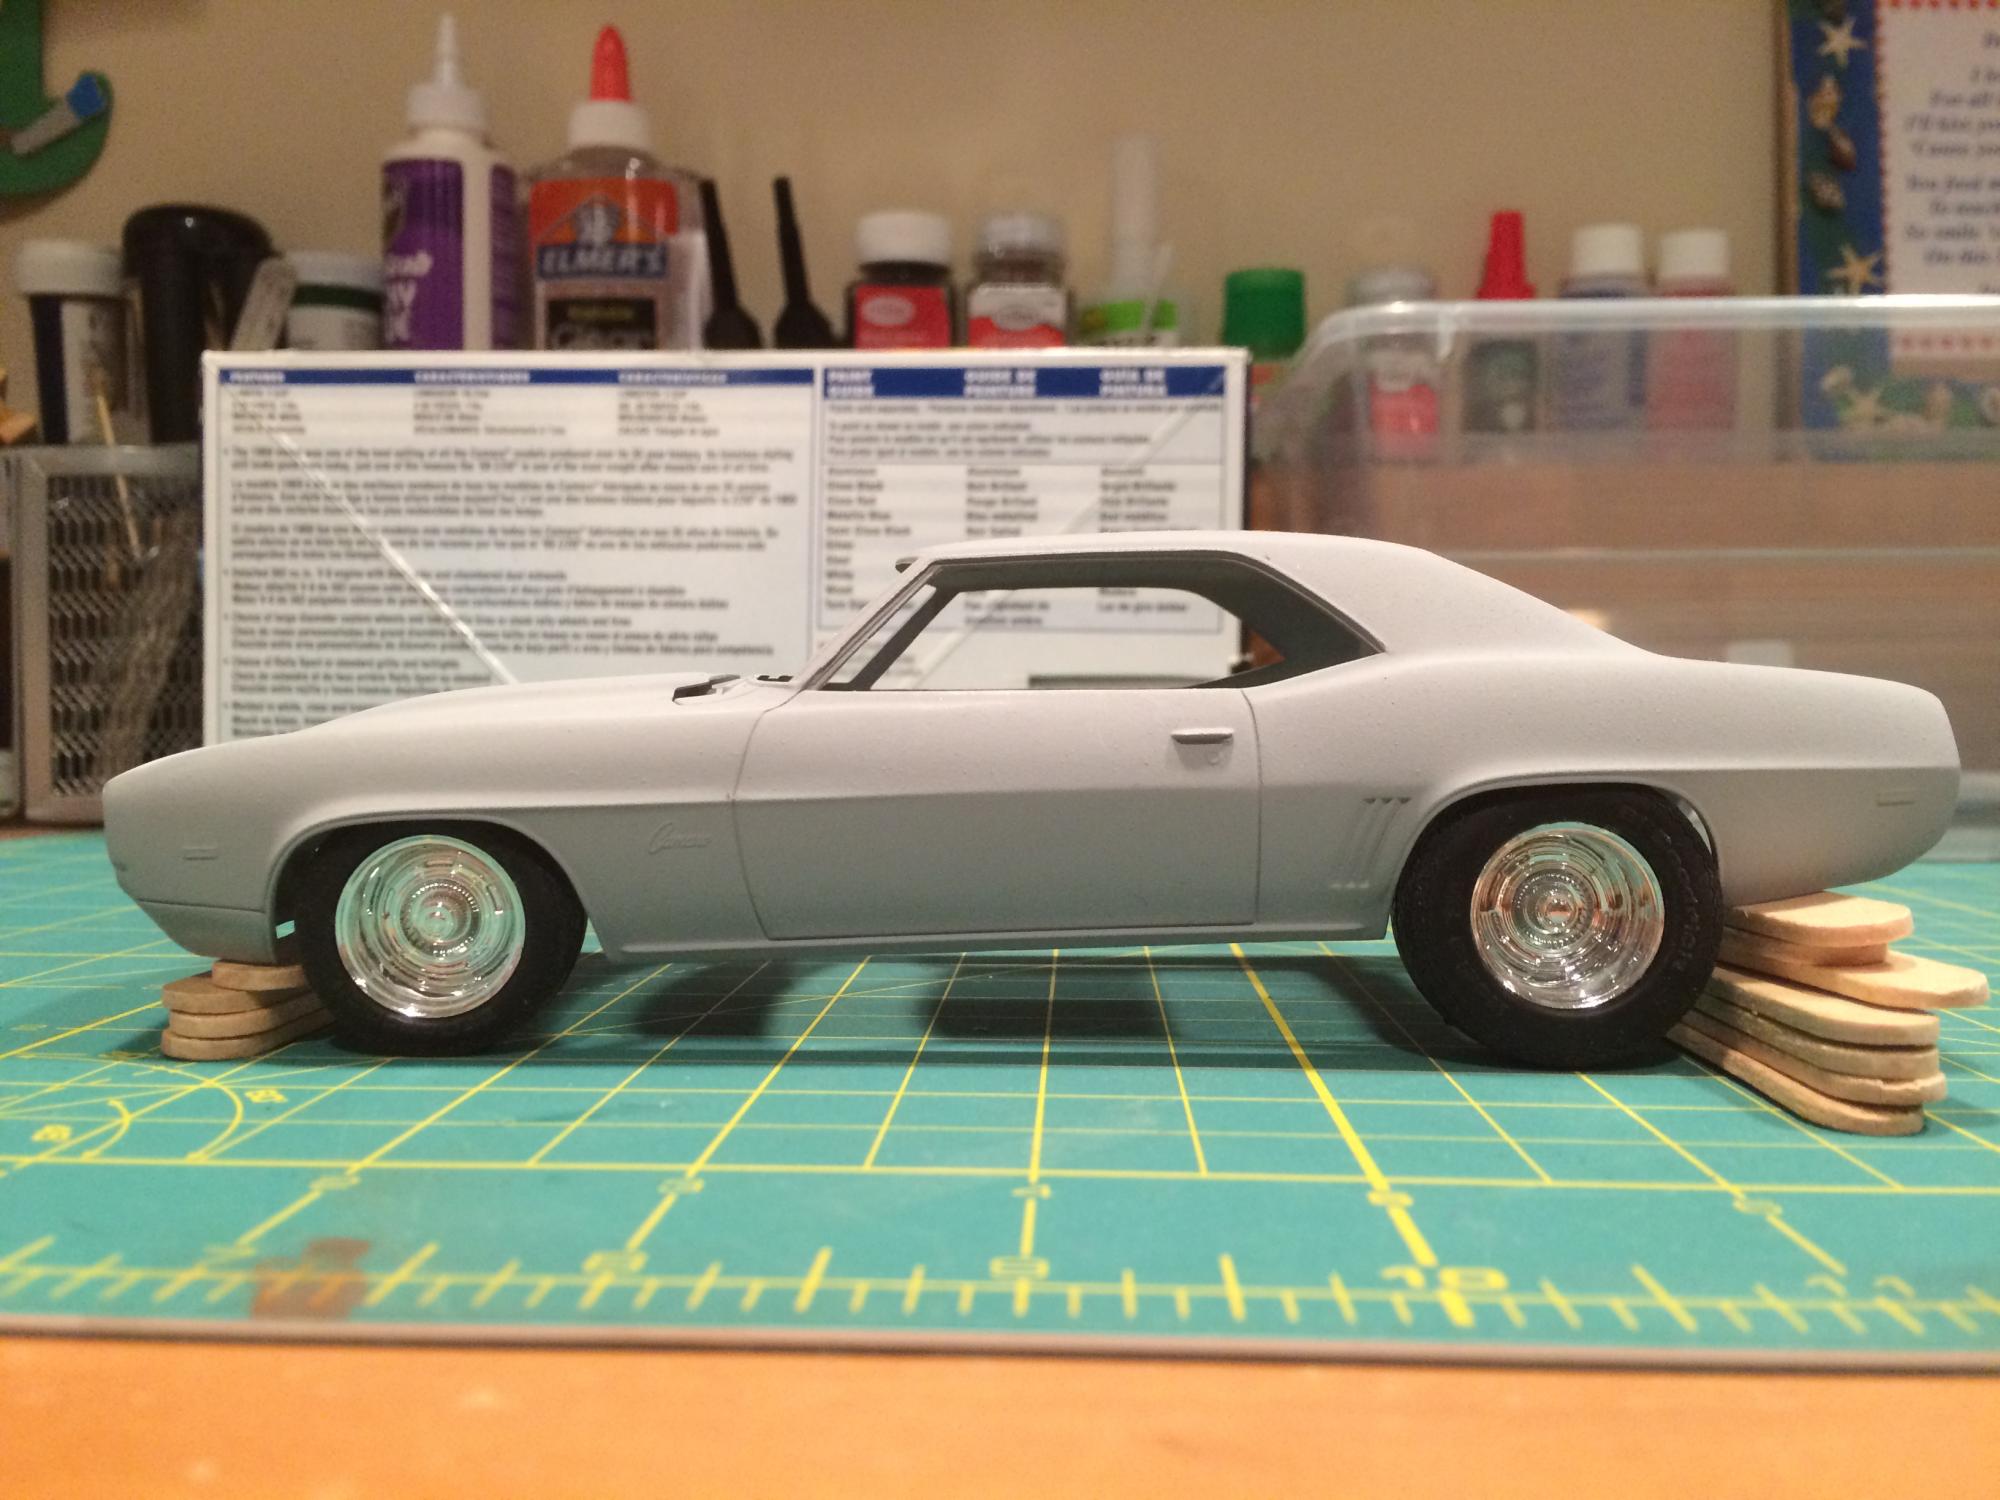
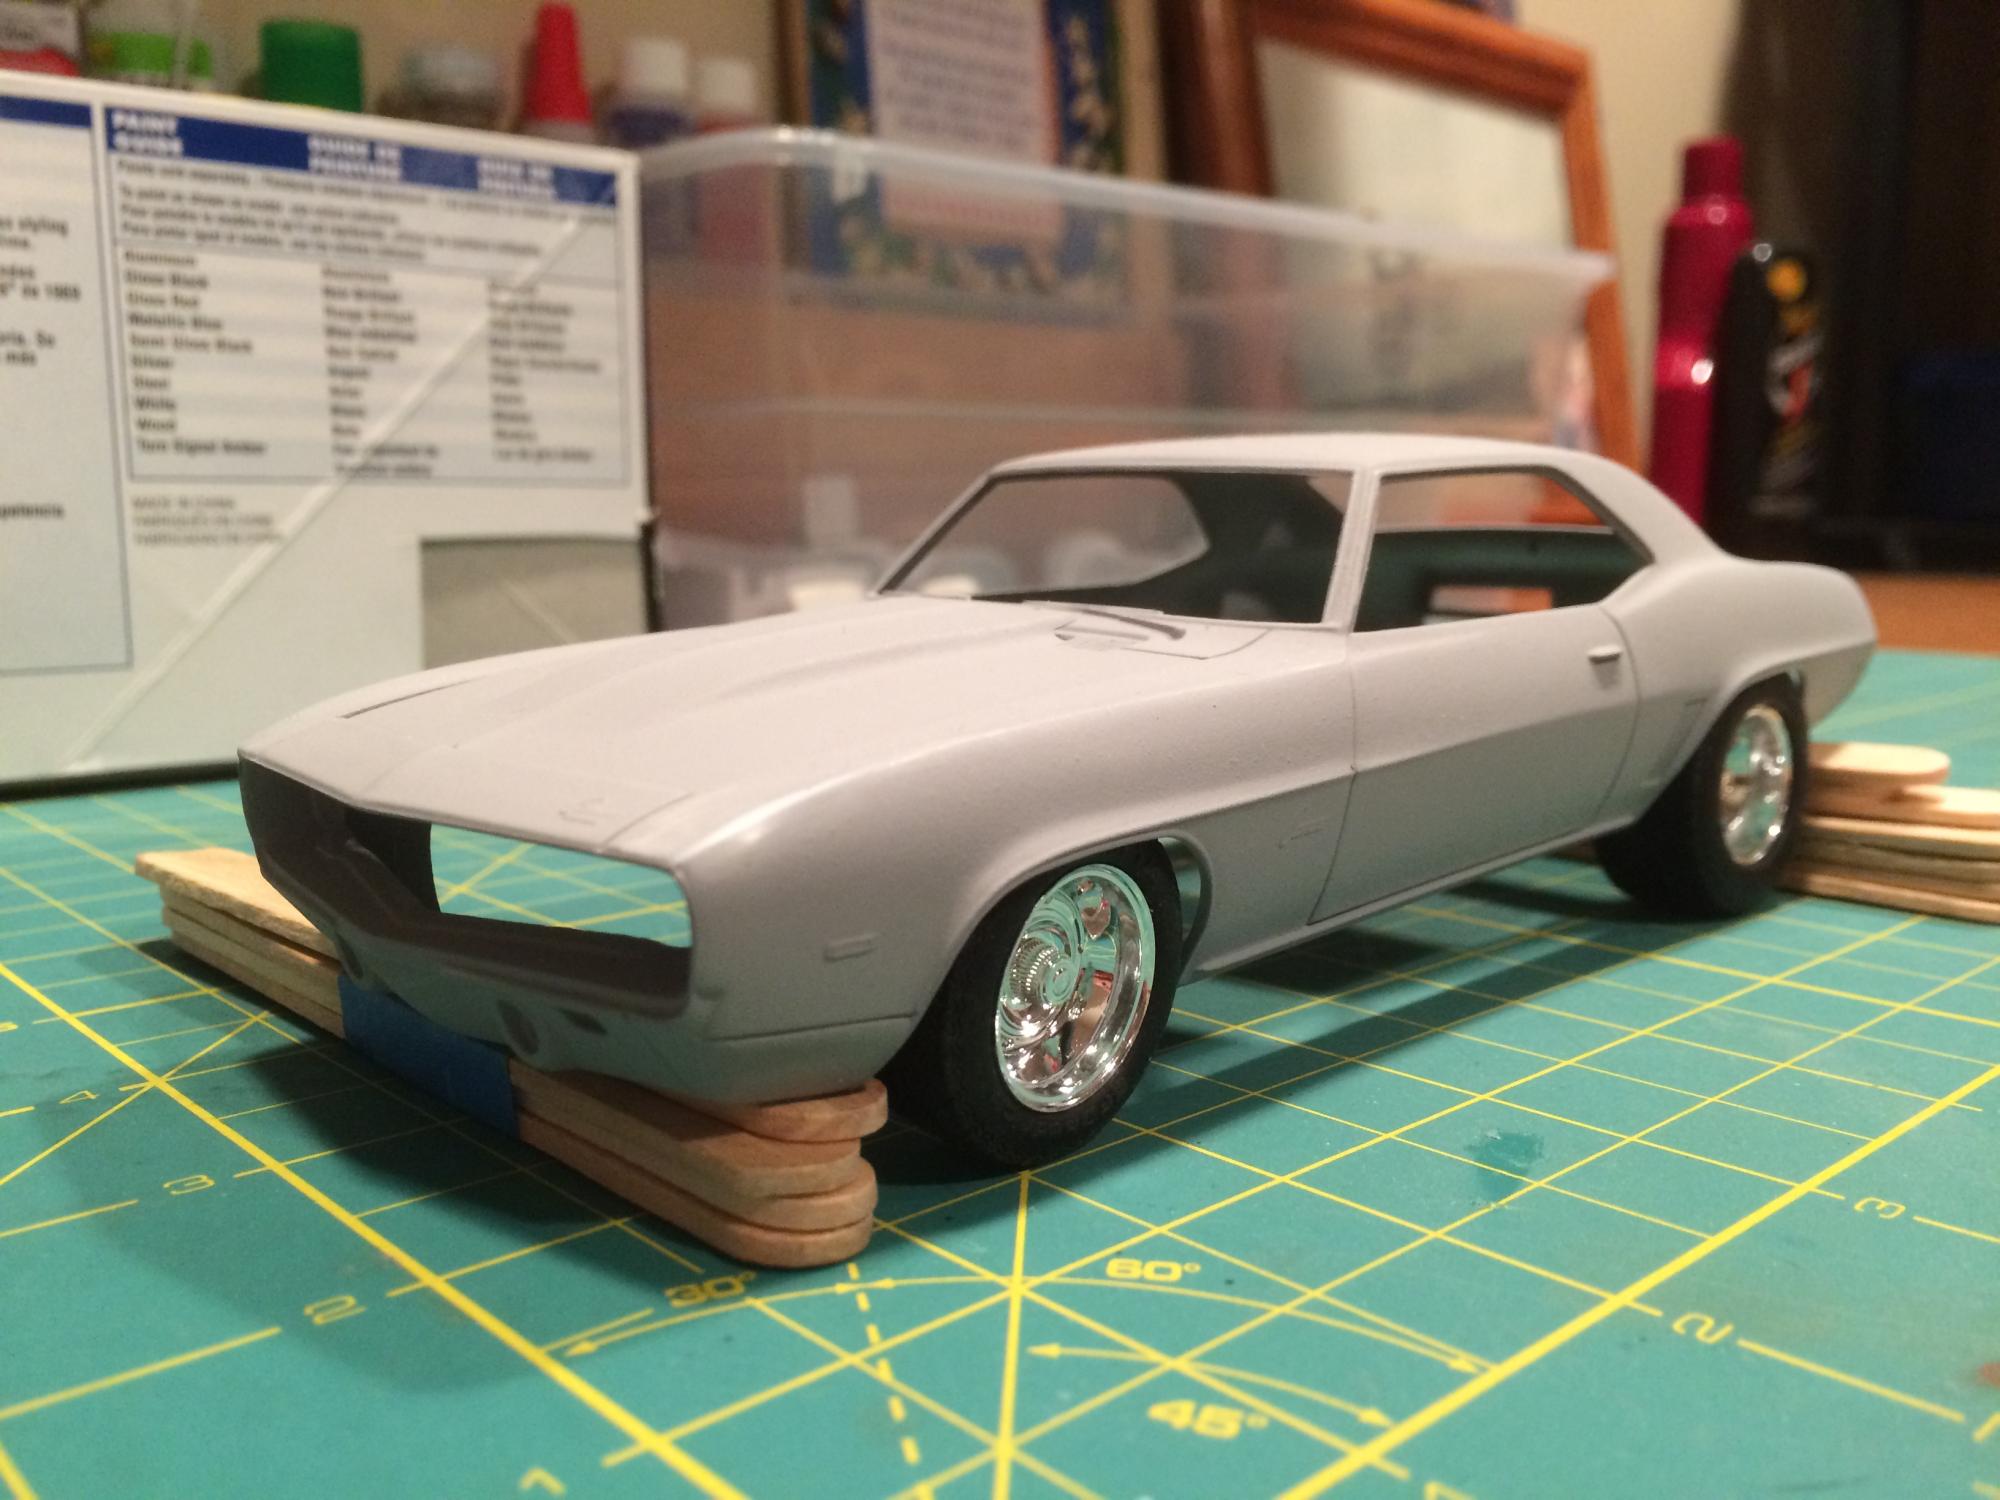
This is going to be tribute build and birthday gift of a 69 Camaro SS that my brother restored about twenty years ago. This is the REVELL 69 z/28 kit. I'm think that I will replace the 302 with a 427 from the COPO kit. The color of his Camaro was black exterior on black interior. This will be my first time painting black so wish me luck cause I know its a tuff color. Right now not much is done, I am just in the mock up stage but this is the look I want to achieve. It will be mostly out of box stock except for the tires and wires.

-
Thanks, that was the first build I ever sanded and polished. Hope it helps you with your build in some way. As I said before your looks really good. I wouldn't worry too much about the imperfections. I think its show worthy.
-
Sorry, the computer I was using wasn't so I was having some technical difficulty. I emailed the pics to you cause I didn't want to steal your post.
-
-
Looks really nice to me. I love this color and actually built a 68 charger star spangled blue. Keep up the good work.
-
I would mix in some dish soap to the water. This will help by lubricating the sand paper and surface so the paper won't dig into the paint.
-
Thanks guys for the compliments. I'm glad you like this build. I really like the pro touring style for all the old muscle cars. In my opinion it gives them a fresh, modern look.
-
-
This came out really nice. I love the paint too. Great job.
-
These remind of 1:1s that you read about as barn finds. They are really cool. I look forward to seeing more.
-
Thanks every one for your compliments. I really appreciate them.
-
Good job. I really like the color and that you blended the bumpers into the body. Nice work.
-
I love these kits. I have a few of them in my stash. Yours came out really nice. Gives me some inspiration to start one of mine. Thank you for showing it to us, its nice to break from the norm and do something different.
-
I like them both but if you want an opinion I like the pro touring look. With that said build what ever inspires you or build both.
-
What I've done in the past is contact customer service and requested for a new body. Revell and Round 2 have great service but you may have to wait a while to get the new part. It also depends how badly warped they are but you can put the bodies in warm water for about 5 min to get the plastic pliable enough so that you can straighten them out but it takes patience. I've tried a couple of times but I'm not real good at it and have found that its never going to be truly straight. Other guys have tried it with more success they might have a better way to do it.
-
This build is off to a good start. Its good to see that your moving forward and not getting discouraged with your first build. I think after modelers gain more experience they use the instructions as references. I learned that after I did a couple of mock ups/dry fittings that I could work on any section of the kit while I was at a stand still with other stages of the build. As for getting all four tires to touch the ground that will come from dry fitting and seeing how the model goes together and what needs to be tweaked, also its always good before starting any model to make sure the body and chassis are not warped because this could also be the cause for having one wheel up in the air and fitment issues. I found that Testors Wet look clear works really well to finish off with but you can also try other brands to see what works best for you. Just remember when painting the best time is when its a nice dry, low humidity, sunny day with temperatures in the 70s and 80s. Do not paint on days when its raining, high humidity, and extremely hot weather or you will run into problems. As far as skill level is concerned I started out with levels 2s and then as I felt more comfortable I moved on to level 3s and I've been building on and off for about 15 years. Sometimes level 2s can be a real beast and will find the advanced kits can sometimes be easier to build. I don't know if any modeler just builds specific levels I think it might just depend on subject matter and what is available for what they want to accomplish. Hope this helped in some way.
-
I would say for your first kit you did a good job. I don't think my first kit looked this good but with every build you learn more, get better, and learn new techniques. Eventually you will learn what tools and products to use to make each building experience easier.... When you hear them saying dry fit or mocking up your kit its a process of putting parts together without painting or permanently gluing the pieces together. You are temporarily putting your kit together to see how all the pieces fit. This way you can make adjustments and make sure the parts fit how you want them before moving forward with painting and final assembly. I use Aleen's Fast Grab Tacky glue when doing my mock up. Its kind of like Elmer's glue but dries faster and it can be washed off with warm water.
-
I've built a couple of the 68 charger kits and they are tight fitting. So far your doing a great job just keep at it and it will come together. I would follow what Bill suggested but don't be afraid to try different techniques. If I may make a suggestion once you have the interior tub assembled let the glue cure for a couple of hours or even for one day so the bond is strong and then insert the interior tub first and then glue it to the body so it stays aligned and secure. Then once the glue is cured install the chassis sliding the rear part of the chassis in first and then gently spreading the body so the rest of the chassis kind of falls in to place. That technique worked best for me when I was doing final assembly of this kit. Also when gluing your pieces together scrape off any paint that is on the two surfaces to be joined as this will also ensure a stronger bond. Hope this helps.
-
Kevin this is turning out great. you definitely have skills. The paint looks awesome. Question how did you do the wood grain for the interior. It looks like you started with an airbrush. Since I don't have an airbrush do you have any suggestion how I could accomplish that affect using brushes.
-
Nice job. I really like this one.
-
I like the color its turning out really nice. Looking forward to seeing more.
-
Nice work so far. The recess in the hood was for the RR kit if the builder chose to build the custom version. I filled mine in with some styrene which also helps to keep the rectangular imprint from showing through.
-
Thanks everyone for your compliments I appreciate them and I am glad that you all enjoy this model.
-
David, thanks for the compliment. No need to ask to use this project as inspiration for your charger. I'm glad I could give out some ideas for anyone to use.