Straightliner59
-
Posts
5,817 -
Joined
-
Last visited
Content Type
Profiles
Forums
Events
Gallery
Everything posted by Straightliner59
-

Super Gas '77 Vega--Completed! (11/12)
Straightliner59 replied to Straightliner59's topic in WIP: Drag Racing Models
Thanks, Ian. They do look really nice! Just a little more work than the "lead" foil I generally use. This set didn't come with an anti-sub belt, so I made it from a piece of an old toothpaste tube. I used a 6" bastard, and rolled it over a round handle, to give it some texture to try to match the Eduard belts. It worked out pretty decently. I'll post photos, with the next update. Thanks, Ron. -
Super Gas '77 Vega--Completed! (11/12)
Straightliner59 replied to Straightliner59's topic in WIP: Drag Racing Models
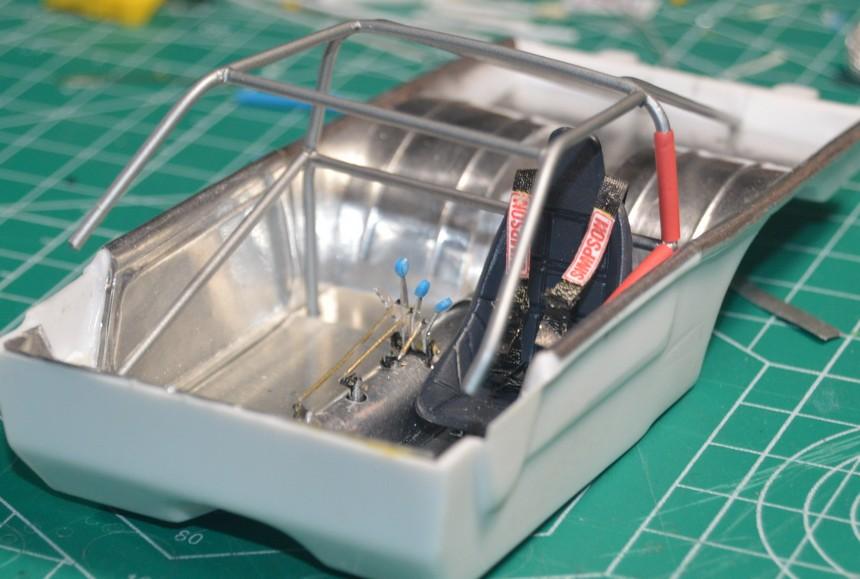
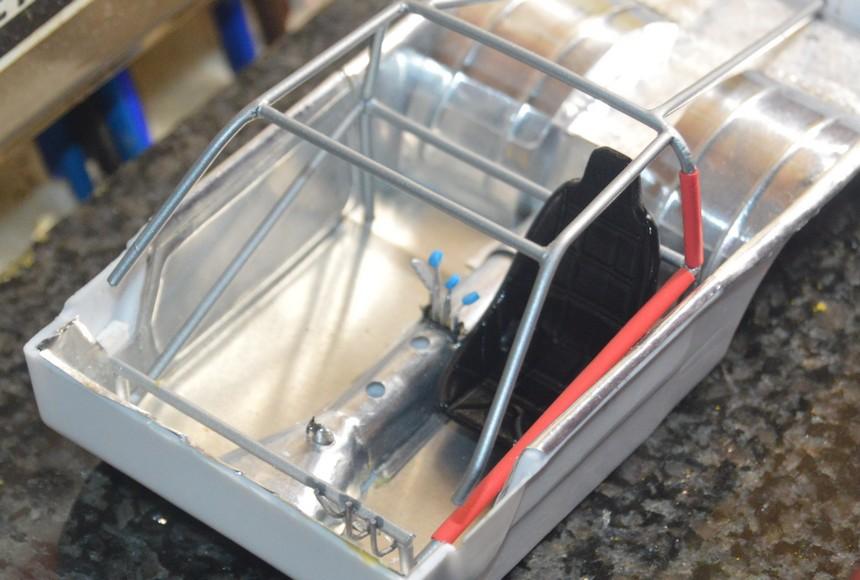
I got the seat installed, along with the lap belts. The shoulder belts are attached to the cage, but the cage can't be installed, until the dash is completed and installed (I'm working on that, next--I think! ?). One thing I like best about the Eduard belts is the printing of the stitching. One of the things I like the least about them, is the stiffness of the material that stitching is printed on. It's very difficult to get it posed, so that it doesn't look posed. I'll mess with the shoulder belts some more, next time I pull the cage out of the tub. The shoulder straps are "wrapped" around the shoulder bar, as nearly as I could do them, given this material's rigidity. They're secured in place by an apparatus (in 1:1) that bolts around the bar. I faked it with Contrails round styrene tube. The seat covering is painted Krylon Chalky Finish Charcoal(?). Once that dried, I drew (no pun intended) a Prismacolor black pencil through the patterns, to give them some depth. I think that's about it, for now. As always, questions, comments and critiques are welcome. Thanks for looking!
-
AMT 53 Ford Pickup
Straightliner59 replied to bluestringer's topic in Model Trucks: Pickups, Vans, SUVs, Light Commercial
I really like the basic white bumpers and grille! Cool! -
Super Gas '77 Vega--Completed! (11/12)
Straightliner59 replied to Straightliner59's topic in WIP: Drag Racing Models
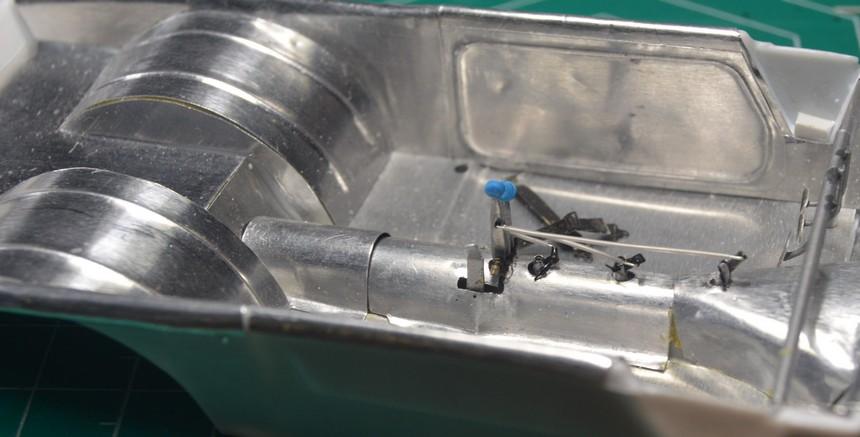
The linkages for the Lenco are done! Since the photos, I've painted them (Tamiya Titanium Gold Acrylic). I'm happy with the way they worked out. I used some old MSC (I suppose that's redundant!) silver/grey 1/25 plug wire, to make them. Anyhoo...
-
Super Gas '77 Vega--Completed! (11/12)
Straightliner59 replied to Straightliner59's topic in WIP: Drag Racing Models
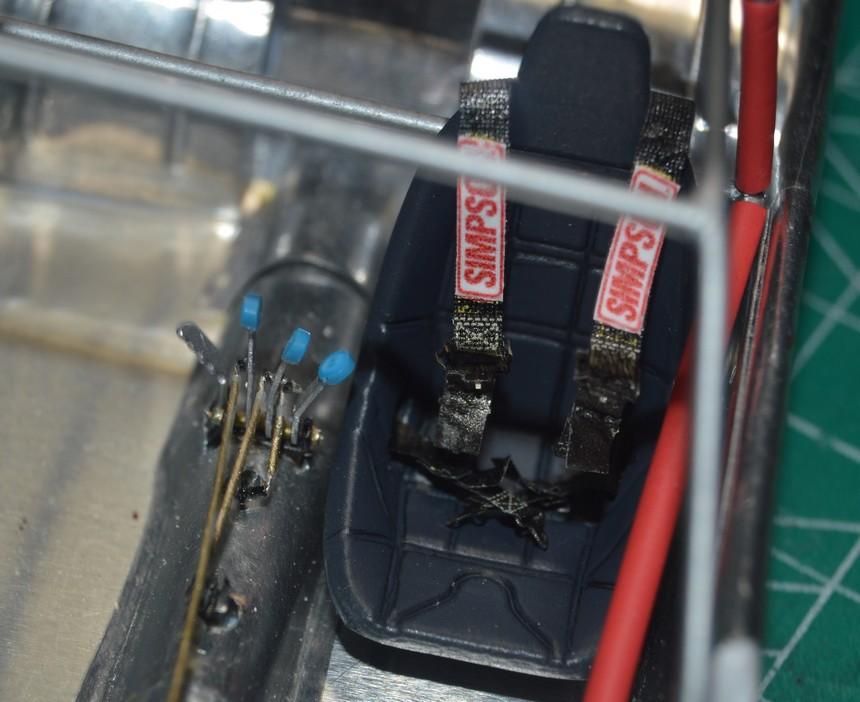
The seat belts are mounted/installed. The lap belts are fastened to the floor with model railroad hex nut/bolt/washer castings. The Eduard belt material is pretty stiff to work with, so I had to fake the wrapping of the belts on the shoulder bar, rather than the actual way it's done. The cage will be installed once the seat, dash, wheel, and shifter details are all installed. Comments, critiques and questions are always welcome. Thanks for looking!
-
post your homemade tools for building!
Straightliner59 replied to markymarkr1's topic in Tips, Tricks, and Tutorials
Once you get the hang of it, you can make longer bends, too. I've used it a lot, over the years! -
Oh, yeah. I remember seeing those heavy old things!
-
post your homemade tools for building!
Straightliner59 replied to markymarkr1's topic in Tips, Tricks, and Tutorials
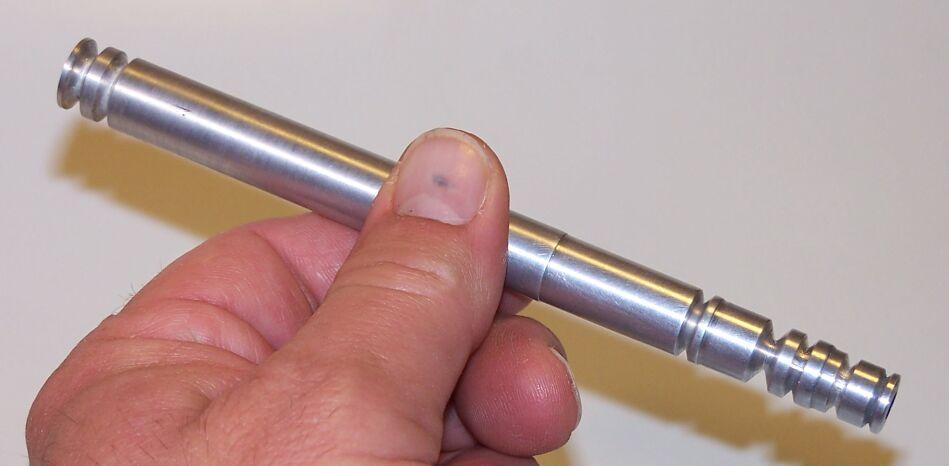
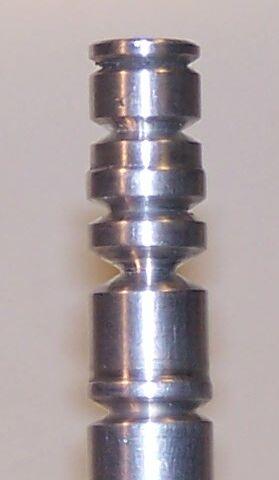
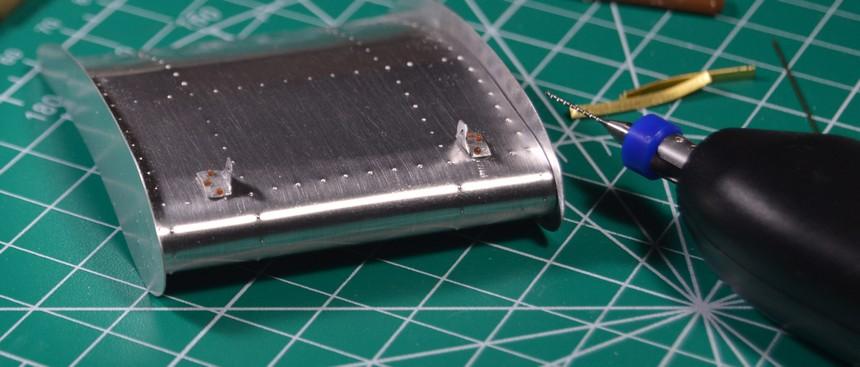
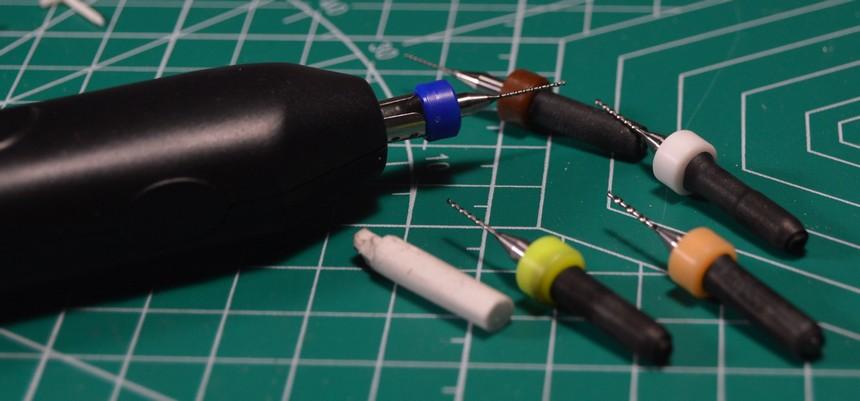
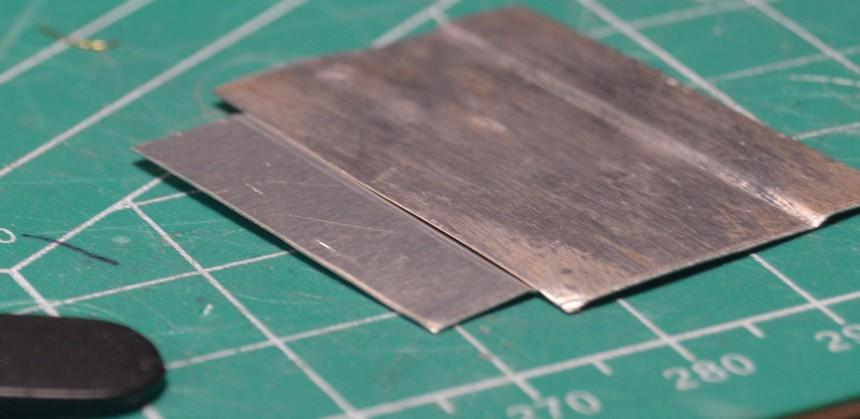
I made this bender on a lathe. It does a decent job of bending 1/16" and 3/32" tubing, without kinking.. I made this drill from a battery powered eraser. I needed to use a couple of layers of heat shrink, so the metal clip that holds the eraser can grasp the carbide bits. This is perfect for these bits, because it's high speed, and ultra-low torque. If the bit grabs, the motor stops turning--tiny bits, too. I used it to drill through the thin aluminum of the wing of my Supermod, quickly and easily! Sometimes, I have to reset the bit in the clip, to eliminate the wobble, before drilling. Finally, I superglued brass strips to this sheet metal bender, with just enough offset to clear the sheet I was messing around with. Once the sheet was aligned, I gave it a squeeze, and ended up with smooth lap joints. It'll be mostly, and especially useful for dragster body side panels.
-
Nice! That'll come in all kinds of handy! Mine's all in an old Evergreen bin.
-
Masking tape experiment test
Straightliner59 replied to 89AKurt's topic in Model Building Questions and Answers
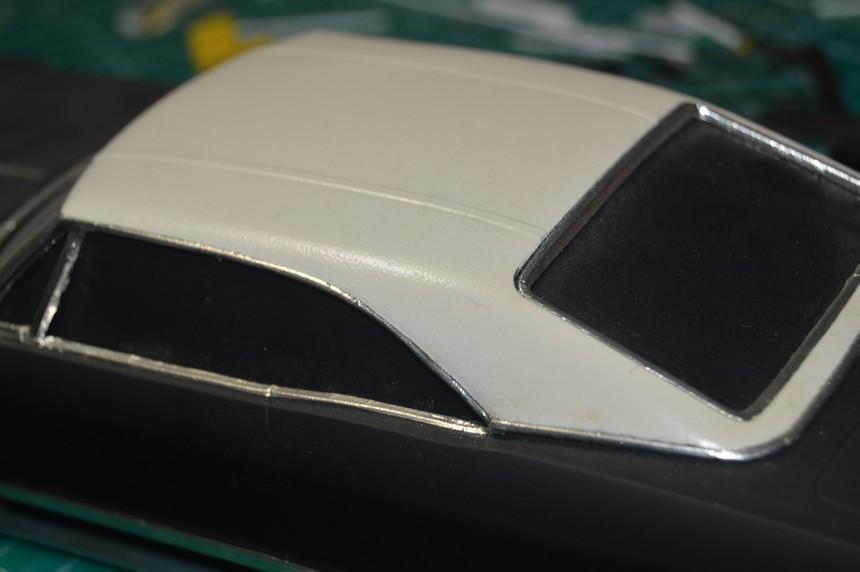
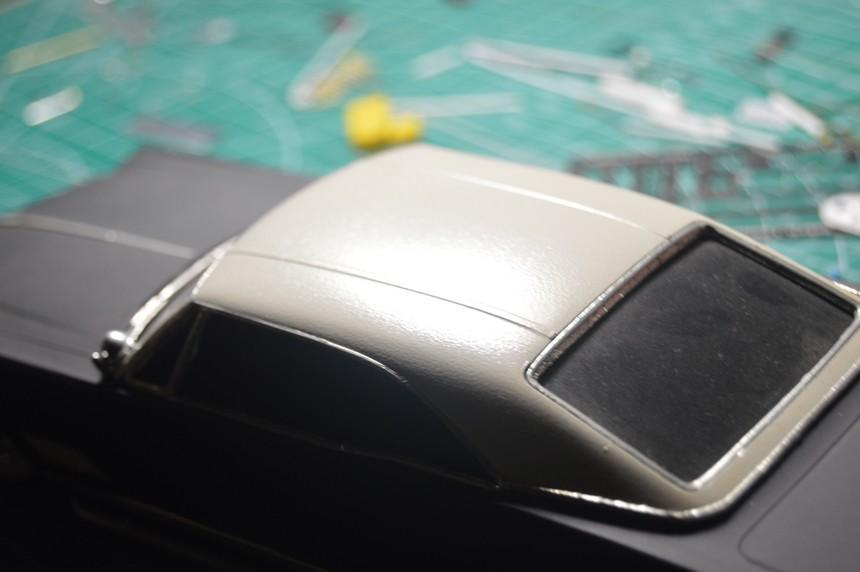
Here's the one I did, with light "overspray". The rest of it's down and dirty, as I really just wanted to try it out. Usually, I would have taped off the trim, and shaped the seams. This is a slammer I did using the Hasegawa Buick. I used a spray bomb, to do this one. I would guess that even finer grain could be achieved, experimenting with an airbrush.
- 20 replies
-
- 1
-

-
- masking tape
- test
- (and 1 more)
-
Super Gas '77 Vega--Completed! (11/12)
Straightliner59 replied to Straightliner59's topic in WIP: Drag Racing Models
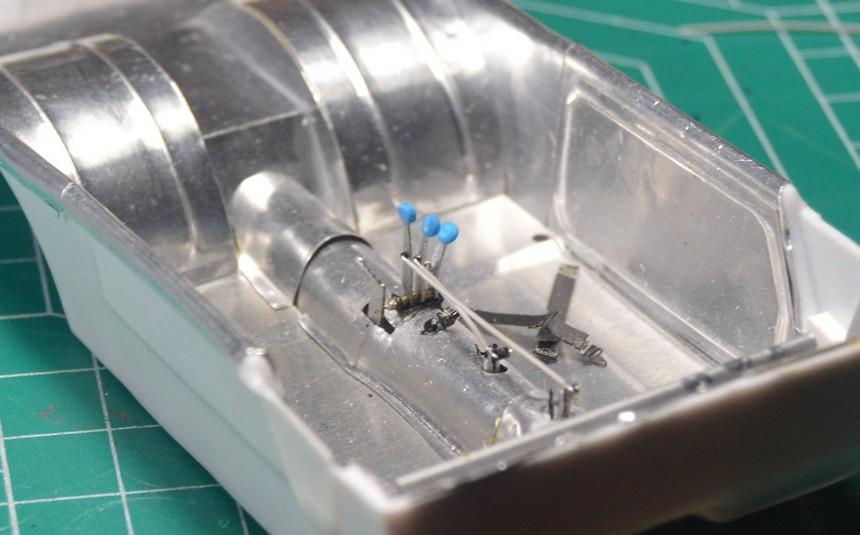
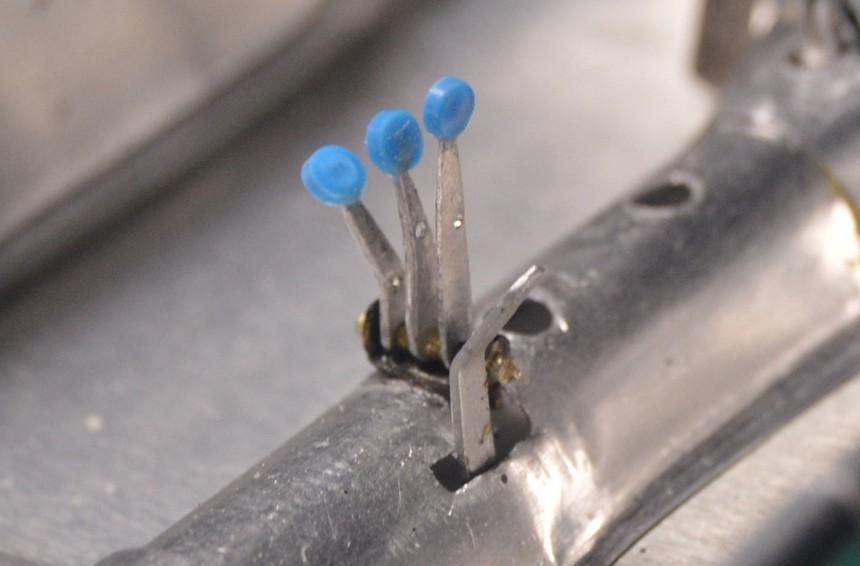
I made the knobs for the Lenco shifters from sprue from an '80s Monogram Pro Stock kit. I sliced thin discs and made a slit on the side of each, to fit over the handle(s). I may use the red roll cage padding, but I have black, as well. Work is progressing! Comments are always welcomed. Thanks for looking!
-
Masking tape experiment test
Straightliner59 replied to 89AKurt's topic in Model Building Questions and Answers
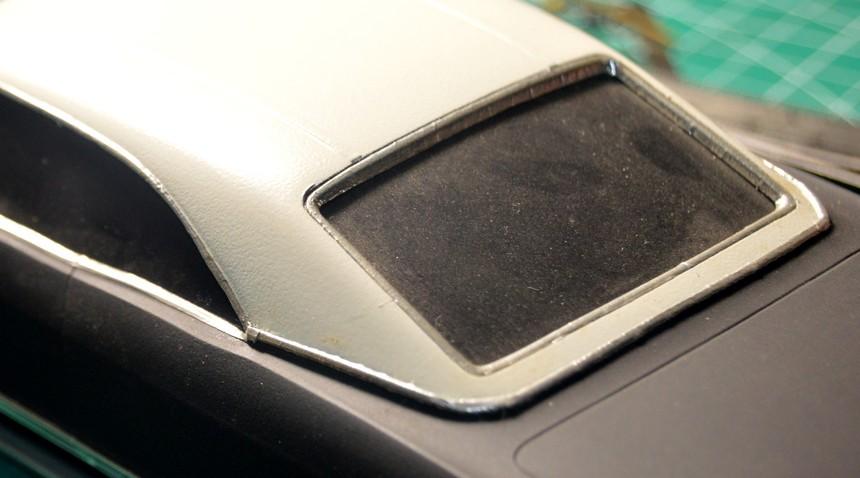
I'd say the way to go is to tape off the body and dust paint on the roof, after applying a color coat. It's the best method I've seen or tried. Simple, too.- 20 replies
-
- 3
-
-
- masking tape
- test
- (and 1 more)
-
Super Gas '77 Vega--Completed! (11/12)
Straightliner59 replied to Straightliner59's topic in WIP: Drag Racing Models
I don't generally use stuff that's in a "finished" state. I was, however, intrigued enough by the Eduard safety harness sets to order a couple of sets of them. I like that the metal is soft enough to be easily cut from the fret with a #11 X-Acto blade. Most frequently, I use lead foil (actually foil from wine bottles, which is no longer lead, but has most of the same properties as Pb) for the belts, because I really don't think 1/25 scale belts need any texture. I digress. The belts that Eduard provides are photoetched with a textured pattern that I'd call heavy, but not annoyingly-so. The sets go together fairly easily, and they look good. Most of Eduard's harness sets are Sabelt. Obviously, in drag racing, Simpson is pretty dominantly used. So, I printed some Simpson decals (heads-up: On Simpson's website, their logo is in .svg format, which is perfect for making decals!) to place over the Sabelt markings. Speaking of markings, I also like the stitching that's printed on the belts. It's nice touch. I think it will look better, toned down, a tad, with some grey/tan pastel. I'll do a bit of touchup, and cover the visible portions of the Sabelt tags with the same paint, while I'm at it. Anyway, here are a couple of shots of Eduard's harness set, before and after...Thanks for looking!
-
Project 1/16th AA/FA AND HERE IT IS!
Straightliner59 replied to Ian McLaren's topic in WIP: Drag Racing Models
The 'chute packs look great! -
They're awesome! I just discovered them in the last couple of years. Everything you said is true, about them, and, they can be had much less expensively! I bought 100 of them for about $12, and they came with a handle. Without the handle they're about $10!
- 39,080 replies
-
- 1
-
-
- johan
- glue bombs
- (and 1 more)
-
Super Gas '77 Vega--Completed! (11/12)
Straightliner59 replied to Straightliner59's topic in WIP: Drag Racing Models
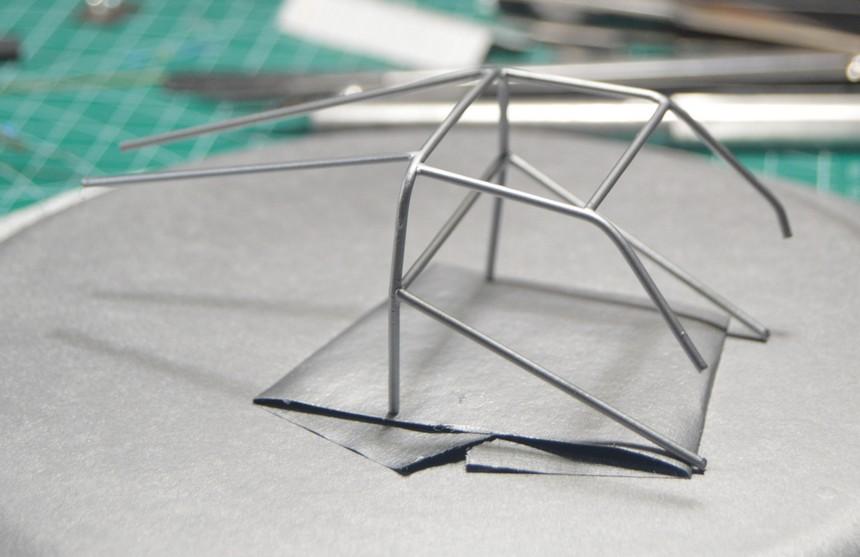
More progress...I somehow managed to build a .063" styrene rod roll cage that was sturdy enough to go into out of the interior, for fitting, etc. I got the door bars made and installed to it, as well. Next, I'll finish up the Lenco. The dash will at least be partially painted the same Mulsanne Blue as the car's exterior. There's still a fair amount of work, to go, here, but I am very happy with today's progress! Thanks for looking!
-
Super Gas '77 Vega--Completed! (11/12)
Straightliner59 replied to Straightliner59's topic in WIP: Drag Racing Models
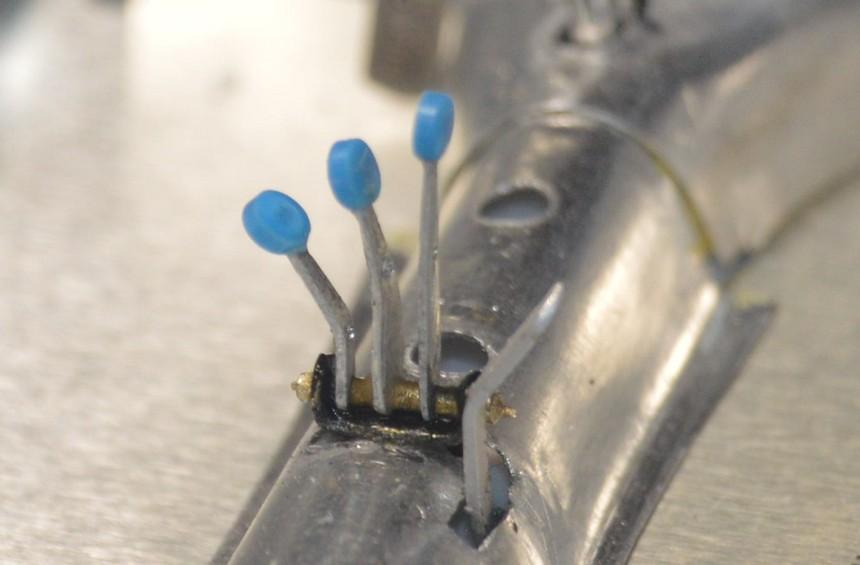
On to the interior... Boy, that Lenco shifter cluster was fun! Now for the knobs. Next, I'll finish the shift towers. I'll wrap up the Lenco with the linkages from the towers to the shifters. Your comments, critiques and questions are always welcomed. Thanks for looking!
-
Scratch build wheels & tires?
Straightliner59 replied to youngtiger1's topic in Model Building Questions and Answers
Go to your regular search engine, and type "site:modelcarsmag.com" (without the quotes) then enter the search terms. That'll work much better for you. Ace Garage Guy gets the credit for that method. In fact, it's in the thread directly above. -
Project 1/16th AA/FA AND HERE IT IS!
Straightliner59 replied to Ian McLaren's topic in WIP: Drag Racing Models
It's coming along very nicely, Ian! Great progress, too! -
Super Gas '77 Vega--Completed! (11/12)
Straightliner59 replied to Straightliner59's topic in WIP: Drag Racing Models
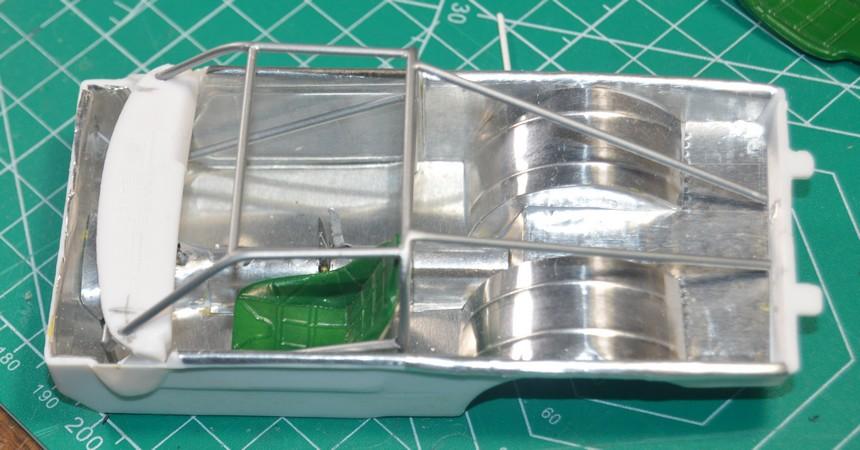
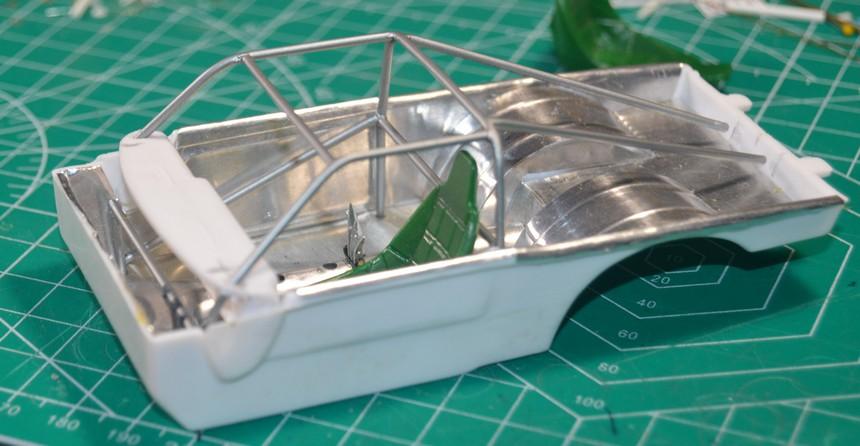
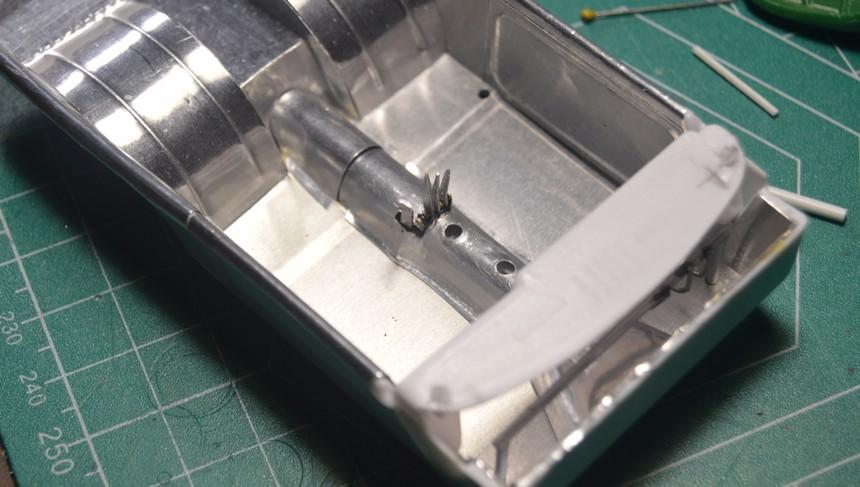
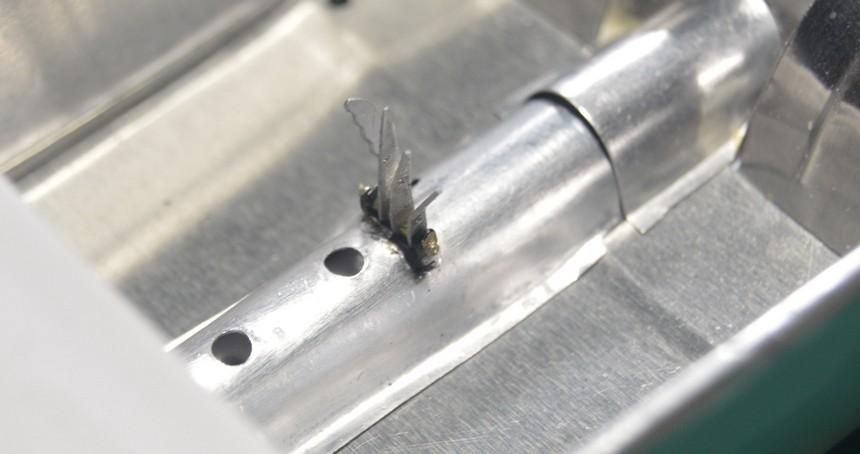
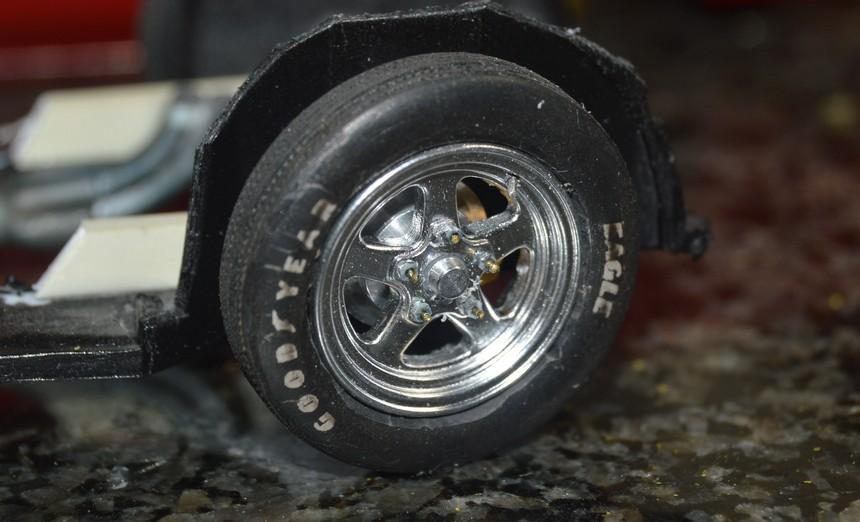
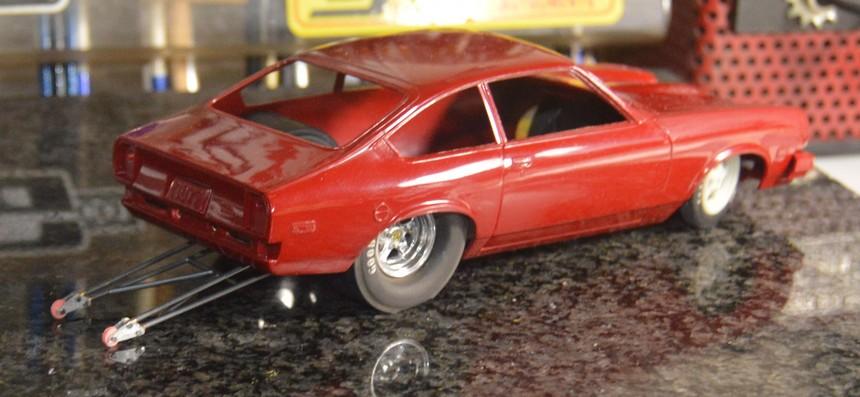
I got the front wheels finished and mounted. I turned the dust caps from an aluminum knitting needle from Dollar Tree. I also formed some aluminum over a wood buck, to represent the fuel cell, but, it'll be barely visible, if at all. One shot shows the underside details, obviously minimal, and limited to what might be seen from a distance, and below the body line. Comments are always welcomed. Thanks for looking!
-
Super Gas '77 Vega--Completed! (11/12)
Straightliner59 replied to Straightliner59's topic in WIP: Drag Racing Models
Thank you, Tomas! Originally, I wanted to use one of the scoops from the Monogram 2nd generation Glidden Pro Stockers. Research led me to this one, as the rounded ones were a couple of years later. I may, however, push the nose of it down, a tad, because that was beginning to be a thing, in '84. Thanks again for your kind words. I hope you'll follow the project, as it comes along. Thanks, Mike. You know me, by now--I will try just about anything, to see if it'll work! I was looking for some opaque plastic rod, to purchase, when I noticed the coat hanger in the closet. I'll be getting to work on the rest of the interior, soon. I just about have the chassis wrapped! I'm trying to figure out how I'm going to do the cage. I'm going to paint it as bare metal, but, I think it'll have to be installed, in sections. That's the next major quandary.? -
Super Gas '77 Vega--Completed! (11/12)
Straightliner59 replied to Straightliner59's topic in WIP: Drag Racing Models
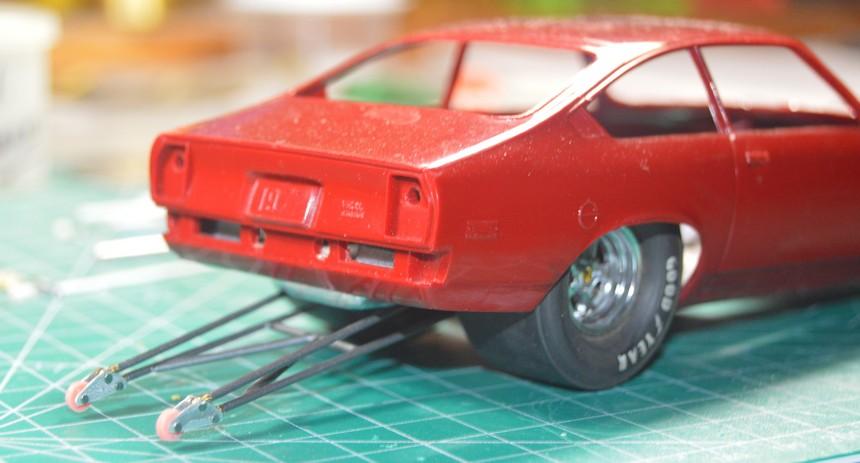
I got the front wheels painted, and the brakes done. Next up will be the lugs/nuts and valve stems. I couldn't loosen the wheelie bars, so I had to rotate the slicks, and put the flat spots up! ? Hey, sometimes ya' gotta do what ya' gotta do... I have often avoided using my airbrush, because I hate even messing with it. That said, Alclad's chrome really is good stuff, Maynard! As I mentioned before, I just shot it over Walmart's Color Place Gloss Black spray. It looks great! As always your comments, questions, etc. are welcomed. Thanks for looking!
-
Prewired Distributors Sources in Canada
Straightliner59 replied to impcon's topic in Model Building Questions and Answers
I like it, because, once the initial expenditures are made, I know that, any time I need a distributor/magneto cap, I can make it! And, it's already "drilled" as well! I've been using that technique for over thirty years. -
I really like those kits. I have several of them, including the Bugatti, Auto Union, One of the 917s, a Tyrell, and the Surtees. I'd like to get the 935. I found the Surtees on Ebay, after I moved back to Colorado. It was in Delano, where I drove through, every day on my way to work, the last three years I lived in Minnesota! Anyway, they're very nice kits!
-
Super Gas '77 Vega--Completed! (11/12)
Straightliner59 replied to Straightliner59's topic in WIP: Drag Racing Models
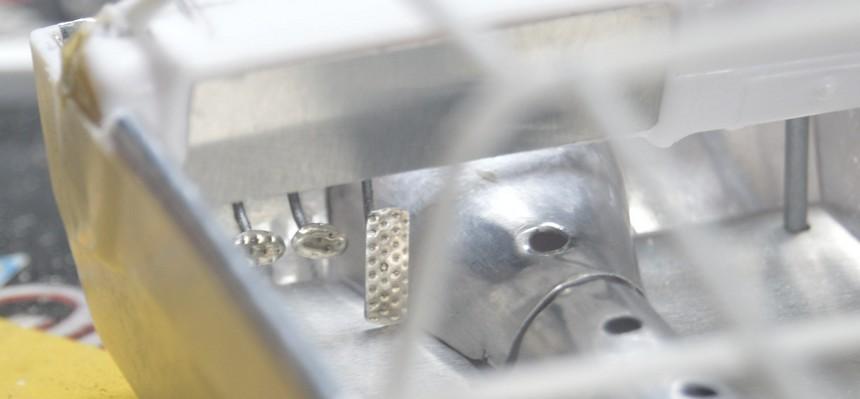
I got a few more things done. I built the bottom tubes at the front of the cage, and mounted the pedals to the crossbar. I got the door bars cut, but they still need to be drilled, so they can be pinned to the cage. I finished the wheelie bars, but, now, I need to figure out what's cause them to be so low that they are holding (slightly) the rear of the car up. Other than that, I think they look pretty nice! I painted them with Testors Metalizer Titanium--which necessitated a moment of silence for my penultimate can of that fine substance. Your critiques, questions and comments are always welcome. Thanks for looking!