Straightliner59
-
Posts
5,817 -
Joined
-
Last visited
Content Type
Profiles
Forums
Events
Gallery
Everything posted by Straightliner59
-

Prewired Distributors Sources in Canada
Straightliner59 replied to impcon's topic in Model Building Questions and Answers
If you can find the supplies, in Canada, try this. You'll never have to buy them, again!
-
That will be interesting. Looking forward to seeing, when the time comes!
-
Super Gas '77 Vega--Completed! (11/12)
Straightliner59 replied to Straightliner59's topic in WIP: Drag Racing Models
I threw together what there is of the headers, this morning, and got them mounted. I bent them from .080" styrene rod I got in an assortment, on Ebay. A Dremel was used to grind away some material from the bottom of the chassis, to add clearance for the headers. I'm now not sure that was necessary. I used a Tamiya weathering set, to add the color.
-
This is really cool, Phil! Builds that are inspired by real cars, without actually being replicas are some of my favorite projects. Excellent work!
-
Super Gas '77 Vega--Completed! (11/12)
Straightliner59 replied to Straightliner59's topic in WIP: Drag Racing Models
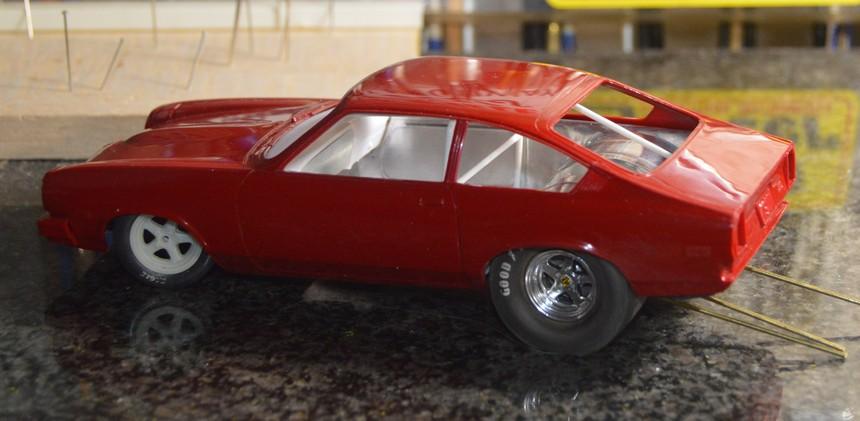
They're a bit more stable, now...
-
Oh, yes! With Vista! I was unfortunate enough to have bought a computer with that on it. Wow. What a memory hog! I bought a computer a little over five years ago with XP, just so I could run programs I use for modeling--CAD and making decal art--that don't run on 64 bit systems. Anyway, I think XP was MS's best operating system.
-
Question for the Drag guys
Straightliner59 replied to JerseeJerry55's topic in WIP: Drag Racing Models
Also, be sure to read this: -
Question for the Drag guys
Straightliner59 replied to JerseeJerry55's topic in WIP: Drag Racing Models
The answers to most of your questions are highly dependent on things like what era and type of race car (ie. what class? street/strip or race car only?). The roll cage or roll bar style will also vary based on the previously mentioned variables. I haven't studied any of the NASCAR cages n quite a while, but, one might work in a mid-'80s-on car, if you cut away the door bars and replace them with a diagonal bar. Whether you're building a replica, or something from your imagination, there can never be enough said for research! Fortunately, that's much easier today than it was in those aforementioned 1980s.? There are a lot of folks who are willing to help, but we'll need something a little more specific, to be of much help. -
Super Gas '77 Vega--Completed! (11/12)
Straightliner59 replied to Straightliner59's topic in WIP: Drag Racing Models
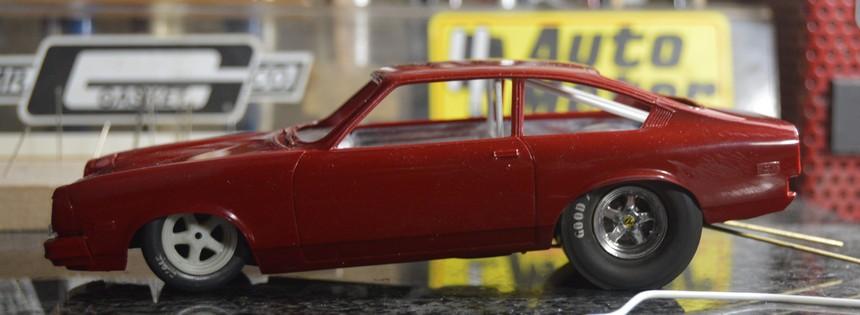
Here's how the wheelie bars look, crudely placed into position. The body is lower than it will be, in these photos, because the tub isn't in it. Still a fair amount of work to be done to them, but, I wanted to see!
-
Favorite Obscure or Discovered Music Album
Straightliner59 replied to afx's topic in The Off-Topic Lounge
Because Phil Mogg recently had a heart attack that, unfortunately, may end his career. This tour was the first I saw this lineup (except Simon Wright was on drums, rather than Andy Parker). I waited 17 years, and had given up hope of ever seeing UFO with Schenker, when I chanced to see a listing in the paper, for weekend shows. One listing said "UFO, Buffalo Rose, Golden". My first thought was "I wonder who Phil's put together, now, as UFO?" I decided to walk down to the free weekly paper box. There, I found the ad touting "UFO! Original lineup!" It's not--It's the classic lineup. The ad featured this album cover art, and all the pertinent information. I was out in Golden, the next night! -
Project 1/16th AA/FA AND HERE IT IS!
Straightliner59 replied to Ian McLaren's topic in WIP: Drag Racing Models
It's looking really bitchin', Ian! That's one sweet hot rod! -
Simulated Metal Paint
Straightliner59 replied to TransAmMike's topic in Model Building Questions and Answers
I think Createx is one. -
Super Gas '77 Vega--Completed! (11/12)
Straightliner59 replied to Straightliner59's topic in WIP: Drag Racing Models
Thank you, kindly, Ray. Except the car's going to be Mulsanne Blue.? I'm thinking purple and teal stripes/bands, outlined in magenta, down the sides, and maybe the hood and roof. I'm playing around with a couple of designs. Subject to change! Thanks, Art! That stuff was a blast! Anything to keep me from having to do things like...paint!? -
Super Gas '77 Vega--Completed! (11/12)
Straightliner59 replied to Straightliner59's topic in WIP: Drag Racing Models
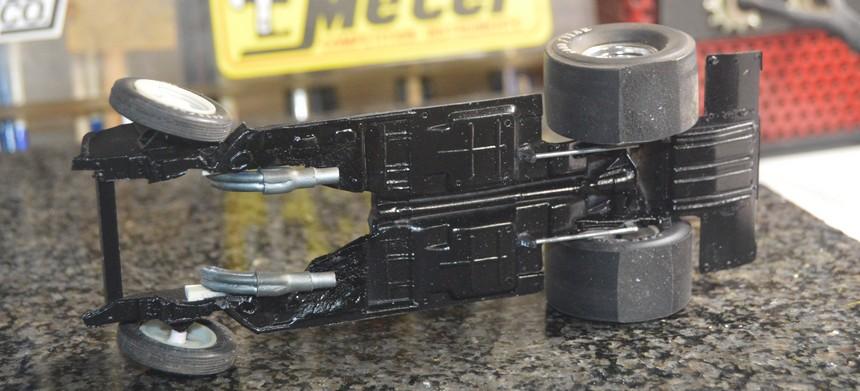
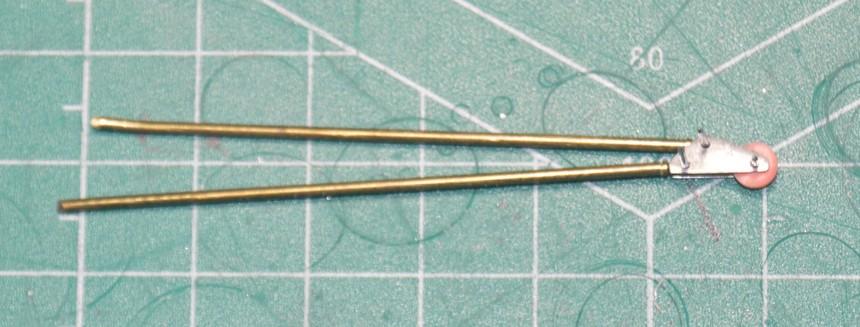
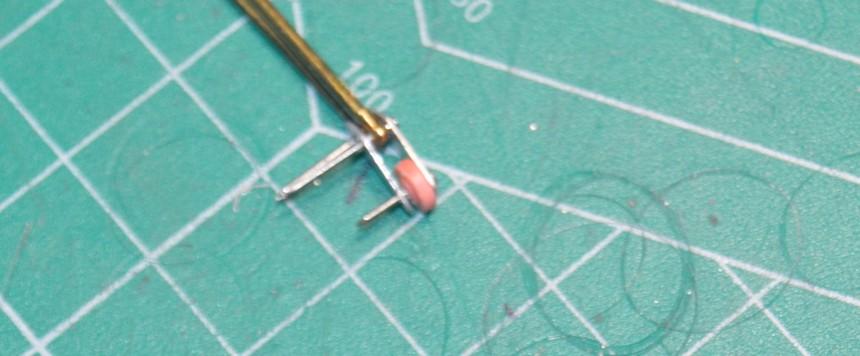
Did some work on the wheelie bars. The struts are .047" craft wire, straightened, then bored .035" to accept HO scale handrail stanchions. The side plates are cut from two sections of mashed aluminum tubing, drilled, then pinned together for finish shaping. The caster is turned from a plastic coat hanger. I thought the color and sheen looked right. They're pinned together with .023" nails, currently. Questions, comments and critiques are always welcomed. Thanks for looking!
-
Simulated Metal Paint
Straightliner59 replied to TransAmMike's topic in Model Building Questions and Answers
Agreed! Those are excellent! -
Engine-Turning Aluminum
Straightliner59 replied to Straightliner59's topic in Tips, Tricks, and Tutorials
I recall seeing your setup in the magazine. It seems to work pretty well! you're right about the foil tape. A roll will last forever, and, it's super-versatile! I just got a new assortment of Micro Mesh sheets, so, I can use the old ones, freely! -
Super Gas '77 Vega--Completed! (11/12)
Straightliner59 replied to Straightliner59's topic in WIP: Drag Racing Models
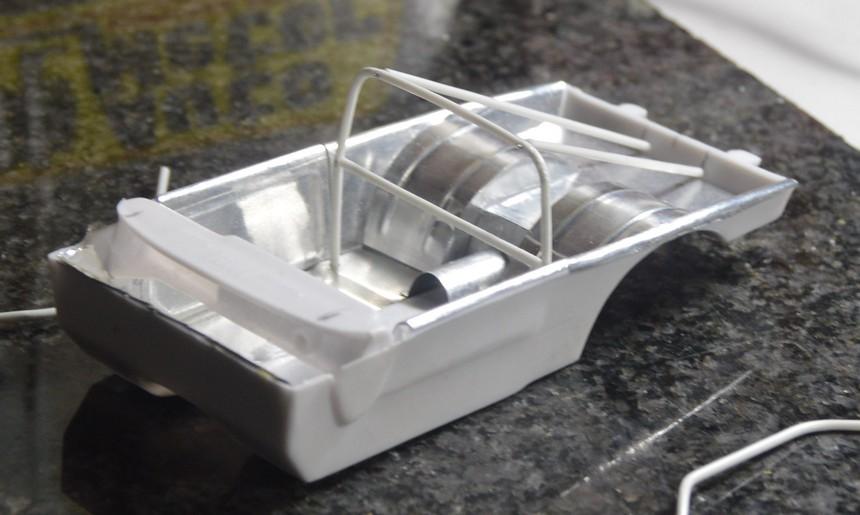
I got a few photos of the roll cage and interior, sans body. I need to add the door bars and make the lower main bars, but, I'm pretty happy with what's there!
-
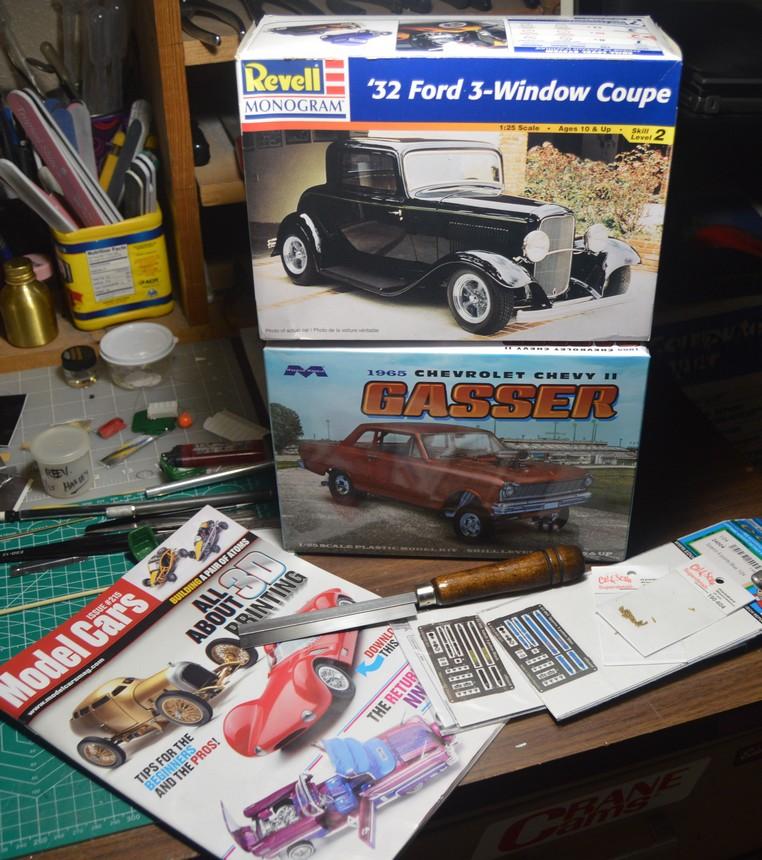
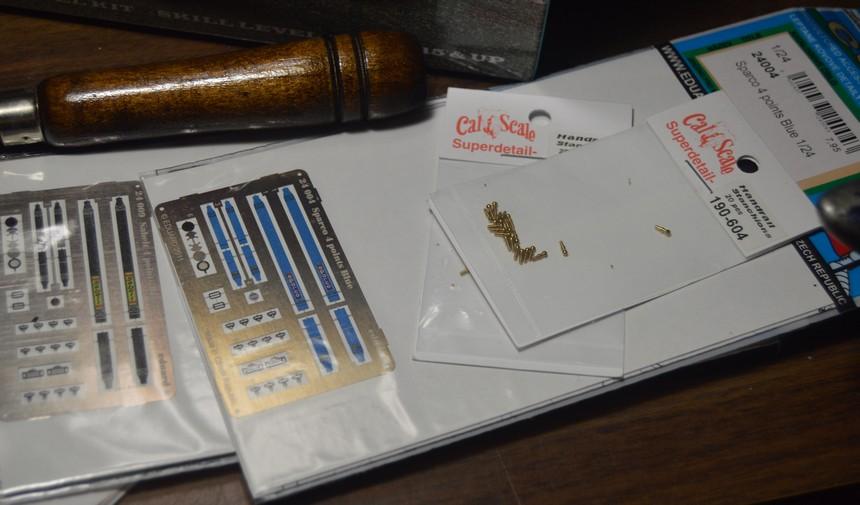
Some things that have showed up, here, over the last few days. Got the '32 in an auction, for pretty cheap. Good, since I didn't have one, anymore! I bought an Ultra-Thin Kerf Zona saw. Although I generally make my own, I was intrigued by the Eduard harness sets, so, I picked up a couple of them. They look pretty nice! Finally, I got 40 HO handrail stanchions. I use them for rod ends/heim joints. They look great, and are quite cost-effective!
-
Super Gas '77 Vega--Completed! (11/12)
Straightliner59 replied to Straightliner59's topic in WIP: Drag Racing Models
Thanks, Ian. I've been digging through all my magazines from '84 to '86, or so. I found some ads from Alston, etc., that illustrated the cages, pretty nicely. I should get back on the chassis and finish it and the front wheels. I really wanted to get the cage figured out, though. I still have a few tubes to install, but, it's figured out! I have the brackets for the wheelie bars and wheels drawn and drilled, but haven't finished shaping them, yet. I am looking forward to trying the belts. I usually make my own, but thought, "What the heck?" They look nice, for sure! I'm looking at a set of their 1/24 WWII-era belts for an early dragster, next time I build one. I think I might be getting an itch to go back to work on my Nostalgia Fueler, once the Vega's done! -
Super Gas '77 Vega--Completed! (11/12)
Straightliner59 replied to Straightliner59's topic in WIP: Drag Racing Models
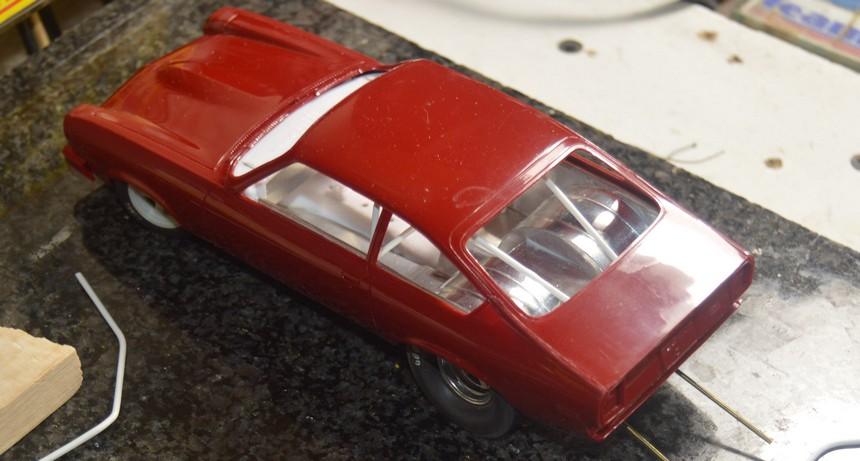
The cage is roughed-in! In order to make my life easier, I drilled holes in the dash that I can feed the cage "tubing" through, once it's initially bent. I fish-mouthed, and bored one end of the rod for a pin that inserts into the main hoop. Now, I can secure both ends of the cage member(s), while fine-tuning their fit. Finally, I will cut and fit the header bar. The lower front "tubes" will be built separately, along with the cross tube, which will hang the pedals. No floor plates are required, because the cage is welded to the chassis, rather than bolted (Hey, it's curbside, so, if I say so!?). Next, I'll get the door bars cut and pinned in place. I welcome any comments you may have. Thanks...again, for looking!
-
Nice work, Art. Looking forward to future posts!
-
Super Gas '77 Vega--Completed! (11/12)
Straightliner59 replied to Straightliner59's topic in WIP: Drag Racing Models
I have the main cage loop built. I think I have a nice cheat figured out for the front lower bars of the cage and the halo section that should make it a pretty simple installation; key word "should".? The cage is .060" styrene rod--it's not quite in its place, in the photos. Once it's sorted, I can finish installing the tunnel, and the bits for the shifters. Then, it'll be on to the seats and dash, and a scratched tach for the dash. I've started kicking around ideas for an appropriately-styled (tacky?) '80s paint scheme. Questions, critiques and comments are always welcomed. Thanks for looking!
-
Project 1/16th AA/FA AND HERE IT IS!
Straightliner59 replied to Ian McLaren's topic in WIP: Drag Racing Models
I think you'll be happy with them, when it's over! Looking great, so far. -
Wrinkle Wall Rear Slicks
Straightliner59 replied to 69NovaYenko's topic in Model Building Questions and Answers
Indeed! Just mirror the wrinkles, and that will get you there. And, the reference is right there!