Straightliner59
-
Posts
5,803 -
Joined
-
Last visited
Content Type
Profiles
Forums
Events
Gallery
Everything posted by Straightliner59
-
 That always blows! Perseverance will pay off, in the end.
 -
It really does. I've finally started using both my machines, more often, over the last few years. Mostly just for basic stuff, like this.
-
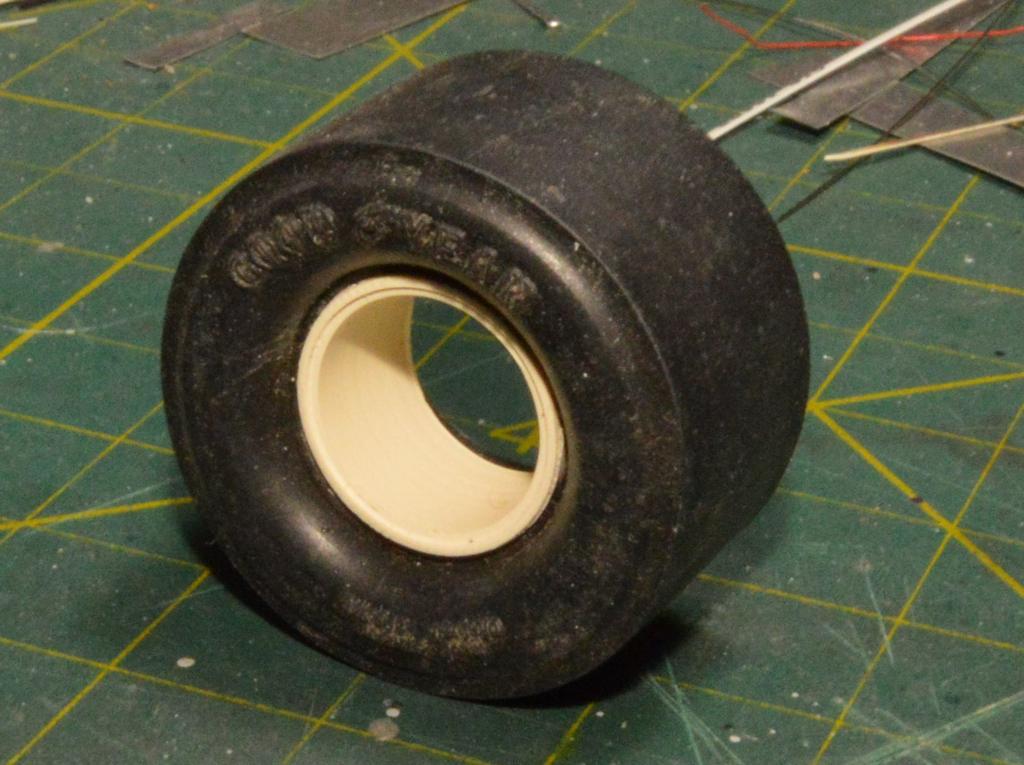
I didn't take photos of the process, but I turned this wheel inner on my Sherline, from 1/2" PVC. It's a great size, to start with! It only takes a little from the outside, and boring the inside (with a bar, not a bit), and a little detail on the lip. I'll be using this, a lot, now, as I always have a difficult time finding proper ones in my stash.

-
I have just got a new computer, online, since the crash of my prior unit. I see I have a lot of catching up, to do! Your fuel system pieces are utterly amazing! Well, all your work is, but small, highly detailed parts really turn my crank. Excellent progress, Tim!
-
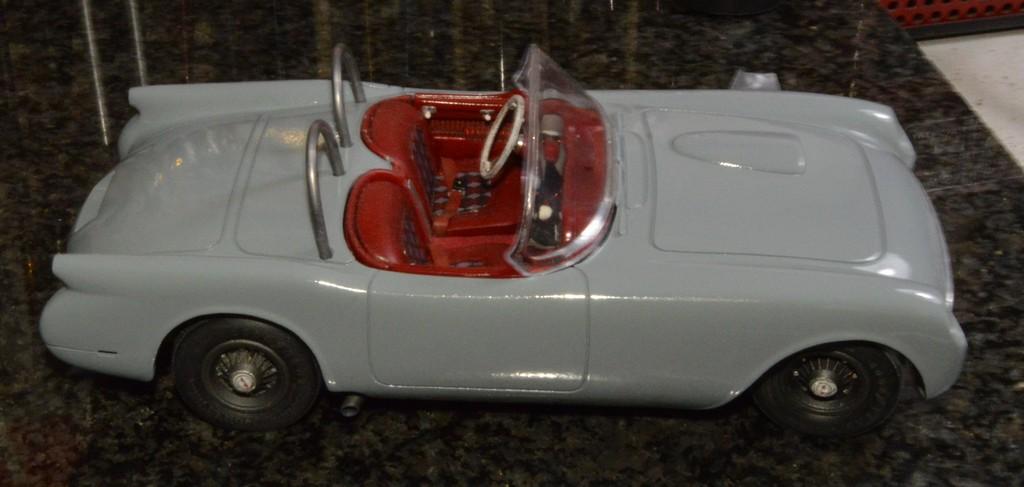
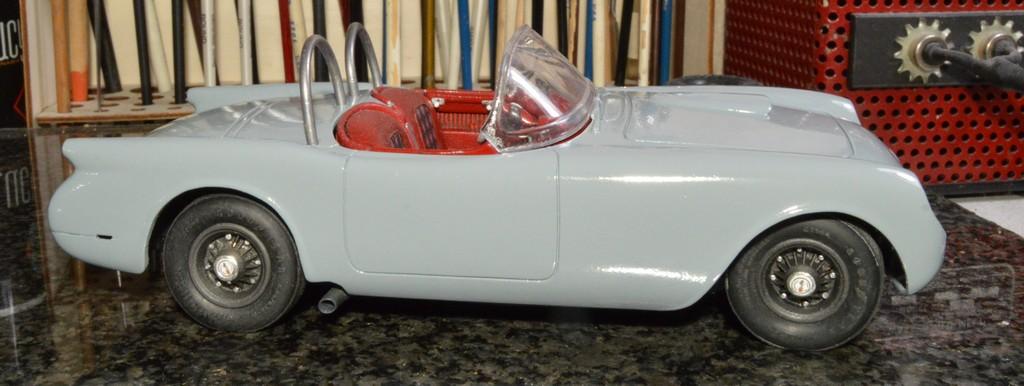
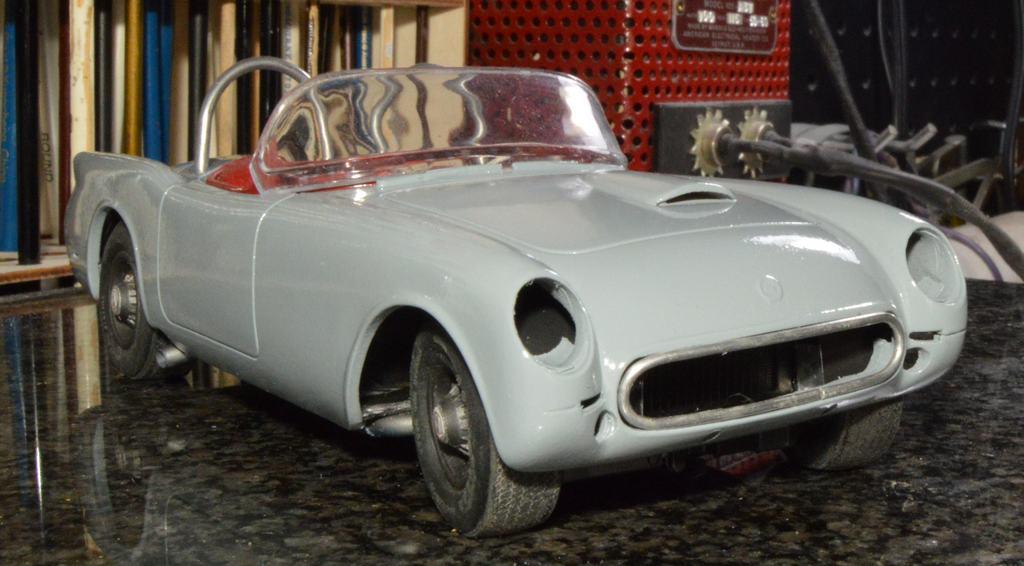
I had some trouble with the Humbrol paint I was using, and I wasn't happy with the results, so...I had a can of Rustoleum Winter Grey (I hate Rustoleum--it takes way too long to dry), so I shot it with that. Still, some work to do, but I like the color. Now, the waiting! Thanks for looking!
-
Flocking/ embossing powder not covering
Straightliner59 replied to Hondamatic's topic in Model Building Questions and Answers
Yes. Enamels work best! -
Flocking/ embossing powder not covering
Straightliner59 replied to Hondamatic's topic in Model Building Questions and Answers
I have always used a similarly-colored paint, for adhesive. It's worked, well. -
'65 Impala Stocker
Straightliner59 replied to Straightliner59's topic in Stock Cars (NASCAR, Super Stock, Late Model, etc.)
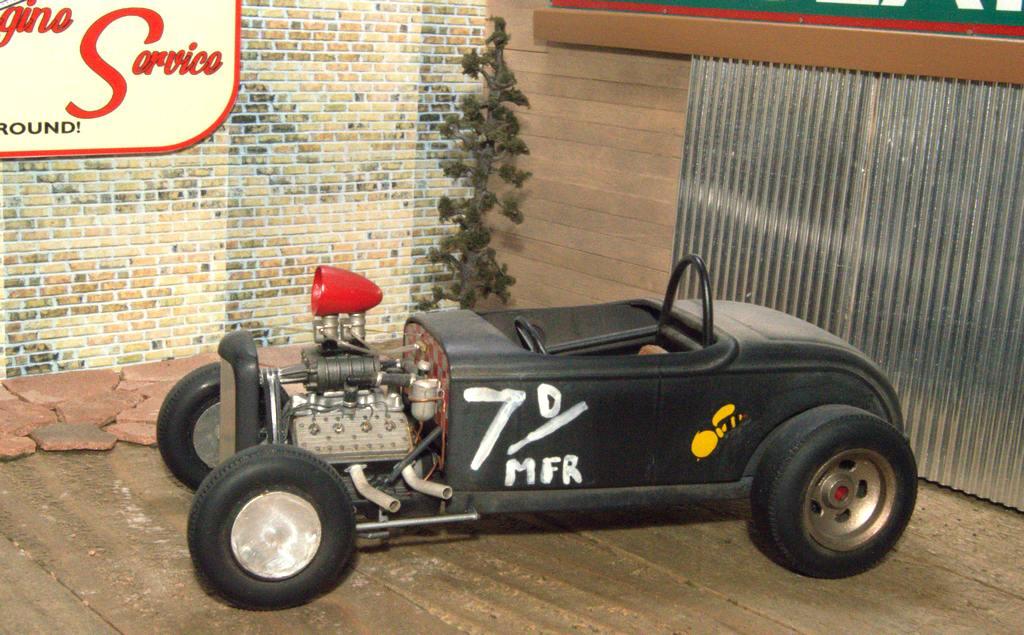
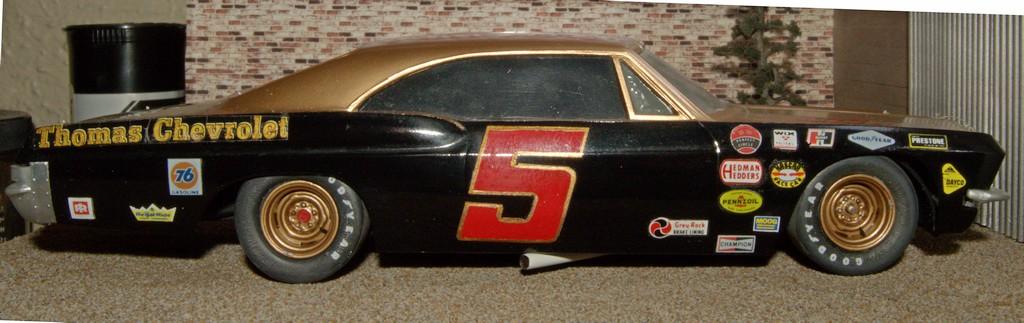
Thank you, Mark! I was pretty impressed with the difference the tires made. Heck, I didn't even have to repaint the wheels! I did apply a wash of Vallejo Oiled Earth, to them. Smokey's cars always looked cool. And he was a "bit" of a rebel, for sure, and I have always admired those folks--Garlits, Muldowney, Grump--those who pushed the rules. You may have noticed that I borrowed from his "Best damn garage in town", for Conrad's Engine Service, too. I appreciate your kind words! Thank you! Thanks, Chris! Can't go wrong with Smokey's colors! Thank you, sir! -
1975 Monza--Completed 12/25/2018
Straightliner59 replied to Straightliner59's topic in WIP: Model Cars
Thanks, again. I really wanted to step up my lights game, with this. Those are something I had never spent a lot of time with. I think they worked out, pretty well. I really enjoy doing curbside stuff, because I feel like I have to pay more attention to what is there, and to make sure there's plenty of visual interest, to make up for the lack of engine and chassis details. Promos are great starting points! -
I liked all of them. Vegas, too! Thanks!
-
Thank you, my friend! Green means go, right?! 😀
-
Thanks, Ron!
-
'65 Impala Stocker
Straightliner59 replied to Straightliner59's topic in Stock Cars (NASCAR, Super Stock, Late Model, etc.)
I pulled this thing out, again, and changed its tires. I switched to a set of '80s-'90s AMT NASCAR tires. These required new inner wheel sleeves. 1/2" PVC to the rescue! Since this is a slammer, I simply turned the outside diameter, until the tube fit snugly in the tires, and cut it to length. I didn't even bother painting them, because they're difficult to see. That said, with the lathe, it would be simple to turn out even a set for a fully-detailed build, using the PVC. I sanded one side of each tire, to remove the markings. Lettering was replaced with some of Fireball's decals. I can't say, enough, how excellent his tire markings are! As JC originally suggested, the bigger tires are a help, in filling the wheelwells, but nothing short of major surgery could fix the rear wheel openings! I wanted the rear to sit a tad lower, but, ended up with more than one tad. Oh, well! Back in the case. Thanks for looking!
-
Thank you, sir!
-
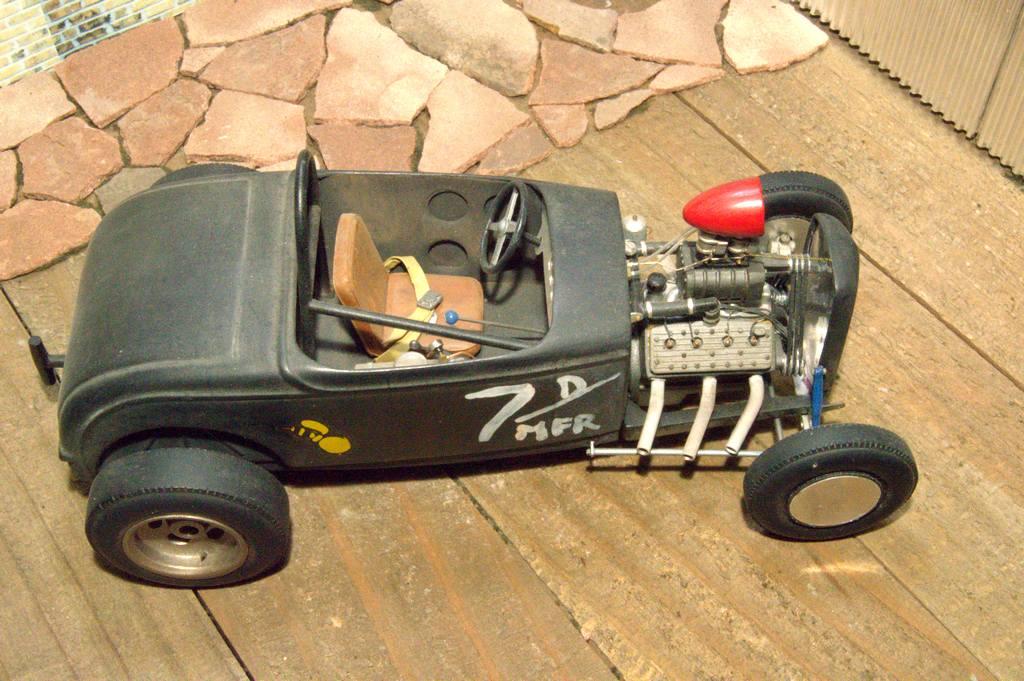
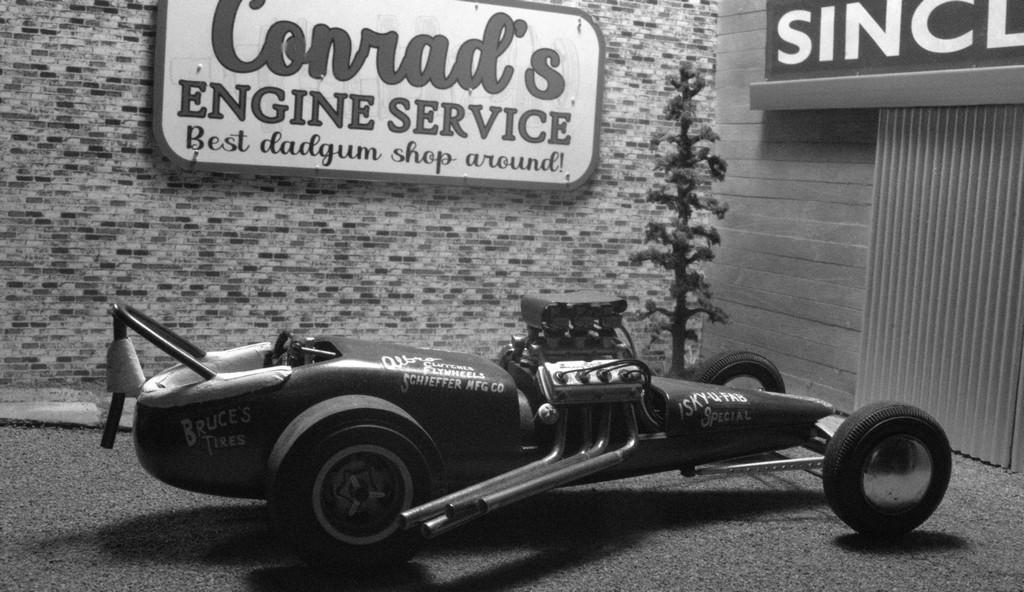
Thanks, Mark. That's the old Monogram Slingshot dragster. I doctored it up, a little!
-
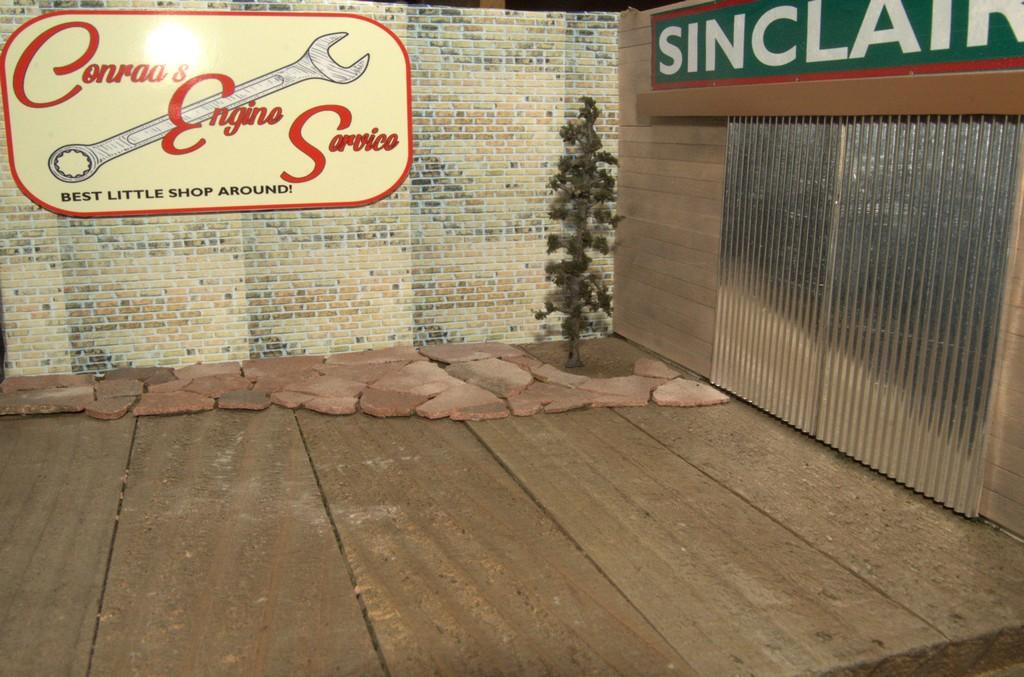
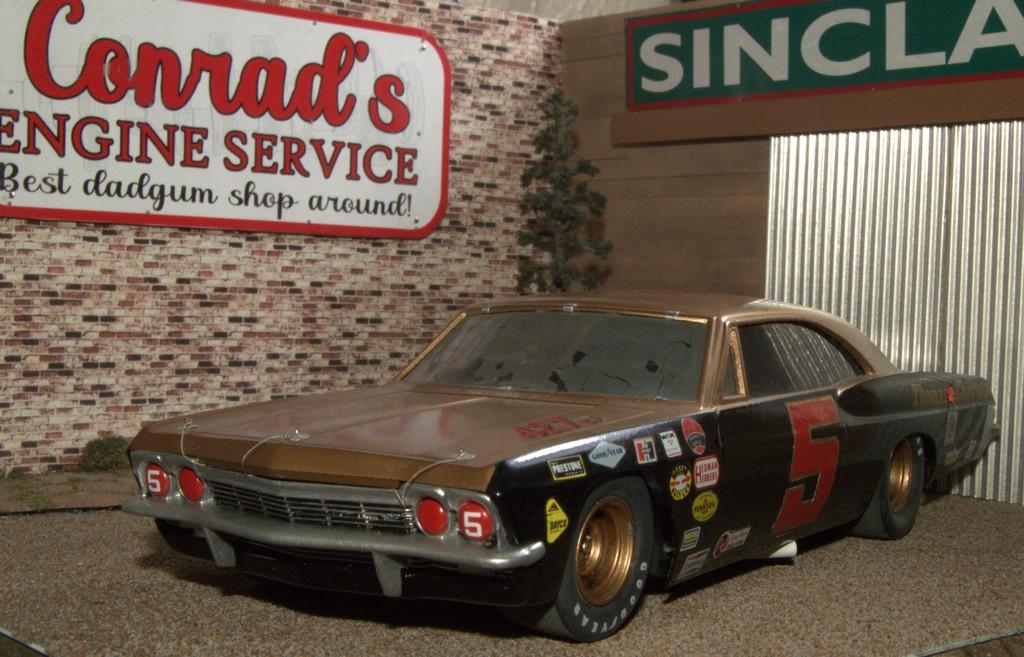
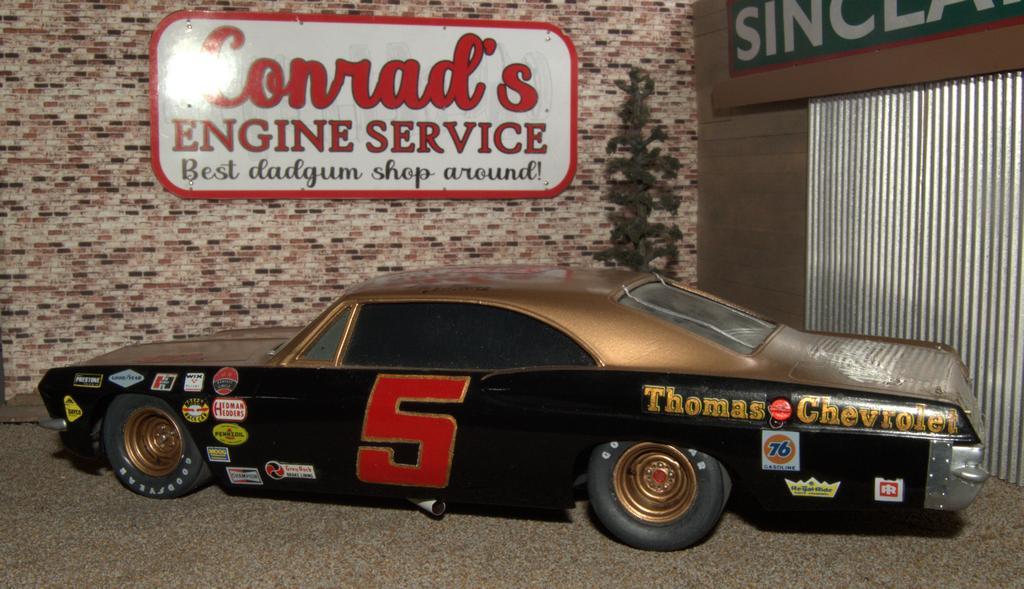
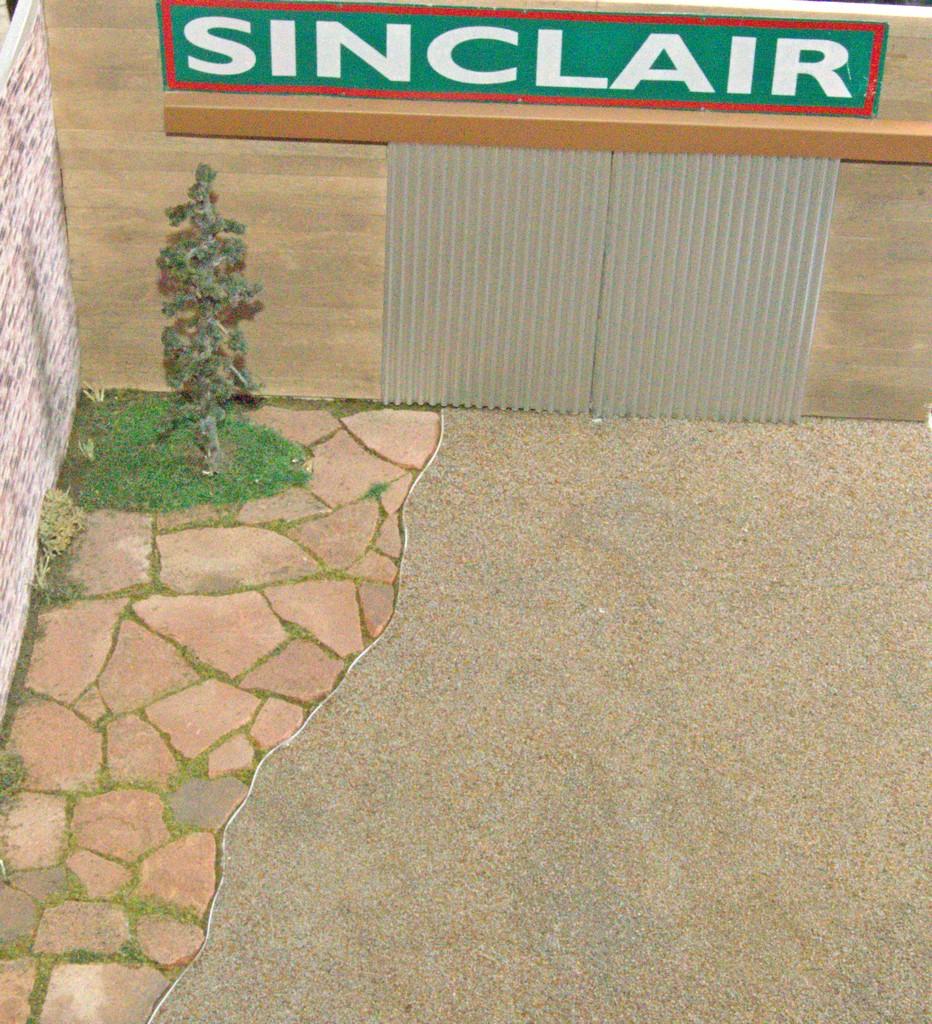
I printed new bricks. I wasn't nuts about the repeating pattern. It was much too pronounced. I also made a new sign, and located it centrally, on the wall. I mixed two colors of railroad ballast, in order to attempt an exposed-aggregate concrete, for the driveway. I should have replicated some control joints. Oh, well. I still need to backfill some areas of the flagstone, and along the edging, on the drive-side. Then, I will do a little weathering, overall. In the meantime, no telling who might show up at this garage! Thanks for looking!
-
No doubt! That's how model railroad shows are done--there's a set of standards, so that modules can be connected.
-
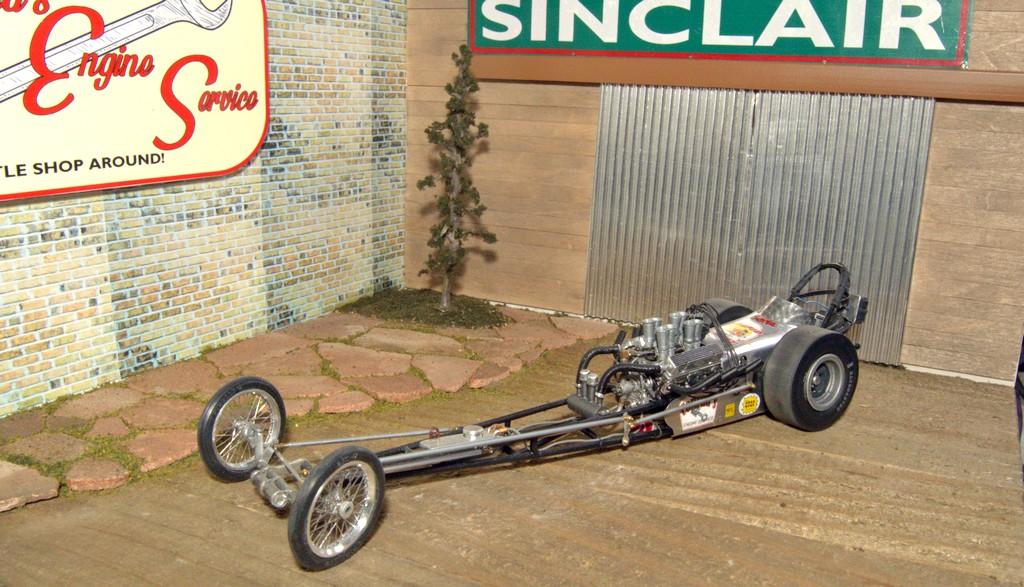
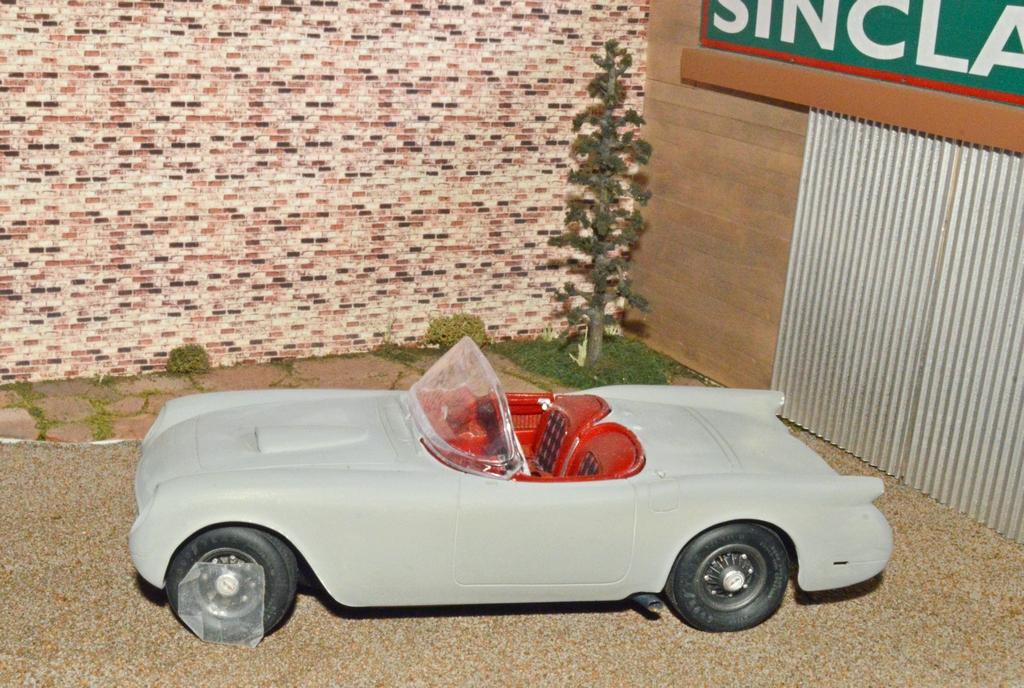
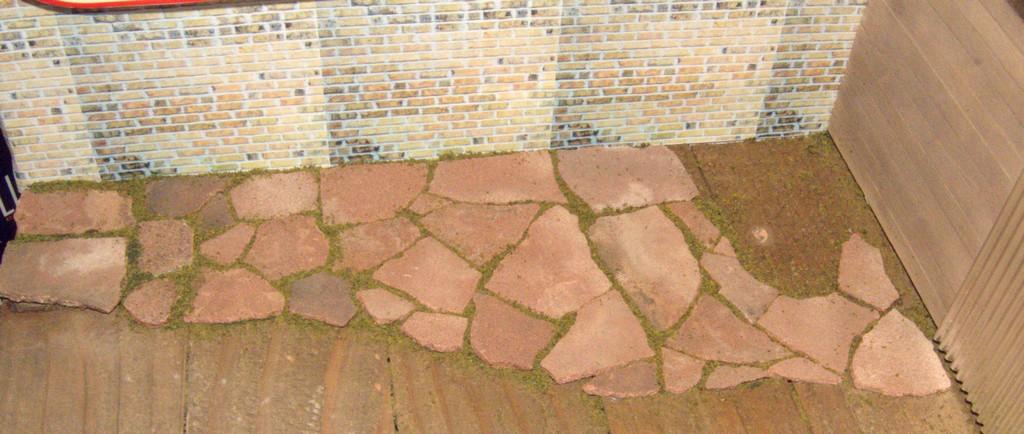
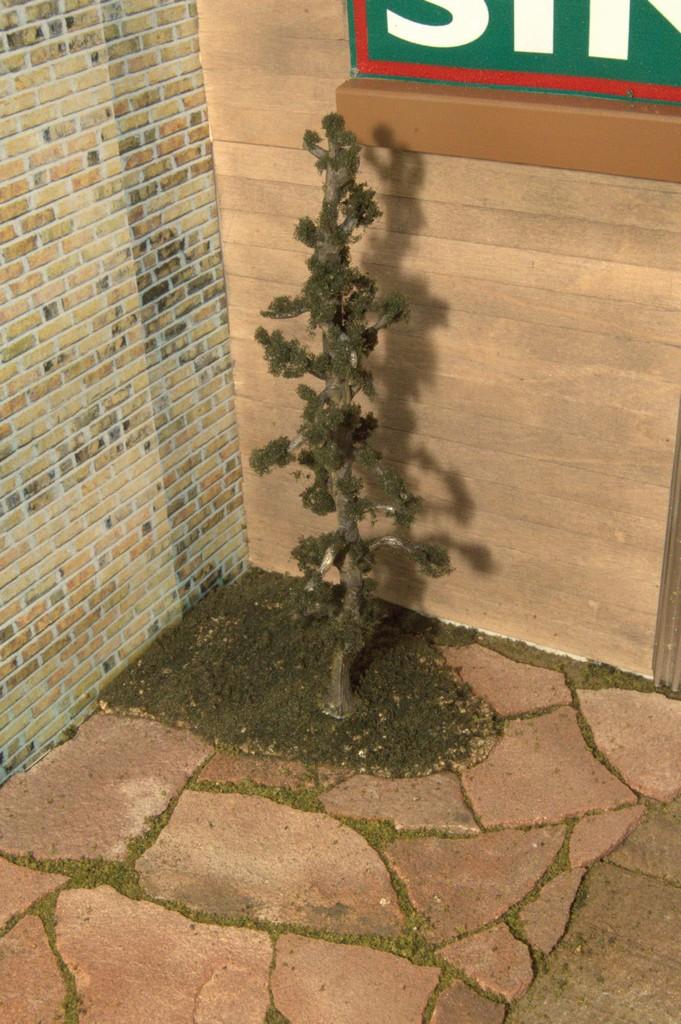
Thank you, Carl. I appreciate it, sir! I have been making progress. The tree is done. So is part of the landscaping around it. It will get some static grass, to go along with the brown "turf", as Woodland Scenics calls it. I made the hummock around the tree with Perma Scene. Once the restbof the landscaping is completed in that area, I will blend in the base of the tree with a little more "turf". I am very happy with the tree--it's a...well, it's a happy, little tree!😅 I filled the voids among the flagstone with green turf, to represent moss. It will get a touch of static grass, here and there, as well. For this update, I brought in my Junior Fueler. As always, questions, comments and critiques are welcomed. Thanks for looking!
-
Yeah, I have limited space, as well. I used this base, because it had been sitting here, forever. It's 10"×10", so that should work! I thought the two open sides would be the best utilization of space. I think my Nostalgia Top Fueler will fit, in the driveway area, although I haven't tried it with the flagstone installed.
-
Thanks, Brian. Actually, they came out fairly flat. Also, I mounted them on wood frames. Not much of a fight, at all!🙂
-
I couldn't tell you how many hours I spent with nothing but a pocketful of Matchbox cars and a pile of dirt! I'm smiling, just thinking about it! I had a Woodland Scenics pine tree kit here. I figured it would look good, it the corner. I scraped off the mold lines and shot it with Grey primer, then washed that with Vallejo Oiled Earth. I followed that with a dry brushing of a light Humbrol brown. Lastly, I dry brushed the undersides of the branches with Humbrol Brown Bess. When I applied the foliage, rather than use the "meshed-together" foliage, as it came from the kit, I scissored it into small bits. I then applied those individually, using Alene's Tacky Glue. I am very happy with the colors of the trunk and branches! Overall, it's a happy, little tree, and is not, I think, a detraction! I set the flagstone using Elmer's Glue, in conjunction with Woodland Scenics soil colored turf, to level the individual pieces, just as I have done many times, in 1:1, except, this time, my muscles don't ache! I plan to use a couple of colors of green turf, between the stones, to resemble moss. The corner area will be grassy, with the appropriate bareness, beneath the tree. I am pretty pleased with the thing. It's been a ton of fun, as well. Thanks for looking!
-
Those were fun times! I had considered doing a walk-in door and a window in place of the printed brick wall. I've enjoyed seeing the photos.
-
Thanks, Mark. It should provide enough interest as a backdrop, I think. It's been fun to poke at.
-
If I can figure out a way to make it practicable, I may have the brick wall replaceable with other prints. That might be interesting.
-
Thanks, bud! There are some cars we used to see, all the time, and now, when you see one, it's almost jaw-dropping. Vegas, Monzas, Mavericks, Gremlins...Pintos!


.jpg.9cdfe574d3573eb836d813e520c1cd1c.jpg)