Straightliner59
-
Posts
5,802 -
Joined
-
Last visited
Content Type
Profiles
Forums
Events
Gallery
Everything posted by Straightliner59
-
Gorgeous!
-

Time To Pick Another Stray From The Pile
Straightliner59 replied to Dragline's topic in WIP: Drag Racing Models
Always hhappy to help, my friend! -
Time To Pick Another Stray From The Pile
Straightliner59 replied to Dragline's topic in WIP: Drag Racing Models
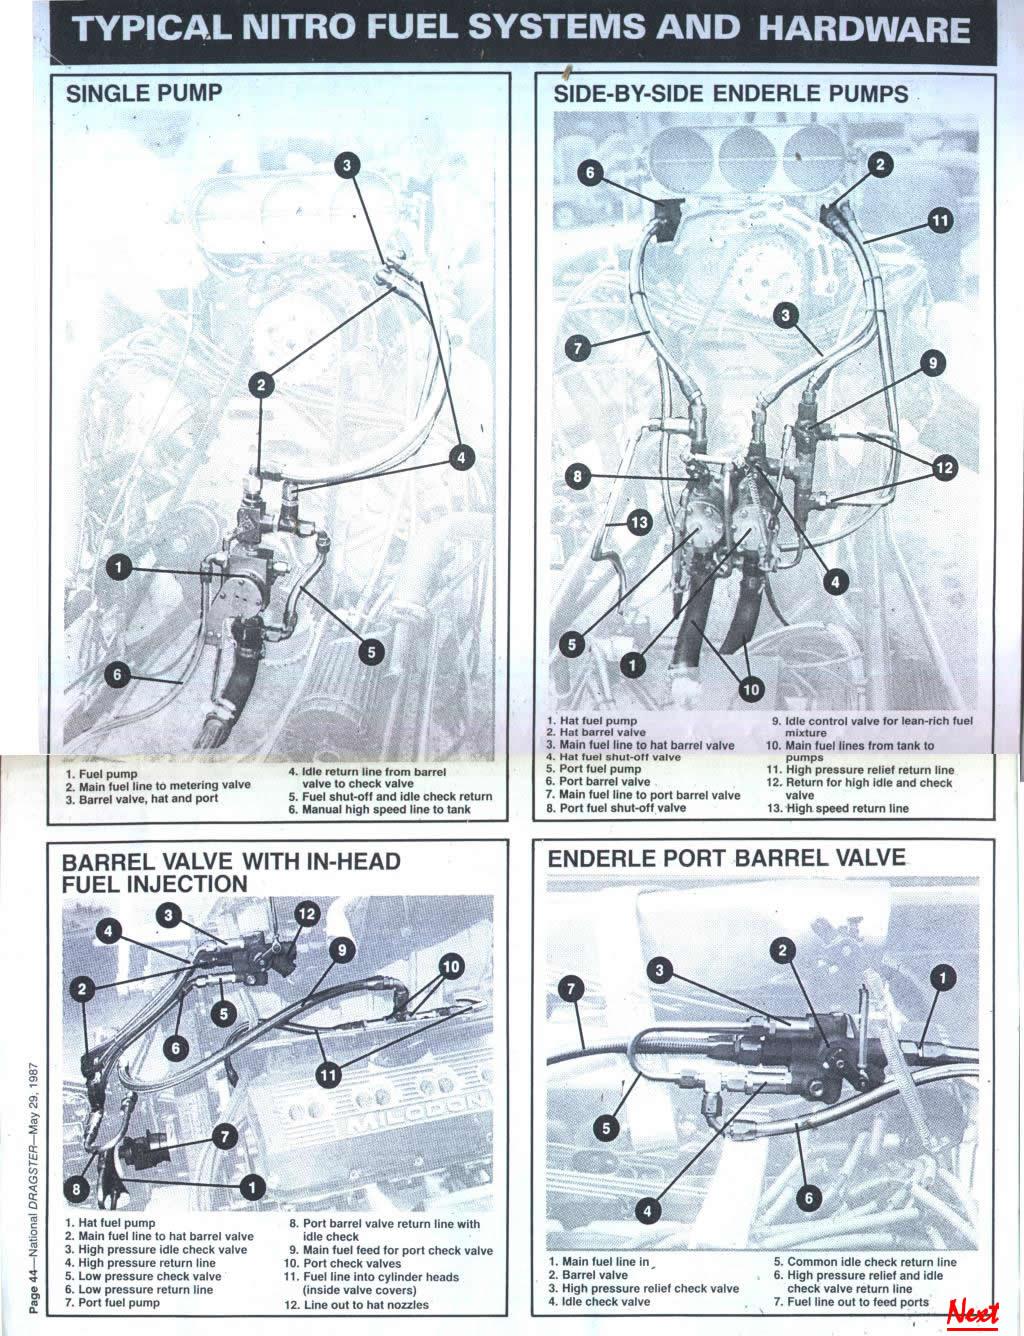
Wow, Bob! That's working even quicker than I expected! Looking great! Glad that was a help. You have a nice collection of parts, so far. Depending on how involved you care to get, here's a deal from National Dragster, back in the '80s. It includes the hi-lo idle control valve and the high-speed leanout. I have a ton of stuff on fuel systems.
-
Time To Pick Another Stray From The Pile
Straightliner59 replied to Dragline's topic in WIP: Drag Racing Models
Bob, you might give the Bud King a "bath" in sunlight. It works on old decals, sometimes; It might be worth a shot. -
I will see what I can do, my friend. I am afflicted, after all!😀
-
AMT '53 Corvette Snapper--Mild Custom Racer
Straightliner59 replied to Straightliner59's topic in Model Cars
Thanks for the kind words, Bob! Unlike the guy who built it, I think it has a touch of class!😅 -
AMT '53 Corvette Snapper--Mild Custom Racer
Straightliner59 replied to Straightliner59's topic in Model Cars
Thank you, Ulbo! -
Okay. It looks like this is my next project. A while back, my computer croaked (followed shortly by my external hard drive--taking virtually every photo I had taken, over the last fifteen years!). My neighbor across the hall, upon hearing this, and unbeknownst to me, ordered me a new laptop. He's always expressed appreciation, and lent encouragement when I share my work with him, so I thought I would repay his kindness by building him something. I asked him what his favorite car is. He replied that it was the 914 Porsche. I told him I just happened to have one, and, here we are! I plan to not get too carried away, but anybody who's familiar with my work knows that I struggle with that!😅 That said, I've replaced the molded-on distributor with one I made, that, even in its simplicity already looks better than the kit piece. It'll get plug wires, for sure. I'll decide as I go, how much (or little) more I'll do. I should have some photos in the next few days. Mostly, I just wanted to find this thread again, and bring it up, where I don't have to dig for it. Stay tuned...
-
1/16th 55 Thunderbird BB/FC Funnycar "GIRL TROUBLE"
Straightliner59 replied to Ian McLaren's topic in WIP: Drag Racing Models
The results make all the effort worth it, my friend! You have a fine collection of tiny models. Excellent work, Ian. -
AMT '53 Corvette Snapper--Mild Custom Racer
Straightliner59 replied to Straightliner59's topic in Model Cars
Thanks, David! I'm pretty happy with the way it turned out. It feels like a cohesive unit, I think. Thanks, Larry. I appreciate it! -
AMT '53 Corvette Snapper--Mild Custom Racer
Straightliner59 replied to Straightliner59's topic in Model Cars
Thanks, Mark! I'm happy you enjoyed the build! I always hope, and try to insert some useful information, in those threads. I appreciate your comments, sir! -
AMT '53 Corvette Snapper--Mild Custom Racer
Straightliner59 replied to Straightliner59's topic in Model Cars
Thanks, David. There's a little more in the build thread, too. I loved the wheels the second I put them in tires, and under the car. I just thought they looked right! -
AMT '53 Corvette Snapper--Mild Custom Racer
Straightliner59 replied to Straightliner59's topic in Model Cars
Thank you, sir! Thanks, Carl! -
AMT '53 Corvette Snapper--Mild Custom Racer
Straightliner59 replied to Straightliner59's topic in Model Cars
Thanks, Mike. I wanted something subtle. I think it's understated. -
AMT '53 Corvette Snapper--Mild Custom Racer
Straightliner59 replied to Straightliner59's topic in Model Cars
Thanks, Jim! -
Car Kits Question...
Straightliner59 replied to DNBush's topic in Model Building Questions and Answers
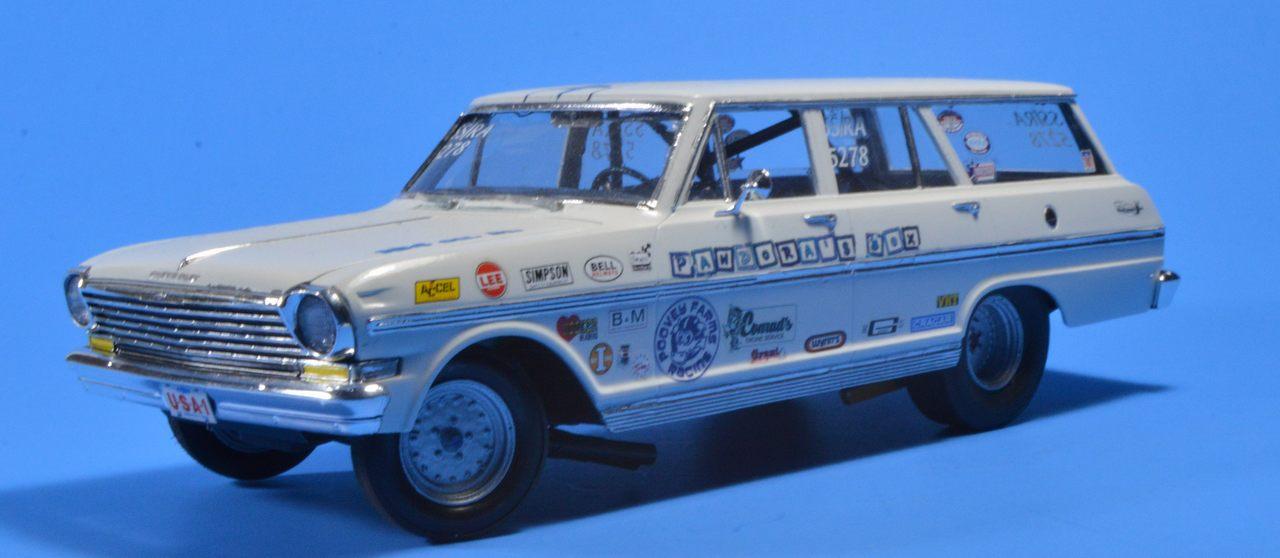
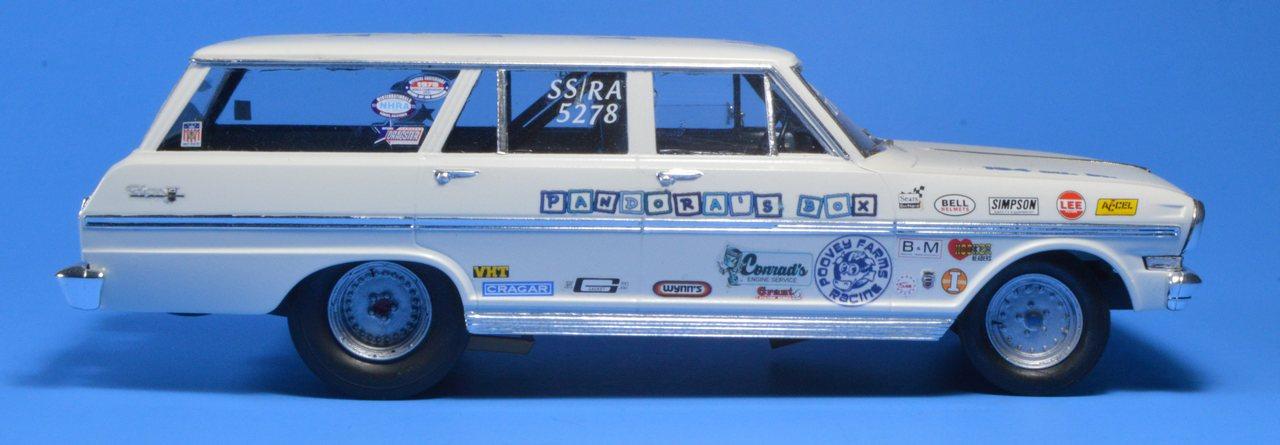
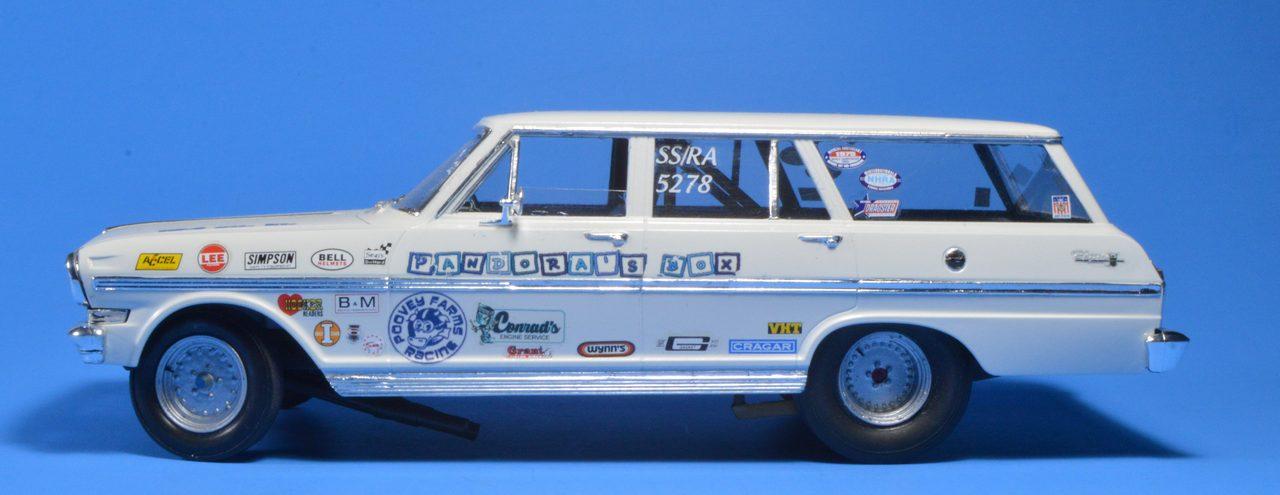
You're right about these kits, Luke! I built this Super Stocker from the Chevy II.
-
AMT '53 Corvette Snapper--Mild Custom Racer
Straightliner59 replied to Straightliner59's topic in Model Cars
Thank you, Rooster! -
AMT '53 Corvette Snapper--Mild Custom Racer
Straightliner59 replied to Straightliner59's topic in Model Cars
Thank you, David. That's an apt comparison, I'd say! -
Here's the "Under Glass" post:
-
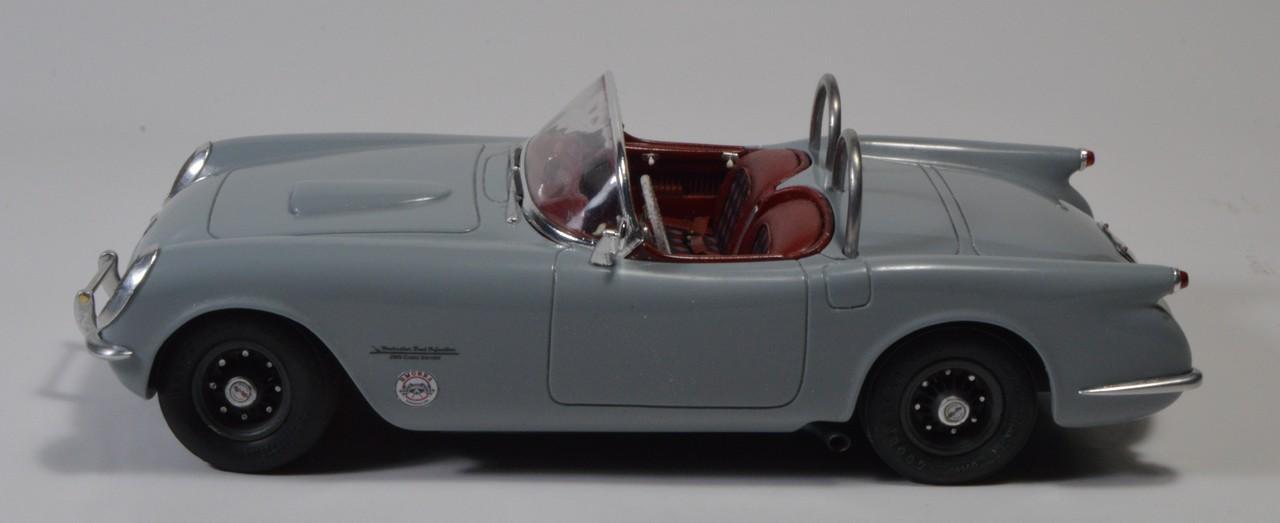
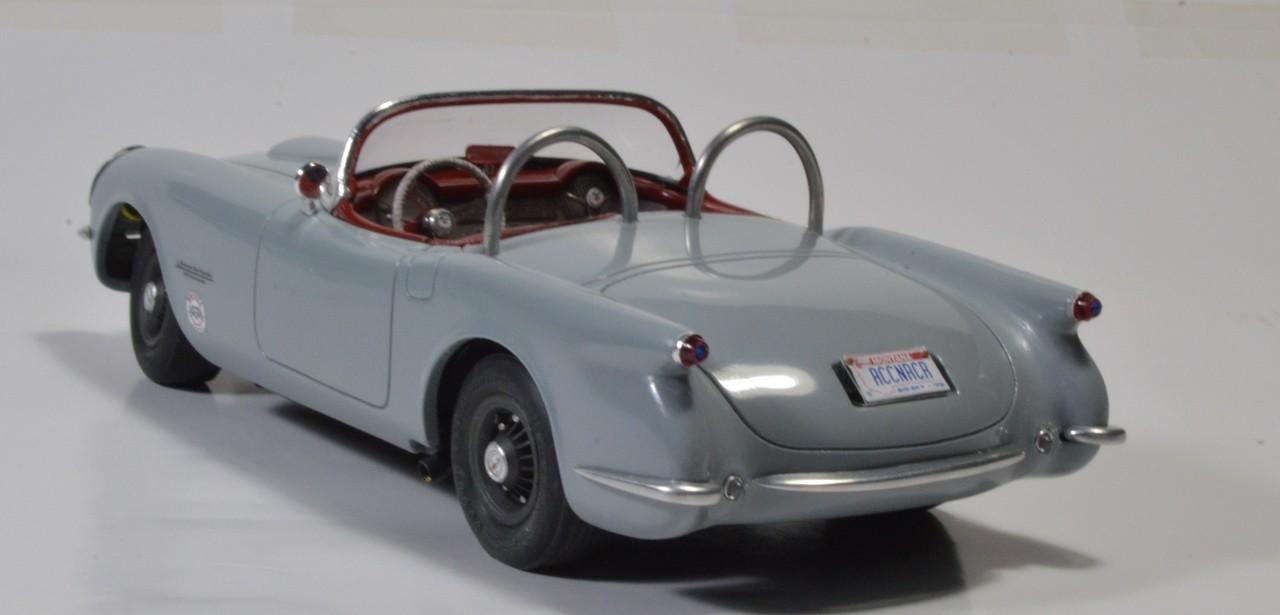
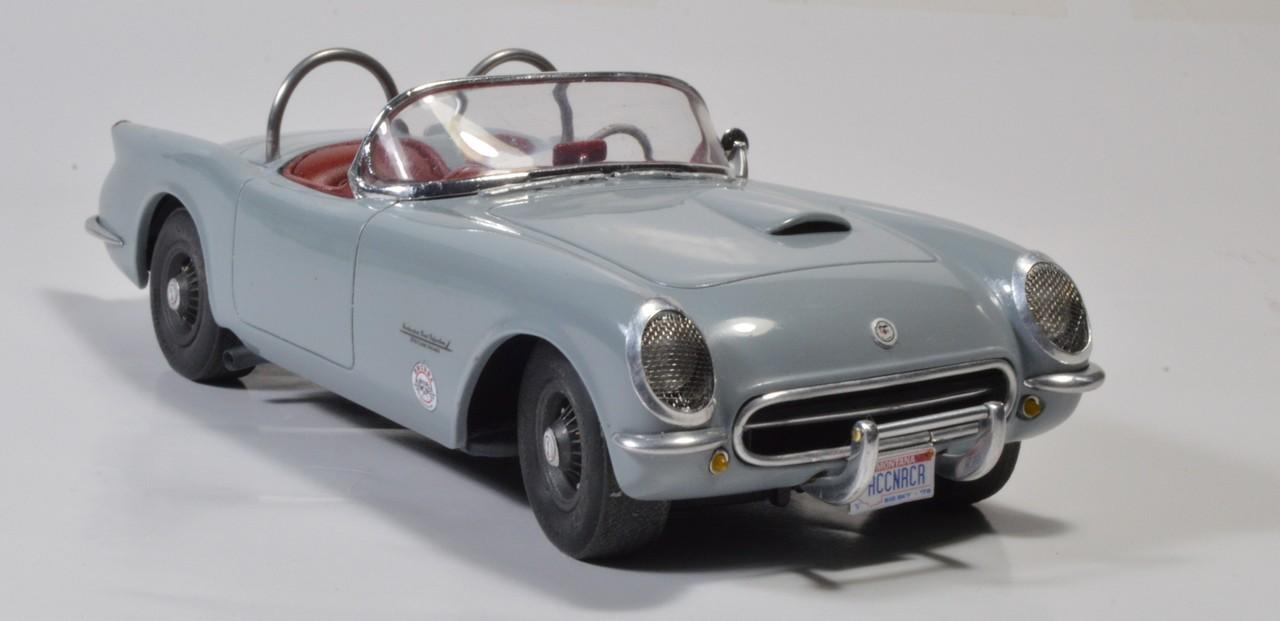
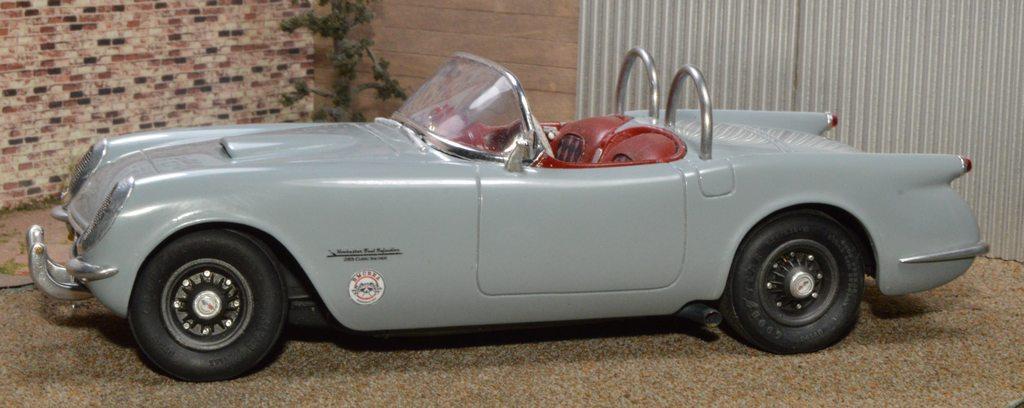
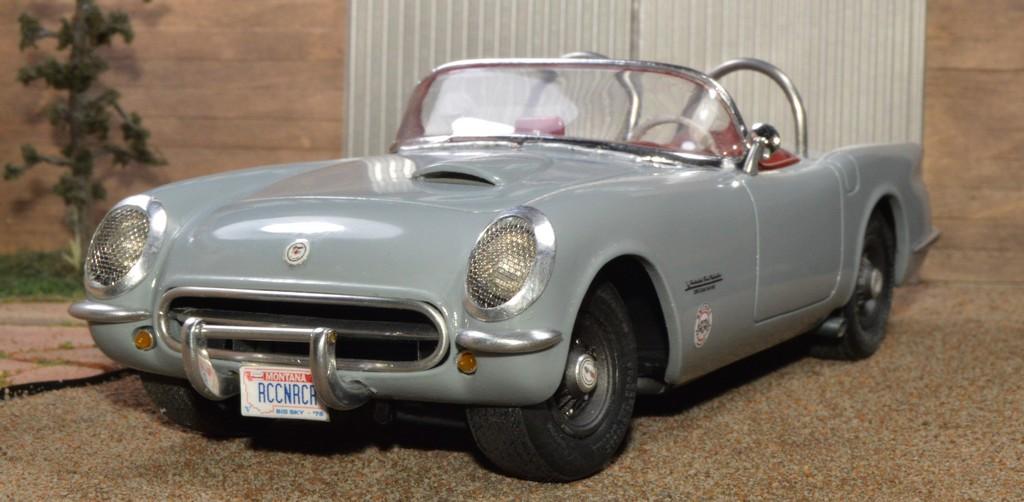
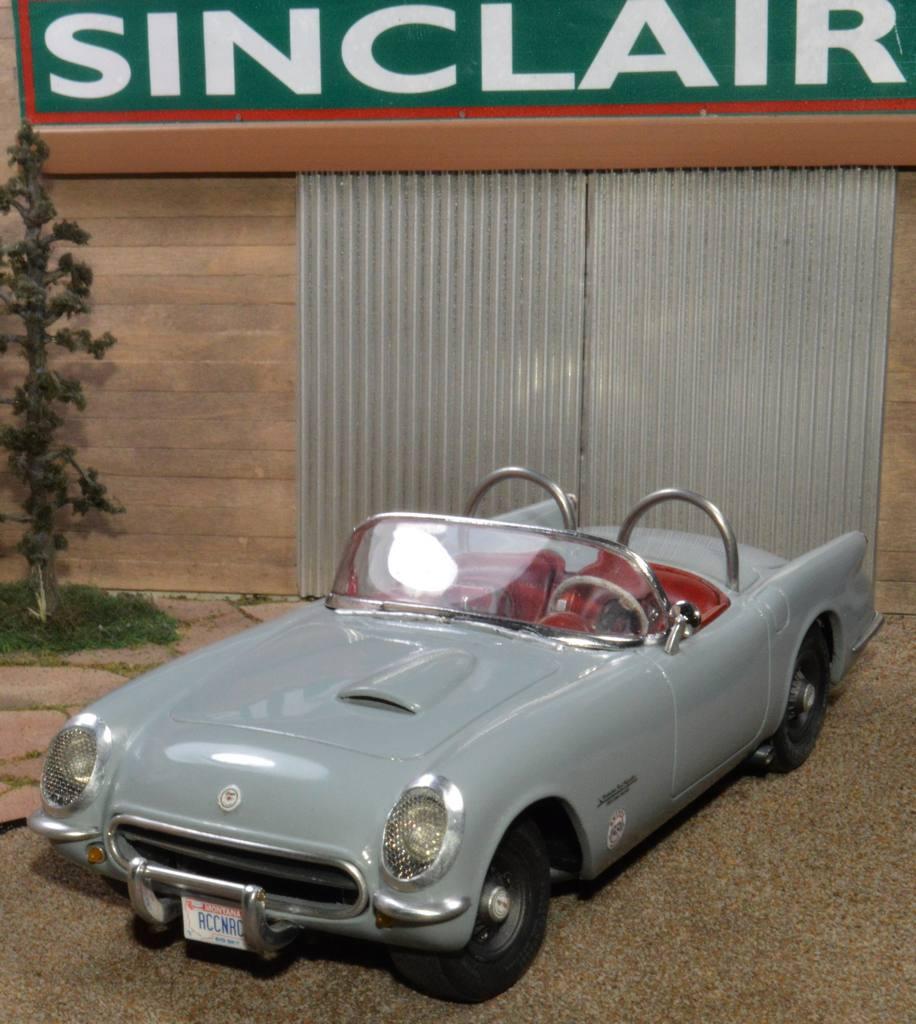
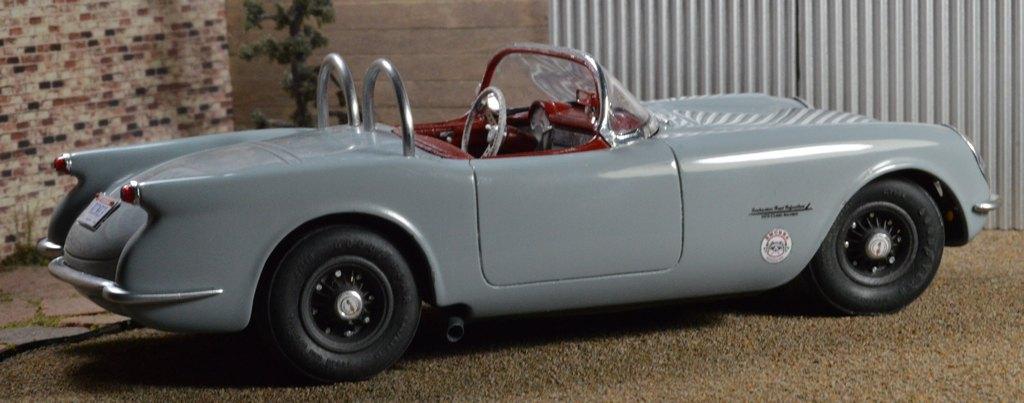
I first started this a few years back. I had problems with the paint, and ended up buying a new kit, for the body, since the chassis already had the exhaust pipes and wheels and tires installed. I picked it back up, a few months ago, and it has now reached the display case, alongside its fellow RMCRRA cars, or, "Raccoon Racers", as I've come to call them. The Rocky Mountain Clandestine Road Racing Association is a figment of my imagination. Was fictitiously born in the basement of a United Methodist Church, somewhere in Montana, in 1975. It was founded as a response to the nationwide 55 MPH speed limit, and the end of "Careful And Prudent" as the daytime speed limit in Montana. The organization's main function was to secure and patrol remote, but enticing stretches of road, so that other members could push their limits. The raccoon became their symbol, based on their inherent stealth--especially at night. The group continues, to this day, only now with the cooperation of local gendarmerie, in Montana, Idaho, Utah, Wyoming, and Colorado. Run what ya' brung, just be sure it's outfitted with the appropriate safety equipment. I shaved the side trim, and the "finlets" from the taillight housings. I wanted to clean up the bumpers by removing the vertical elements from them. It didn't take long to discover that it was much easier to simply fabricate them from 9ga. aluminum armature wire. The recessed grille bar was also created from the same material. I made a pair of punches from brass tube, and used them to make the aluminum surrounds for the headlights. The headlights had to be drilled out, and receptacles for the lights, themselves created with plastic tube. I turned the aluminum rings for the headlights, and made reflector dishes from Maid-O-Metal tooling aluminum. The lenses were from my parts stash. I did a little research, to discover how screens were measured/classified, and ordered some fine silver-colored screens. I didn't put two and two, together, or I'd have just stopped into one of the local dispensaries, since that's what these turned out, to be. Anyway, they're woven from finer wire, and appear more open that the automatic transmission filter screen, I had originally planned to use. The hood scoop came from my parts boxes, as well. It's offset to accomodate the Rochester-injected 283, that (allegedly) lurks beneath. The roll loops are solder. The grille surround is .040" aluminum wire. I found an argyle pattern I liked and made decal inserts, for the seats. I deleted the radio and heater from the dash, and made new plates, gauges and switches. The pedals are fabricated from brass and some bits of a perforated auto-trans screen. I scratched the belts and hardware, and used Detail Master detailing wire for the piping. The floor was treated to some red embossing powder. As indicated by the shifter, a four speed was swapped in. I really like the way the Pontiac eight-lug wheels look on the car. I found one in my stash, and cast a set from acrylic nail resin. Because I didn't have any grey Krylon, on hand, I painted the car with Rustoleum Winter Grey. My only real problem with Rustoleum, is that it takes much longer to dry, than Krylon, so... I printed all the decals and gauges at home. It's not perfect, but, I like its combination of elegance and performance. I think it looks slick, and clean. Your comments are always welcomed. Thanks for looking!
- 27 replies
-
- 13
-

-
Mini Lathe suggestions
Straightliner59 replied to 58 Impala's topic in Model Building Questions and Answers
I have a Sherine lathe and one of their milling machines. They're more than suited for what I do, and there are members of this forum who do amazing work, on them. -
Yessir! That's all you can do--it's never good to mess with model mojo.
-
Thanks, Bob! I never really was, either. I prefer the Mako Shark inspired cars. Originally, I had planned to do a low Gas Class car with it, but, it took on a life of its own!😄
-
Thank you, sir! I appreciate it!
-
This'n's done! The RCCNRCR (Raccoon Racer) plate is an allusion to my fictional racing group, the Rocky Mountain Clandestine Road Racing Association, whose mascot is a raccoon. This isn't a typical project, for me, as it kind of wanders into mild custom territory. I shaved the trim, and made all new bumpers, and the pushbars with 9ga aluminum armature wire. I wanted to clean up the bumpers, and get rid of the vertical members. I decided that it would be easier (and much more rewarding) to fabricate them, than clean up the kit parts. The grille surround is .040" aluminum wire, and the horizontal bar is 9ga wire. I decided, early on, that I wanted patterned inserts for the seats. I found a suitable argyle pattern, and used that. The seat belts and hardware are scratched, as well. I added a length of Evergreen .080" half-round to the inside of the windshield. Because I didn't have any grey Krylon, and not relly a chance to hunt some down, I sprayed it with a can of Rustoleum Winter Grey I've had in the shop for several years. Mt biggest gripe with Rustoleum is its dry time. It's freaking slow! I made new lights, for it, including the front turn signals, and a pair of backup lamps, in the former exhaust opening. Here are a few photos. I'll get some better ones, soon, and create an "Under Glass" page, for it. Comments are always welcomed. Thanks for looking!