Straightliner59
-
Posts
5,797 -
Joined
-
Last visited
Content Type
Profiles
Forums
Events
Gallery
Everything posted by Straightliner59
-
The fluidity of their change, from day to day, race to race, definitely adds to the challenge. There are almost always some educated guesses involved.
-

Older decal sheets
Straightliner59 replied to kenton44's topic in Model Building Questions and Answers
That's the stuff! It's worked great for forty years, or so. -
Way cool! I've been wanting one of those F-85s, forever! I'll be check it out!
-
Yes. Midwest makes it, too.
-
tonneau cover & fabrication thereof
Straightliner59 replied to sidcharles's topic in Model Building Questions and Answers
That's what I'd use. Well, I like kitchen parchment and diluted white glue. I would put a wire framework together to sit atop the cockpit area, and use that to form the paper--you know, so it could drape over a support? Once it's dry, trim it and paint it, and don't glue it on. You should be able to figure a way to align it with the cockpit, simply--a couple of small tabs, or such. Just for the record--all bucks are males!😂 -
That would echo my sentiment. There are tradeoffs, with everything. I really barely notice the ads, anyway. It would be cool if they could be ads for places like Albion Metals, Scale Hardware, Micro-Mark, Sherline, etc., but whatever pays the bills! Nobody's being harmed by ads. If you are being hassled over the ads on here, you might want to find some more reasonable people to hang out with!
-
I love building projects that draw inspiration from "classic" sources. I have a project on my bench shelf that's inspired by the first Warren, Coburn and Miller rear engined car. I have a plan to build Monogram's Long John as inspired by Mel Heath's '56 Nationals winner. I have a couple of others, like that, as well. I don't see anything at all wrong with it. I have only ever built two replicas; Dick Kraft's "The Bug" and Cook and Bedwell's dragster, from a Monogram Slingshot. Most frequently, I pull together cool features from different sources, and incorporate them into my models. I guess I mostly look to capture an era.
-
Nope! I know exactly what you mean! I've made almost all the decals for my models, the last few years. Unfortunately, I can't print white, so I have to figure out other ways around it. I really wish I had a space to set up my Cricut, then I could just print them on white, and cut them out. Anyway, this stuff interests me!
-
I think solder is fine, as well. I am most interested in the way it forms, when I want to pose it. Well, and at least to be reasonably sized!
-
I enjoyed seeing it from its inception, to now! Nicely done! I've long wanted to build something inspired by High N Mighty. Very cool project!
-
Micro Superfilm is what you're looking for. It's excellent stuff!
-
I would tend to doubt that they would be, because the Revell kit was new tooling, upon its release. I believe the 1/12 kit is the old Monogram kit. At the same time, the Revell kit was released after the Revell-Monogram merger, so I suppose there's at least a chance they based the 1/25 kit off the 1/12 one.
-
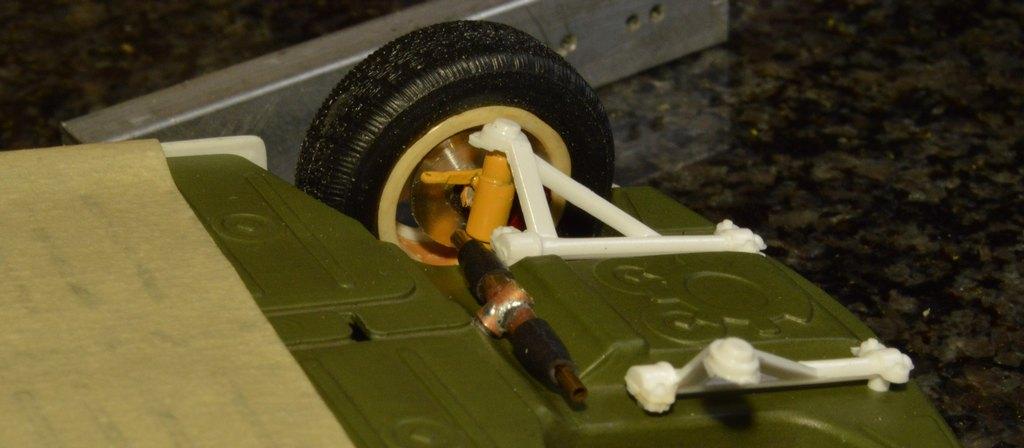
I've had another setback with the strut, dang it! I had it repainted, after the previous repair, then notice that the steering arm was nowhere to be found! I have a new one made, I just need to solder it on, then I can paint the strut...again!
-
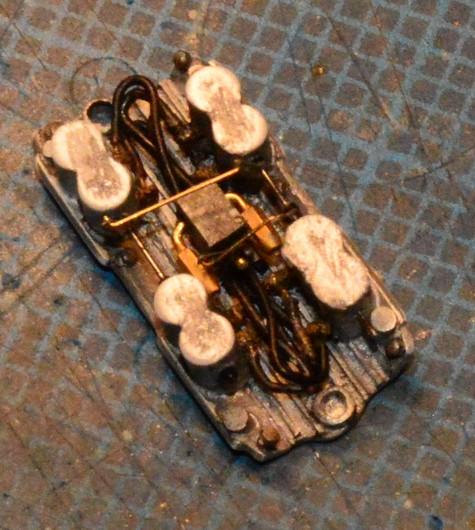
Yes, I screwed up the math!🙂 I'm not really sure, how, since the entire time I am at the bench, I think in terms of .005"=1/8". Same with Evergreen. That's not .040"X.040", it's 1"X1"! I'm clueless as to how I messed that up!😄 I generally only measure that small if I need something to fit. The Sherline equipment makes it easy--for that matter, even plausible, at least to thousandths. I try to make all my fittings the proper size, but, somethimes concessions have to be made, because I just can't work that small. Plug wires have always been a conundrum, for me. While .010" would be very close, it's always looked small, to me. Generally, I go with some old MSC stock I have, or Detail Master's wire. The stuff I used on this thing is some old craft wire that came in a box of eight or ten rolls of different colors. I've had it for abut 20 years, now, and had never even tried working with it, so I thought, why not? It's sized almost identically to the aforementioned suppliers. Thanks for your interest and for your kind words!
-
AMT '53 Corvette Snapper--Mild Custom Racer
Straightliner59 replied to Straightliner59's topic in Model Cars
Thanks, Brian! I was just admiring your truck, last night. That's some beautiful work, as well! -
Thanks, Ken! I appreciate that!
-
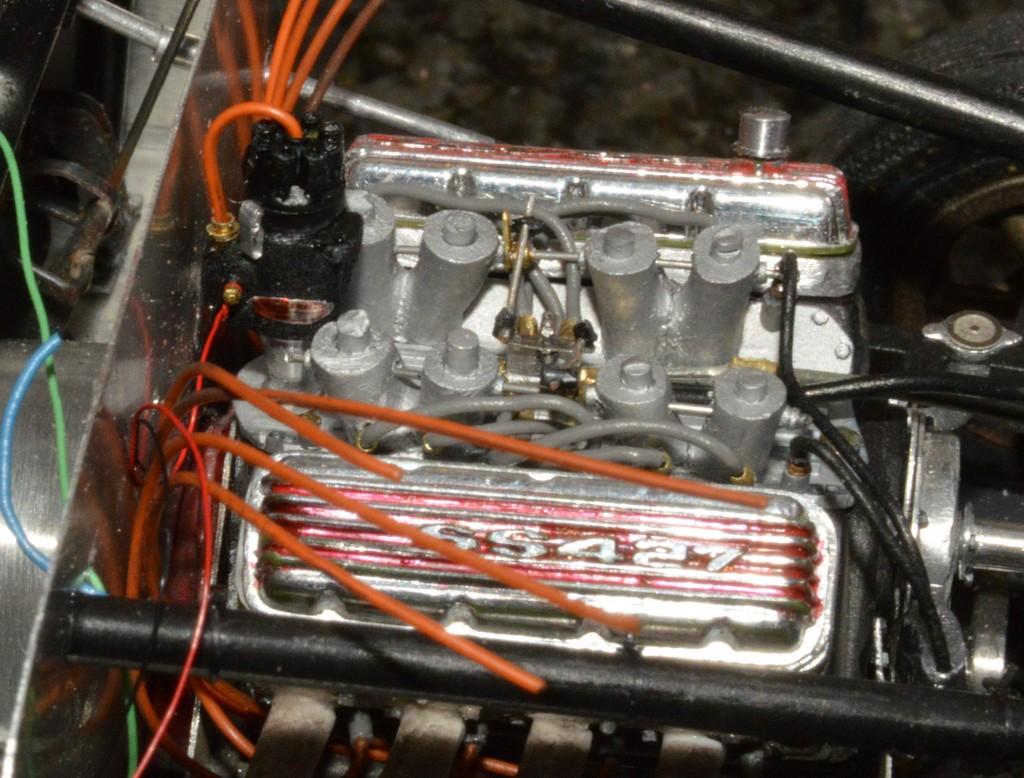
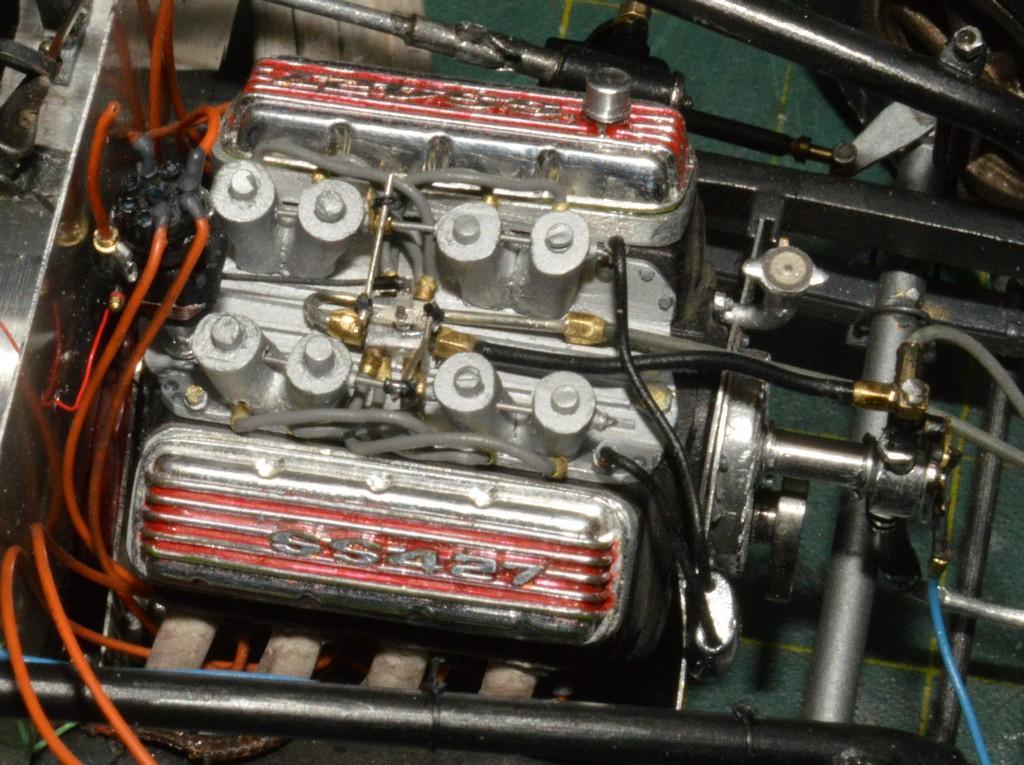
plumbing Hilborn fuel injection
Straightliner59 replied to fiatboy's topic in Model Building Questions and Answers
Thanks, Mark! I appreciate that. I make them, either from aluminum, or from Plastruct hex stock. I can make pretty small metal fittings using the lathe and the rotary table, on the mill. It's something I've always wanted to be able to do! -
plumbing Hilborn fuel injection
Straightliner59 replied to fiatboy's topic in Model Building Questions and Answers
Thank you, sir. I've had a bit of practice, over the last few years!😄I can never seem to build anything that is readily available...that I like.
-
plumbing Hilborn fuel injection
Straightliner59 replied to fiatboy's topic in Model Building Questions and Answers
I used some model railroad wire for this. I think I got it from Train Control Services(?). It's just under .020", which isn't too far off, for rubber lines.
-
Also, I recently "lost" an external HD, along with about 15 years worth of photos. I use the "view my attachments" and it has every photo I've posted, here, so I can at least have the cropped and resized images back, without having to search through everything to find them.
-
Thanks, Ken! It's a blast!
-
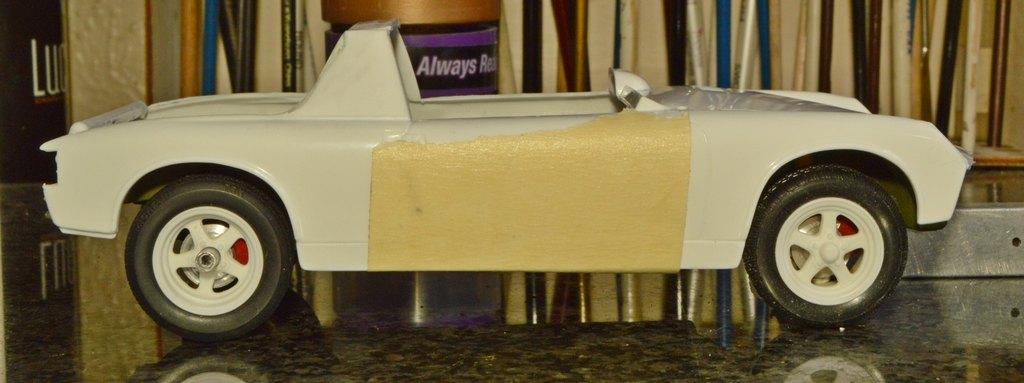
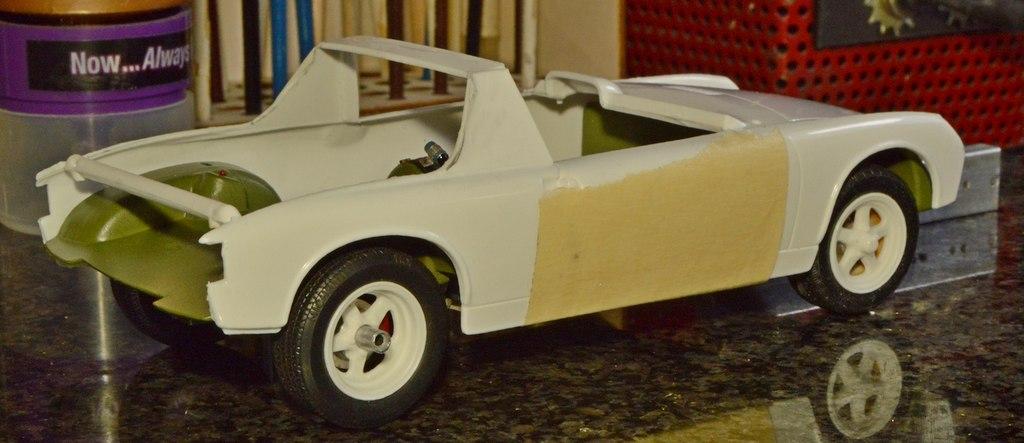
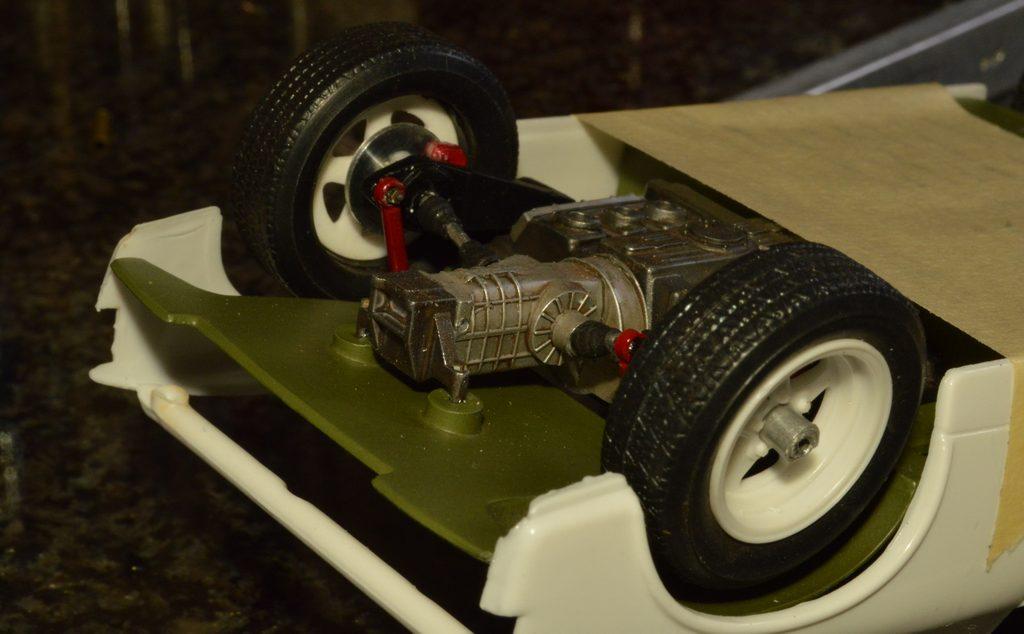
I had everything ready to go, thinking I could get it completely on the wheels, overnight. I would have made it, I think, except I broke one of the spindles off. That left me stripping the strut, so I could re-solder it. I got it done, but after these photos were taken...So, it's up on three wheels! Obviously, some fine tuning of things is still in order, but, here she sits. Next, I'll finish up the rack and pinion, and the rest of the steering. I'm trying to decide what finish I want on the wheels. Ideas? Thanks for looking!
-
Any updates on the Moebius 72 Maverick?
Straightliner59 replied to GMP440's topic in Car Kit News & Reviews
I wanted one, badly enough that I paid, I think, $85 for a promo, about five or six years ago! -
I suggested that the LSR cars be in the drag racing forum, because most salt flats/dry lakes cars are very similar to drag cars, especially in the coupes and roadsters classes. In the early days of organized drag racing, many of those cars pulled double duty!
-
UV adhesive for Temporary Assembly
Straightliner59 replied to NOBLNG's topic in Tips, Tricks, and Tutorials
Alene's Tacky Glue is excellent for temporary assembly. It's water-based, so it doesn't harm the plastic, however, its tackiness holds parts, quite well. They can usually be pulled apart, but, if they're delicate, a quick soak in some water will dissolve them apart. I use it, constantly.


.jpg.10e0473a874417e58fe6f3cacf74d14b.jpg)