Straightliner59
-
Posts
5,795 -
Joined
-
Last visited
Content Type
Profiles
Forums
Events
Gallery
Everything posted by Straightliner59
-
 If we're considering these your first models, then, you're off to a fine start, it appears! And, clearly, a healthy sense of humor! Welcome to the...well, madhouse!
 -
'66 F-600 kitbash ideas
Straightliner59 replied to Harv Mushman's topic in Model Building Questions and Answers
Thanks, Mark. I started doing a chassis for a '41 Plymouth, the same way. It's the best method I've found, for doing open rails. I just looked, and, unfortunately, I don't have photos of it. Probably no big deal--I just did one side of the chassis, anyway. -
cheetah reboot
Straightliner59 replied to charlie libby's topic in WIP: Other Racing: Road Racing, Land Speed Racers
Well, this will certainly be interesting! Awesome! -
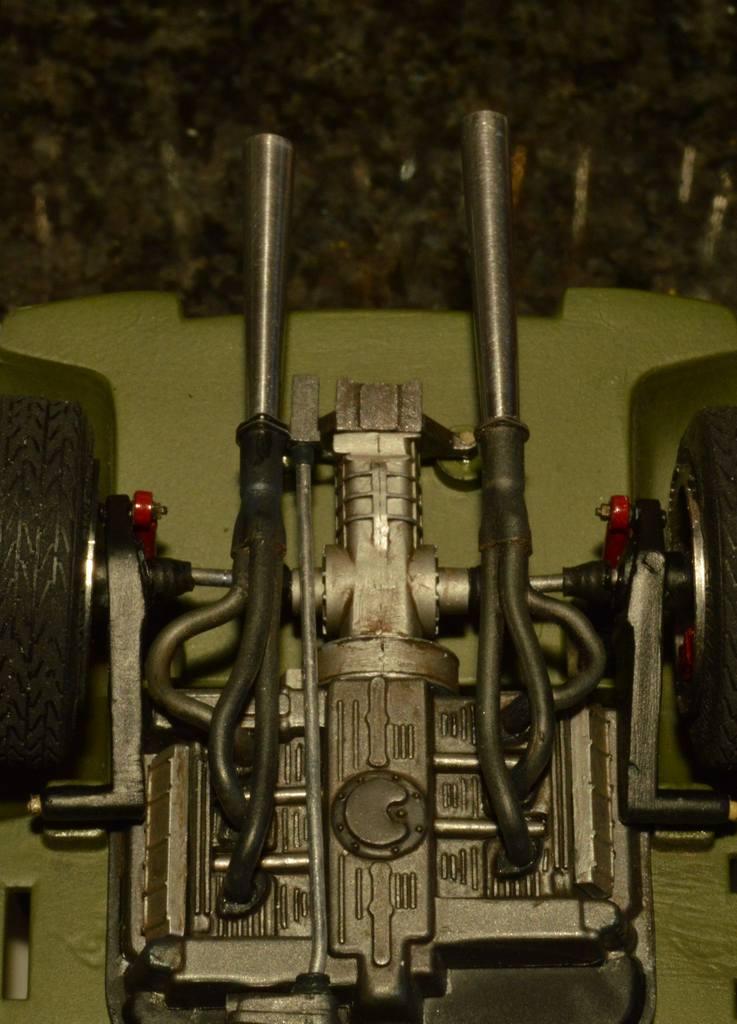
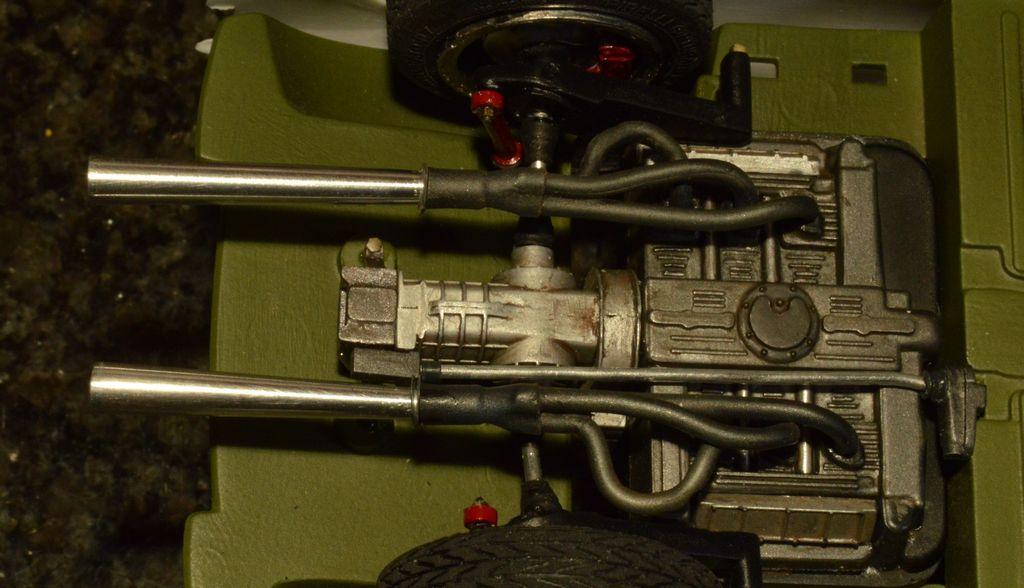
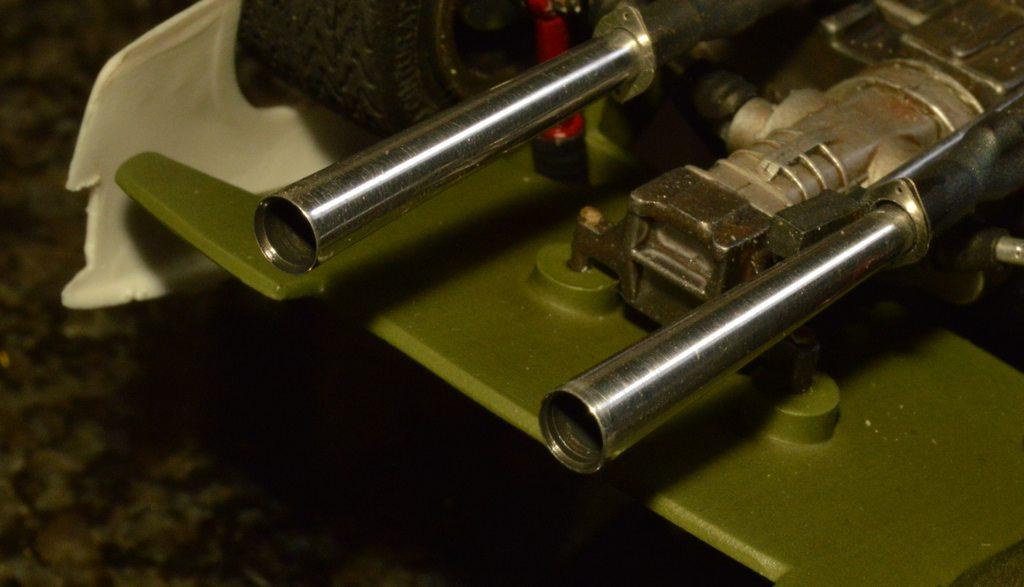
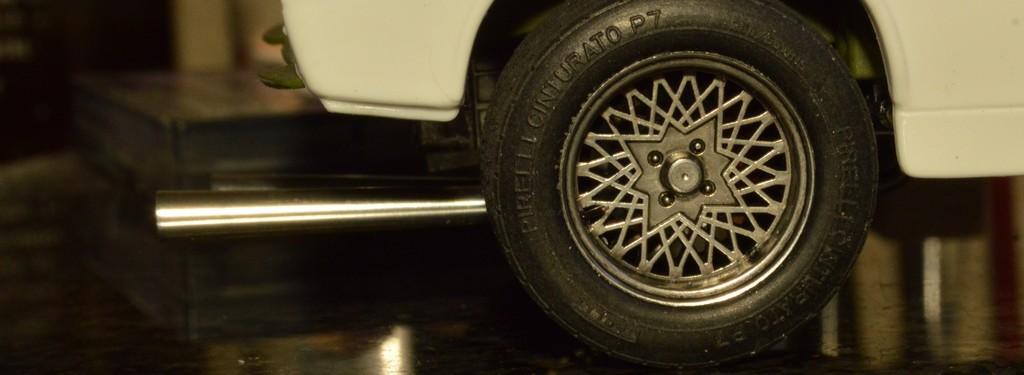
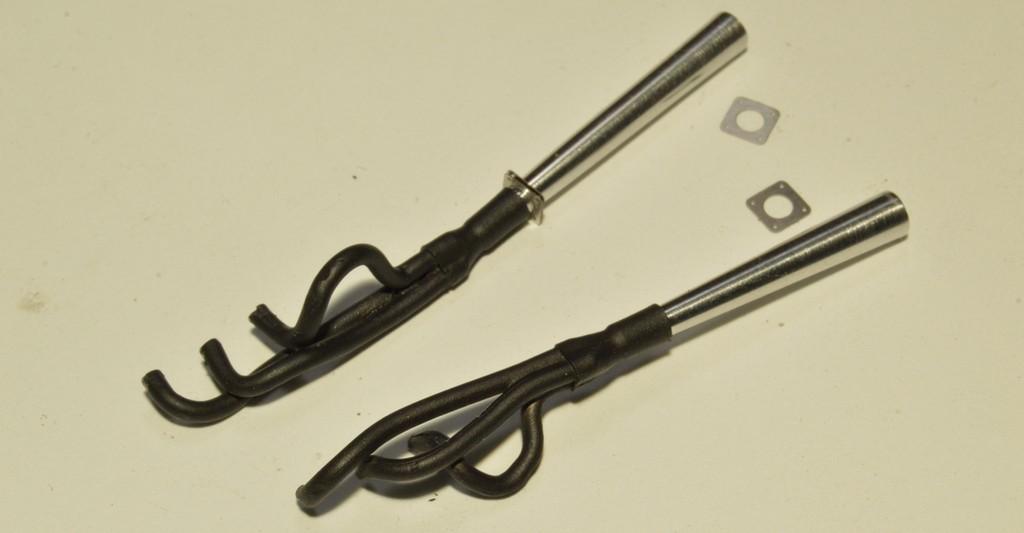
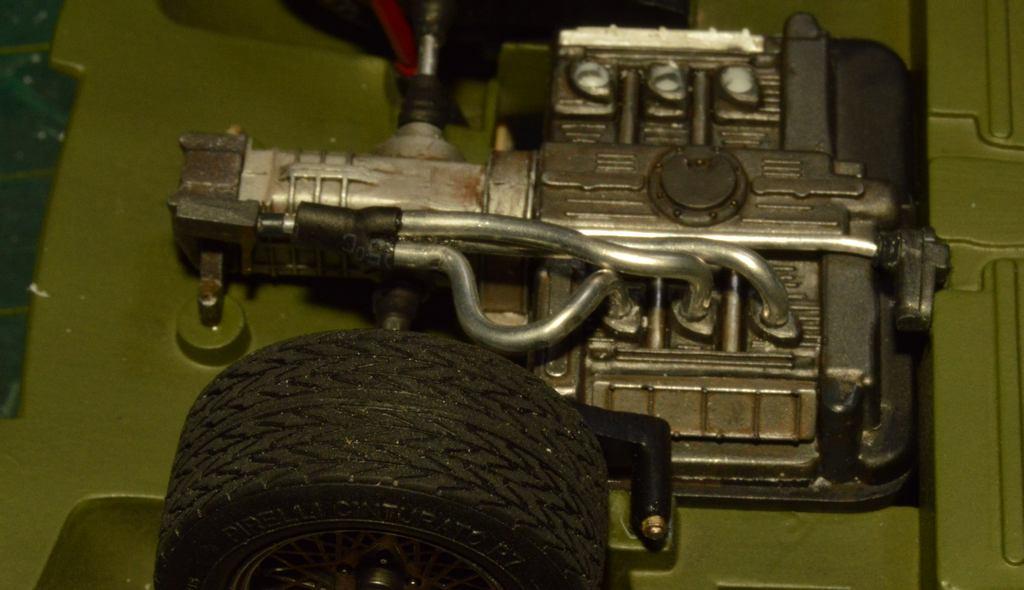
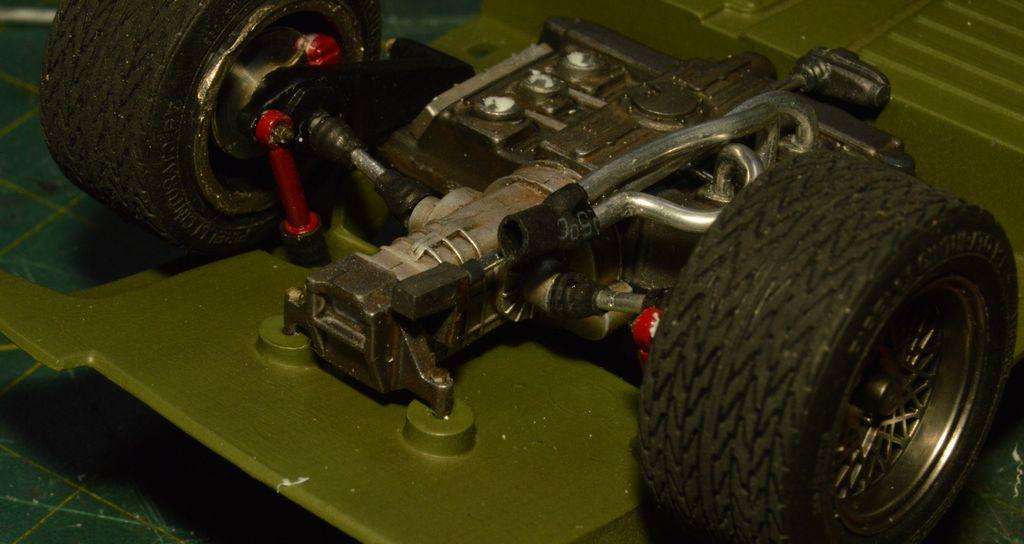
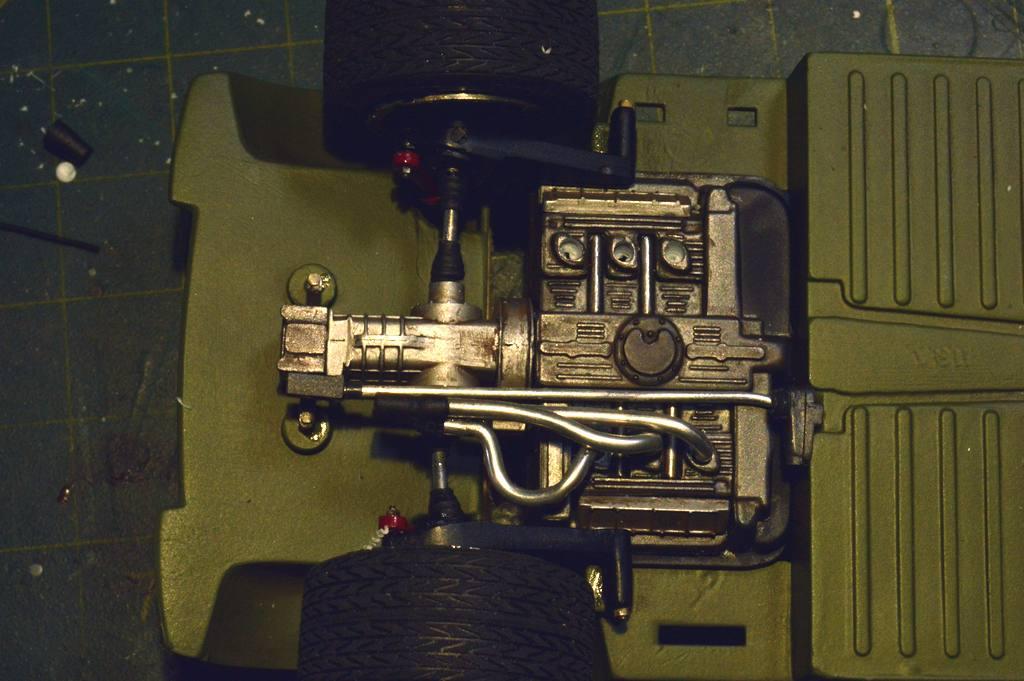
They're mounted, and the megaphones are in place. Next task is to make the hangers, which will line them up, nicely! I ended up using Detail Master's square flanges, and sanding two corners off and rounding them to make the flanges, here. I also changed the front tires. I'm not sure what they're from, but they're Centuratos, like the rears. They're a tad shorter. I had to trim material from the inside edge, so that the tire would slip far enough back, onto the wheel. It's not really visible, though, so, good! Thanks for looking!

-
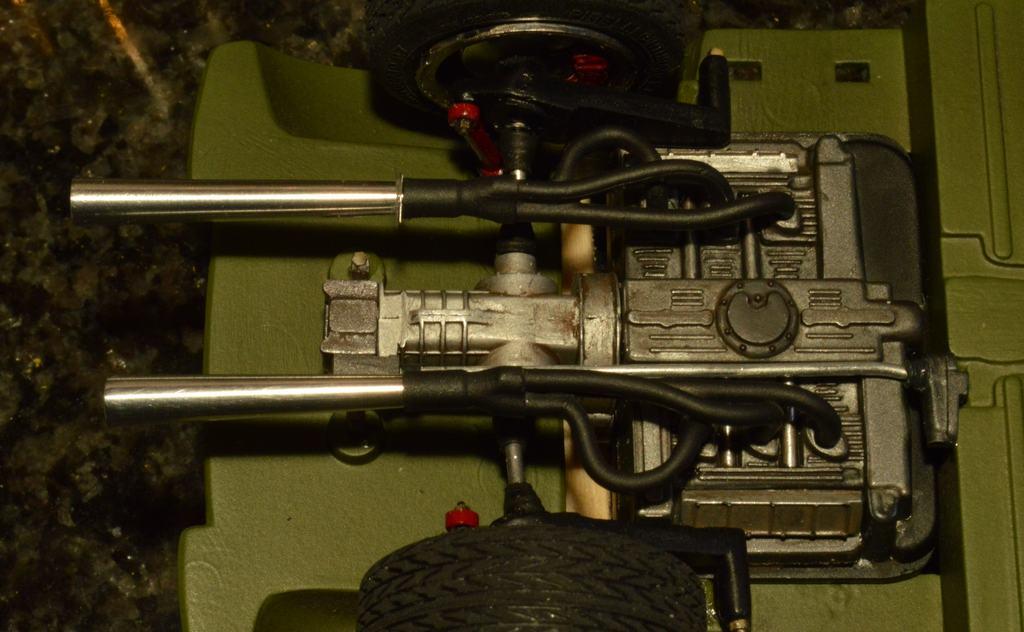
I bought a compound slide for tapers. I have done it, before, rotating the headstock. It's much better, this way. I can use a RH cutting tool, and push it down, turning between centers. The flanges are Detail Master. Thanks, Mark!
-
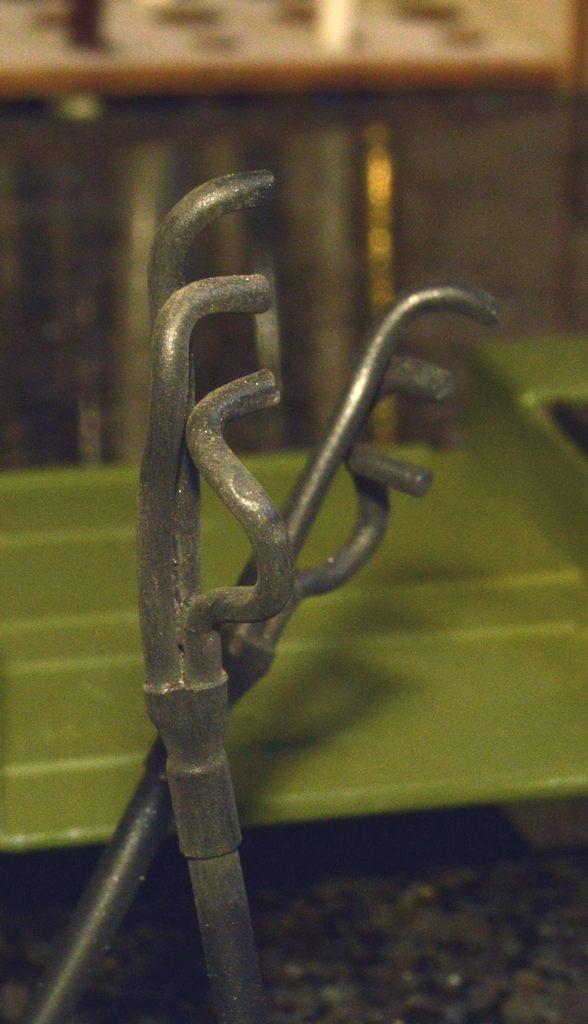
I turned the megaphones. I need to start some work on the body, so I can see how I like the length of these. Otherwise, I like 'em! I need to make hangers, and be sure they're adjusted, so that they end up along the same vertical plane, given the offset of the cylinders. I'm going to work a little more weathering, on them. Your comments are always welcomed. Thanks for looking!
-
Thanks, Brian. I hope to get them finished, later today!
-
Valve cover hoses?
Straightliner59 replied to MonsterFan88's topic in Model Building Questions and Answers
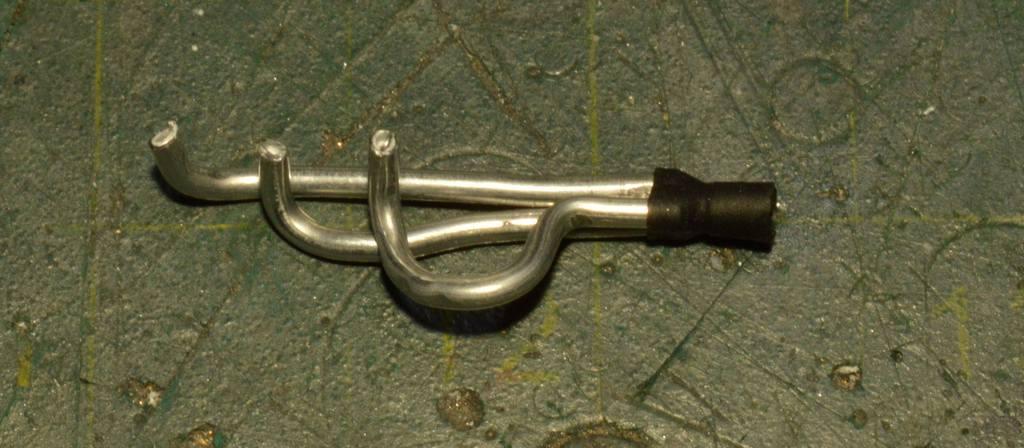
Correct. I funny cars, they use the frame tubes to carry overflow oil to a "puke tank", located behind the seat. In front engine dragsters, the hoses typically dump into a tank located in front of the engine. I can post photos, in a bit. -
That would be awesome! Targeted advertising, not based on some loco logarithm.
-
I always try to. I am generally an inch or two off, by the time everything's lined up, in place, due to trimming, etc. I couldn't find a stated length, for these, so I went with 24". Thank you, Mark!
-
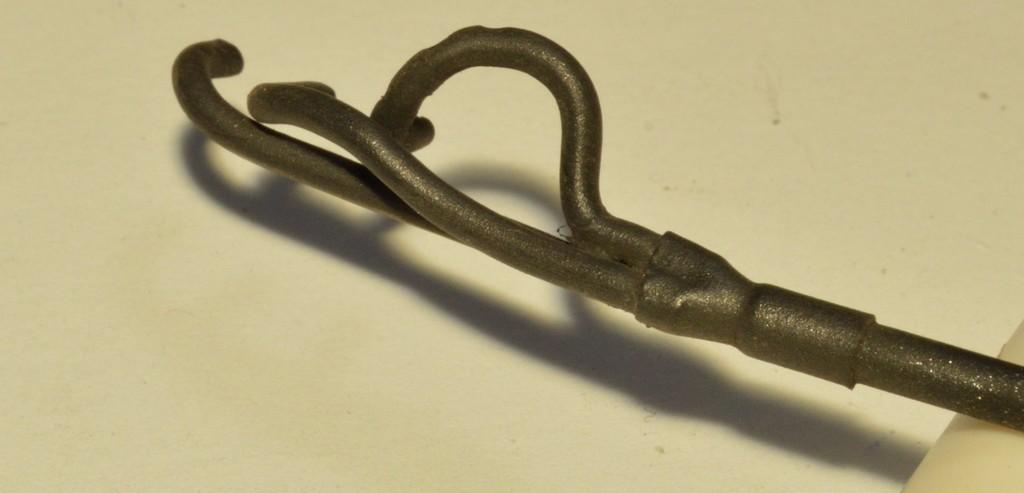
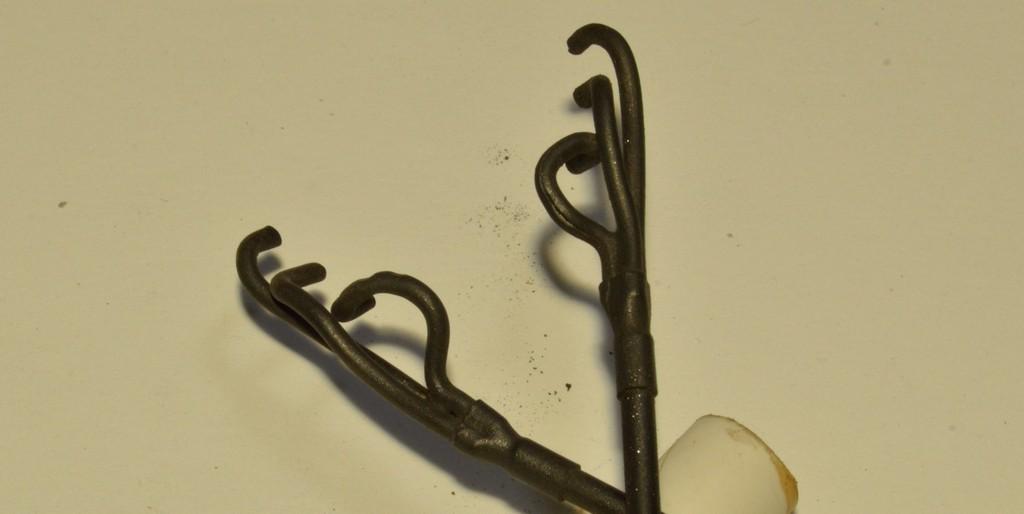
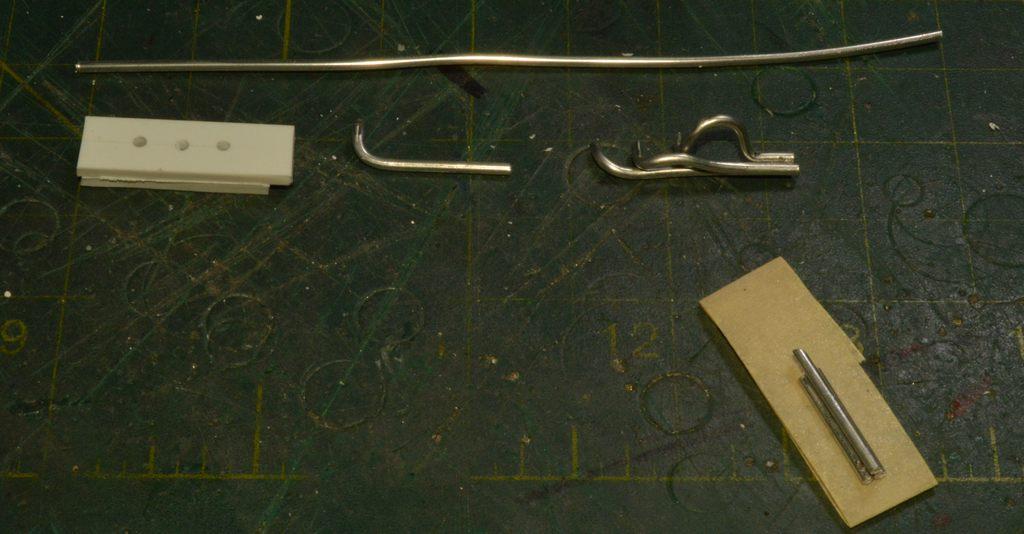
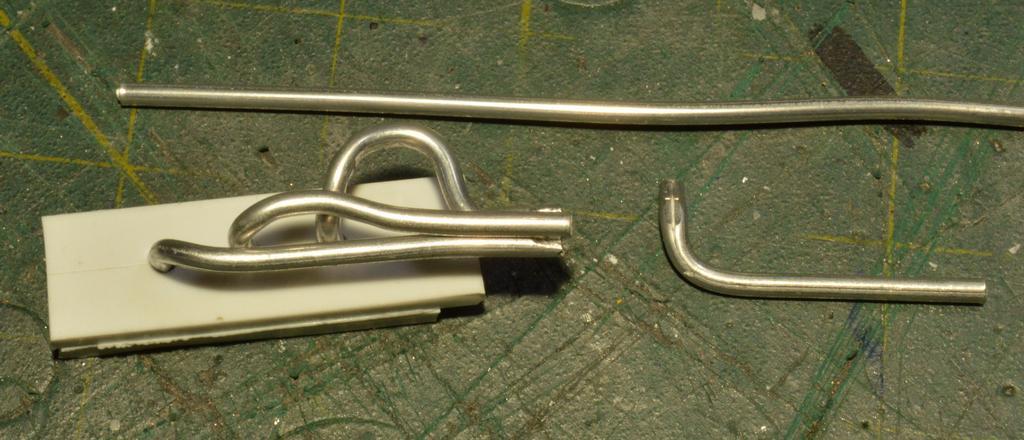
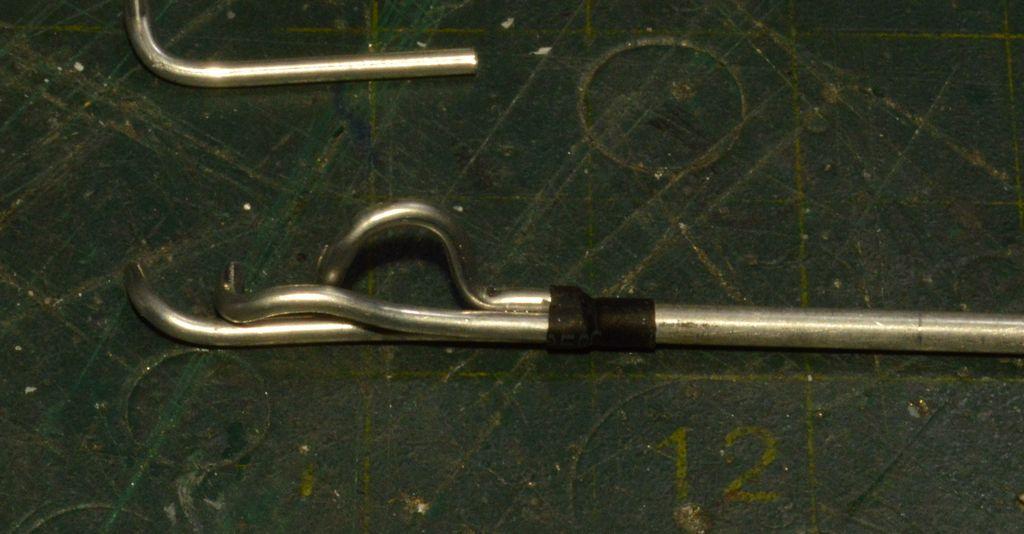
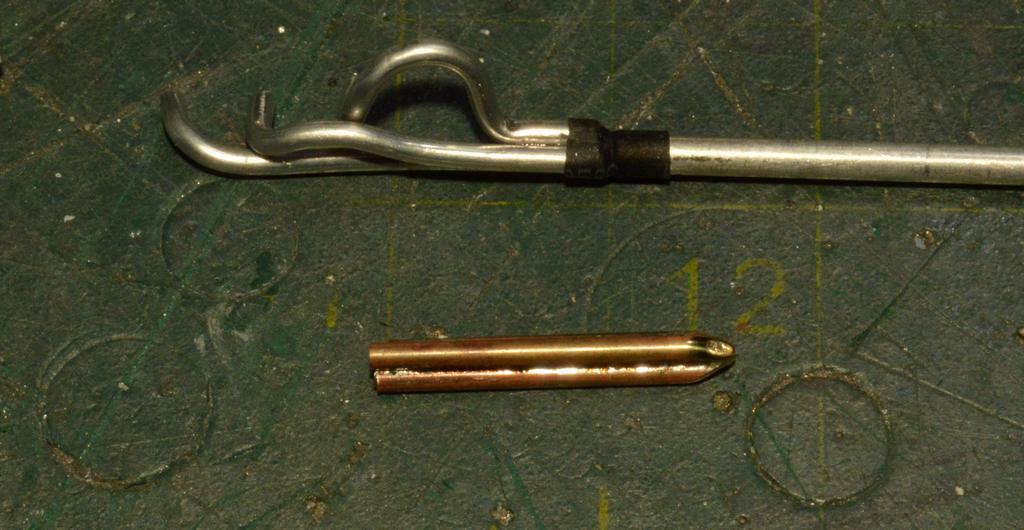
Thanks, Greg! Also look for aluminum armature wire. It's dead-soft and works great. If I had 1/16" on hand I would have used that. I just grabbed my micrometer and started measuring what I had, on hand until I found this. It was all I had, in this size, that I could form easily.
-
Old Diamond P stuff on Roku!
Straightliner59 replied to Straightliner59's topic in General Automotive Talk (Trucks and Cars)
I will have to look for the IHRA deal. Looks like it's starting to really take off, again. -
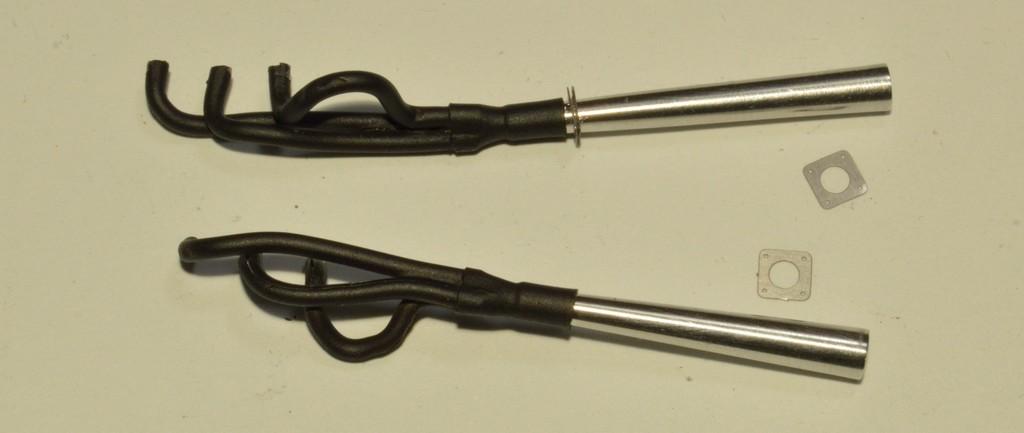
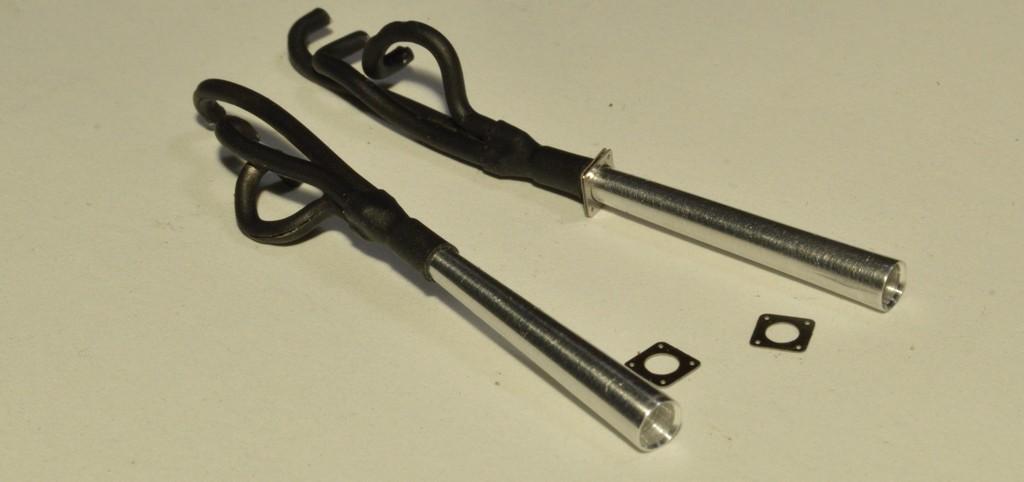
And, that's a pair! I redid the taper on the form for the collector. I think that looks better, now. I got my aluminum cut for the tailpipes, but haven't started further work, on them. I painted the headers with Krylon Ultra Flat Black, then burnished them with a Q-tip, dipped in powdered graphite. I followed that with a mix of black, grey and dark brown pastels. I hope to mount them in the next day or so. Thanks for looking!
-
Farm Floater Truck 1/24th scale
Straightliner59 replied to Randy D's topic in WIP: Model Trucks: Big Rigs and Heavy Equipment
Oh, yes! I've been admiring a certain crane! -
One header is done--mostly. I used some aluminum solder that is 1/16" which is correct for the 1-5/8" primaries that seem prevalent. I am leaning toward reworking the collector form. I think the taper needs to be longer. I'll turn some long megaphones, to go one them. I am planning to use Detail Master flanges. It's not too bad, I reckon. Thanks for looking!
-
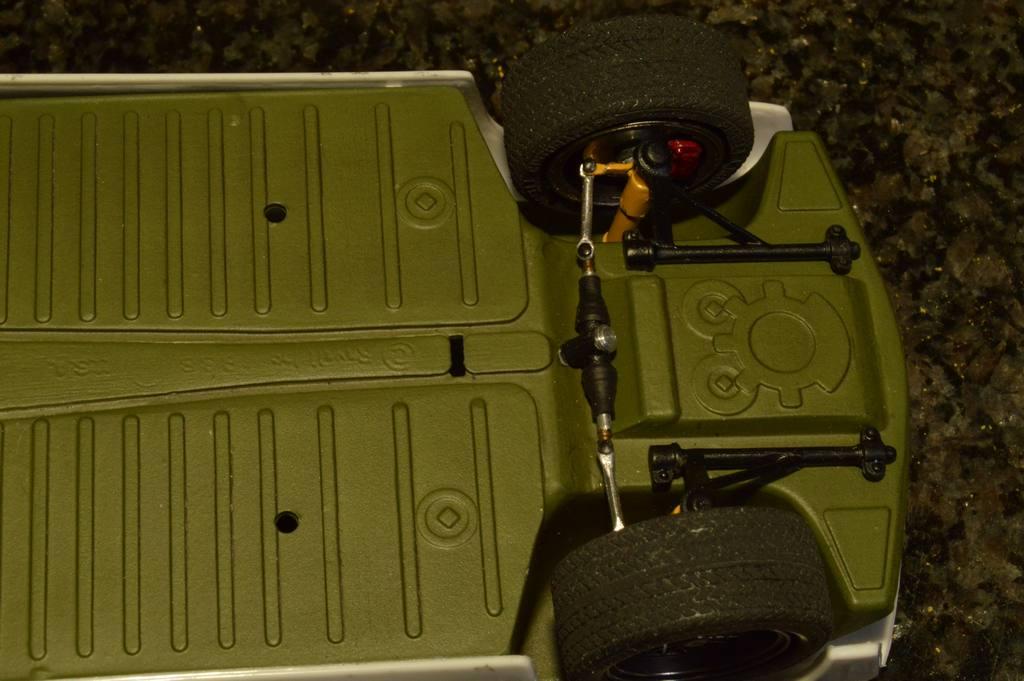
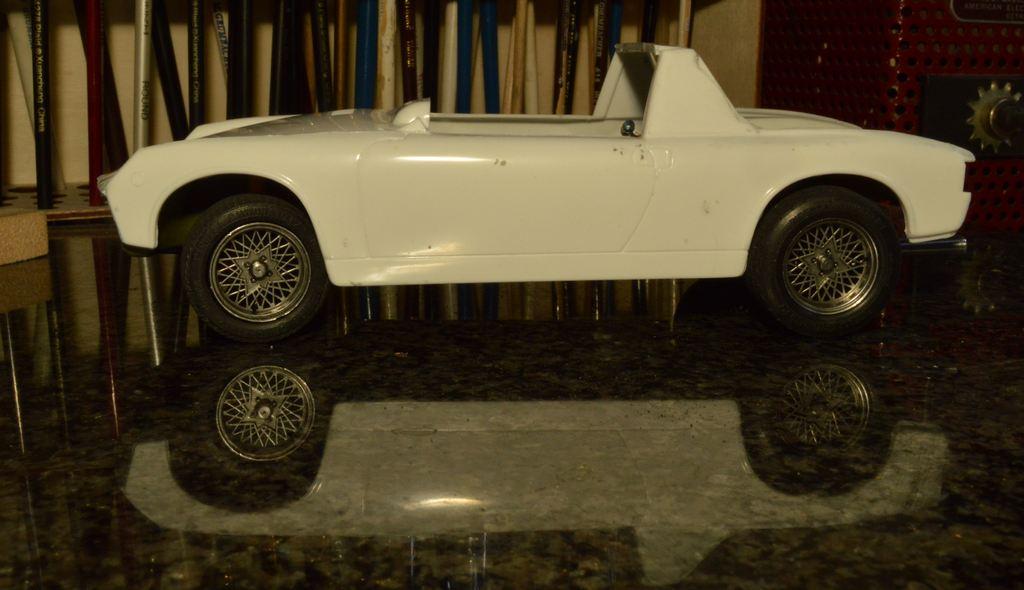
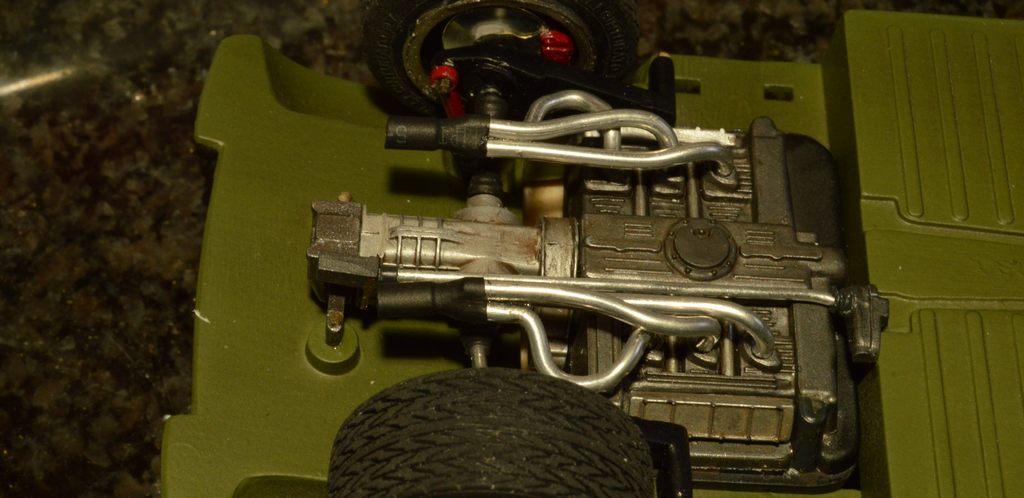
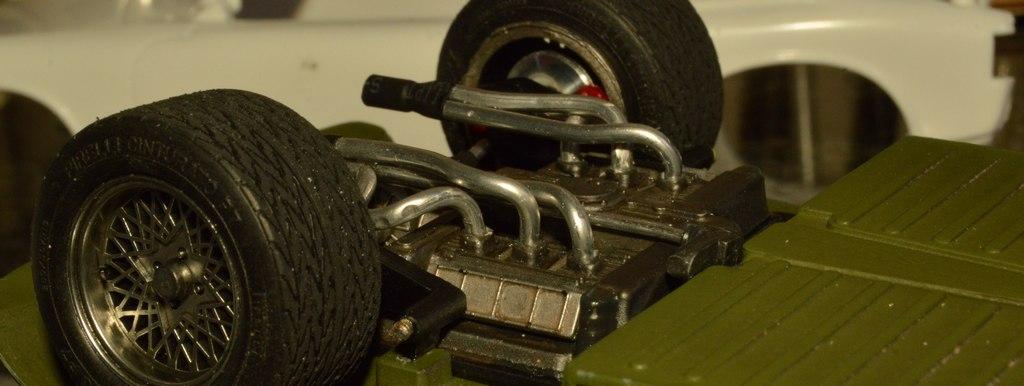
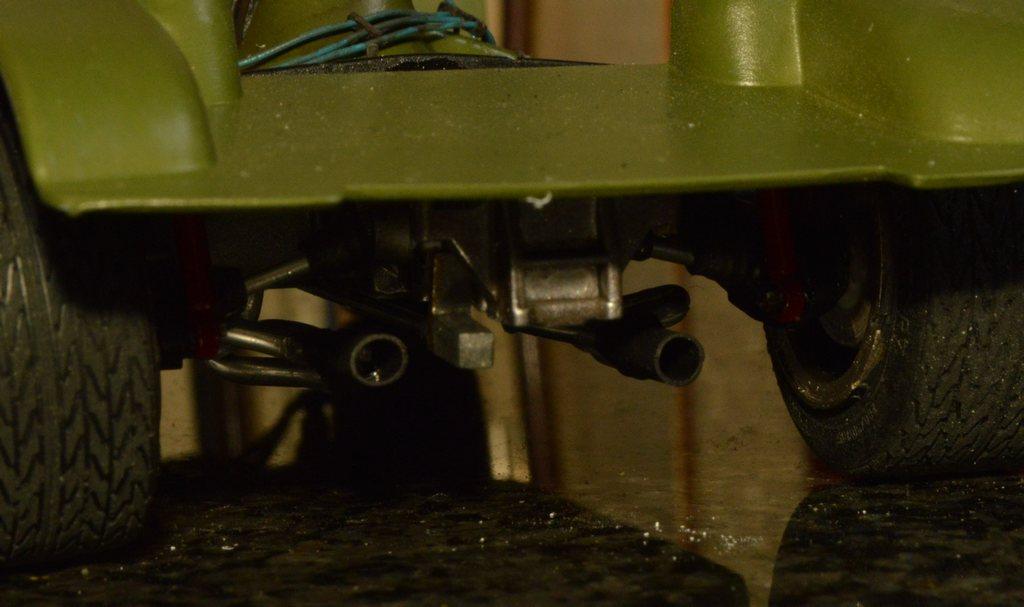
I got the wheels on the chassis. Whatever these wheels are, the finish is gorgeous! All I did was give them a wash of Vallejo Dark Grey wash, and add valve stems made of plug wire. The color is now almost an exact match for the (real) magnesium of the Cox Chaparral wheels I bought, a few years ago. The chassis pan is not at its final home, yet. Thanks for looking!
-
Wire nuts! Not bad!
-
ARII Chaparral 2C
Straightliner59 replied to Mark W's topic in WIP: Other Racing: Road Racing, Land Speed Racers
I think that, as long as it looks like what needs to be there, you're fine. I had to build inner fender walls for the Corvette, because you could see straight through. No need to go nuts, just cover the hole. It's going to look fine, I think! -
how important is the fit?
Straightliner59 replied to sidcharles's topic in Model Building Questions and Answers
I use an old Monogram driver, too. Rather than actually fit him in the car, I use him to line things up, and make sure driver can reach the pedals, shifter and wheel, and that the roll bar will clear his head, on open cars. I agree, it's off-putting when things obviously will not "work". -
ARII Chaparral 2C
Straightliner59 replied to Mark W's topic in WIP: Other Racing: Road Racing, Land Speed Racers
It's coming along nicely, my friend! I think it's fine, as a curbside. Full detail is a whole new can of worms! Keep up the nice work, Mark. -
Looking more closely at them, I am going to guess that they are from a Fujimi tire and wheels set from the late '80s to early '90s. The tires are Centuratos.
-
AMT's 1929 Ford Woody/Pickup Kit: WIP
Straightliner59 replied to David G.'s topic in WIP: Model Cars
I would like to add my voice to the chorus singing the praises of your woodwork! Beatifully done, sir! -
1/16th 55 Thunderbird BB/FC Funnycar "GIRL TROUBLE"
Straightliner59 replied to Ian McLaren's topic in WIP: Drag Racing Models
Those are going to look killer, Ian! The car just looks right. Excellent work, as always, my friend! -
The best answer I have, is from my parts box! I didn't even remember having them.
-
I think that's what size mine is. When I'm not using it for actual construction, I put finished parts/assemblies on it.