Straightliner59
-
Posts
5,800 -
Joined
-
Last visited
Content Type
Profiles
Forums
Events
Gallery
Everything posted by Straightliner59
-
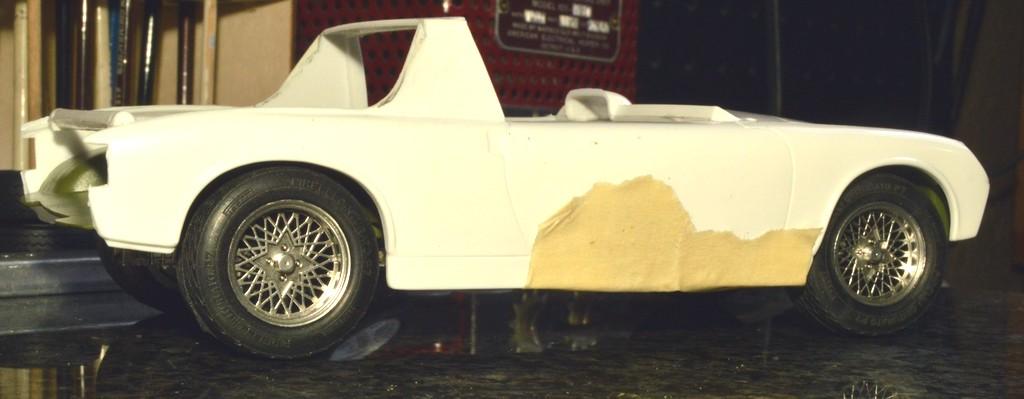
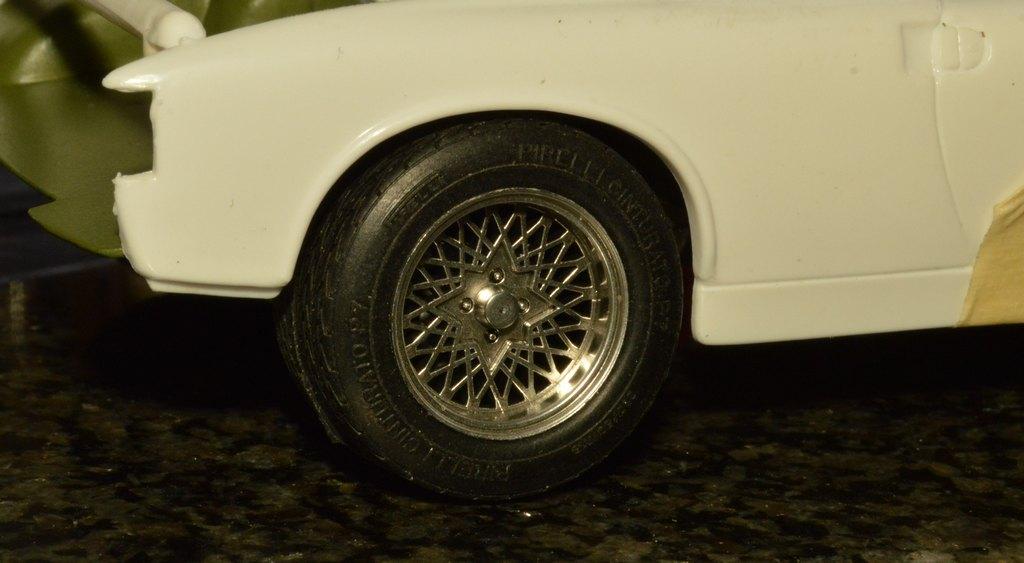
Looking more closely at them, I am going to guess that they are from a Fujimi tire and wheels set from the late '80s to early '90s. The tires are Centuratos.
-

AMT's 1929 Ford Woody/Pickup Kit: WIP
Straightliner59 replied to David G.'s topic in WIP: Model Cars
I would like to add my voice to the chorus singing the praises of your woodwork! Beatifully done, sir! -
1/16th 55 Thunderbird BB/FC Funnycar "GIRL TROUBLE"
Straightliner59 replied to Ian McLaren's topic in WIP: Drag Racing Models
Those are going to look killer, Ian! The car just looks right. Excellent work, as always, my friend! -
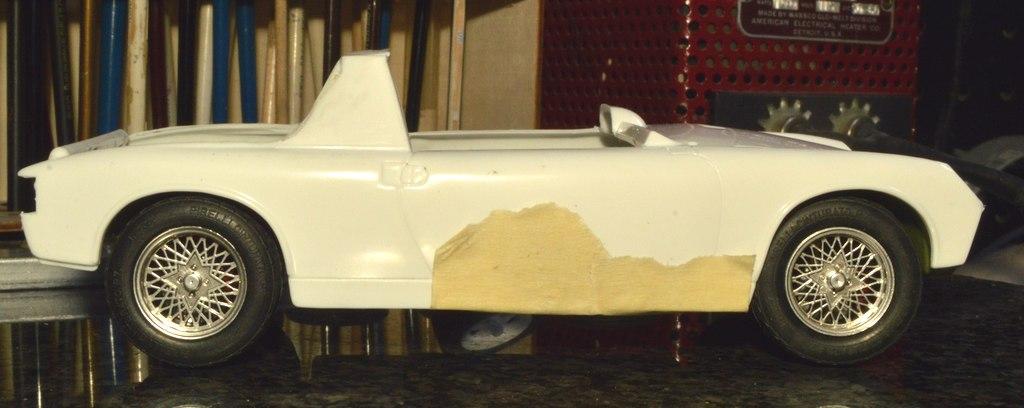
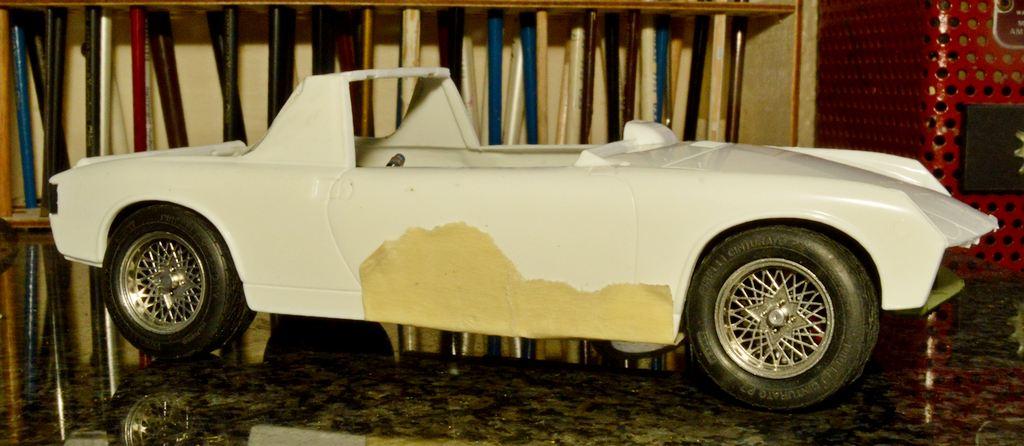
The best answer I have, is from my parts box! I didn't even remember having them.
-
I think that's what size mine is. When I'm not using it for actual construction, I put finished parts/assemblies on it.
-
I found some new wheels. They're not the correct bolt pattern, but, man, are they perfect. This is a set I found in one of my parts drawers. The fill the wheelwells much better than the previous set. I'm really strongly leaning to these, in spite of the missing lug.

-
F'r instance...
-
Thanks, Mark! It did come out, pretty nicely!
-
Yep. A friend gave it to me, many years ago. It can be seen in many of my WIP photos.
-
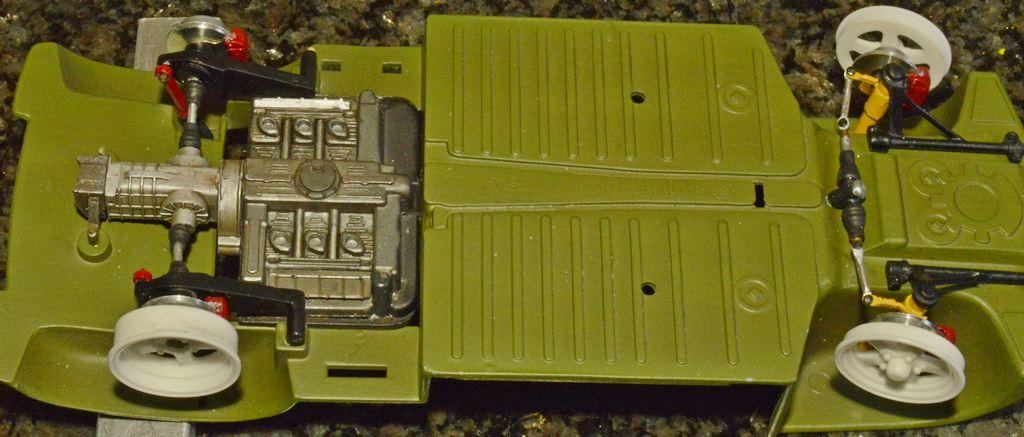
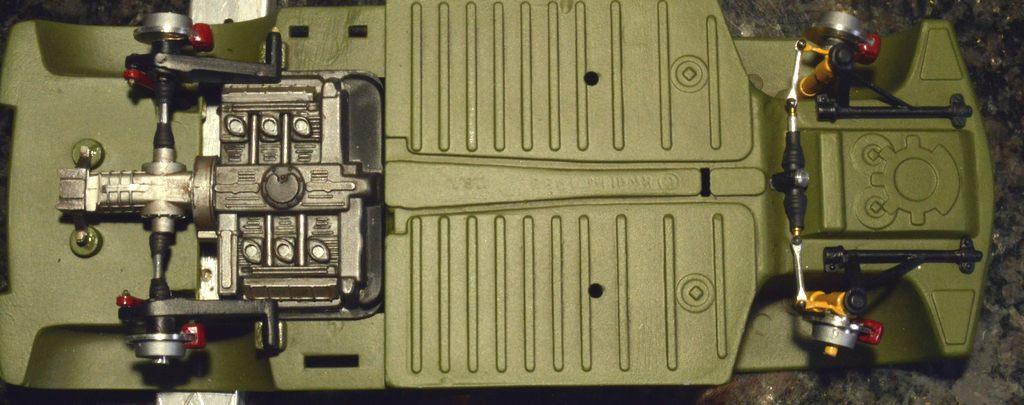
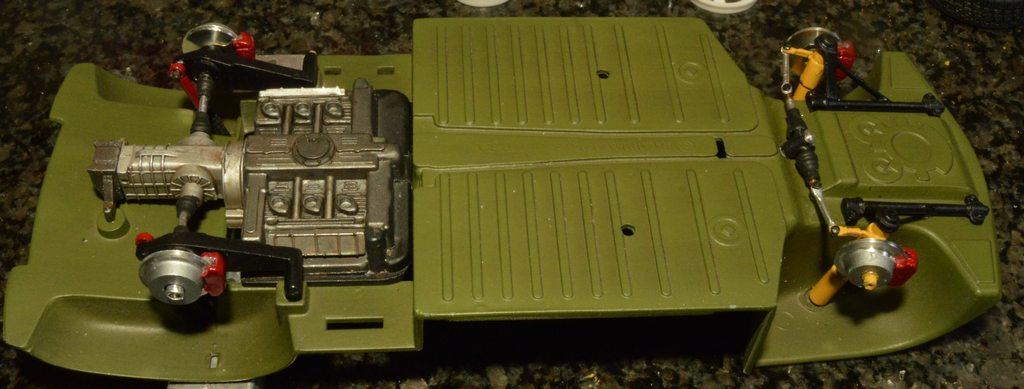
Brakes are on. Axles are all set up for the wheels! Now, I just have to make it smutty! Thanks for looking!
-
Crossing Scales For Extra Detail
Straightliner59 replied to oldcarfan's topic in Tips, Tricks, and Tutorials
I have forever used different scales of model railroad parts. HO handrail stanchions, especially. I use them for tie rod ends, etc. There are some n almost every model I build. Phil Jensen used Kemtron O scale glad hands, on his model trucks. I still have some floating around the shop, somewhere that I bought in 1975, I think, in a hobby shop in downtown Pittsburgh. -
I have a slab of polished granite. That sucker's heavy!
-
Having to redo stuff is frustrating. I feel that pain! Every time I look at this, it gives me the same feeling as when I see any other beautiful artwork--you know, it just make you feel like you're smiling, inside? This is fantastic, and you should be very proud, Tom.
-
'66 F-600 kitbash ideas
Straightliner59 replied to Harv Mushman's topic in Model Building Questions and Answers
I did this one about 150 years, or so, ago. In this case, I think I just "stacked" Evergreen strip stock, to create the profile, then added the flanges. It's pretty simple to do, and it allows for more complex contours.
-
'66 F-600 kitbash ideas
Straightliner59 replied to Harv Mushman's topic in Model Building Questions and Answers
I would agree with Bill. Cutting out the profile, then adding flanges would be the best way to go about it. If you're feeling really ambitious, you could always go with brass, too. -
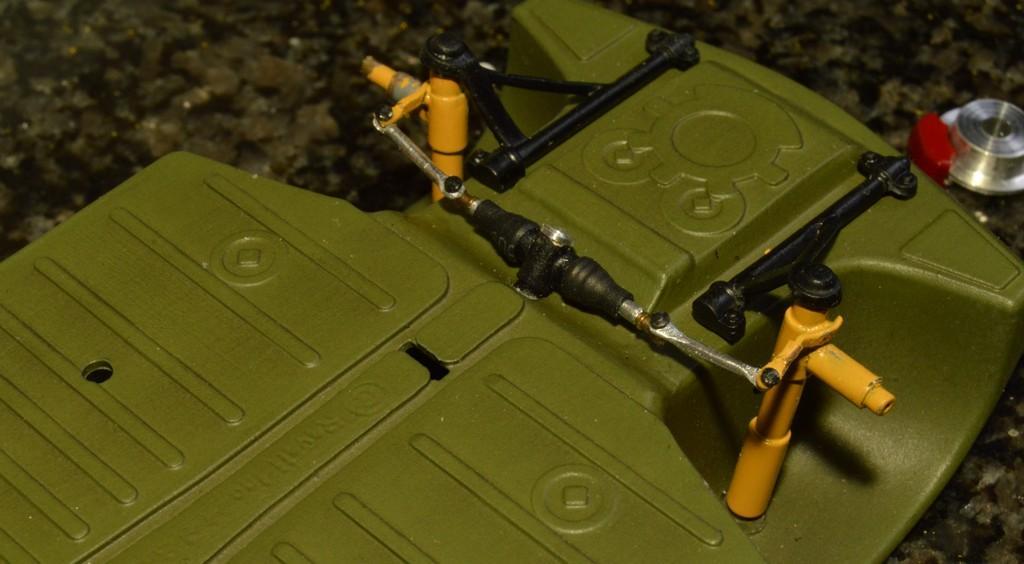
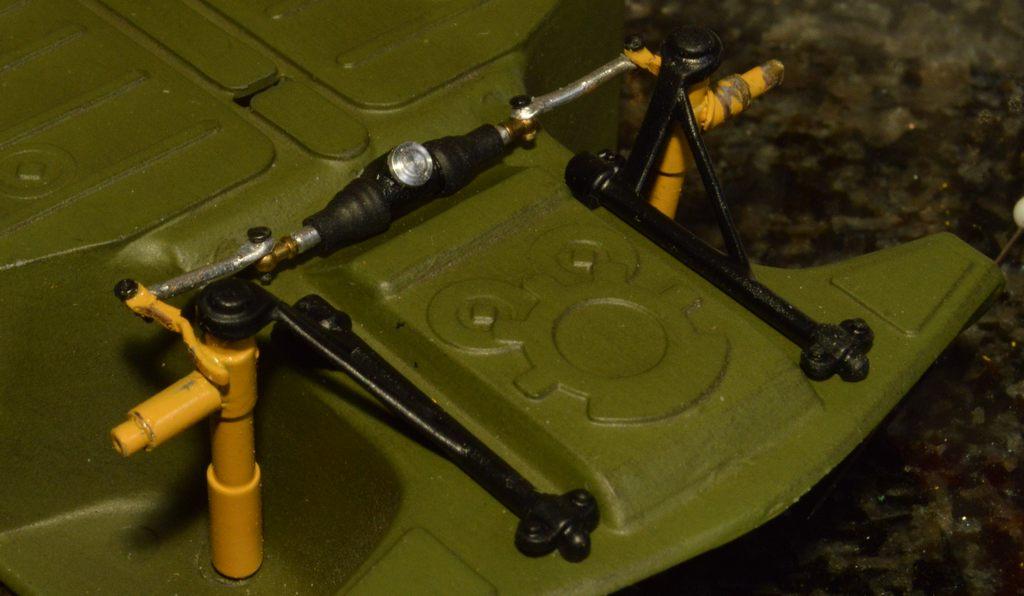
Thank you, Trevor. That thing was a pain! I also discovered that I put the arms on wrong. They should be above the spindle. By the time I noticed , I was like, "Screw that!" It looks okay, anyway. The best part about having to redo the strut, being brass, I just tossed it in lacquer thinner, so it didn't take any time to strip it...twice!😄
-
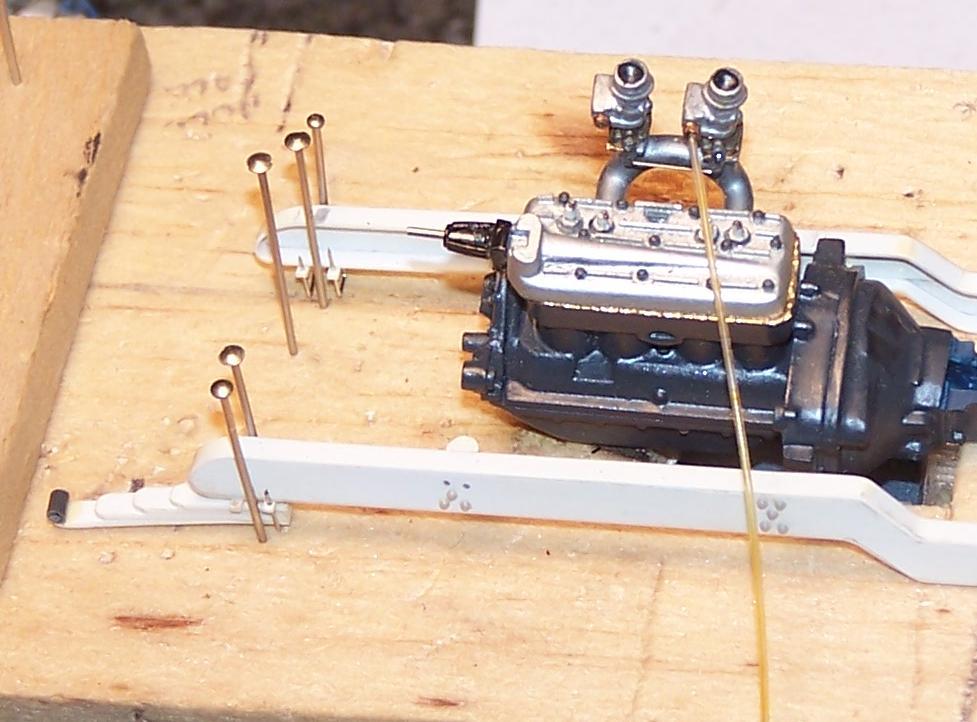
I finished the steering. I used .040" dead-soft aluminum armature wire to make the tie rods. I tried something new, on the ends that attach tto the rack. I flattened the end of the wire, using a 1/16" punch. I made a rough die by making a dimple, using a 1/16" ball-ended end mill, in a scrap piece of 1/4"X1/2" aluminum bar. I used a ball-ended burnisher to cup the end, and drilled it to accept a .022" pin. Now, the aluminum rod cups the handrail stanchion. It adds a little extra to look at, I guess. Mostly, because I plan to mount this on a base, I was just having fun, messing around with stuff! Still, while not prototypical, it looks cool. I'm very close to having to deal with choosing a color for the wheels. There's still a chance I could dig through my wheels, again, too. At any rate, it's close to being ready for them. As always, questions, comments and critiques are welcomed. Thanks for looking!
-
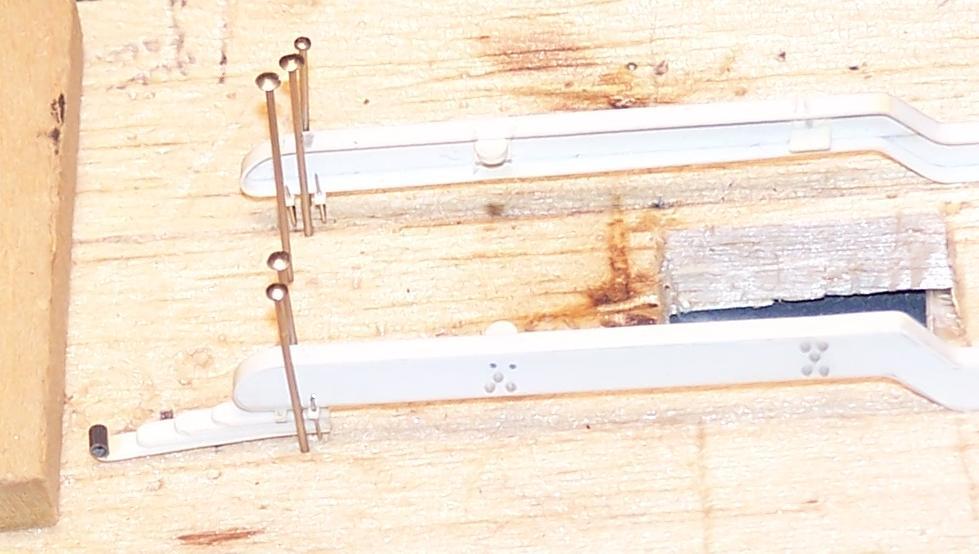
I have the front suspension in place, and the steering rack, as well. I'm currently figuring out what needs to be what length, to mount the rear wheels, and have the axle ends not poking out of the wheel. Up front, there's touchup, detail paint, and tie rods to make, then I'll mount the brakes, while I decide what color to paint that dadgum wheels! Anyway, it's not a lot, but it is progress. Thanks for looking!
-
Old Diamond P stuff on Roku!
Straightliner59 replied to Straightliner59's topic in General Automotive Talk (Trucks and Cars)
I'm so happy I did it! I'm saving nearly $200/mo. Currently, they're showing the 1963 Winternationals. I've barely taken it off the NHRA channel, since I found it! -
Valve cover hoses?
Straightliner59 replied to MonsterFan88's topic in Model Building Questions and Answers
That much is true. -
Old Diamond P stuff on Roku!
Straightliner59 replied to Straightliner59's topic in General Automotive Talk (Trucks and Cars)
I use all three of those. Yeah, I can't see anymore need for cable. I do need to get an antenna, and I wouldn't mind having DVR, of some sort. -
Valve cover hoses?
Straightliner59 replied to MonsterFan88's topic in Model Building Questions and Answers
They're puke hoses, I'd guess. The probably go into a tank. They are the same thing as these:
-
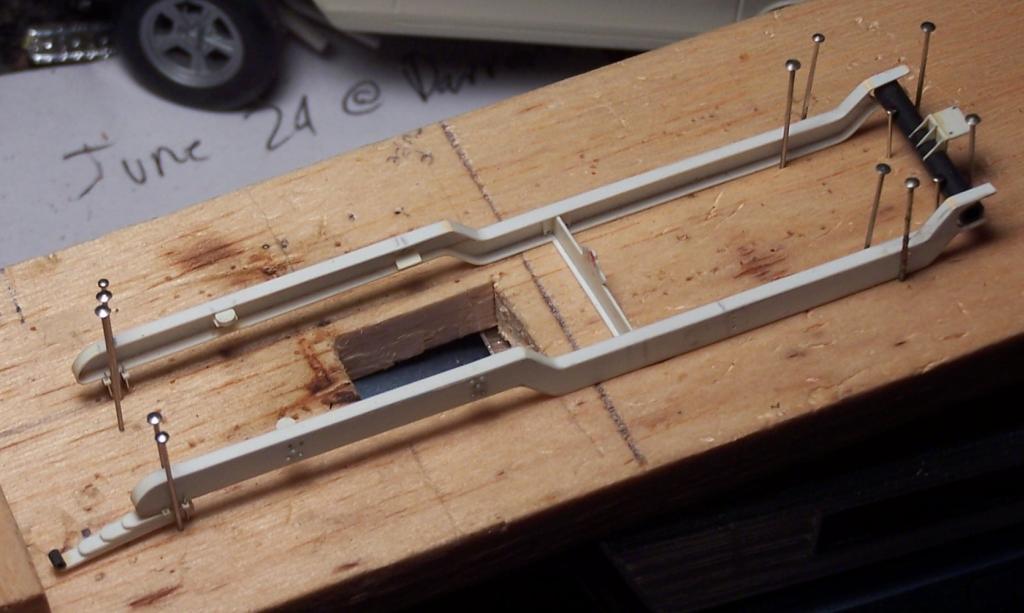
I'm hoping to have an update, later. I've had to redo the left strut three times! Twice after paint. Grr. I just re-primered it. I did get the middle section (rack and pinion housing) of the steering done, barring an end cap for the pinion housing.
-
In the new Museum Annex to your house!😂
-
That's an excellent idea! Given the size, this beautiful beast will be should provide lots of backdrop space, too.