StevenGuthmiller
-
Posts
15,088 -
Joined
-
Last visited
Content Type
Profiles
Forums
Events
Gallery
Everything posted by StevenGuthmiller
-
I couldn't beg, borrow or steal a can of anchovies last week! Figure that one out! Steve
-
I guess the corn left standing in the fields all winter around here was a blessing in disguise. Just in case! Steve
-
That reply was directed at Bob. It was in reference to the "narrow minded" statement. I respect your opinion Chris, as well as Bob's, and everyone elses. Everyone's opinion should be respected here. And I have no knowledge or doubt about the quality of the kits. I'm only stating my opinion on the subject matter, but that opinion appears to be unacceptable to some. I've read many statements over the years on some of the boards that some people feel that building factory stock model cars, (which is my main interest) is boring or dumb. I don't take it personally. But I won't darken the doorstep of this thread any longer. I wasn't looking to get into a fight. I just thought that it might be worthwhile to add a dissenting view to the discussion about these models. There's a good possibility that someone starting a thread about about 1/25th scale Corvettes on a nautical model forum might get a few raised eyebrows and a couple of guffaws as well. Steve
-
That's fine guys. Everybody here has opinions. You have yours, and I have mine. One just as valid as the other. There's really no need to cast aspersions because my opinion doesn't match yours. I don't consider anybody that enjoys this particular hobby anything other than noble if it's what they like to do. I wouldn't tag a Gundam builder who doesn't like model cars as "narrow minded", or an armor builder who won't build an aircraft carrier "narrow minded". I would consider them dedicated to their craft, and I wouldn't demand that they genuflect to my way of thinking just because it happens to be a cousin of what I am passionate about. There are but a few sites on the web dedicated solely to model cars. I'll bet there are plenty dedicated to Gundam as well. I doubt very much that they are demanding my approval. Do you find them mindless because they are something that you have no interest in, or know little about Bob, or are you just being "narrow minded"? Steve
-

Biggest pet peeves on builds.
StevenGuthmiller replied to LL3 Model Worx's topic in General Automotive Talk (Trucks and Cars)
You must be talking much later than I remember. I don't remember any buzzers in any of my folks cars from when I was a kid. I didn't even know that my 1:1 '69 Grand Prix had rear seat belts until I ripped the back seat out a few years ago to find them under the seat in a sea of dust and gunk! Steve -
I wasn't really "comparing" them to Ikea furniture. I was comparing them more so to Dungeons and Dragons, or any other figure, which is an absolutely fair comparison. If not, I would need someone to explain the difference to me. My reference to Ikea was merely my attempt to make the point that just because something requires assembly, it's not necessarily automatically a "model". A great deal of the Dungeons and Dragons figurines that I used to paint were comprised of a few parts that required being glued together, but I wouldn't consider them "models". They were "figurines". The painting was the skill required. I understand that some of these "models" require much more assembly than a few parts, and I get that. I recently attended a show that had a table set up for "figures" which included Gundam. My first thought upon looking at some of these "figures" was that there was virtually no assembly involved at all. There were several different resin animal heads mounted on pedestals that consisted of 2 parts, the head and the pedestal. That in my opinion is not "modeling". Chris made the statement that Bandai produces kits that make AMT or Revell look like garbage. Well sure, it's a lot easier to produce a kit that requires no accuracy whatsoever. Bandai doesn't have to craft something that looks exactly like a '69 Camaro, a Tiger tank or a P-51 Mustang. They can just make it up as they go along, so I'm not convinced that is a fair comparison to make at all. So I guess that we can call it even. Steve
-
Exactly. Flat paints not only flow out better, with much less brush mark issues, but they also dry much faster. I figure, why have gloss black on my bench when all it takes to make flat gloss is a little gloss coat. Steve
-
I'm not afraid of them, I just never have, and never will take any interest in Power Rangers, that's all. Steve
-
You didn't stir anything up. You asked a question. Steve
-
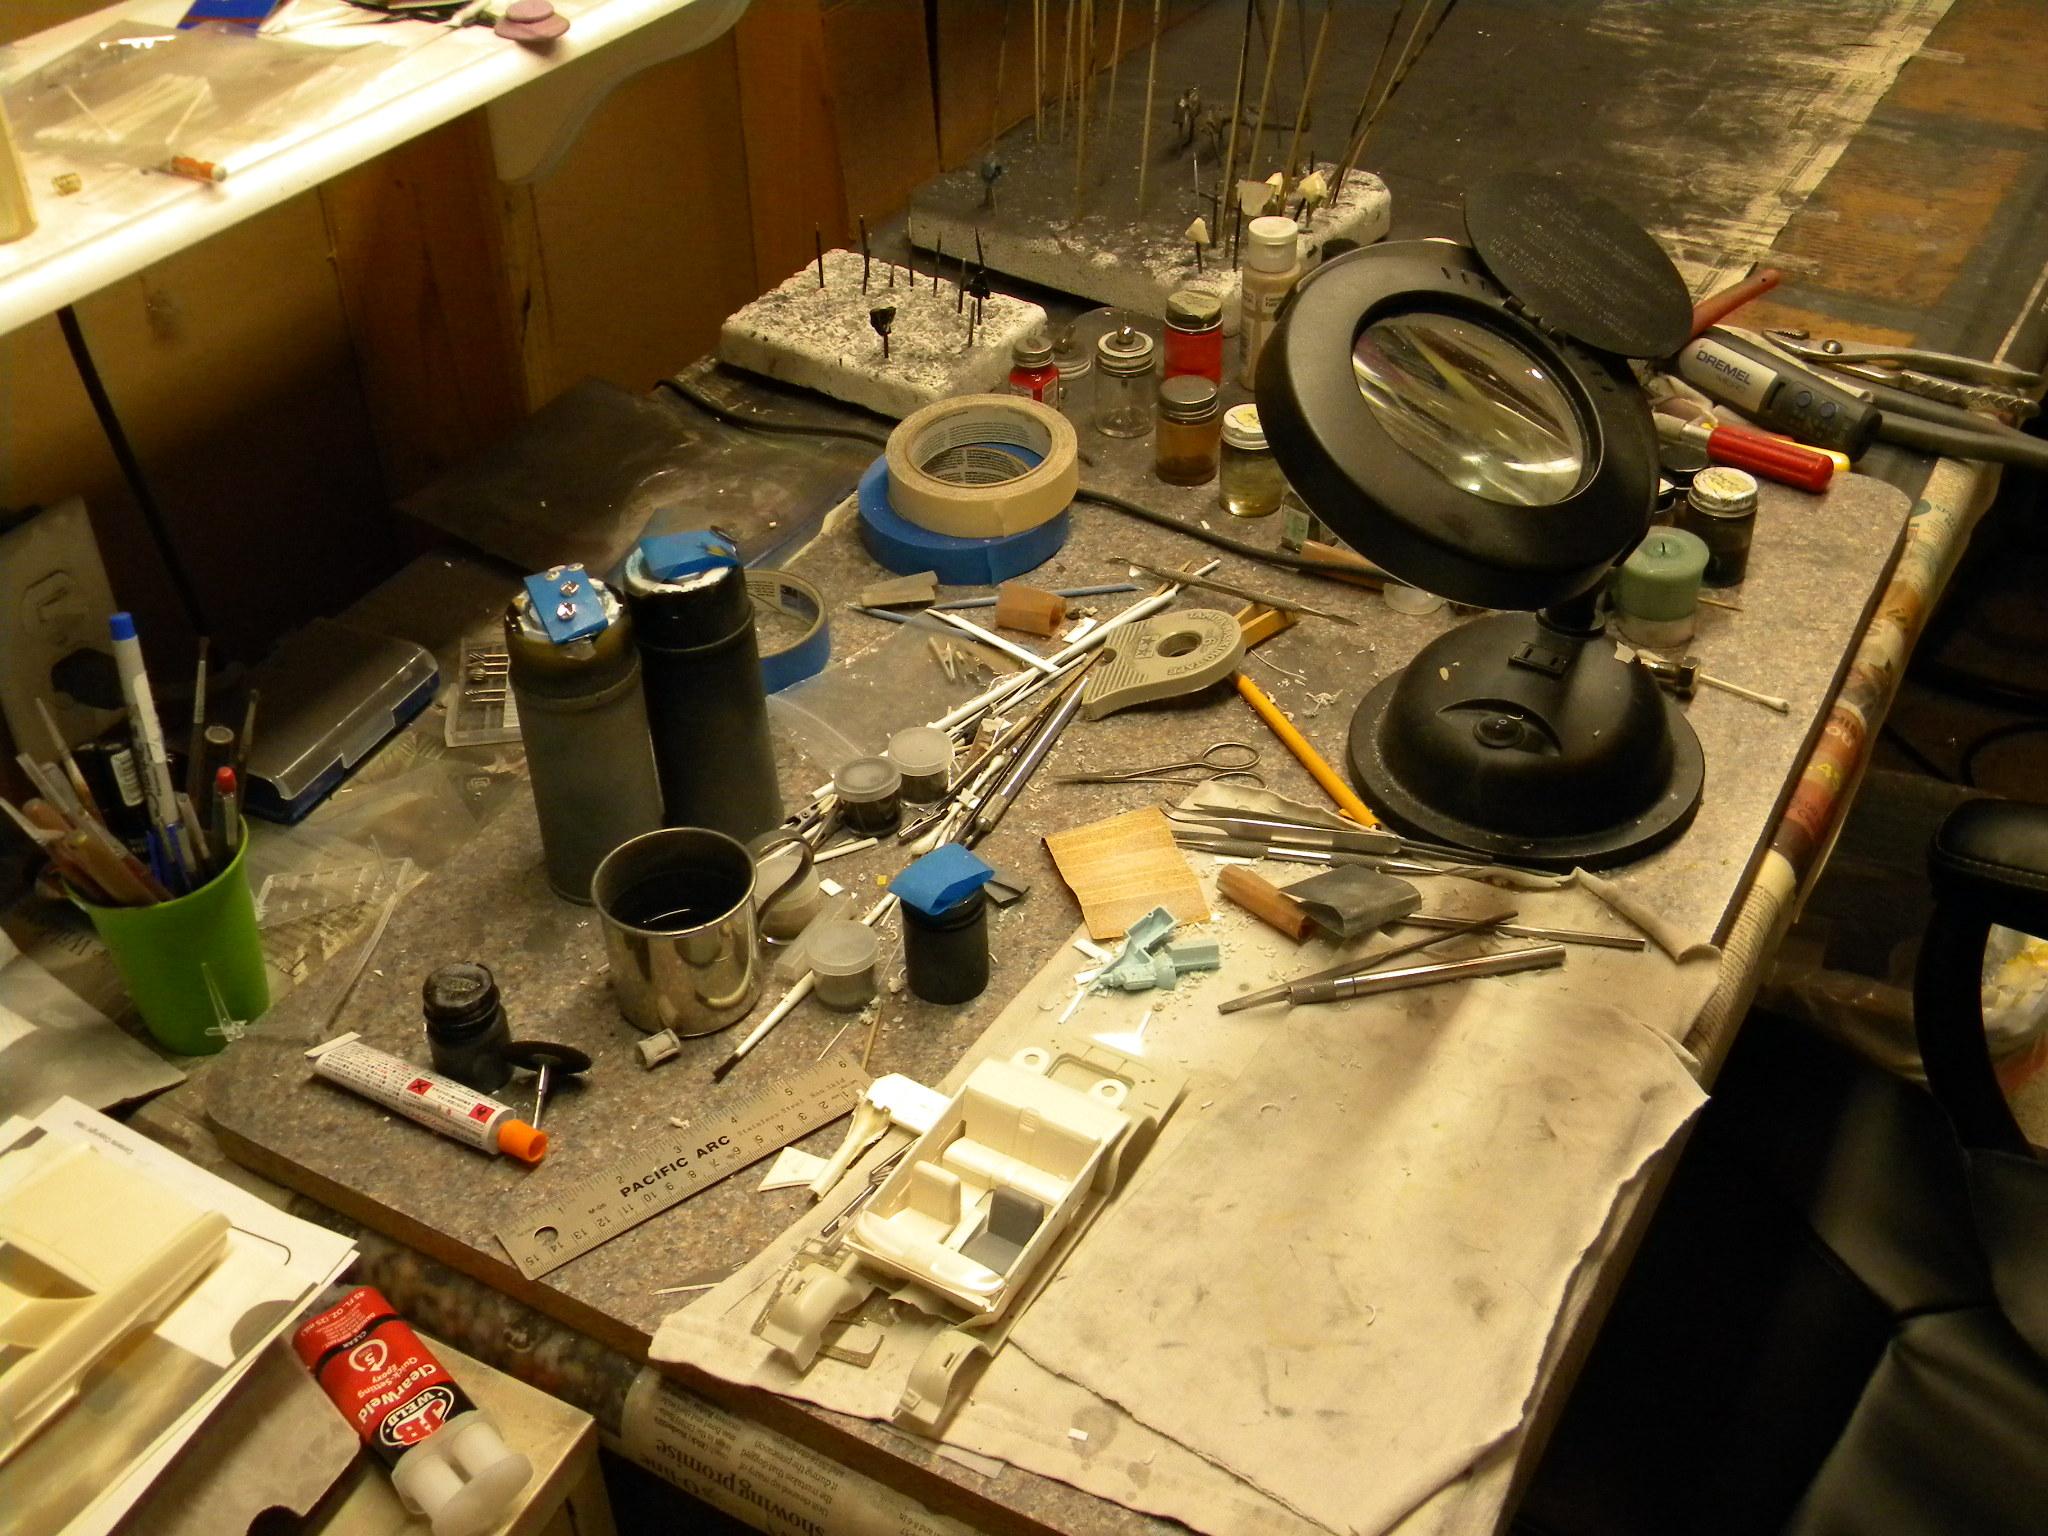
Uh, yeah........No! My shop looks similar to that for about 8 minutes in between projects. After that it looks like this for about 5 or 6 months! Steve

-
Body colors are completely subjective, but if you're asking about basic brush paints for detailing and such, there are some colors that I can't do without. Most are Testors enamels, and almost all are flat. The finish can be determined by adding a coat or 2 of gloss if desired. Flat black Flat white Flat red Flat Blue Flat green Flat yellow Aluminum Steel Gold There are a ton of specialty colors that you can add to that list like Rubber, Rust, etc, that all come in very handy, but these are the basics. I also always have a big bottle of Testors Dullcote and Glosscote lacquers on hand. Steve
-
Biggest pet peeves on builds.
StevenGuthmiller replied to LL3 Model Worx's topic in General Automotive Talk (Trucks and Cars)
That's a big reason why I never add seat belts to a project. Nobody ever used them back when I used to see cars from the '60s or 70s running around when I was young, so they got tucked into the seats. Nobody ever left their seat belts laying across the seats.........ever! Steve -
1964 Pontiac Auto Transmission
StevenGuthmiller replied to StevenGuthmiller's topic in Model Building Questions and Answers
I understand that Bill, but it appears that I'm a little short on Slim Jim transmissions at the moment! It seems that the only option is to either use the one from the Johan Olds, (which apparently is not correct either) or to use something else that is incorrect. Unless someone knows of a resin caster who happens to make them, I'm kind of stuck. I don't have any interest in spending hours fabricating a transmission. Steve -
Terrific work! It might be a more difficult task to remove that horrific parting line around the Starfire script on the C-pillar! Steve
-
1964 Pontiac Auto Transmission
StevenGuthmiller replied to StevenGuthmiller's topic in Model Building Questions and Answers
I'm anal, but not that anal! If I use it, I probably won't make a whole lot of changes to it. I usually don't spend exorbitant amounts of time on the underside of my projects anyway. Steve -
Agreed. This is a forum. Not just a "catalog" of subjects. Maybe he'll learn something new that wasn't discussed last time. Steve
-
1964 Pontiac Auto Transmission
StevenGuthmiller replied to StevenGuthmiller's topic in Model Building Questions and Answers
Thanks for that tip Jack. Still not exactly correct, but it might be my only real option. I will give that consideration! Steve
-
Well sure. Anything that requires assembly and painting could technically be considered a "model". I suppose you could consider a shelving unit from Ikea a model if it fits your definition. I just hope we don't start seeing Ikea furniture at model shows. I suppose I should drag out some of my old Dungeons and Dragons stuff and enter them in the next show that I attend. Steve
-
1964 Pontiac Auto Transmission
StevenGuthmiller replied to StevenGuthmiller's topic in Model Building Questions and Answers
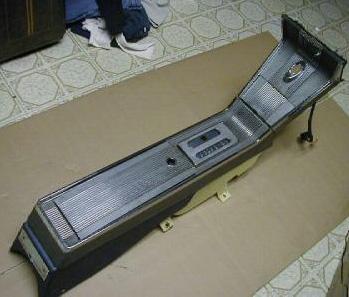
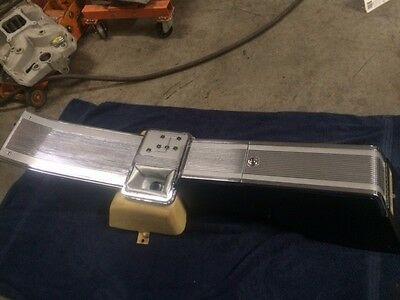
My only other option at this point is to try to scratch build a 4 speed console. That looks like more work than it's worth. I would need to go from this. To this. Steve
-
Thanks Fellas! Steve
-
1964 Pontiac Auto Transmission
StevenGuthmiller replied to StevenGuthmiller's topic in Model Building Questions and Answers
That would be after market. I'm shooting for as close to factory stock as possible. Steve -
1964 Pontiac Auto Transmission
StevenGuthmiller replied to StevenGuthmiller's topic in Model Building Questions and Answers
At this point, it appears that it might be easier to try to convert the console from an automatic, to a 4 speed, but I don't know how easy that will be either. Steve -
1964 Pontiac Auto Transmission
StevenGuthmiller replied to StevenGuthmiller's topic in Model Building Questions and Answers
By the way, this is for my '64 Pontiac Grand Prix project folks, if that makes any difference. Steve -
1964 Pontiac Auto Transmission
StevenGuthmiller replied to StevenGuthmiller's topic in Model Building Questions and Answers
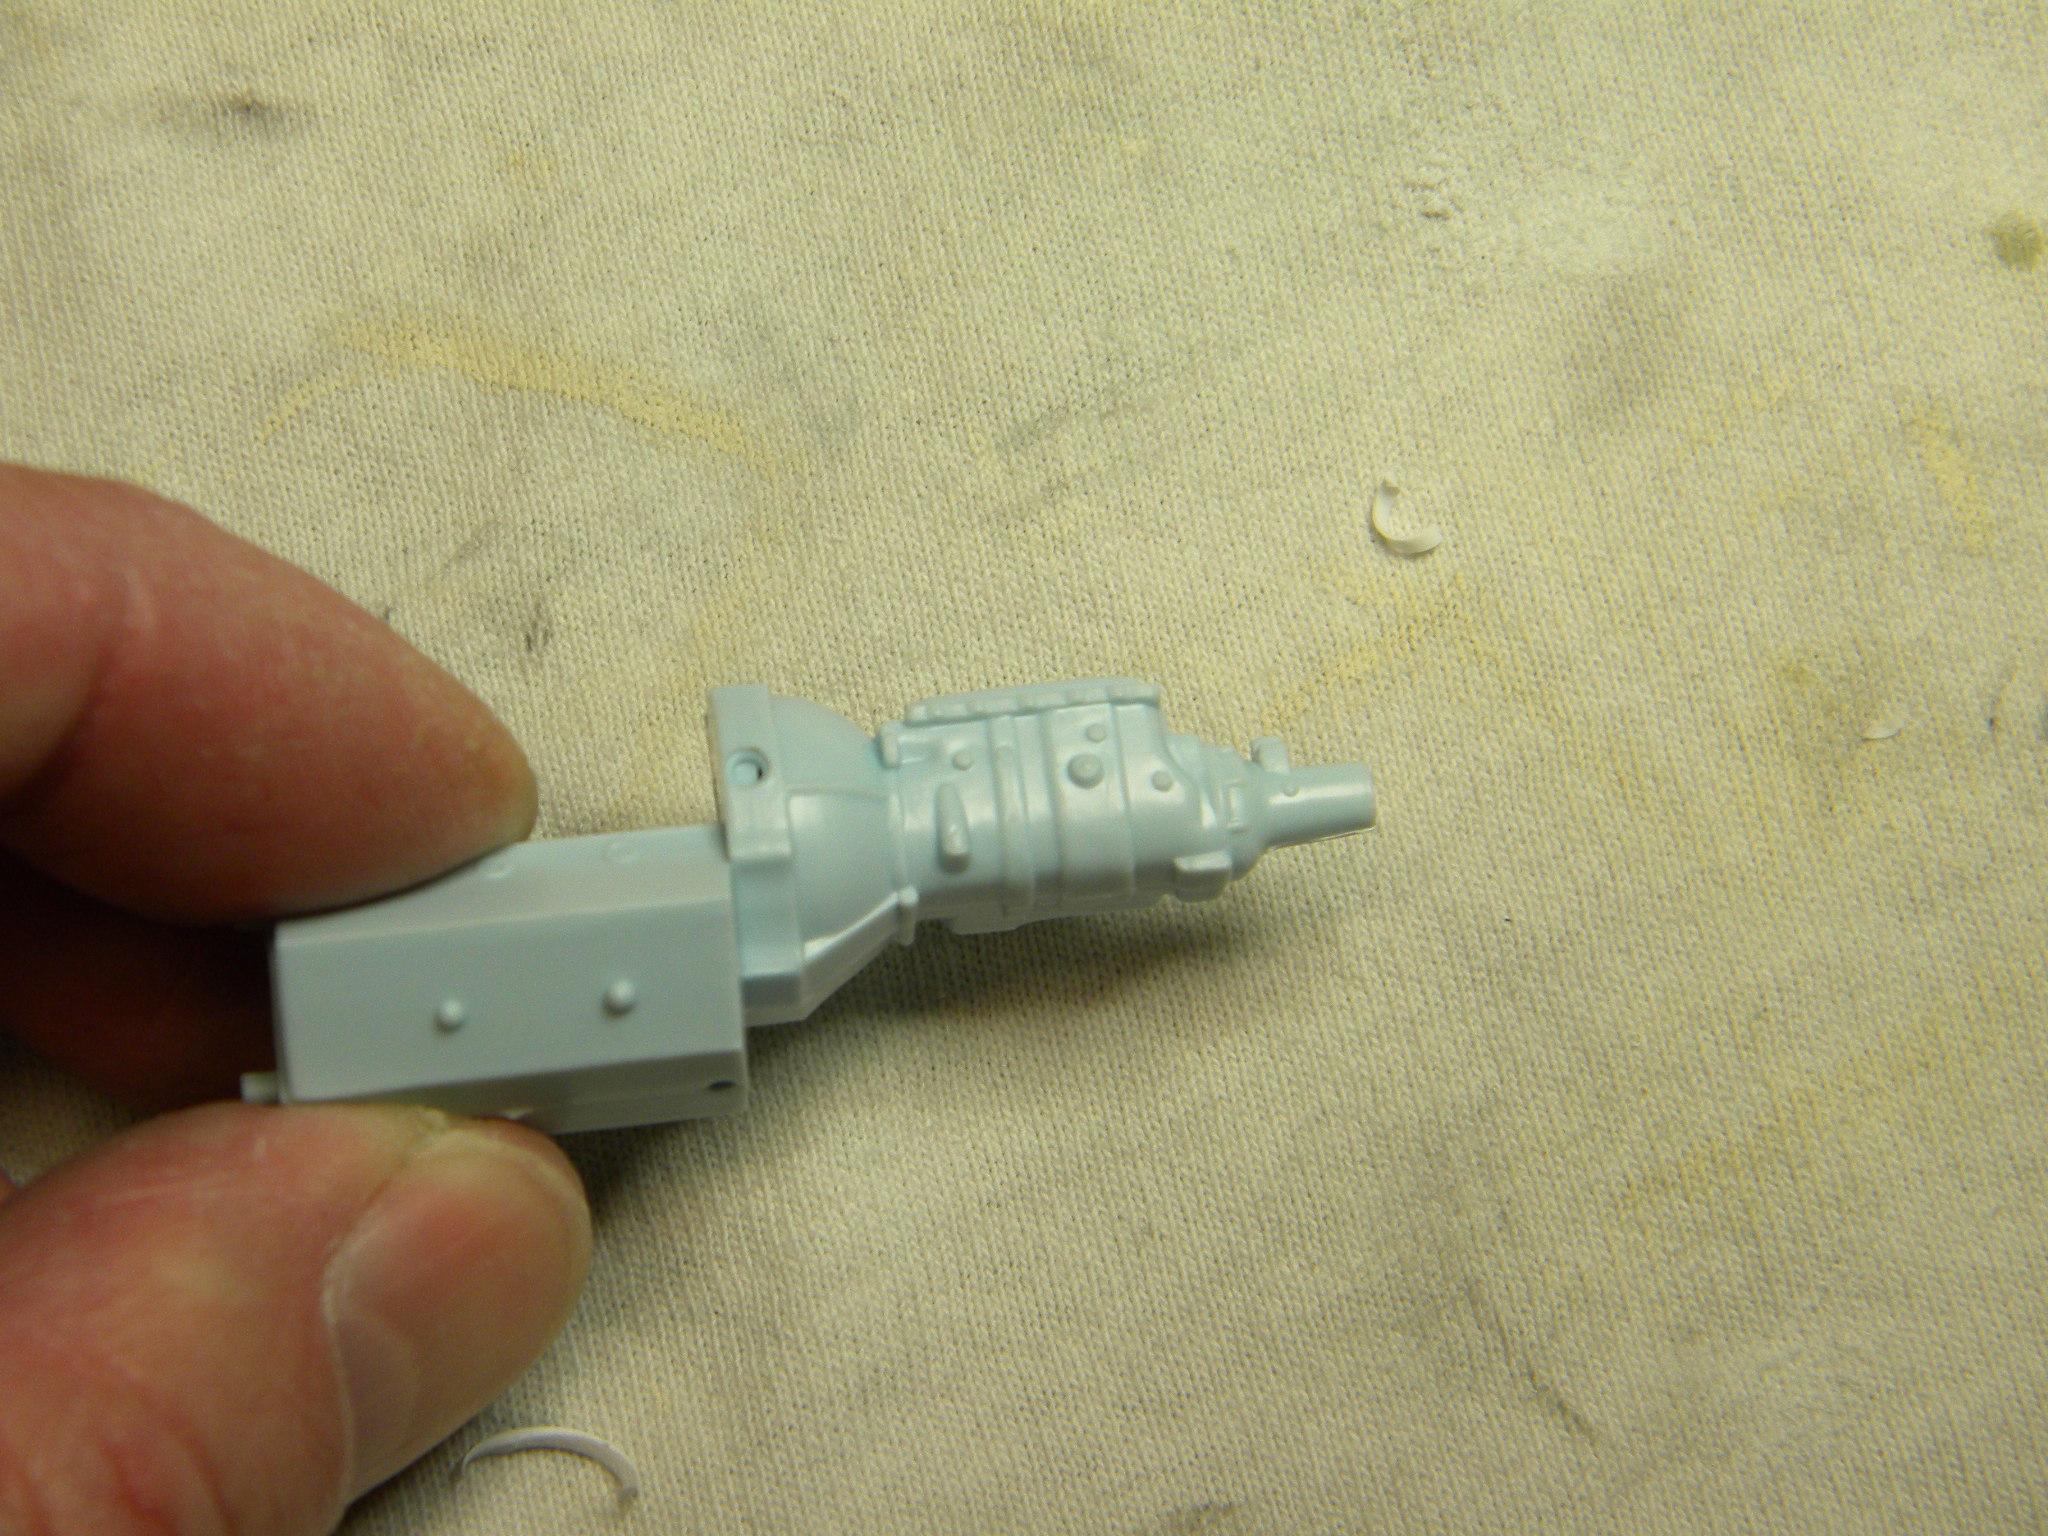
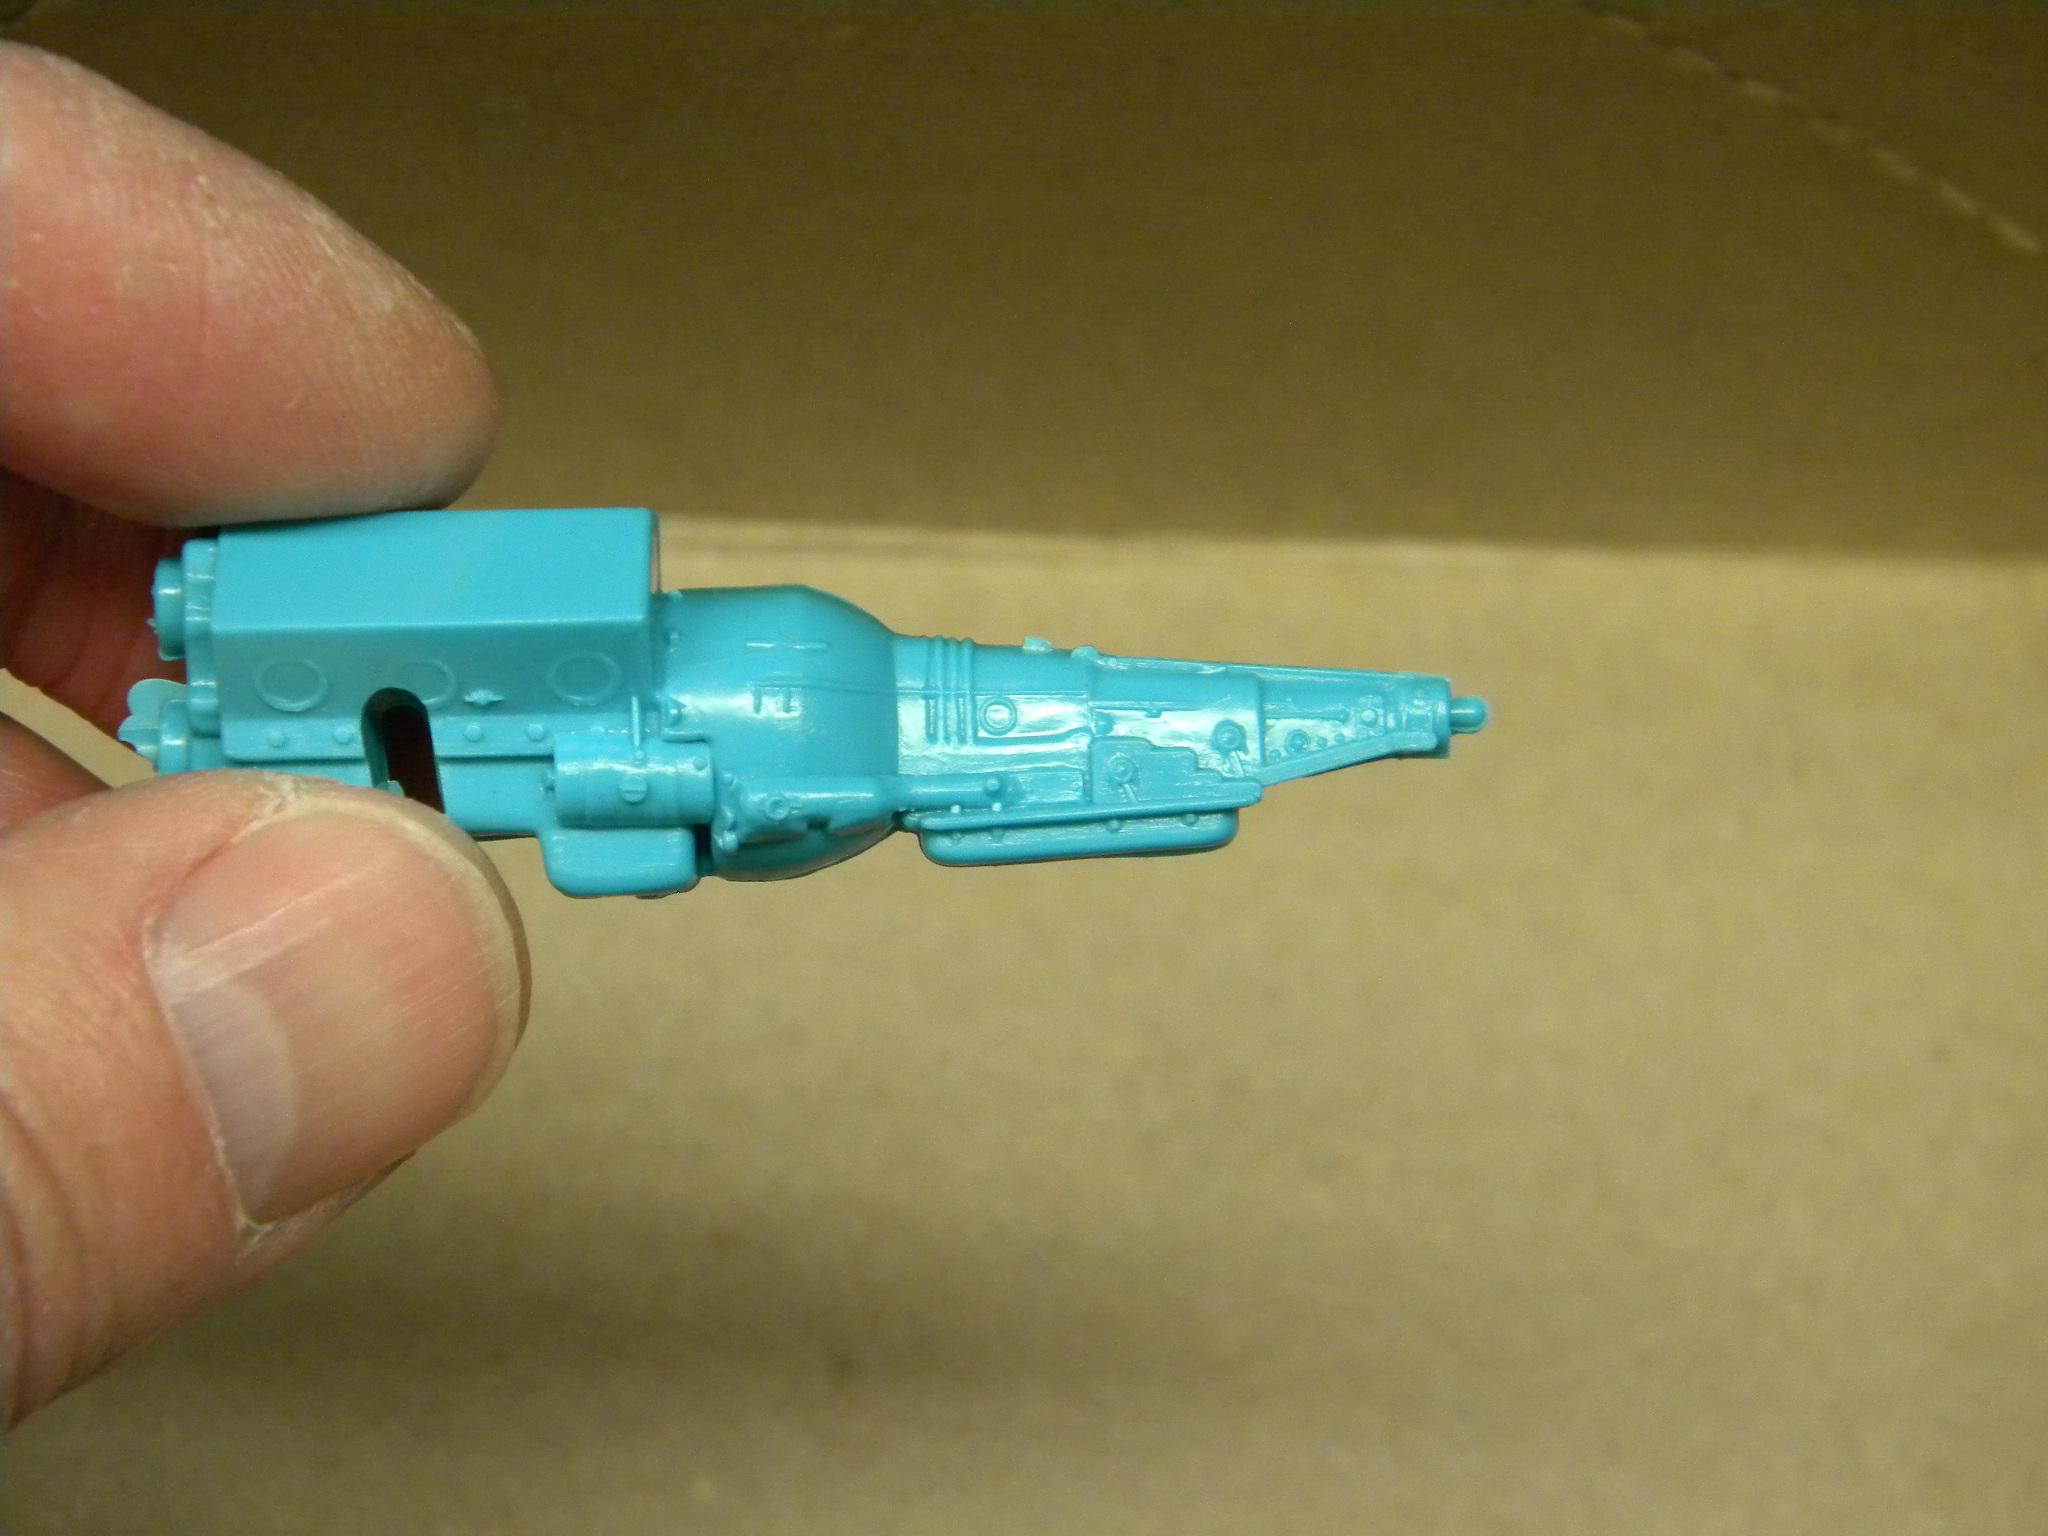
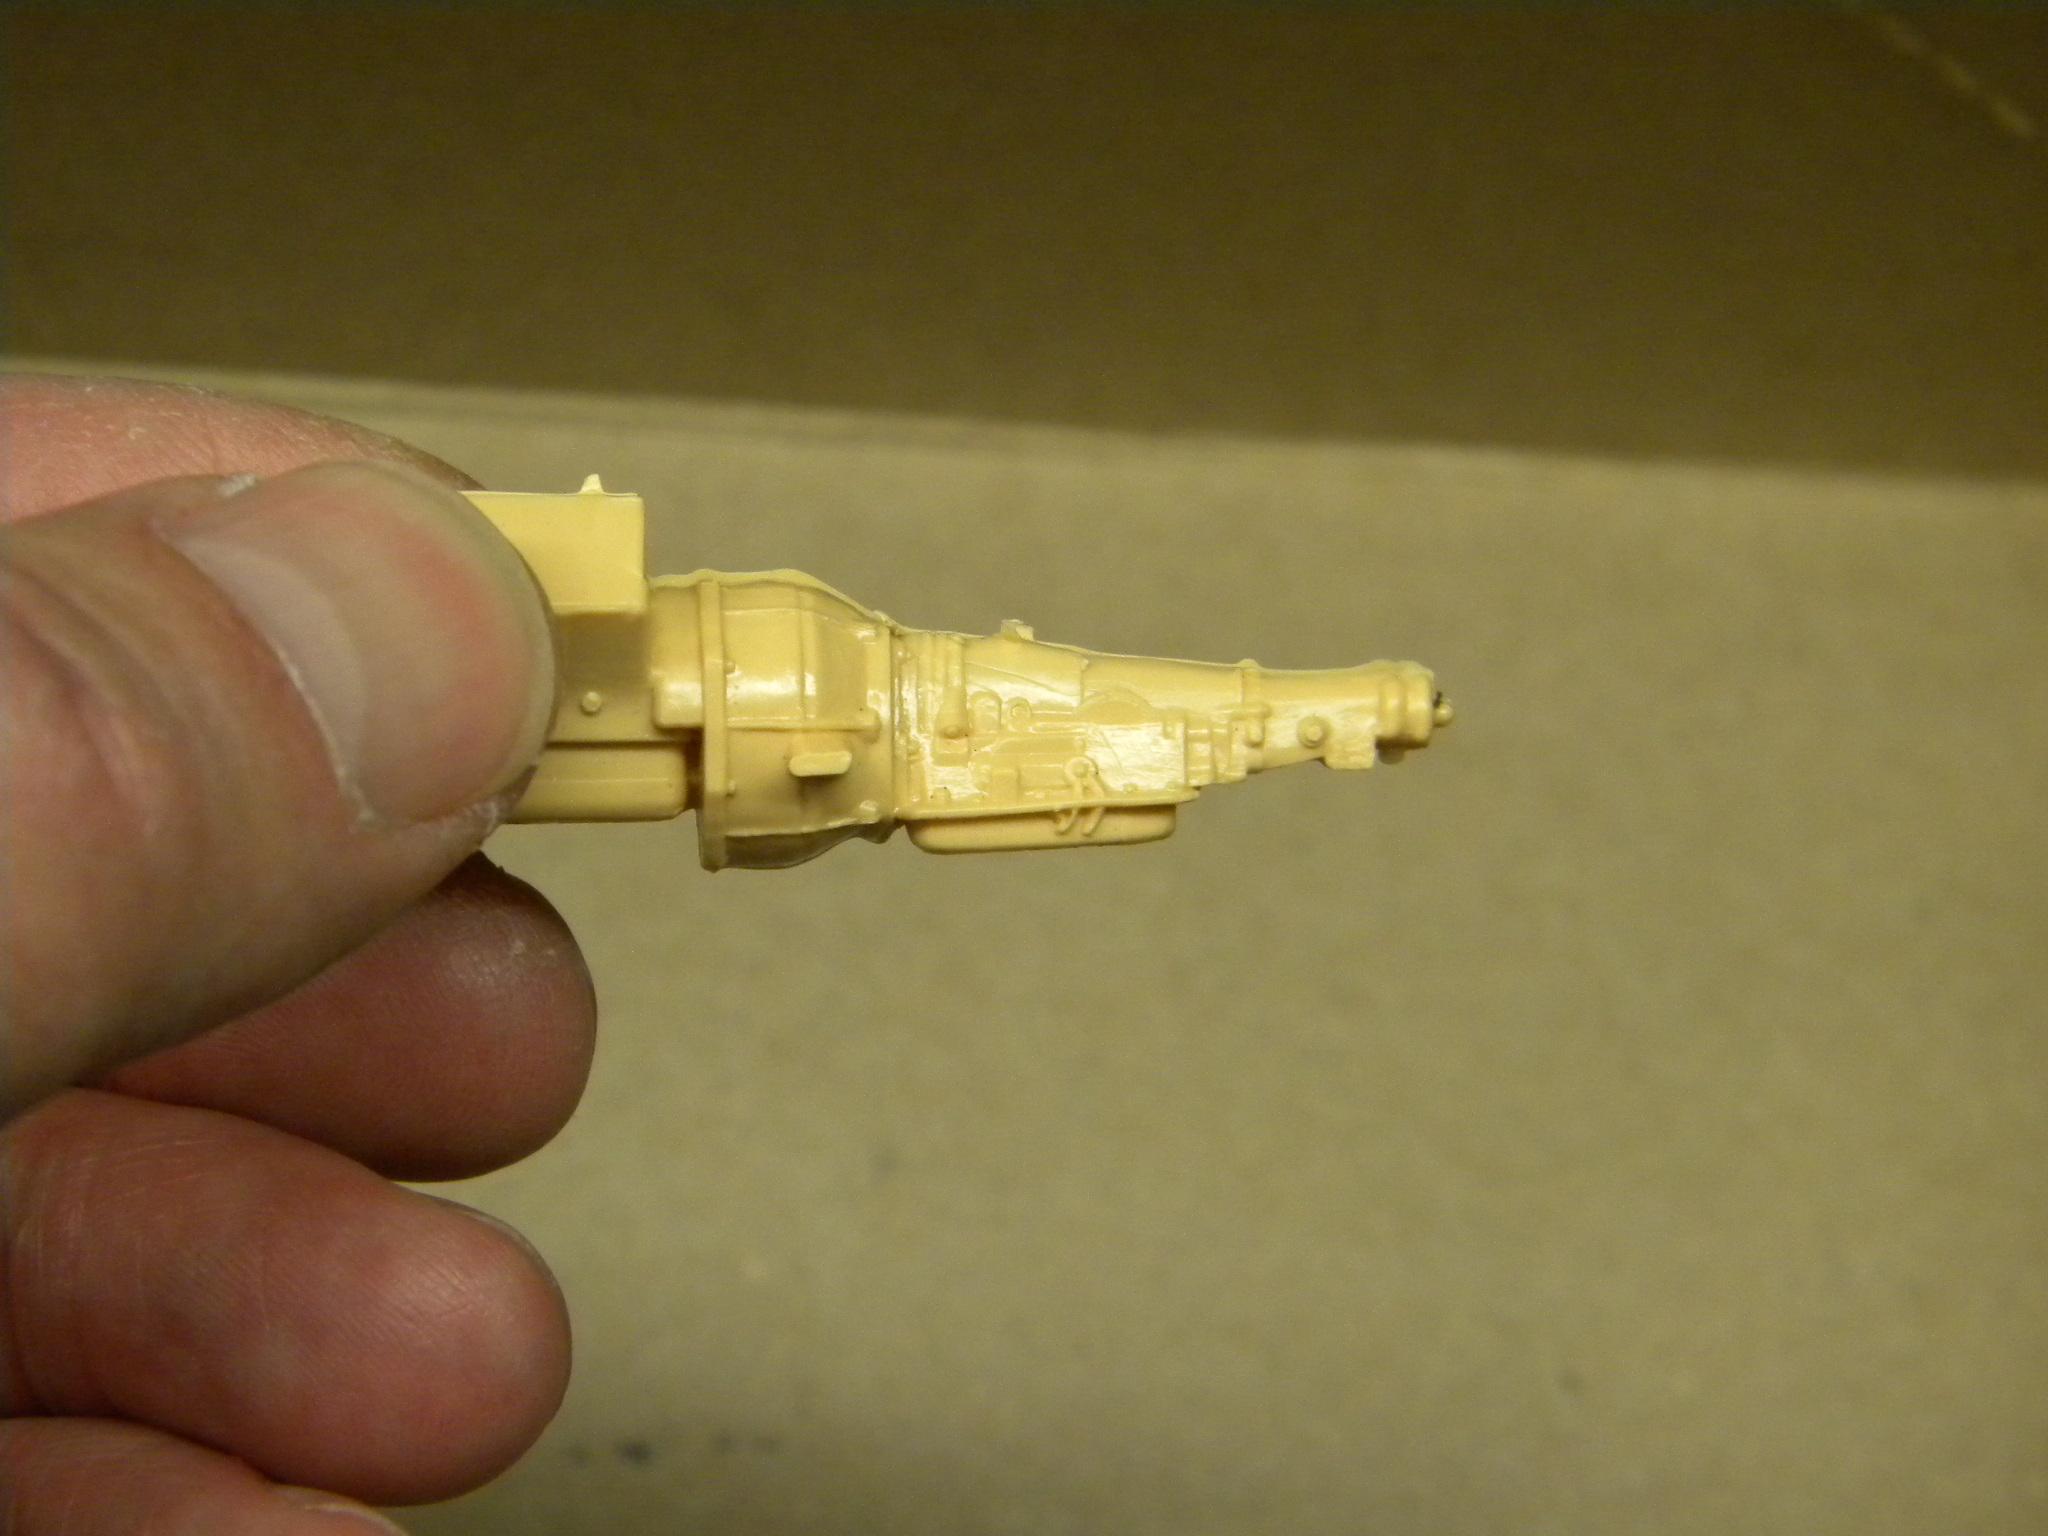
This is the Johan '63 Starfire tranny, followed by the '64 Cadillac. Is this what I'm looking for? Steve
-
1964 Pontiac Auto Transmission
StevenGuthmiller replied to StevenGuthmiller's topic in Model Building Questions and Answers
Great info guys. But what I'm hearing so far is that I'm basically SOL! Steve