StevenGuthmiller
-
Posts
15,071 -
Joined
-
Last visited
Content Type
Profiles
Forums
Events
Gallery
Everything posted by StevenGuthmiller
-

Bare metal foil small writing
StevenGuthmiller replied to Ctmodeler's topic in Model Building Questions and Answers
I remove the paint from the scripts before clear. Steve -
1964 Pontiac Bonneville Convertible.
StevenGuthmiller replied to StevenGuthmiller's topic in WIP: Model Cars
Excellent!! Steve -
Bare metal foil small writing
StevenGuthmiller replied to Ctmodeler's topic in Model Building Questions and Answers
You certainly could do that, but it sounds like a lot of unnecessary work to me. And if you’re sanding rather than using a solvent to remove the paint from the script, there’s a high probability of sanding through the foil. Steve -
That's the scary part. No builder required. Steve
-
Convertible cars with supports
StevenGuthmiller replied to Milo's topic in Model Building Questions and Answers
Certainly doesn't require anything fancy. I bent this coat hanger in about 30 seconds 20 years ago and have used it for painting every body since. A couple of short pieces of tape on the inside of the body will hold it in place just fine. Steve -
Enamel paint thinner question
StevenGuthmiller replied to 10543Modeler's topic in Model Building Questions and Answers
Another vote for lacquer thinner. For airbrushing that is. I would stick with enamel thinner/mineral spirits for paint used for brush painting. Steve -
AMT 1964 Pontiac Bonneville Convertible.
StevenGuthmiller replied to StevenGuthmiller's topic in Model Cars
Thanks everyone! Thanks Tony. I had that idea a few years ago when I was working on a '68 Olds 442 project. I wanted to be able to show off those beautiful Fireball Modelworks carbs, so at the very least, I wanted a removable air cleaner. While I was considering that, I wondered about how difficult it might be to make a "hollowed out" version with and air filter element. Well, it turned out quite well, so I've begun incorporating it into a few models. Takes a little extra time to make, but I've never been concerned much about time anyway. Steve -
Who me? I gave up on this discussion quite some time ago. The more I read, the more pointless it seems. So if I read your post correctly, we should just eliminate the term "scratch made" from the English language, because it's an impossibility, and does not exist. Everything that mankind makes is from "existing materials", zero exceptions. Anyway, It's been fun guys, but this discussion seems to have really become an exercise in futility. In the end, it is completely irrelevant whether we consider 3-D printing "scratch building" or not, isn't it? It's here to stay, and that's the end of it. Steve
-
Convertible cars with supports
StevenGuthmiller replied to Milo's topic in Model Building Questions and Answers
Same question as "painting parts on the sprue". Steve -
1964 Pontiac Bonneville Convertible.
StevenGuthmiller replied to StevenGuthmiller's topic in WIP: Model Cars
Hi Barry. I've been using M.A.D. pre-wired distributors for some time and really love them. Each pre-wired "kit" comes with a wired cap, a white resin base, and a length of wire the correct size to be stripped and the jacket used for boot material. Everything is included to do a nice wiring job. The looms or "separators" as you called them are just the thinnest plastic sheet that I had, with four holes drilled in a line as close together as possible, and then the outer perimeter cut and sanded to the shape desired. Then of course they are painted and simply threaded onto the appropriate wires. Hope this is a satisfactory explanation. Of course there are multiple techniques for creating wire looms all over the modeling realm to investigate. This is just how I've done them relatively quickly with things that I have on hand. Steve -
1964 Pontiac Bonneville Convertible.
StevenGuthmiller replied to StevenGuthmiller's topic in WIP: Model Cars
Wonderful Jim! I'm glad that you were able to find what you needed. Finding a combination of tubing and wire that not only fit together properly, but the right size to look somewhat close to scale is the difficult part. Steve -
1964 Pontiac Bonneville Convertible.
StevenGuthmiller replied to StevenGuthmiller's topic in WIP: Model Cars
Hi Jim. The antennas are by no means a secret. I can give you brief summary of the construction, but what I unfortunately cannot give you are the exact sizes of the materials used. The base is just made of plastic, and I didn't really record or pay attention to what sizes of rod that was used. It's my usual practice just to grab and eye ball the plastic stock until I find a size that seems about right. As for the tubing and wire used for the mast, I bought it a long time ago and don't recall the sizes. They came in 3 foot lengths, enough to last me the rest of my modeling career, so I don't believe that I saved any information on them. That said, here's a general description of how they were made. I started with the base by choosing a piece of rod that looked about right for the body of the base, and then sanded it to somewhat of a rounded taper. Once that looked about the right shape, I drilled a hole the same size as the mast tubing into the center of the cone shaped rod. Then I laid the rod on a flat surface on a piece of double sided tape to ensure it didn't end up on the other side of the room, and cut a short piece of the tapered end of the rod at an angle with a #11 blade. Then I selected a slightly larger piece of rod than the first, and cut as thin of a slice of it as I feasibly could, and then glued that slice to the bottom of the angle cut tapered rod. Using the drill bit itself as my holding tool, I inserted it back into the hole on the rod, and then sanded the bottom of the larger piece of rod as thin, flat and even as possible. Once it looked correct, I finished drilling the hole through the bottom of the base. Finally, the finished base was painted with Alclad chrome using the required method. This is of course the most difficult, or I should say, the most involved portion of the antenna, as it requires the most work. The rest is easy if you have the correct materials. The base of the mast is nothing more than a very small, thin walled, stainless steel hypodermic tubing. Yes, the same stuff that the make hypodermic needles with. You can buy it in lengths online, (I bought mine on eBay) but as I've already confessed, I don't remember the size. Likewise, the upper portion of the mast is just thin, stiff, steel wire, the correct size to fit fairly snugly into the center of the tubing. Once you have these materials in hand, it's just a matter of cutting lengths of the tubing and wire that you desire for the size of the antenna that you want. (I use a cutting wheel on a Dremel tool to cut the pieces and then grind the ends flat) A couple of turns with the tip of a sharp #11 blade in the end of the tubing to remove any burrs will ensure that the wire slips inside smoothly. For the ball on the tip of the mast, I just dip it in a little 2-part epoxy and then let it cure fully. Nothing else is really required, but if you desire, you could dip the epoxy ball in a little Molotow at the end. So, that's how I do antennas for basically all of my builds with varying methods for making the bases, depending on shape and size desired. I wish I could be more help with the sizes, but unfortunately......... Steve -
1964 Pontiac Bonneville Convertible.
StevenGuthmiller replied to StevenGuthmiller's topic in WIP: Model Cars
Thank you gentleman! Steve -
AMT 1964 Pontiac Bonneville Convertible.
StevenGuthmiller replied to StevenGuthmiller's topic in Model Cars
I would like to take a moment and thank you all for all of your wonderful comments, and a special thank you to all of those who followed along and encouraged me, and offered suggestions along the journey. Your interest and input help me a great deal as the project progresses. You're instrumental in keeping me motivated to continue on with these long projects, and for that, I am truly grateful. Likewise, I would like to thank any of you that may have contributed materials, parts, or just plain advice to help me to bring this project to fruition. Above all, I would like to thank the academy............Sorry, I couldn't resist! Sincerely, I appreciate all of the help and encouragement! Steve -
AMT 1964 Pontiac Bonneville Convertible.
StevenGuthmiller replied to StevenGuthmiller's topic in Model Cars
? That is pretty freakin’ cool! Steve
-
I can’t argue with any of that Bill. Makes all the sense in the world to me. Steve
-
We're not talking about "sticking together" model kits. We're talking about scratch building versus 3-D printing Whether that be a single part, or an entire model. The discussion is about making something from nothing, regardless of the method. You're wandering off a little Richard. And taking things a little too seriously I might add. There's no need to get all wound up because others have a different view than you. Nobody's "sneering" at anyone. Some of us just feel that creating something on a computer is different than someone creating something by hand. Don't know why that gets some people so heated. Steve
-
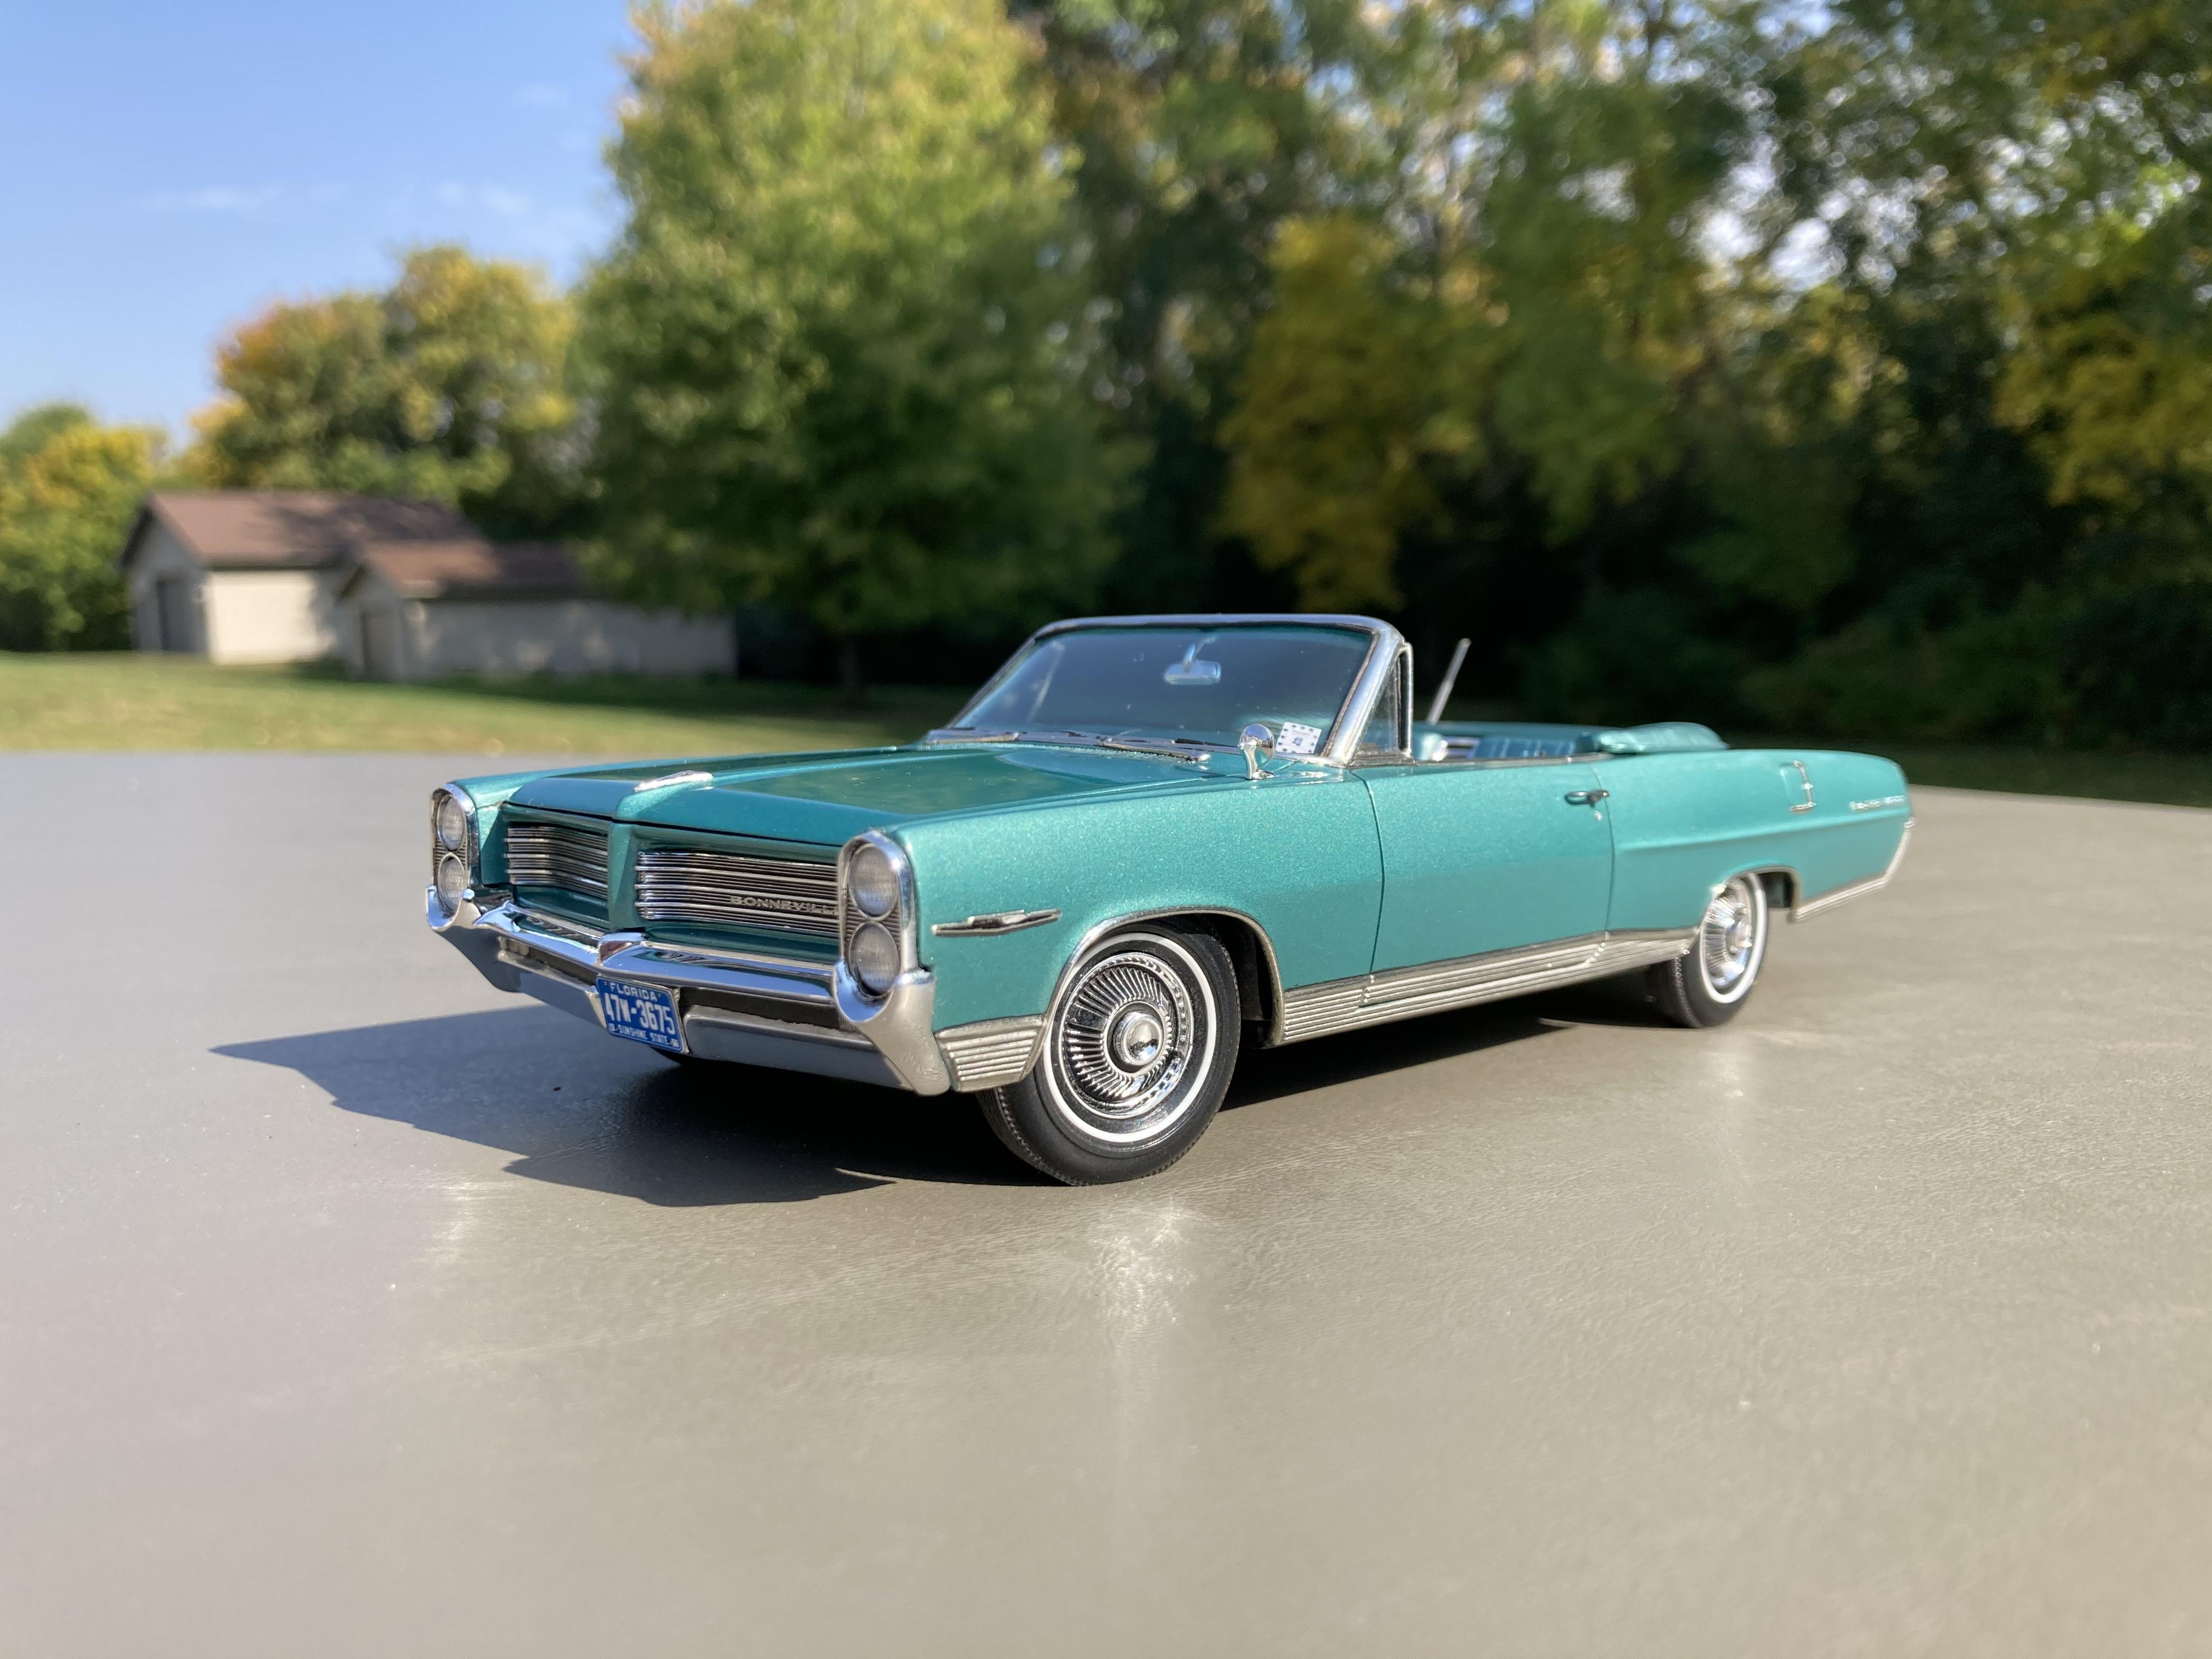
Well folks, after nearly a year and a half of poking and prodding this project, it's finally finished! For those of you who followed my WIP thread, you'll know what went into the construction, so I won't bore you with the details at this time, but by all means, if you have a question, I'll be more than happy to try to answer. Thank you all for bearing with me for...........forever!! Hope you enjoy. (Sorry, it's a little pic heavy) Steve
- 62 replies
-
- 16
-

-
I agree. Just like politics, everyone has their own opinion, and it's highly unlikely that anybody is going to change anyone's mind. But, the OP wanted our opinions, so he's getting them. Steve
-
I'm with you. At least for me, there's nothing quite like the satisfaction of taking some scraps of plastic and making something out of it with your own two hands. Steve
-
1964 Pontiac Bonneville Convertible.
StevenGuthmiller replied to StevenGuthmiller's topic in WIP: Model Cars
Thanks a bunch guys! The Bonneville is finally finished! Look for it soon in the "Under Glass" section. Steve -
Not unless you're creating the master. Resin casting kit parts is just copying. Your not scratch building anything. Steve
-
That’s all well and good, and if others are like me, they realize that 3-D printing is very likely the way of the future, and everyone is free to explore that corner of the hobby, or not, as they choose, but it doesn’t really address the question of whether it could, or should be considered scratch building. In the end it’s all just an exercise of philosophy, because it really doesn’t make one whiff of difference what we chose to call it. It’s here to stay, like it or not. The only place that I can really see it being a question at all is on a contest table, where a judge is going to have to make the determination as to whether a 3-D printed part is comparable to a scratch made part when making his deliberations. Otherwise, what each of us chooses to call it is nothing more than personal opinion. Steve
-
It's not that there's no effort or creativity involved with creating files. There absolutely is. It's just not the same kind of "get your hands dirty" effort or creativity. I'm sorry, but I will never equate "Call of Duty" with "Michelangelo's Sistine Chapel". As the saying goes in Brooklyn, "Fogetaboutit"! "and your opinions on it are without value" ???????? C'mon. Steve
-
So by the logic of those who say that it is indeed scratch building, when the technology arrives, (and I can imagine that it will), that someone can create an entire finished model sitting in front of a computer screen, and never have to touch it, except for removing it from whatever machine does the actual construction and placing it in a case, that will be a scratch built model. I suppose if that's the prevailing view, so be it, but it's not my world. In my world, a true artist works with his hands. I'm sure that there are machines in existence today that through computer programs can create a complete kit of an intricately carved faux Chippendale, but I'm sorry, I'll never, under any circumstance equate that with the real article. That's my story, and I'm sticking with it. Steve