StevenGuthmiller
-
Posts
15,071 -
Joined
-
Last visited
Content Type
Profiles
Forums
Events
Gallery
Everything posted by StevenGuthmiller
-
 I've been monkeying around in my shop today, working on retrofitting some parts from the Revell '66 GTO into my '64 Lemans, and I just have to ask the question to those of you that have built the Revell '66. Has the fit between the inner fender wells and the frame rails manifested itself this poorly to any of you, or am I doing something wrong? Maybe I expected too much from a widely harolded kit, but it looks a lot like horse manure to me! I'm a modeler, so I'm not going to let it stop me, but with as much tinkering with fitment that I'm going to have to do between the GTO and Lemans already, I didn't expect that I would have to straighten out fit problems with the donor kit before I even began. A little frustrating, especially for a Revell kit. Steve
 -
Correct. And very tight in the width, which is exactly how I like it. Much easier to subtract material than add. Steve
-
My original replacement hood for my ‘64 Lemans arrived this afternoon. Steve

- 39,201 replies
-
- 2
-

-
- johan
- glue bombs
- (and 1 more)
-
Those that were only made once
StevenGuthmiller replied to T-Ray's topic in General Automotive Talk (Trucks and Cars)
I actually had a ‘62 Meteor that I traded away a few years back. I appreciate the offer, but the ‘63 Merc that was my main target was a Monterey convertible. Steve -
Those that were only made once
StevenGuthmiller replied to T-Ray's topic in General Automotive Talk (Trucks and Cars)
Absolutely. The only one that I don’t have is a ‘63. Steve -
Those that were only made once
StevenGuthmiller replied to T-Ray's topic in General Automotive Talk (Trucks and Cars)
For that matter, you can add the ‘62, ‘63 and ‘65 Mercurys to that list. I believe that the only re-issued full sized Mercurys were the ‘64 and ‘66. Steve -
The color combo is over the top! But there’s no question that it works. A real attention grabber!! Steve
-
You know, I honestly think we often forget how pretty these cars were because we’ve become so accustomed to seeing them all hacked up. I’m sorry, but it’s just my opinion that it’s very difficult, if not impossible, to improve upon the looks of many of these vintage cars. Steve
-
To be honest, I have no clue what I'm doing! I have very little experience at all with weathering of any kind on models. I just got to the point where I was tired of producing the perfect, straight out of the restoration shop, or off of the assembly line, model cars over and over again. I thought to myself that the only time that you EVER see a vintage car like that, is when it's some trailer queen at a car show. It just didn't equate to real life to me anymore. I wanted to recreate the ACTUAL look of a car that you would see on the street. I really have no interest in building the typical "barn find"/"junk yard dog"/"rat rod" type stuff that you see quite frequently today. I still wanted to build nice, shiny classic cars. But something that you almost never see is a combination of the two genres. A well maintained, but well driven vehicle that you would see in most classic car enthusiast's garages. In most cases, builds are either to one extreme or the other, with almost no representation of what MOST vehicles would look like if they were actually driven. So, I got out some acrylic paint and just experimented a little to see what I could come up with without having to go out and buy a couple hundred bucks worth of weathering dedicated materials. I was surprised to find that it was actually not terribly difficult to achieve fairly convincing results with nothing other than paint, and I found that I actually enjoyed the process. I don't think you're ever going to see me building a rat rod, but I'm pretty confident that you'll be seeing this fusion of genres from me for quite some time into the future. Steve
-
There are of course any number of ways to achieve what you're looking for. My thought is that how the base coats are applied is secondary to the materials used for the weathering itself. I do apply clear to some of the parts prior to weathering, although that's designed more towards protecting the parts from damage, or from the paint rubbing off during handling, than it is to facilitate how the weathering agents work. That of course might be more important if the materials that you're using for weathering are solvent based rather than water based. Just my opinion, but I believe that your problem with the panel line accent that you're using looking too "dark" or "demarcated" is mostly due to the fact that it's stark black. My suggestion would be to use a less harsh color to begin with. This is part of the reason why I find flat acrylic paint to be so useful. I mix a dark "oily" brown for the "base" of the weathering. The second advantage to using craft paints is that you can brush on a thin wash of the color over the entire part, and then after it has dried, you can use a slightly dampened Q-tip to lightly "roll" over the surface. This leaves a very thin mottled film over the entire surface of the part instead of just dark pools in the recesses, which helps eliminate those stark demarcations. Another pro of the craft paint is of course that it's water based, so that you can manipulate it much easier with damp Q-tips to get the effect that you desire, and it's not so permanent, so if you don't like the effect, you can just wash it off and do it again. But my experience has been that you really can't mess it up, and it's very easy to vary the degree of the weathering that you want to achieve. Steve
-
1964 Pontiac Lemans Convertible.
StevenGuthmiller replied to StevenGuthmiller's topic in WIP: Model Cars
My assumption was that the Polar Lights GTO had either a rudimentary “snap kit” type chassis, or was a copy of the old Monogram 1/24th scale kit. Regardless, it looks like either of the Oldsmobiles, or even more likely, the Revell ‘66 GTO chassis looks to be a very good option. Steve -
1964 Pontiac Lemans Convertible.
StevenGuthmiller replied to StevenGuthmiller's topic in WIP: Model Cars
That’s good to know. I know absolutely nothing about the smaller displacement Pontiac engines, so it was my assumption that as with other GM makes, there was probably a demarcation between a big block and small block. This was one of the things that I was going to have to research, but as you’ve clarified it for me, it will make substituting an engine considerably easier. Thanks! Steve -
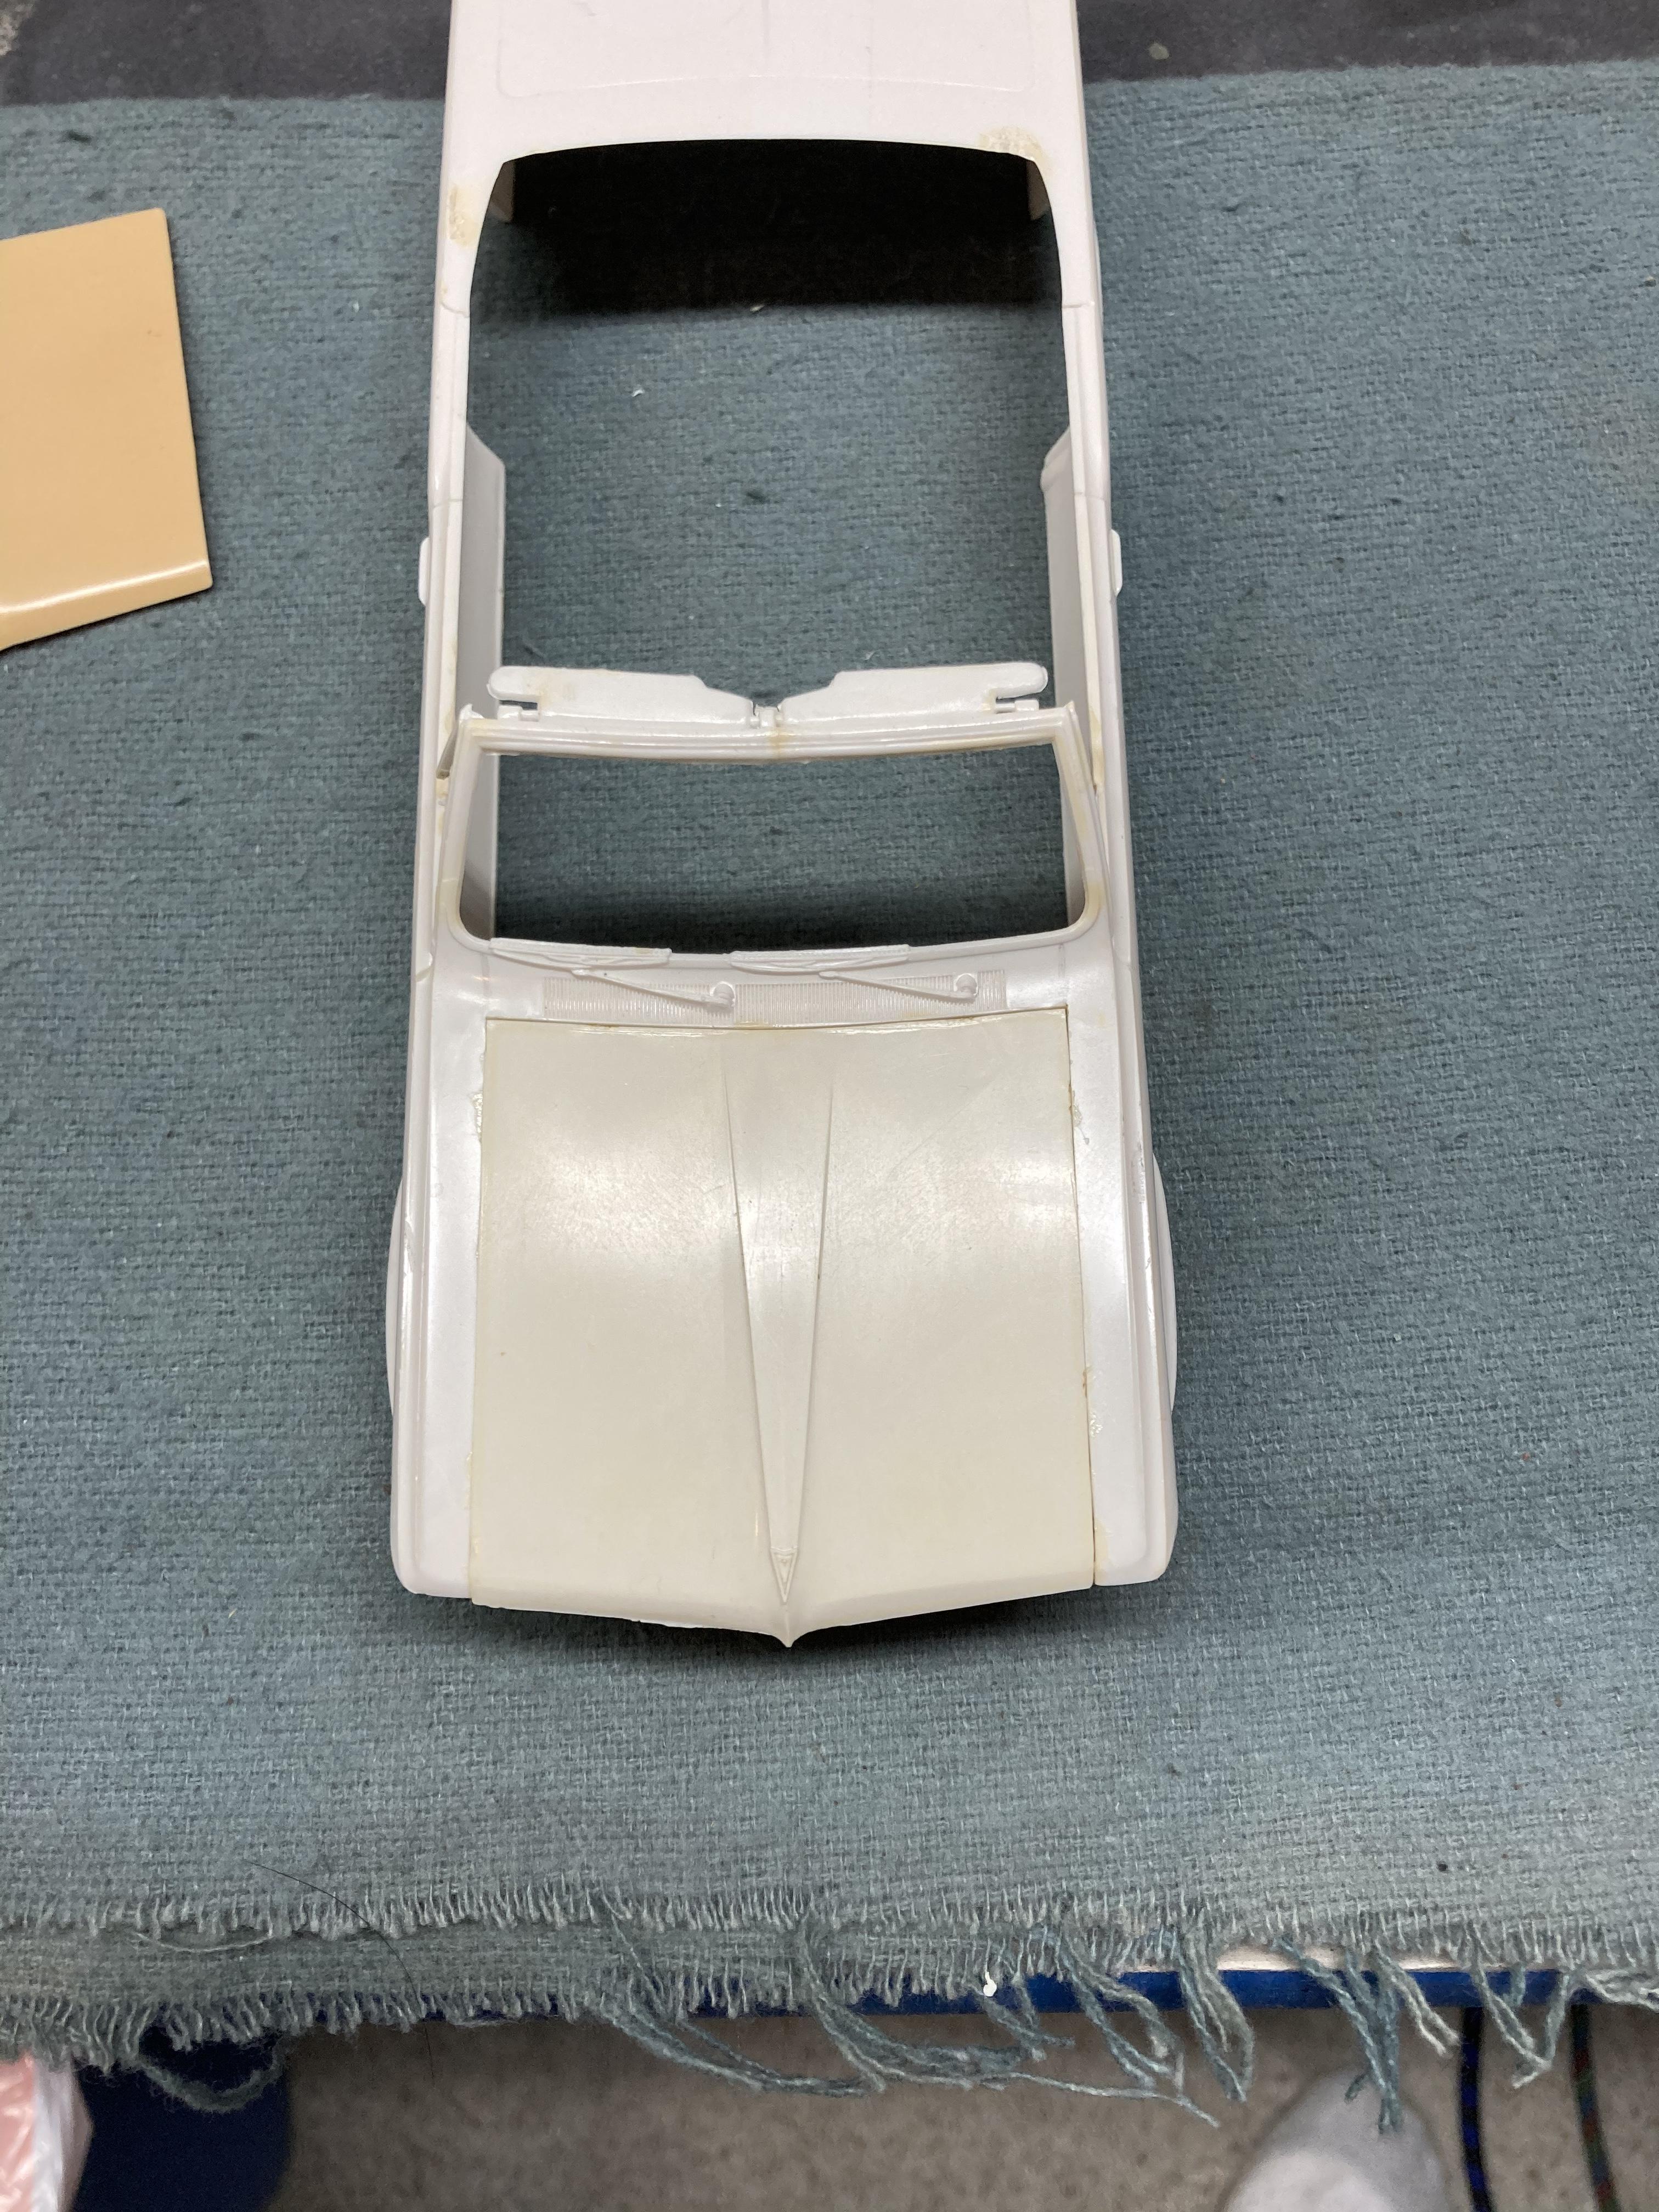
Well, I've decided that I'm going to continue on with the final installment of my 1964 Poncho trio. The '64 Grand Prix and Bonneville are now in the history books, so all that I have left to do, (Short of an original AMT '64 GTO presenting itself) is this somewhat derelict AMT '64 Lemans convertible. I began working on converting an old X-EL 1959 Desoto Fireflite 4 door hard top into a convertible a few weeks ago, but I'm just not feeling it at this time. It was going to be a very involved project that would need a completely scratch built interior, and it was having a hard time keeping my attention, so I thought it might be better to move on to something a little less involved. Not that this project will be a simple one, as it's still going to be a full detail build with all of the usual goodies, but it will be a little less ominous undertaking than the Desoto. So, in any event, I picked up this kind of abused '64 Lemans at an antique shop many years ago for $12.00. It was missing the hood and tail light lenses, but I was able to replace those via Modelhaus before they closed up shop. Interestingly, as I'm not a big fan of working with resin, and I'm not particularly convinced of it's long term viability, on a whim, I went on eBay last night just to check on the odd chance that there might be an original hood available. Lo and behold, there was a pristine original hood that someone was selling for $20.00, so I snapped it up! At least now, short of the tail light lenses, the entire model will be styrene. The hood should arrive within a week or two. There is some minor damage to this kit, including a mild windshield frame crush, consisting of damaged and missing vent posts, and a crack in the center of the windshield header, but those are easy fixes. A little more of an issue is some of the interior glue rash. The previous builder had of course glued on the seat belts to the front bucket seats, causing some relatively minor damage to the upholstery pattern. These shouldn't be extremely difficult to repair. More daunting is the fact that he had also glued custom parts to the center console, completely destroying the fluted panels. Unless I can find some suitable material to replace those panels with, the entire console might have to go. Not that I have any aversion to console delete 4 speeds. We'll cross that path later. So in conclusion, I believe that one of the '65-'67 Chevelle chassis will be a good fit, or even more so, if the wheel base is correct, either the AMT '66, or the Lindberg '67 442 should be the ticket. I'll have to do more research on the engine to make an informed decision, but at this point it appears that a 6 cylinder, a 326 2bbl, or a 326 4bbl were the only options for the '64 Lemans, and if that's the case, finding a suitable Pontiac small block is likely to be all but impossible. In that case, I'll have to find out what the appearance differences were between the 326 and 389, and either do some parts swapping between them, or try to do some upgrading of the original engine. So, here's what I'm starting with. New chrome some time back and a new hood on the way. The tentative decision on color at this point is correct '64 Pontiac "Singapore Gold" from scale finishes. I'll have to do some research and thinking about it, but my initial thought off the top of my head is a dark red, or white and red interior. Either that, or some combination of gold and white, or just gold. Steve
-
I can't get enough of the AMT '62 Catalina, Moebius '61 Pontiacs, or Revell 1966 GTO kits. Not because I have any real desire to build any of them. But because I need them to raid for parts for my many vintage AMT and MPC Pontiac projects!! Steve
-
I'm with Bill and Marcos on the panel line question. It's become evident to me that scribing deeply pretty much eliminates any need for darkening panel lines, and in fact, looks more realistic than using a panel line accent. These panel lines had no accent added whatsoever. Just deeply scribed, and left at that. As far as weathering goes, It's my opinion that there are a great number of other techniques that can be used to better represent weathering. I think what you're accomplishing here Jeremy is not exactly what I would consider "weathering" but more just trying to add a little extra "depth" to the part, rather than "age" or "use". When I think of weathering, I think of adding a little, (or a lot of) extra oil, dirt, road grime, rust, etc. I've discovered that a little playing around with some simple and cheap acrylic craft paints works extremely well for various degrees of "weathering". This Coronet's engine and chassis were weathered very lightly with acrylic craft paint to represent light use. The engine and chassis on this Bonneville were weathered a bit more heavily with the same products to represent a vehicle of a few years of age, and 20,000-30,000 miles of use. Steve
-
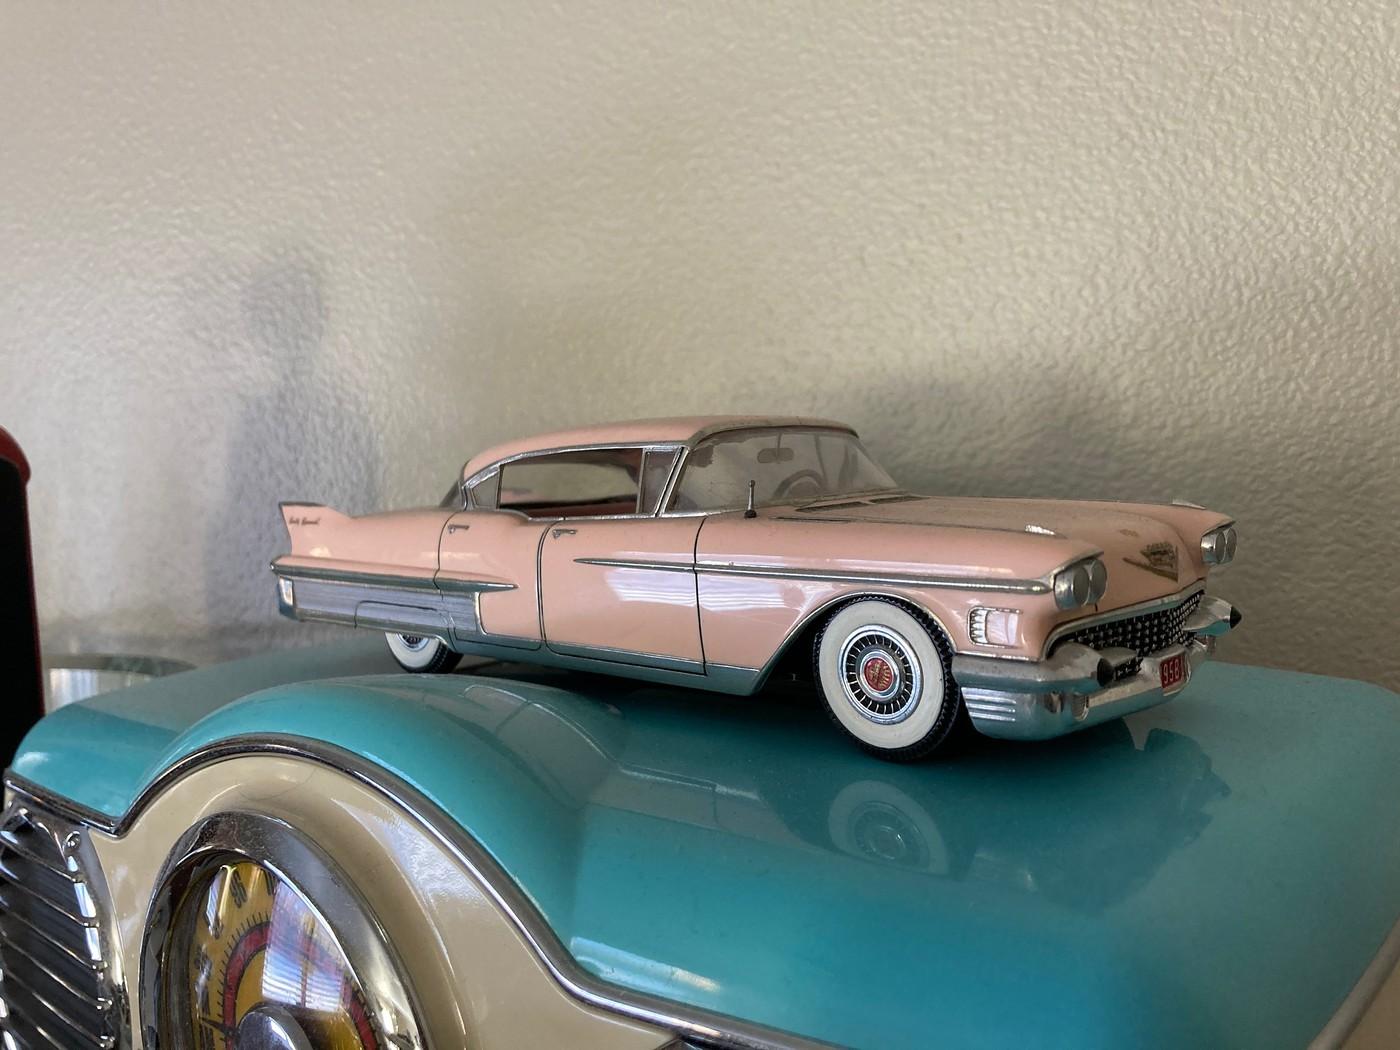
58 Cad Fleetwood... what do I have here?
StevenGuthmiller replied to hedotwo's topic in Model Building Questions and Answers
Yes, almost definitely an X-EL model. Many of these were molded in color. Mine was molded in light pink. By the way, $15.00 is an absolute steal!!! Steve
-
The model car mob
StevenGuthmiller replied to Chuckyg1's topic in General Automotive Talk (Trucks and Cars)
I think that there are more than enough mindless topics on the forum for those that are so inclined. The "Off Topic Lounge" is full to the brim with them, which is why I rarely visit there. That said, I believe that there's room for all of us. Those who just want a quick, simple aversion, and those that want to examine some things a little deeper. I fail to see anything wrong with either perspective. I'm having fun! Steve -
The model car mob
StevenGuthmiller replied to Chuckyg1's topic in General Automotive Talk (Trucks and Cars)
I agree completely. I have far more curbside models in my collection than I do fully detailed ones. Steve -
The model car mob
StevenGuthmiller replied to Chuckyg1's topic in General Automotive Talk (Trucks and Cars)
I don't think anyone is getting upset. Maybe it's just the way that I see things, but I always feel that every topic has room for expansion and discussion that actually have some meaning. Otherwise it just becomes another dopey list with no purpose. I enjoy digging a little deeper and having discussions with others about their thoughts. I suppose that there are some that come to these boards for some simple mindless amusement, but I can get all of that that I'll ever need from watching television. Steve -
The model car mob
StevenGuthmiller replied to Chuckyg1's topic in General Automotive Talk (Trucks and Cars)
noun a person who engages in a hobby, an interest or activity pursued for pleasure or relaxation and not as one’s main occupation: I was focusing more on the text book definition of a hobbyist, which would basically include ALL of us who engage in this hobby, regardless of what direction in which we choose to go with it, so I suppose it boils down to more of an objection to how you're defining the term than how you view the subject. I used the term "minimalist" to describe the modeler who's general perspective is to build basically in a box stock configuration as their regular routine, not so much as just a occasional respite from a more detailed direction. My impression is that some of the other terms that you used in your response would be more applicable for your mob name. I think "The Model Sportsman" would be a perfect fit. Absolutely not David! I consider a modeling forum to be a place for open discussion, and if we have no discussion, it's really a useless venue. Steve -
The model car mob
StevenGuthmiller replied to Chuckyg1's topic in General Automotive Talk (Trucks and Cars)
"The Styrene Narcissist". The modeler who has the belief that his approach to building is the correct approach, and everyone else's is wrong. This delusion can manifest itself from both ends of the spectrum. Whether from the builder who goes to great lengths to include every detail possible in his model and views those that do not as "slackers" or "amateurs", or the builder who feels that the only objective is something that looks acceptable sitting on a shelf and feels that anyone who involves himself with the finer details is an "attention seeker", "trophy hound" or "braggart". Steve -
The model car mob
StevenGuthmiller replied to Chuckyg1's topic in General Automotive Talk (Trucks and Cars)
Sure, but you make that sound as if those of us that enjoy the "satisfaction of the build" precisely by focusing on "details and accuracy" are somehow not "hobbyists". There are all different echelons of hobbyists. Those that get into the minutia of the project, those that do not, and everything in between. I personally get great satisfaction and relaxation from researching and implementing things like correct firing orders and body colors, so the implication that we are somehow not "enjoying the build" is frankly completely inaccurate. I think a more appropriate title for what you are describing might be "The Minimalist". I suppose the opposite of "The Rivet Counter". Steve -
The model car mob
StevenGuthmiller replied to Chuckyg1's topic in General Automotive Talk (Trucks and Cars)
I’m the same way with all of the “series” that seem to be everywhere on television these days. I’ve never been big on series anyway, but inevitably, when people begin to suggest the latest Netflix series, or what have you, I automatically subconsciously, (or maybe even consciously) zone it out. Maybe it’s some psychosis about feeling like you don’t want to be told what to do? At least that might explain both the model and television thing. ? Steve -
The model car mob
StevenGuthmiller replied to Chuckyg1's topic in General Automotive Talk (Trucks and Cars)
Exactly! If I hadn't done it when I did, chances are pretty high that I would have bypassed it for something more unusual. I'm kind of in the same predicament with the original AMT 1960 Ford pickup that I have. With Round-2 getting ready to release it again, my interest in building it is already beginning to wane. It won't be long after the re-release, and you'll be seeing them everywhere. Most likely that will be all that it takes to kill it for me. Maybe this could be considered another member of the "Model Car Mob", although I'm not sure of what to call it. "The Unconventional Eccentric"? Steve -
The model car mob
StevenGuthmiller replied to Chuckyg1's topic in General Automotive Talk (Trucks and Cars)
Be careful what you wish for? I have to admit, I'm kind of guilty of this kind of behavior myself. I'm a vintage kit fanatic, and though I have most of what I want, there were a few that eluded me. At some point, I may have been willing to pay a sizeable price for some of these, but now that Round-2 has began re-issuing some of them, I find that I'm not really all that interested. The '64 Olds Cutlass and the '71 Dodge Demon were always on my bucket list, but since the Olds was re-popped, It's not really all that high on my priority list anymore. As a matter of fact, there's a fair chance that I may never build it. I suspect that the same thing might happen when the Demon comes out. I think it has something to do with the fact that I have a real distaste for working on something that everyone else is doing. I'm not sure why it is, but every time a new kit comes out, and I start seeing example after example every where I look, it's kind of over with for me. Even though it might be something that I thought was desirable just a short time ago, they become real ho-hum for me once you can't avoid seeing them anymore. Steve