landman
-
Posts
7,921 -
Joined
-
Last visited
Content Type
Profiles
Forums
Events
Gallery
Everything posted by landman
-
Thanks Harry. However what I meant are there plans to scratch build stuff out of styrene? I will definitely attempt some of the wooden ones.
-
My other hobby is woodworking. If you look around, you can almost always find plans for what you want to build. Are there any plans available to build things from scratch? Trailers etc...
-
 Me three.
 -
I was a pipeline land agent. Became a manager. Retired and started doing landwork on contract to pay for a 1:1 restoration and all these models.
-
Another Snap Pete which will likely end up under a vintage cab. Another Mustang which will end up on the car hauler.
-
1950 Ford F6 COE single axle tractor
landman replied to cdnmodman's topic in WIP: Model Trucks: Big Rigs and Heavy Equipment
Are there kits of the small,round nosed trailers? -
Dodge L-700 Stake bodied crane truck.
landman replied to landman's topic in Model Trucks: Big Rigs and Heavy Equipment
Thanks guys. -
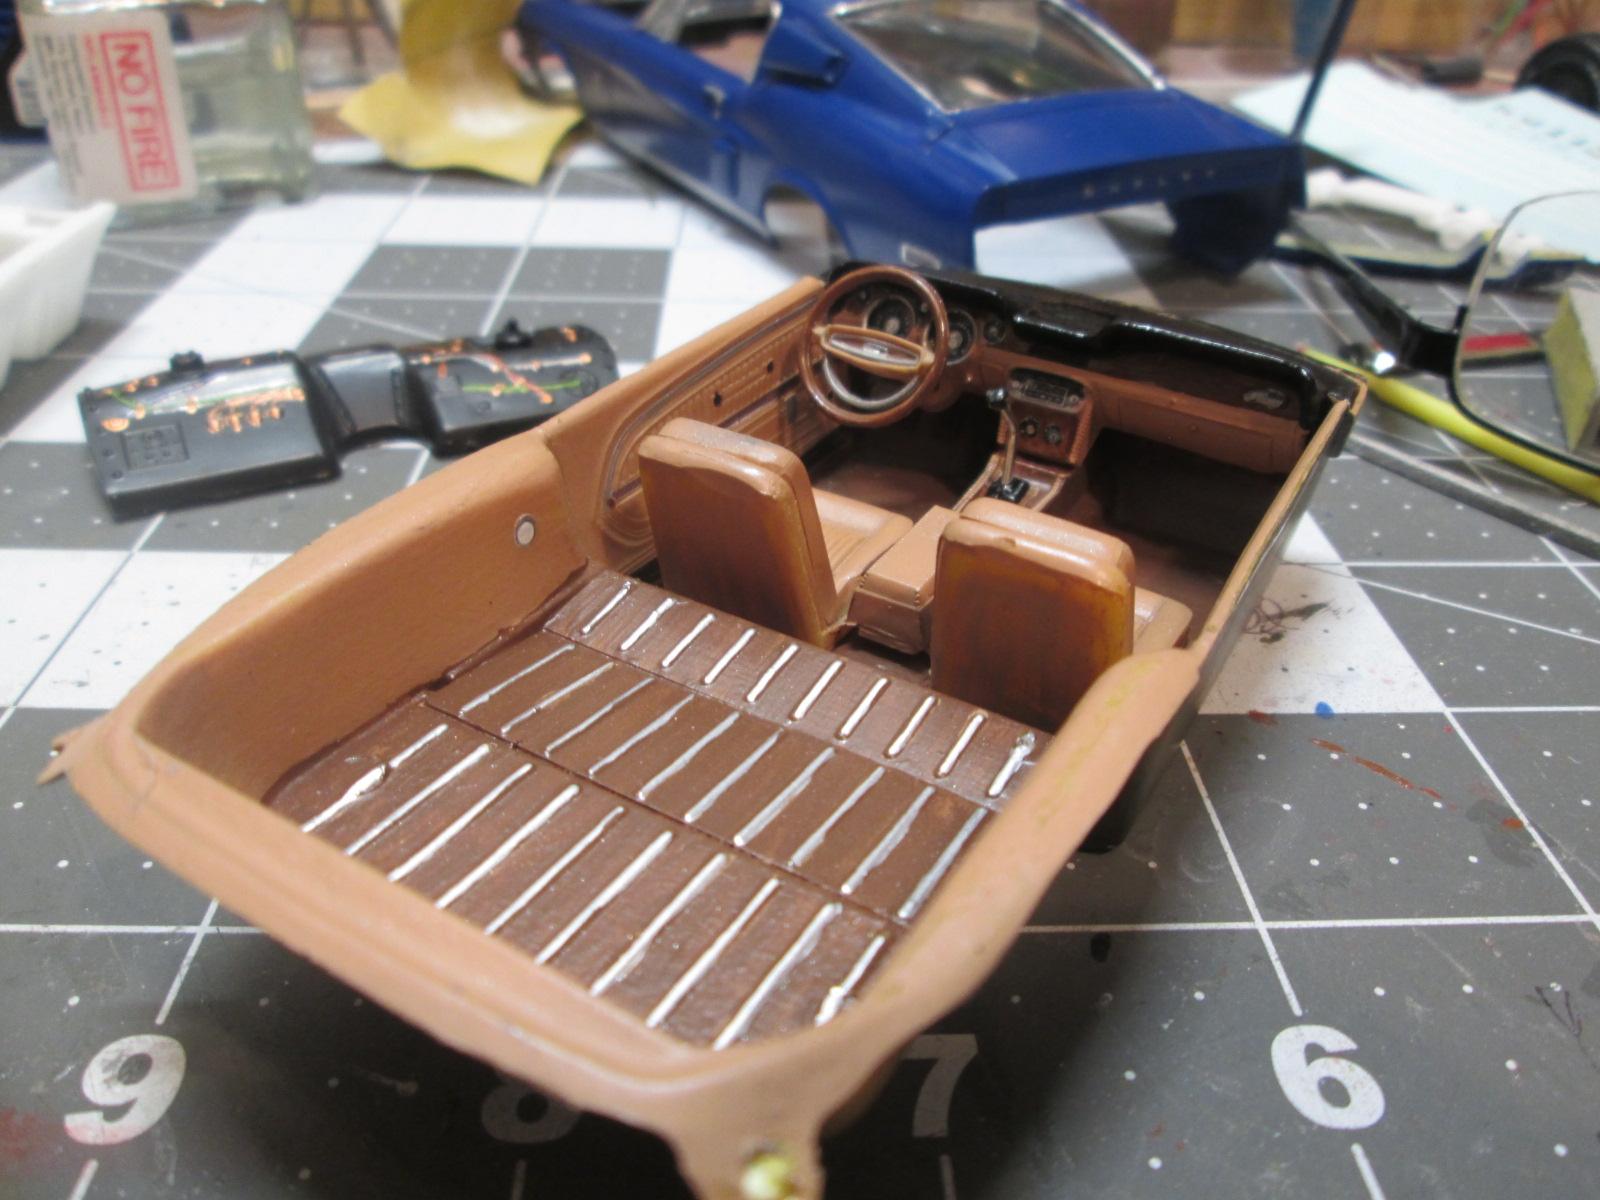
After a few hours it developed a very fine orange peel which clear should fill in. Gave the chassis its overspray. I see I forgot to touch up the tailpipes. Started on the interior. Painted the dash pad, added brown to the floor and some wood details. Next are the decals.

-
I don't know Wayne. Just tried it again, fully expecting to have to strip it but it seems to be OK. At first it wanted to orange peel so I added a bit to help it level off. It may be to heavy.
-
question on the DODGE L-700
landman replied to dogma3's topic in General Automotive Talk (Trucks and Cars)
I built one too. I agree with the doors being a pain. The tilt bit works well. -
Thanks Charlie. I was thinking about that when I saw what it looked like once it was cleaned off. Maybe it is no good anymore. I'll give it aother try in a few days when the primer is cured. We'll see.
-
I have two blues which may do. The Krylon is non metallic and is the one I prefer but my first attempt turned out bubbly after a while.. So I allowed the primer to cure another day and tested both colors on my trusted Trans Am. No bubbling there. Is it possible the Krylon isn't compatible with the Duplicolor primer?
-
Gotta get some of those. Thanks for sharing. we always have one on the go during the winter. may as well be about cars eh?
-
I certainly can Richard. What I was meaning though is the high voltage wiring running in conduits along the walls. The large pieces of equipment would be running on 550 volts and would be hardwired to junction boxes in this system.
-
I am probably "normal" then. Two hours a day. I am on this forum, a woodworking forum, and two classic car forums. I am also on Facebook. I have found old schoolmates on there and sort of keep in touch with several cousins I would probably not have contact with otherwise. I ignore most of the bullshit on it. I have received tremendous help and assistance on the forums I belong to whether the car is 1:1 or 1:25 or with the woodworking. As for the bench, it varies. Living in Canada, if it's nice out ,I'm out. Even in the winter. I snowshoe a lot. I'd say the bench is early mornings and early evenings. The rest of the time, it is chores or the other hobbies.
-
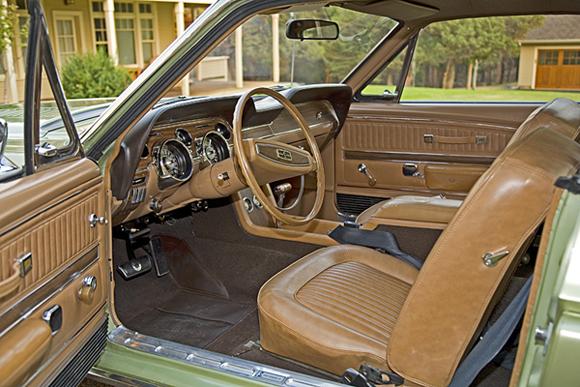
I had done the interior in some sort of flat tan. Now, I am looking to get something like this. I tried some Tamyia pearl clear on the flat tan. Looks like it might work.
-
I think you hit it dead on. Effect achieved.
-
Thank you sir. I'm going to try some of this. I'll also call on you for ideas about wiring in conduit when I build and install the big machines.
-
Rebuilt rear springs using styrene strips. The purple stuff cleaned up the windows nicely. I'm sure the fogginess was clearcoat gone dull. Couldn't find the driveshaft so stole one from one of the Nascars and shortened to fit.
-
Sanded some seams that I either didn't see or ignored the first time around. Car is sitting, waiting for the putty in the sinkholes to harden.
-
Brought the "shop" into the house and placed it where it belongs. It will need some better lighting. The photo with the truck used the flash. The one with the Porsche one of the leds from the house studio.
-
Two Internationals and a Peterbilt. My guess is that Peterbilt is some sort of service truck, albeit a big one.
-
Another question about paint o'er foil.
landman replied to landman's topic in Model Building Questions and Answers
Thanks Tom. -
Dumb question: What do you experts recommend? Put the foil under the primer or between the primer and the paint?
-
Engine for the Dodge
landman replied to landman's topic in General Automotive Talk (Trucks and Cars)
Thanks Brian. I think I'll try and find a Detroit 8V-71.