St Louis Snacker
-
Posts
24 -
Joined
-
Last visited
Content Type
Profiles
Forums
Events
Gallery
Everything posted by St Louis Snacker
-
Nice job. Always one of my favorites.
-

Shirley Shahan’s Hornet Pro Stock
St Louis Snacker replied to dragcarz's topic in WIP: Drag Racing Models
I'm from St Louis as well and grew up right near you. I was a little farther north up Kingshighway by Plackie Chevrolet. I did go to Kennard School for a couple years so I remember Lindenbusch. My parents bought a Gremlin from that dealer in 1972 but I think it had changed hands by then. Do you remember when Sinclair Ford was by Southtown? They used to position a car half way through the front window with a big sign saying something like Another customer trying to get a early look at the 68 Fords! As a little kid, I thought that was so crazy. By the way, your work looks great. -
Liquitex spray nozzle assortment
St Louis Snacker replied to Flat32's topic in Model Building Questions and Answers
I have used the Liquitex Soft Body Acrylics thinned with Liquitex air brush medium. You can also use Liquitex acrylic ink without thinning. I'm sorry I've never tried the spray cans. Good Luck. -
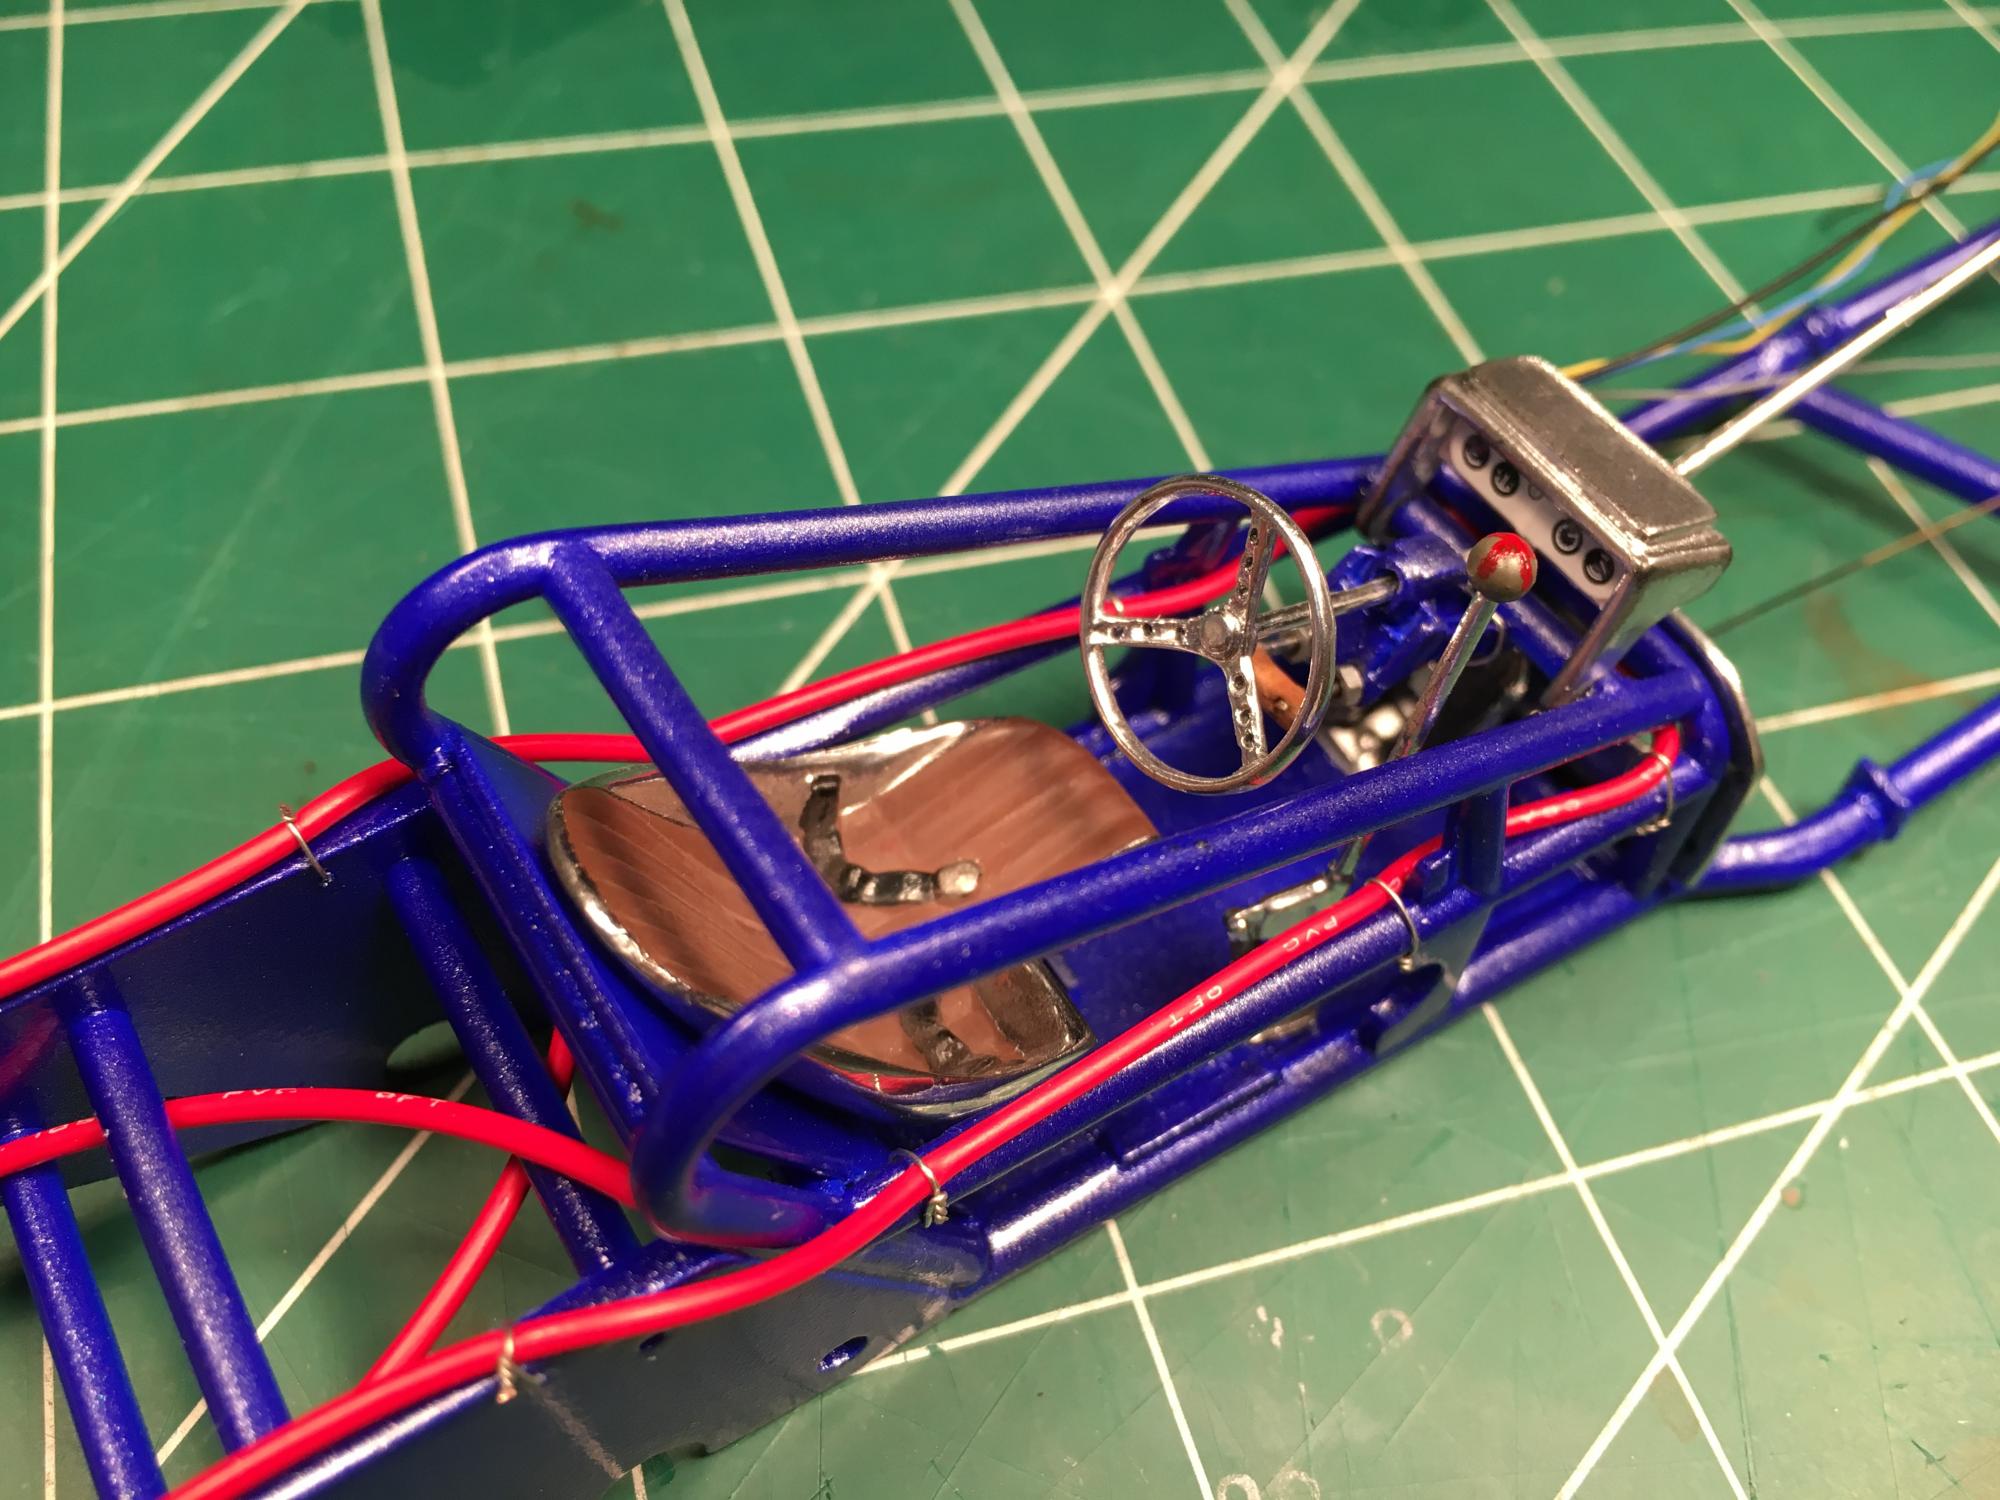
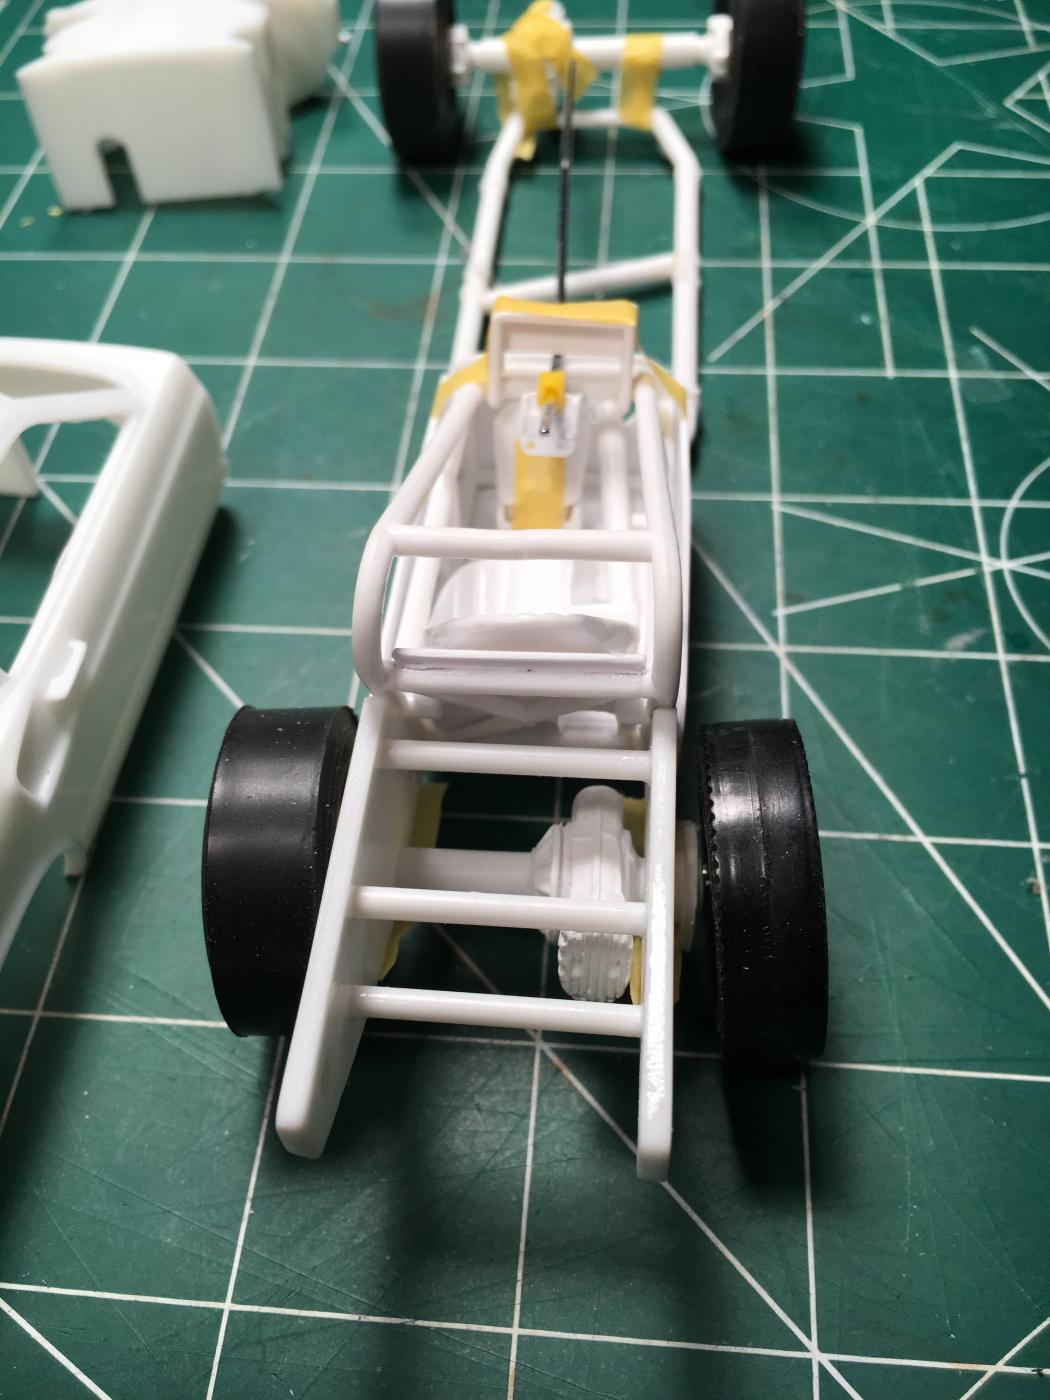
Rainy weekend in STL so I was able to get some things completed. Seat is in, Parachute Pull in, Dash Board in, Pedals in. The steering wheel is not attached yet. I just have it stuck on for effect. I'm slowly pressing along. Ran into an issue with the front end. I think I might have used the wrong axel shafts. The tie rod, steering rod set up is too long. That's OK, I don't really like the kit one anyway. I'll just make up a new one.

-
MPC '79 Firebird T/A (Questions)
St Louis Snacker replied to echoxrayniner's topic in Car Kit News & Reviews
Make a junker out of it.
-
So many beautiful models on this thread. Here is my current favorite.
-
John, Thank you for sharing your pictures. I know mine wont be quite as detailed as yours. That model is kick ass! Mod3l Lover, Those slicks were just for mock up but it did run skinny 60's slicks.
-
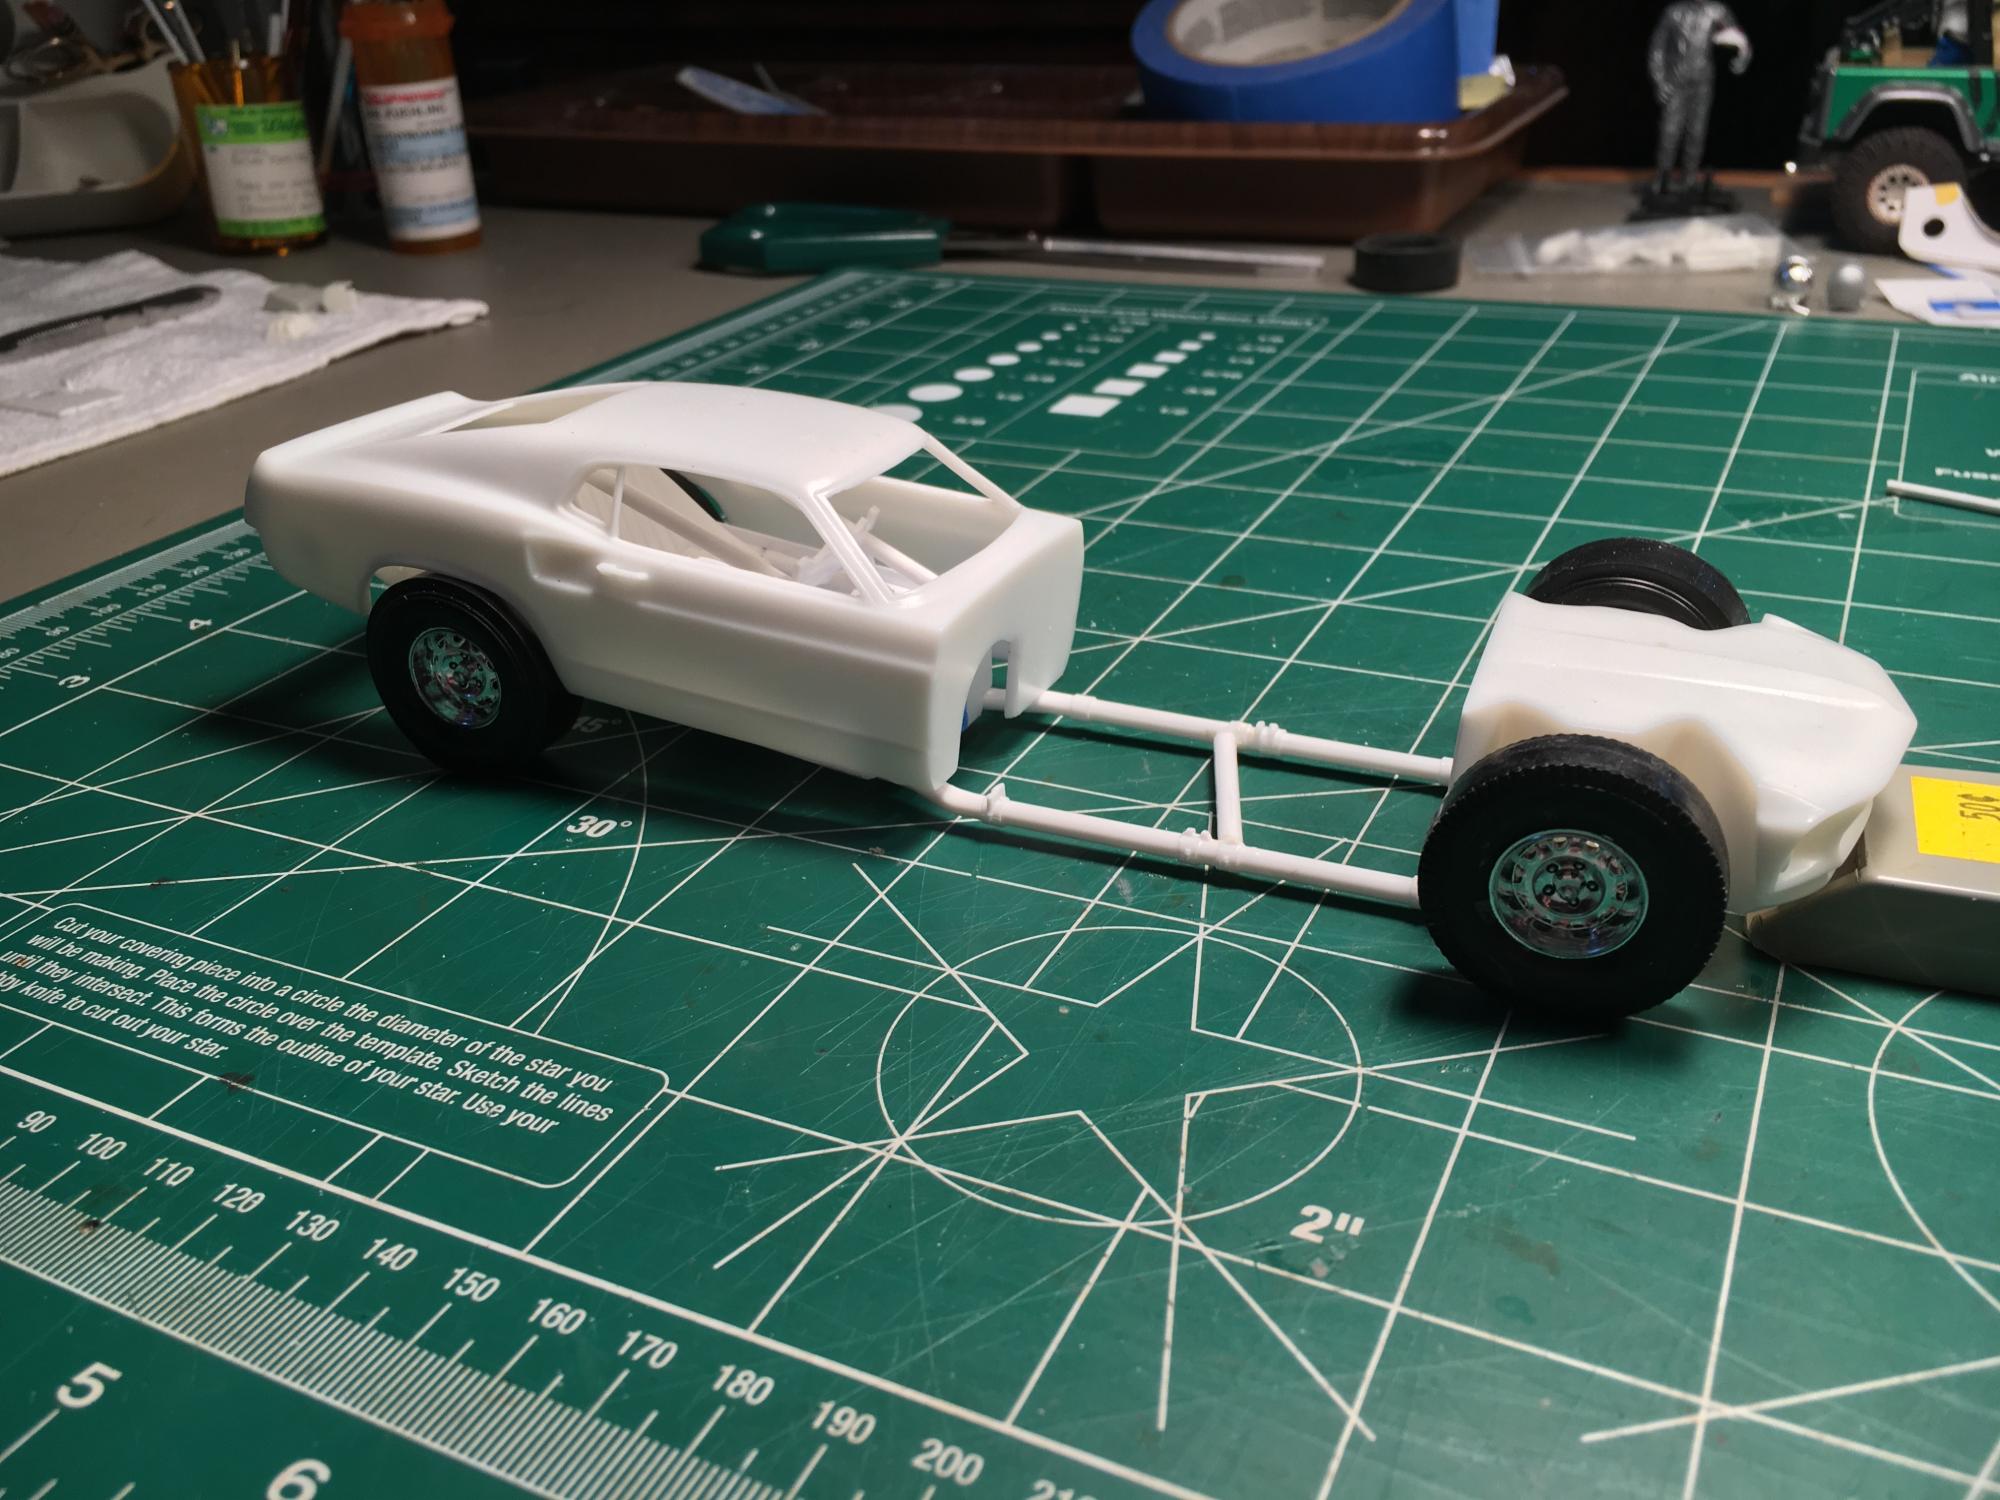
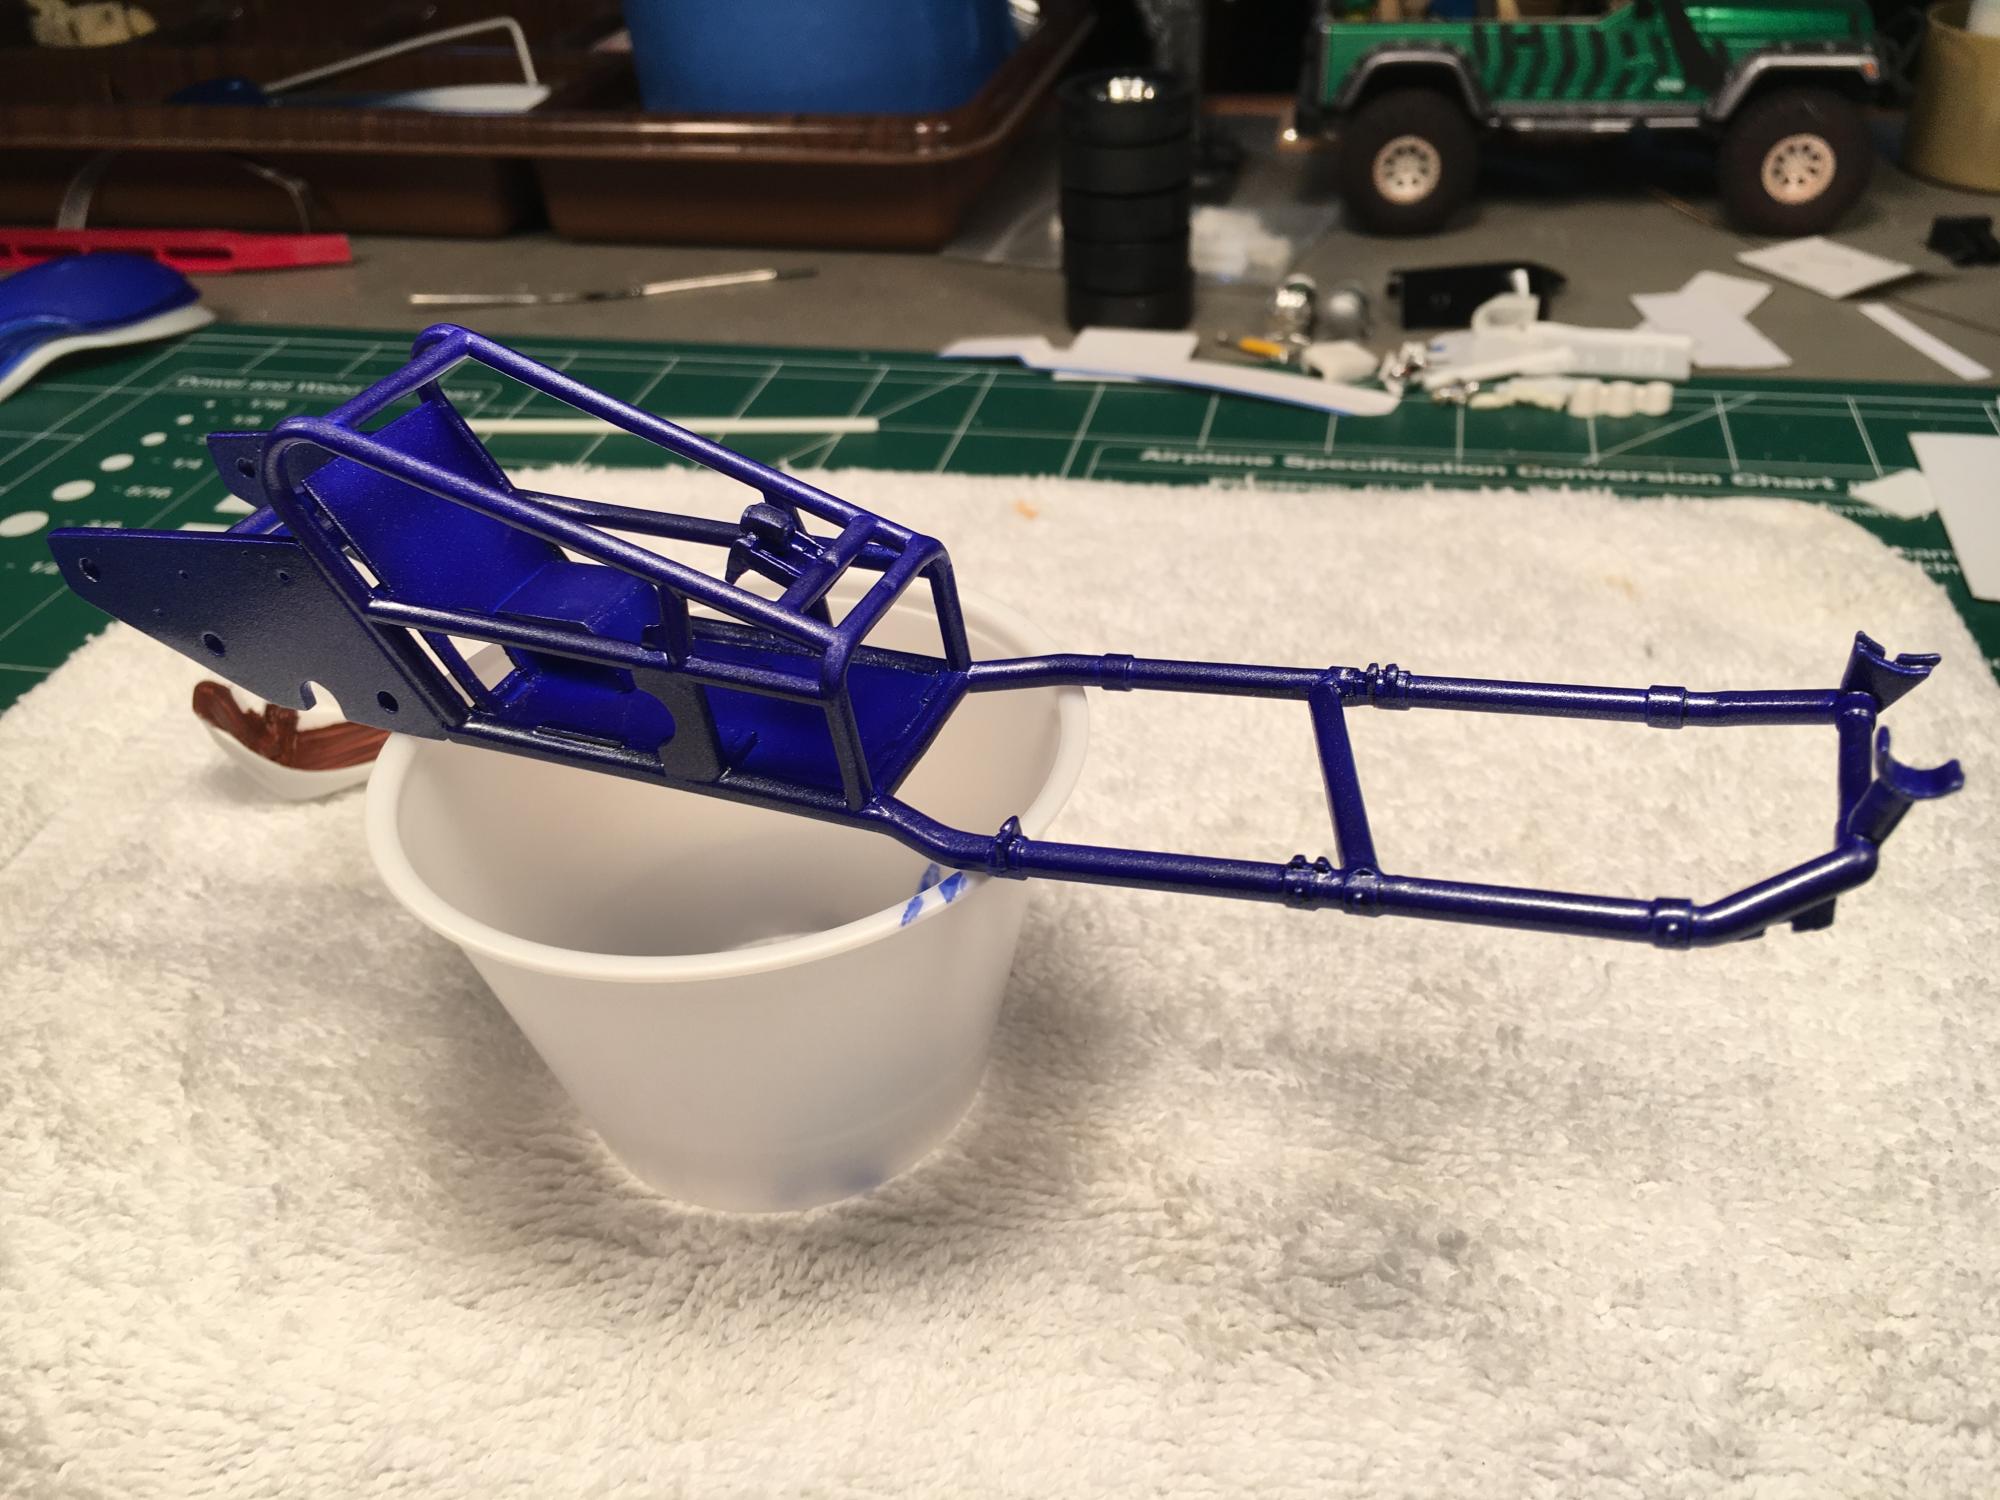
So I like a challenge. For something different I decided to build this bad boy. The resin kit is from Speed City Resin with the decals from Whoppie Cat. You use the TV Tommy Ivo Showboat Dragster as the basis for the heavily modified bad ass Mustang. There is not a lot of detailed pictures on the internet so I'm going off the top of my head for much of it. I'm looking forward to building the 4 engines. I'm playing around with some different paint effects. I'm using some artist acrylics that work great through an air brush. I went over the blue with a pearl effect paint. I'm not sure I really like the pearl effect. We will see. I'm wondering is anyone else on here has built this and have any suggestions or tips for me.
-
Nice job. This is a great kit. I will say I like the look of the car better without all the lights hanging on the front. A necessary evil to see the road at night I guess.
-
I love it. I like those tattered and battered well used models. I think they are more challenging then a straight build. I like your color choice and all the extra detailing.
-
Old Trusty Truck
St Louis Snacker replied to St Louis Snacker's topic in Model Trucks: Pickups, Vans, SUVs, Light Commercial
Thank you all for all the nice comments. I really appreciate it. Dusterman, The Current is one of my favorites, but I think the most beautiful river is the Eleven Point River. -
1971 Ford Ranger XLT
St Louis Snacker replied to Harry Joy's topic in Model Trucks: Pickups, Vans, SUVs, Light Commercial
I think the fit issues have to do with the fact that's it's a Ford. That's they way they came from the factory. Consider it authentic. -
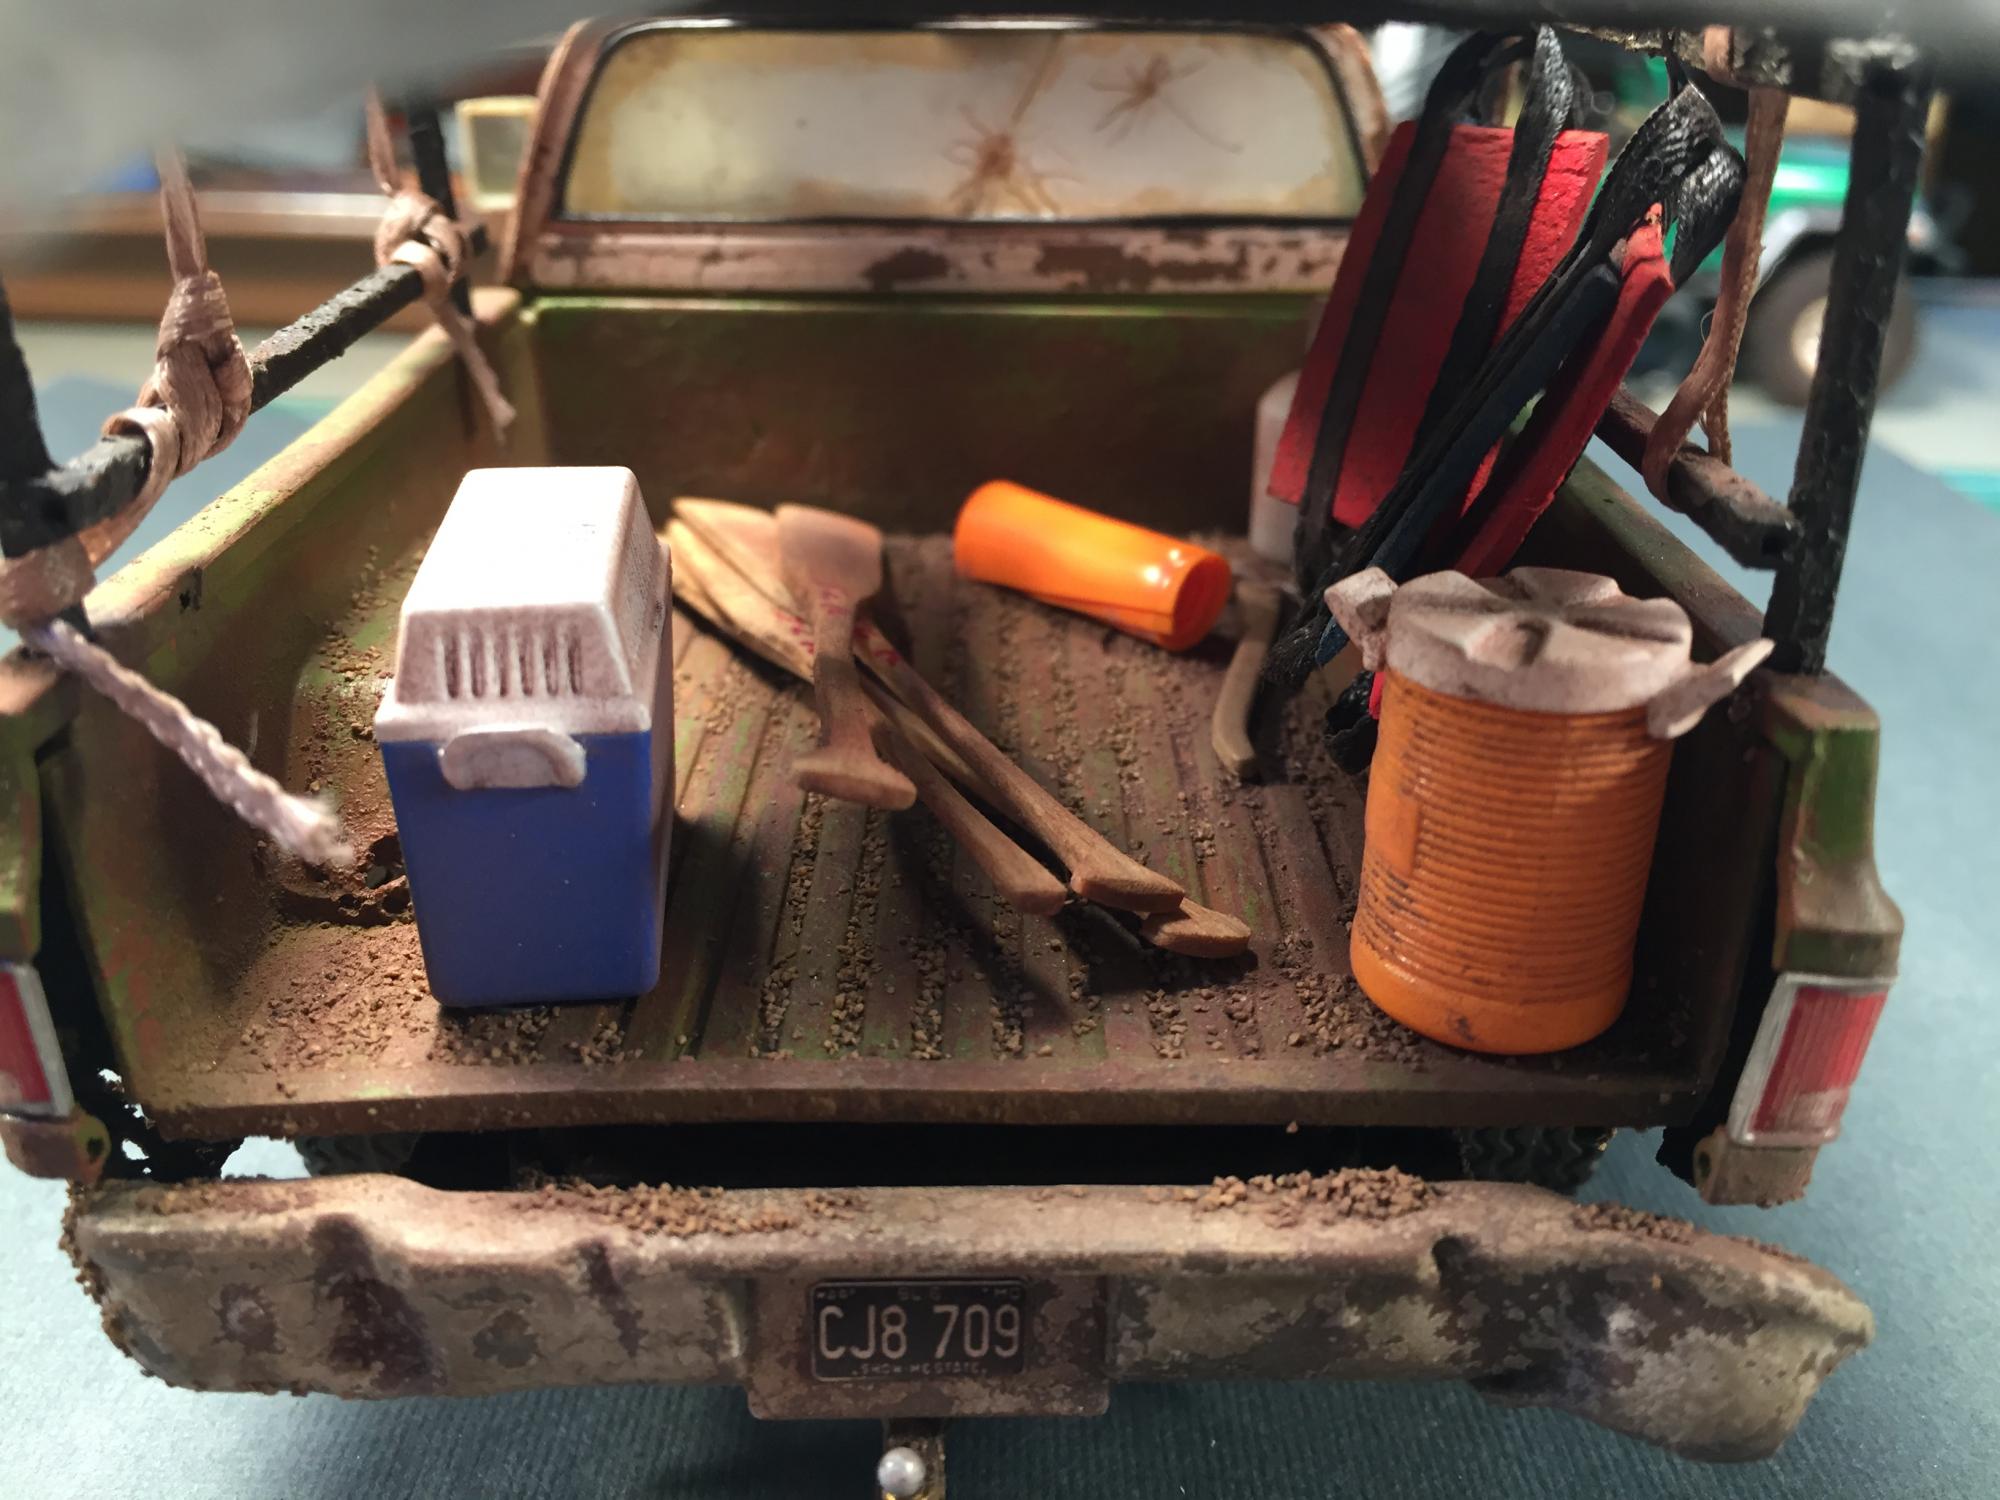
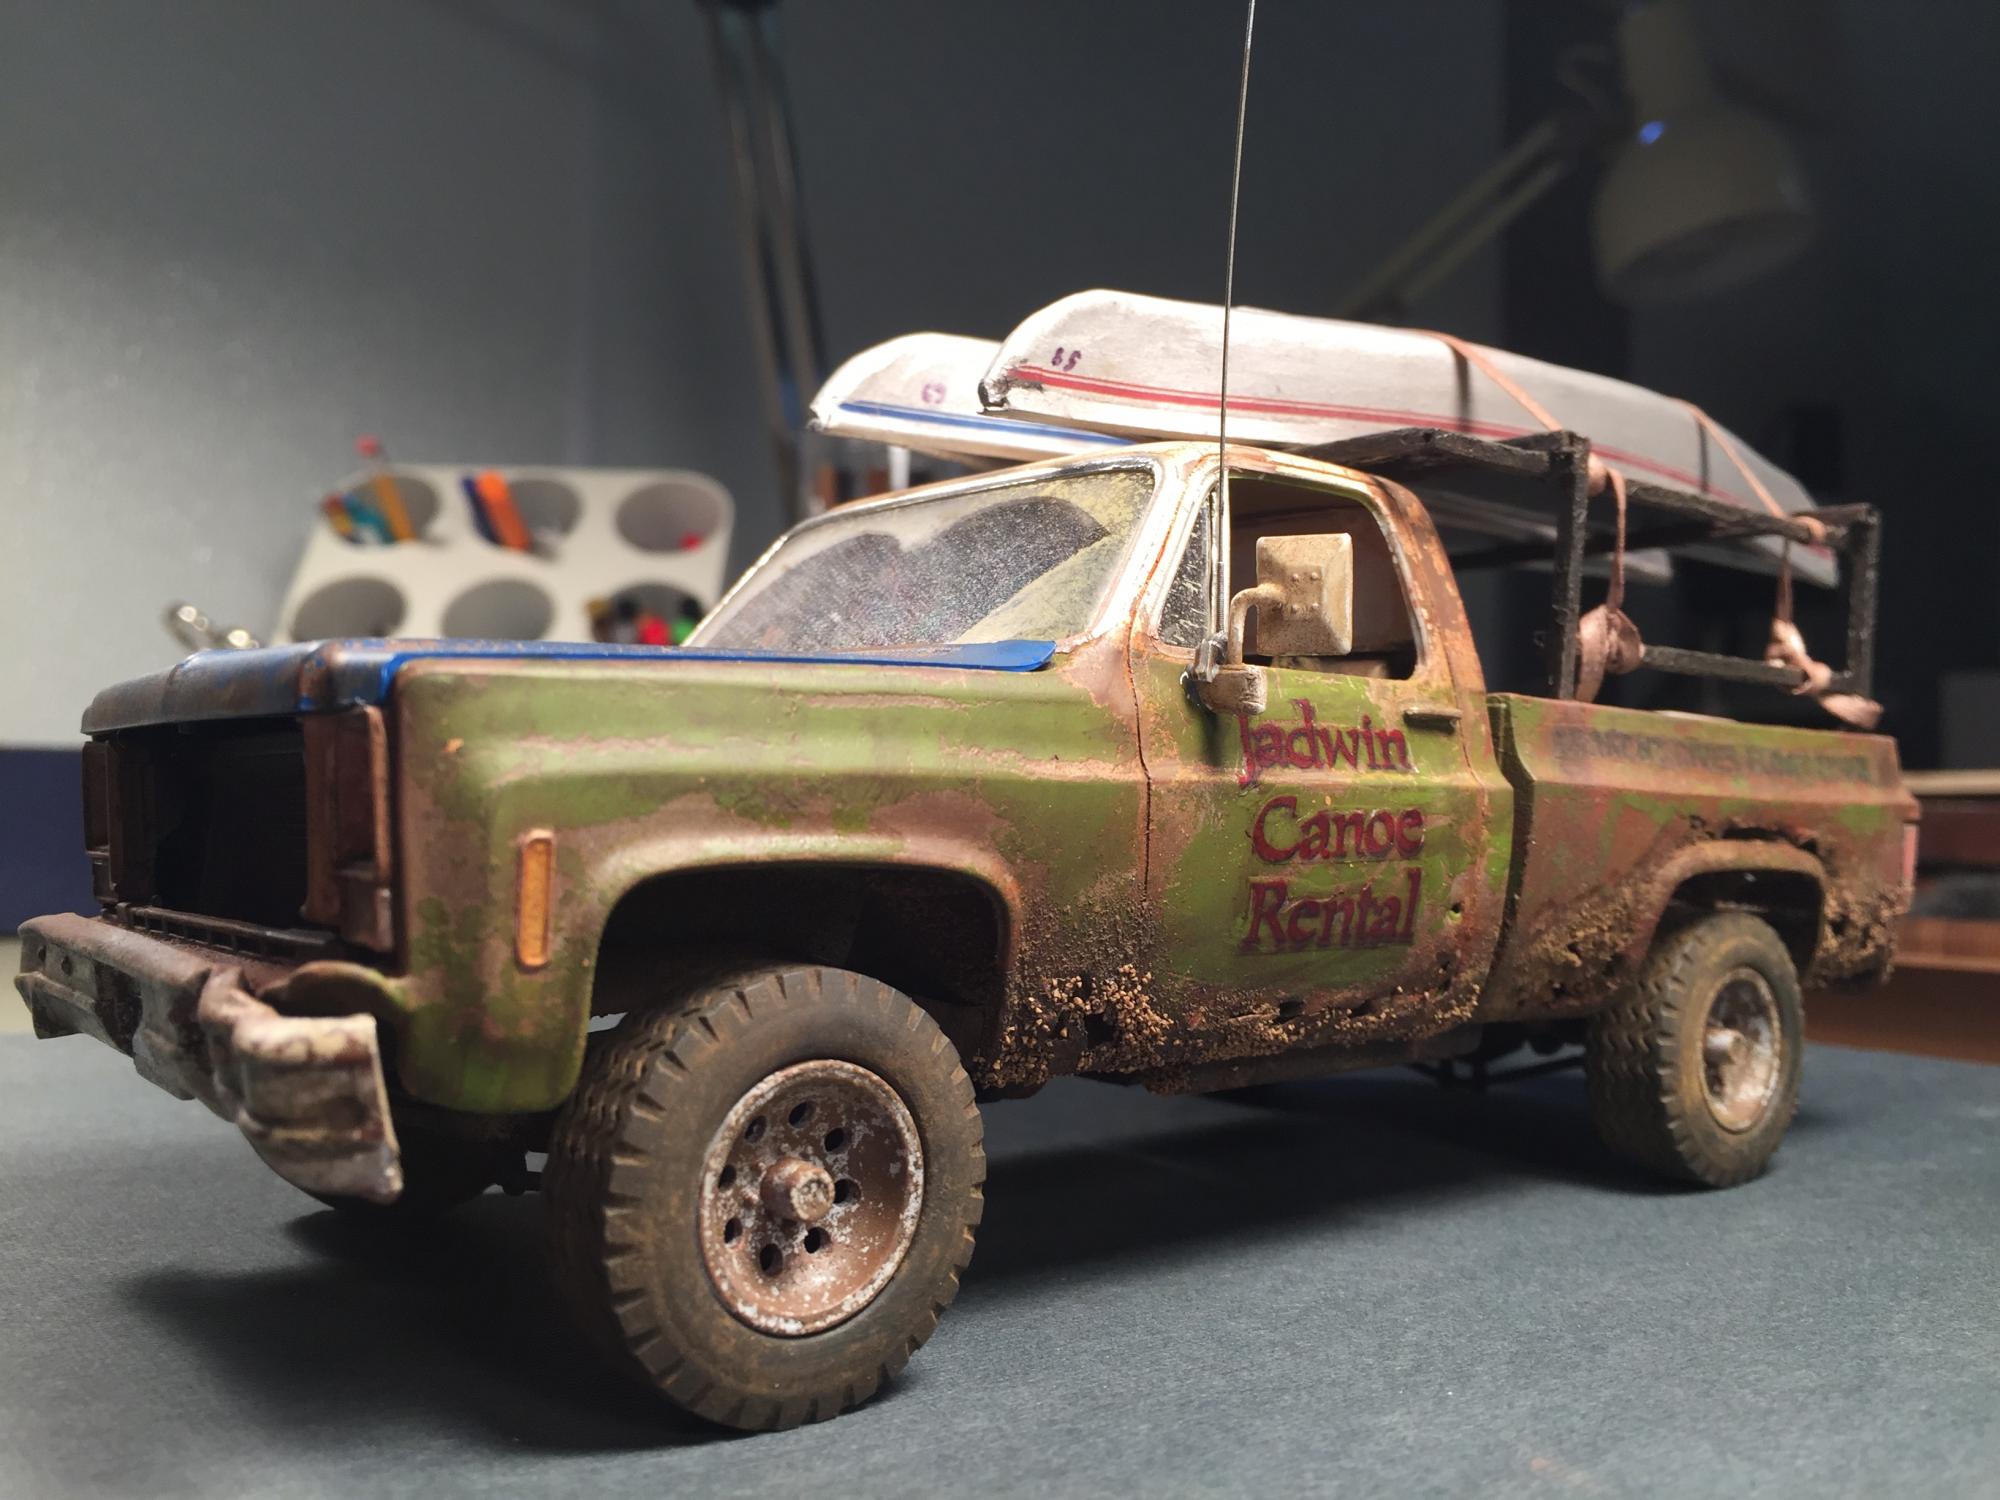
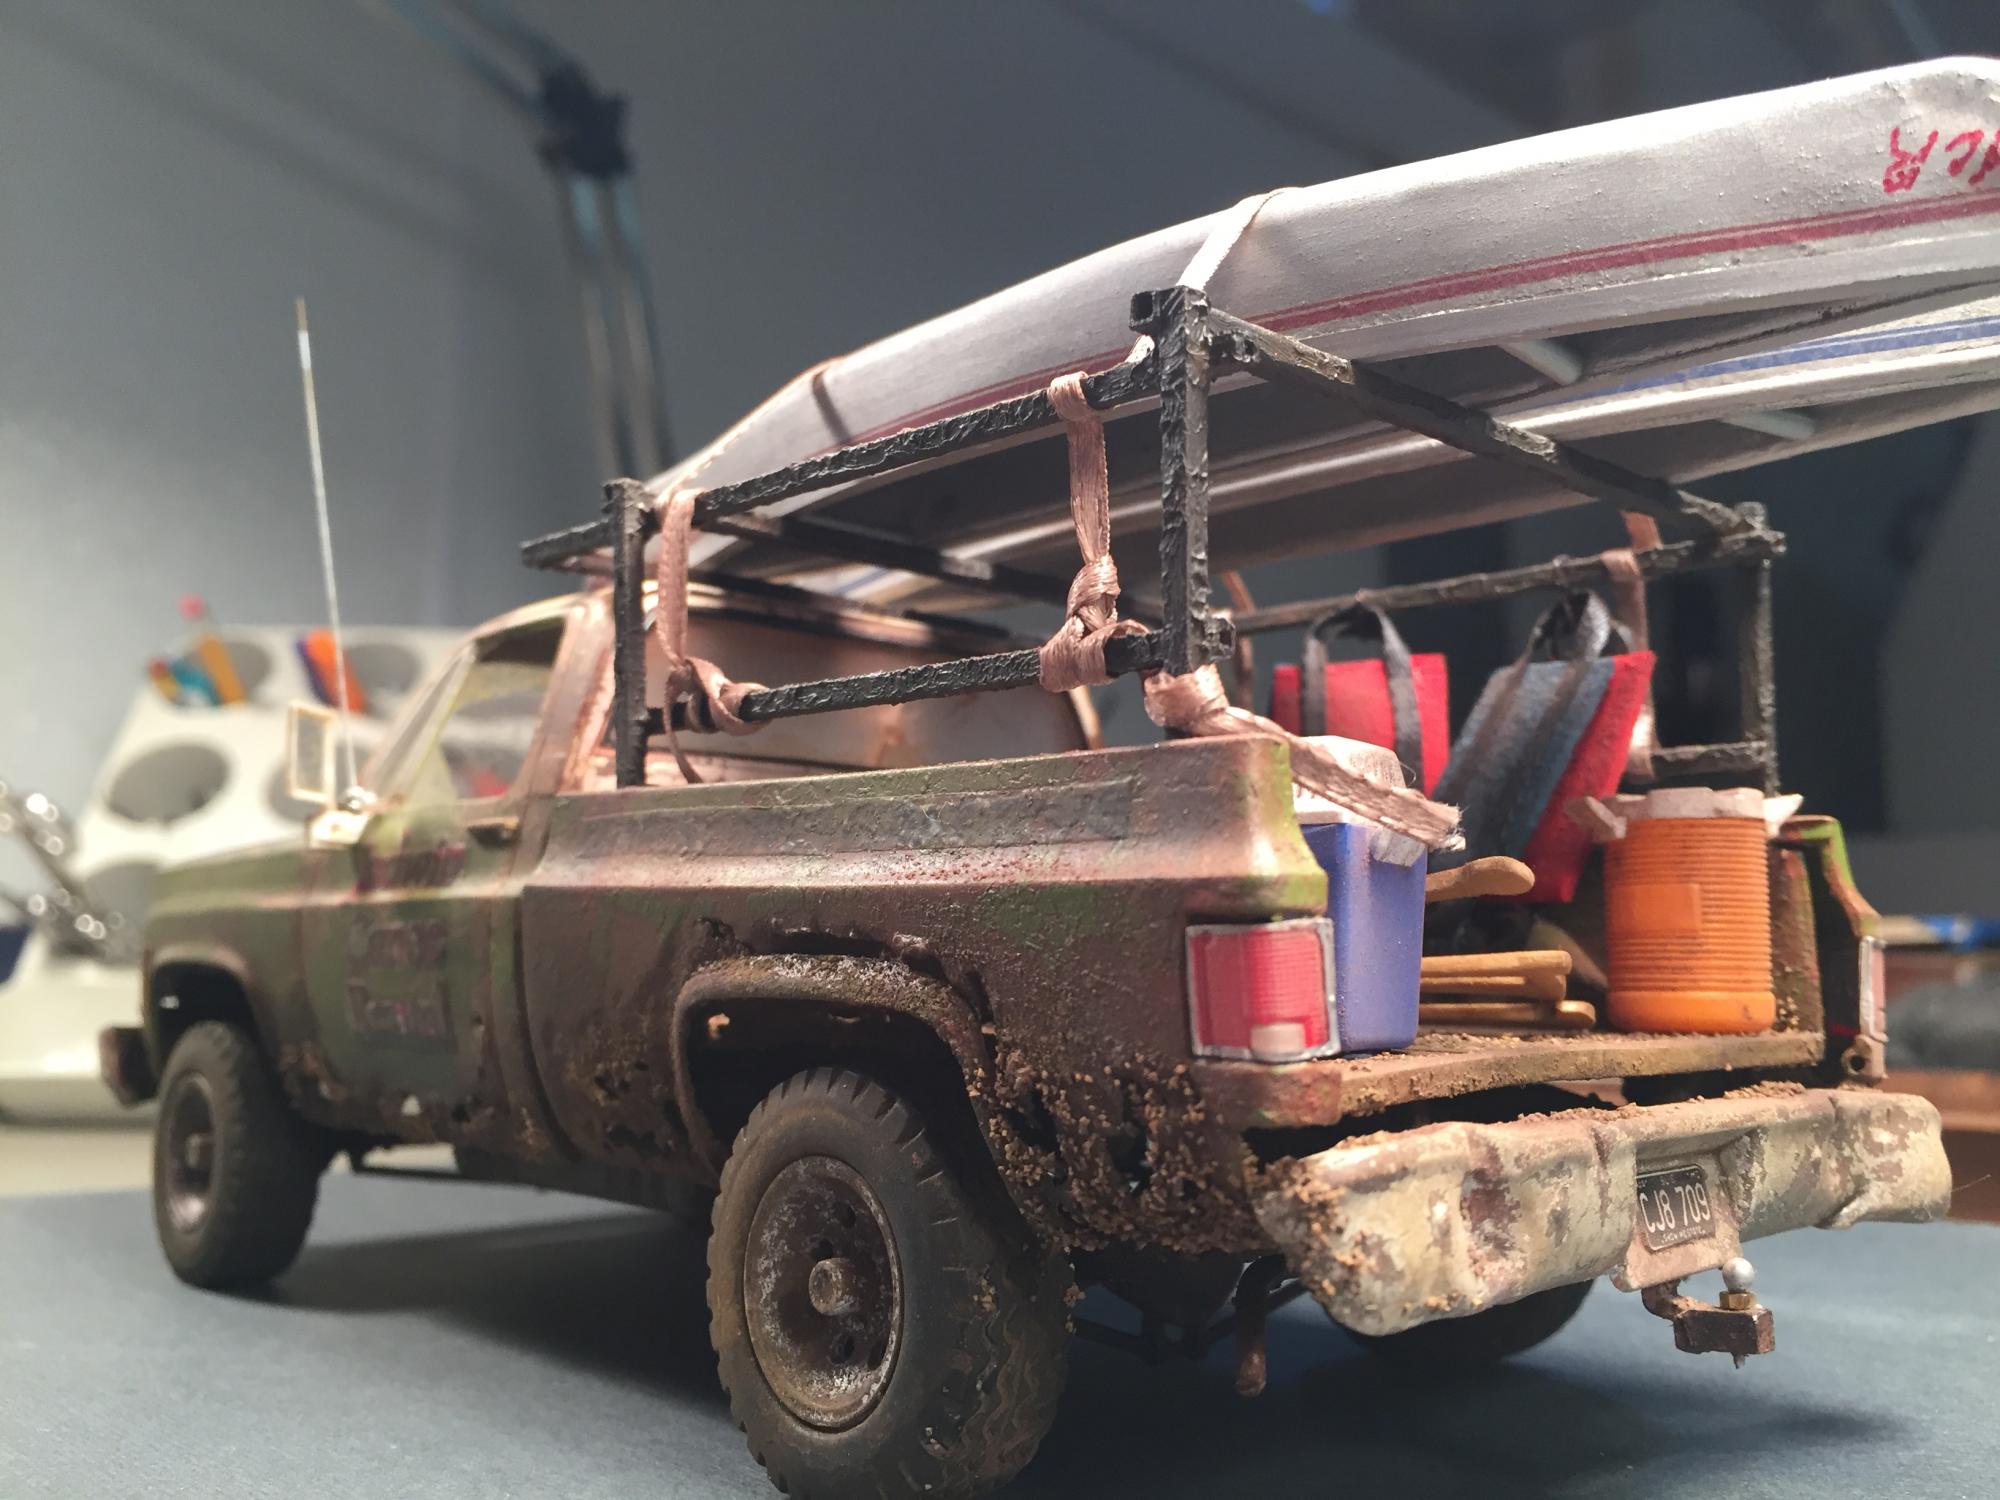
I live in Missouri and in the summer I love to go down to our beautiful streams and canoe on the rivers. The canoe rental company I rent from is Jadwin Canoe rental. Over the winter I thought I'd make a truck that you might see them using to shuttle canoes and people back and forth on the river. I started with the Revell Trucks, GMC Pick Up. The paint is an acrylic artist paint made by Golden and applied through a dual action air brush. It is great stuff. While it may seem expensive, coverage is great and you hardly need to use any. You dont have to thin it, water clean up is a snap, and it covers great. I used the hair spray method to create the rusty paint job. I think the trick to success with this method is to not let the hair spray or the paint dry too long. You really need to do the procedure within 24 hours or the paint dries too hard and you cant get it off. I think you also need to use an acrylic paint. I've never had luck with enamels with this method. I also used Vallejo washes and Mig Pigments for the first time. Both work great! Highly recommended. The rack for the canoes was made from brass square and soldered together. The paddles were hand made from coffee stirs. The canoes were cheap toy canoes bough on line for less than $5.00. The pin stripe decals on them really made them come alive. Skills I was trying to work on with this project were: Painting with an airbrush, hair spray technique, rust through on body panels, soldering, making my own decals, miniaturizing maps and brochures, and general weathering using pastel chalks and washes. I hope you like it. If you have never tried making truck or car look used and beat up, you should. It's a lot of fun and if you screw something up, put a little more rust on it.
-
UPDATED 6/12 - 1968 Hemi Dart - Body Mounted, Almost Done
St Louis Snacker replied to Quick GMC's topic in WIP: Model Cars
I really like the build so far. I am wondering how much money you have spent on this model. -
1/25 Revell Ford Del Rio Ranch Wagon 2'n'1
St Louis Snacker replied to Matt T.'s topic in Car Kit News & Reviews
I know you guys are all excited about this release but its not a kit many of us are really interested in. I'd love to see a modern pro stock or funny car. While I'm not a fan, a modern NASCAR kit or a modern Chevy or Ford pick up truck. Can the model companies produce a kit of a car newer than 1975?. Something other than another rehashed kit that has already been released 8,9,10 times. AMT 1968 Mustang. Revell 1969 Camaro as example. As far as errors in kits, I can understand it in the old tooling but with all the computers and programs available as well as 3D printing that's available to manufacturers there shouldn't be any thing we hobbyist builders should have to fix before we can even start building the model. Not to mention that kits approaching $30.00, we should expect better. -
Testors clear cement for windows is the bomb. It comes out milky white, but dries completely invisible and wont harm your clear part or your paint. It comes in a weird shaped bottle with a long thin spout. Very easy to control the amount of glue. It takes 24 hours to completely dry but that's OK. Gives you time to work on something else.
-
Nice. I like that body style. They were quite the car in the day.
-
I'm facing the same dilemma with the side Mustang lettering. I'm planning on placing a strip of Tamiya masking tape below where the letters will be placed. Then I'm going to make little marks on the tape just below where the letters will be placed on the body. This should keep the letters even and straight. I'm planning on using a very small drop of Tanya clear then placing the letter on to the clear. After the letters are on, remove the tape and let it dry for at least 24 hours. The next day repeat on the other side of the car.
-
1970 Buick GSX. Rusty Crusty
St Louis Snacker replied to St Louis Snacker's topic in WIP: Model Cars
Thanks for the comments on my Buick. I made up a base to display the car on. This was my first attempt at a doing this kind of decroative base. I did find a whole new area of the hobby shop though. There is some pretty cool stuff in the train sections. Hope you enjoy the car.
-
1970 Buick GSX. Rusty Crusty
St Louis Snacker replied to St Louis Snacker's topic in WIP: Model Cars
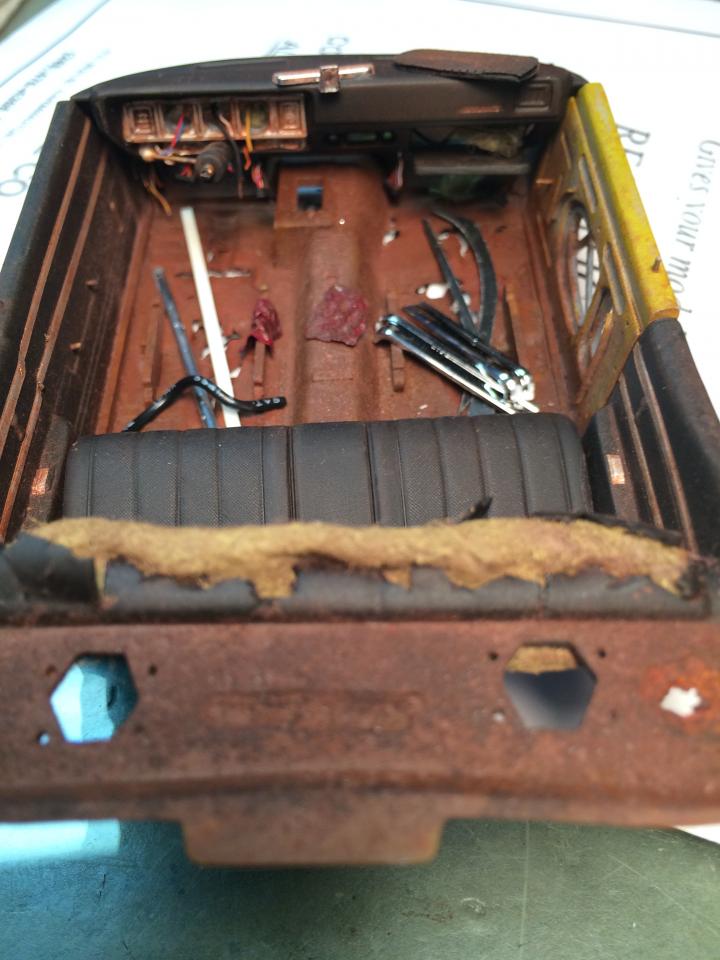
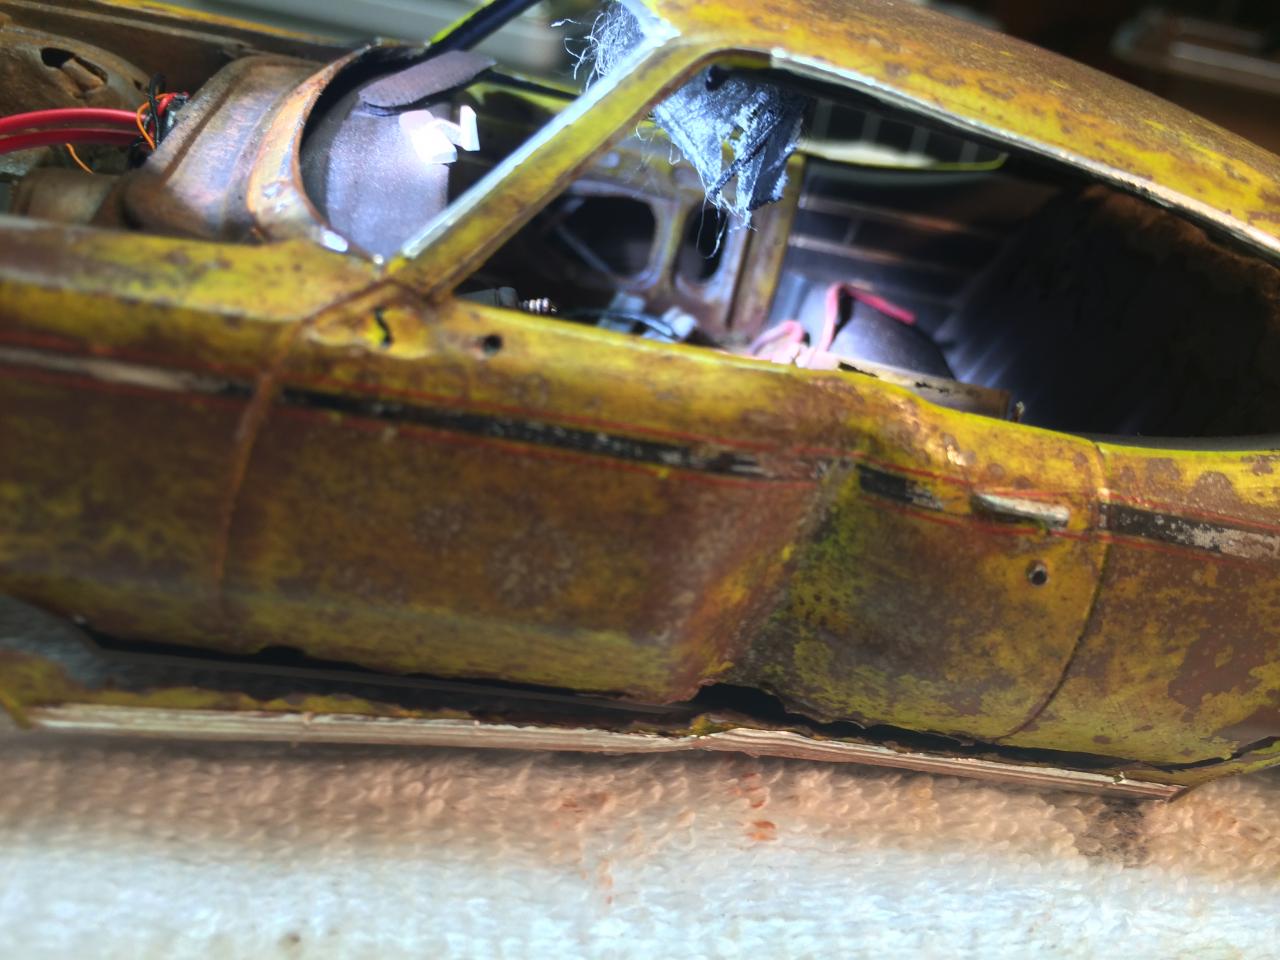
Thanks everyone. As many of us do, I wasnt going for 100% accuracy. I really was trying to do something completly different than I normally do. bisc63, it has the rear window in it. I actually tried to replicate delaminating of the window around the edges with a mix of Stiffy Fabric stiffner mixed with a little brown paint. mad31lover, I searched all over for some foam that would have worked. I tried to find a make up sponge but the ladies dont use those anymore. Thats why I went with the painted stuffing. -
1970 Buick GSX. Rusty Crusty
St Louis Snacker replied to St Louis Snacker's topic in WIP: Model Cars
Midnightprowler, You had to catch that didnt you? LOL. I pulled that hub out of the junk pile and I didnt think about it till after I had it done. I didnt think anyone would notice. -
1970 Buick GSX. Rusty Crusty
St Louis Snacker replied to St Louis Snacker's topic in WIP: Model Cars
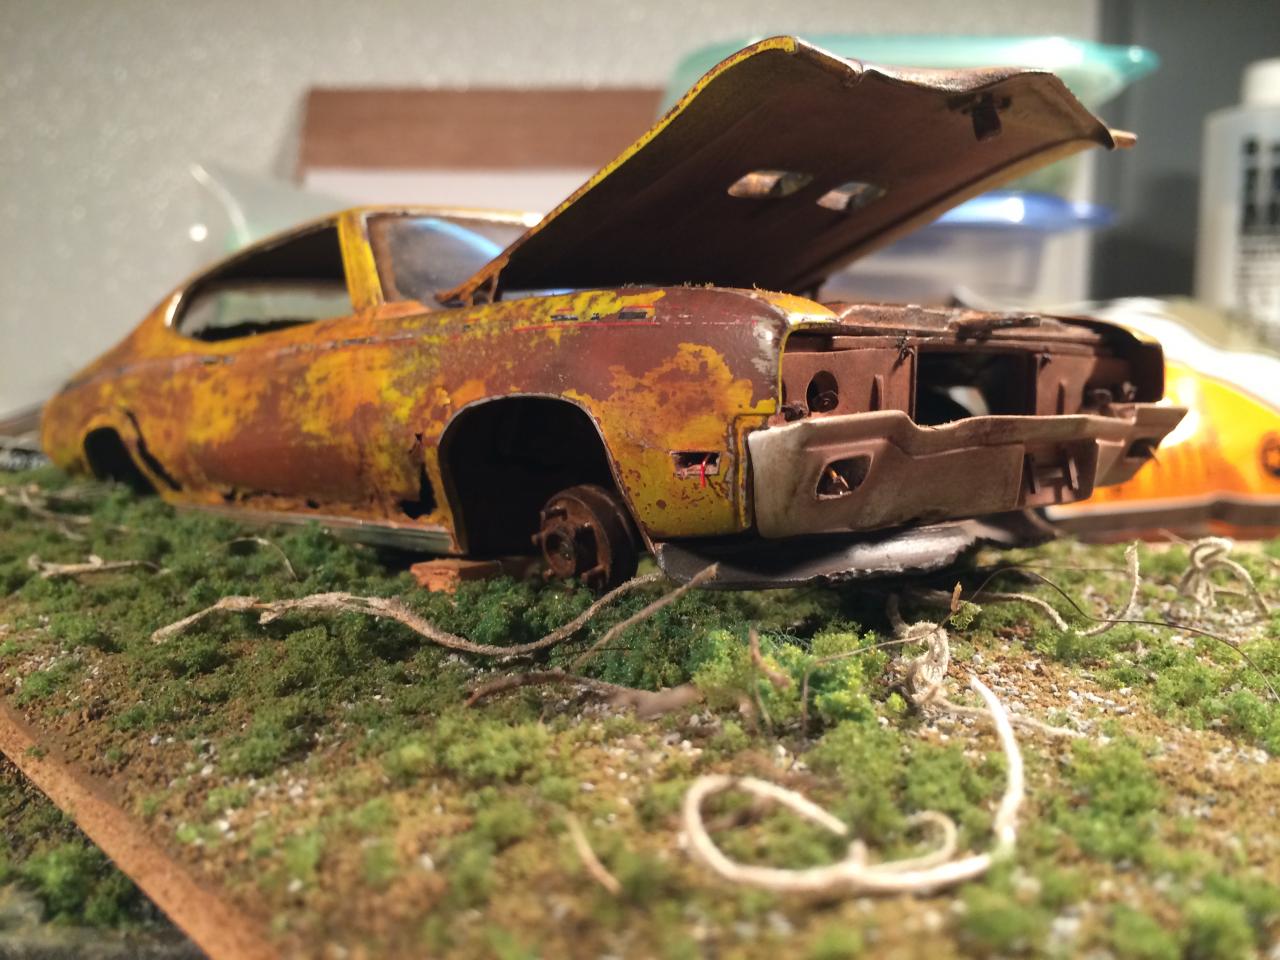
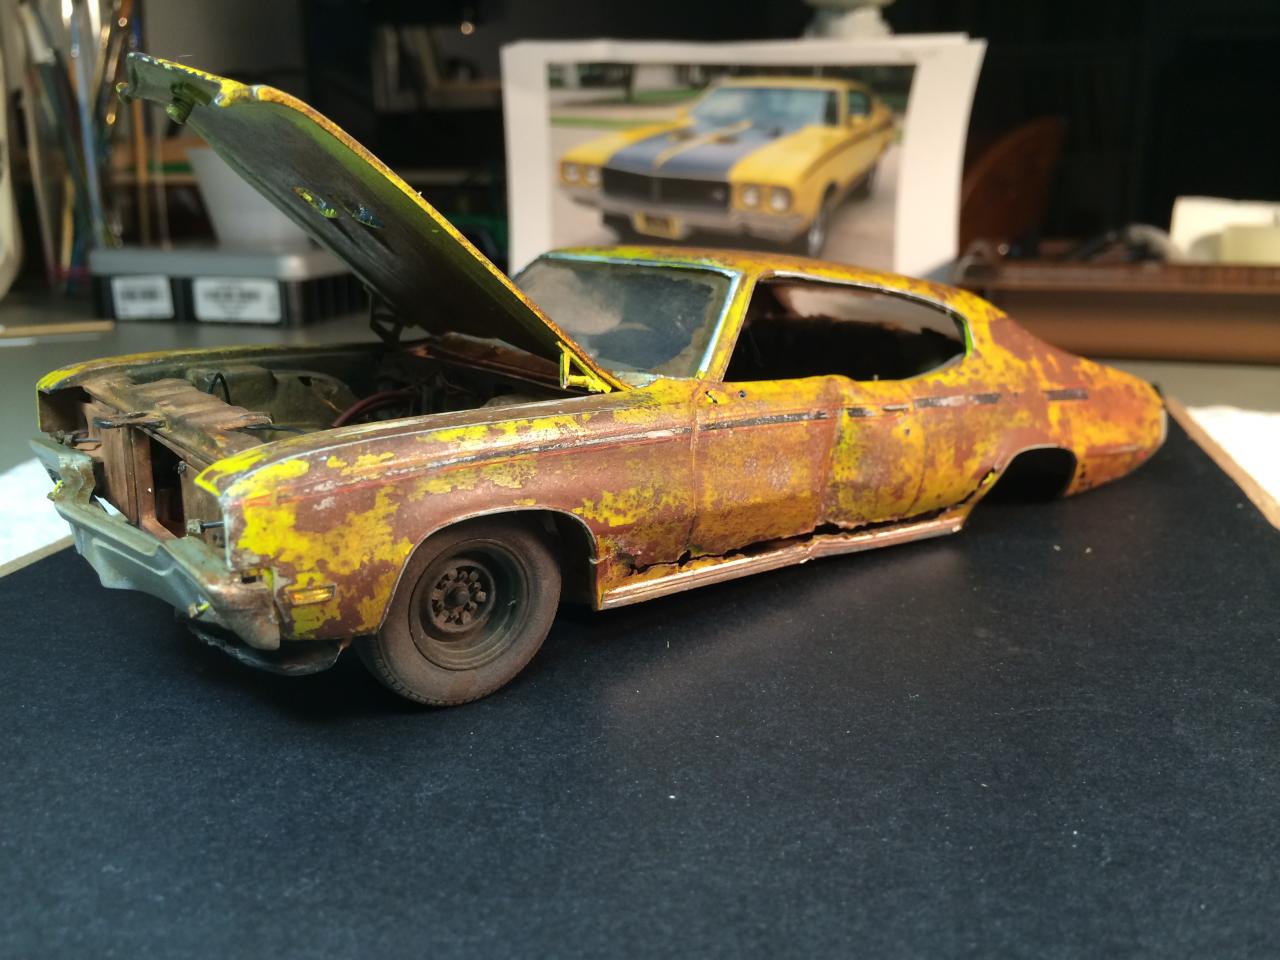
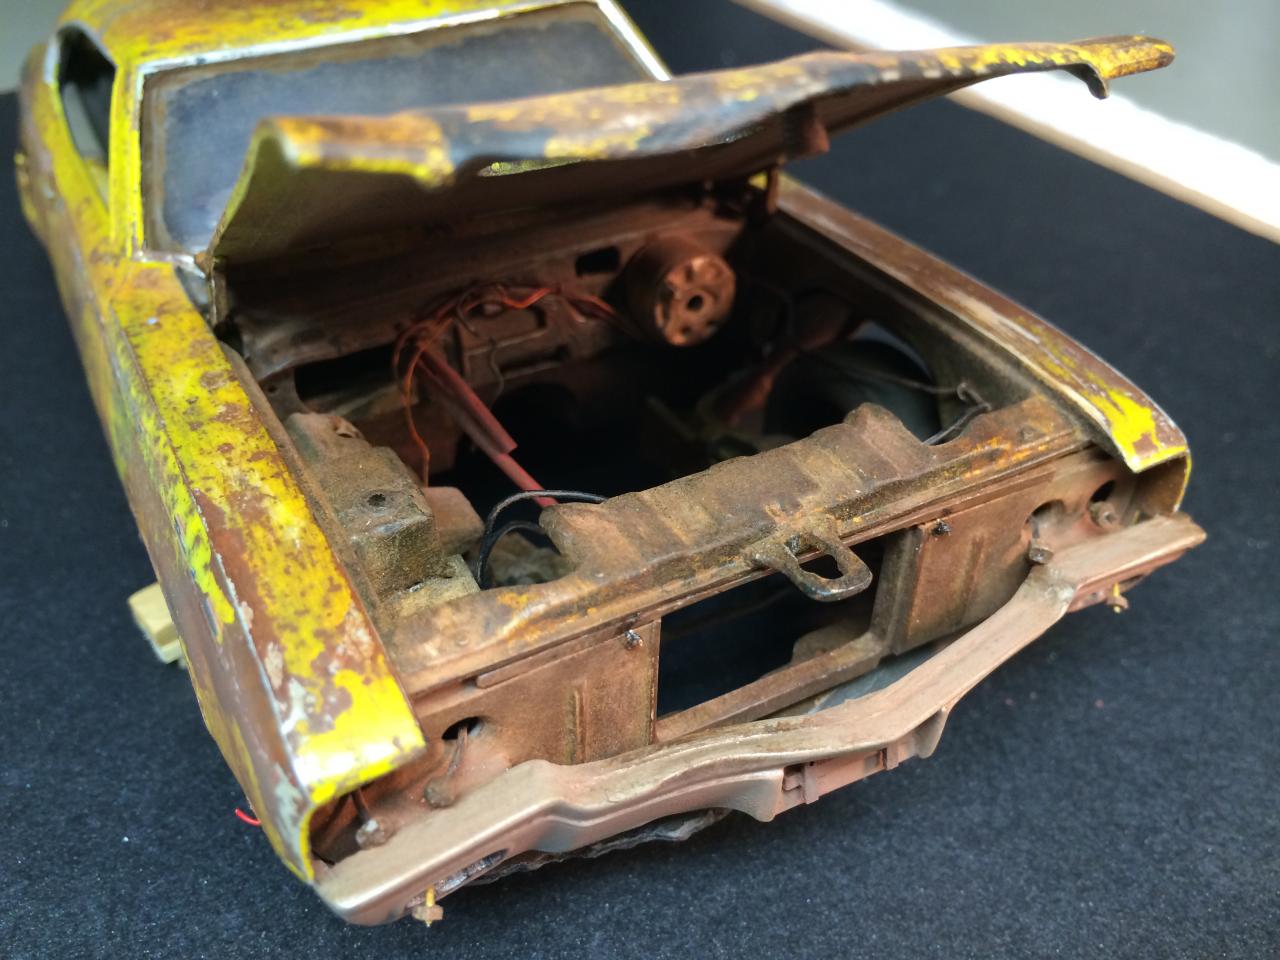
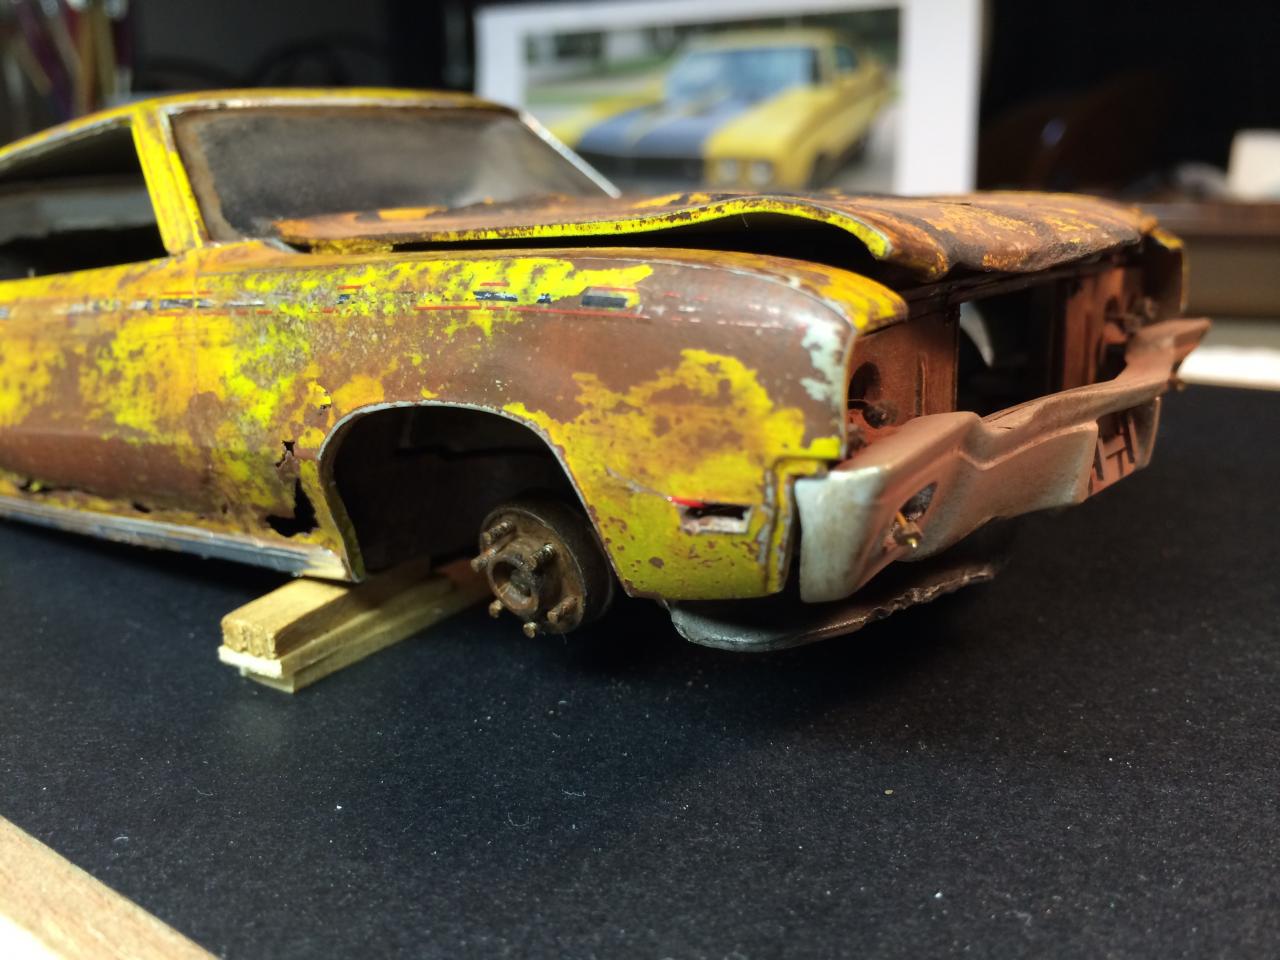
Thanks for the response. To answer some questions. I built this to resemble a car sitting out in the elements for 40 years. I pass a junk yard in Iowa that has hundreds of old cars rusting away. That is where I got my insperation. 1) I cut out the kit floor and replaced it with a floor from a AMT Stock Car kit. I wanted it to resemble a floor without carpet texture. 2) I cut out the door pannel, sanded it down and added another sheet of plastic over it. The door regulator is faux just for looks. The rear seat was ground away till super thin. The stuffing was from the scrap box and lightly painted with Tamaya Lt. Sand in the final version. 4) I dont like the marker lamp wire either. It's going to go.
-
1970 Buick GSX. Rusty Crusty
St Louis Snacker replied to St Louis Snacker's topic in WIP: Model Cars
I am working on placing it on a small base that will resemble the car sitting in mud, rocks, grass, weeds, for the last 40 years rusting away. -
I'm new to the forum section. I've been working on this model off and on for the summer. Just looking for some constructive criticism.