gonzo64nova
-
Posts
186 -
Joined
-
Last visited
Content Type
Profiles
Forums
Events
Gallery
Everything posted by gonzo64nova
-

Don Garlits Swamp Rat 6 AA/FD Dragster
gonzo64nova replied to Bruno's topic in WIP: Drag Racing Models
Your added details and paint work really brought this kit to life. Great job! - Bill -
1985 Chevy S10 " work truck "
gonzo64nova replied to Piero's topic in Model Trucks: Pickups, Vans, SUVs, Light Commercial
That second shot in front of the garage is really great.... looks like its ready to start up and drive away. - Bill -
'Lil Giant Killer - Jr. Fueler F.E.D. - Final Pics
gonzo64nova replied to Bernard Kron's topic in WIP: Drag Racing Models
Beautiful job Bernard, I can almost smell the nitro when I look at it. - Bill -
51 ford c.o. e,
gonzo64nova replied to bpletcher55's topic in WIP: Model Trucks: Pickups, Vans, SUVs, Light Commercial
Very cool Blair! -
Chris, every detail you add keeps pushing the "wow" meter higher and higher. - Bill
-
Casey, I think the direction you took this build is great,much more interesting than a straight shiny and done build, not that there is anything wrong with that. lol -Bill
-
Thanks again everyone for your compliments ,it means a lot. -Bill
-
'Lil Giant Killer - Jr. Fueler F.E.D. - Final Pics
gonzo64nova replied to Bernard Kron's topic in WIP: Drag Racing Models
Bernard, great start, I have the Ramchargers kit also and thought about the same body mods. Looking forward to the finish. -Bill -
70.5 Z28 10.5 Outlaw (WIP....Update 7.9.13)
gonzo64nova replied to hOLMS's topic in WIP: Drag Racing Models
Jeff, excellent scratch building so far. Im glad you decided to add the motor to the build ,it certainly deserves it. Ill be following this one for sure. -Bill -
That Harley is awesome,Im really impressed with all the details -Bill
-
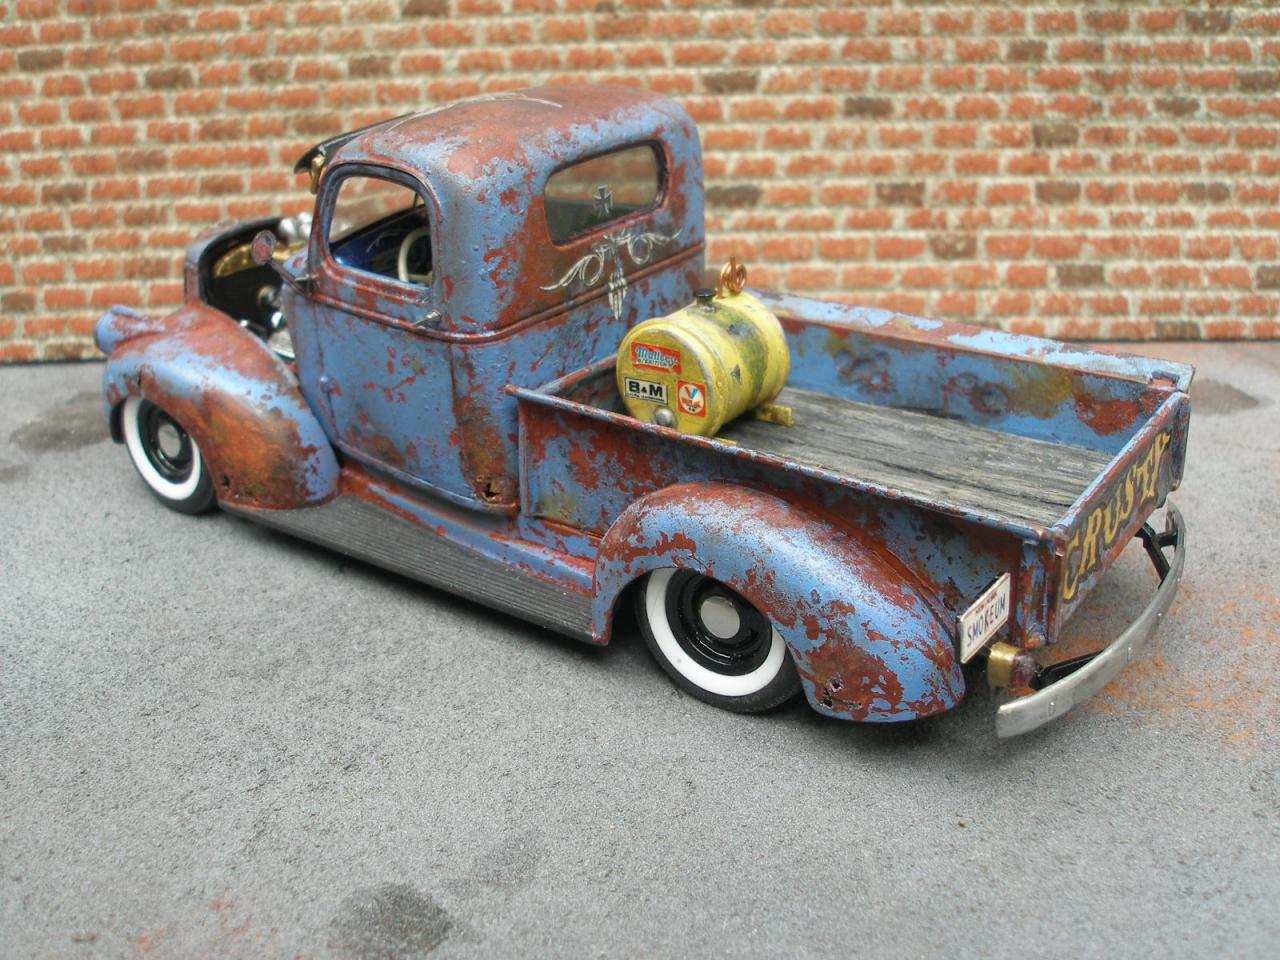
1950 Chevy pickup
gonzo64nova replied to IceMan Collections's topic in Model Trucks: Pickups, Vans, SUVs, Light Commercial
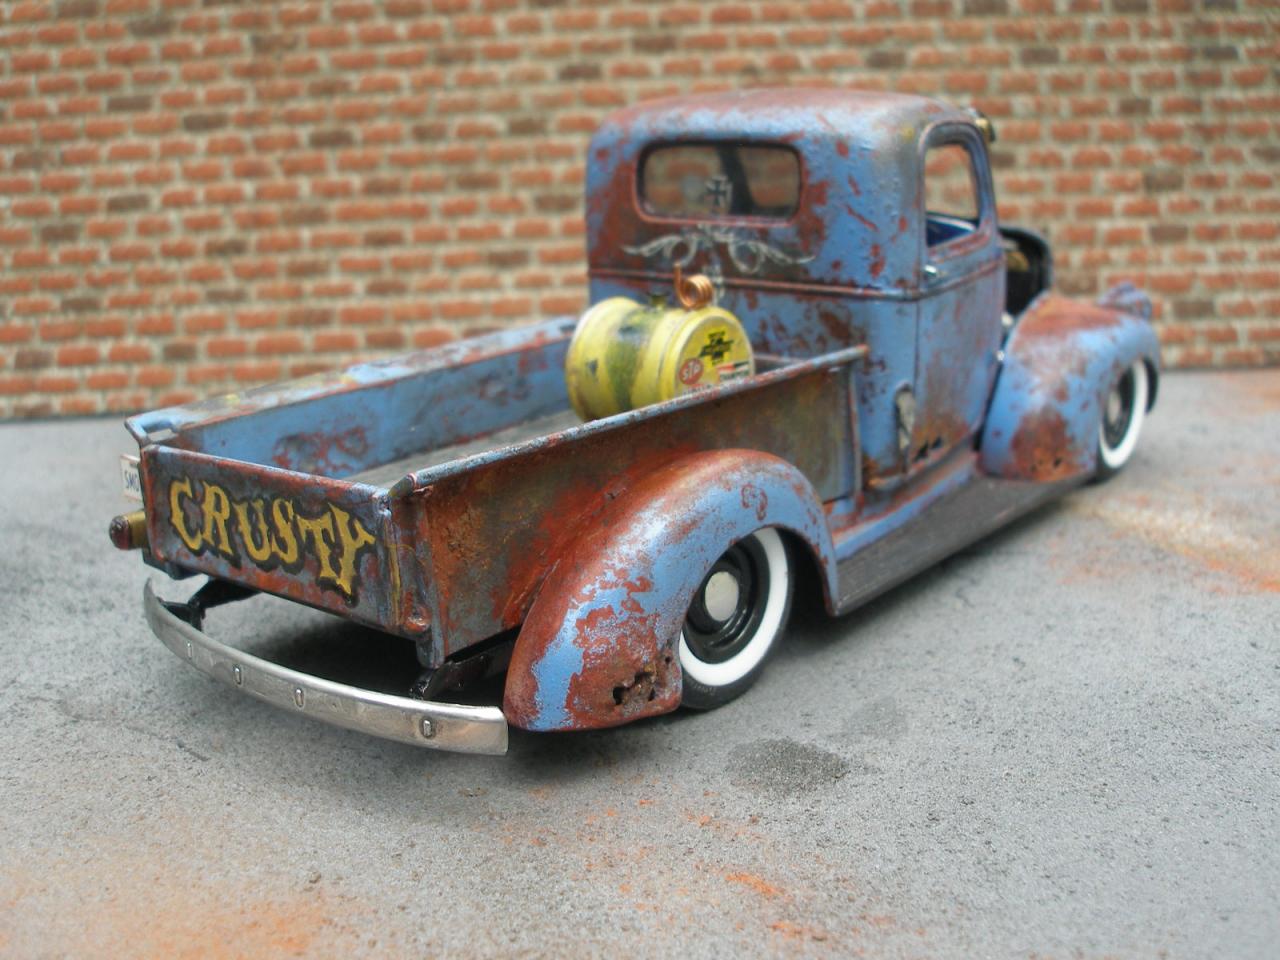
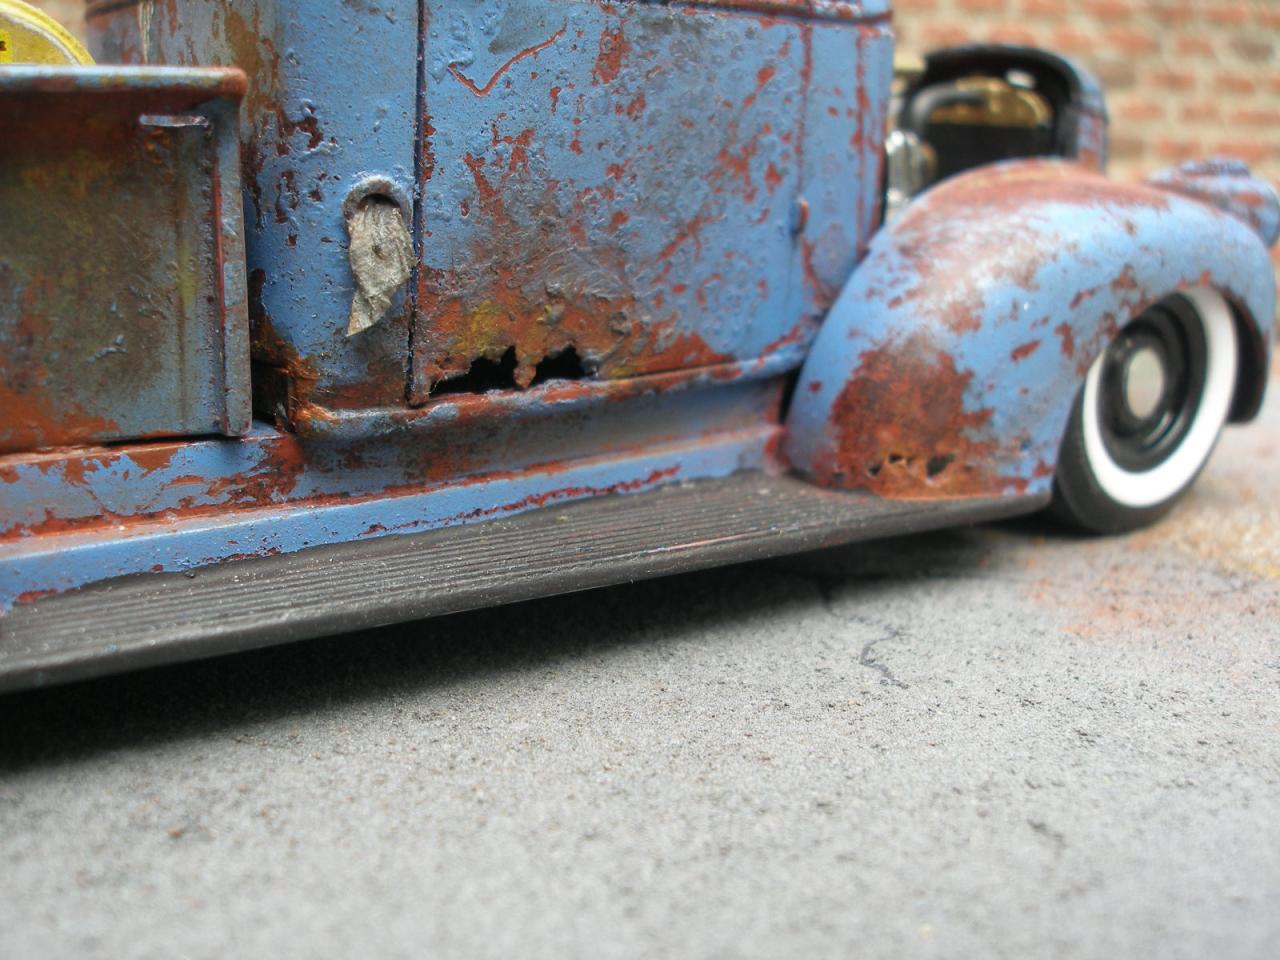
Your weathered paint looks very good.... If you want to try to create rust thru holes its pretty easy. I use my dremel tool to grind out the inside of the fender while I keep my finger in the same spot on the outside,this way you can feel when it gets very thin (dont go all the way thru) then take your exacto knife and poke very small holes in it from the outside. It looks more accurate if there are many staggered sized holes instead of one big one. Another tip is to take the small pieces of plastic that came off the fender while grinding and liquid glue back into the hole from the back to really create some very fine detail. Good job on your 50 - Bill -
Thanks for the compliments...They are the kit springs , I moved the front axle up to lower the car so the upper mounts had to be scratch built.. I usually paint them if they are not chromed ,if they are chrome I use a colored Sharpie to color them. In either case I use a black wash afterward to bring out the detail. Hope this helps some. - Bill
-
Revell 2n1 41 Chevy kit
-
I just converted one of my pics to a Sepia tone... it really has the "look" now -BILL

-
Great job on the paint and decals..they can be a real PITA. Your P/S builds are always dead on. -Bill
-
Thanks for all the compliments guys ,its much appreciated. Blair, I had a feeling you would like this one. -Bill
-
Custom Ford P/U (Done)
gonzo64nova replied to James2's topic in WIP: Model Trucks: Pickups, Vans, SUVs, Light Commercial
This truck has tons of potential, like Blair said you have all the right ingredients. Good luck. - Bill -
I really like the old Impalas and your subject car looks great. Seeing your progress I can tell this is going to be very detailed and well executed build. -Bill
-
Thanks for all the compliments, I enjoyed this build alot. W-409 The class markings are done with sign painters One Shot enamel, I mix a sort of off white then dilute it with mineral sprits (to give it the look of shoe polish). The best way to perfect this is practice on a piece of glass till you have the consistency of the paint right. Good brushes are essential also. I am a pinstriper so I had alot of practice with this paint. Acrylic paint might work also.
-
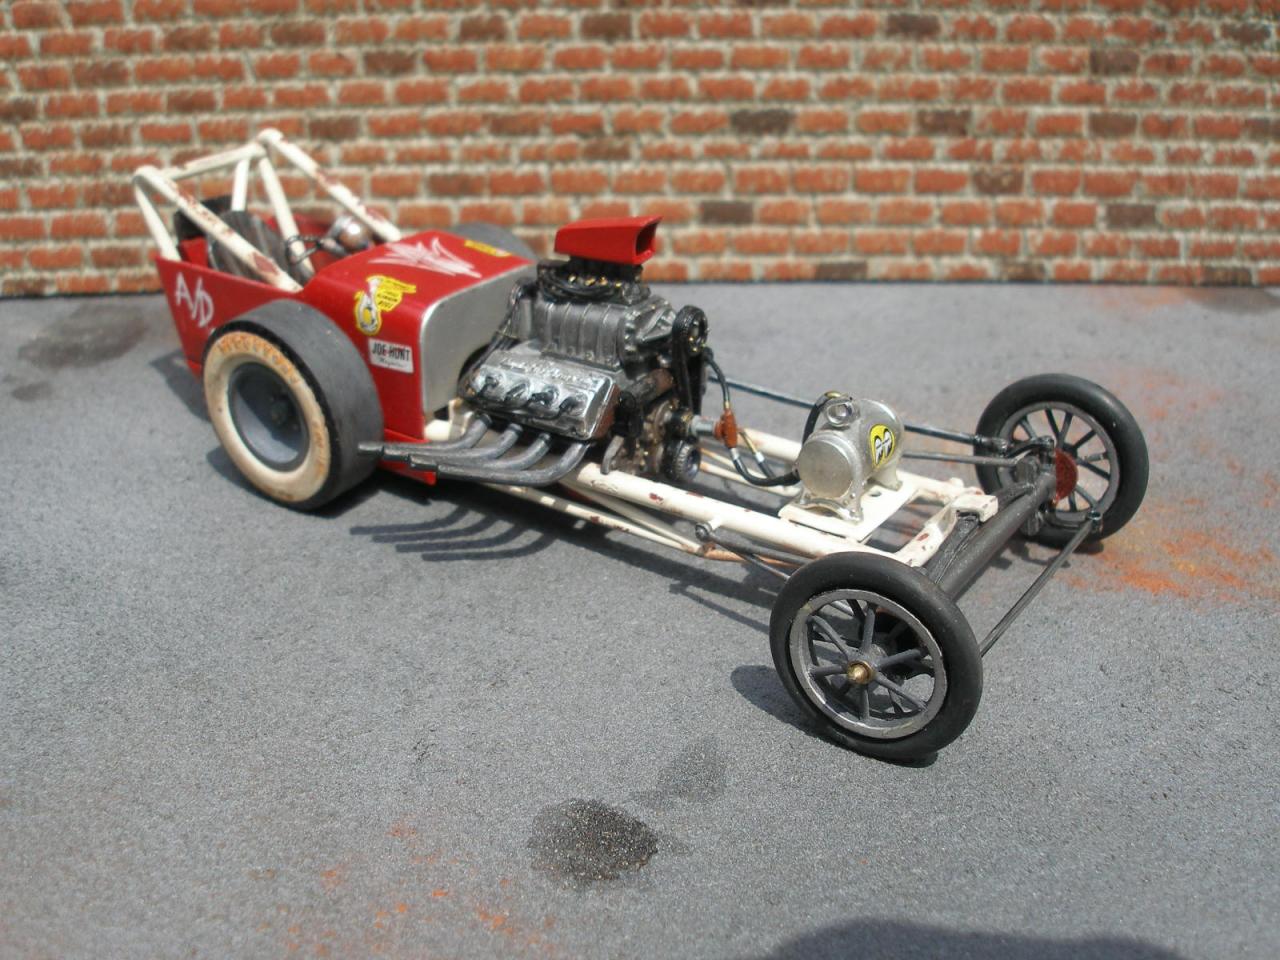
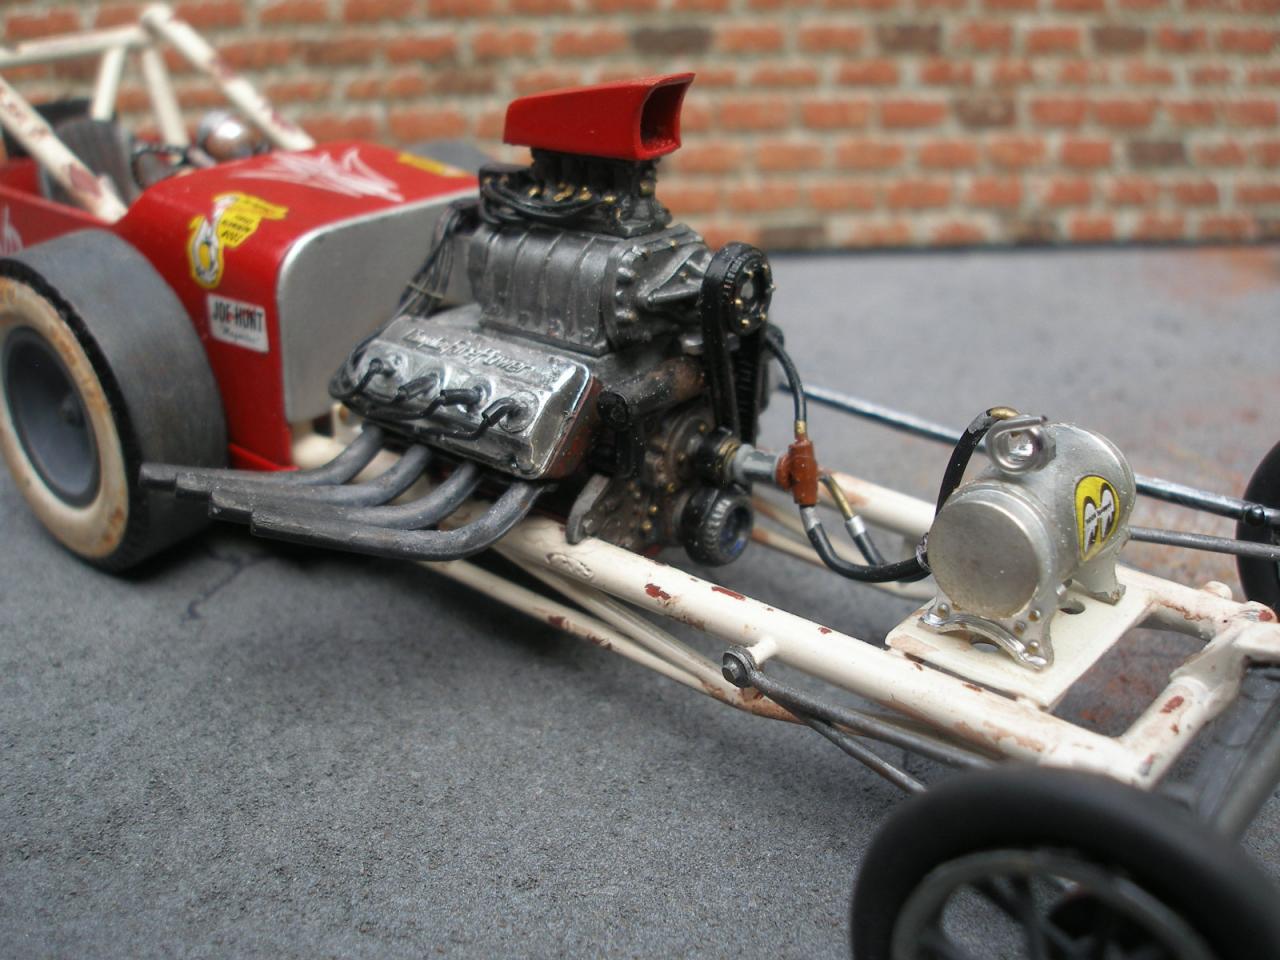
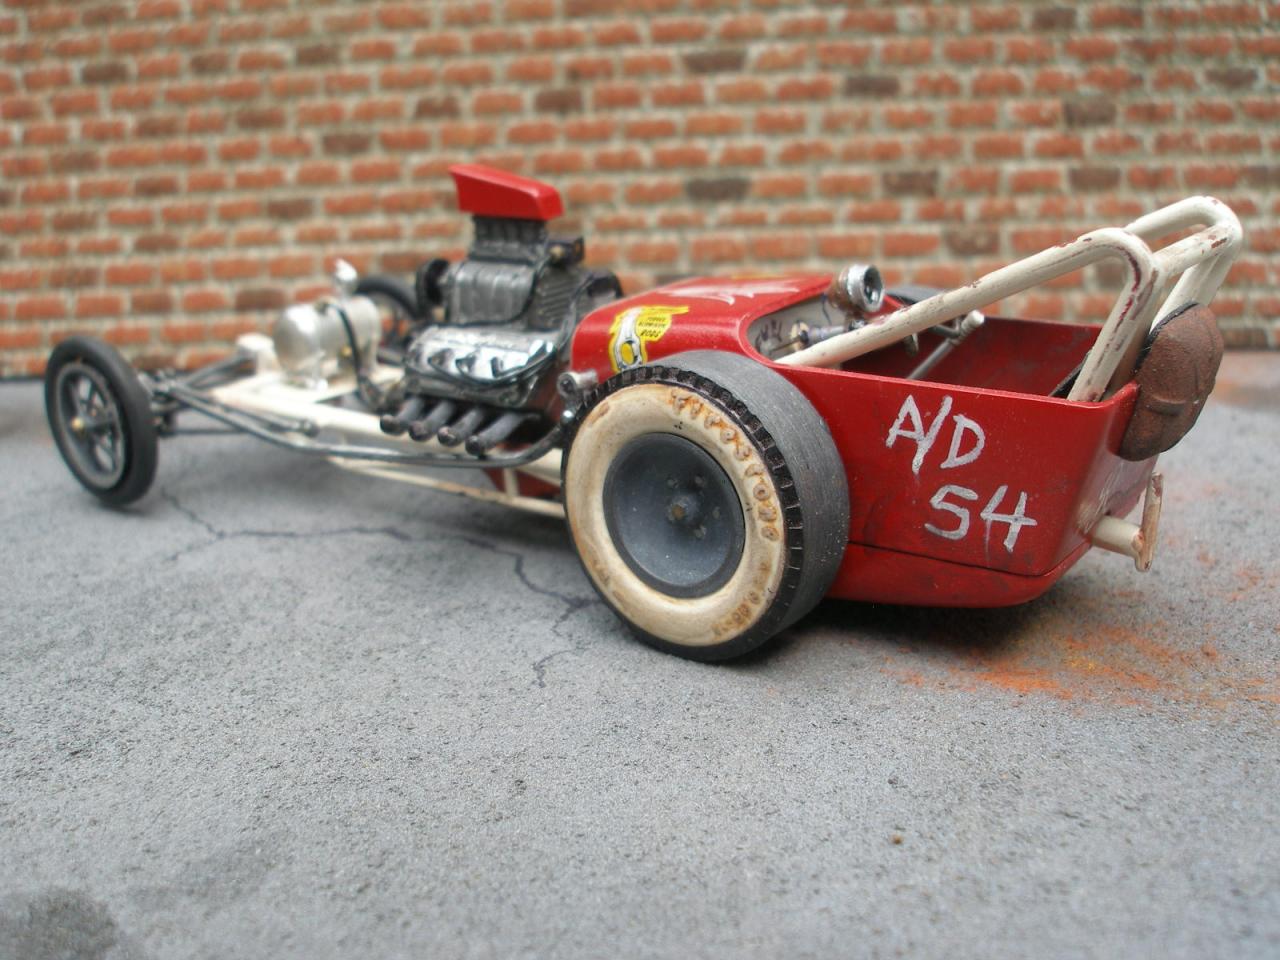
I built this from a DD kit. I liked the all business look of the early dragsters so I built this in that style, while trying to keep it as traditional as possible. Enjoy the pics - Bill
-
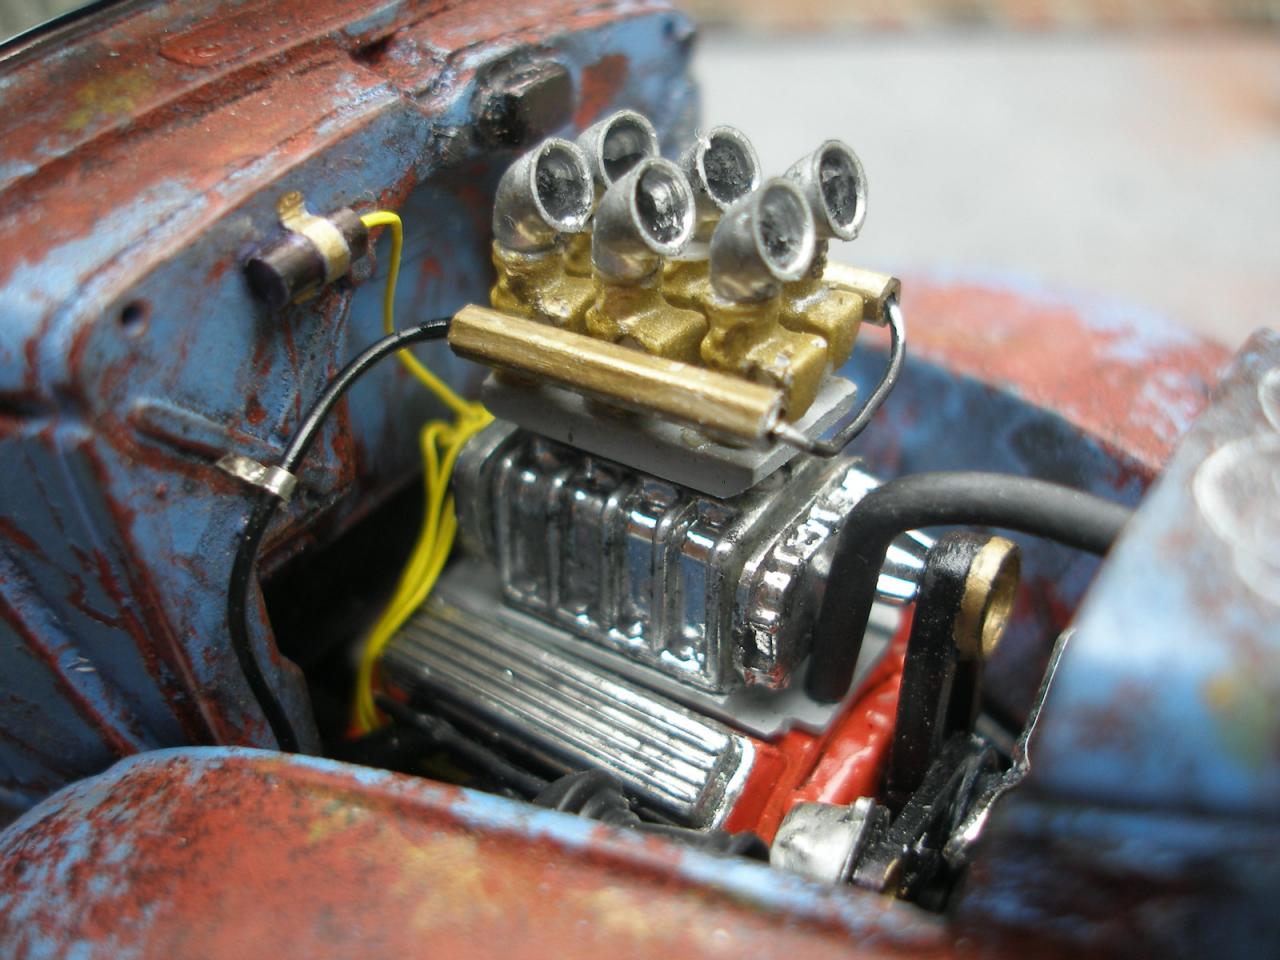
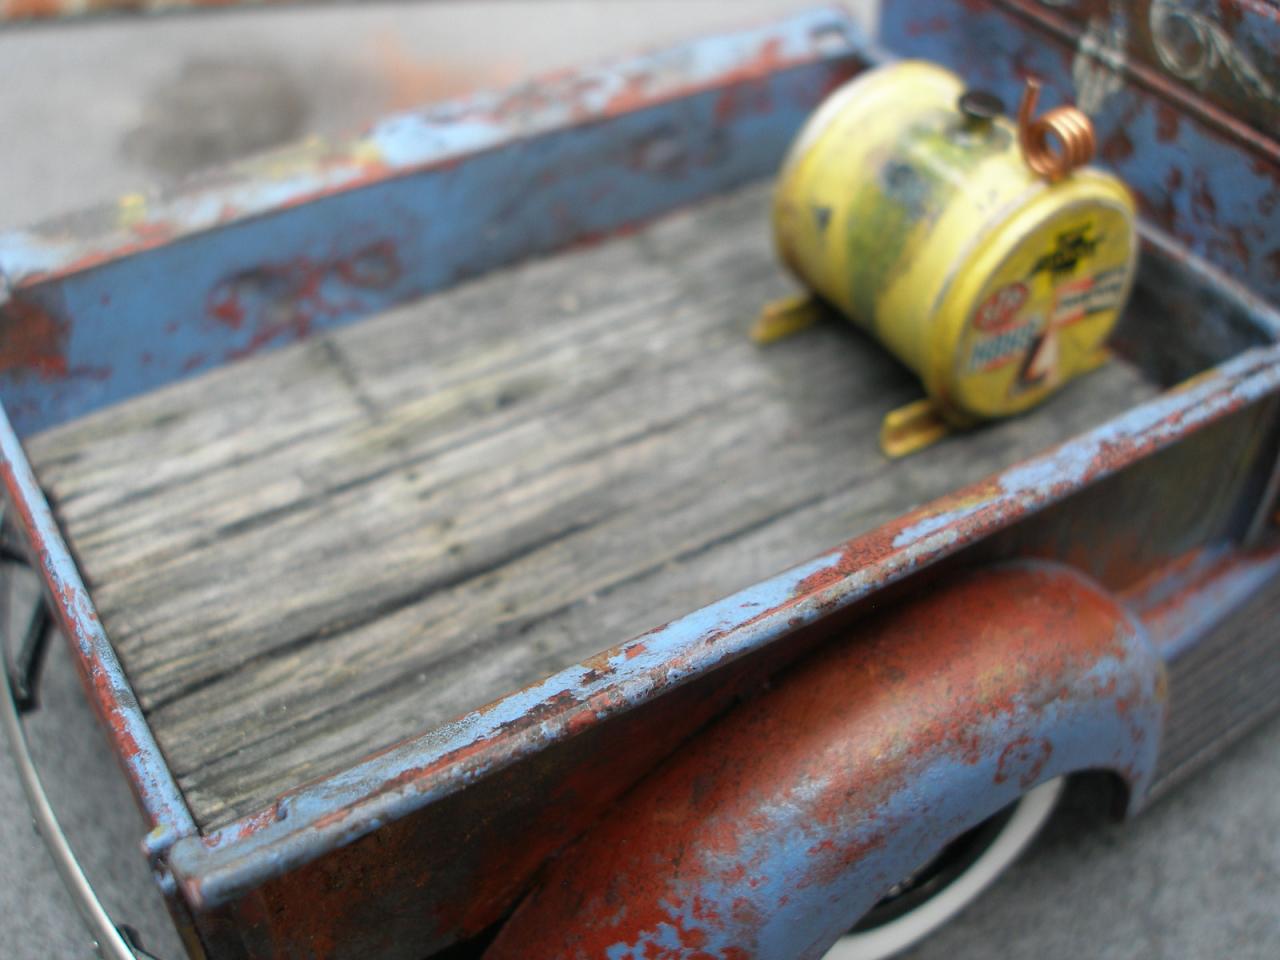
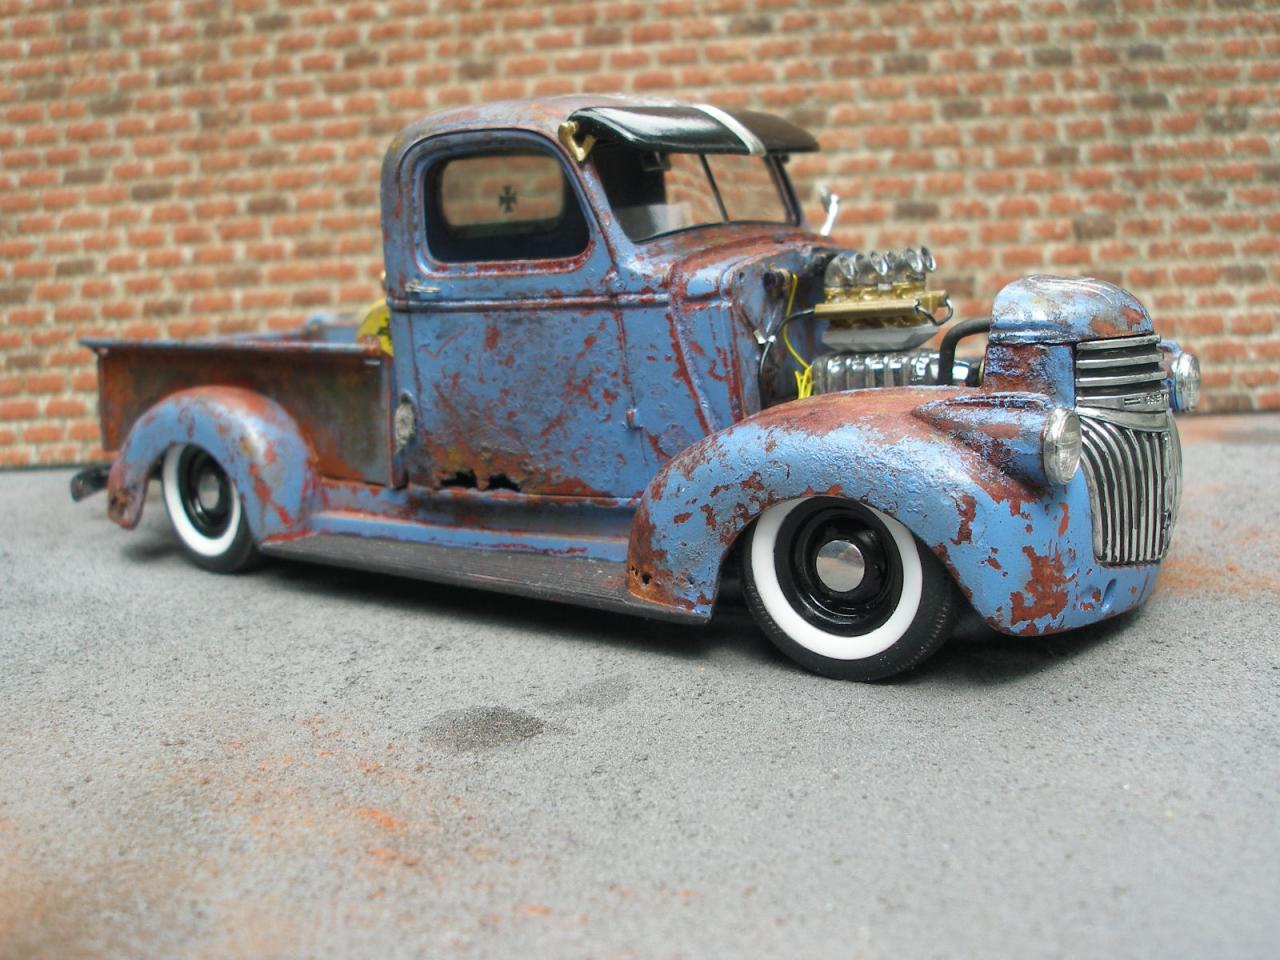
I finished up the 41 today and the sun was shining so I shot some pics. Enjoy! -Bill
-
James, you didn't waste any time getting the Gremlin built. Nice job! - Bill
-
Thanks for the compliments guys it keeps me striving to build better cars with more detail. W409- I didnt think anyone would even notice that little addition,much less know what it was. You've got a sharp eye! -Bill
-
Tutorial - Tractor style hot rod grill shell
gonzo64nova replied to Jantrix's topic in Tips, Tricks, and Tutorials
Just to add something to this.... I created a tractor grille using one of the gas tanks from a Revell Gamblers motorycle kit. I just widened the tank and cut slots in it the same way shown here. - Bill -
Thats very cool RIC... very rare to see this version of one of Grumpy's Toys .